MarcHarris
New member
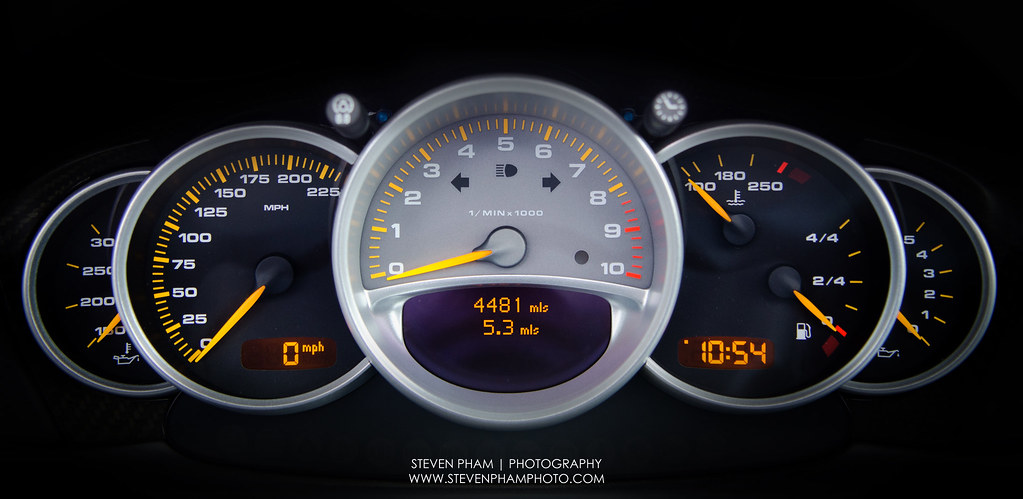
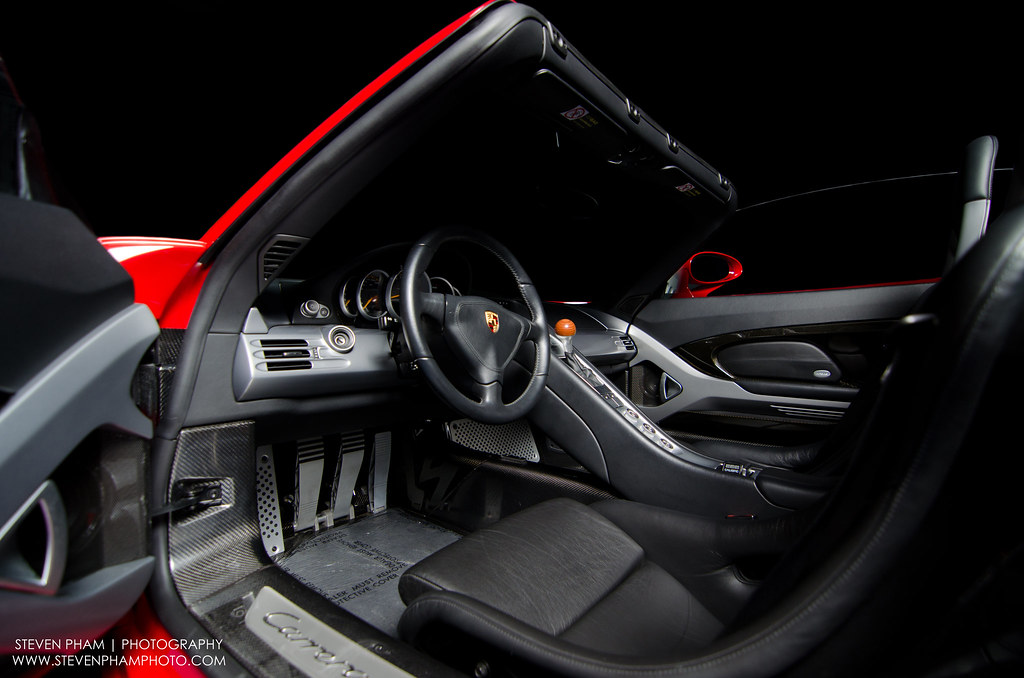
With the weight of a VW GTI but more than 3 times the power, the Porsche Carrera GT is the essence of what a supercar is: a street legal race car. This isn't your run of the mill exotic that is equipped with a few go-fast goodies and a few pieces of trim made from lighter weight material.
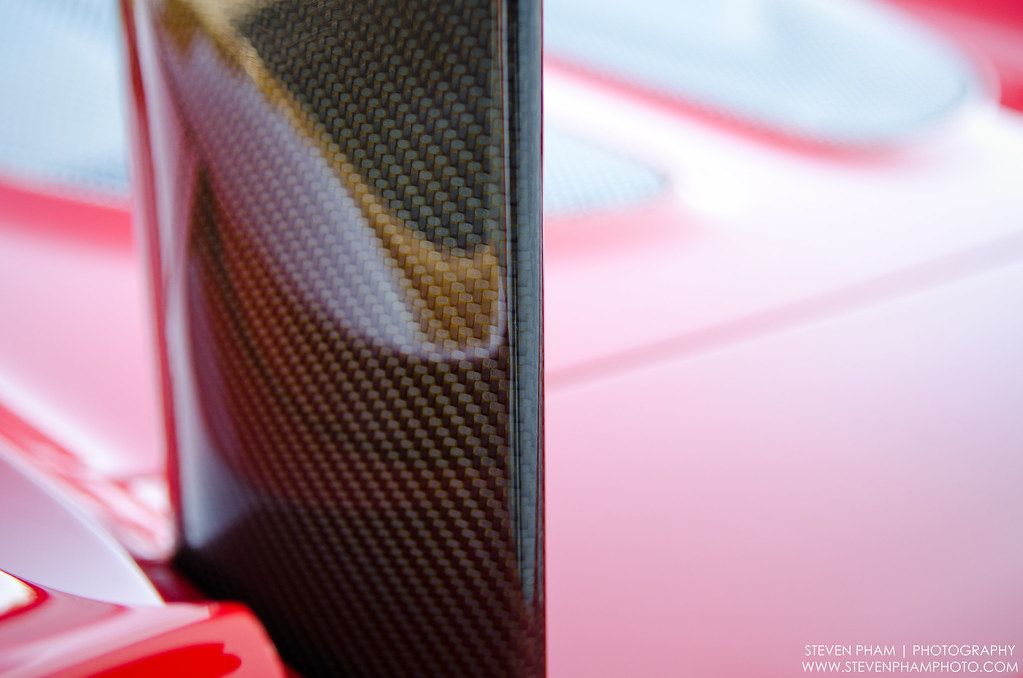
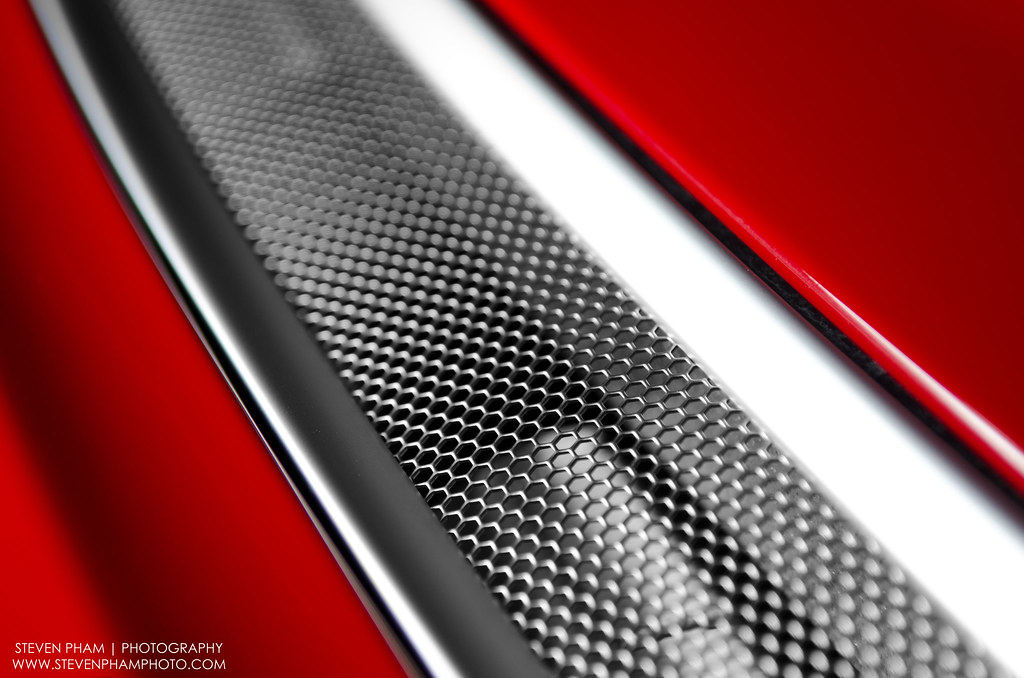
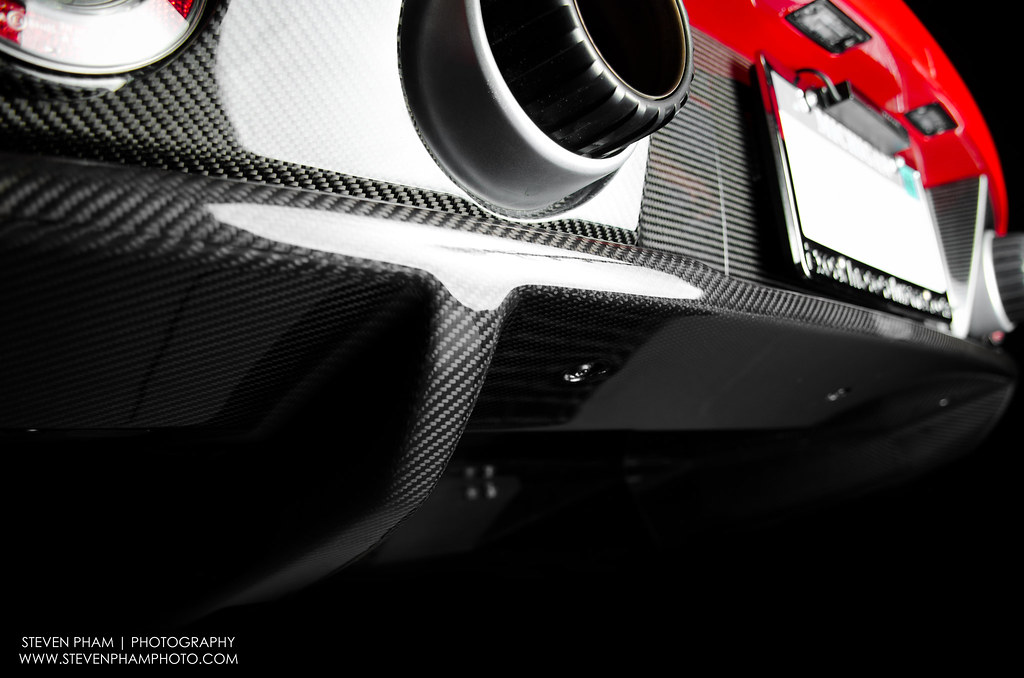
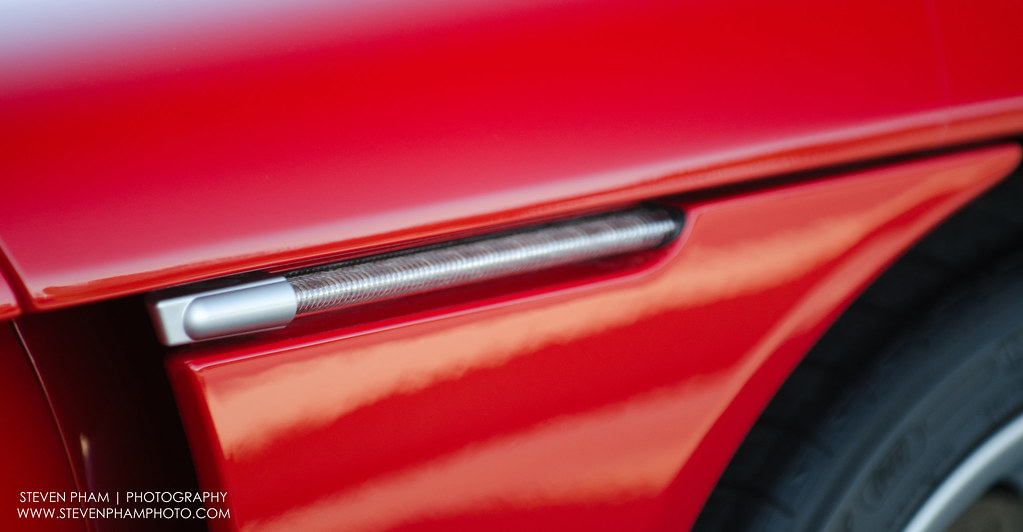
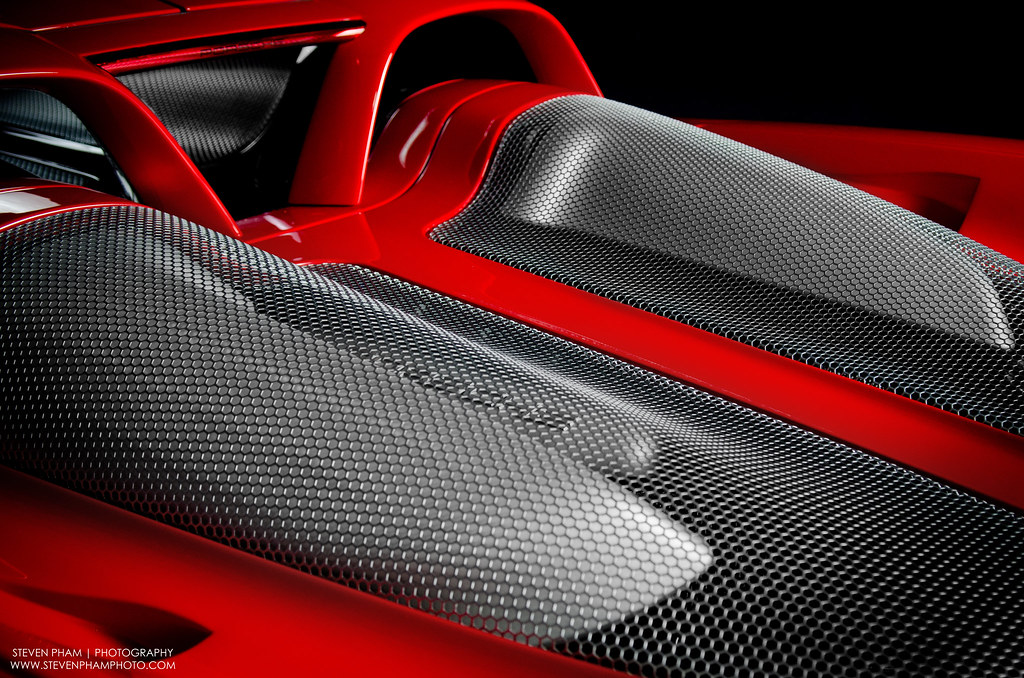
The entire vehicle is carbon fiber.
The vehicle's design is taken from a Le Mans race car.
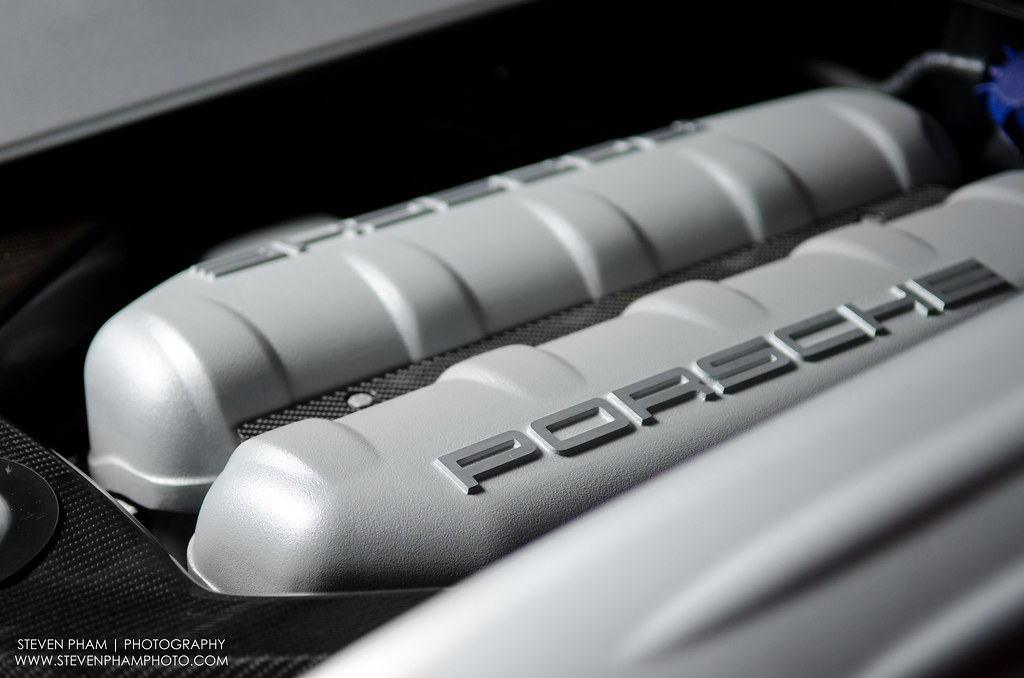
The engine is taken from a Le Mans prototype.
The transmission, and on-board suspension is akin to what you'd see if you were in the grandstands of a major race.
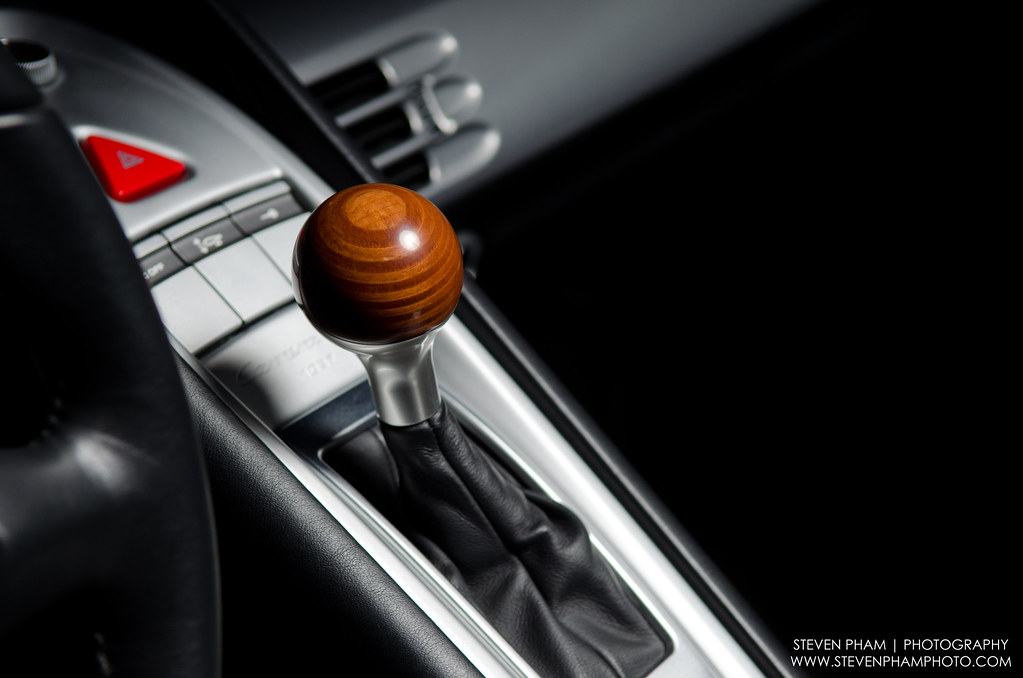
The wooden shift knob pays ode to a Porsche Le Mans race car of the past.
Sadly, production of these was cut short because the world wasn't ready for such awesomeness. Even with the extreme performance and automotive engineering that went into this car, aesthetics often suffer in the production process as performance (not aesthetics) is the company's priority in bringing cars of this caliber into existence. When something so rare and valuable needs to be brought to perfection, owners need to choose the appropriate professional that will safely and effectively restore the full luster of their investment.

We have already worked for this collector multiple times, to include major work on his Ferrari 430 Scuderia ( Italian Excellence: Ferrari 430 Scuderia Paint Correction and Detailing by AutoLavish – Detailed Image ) and several all-numbers -matching classics (most still to be posted in the near future). Building a strong reputation with a serious collector that knows what quality work should be has given us the benefit of him being able to spot the short comings this vehicle possessed.
Some issues were from the factory, such as residue in cracks and crevices:

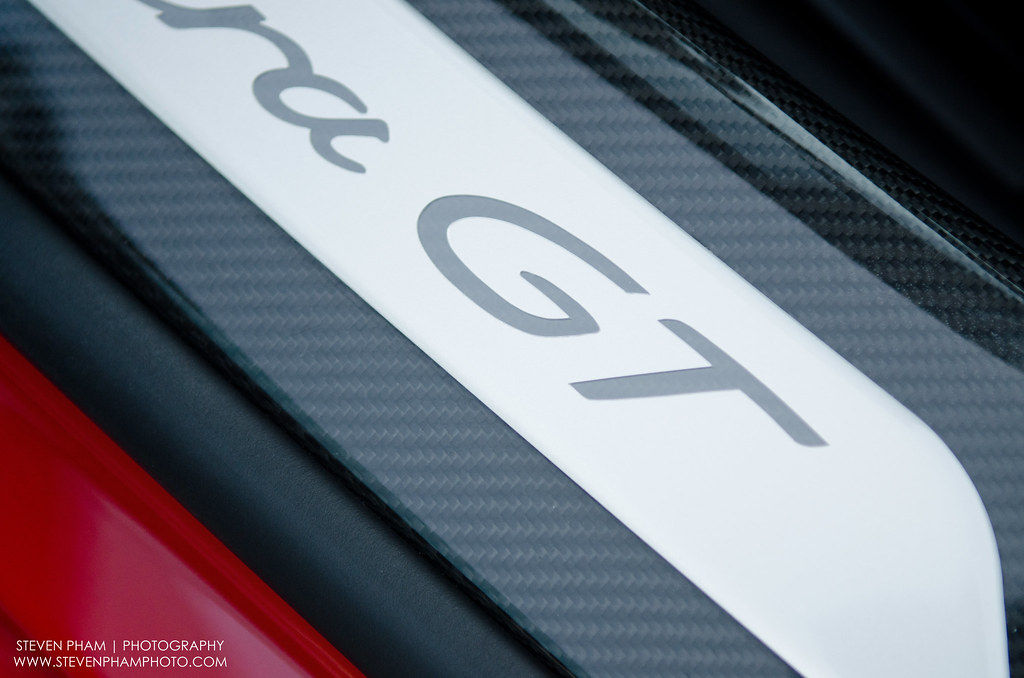
… or the less-than-perfect and cloudy finish on the clear-coated carbon fiber engine bay cross brace.

Others issues resulted from driving, as in dirt and dust building up along water channels:

Or light dirt build-up inside the fuel tank door, which is a pet peeve of mine; nothing is worse than feeling like you have a clean ride until you have to fill her up and realize there's still grime.

There was even light dirt residue on the engine's cooling covers:

As well as the windshield washer fluid reservoir:

Before we could begin with our standard initial decontamination process, we removed the plate, and had to take special care of the hardwired Escort laser shifter that was attached to the plate bracket so it wouldn't potentially scratch the rear end.


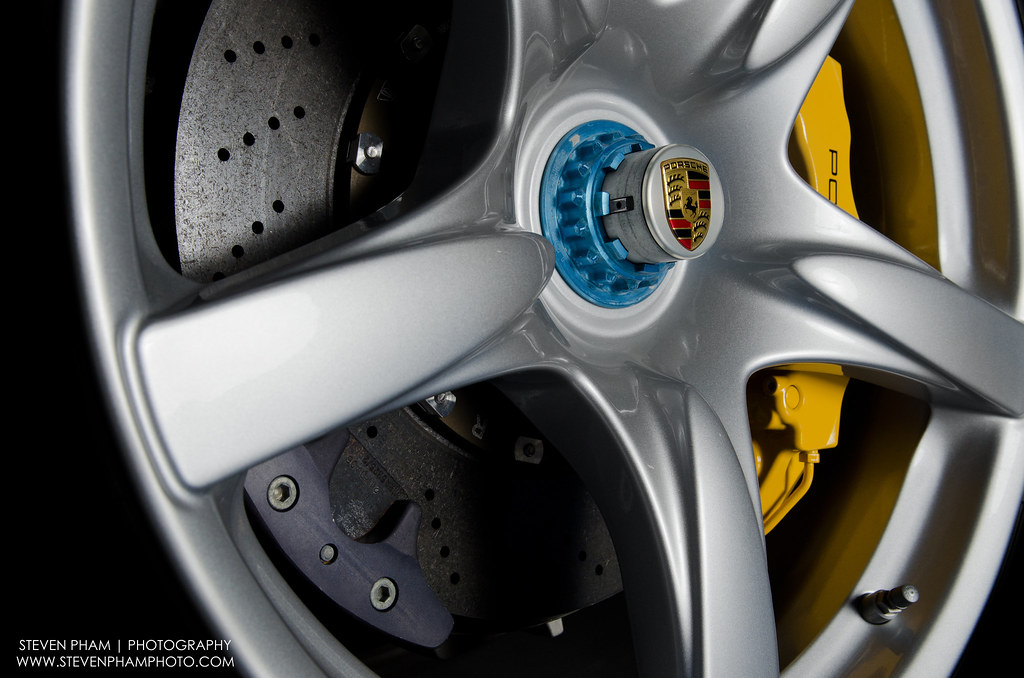
We began our work as we always start; with the wheels and tires. Although the carbon-ceramic brakes will not cause typical brake dust build-up seen on most vehicles, road grime can still be found. This requires gentle yet effective cleaning and grit removal.
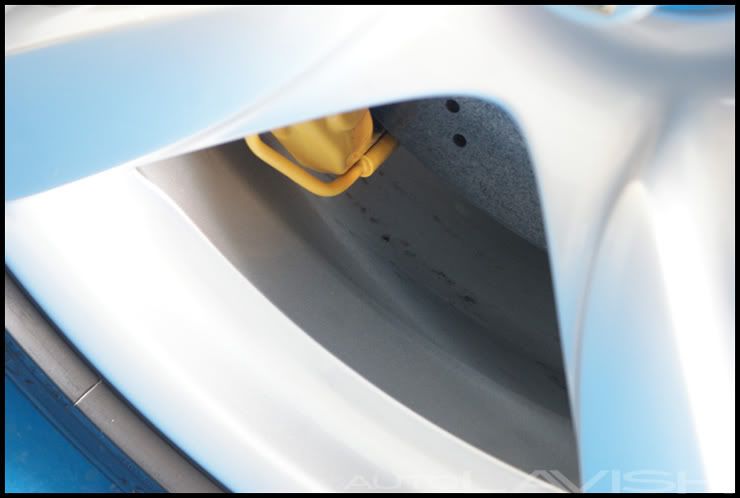
Wool wheel brushes were chosen first due to the delicate nature of the wheel and brake component finishes. To use them, we first lightly rinsed them in water so that the cleaner we used wouldn't soak into the wool, but would rather stay suspended closer to the surface of the tool. Water is also a key component for the cleaner to work.

Once damp, the wool brush was sprayed with Sonax Full Effect to provide safe and gentle cleaning. To provide additional safety to the extremely expensive (and porous) rotors, only one side of the wool brush was sprayed with cleaner. This helps reduce the risk of having soap embed in the carbon. Any impurity on or in the brake rotor can cause a change in the rate of cooling after a hard deceleration, which can cause internal stress among the carbon lattice, and increases the risk of cracks. All OEM suppliers of brakes like this recommend no cleaning agents come into contact with the rotar for this specific reason.


The foot wide rear wheels would need the slimmer profile EZ Detail Brush used in the same safe technique as the wool wheel cleaners to reach behind the close clearance calipers. The bristles on this brush are nonabsorbent, unlike the wool brushes, so pre-dampening is not required, but we'd still recommend it in order to get more lather.

The center locking lug nuts weren't over-looked in cleaning, and also received attention.

As did the parking brake caliper:

While Tim continued to tackle the wheels themselves, I turned my attention to the tires. Someone decided at some point that a thick greasy layer of nasty tire shine should be applied to the ultra high performance rubber sidewalls. Not only can a sloppy application of such a tire dressing cause "sling" along the side of your vehicle, but if not applied correctly, you can get a spotty finish in which some looks darker and wet while other spots look lighter and dry. Why would anyone want $700 tires to look so cheap?
Pay special attention to the rubber surrounding the printed text on the sidewall:


The solution began with spraying down the tires with diluted Optimum Power Clean and allowing it to dwell for a minute or two:

Then spraying the same product onto my Tuff Shine Tire Brush:

And scrubbing the rubber until the brush was loaded with the old nasty residue.

After a good scrubbing, the pressure washer was used to go over the tires and help remove any residue that loosened up.

Look at all that nastiness that the tires were holding

Each tire needed two thorough scrubbings to fix, but in the end, it's the small details that add up to a big change.
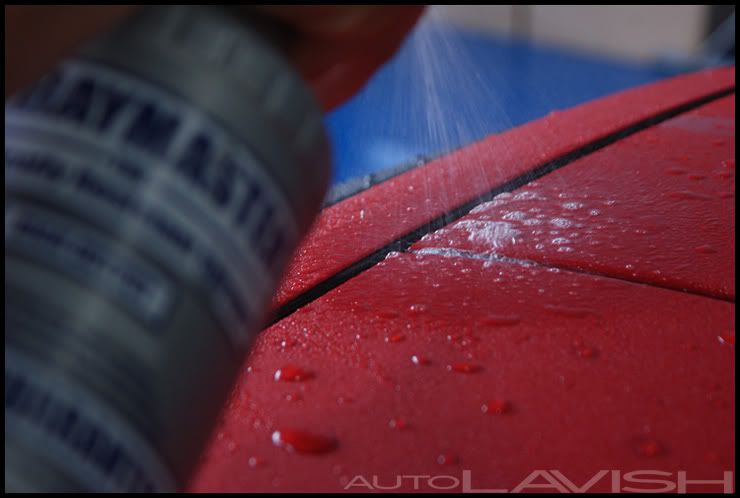
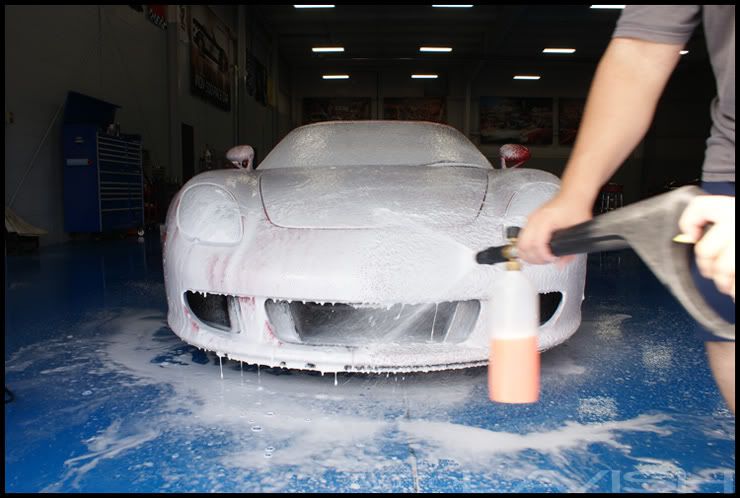
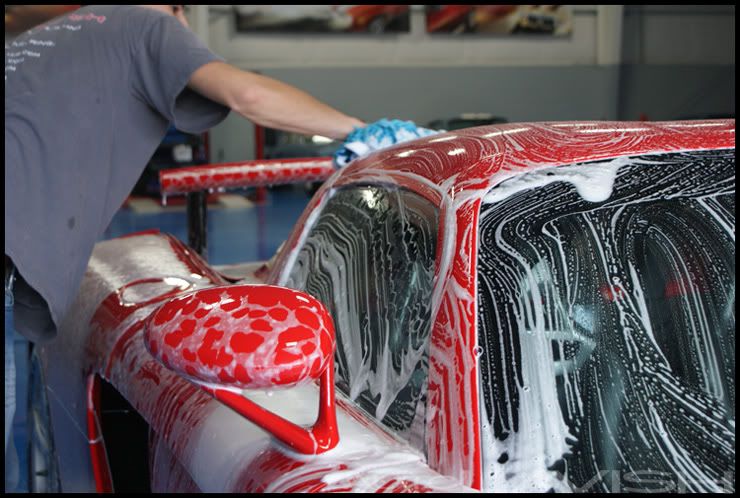
With the wheels and tires looking appropriate, we foamed the vehicle down to soak. Loosening any standing dirt and removing it from the finish without having to use manual physical agitation means less risk of causing light scratches to the finish.


The vehicle was then rinsed thoroughly, foamed again, and hand washed carefully.


Fun Fact of the Day: The Carrera GT rear tires are nearly three Pop-Tarts wide.

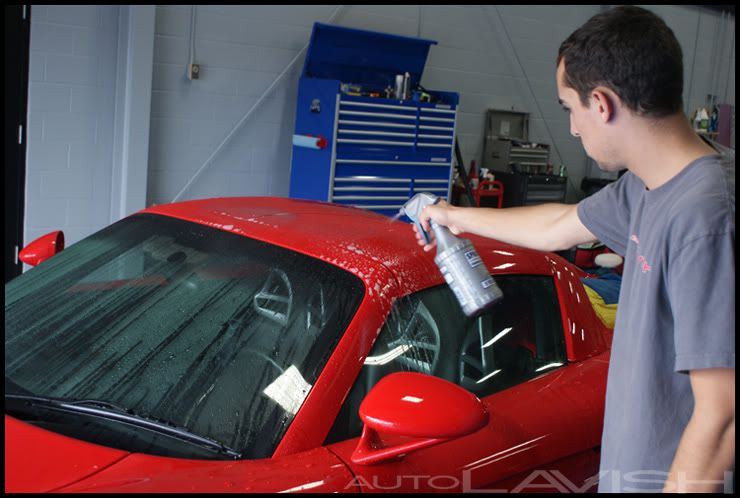
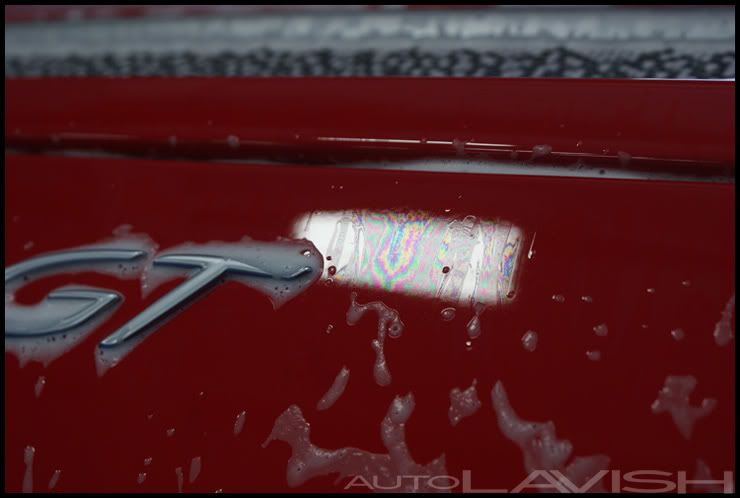
By the time we've thoroughly rinsing the vehicle again, we're still checking for small clues about the finish. Here's one important factor we keep in our minds: by the time the car is at this point, water beading shouldn't be present on the finish. Clear-coat doesn't naturally bead water, and a lack of beading is a sign the finish is sanitized of any oils or residue from any other products. While this may seem like a small detail, it will equate to us knowing later when we do a thorough paint inspection that there isn't anything on the finish hiding or concealing defects that should otherwise be removed with machine polishing.
Here, you can see the distinct difference in the trunk's lack of beading while the paint protection film (clear-bra) is still beading on the front end:

Water running off flat, just as intended.


To dry the vehicle quickly and safely I used a leaf blower. This removed the majority of the water on the wide surfaces and crevices. Tim followed behind with microfiber waffle weave drying towels on the reachable areas.


Once the vehicle was dried and moved to a more suitable location inside the building we proceeded to clay the car. Clay will remove the contamination in the finish that won't come off with normal washing. There are small particles stuck in the clear-coat which can not be removed with other methods. Once again, this will allow for a completely sanitized surface for better evaluating the finish, and won't risk contaminating our polishing pads in the near future.

Very little contamination as a whole, but still impressive for this type of vehicle with low milage.

Finally prepped and done for day one!

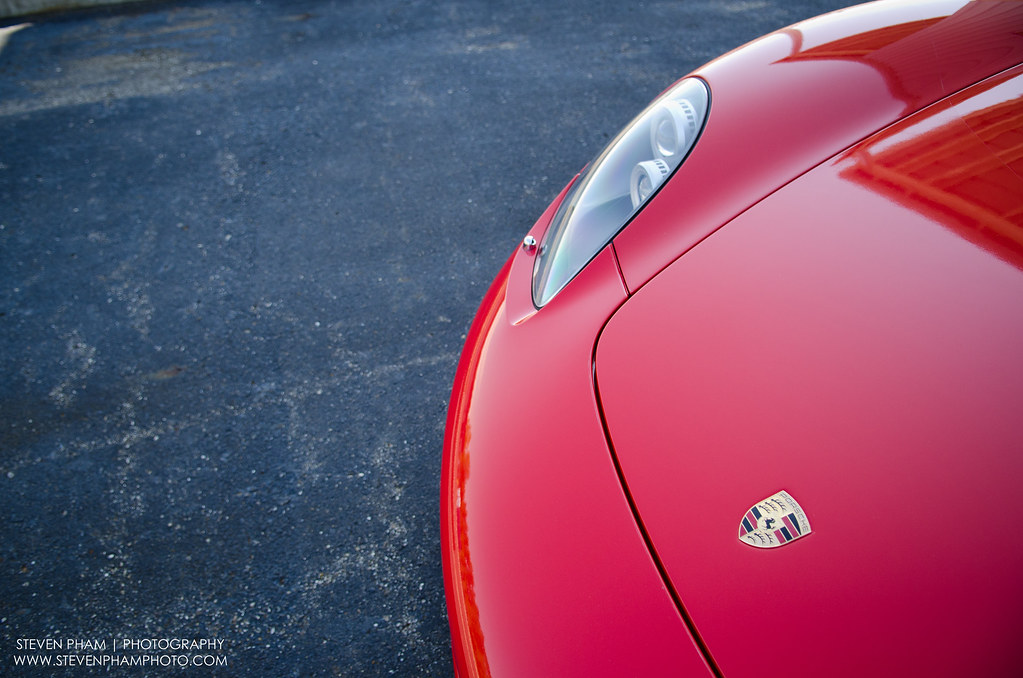
Getting back to work, we started on the next phase of bringing out the best of the Guards Red paint. The entire vehicle had a uniform hazy / milky finish. Looking at the reflection of the overhead lights, you can see a halo around the lights from a lack of clarity.


Upon a closer look, we can see the root of the problems in the paintwork which lead to this haze effect: scratches on the surface that cause light to be refracted and scattered, and the color to be "whiter" in this case. True color purity and maximum reflectivity is achieved when the surface is as smooth as possible. This is the essence of polishing and why detailers call the process Paint Correction; a perfectly smooth and flawless clear-coat shows the finish as the manufacturers intended it to look.

The most prevelant type of scratch on this vehicle were Dual Action sanding marks from the factory, which look like tightly knit crescents. The entire finish was covered in them:


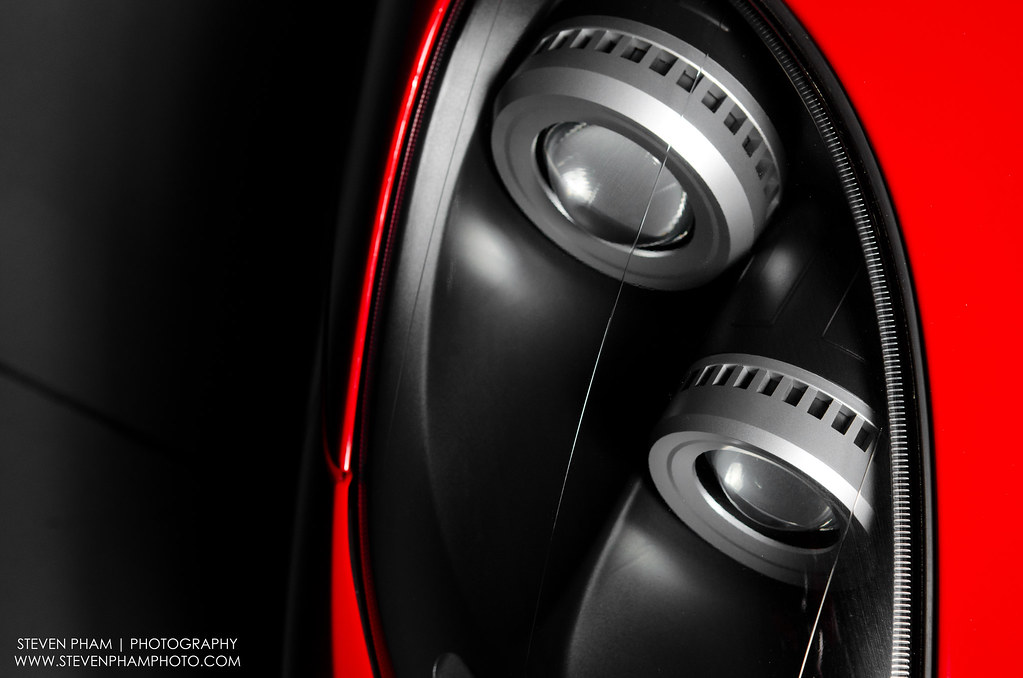
Even the plastic third brake was missing clarity due to light scratches and swirl marks:

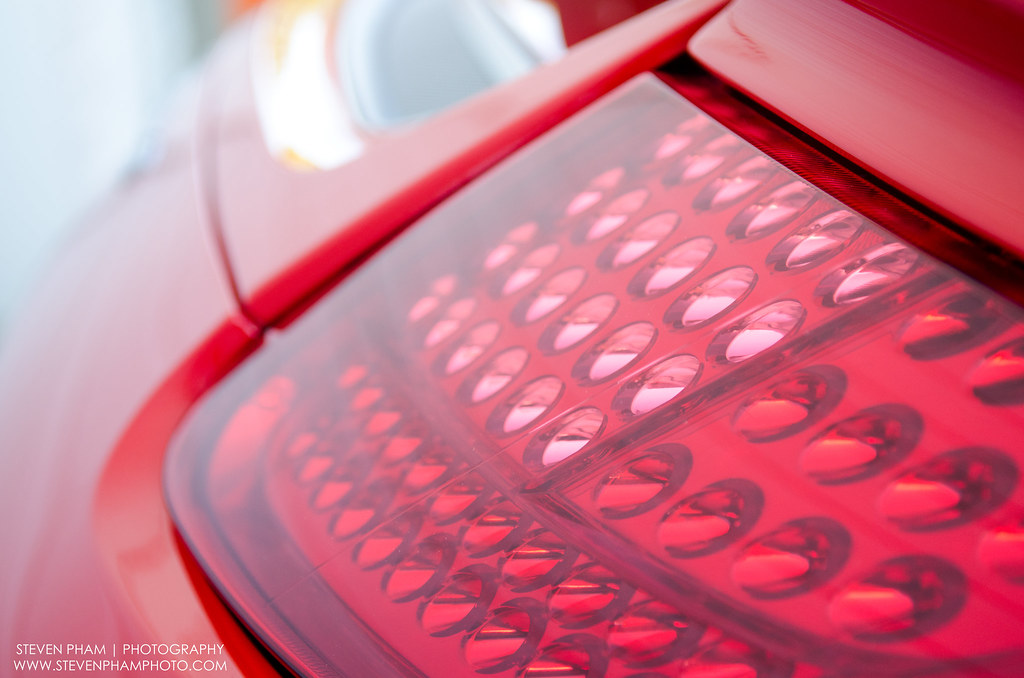
As were the tail light lenses:

With a paint job thin enough to see the carbon fiber weave underneath, paint thickness measurements help to ensure maximum safety for the vehicle.

Standard coating thickness gauges do not read on composite materials, so only the detailer who has invested in an ultra-sonic thickness gauge, as we have, can know the depth on the finish and thus the capability of the paint they're working on. In our case, our Defelsko 200 Advanced is accurate enough to read the clear-coat separately from the primer sealer and base-coat, allowing us to track the actual clear-coat thickness to a thousandth of a millimeter as we polish.

For an additional step towards safety, flexible low-tac tape is used on all delicate trim that might otherwise be damaged by a rotating buffer. Alternately, we use the same tape to limit polishing / residue dust build-up in certain areas for faster, easier, and most importantly, more complete cleaning.

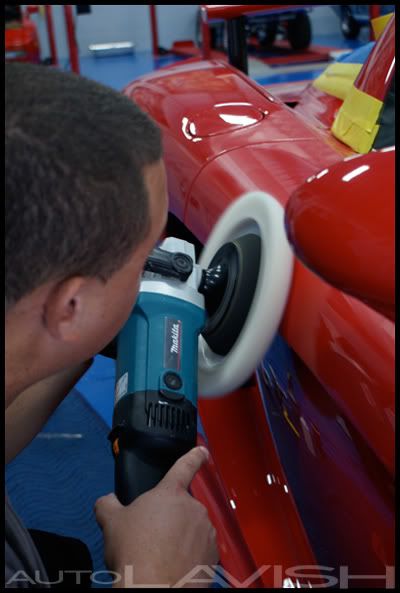
Machine polishing began with a couple different pad + polish combinations using the Dual Action polisher to test how hard or soft the finish was, and how it would react to different combinations. Here, Tim has a section of the fender taped off to frame a distinct line, making it easier to see and compare different polishing combinations. On the left side is Meguiar's 105 with a Surbuf pad and on the right is Meguiar's D300 on a microfiber pad.


With a half dozen polish + pad combinations working to bring additional clarity to the finish, they all failed to remove the sanding marks. I made a phone call to Bob Willis of Auto Concierge for some encouragement. I knew he had more experience with CGT's and wanted to know if the extreme amount of sanding marks was a normal occurrence on these cars, and if so, his experience removing them with or without having to do some sanding himself. When it comes to my work and my clients expectations, I won't allow self pride to get in the way of perfection. We've gone as far as consulting with the actual painter who worked on a specific car, or talking to indivuduals who were directly involved in the production of certain cars.
It seems this might be the worst factory prepped Carrera GT made. There would be no short cuts on this project, only a long road with many polishing steps, with thorough visual inspections and thickness readings taken between each. Even the infantry needs assistance at times. It was time to call in some artillery for fire support; the rotary polisher, wool pads, M105, and plenty of patience.


The entire vehicle is carbon fiber.
The vehicle's design is taken from a Le Mans race car.
The engine is taken from a Le Mans prototype.
The transmission, and on-board suspension is akin to what you'd see if you were in the grandstands of a major race.
The wooden shift knob pays ode to a Porsche Le Mans race car of the past.
Sadly, production of these was cut short because the world wasn't ready for such awesomeness. Even with the extreme performance and automotive engineering that went into this car, aesthetics often suffer in the production process as performance (not aesthetics) is the company's priority in bringing cars of this caliber into existence. When something so rare and valuable needs to be brought to perfection, owners need to choose the appropriate professional that will safely and effectively restore the full luster of their investment.
We have already worked for this collector multiple times, to include major work on his Ferrari 430 Scuderia ( Italian Excellence: Ferrari 430 Scuderia Paint Correction and Detailing by AutoLavish – Detailed Image ) and several all-numbers -matching classics (most still to be posted in the near future). Building a strong reputation with a serious collector that knows what quality work should be has given us the benefit of him being able to spot the short comings this vehicle possessed.
Some issues were from the factory, such as residue in cracks and crevices:
… or the less-than-perfect and cloudy finish on the clear-coated carbon fiber engine bay cross brace.
Others issues resulted from driving, as in dirt and dust building up along water channels:
Or light dirt build-up inside the fuel tank door, which is a pet peeve of mine; nothing is worse than feeling like you have a clean ride until you have to fill her up and realize there's still grime.
There was even light dirt residue on the engine's cooling covers:
As well as the windshield washer fluid reservoir:
Before we could begin with our standard initial decontamination process, we removed the plate, and had to take special care of the hardwired Escort laser shifter that was attached to the plate bracket so it wouldn't potentially scratch the rear end.
We began our work as we always start; with the wheels and tires. Although the carbon-ceramic brakes will not cause typical brake dust build-up seen on most vehicles, road grime can still be found. This requires gentle yet effective cleaning and grit removal.
Wool wheel brushes were chosen first due to the delicate nature of the wheel and brake component finishes. To use them, we first lightly rinsed them in water so that the cleaner we used wouldn't soak into the wool, but would rather stay suspended closer to the surface of the tool. Water is also a key component for the cleaner to work.
Once damp, the wool brush was sprayed with Sonax Full Effect to provide safe and gentle cleaning. To provide additional safety to the extremely expensive (and porous) rotors, only one side of the wool brush was sprayed with cleaner. This helps reduce the risk of having soap embed in the carbon. Any impurity on or in the brake rotor can cause a change in the rate of cooling after a hard deceleration, which can cause internal stress among the carbon lattice, and increases the risk of cracks. All OEM suppliers of brakes like this recommend no cleaning agents come into contact with the rotar for this specific reason.
The foot wide rear wheels would need the slimmer profile EZ Detail Brush used in the same safe technique as the wool wheel cleaners to reach behind the close clearance calipers. The bristles on this brush are nonabsorbent, unlike the wool brushes, so pre-dampening is not required, but we'd still recommend it in order to get more lather.
The center locking lug nuts weren't over-looked in cleaning, and also received attention.
As did the parking brake caliper:
While Tim continued to tackle the wheels themselves, I turned my attention to the tires. Someone decided at some point that a thick greasy layer of nasty tire shine should be applied to the ultra high performance rubber sidewalls. Not only can a sloppy application of such a tire dressing cause "sling" along the side of your vehicle, but if not applied correctly, you can get a spotty finish in which some looks darker and wet while other spots look lighter and dry. Why would anyone want $700 tires to look so cheap?
Pay special attention to the rubber surrounding the printed text on the sidewall:
The solution began with spraying down the tires with diluted Optimum Power Clean and allowing it to dwell for a minute or two:
Then spraying the same product onto my Tuff Shine Tire Brush:
And scrubbing the rubber until the brush was loaded with the old nasty residue.
After a good scrubbing, the pressure washer was used to go over the tires and help remove any residue that loosened up.
Look at all that nastiness that the tires were holding
Each tire needed two thorough scrubbings to fix, but in the end, it's the small details that add up to a big change.
With the wheels and tires looking appropriate, we foamed the vehicle down to soak. Loosening any standing dirt and removing it from the finish without having to use manual physical agitation means less risk of causing light scratches to the finish.
The vehicle was then rinsed thoroughly, foamed again, and hand washed carefully.
Fun Fact of the Day: The Carrera GT rear tires are nearly three Pop-Tarts wide.
By the time we've thoroughly rinsing the vehicle again, we're still checking for small clues about the finish. Here's one important factor we keep in our minds: by the time the car is at this point, water beading shouldn't be present on the finish. Clear-coat doesn't naturally bead water, and a lack of beading is a sign the finish is sanitized of any oils or residue from any other products. While this may seem like a small detail, it will equate to us knowing later when we do a thorough paint inspection that there isn't anything on the finish hiding or concealing defects that should otherwise be removed with machine polishing.
Here, you can see the distinct difference in the trunk's lack of beading while the paint protection film (clear-bra) is still beading on the front end:
Water running off flat, just as intended.
To dry the vehicle quickly and safely I used a leaf blower. This removed the majority of the water on the wide surfaces and crevices. Tim followed behind with microfiber waffle weave drying towels on the reachable areas.
Once the vehicle was dried and moved to a more suitable location inside the building we proceeded to clay the car. Clay will remove the contamination in the finish that won't come off with normal washing. There are small particles stuck in the clear-coat which can not be removed with other methods. Once again, this will allow for a completely sanitized surface for better evaluating the finish, and won't risk contaminating our polishing pads in the near future.
Very little contamination as a whole, but still impressive for this type of vehicle with low milage.
Finally prepped and done for day one!
Getting back to work, we started on the next phase of bringing out the best of the Guards Red paint. The entire vehicle had a uniform hazy / milky finish. Looking at the reflection of the overhead lights, you can see a halo around the lights from a lack of clarity.
Upon a closer look, we can see the root of the problems in the paintwork which lead to this haze effect: scratches on the surface that cause light to be refracted and scattered, and the color to be "whiter" in this case. True color purity and maximum reflectivity is achieved when the surface is as smooth as possible. This is the essence of polishing and why detailers call the process Paint Correction; a perfectly smooth and flawless clear-coat shows the finish as the manufacturers intended it to look.
The most prevelant type of scratch on this vehicle were Dual Action sanding marks from the factory, which look like tightly knit crescents. The entire finish was covered in them:
Even the plastic third brake was missing clarity due to light scratches and swirl marks:
As were the tail light lenses:
With a paint job thin enough to see the carbon fiber weave underneath, paint thickness measurements help to ensure maximum safety for the vehicle.
Standard coating thickness gauges do not read on composite materials, so only the detailer who has invested in an ultra-sonic thickness gauge, as we have, can know the depth on the finish and thus the capability of the paint they're working on. In our case, our Defelsko 200 Advanced is accurate enough to read the clear-coat separately from the primer sealer and base-coat, allowing us to track the actual clear-coat thickness to a thousandth of a millimeter as we polish.
For an additional step towards safety, flexible low-tac tape is used on all delicate trim that might otherwise be damaged by a rotating buffer. Alternately, we use the same tape to limit polishing / residue dust build-up in certain areas for faster, easier, and most importantly, more complete cleaning.
Machine polishing began with a couple different pad + polish combinations using the Dual Action polisher to test how hard or soft the finish was, and how it would react to different combinations. Here, Tim has a section of the fender taped off to frame a distinct line, making it easier to see and compare different polishing combinations. On the left side is Meguiar's 105 with a Surbuf pad and on the right is Meguiar's D300 on a microfiber pad.
With a half dozen polish + pad combinations working to bring additional clarity to the finish, they all failed to remove the sanding marks. I made a phone call to Bob Willis of Auto Concierge for some encouragement. I knew he had more experience with CGT's and wanted to know if the extreme amount of sanding marks was a normal occurrence on these cars, and if so, his experience removing them with or without having to do some sanding himself. When it comes to my work and my clients expectations, I won't allow self pride to get in the way of perfection. We've gone as far as consulting with the actual painter who worked on a specific car, or talking to indivuduals who were directly involved in the production of certain cars.
It seems this might be the worst factory prepped Carrera GT made. There would be no short cuts on this project, only a long road with many polishing steps, with thorough visual inspections and thickness readings taken between each. Even the infantry needs assistance at times. It was time to call in some artillery for fire support; the rotary polisher, wool pads, M105, and plenty of patience.


")
