JustJesus
New member
1976 Porsche 912 – Paint Correction (feel free to skip to the “Paint Correction” section!)
Story. The owner of this Porsche is a young man that I’ve known for some time. We’re not exactly best friends, but we do chat from time to time and hang out with fellow CRX enthusiasts at a local CRX Meet. We also have a mutual friend, whom I’m a lot closer with.
This ’76 Porsche is actually his first car, which he inherited from his father after he himself upgraded to an ’86 (I believe). The owner also is an all around car guy, with vast knowledge with Hondas. He’s a mechanic that works out of his home, and does quite well for himself. He’s also known for being meticulous, even anal, about the quality of work he provides….and expects!
He maintains his own cars to a near-Autopian level. He washes, clays, and waxes regularly. Since his forte is in mechanics, detailing (and paint correction) is something he doesn’t do. So although he washes and such on a regular basis, he doesn’t follow the 2BW or other Autopian methods to do said washes.
Let’s get this more to the paint correction, shall we?
This guy decided to have his Porsche redone. He did most of the work himself, except the paint. He stripped down the car to a shell. For the paint, Porsche Guardsman Red, he had a shop to the work. They media blasted the shell and then painted it using PPGs hard clear paint. Not sure if it was Ceramiclear, or something similar.
Well, the shop did a horrible job. Even though he allowed them *months* to do the paint job, they appeared to have rushed the job and left it in bad shape. When he saw it, he was immediately ticked off with them. They offered to “correct” it, and follow it up with a “polish job.” He was so upset with them, he didn’t want them touching his car ever again.
How bad was it? After he took it home, he was left vacuuming for who-knows-how-long. There was sand (from the media blasting) throughout the car. EVERYWHERE. Well, granted, it was hidden in the nooks and crannies, but it was there.
That’s where I come in. He had been wondering what to do with the car. Didn’t know if he wanted to paint it, which he was strongly opposed to, or maybe just live with it the way it sat. Knowing him, there’s no way that would ever happen.
Right about this time, I had finished correcting the paint on that mutual friend’s Toyota 4Runner. This is important. Why? Because that 4Runner was in serious bad shape!!! Aside from your typical swirls and such, he also had “pinstriping.” That’s what the off-road community calls all the scratches left behind from rubbing up against shrubs, trees, etc, when doing some serious off road trails (or even some simple ones). Here’s what that 4Runner looked like.

And this is how I gave it back to the owner

Let’s do a full circle on this. The Porsche guy saw what I did with the 4Runner, and the cogs in his head started spinning. Sure enough, he asked me to come over to his place so I can have a look at his Porsche. I agreed to, but with hesitation. This guy is *meticulous* about the quality of work! He’s downright scary with his ability to see the little details in things. So I was scared to screw this one up! But then, this would also be a test for me. If I could pass HIS watchful eye and leave him satisfied, then I could say I do a pretty darn good job with my paint correction.
SORRY for this story, as it’s getting loooong.
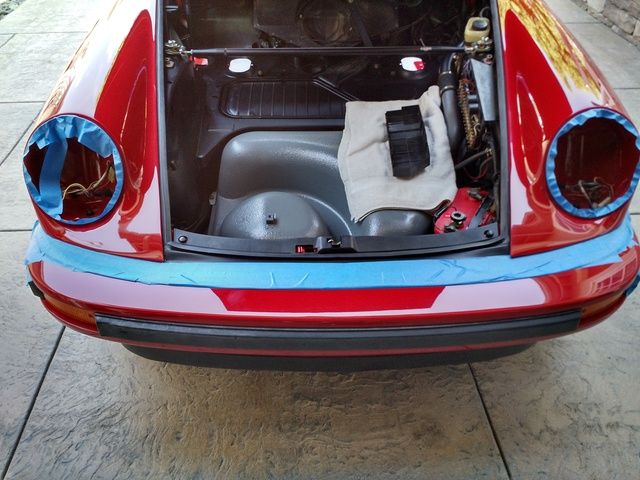
To summarize what I was working with:
HOOD. The hood looked like some tech at the shop dropped some dirt on it, then took a dirty, greasy towel and wiped in large arc motions to clean it up. In doing so, he left some long, shallow scratches throughout. BAD (sorry, didn’t have pics of this, as the owner was watching me like a hawk for the first few hours)
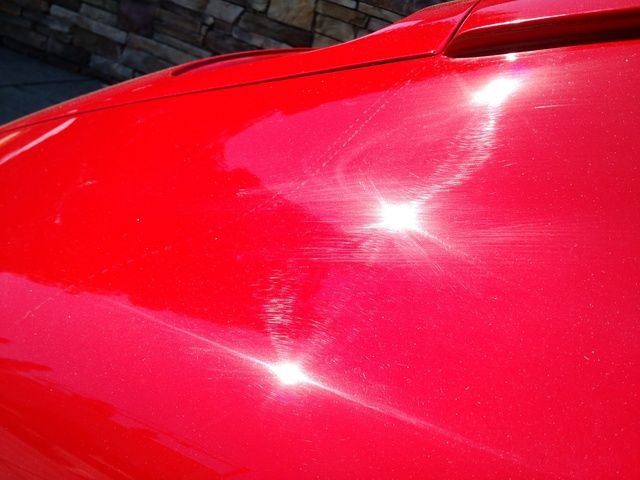
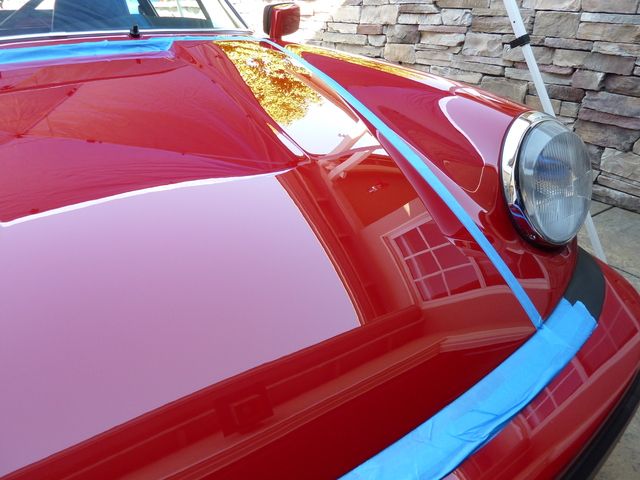
ROOF: The roof had some swirls, webbing, etc, along with some sanding marks. NOT SO BAD
QUARTER PANEL: What the heck happened there? When I inspected the car, I noticed an oily film on the quarter panel. As if someone sprayed WD40, or something, and wiped it with a dirty rag. Aside from the oily film, it had scratches, swirls/webbing, sanding marks, and some weird, um…dirt(?) inside the paint. Before I took the job, I told the owner he would have to clean that off and wait at least a couple of weeks before I would touch it. I didn’t want to risk some strange chemical reaction, since I had no idea what that oily stuff was. REALLY BAD
REST OF CAR: Just typical paint correction needed. NOT BAD
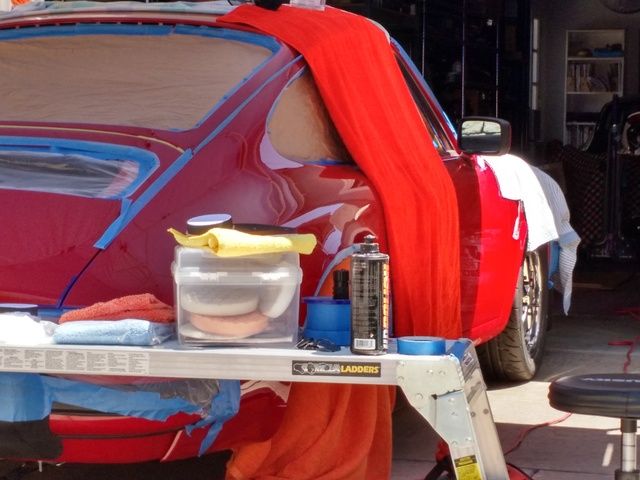
>>>>>>>>>> >>>>>>>>>> PAINT CORRECTION <<<<<<<<<< <<<<<<<<<<
I started off on the hood. It was a bad spot. If I couldn’t do anything here, then there would be no point in doing anything else anywhere on the car.
I used my go-to process:
- Porter cable
- Hex Logic Orange Pad(all pads are 5.5”)
- Megs 105
- Hex Logic White Pad
- Megs 205
Oh-no. After HOURS on the hood, slowly working the product, I was not satisfied with the results. There was definite visual improvement (sorry, no pics yet) but no way would I leave the car this way. BUT, at this point, I didn’t know what else I could use, and didn’t have anything better. I told the owner this is all I can do with the crap paint job, and my limited products. I could tell he was not happy, but we both knew it DID look better. I offered to call it quits, with no money out of his pocket for the hood. He thought about it, looked the car over, and said, “No. Keep going. At least it looks better.”
Alrighty then.
Not one to give up, I made fast for the not-so-local detail supply store. Made it with 10 min to spare. I talked to the guy behind the counter, explained the situation, and he suggested Menzerna FG400. He also suggested Megs 100 (or 101) *IF* I wanted to stay with the Megs line. But he thought FG400 was better. So I went with that. Picked up some Megs MF Cut Discs as well.
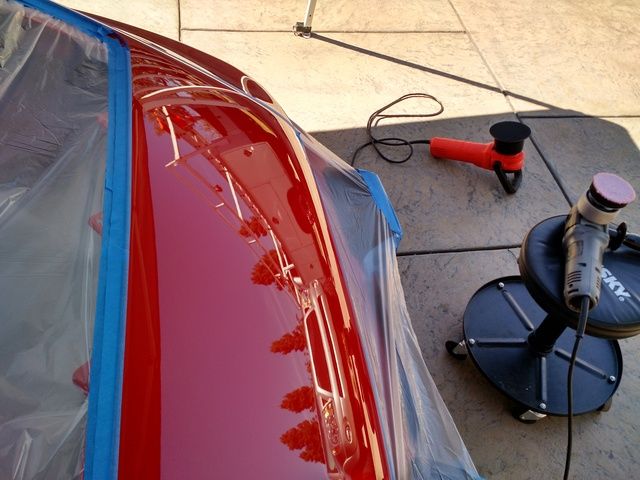
NEXT DAY. I tackled the roof.
- Griot’s Garage 6” DA (I’ve had it, never used it before)
- Menz FG400
- Megs MF Cut Disc
- HD Polish
- Hex Logic White Pad
Didn’t care for the chemical/industrial smell of the FG400, but coupled with the MF Cut Disc, we were now in business! Sweet. I did more with this set up than the other. Faster. Better cut. Better finish. When I was almost done with the cut process, the owner came out and was blown away with the “new” results with this product combo. He asked if the next step was the wax. I said, “Nope, gotta hit it with polish first.” He did a double take and said, “But it looks good. It looks ready!” Indeed, the FG400 does finish pretty nicely. But I assured him the HD Polish would make it pop just a little more. And I was right.
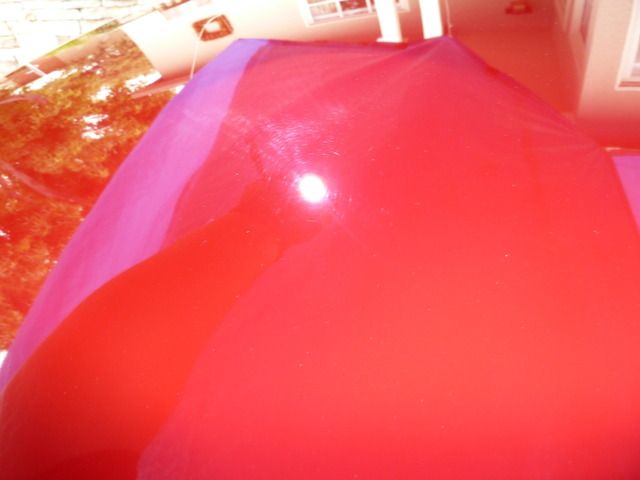
Here are some pics of the roof

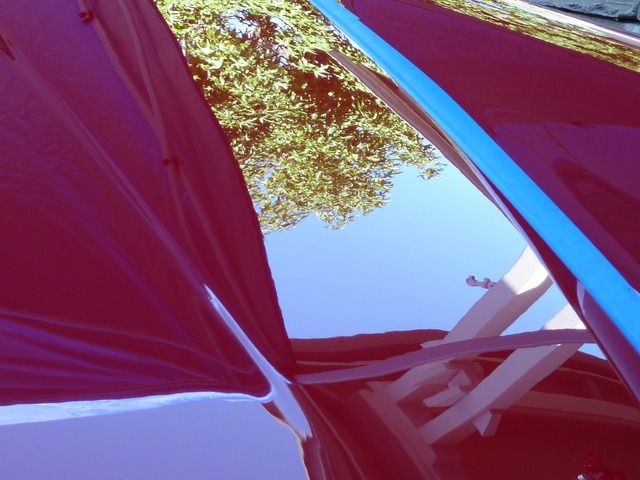
Roof portion just in front of the sunroof area
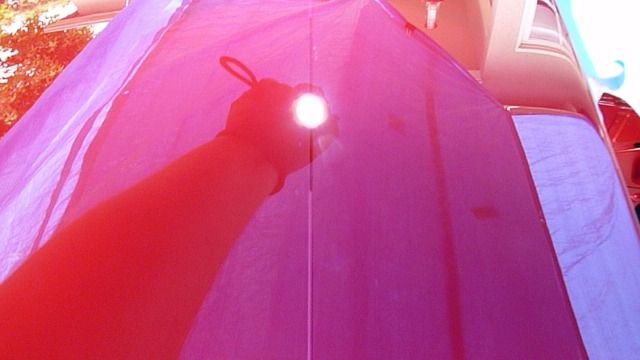
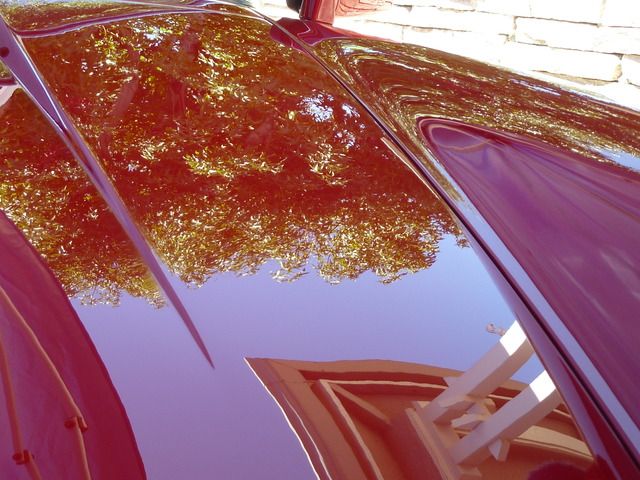
More of the roof
I made progress, but still, it was time consuming. I had to stop the job and would come back weeks(?) later due to scheduling. During this time, I had a chance to visit Meguiar’s Headquarters for their advance class. I was introduced to some new things, including their D300 MF Correction Compound. It looked promising, to say the least. So I bought some. And then….I was in love.
I used the following for the remainder of the paint correction:
- GG6
- D300
- Megs MF Cut Disc
- HD Polish
- Hex Logic White Pad
Now, don’t get me wrong. The FG400 is a great product (as is the M105). But the D300 seemed to cut just a bit easier. MUCH easier clean up. And the best part (to me) was the sweet Cinnamon scent. Goodness, I wanted to taste it! There were some spots where the D300 only required one pass, as opposed to 2-3 with the FG400 (BTW, the M105 combo took 5-6 passes). I feel it could be attributed to the products, AS WELL AS the inconsistencies in the paint. Like I said, it was a bad paint job
More pics
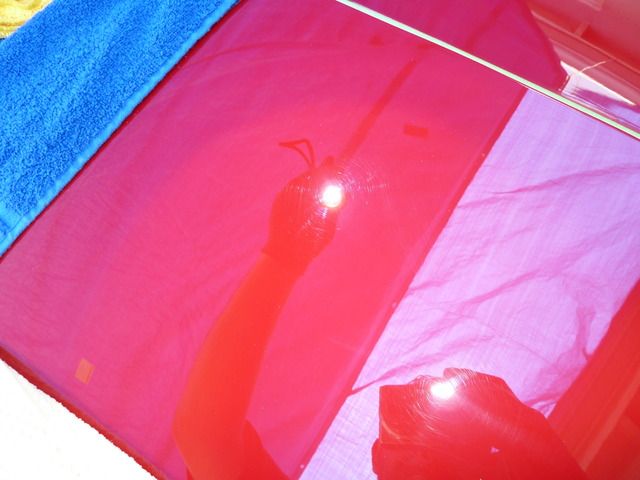
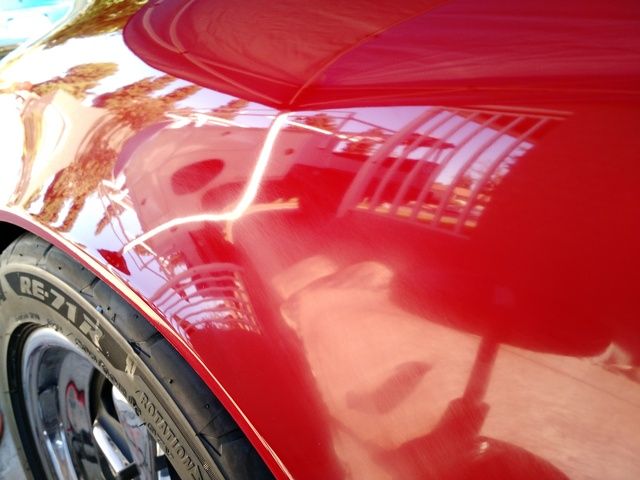
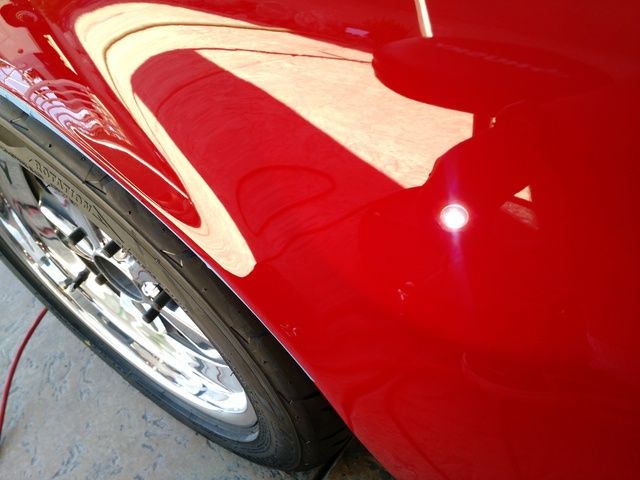
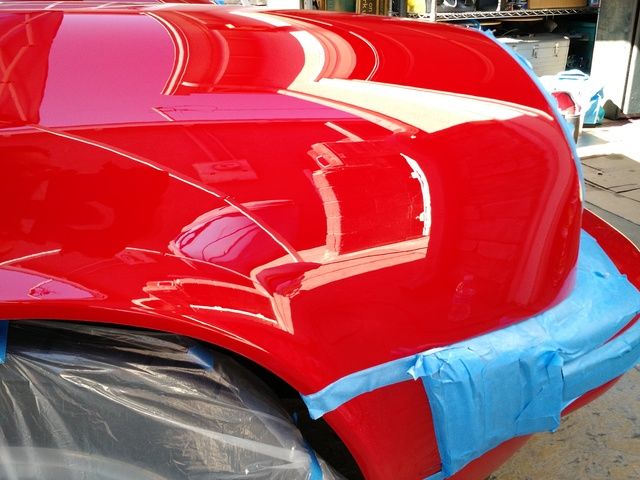
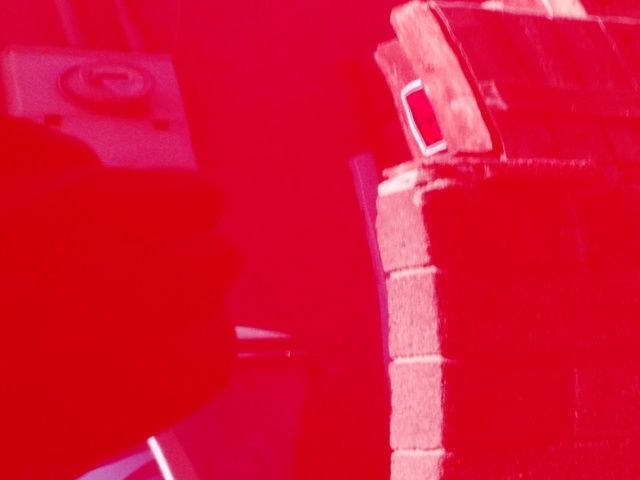
Here is that crazy quarter panel I mentioned earlier, in all its nastiness!
Here’s the part that looks like there is dirt underneath the paint
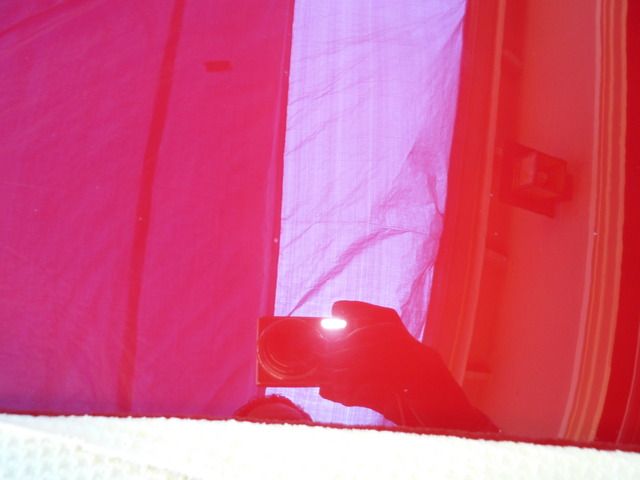
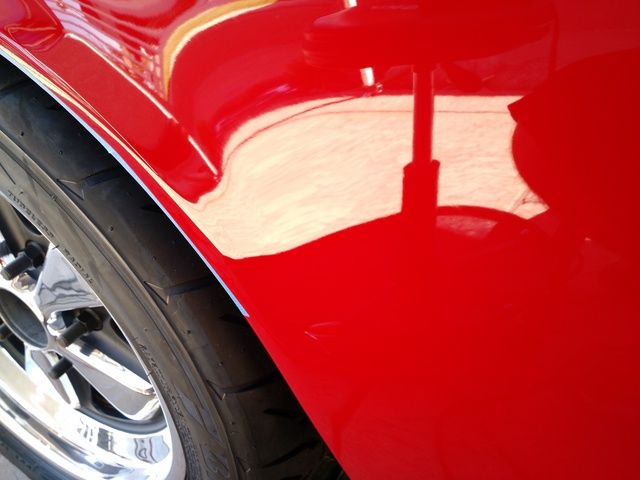
This section is behind the rear wheel on the same quarter panel.
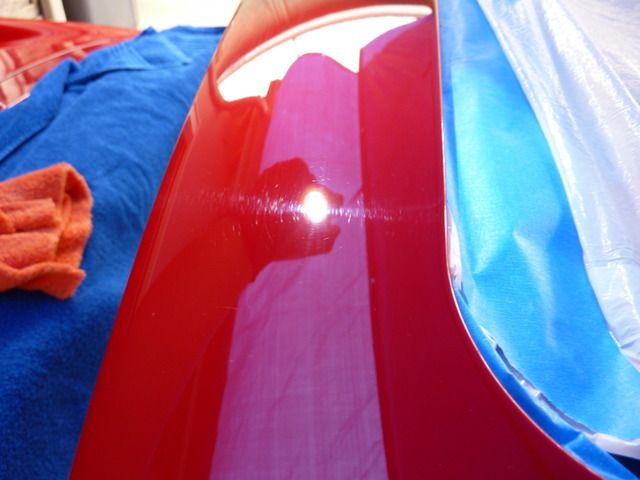
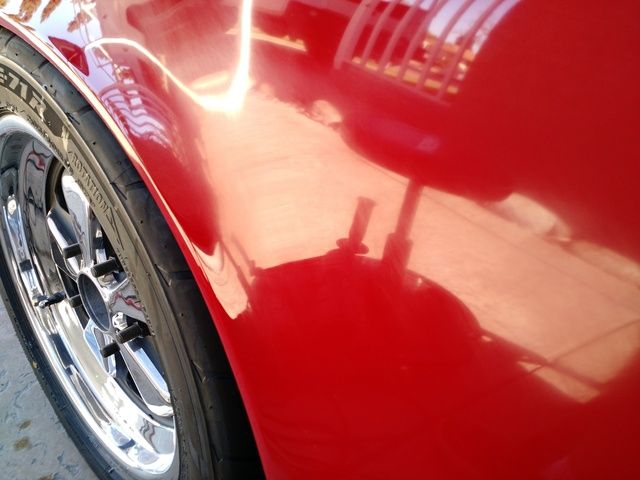
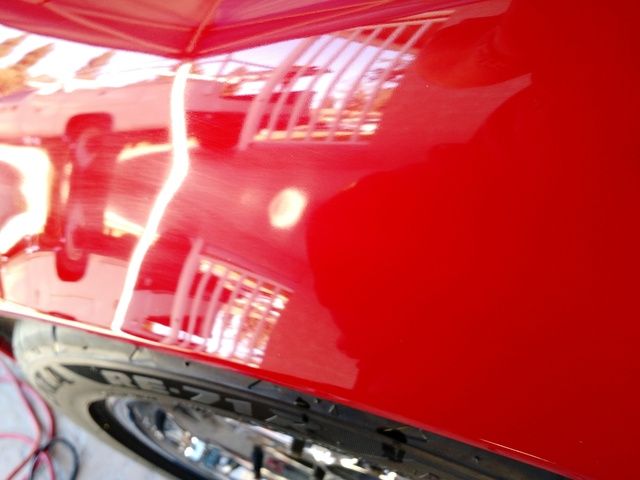
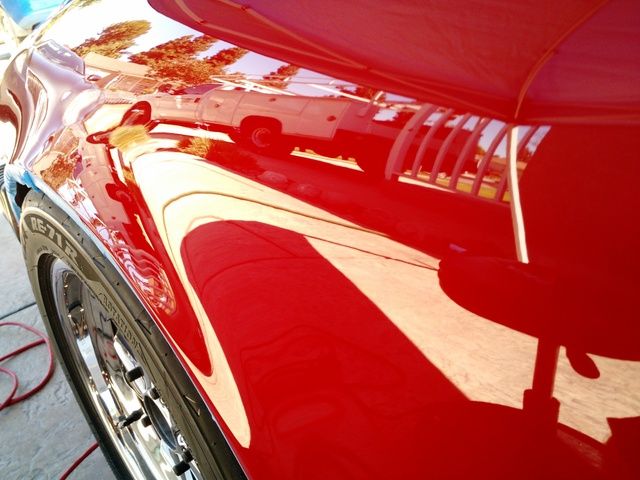
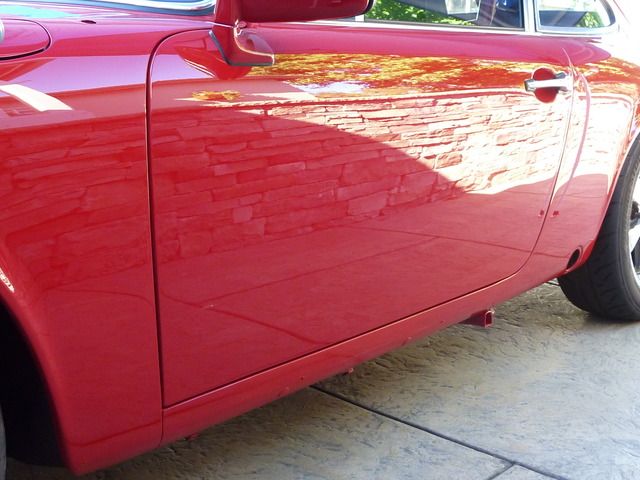
The same quarter panel after it was corrected….
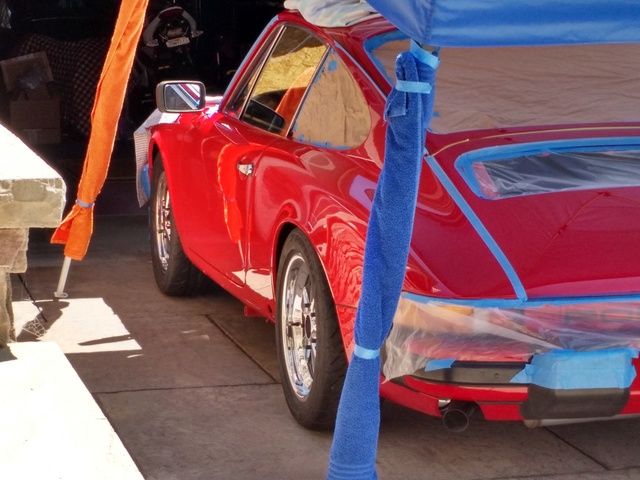
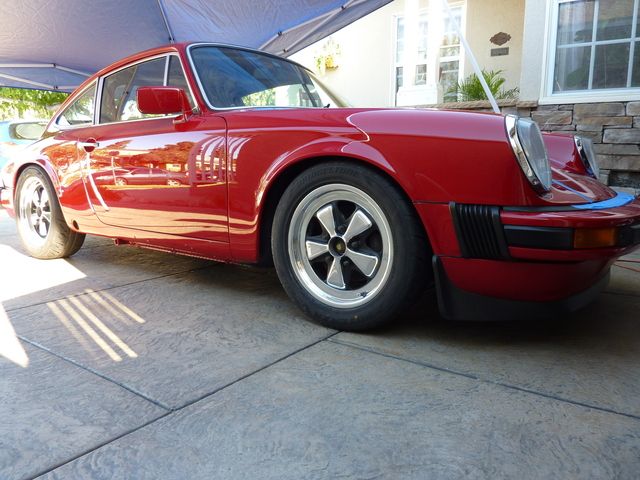
And finally, some parting shots. Enjoy. Thanks for taking the time to view (and read, if you did so!)
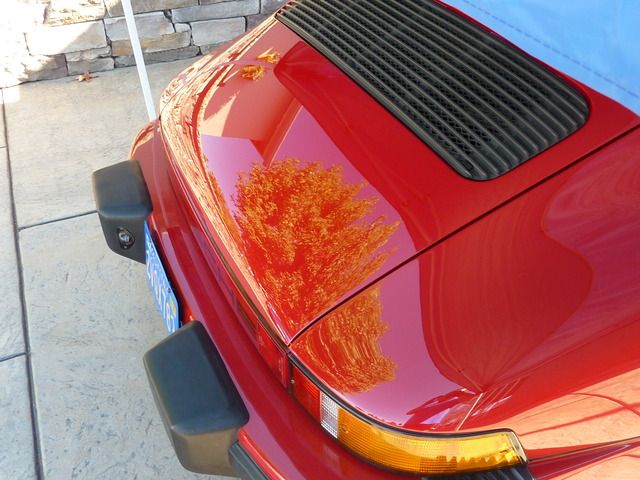
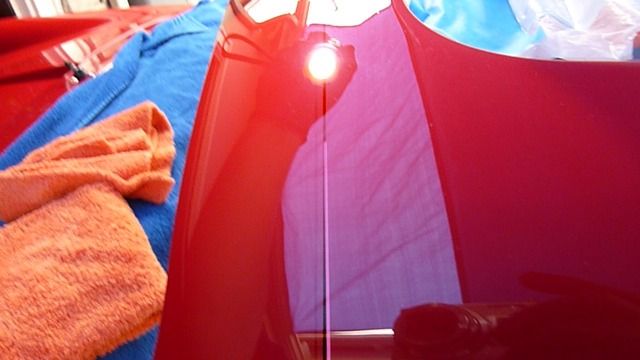
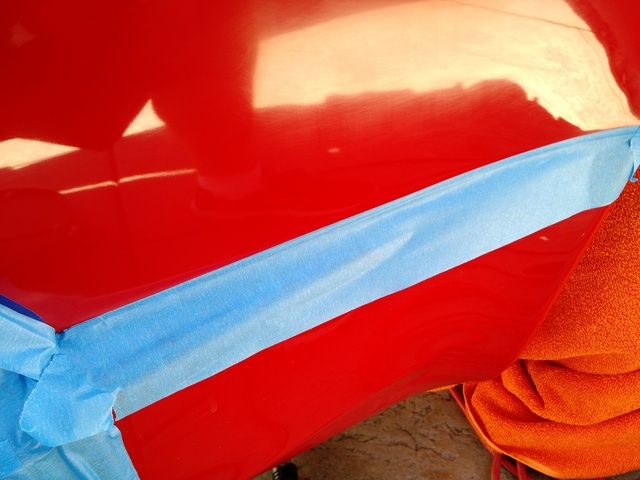
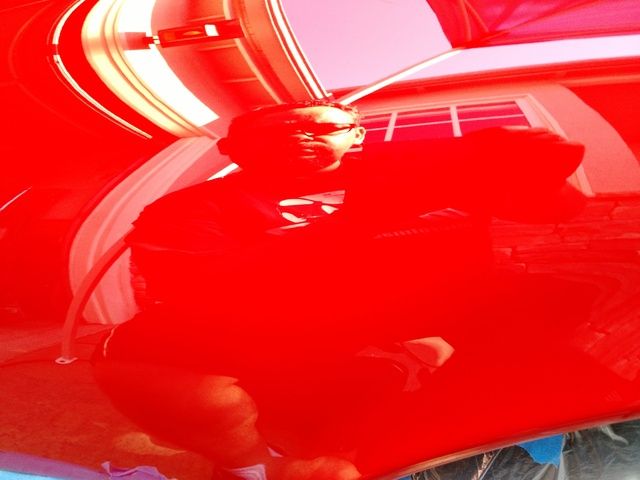
And although I’m not one to take selfies, I just liked the way this reflection looked on the red paint
Story. The owner of this Porsche is a young man that I’ve known for some time. We’re not exactly best friends, but we do chat from time to time and hang out with fellow CRX enthusiasts at a local CRX Meet. We also have a mutual friend, whom I’m a lot closer with.
This ’76 Porsche is actually his first car, which he inherited from his father after he himself upgraded to an ’86 (I believe). The owner also is an all around car guy, with vast knowledge with Hondas. He’s a mechanic that works out of his home, and does quite well for himself. He’s also known for being meticulous, even anal, about the quality of work he provides….and expects!

He maintains his own cars to a near-Autopian level. He washes, clays, and waxes regularly. Since his forte is in mechanics, detailing (and paint correction) is something he doesn’t do. So although he washes and such on a regular basis, he doesn’t follow the 2BW or other Autopian methods to do said washes.
Let’s get this more to the paint correction, shall we?
This guy decided to have his Porsche redone. He did most of the work himself, except the paint. He stripped down the car to a shell. For the paint, Porsche Guardsman Red, he had a shop to the work. They media blasted the shell and then painted it using PPGs hard clear paint. Not sure if it was Ceramiclear, or something similar.
Well, the shop did a horrible job. Even though he allowed them *months* to do the paint job, they appeared to have rushed the job and left it in bad shape. When he saw it, he was immediately ticked off with them. They offered to “correct” it, and follow it up with a “polish job.” He was so upset with them, he didn’t want them touching his car ever again.
How bad was it? After he took it home, he was left vacuuming for who-knows-how-long. There was sand (from the media blasting) throughout the car. EVERYWHERE. Well, granted, it was hidden in the nooks and crannies, but it was there.
That’s where I come in. He had been wondering what to do with the car. Didn’t know if he wanted to paint it, which he was strongly opposed to, or maybe just live with it the way it sat. Knowing him, there’s no way that would ever happen.
Right about this time, I had finished correcting the paint on that mutual friend’s Toyota 4Runner. This is important. Why? Because that 4Runner was in serious bad shape!!! Aside from your typical swirls and such, he also had “pinstriping.” That’s what the off-road community calls all the scratches left behind from rubbing up against shrubs, trees, etc, when doing some serious off road trails (or even some simple ones). Here’s what that 4Runner looked like.

And this is how I gave it back to the owner

Let’s do a full circle on this. The Porsche guy saw what I did with the 4Runner, and the cogs in his head started spinning. Sure enough, he asked me to come over to his place so I can have a look at his Porsche. I agreed to, but with hesitation. This guy is *meticulous* about the quality of work! He’s downright scary with his ability to see the little details in things. So I was scared to screw this one up! But then, this would also be a test for me. If I could pass HIS watchful eye and leave him satisfied, then I could say I do a pretty darn good job with my paint correction.
SORRY for this story, as it’s getting loooong.
To summarize what I was working with:
HOOD. The hood looked like some tech at the shop dropped some dirt on it, then took a dirty, greasy towel and wiped in large arc motions to clean it up. In doing so, he left some long, shallow scratches throughout. BAD (sorry, didn’t have pics of this, as the owner was watching me like a hawk for the first few hours)
ROOF: The roof had some swirls, webbing, etc, along with some sanding marks. NOT SO BAD
QUARTER PANEL: What the heck happened there? When I inspected the car, I noticed an oily film on the quarter panel. As if someone sprayed WD40, or something, and wiped it with a dirty rag. Aside from the oily film, it had scratches, swirls/webbing, sanding marks, and some weird, um…dirt(?) inside the paint. Before I took the job, I told the owner he would have to clean that off and wait at least a couple of weeks before I would touch it. I didn’t want to risk some strange chemical reaction, since I had no idea what that oily stuff was. REALLY BAD
REST OF CAR: Just typical paint correction needed. NOT BAD
>>>>>>>>>> >>>>>>>>>> PAINT CORRECTION <<<<<<<<<< <<<<<<<<<<
I started off on the hood. It was a bad spot. If I couldn’t do anything here, then there would be no point in doing anything else anywhere on the car.
I used my go-to process:
- Porter cable
- Hex Logic Orange Pad(all pads are 5.5”)
- Megs 105
- Hex Logic White Pad
- Megs 205
Oh-no. After HOURS on the hood, slowly working the product, I was not satisfied with the results. There was definite visual improvement (sorry, no pics yet) but no way would I leave the car this way. BUT, at this point, I didn’t know what else I could use, and didn’t have anything better. I told the owner this is all I can do with the crap paint job, and my limited products. I could tell he was not happy, but we both knew it DID look better. I offered to call it quits, with no money out of his pocket for the hood. He thought about it, looked the car over, and said, “No. Keep going. At least it looks better.”
Alrighty then.
Not one to give up, I made fast for the not-so-local detail supply store. Made it with 10 min to spare. I talked to the guy behind the counter, explained the situation, and he suggested Menzerna FG400. He also suggested Megs 100 (or 101) *IF* I wanted to stay with the Megs line. But he thought FG400 was better. So I went with that. Picked up some Megs MF Cut Discs as well.
NEXT DAY. I tackled the roof.
- Griot’s Garage 6” DA (I’ve had it, never used it before)
- Menz FG400
- Megs MF Cut Disc
- HD Polish
- Hex Logic White Pad
Didn’t care for the chemical/industrial smell of the FG400, but coupled with the MF Cut Disc, we were now in business! Sweet. I did more with this set up than the other. Faster. Better cut. Better finish. When I was almost done with the cut process, the owner came out and was blown away with the “new” results with this product combo. He asked if the next step was the wax. I said, “Nope, gotta hit it with polish first.” He did a double take and said, “But it looks good. It looks ready!” Indeed, the FG400 does finish pretty nicely. But I assured him the HD Polish would make it pop just a little more. And I was right.
Here are some pics of the roof


Roof portion just in front of the sunroof area


More of the roof


I made progress, but still, it was time consuming. I had to stop the job and would come back weeks(?) later due to scheduling. During this time, I had a chance to visit Meguiar’s Headquarters for their advance class. I was introduced to some new things, including their D300 MF Correction Compound. It looked promising, to say the least. So I bought some. And then….I was in love.
I used the following for the remainder of the paint correction:
- GG6
- D300
- Megs MF Cut Disc
- HD Polish
- Hex Logic White Pad
Now, don’t get me wrong. The FG400 is a great product (as is the M105). But the D300 seemed to cut just a bit easier. MUCH easier clean up. And the best part (to me) was the sweet Cinnamon scent. Goodness, I wanted to taste it! There were some spots where the D300 only required one pass, as opposed to 2-3 with the FG400 (BTW, the M105 combo took 5-6 passes). I feel it could be attributed to the products, AS WELL AS the inconsistencies in the paint. Like I said, it was a bad paint job
More pics


Here is that crazy quarter panel I mentioned earlier, in all its nastiness!


Here’s the part that looks like there is dirt underneath the paint

This section is behind the rear wheel on the same quarter panel.

The same quarter panel after it was corrected….


And finally, some parting shots. Enjoy. Thanks for taking the time to view (and read, if you did so!)


And although I’m not one to take selfies, I just liked the way this reflection looked on the red paint

