Wet Sanding Lessons

thai626 said:
How long do people usually wetsand for? cause I tried to even the paint surface but coudn't because I was so afraid of sanding too deep. I only wetsanded for about 5-10 minutes (multiple spots), then I just gave up. The mark is still noticeable.......should I continue sanding again?


Dont do it for a specific time. you do it until there is no more shine on the surface (if you are looking to remove a little orange peel)


I havent done any work on this yet. I will get started this weekend. Ill put photos up and then I will edit the video.
 
I too am interested in learning more about this. I just completed the front half of my Passat with very good results but i'd love to see how the pro's do it ;)
 
Considering this thread was started in March... I'm willing to bet we won't see any tutorial out of this. It's too bad really.
 
I realize this is my first post, but I have read thru this thread and have seen no mention of something I feel is VERY important. When wet sanding, you begin with your choice of paper. Make sure it is "P" grade and not regular paper. Why is this important? If you are using "regular" 2000 grit paper, you may in fact have some 1500 grit abrasives in the paper. If you use "P" grade paper, you may have some 1800 grit abrasives in the paper, but it tells you that the paper will give you a much truer grade of the paper you are purchasing. The "P" grade is just a stricter guideline on the size of the abrasives that are allowed to pass thru the sifter when making the sandpaper. Hope this helps.
 
So sorry, this may fail. I have been trying to open a used car lot and detail garage near my home for the past 60 days, our open dats is now Sept 1 2006. Its devouring my time along with my IT business. I do plan to update this thread once the store is open. I will film it there. I planned on doing a panel or two and posting photos a few weeks ago but ended up in the Dominican Republic relaxing just before hurricane season. This weekend Ill be up in Montreal at the Grand Prix du Canada to see the F1 race. Next is 4th of July, booked as expected. I would rather plan on doing this at the new garage as a promo and to post some shots of the place.


If anyone wants to talk about how to do it and what to look for, PM me and I will assist.
 
Not familiar with the Meguiars paper. If you want to, call them tomorrow and ask them if it is P Grade. Maybe I'll call them and ask, too.
 
im sure you can do a search on how to wet sand online fellas, and no offense jsat, but i dont think you should start a thread "wanna learn how to wet sand" and not "teach people how to wet sand" jmo good luck with your garage but honestly how long would it take to snap a few shots while working just to give these guys something to work with?
 
VaSuperShine said:
im sure you can do a search on how to wet sand online fellas, and no offense jsat, but i dont think you should start a thread "wanna learn how to wet sand" and not "teach people how to wet sand" jmo good luck with your garage but honestly how long would it take to snap a few shots while working just to give these guys something to work with?


Now that is a fine ribbon with which to tie up this thread.


Time to close this thread, unless someone has a course to offer.


Jim
 
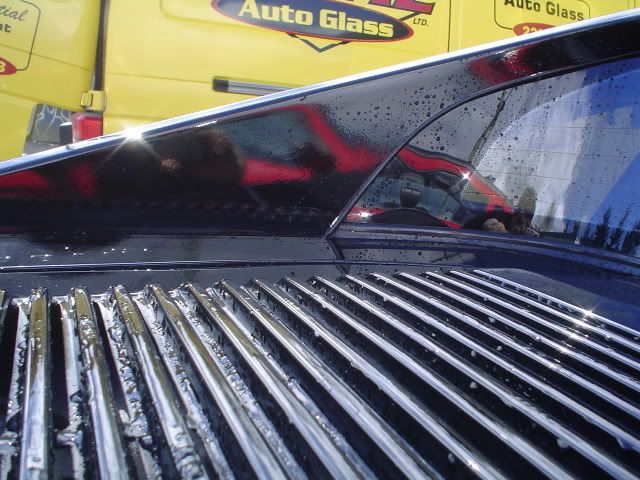
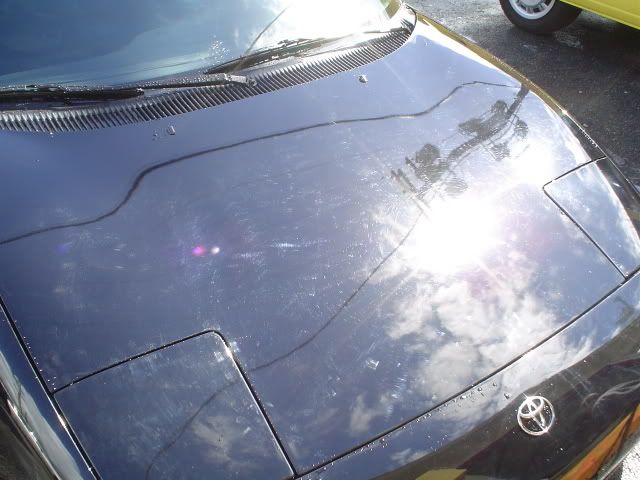
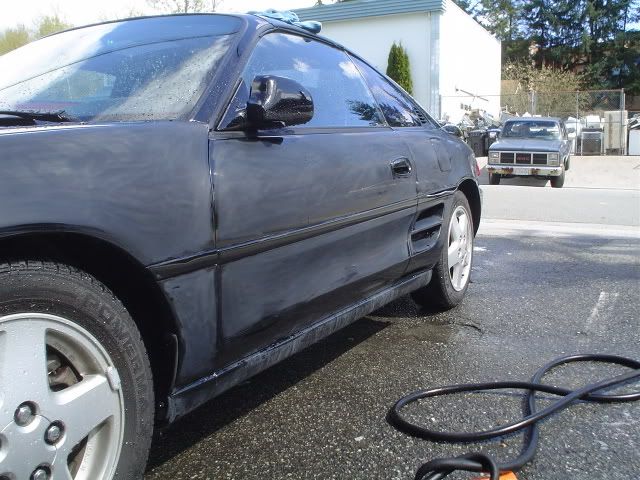
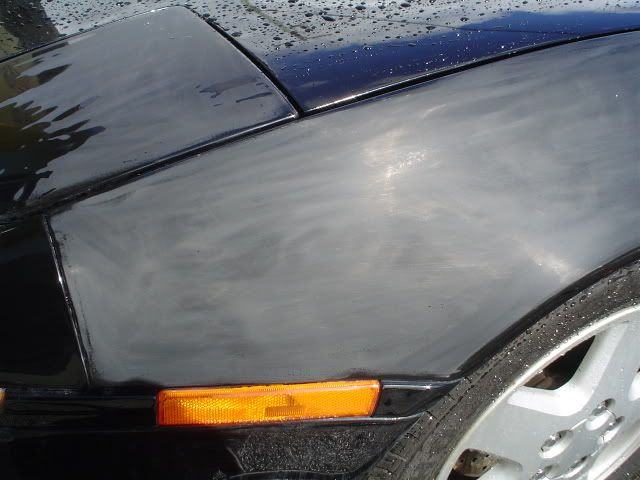
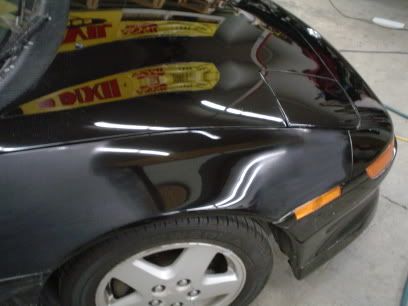
I have a few pictures of my last wetsand job on a BLACK Toyota MR2.

It took a total of 1 day and 2 evenings, for a total of around 24 hours.


He wanted to get every bit of orangepeel off of everything. Especially on the inside of the rear panels... I said I'd do my best!


Here are my pics:


DSC03173.jpg


DSC03165.jpg


DSC03180.jpg


DSC03177.jpg


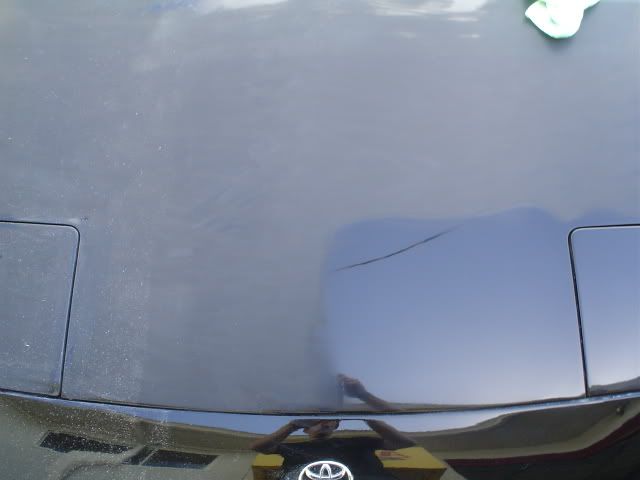
Wetsanded with 2000 grit paper, and a constant supply of water via hose. Front to back strokes as much as possible, to make it easier to compound. I used a 1x2" block of foam as a sanding block. I'd suggest a 2x2" section of a sanding block.


Wetsand only until the small dots of unsanded paint dissapear. I used a California Water Blade to always see what it looks like dry. You need to dry it every 2 or 3 passes to make sure you don't go further than necessary. This is where experience comes into play...


DSC03197.jpg


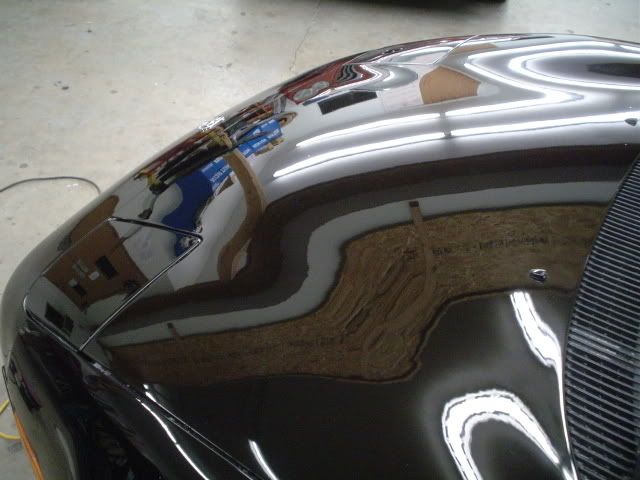
I started buffing it out with a Wool pad and Menzerna PowerGloss Compound, but it proved to be very slow work... I got a 6" foam pad for the rotary, and it worked wonderfully!! Black foam compounding pad from KMS Tools, it basically makes the rotary as easy to use as a D/A polisher! Almost...


DSC03181.jpg


It took an average of 3 - 2minute long tries per section, and I worked in basically a square foot at a time.


DSC03182.jpg


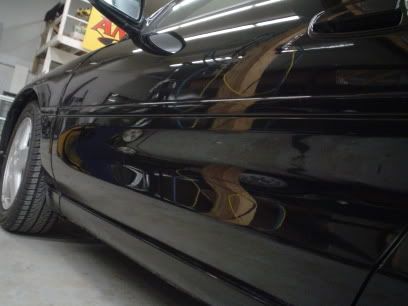
Then I brought it inside and kept at it:


DSC03188.jpg


DSC03240.jpg


If anyone has questions or criticisms, I'd be glad to converse :tumblewee
 
beautiful, no criticism, just a question, did you wet sand the entire car and if yes was it needed? great hood in garage shot. i think the toughest question id have is determining exactly what needs to be and knowing what you can do with it. i mean id hate to spend a few hours on one panel via pc and not get what im looking for, at the same time i wouldntwant to immediately wet sand just for the sake of doing so, guess its a good thing ive got a good practice car.
 
As for buffing, I used a Makita rotary at around 1500RPM, with a black 6" foam cutting pad.


I did the entire car. Even the wing. Even the little air intakes. Even the roofbelt. And the C pillars. It took FOREVER! I will definitly be more selective next time ;)


I buffed with the rotary and Menzerna PowerGloss Compound until the paint was completely free of any wetsanding marks. The paint was fairly hazy after, and the dust went EVERYWHERE, but it was the strongest stuff I had and it was the only thing that worked.


Then I went over every bit with my PorterCable and some Meguiars DACP on a red Meguiars cutting pad, on speed 6.


After that I polished to brilliance with the PorterCable, yellow Meguiars polishing pad, and Meguiars SwirlRemover, and then protected with both a coat of Klasse All-In-One, and a topcoat of P21S Carnauba.


I was paid $400 for it :thumbup: Should have charged $500 :sosad
 
I was paid $400 for it :thumbup: Should have charged $500

#56 Reply With Quote


No, you should have charged twice that... What you accomplished is the most skilled aspect of a $4-6,000 paint job!


Assuming that you'll be doing even more of this type of work, look into the MIRKA "Fast Finish" System. It involves a pneumatic orbital sander and some very sweet abrasives... you'll be amazed at what 4000 grit pads can do! Makes the polishing step so easy...


Good Luck!


Jim
 
Thanks for the tip!


I definitly would love to use that Meguiars unigrit 3000 paper, since I used generic 2000grit from Lordco! It sure turned out perfect, so I definitly want to do it again :)


I need to move into the hotrod and custom car field :)
 
Stumpy Detailing,


Pictures and paint look real good. Good job.


Have you ran a flouresanat light over your work? The light will pull out missed areas when you buffed. The reason behind using the light is because at different times of the day you will notice different spots you missed when buffing, the light brings out the spots all at once. Just curious, looks good.


I know you are probably done with the buffing and thanking God for it to be over.
 
Back
Top