Todd@RUPES
Just a regular guy
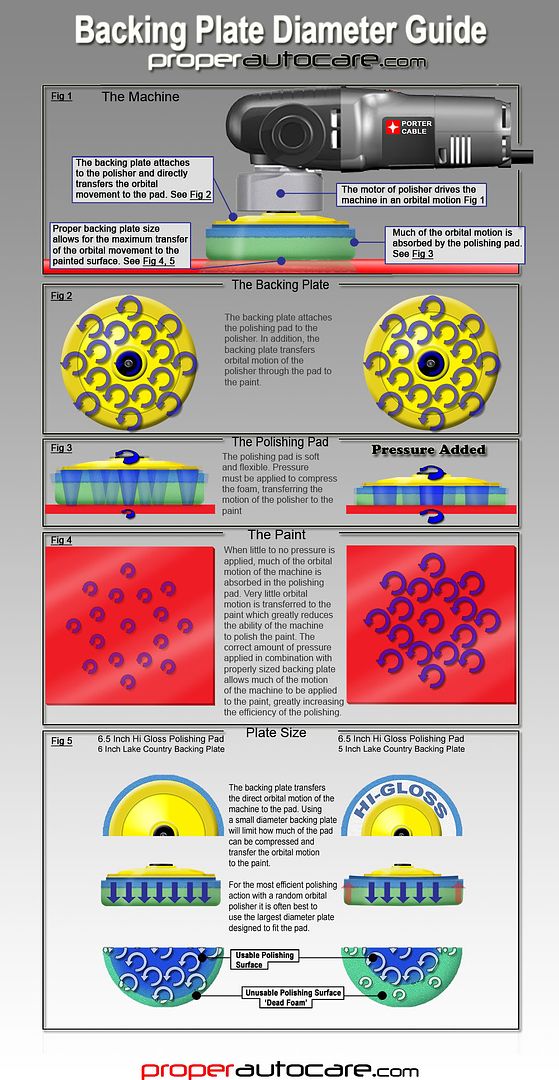
Choosing a proper backing plate design and size can be confusing. The link between the machine and the pad is often an after thought, although absolutely vital in getting the best performance from your polisher.
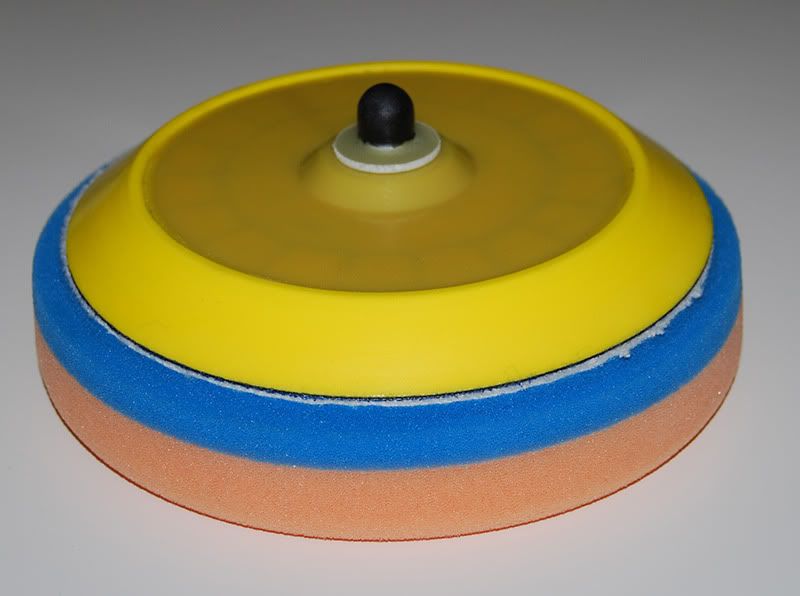
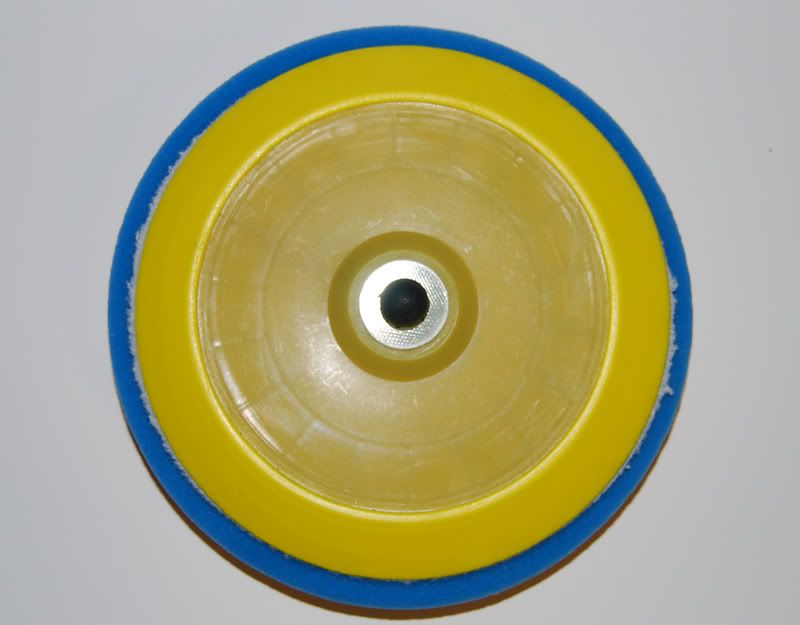
A backing plate for a dual-action orbital polisher is a disc that transfers the motion of the machine to the pad. It threads into the machine and features a hook or loop backing allowing for polishing to pads to be changed quickly.
Why is backing plate size important?
Blacking plate size, relative to the size of the polishing pad, is important because foam pads do a poor job of transferring the orbital motion of the polisher into useful polishing motion where the polisher meets the paint. This is called the working surface. Much like a bowl of Jell-O that giggles on itself, the foam absorbs much of orbital motion of the machine. With out an efficient transfer of the orbital movement we are left with a low speed rotary polisher.
To reduce the amount of orbital movement absorbed in the pad we must use down force, or pressure applied to the head of the polisher, to compress the pad. Using a properly sized backing plate allows for the an even amount of compression across the entire area of the pad; increasing the polishing area of the pad and making it more efficient. A backing plate that is too small will only compress the area of the pad that is directly underneath it, reducing the amount of the pad that is able to polish effectively.
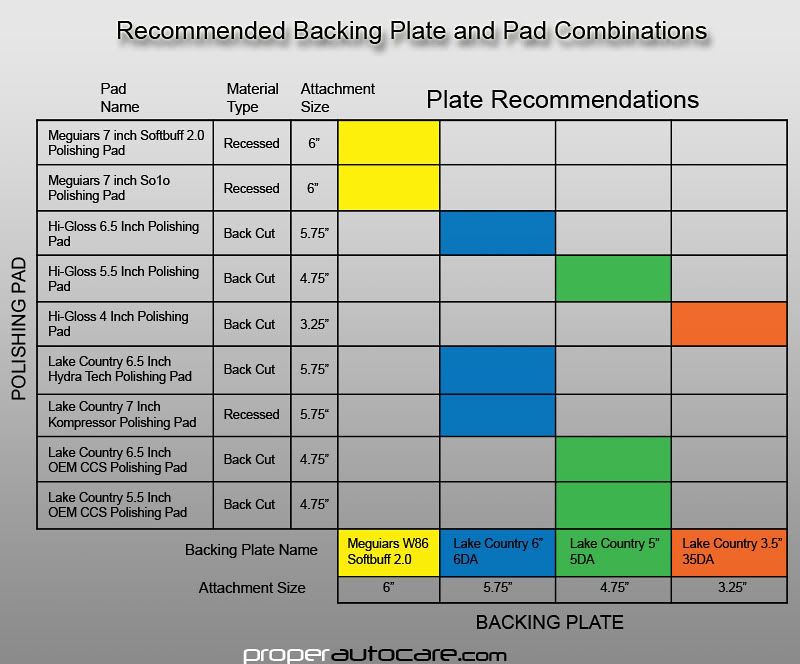
Generally, you want to use the largest diameter backing plate that will safely mount the polishing pad you are using.
Why is backing plate design important?
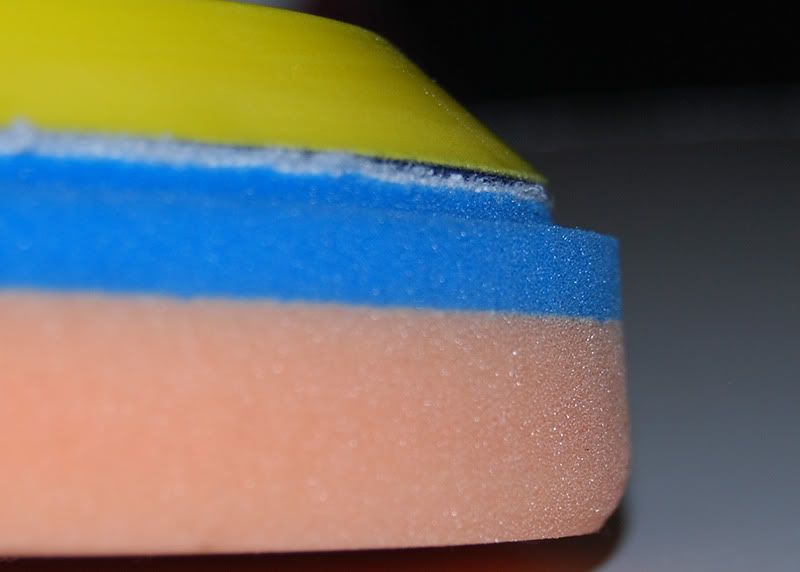
Not all polishing pads are designed equally. Despite differences in foam, height, and diameter, polishing pads have unique design features which may determine the best backing plate for them. First, you want to make sure the hook n? loop backing material is compatible with the pad and the backing plate so that it engages securley. When a dual-action polisher is orbiting 6000+ times a minute, there is a considerable amount of force created that wants to pull the pad off of the backing plate and fling it across the garage.

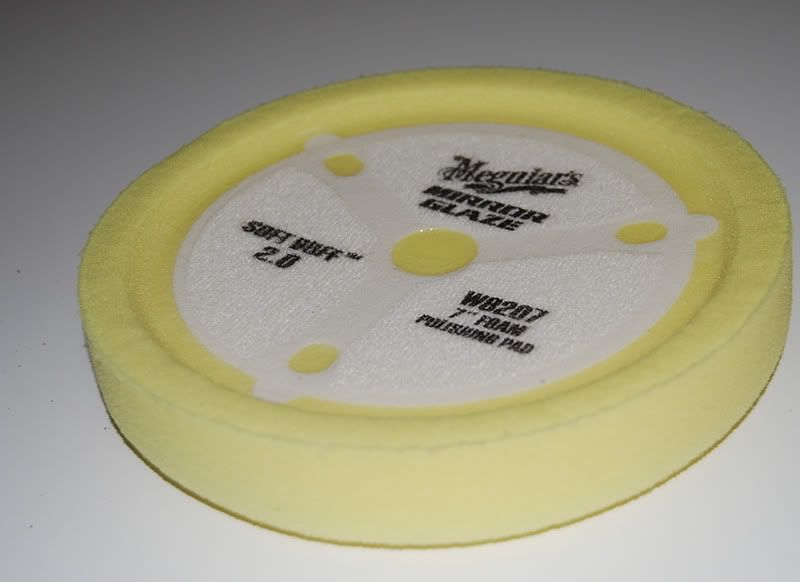
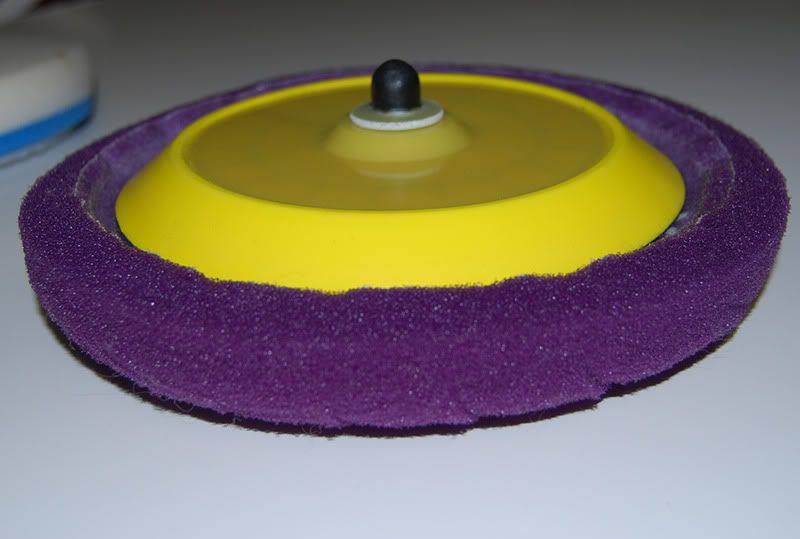
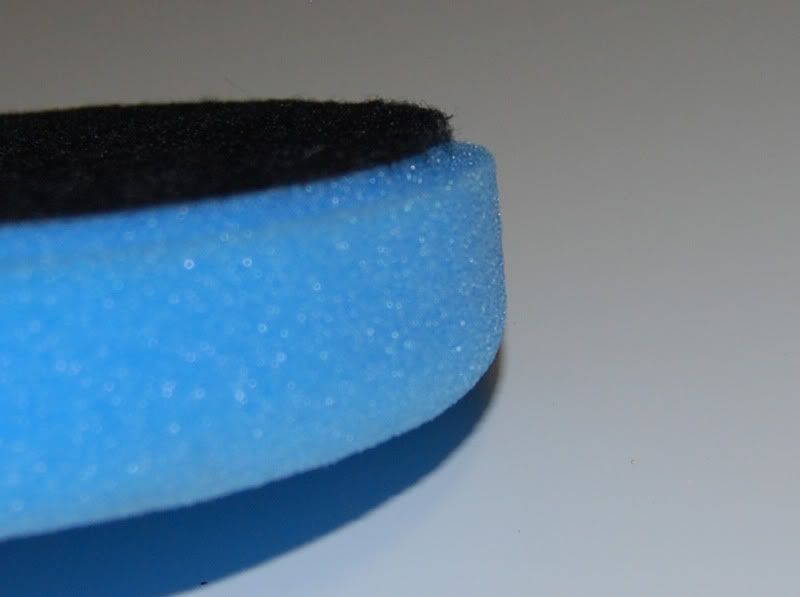
The attachment material can be flat , as well as raised above, or recessed below the back of the pad. Both Meguiar?s Softbuff 2.0 and So1o polishing pads as well as Lake Country Kompressor pads feature a recessed backing. The attachment material is below back of the pad, which creates a safety barrier between paint and the backing plate. This reduces or eliminates the potential of the backing plate from contacting the paint while polishing and causing damage when polishing a tight area, a complex curve, or using polishing with excessive tilt.
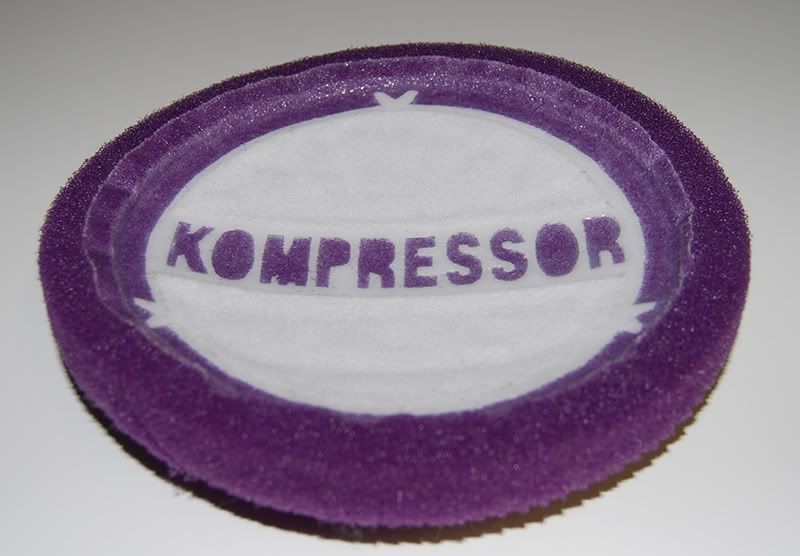
The design of the Lake Country Kompressor Pad requires that the proper size 6 inch backing plate be used to fully lock the blocks of foam together.
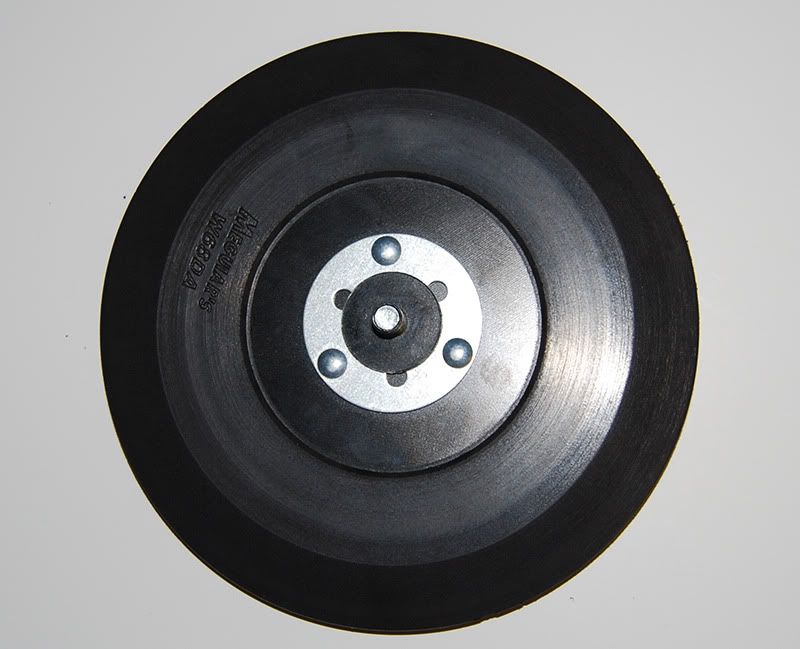
The design of the Meguiar?s Softbuff Polishing Pads is also recessed, but features a wider rim of plastic around the Velcro. The Meguiar?s W68 Softbuff 2.0 Backing Plate features a unique soft urethane border that matches up with the pad when they are attached. This prevents the backing plate from cutting through the foam while allowing for the largest sized plate to be used for maximum efficiency.
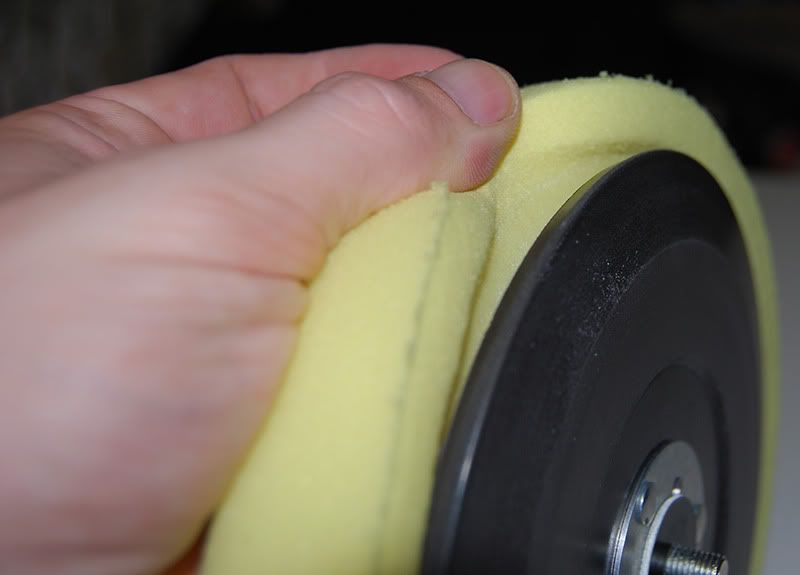
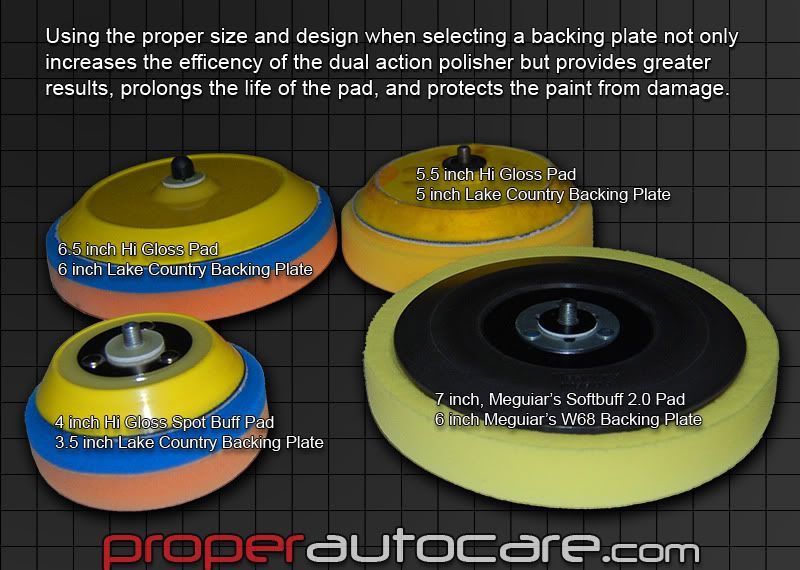
All of Proper Auto Care?s Hi-Gloss Polishing Pads feature a ?back cut and raised? design. The attachment material is cut back so that it is smaller then the diameter of the pad. By moving the backing plate and attachment material up and away from the edge of the polishing pad a full sized plate can be used for the best possible results.
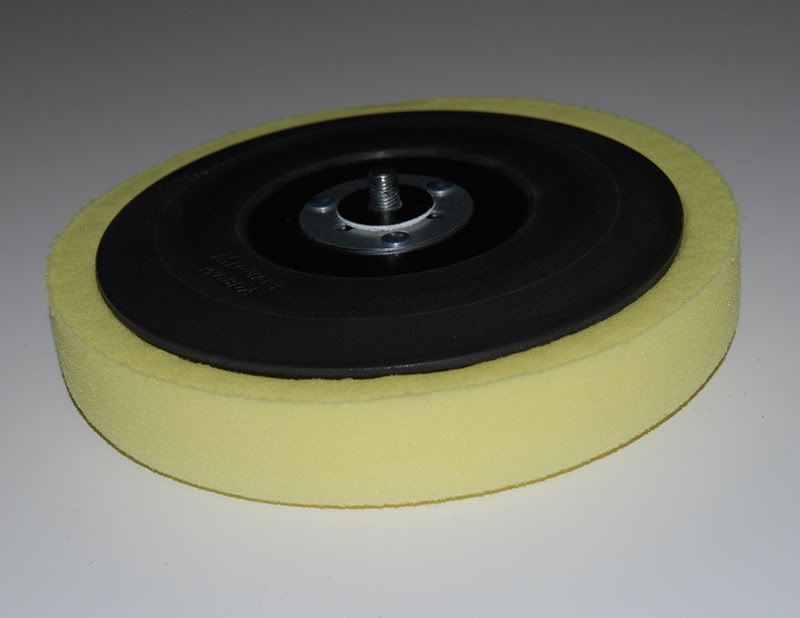
Lake Country choose to use this design on their new Hydro Tech polishing pads as well.
Back cut and raised polishing pads also make it very easy to center the pad onto the plate on the first try!
So I should always use the largest backing plate with my random orbital polisher?
In general yes but there are some exceptions to the rule. If you are using a ?standard? polishing pad that does not have any safety features, you are likely better off using a smaller backing plate, and living with the trade off in performance.
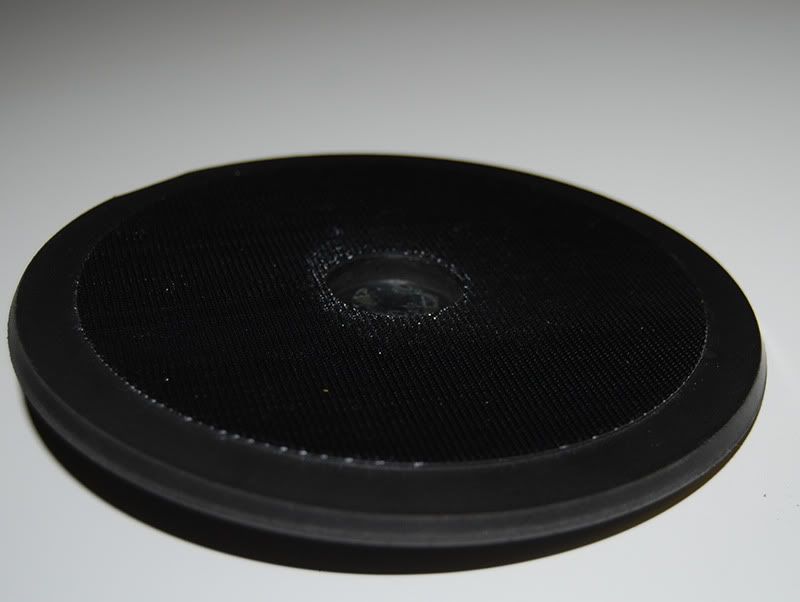
This standard 6.5 inch Lake Country CCS pad has a flat attachment material that runs to the edge of the pad as well as a sharp edge on the polishing surface. In this case, using a smaller sized backing plate, such a 5 inch plate will cause the edges to cave inward when pressure is applied. This will help keep the sharp attachment material from cutting through the paint as well as pull the sharp polishing edge of the pad off the paint where it can dig in and create swirl marks and holograms.
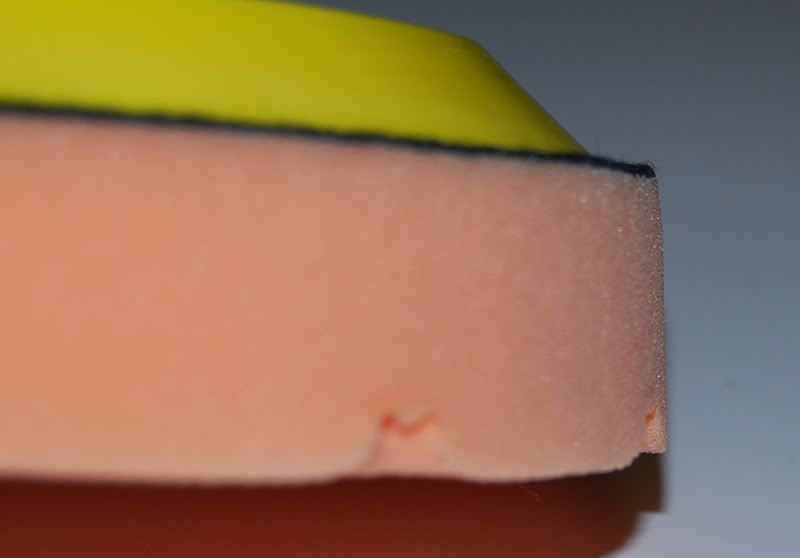
As you can see in the picture, it safer to use a smaller backing plate and live with the performance trade off, when using standard pads that do not have any safety features. This is why we recommend a 5 inch pad with our entry priced ?OEM? polishing pads.
Helpful links
Choosing a Machine Polisher
CMA Polish Range Comparison Chart
Meguiars M105/M205 Polish and Pad Comparison Chart
Lake Country/Menzerna Polish and Pad Comparison Chart
Understanding Lake Country Polishing Pads and Foams
Removing Paint Defects
A backing plate for a dual-action orbital polisher is a disc that transfers the motion of the machine to the pad. It threads into the machine and features a hook or loop backing allowing for polishing to pads to be changed quickly.
Why is backing plate size important?
Blacking plate size, relative to the size of the polishing pad, is important because foam pads do a poor job of transferring the orbital motion of the polisher into useful polishing motion where the polisher meets the paint. This is called the working surface. Much like a bowl of Jell-O that giggles on itself, the foam absorbs much of orbital motion of the machine. With out an efficient transfer of the orbital movement we are left with a low speed rotary polisher.
To reduce the amount of orbital movement absorbed in the pad we must use down force, or pressure applied to the head of the polisher, to compress the pad. Using a properly sized backing plate allows for the an even amount of compression across the entire area of the pad; increasing the polishing area of the pad and making it more efficient. A backing plate that is too small will only compress the area of the pad that is directly underneath it, reducing the amount of the pad that is able to polish effectively.
Generally, you want to use the largest diameter backing plate that will safely mount the polishing pad you are using.
Why is backing plate design important?
Not all polishing pads are designed equally. Despite differences in foam, height, and diameter, polishing pads have unique design features which may determine the best backing plate for them. First, you want to make sure the hook n? loop backing material is compatible with the pad and the backing plate so that it engages securley. When a dual-action polisher is orbiting 6000+ times a minute, there is a considerable amount of force created that wants to pull the pad off of the backing plate and fling it across the garage.
The attachment material can be flat , as well as raised above, or recessed below the back of the pad. Both Meguiar?s Softbuff 2.0 and So1o polishing pads as well as Lake Country Kompressor pads feature a recessed backing. The attachment material is below back of the pad, which creates a safety barrier between paint and the backing plate. This reduces or eliminates the potential of the backing plate from contacting the paint while polishing and causing damage when polishing a tight area, a complex curve, or using polishing with excessive tilt.
The design of the Lake Country Kompressor Pad requires that the proper size 6 inch backing plate be used to fully lock the blocks of foam together.
The design of the Meguiar?s Softbuff Polishing Pads is also recessed, but features a wider rim of plastic around the Velcro. The Meguiar?s W68 Softbuff 2.0 Backing Plate features a unique soft urethane border that matches up with the pad when they are attached. This prevents the backing plate from cutting through the foam while allowing for the largest sized plate to be used for maximum efficiency.
All of Proper Auto Care?s Hi-Gloss Polishing Pads feature a ?back cut and raised? design. The attachment material is cut back so that it is smaller then the diameter of the pad. By moving the backing plate and attachment material up and away from the edge of the polishing pad a full sized plate can be used for the best possible results.
Lake Country choose to use this design on their new Hydro Tech polishing pads as well.
Back cut and raised polishing pads also make it very easy to center the pad onto the plate on the first try!
So I should always use the largest backing plate with my random orbital polisher?
In general yes but there are some exceptions to the rule. If you are using a ?standard? polishing pad that does not have any safety features, you are likely better off using a smaller backing plate, and living with the trade off in performance.
This standard 6.5 inch Lake Country CCS pad has a flat attachment material that runs to the edge of the pad as well as a sharp edge on the polishing surface. In this case, using a smaller sized backing plate, such a 5 inch plate will cause the edges to cave inward when pressure is applied. This will help keep the sharp attachment material from cutting through the paint as well as pull the sharp polishing edge of the pad off the paint where it can dig in and create swirl marks and holograms.
As you can see in the picture, it safer to use a smaller backing plate and live with the performance trade off, when using standard pads that do not have any safety features. This is why we recommend a 5 inch pad with our entry priced ?OEM? polishing pads.
Helpful links
Choosing a Machine Polisher
CMA Polish Range Comparison Chart
Meguiars M105/M205 Polish and Pad Comparison Chart
Lake Country/Menzerna Polish and Pad Comparison Chart
Understanding Lake Country Polishing Pads and Foams
Removing Paint Defects


")