Well this is a first for me, I'm doing a write up on a car we just finished yesterday. I'm trying to stay on top of these things more!
A few weeks back we had done a different FRS, this one was Asphalt Grey - and in very bad shape. Only a few months old but hammered already from the local hand wash joint. We were able to save his car and ''wow'' him with the results (literally). Well the owner of this Raven Black had heard about proper paint care, Opti-Coat and US from the Asphalt Grey owner. He contacted us a couple weeks back and we set up a date for him to drop it off with us to take care of.
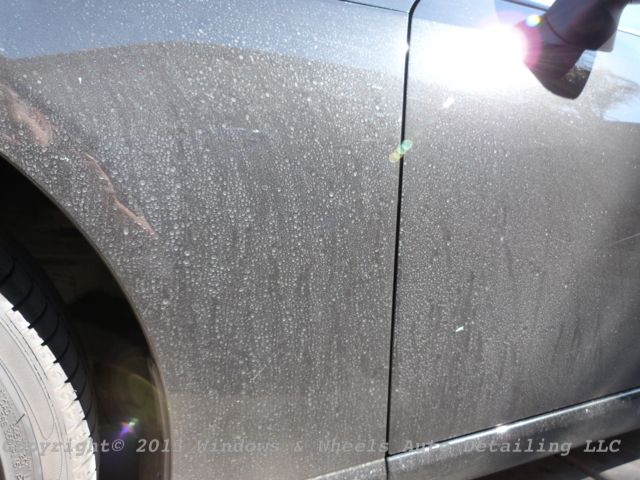
Upon delivery, it was FILTHY. BUT, this was ok - honestly we'd rather have a filthy car that WE wash rather than a clean car with added swirls in the paint because it was improperly washed. We had requested that the owner just let us wash it rather than risk extra damage...so thats what he did!
Here she is, with a nice protective layer of dirt on it lol:

OH yeah, she's dirty lol
Always gotta pull that license plate to be sure to get that caked up grime behind it...and this is after only about 1,000 miles of driving!
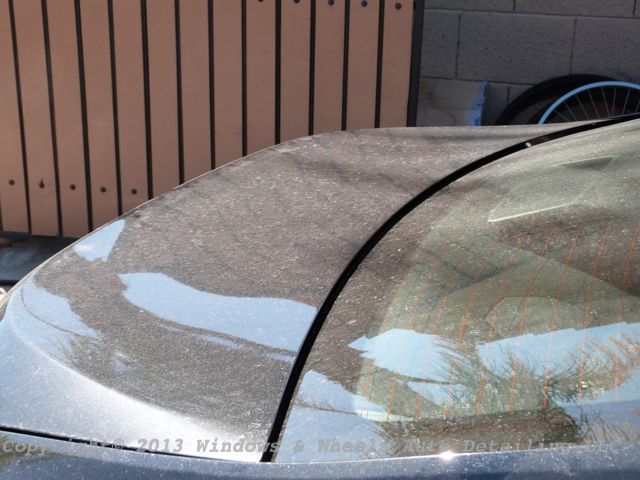
Some areas had been hit by water and spotted up, thus leaving some water spot etching for us to deal with. Part of the spots were just topical mineral build up, but the others had actually etched into the paint already:
Tires were uhm..yeah...just...yup:
Dirt coating!
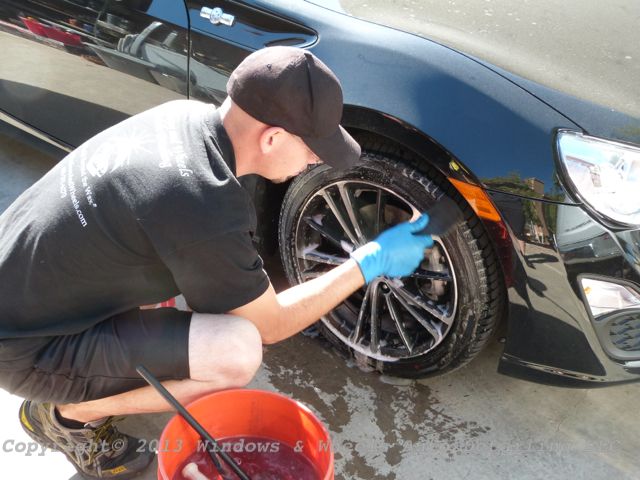
About 5 different brushes along with 3 different cleaners were used just to get the tires, rims and wheel wells back into shape. 1 brush for the tires, another for the wheel faces, 2 different types for the wheels barrels and then a 5th one for the wheel wells. Notice the bucket full of brushes. Also note this water was ONLY used for the tires and wheel wells.
After the tires were done, the car was rinsed, then covered in foam to help break down the dirt...and hand washed. We rinsed it clean, dried it off and pulled it inside the garage to being with the clay bar decontamination process of it. Both the paint and windows were all very 'grabby' from contaminants, but we were able to get rid of those bonded contaminants without much fuss.
Then it was paint inspection time....here's the damage. First the etched in water spots:
Then of course, the swirls. Most were straight line scratches going lengthwise with the body of the car. I'm thinking its pretty safe to assume that this was mostly from the dealership wash.
More goodies:
Close up, not pretty is it?
A few deeper ones were present in some areas:

OUCH!
Of course around the door handle always gets scuffed up:
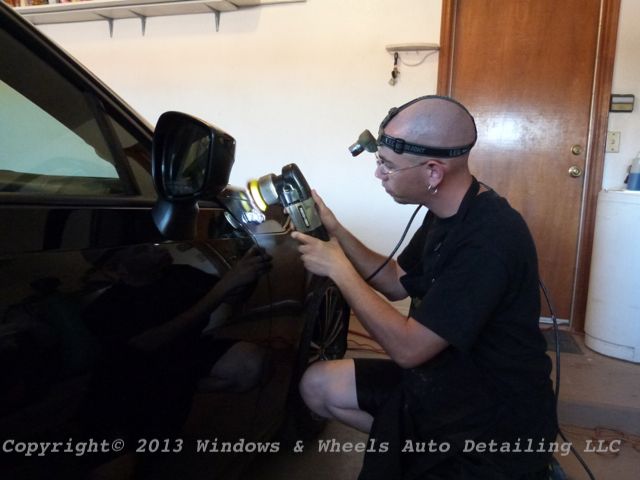
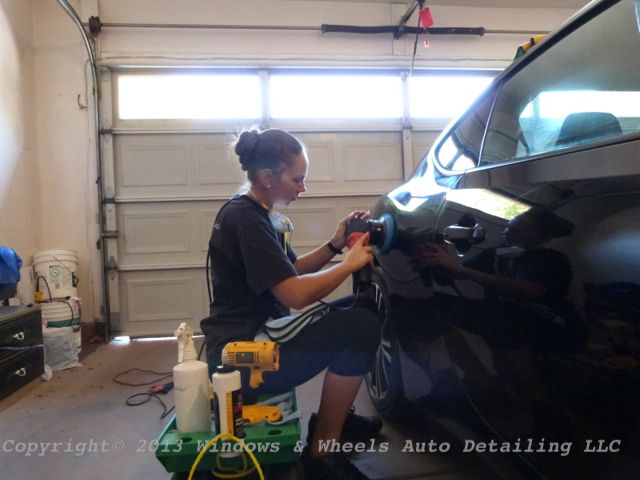
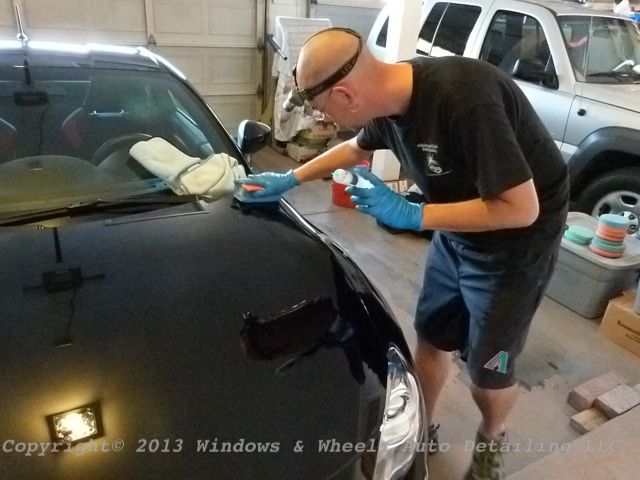
So now that we saw what we were working with, it was time to do a test spot. With new cars, we typically try to get all the correction we need with a 1-step polish. So first we tried a Buff & Shine Blue light polishing pad with some Meguiars 205 polish. After doing a section...it came out very nice, but there were still quite a few deeper scratches left. SO, i bumped up the pad aggression to a green medium polishing pad and tried again.
Unfortunately, the results were the same....it was good, but not good enough. I finally went and set up a Megs Microfiber cutting disc along with some Megs D300 compound and did the area again. It left noticeable haze, but the swirls and deep scratches were gone. My sister followed up behind me with the blue pad and 205...and MAN did it look sweet!
Knowing the combo that was needed, i sent a message to the owner letting him know extra work would need to be done and it would take extra time, but we did not want to Opti-Coat a 'pretty good' looking car. He said he totally understood and appreciated the extra work.
So, round and round we went:
Light looks ridiculous but it is needed to see what type of results im getting as I'm compounding.
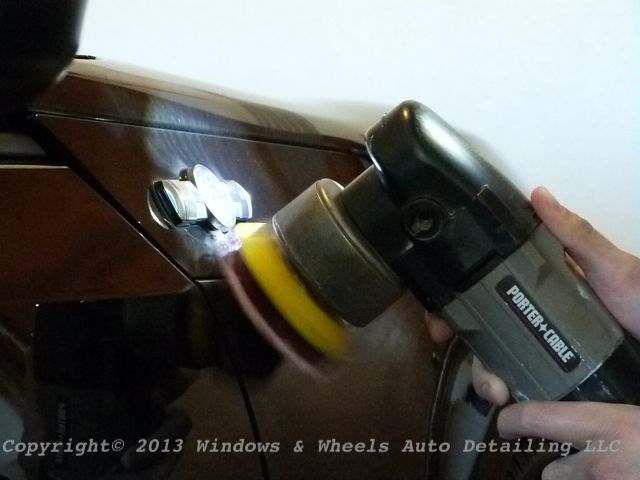
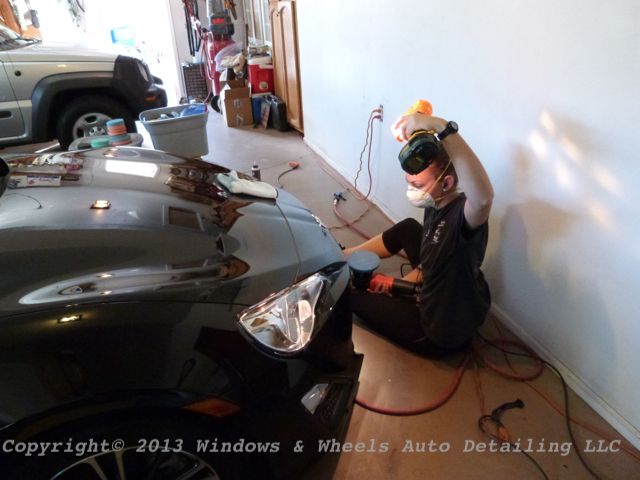
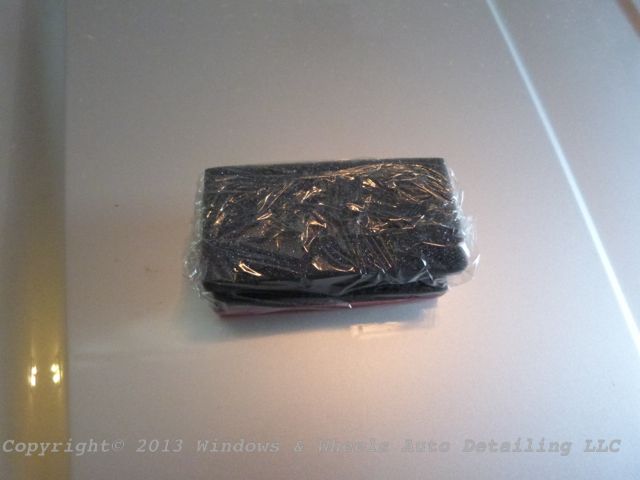
Small pads for small areas:
Coming along behind me was Dani doing the final polishing:
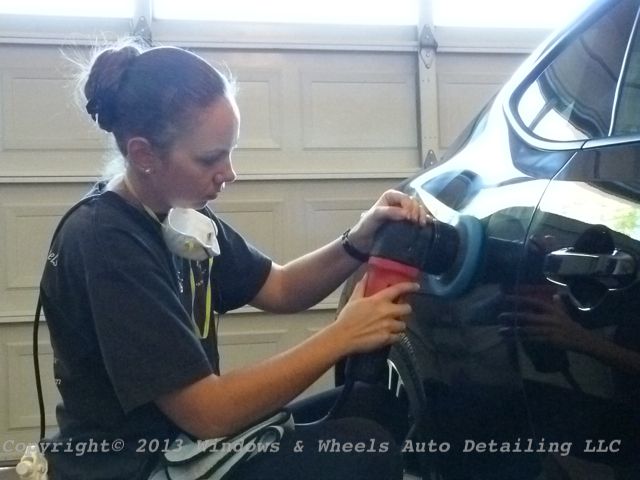
Again, checking the condition of the paint to be sure all hazing/marring left behind was removed. She would also check to see if there were any deeper scratches i missed while compounding...which she found a few, so i'd come back and touch up that spot to get rid of the deep guys...and then she'd re-polish it to glossy perfection:
We finally finished with the polishing - so it was time to spray down each panel with isopropyl alcohol and do a rinseless wash on the car to make sure all polishing oils were removed.
Now it was time to Opti-Coat. I would be using a new method this time for application. I took a tire dressing applicator sponge and wrapped it in plastic wrap...this was to make sure that the sponge wouldn't absorb the coating:
Next i put my suede applicator on top of the sponge:

Then i primed the cloth with Opti-Coat...and began applying:
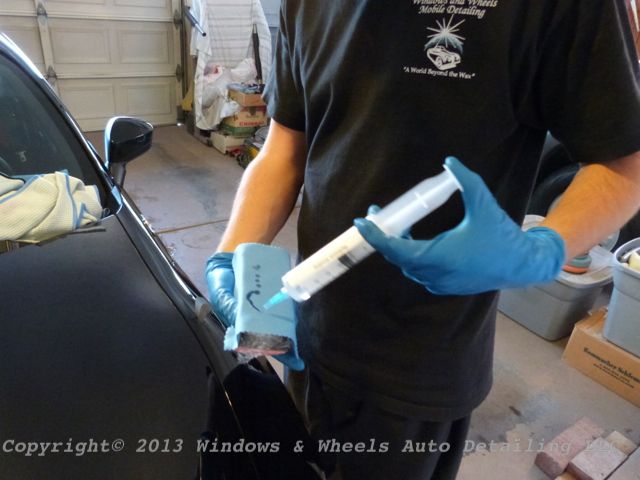
I found this to apply the coating MUCH smoother than using a foam pad. It took a bit more to prime the cloth, but once after about a panel or so it was pretty well primed and didnt require so much coating for each following panel.
I went around and coated all of the paint while Dani went around and cleaned all of the wheels and coated them. She also applied it to the hard plastic on the back, the head and tail lights and even coated the exhaust tip")
After i finished the paint, i coated the windshield wipers and the hard plastic under them as well.
The polishing was done, the coating was done, but the DETAILING was not....i think all too often these things are all lumped into one. A paint polisher isn't always a good detailer...and a detailer MOST times is not a good paint polisher. While paint polishing correctly i feel is an art form and requires a great amount of skill, time and knowledge...I think that if you leave the DETAILS out of your job, you're not giving your work the best presentation possible.
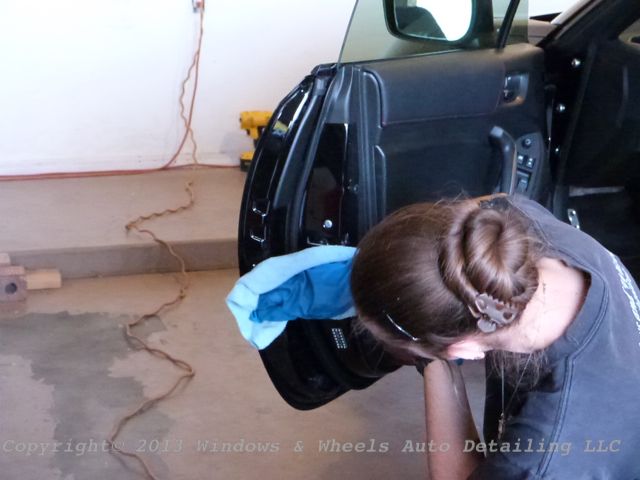
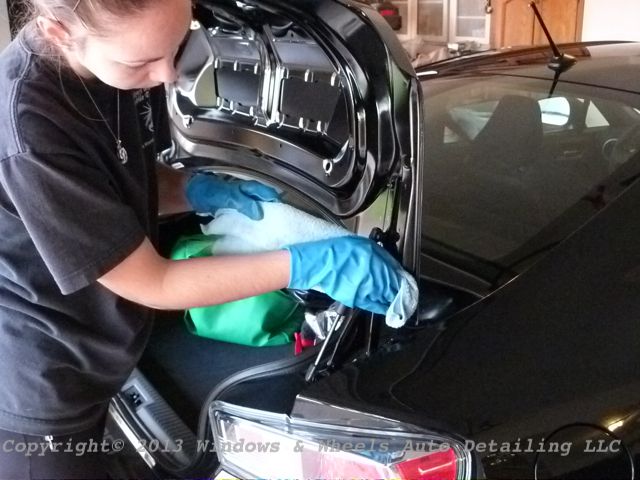
So, thats why after several hours of work, we still had more to do. We went around wiping down all the door jambs, trunk jamb and hood jamb...cleaned all the windows...and even though this was not an interior detail...Dani vacuumed out the inside and did a wipe down of all dirty surfaces.
Having this type of work done should be an all around excellent EXPERIENCE for the owner...so if we can do a few extra things to make it just that...then thats just what we do
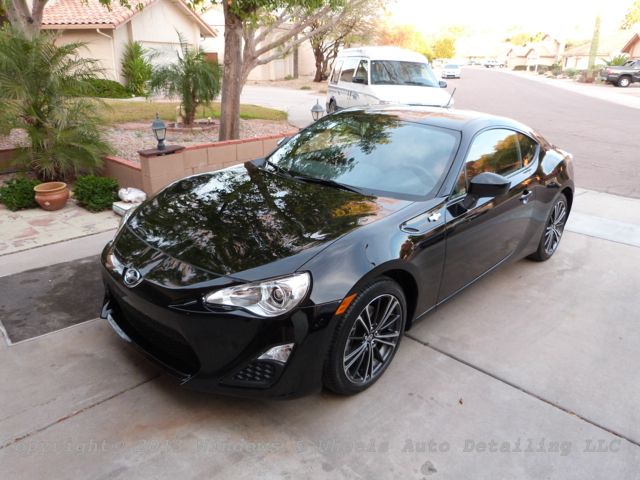
Now for the fun part, we got to pull it out and take a look at our work!
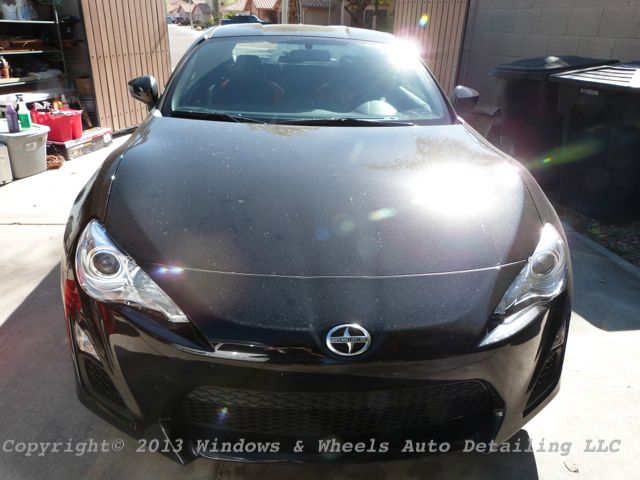
All swirls and water spots had been removed:
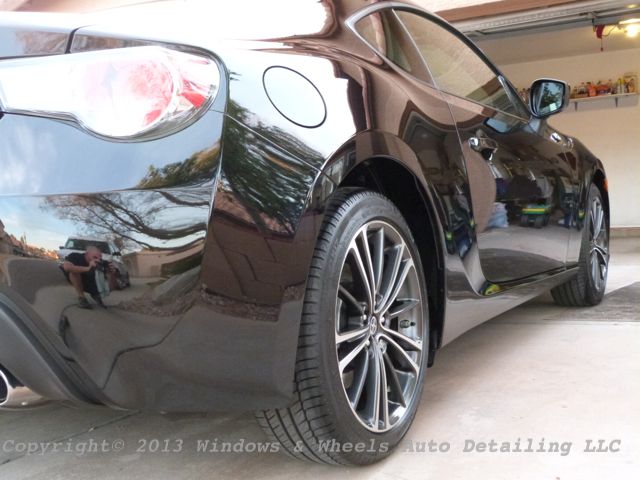
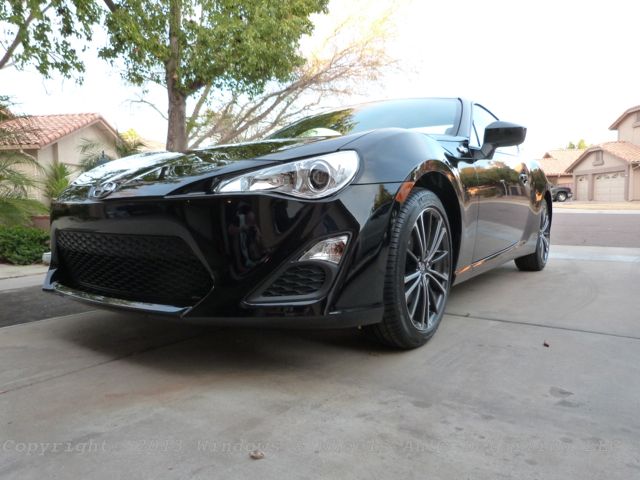
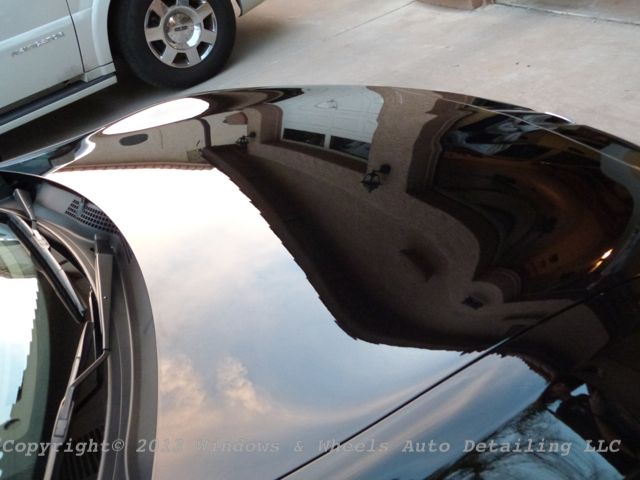
The paint looked GORGEOUS! Under direct light it had a beautiful metallic look, but in indirect light it looked black and liquid and glossy. The reflections were awesome.


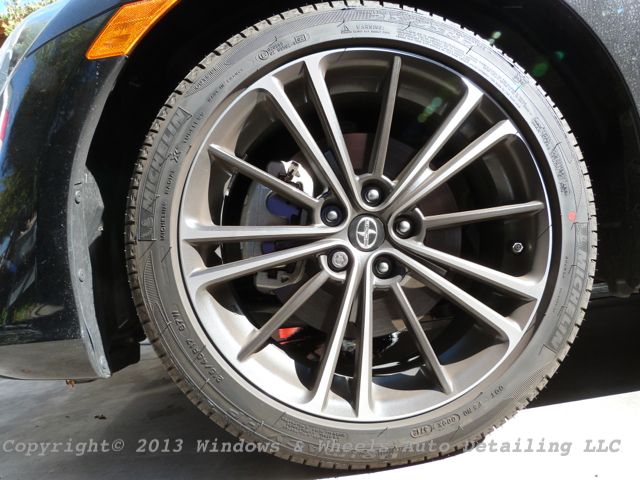
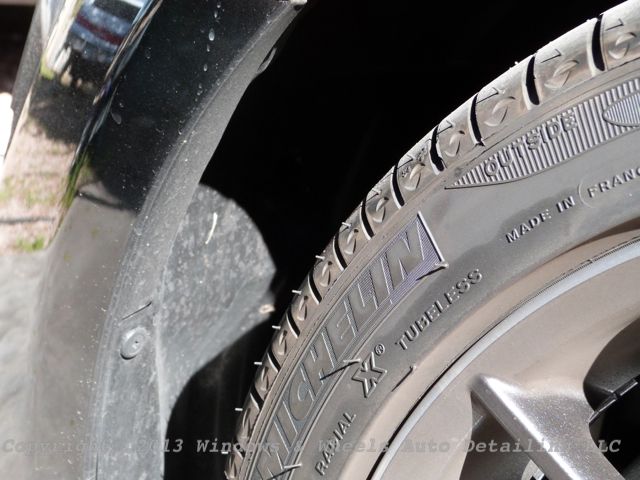
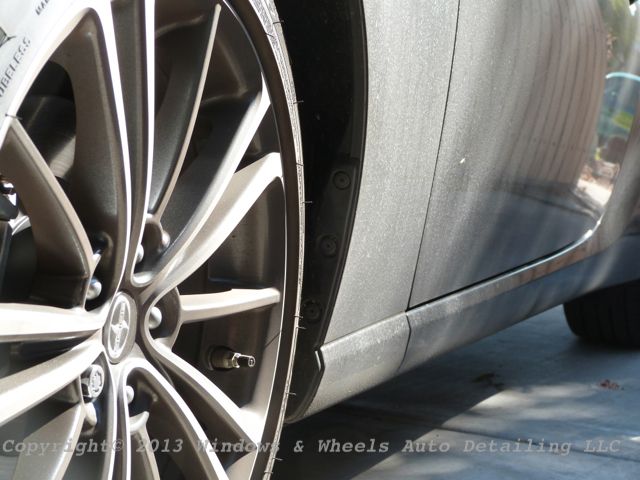
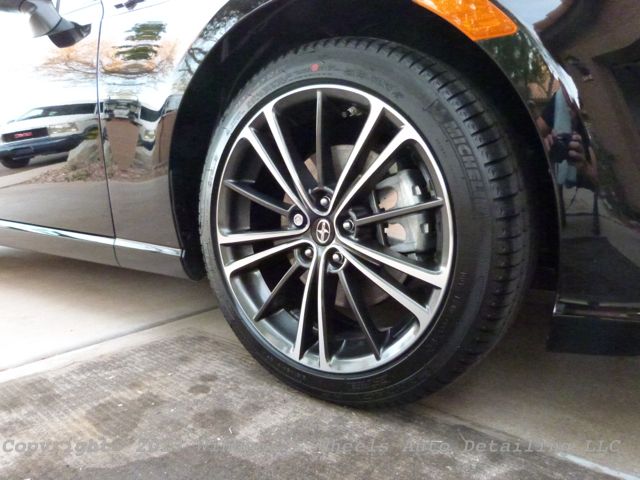
And those nasty looking tires, rims and wheel wells...well they were better than new:
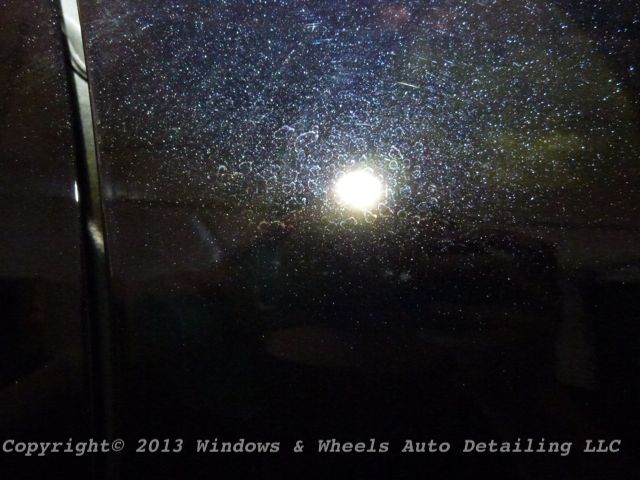
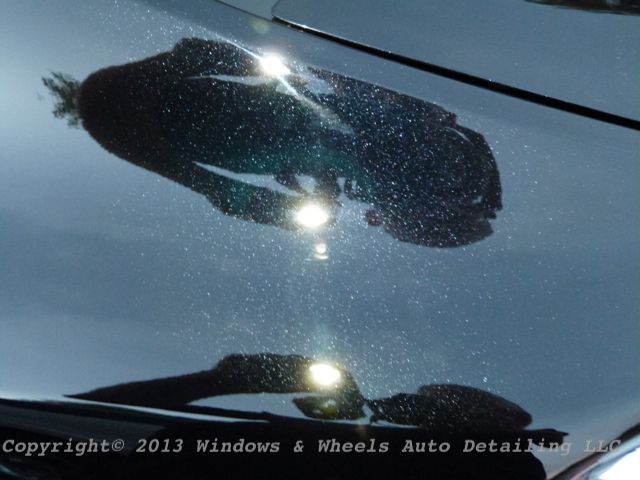
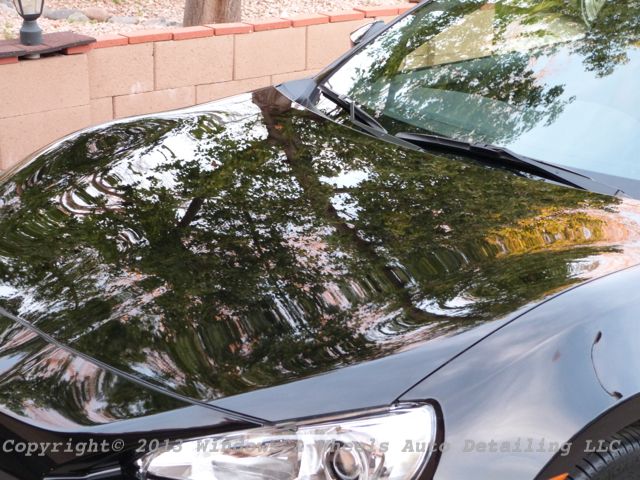
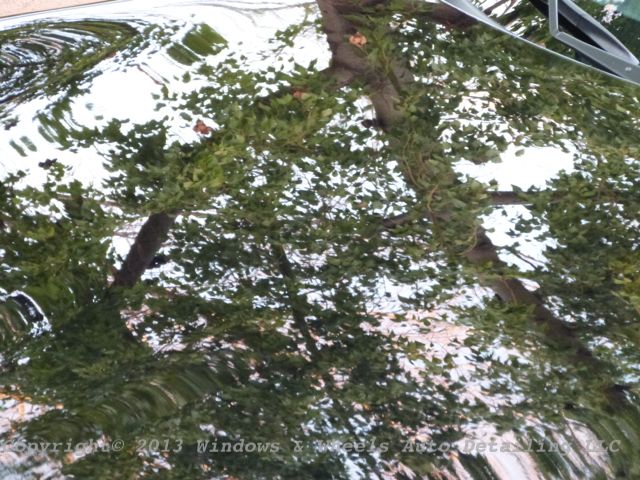
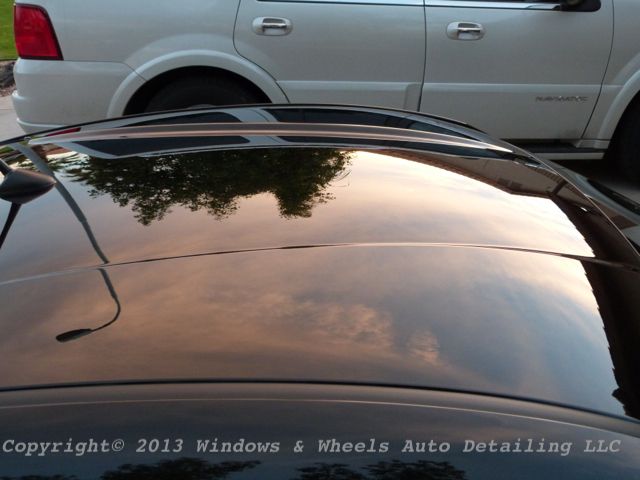
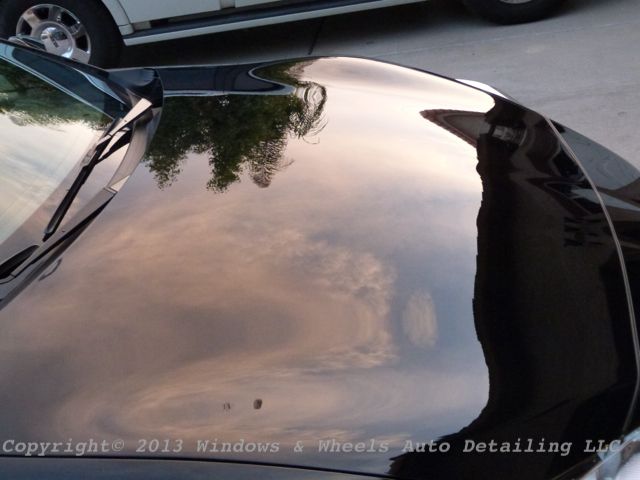
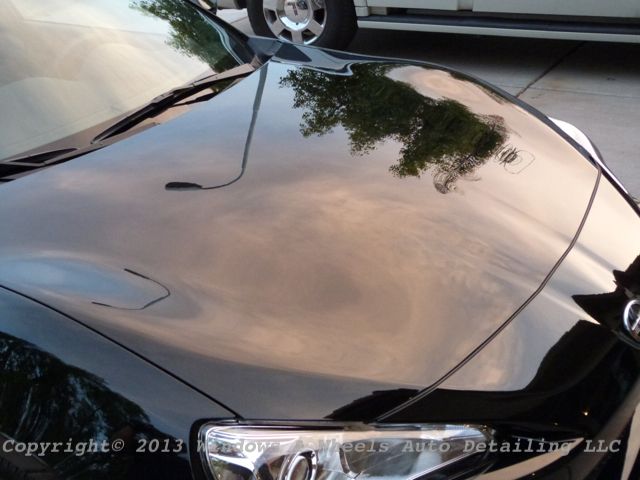
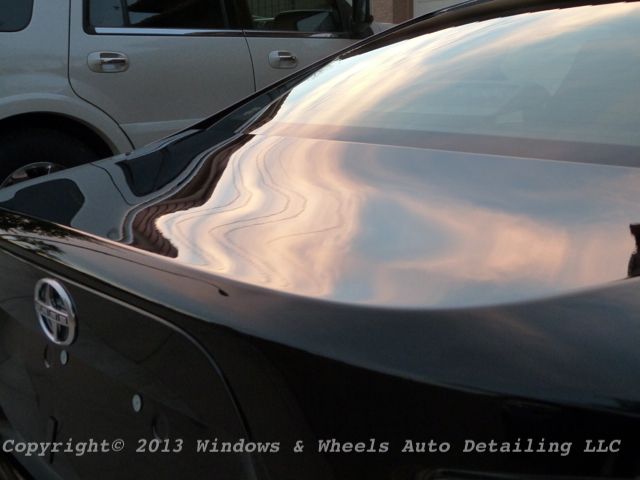
Here is a series of reflection shots that i thought were awesome...it looked great far away:
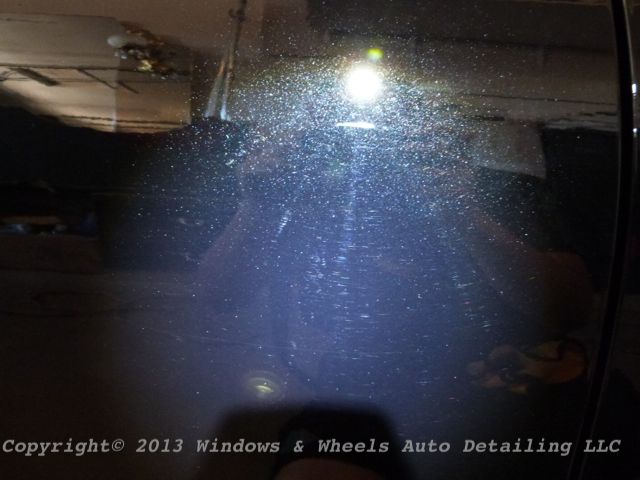
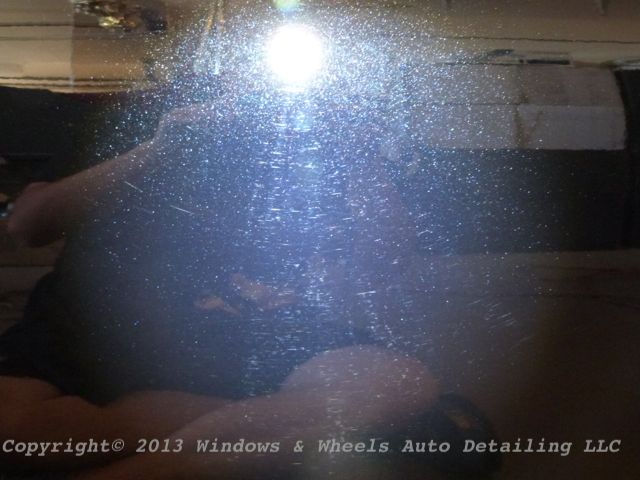
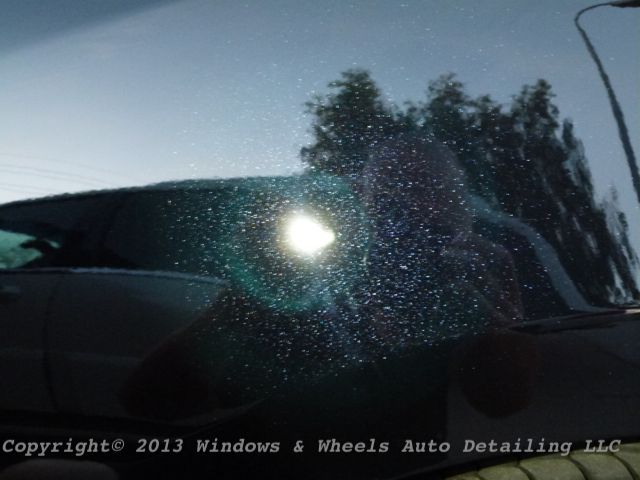
And then if you looked closer...it looked better:
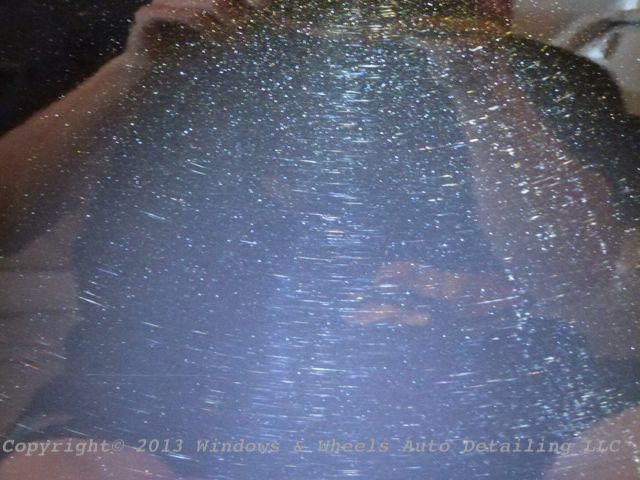
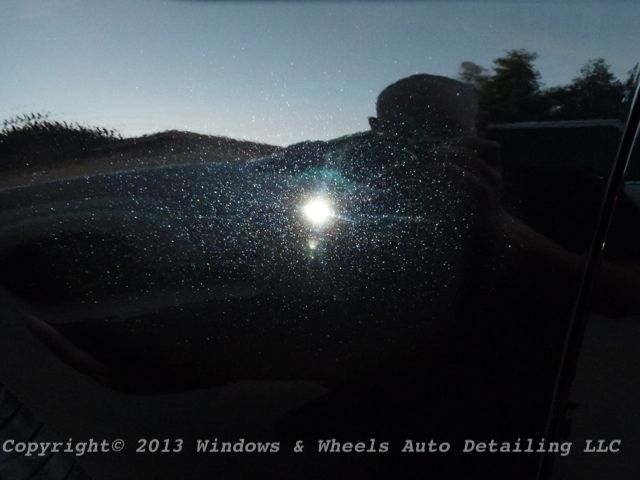
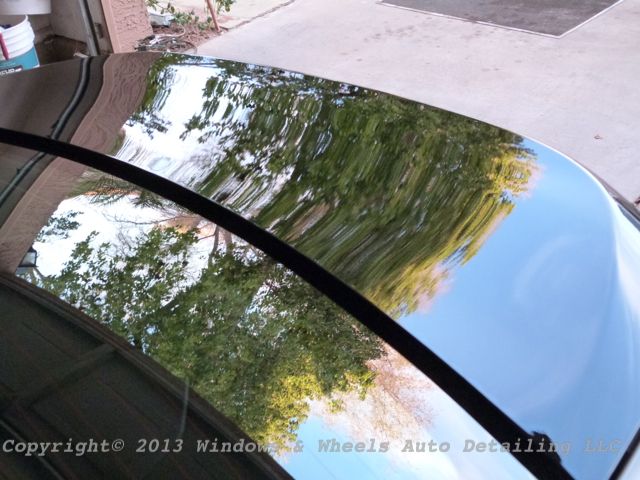
And once you got right on top of it..it was like you were going into another dimension...it LITERALLY looked like you could reach into the paint:
The owner pulled up and the first words out of his mouth were "Oh my God" lol. THIS is what we live for! We love reactions like that. He circled around the car with us...he didn't even want to get in it because he didnt want to touch the door handle - our kinda guy!
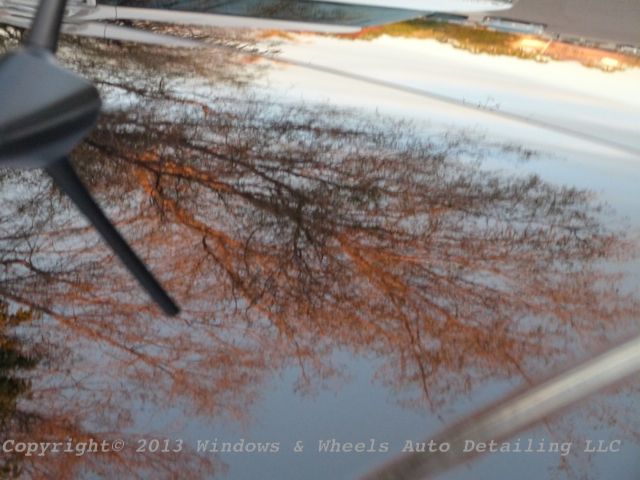
As we stood around talking, the sun began to set..and it darkened the reflections on the paint...giving them a different, but very cool look:
Then, right on point, some clouds rolled in and this is what we were left to look at as the sun went down:
I hope you guys enjoyed the read and the pictures, it was a fun detail with an excellent turn around and finished product
Thanks all!
A few weeks back we had done a different FRS, this one was Asphalt Grey - and in very bad shape. Only a few months old but hammered already from the local hand wash joint. We were able to save his car and ''wow'' him with the results (literally). Well the owner of this Raven Black had heard about proper paint care, Opti-Coat and US from the Asphalt Grey owner. He contacted us a couple weeks back and we set up a date for him to drop it off with us to take care of.
Upon delivery, it was FILTHY. BUT, this was ok - honestly we'd rather have a filthy car that WE wash rather than a clean car with added swirls in the paint because it was improperly washed. We had requested that the owner just let us wash it rather than risk extra damage...so thats what he did!
Here she is, with a nice protective layer of dirt on it lol:
OH yeah, she's dirty lol
Always gotta pull that license plate to be sure to get that caked up grime behind it...and this is after only about 1,000 miles of driving!
Some areas had been hit by water and spotted up, thus leaving some water spot etching for us to deal with. Part of the spots were just topical mineral build up, but the others had actually etched into the paint already:
Tires were uhm..yeah...just...yup:
Dirt coating!
About 5 different brushes along with 3 different cleaners were used just to get the tires, rims and wheel wells back into shape. 1 brush for the tires, another for the wheel faces, 2 different types for the wheels barrels and then a 5th one for the wheel wells. Notice the bucket full of brushes. Also note this water was ONLY used for the tires and wheel wells.
After the tires were done, the car was rinsed, then covered in foam to help break down the dirt...and hand washed. We rinsed it clean, dried it off and pulled it inside the garage to being with the clay bar decontamination process of it. Both the paint and windows were all very 'grabby' from contaminants, but we were able to get rid of those bonded contaminants without much fuss.
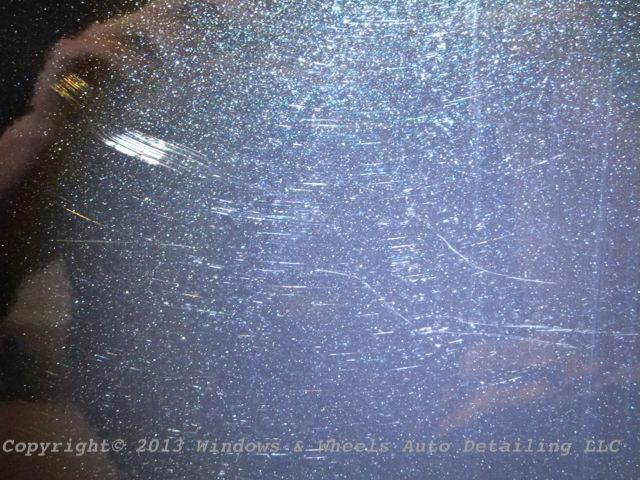
Then it was paint inspection time....here's the damage. First the etched in water spots:
Then of course, the swirls. Most were straight line scratches going lengthwise with the body of the car. I'm thinking its pretty safe to assume that this was mostly from the dealership wash.
More goodies:
Close up, not pretty is it?
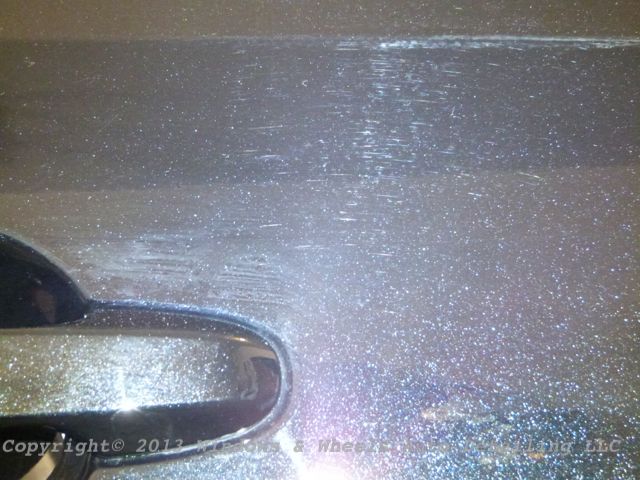
A few deeper ones were present in some areas:
OUCH!
Of course around the door handle always gets scuffed up:
So now that we saw what we were working with, it was time to do a test spot. With new cars, we typically try to get all the correction we need with a 1-step polish. So first we tried a Buff & Shine Blue light polishing pad with some Meguiars 205 polish. After doing a section...it came out very nice, but there were still quite a few deeper scratches left. SO, i bumped up the pad aggression to a green medium polishing pad and tried again.
Unfortunately, the results were the same....it was good, but not good enough. I finally went and set up a Megs Microfiber cutting disc along with some Megs D300 compound and did the area again. It left noticeable haze, but the swirls and deep scratches were gone. My sister followed up behind me with the blue pad and 205...and MAN did it look sweet!
Knowing the combo that was needed, i sent a message to the owner letting him know extra work would need to be done and it would take extra time, but we did not want to Opti-Coat a 'pretty good' looking car. He said he totally understood and appreciated the extra work.
So, round and round we went:
Light looks ridiculous but it is needed to see what type of results im getting as I'm compounding.
Small pads for small areas:
Coming along behind me was Dani doing the final polishing:
Again, checking the condition of the paint to be sure all hazing/marring left behind was removed. She would also check to see if there were any deeper scratches i missed while compounding...which she found a few, so i'd come back and touch up that spot to get rid of the deep guys...and then she'd re-polish it to glossy perfection:
We finally finished with the polishing - so it was time to spray down each panel with isopropyl alcohol and do a rinseless wash on the car to make sure all polishing oils were removed.
Now it was time to Opti-Coat. I would be using a new method this time for application. I took a tire dressing applicator sponge and wrapped it in plastic wrap...this was to make sure that the sponge wouldn't absorb the coating:
Next i put my suede applicator on top of the sponge:
Then i primed the cloth with Opti-Coat...and began applying:
I found this to apply the coating MUCH smoother than using a foam pad. It took a bit more to prime the cloth, but once after about a panel or so it was pretty well primed and didnt require so much coating for each following panel.
I went around and coated all of the paint while Dani went around and cleaned all of the wheels and coated them. She also applied it to the hard plastic on the back, the head and tail lights and even coated the exhaust tip
After i finished the paint, i coated the windshield wipers and the hard plastic under them as well.
The polishing was done, the coating was done, but the DETAILING was not....i think all too often these things are all lumped into one. A paint polisher isn't always a good detailer...and a detailer MOST times is not a good paint polisher. While paint polishing correctly i feel is an art form and requires a great amount of skill, time and knowledge...I think that if you leave the DETAILS out of your job, you're not giving your work the best presentation possible.
So, thats why after several hours of work, we still had more to do. We went around wiping down all the door jambs, trunk jamb and hood jamb...cleaned all the windows...and even though this was not an interior detail...Dani vacuumed out the inside and did a wipe down of all dirty surfaces.
Having this type of work done should be an all around excellent EXPERIENCE for the owner...so if we can do a few extra things to make it just that...then thats just what we do
Now for the fun part, we got to pull it out and take a look at our work!
All swirls and water spots had been removed:
The paint looked GORGEOUS! Under direct light it had a beautiful metallic look, but in indirect light it looked black and liquid and glossy. The reflections were awesome.
And those nasty looking tires, rims and wheel wells...well they were better than new:
Here is a series of reflection shots that i thought were awesome...it looked great far away:
And then if you looked closer...it looked better:
And once you got right on top of it..it was like you were going into another dimension...it LITERALLY looked like you could reach into the paint:
The owner pulled up and the first words out of his mouth were "Oh my God" lol. THIS is what we live for! We love reactions like that. He circled around the car with us...he didn't even want to get in it because he didnt want to touch the door handle - our kinda guy!
As we stood around talking, the sun began to set..and it darkened the reflections on the paint...giving them a different, but very cool look:
Then, right on point, some clouds rolled in and this is what we were left to look at as the sun went down:
I hope you guys enjoyed the read and the pictures, it was a fun detail with an excellent turn around and finished product
Thanks all!