Polished Bliss: Audi S3 & 911 GT3...

cupra_clark

New member
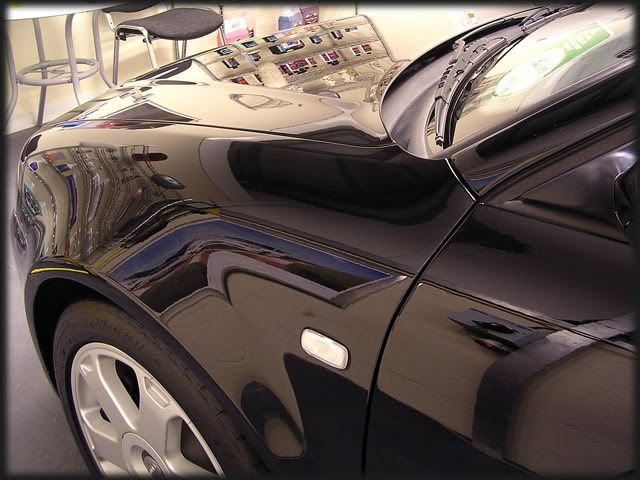
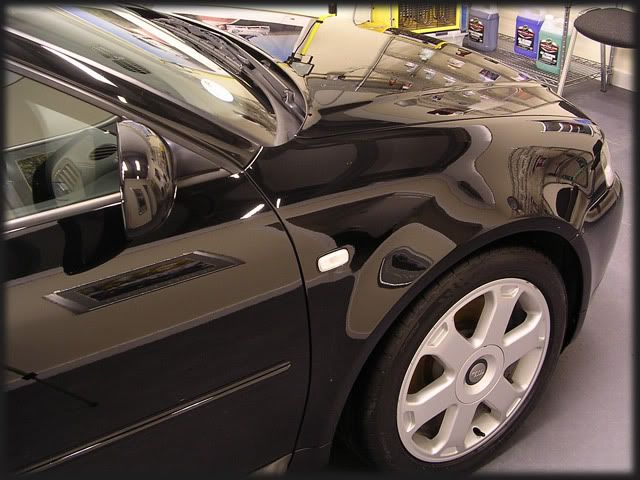
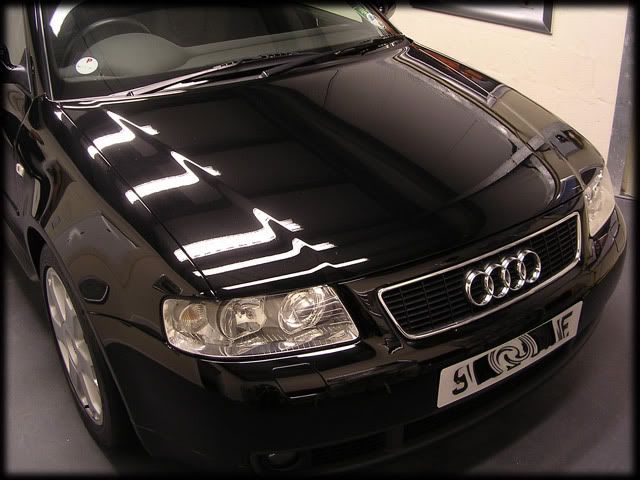
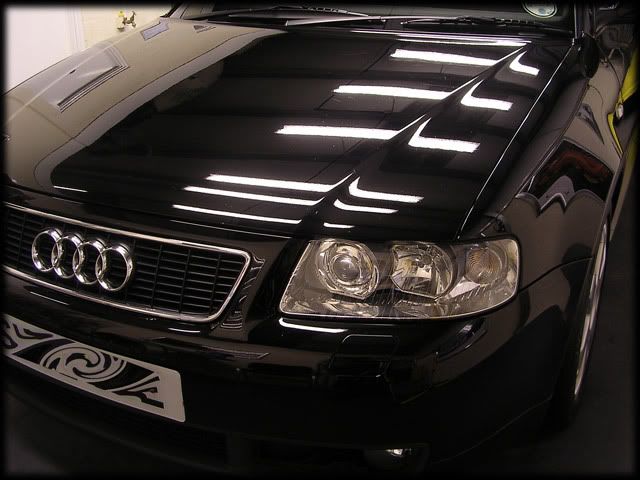
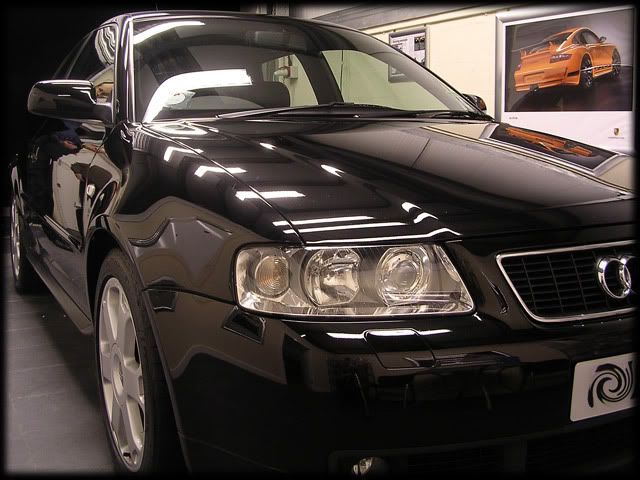
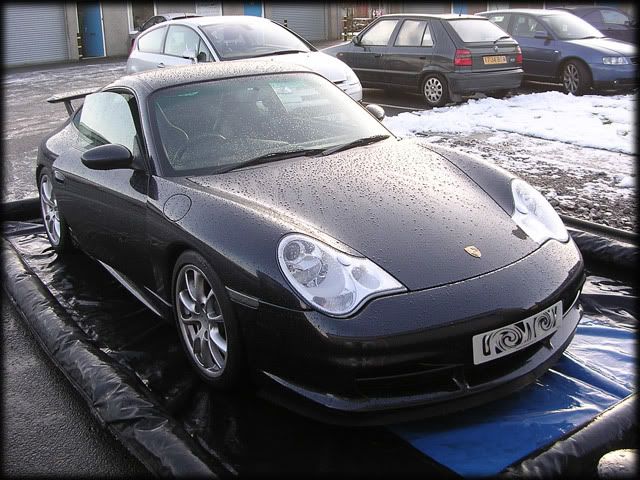
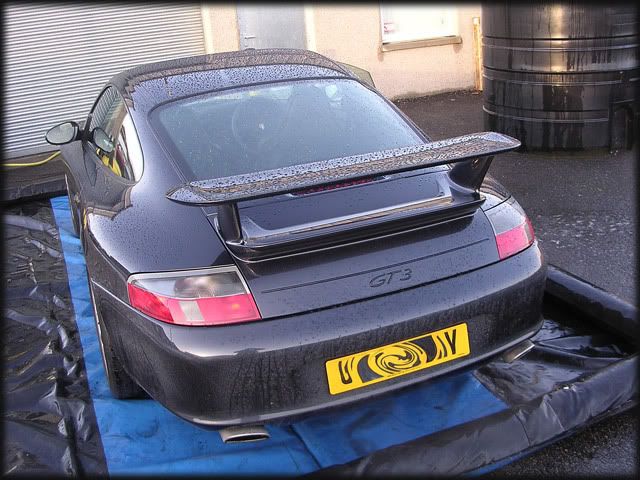
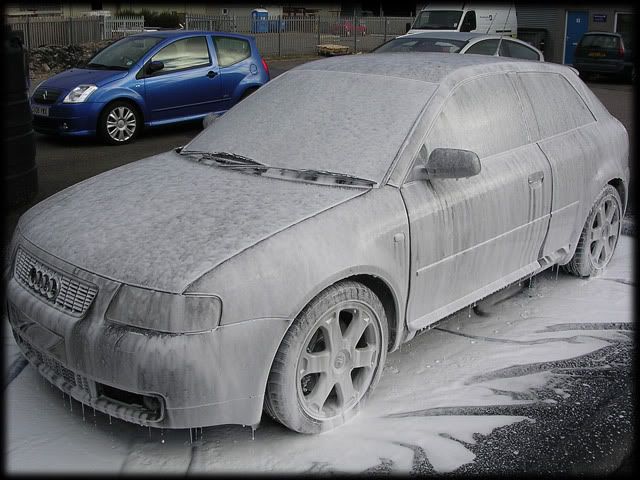
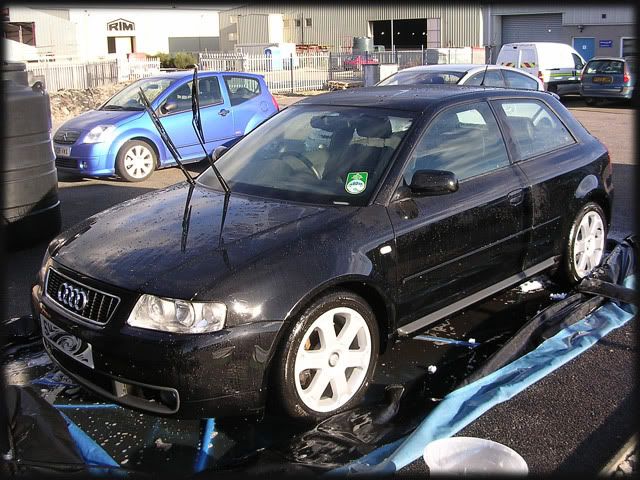
Here's 2 cars that were done recently, first one was this Audi S3, booked in for a 3 day major correction:


C1.jpg


C3.jpg


C2.jpg


C4.jpg


C5.jpg


C6.jpg


C7.jpg


C8.jpg


C9.jpg


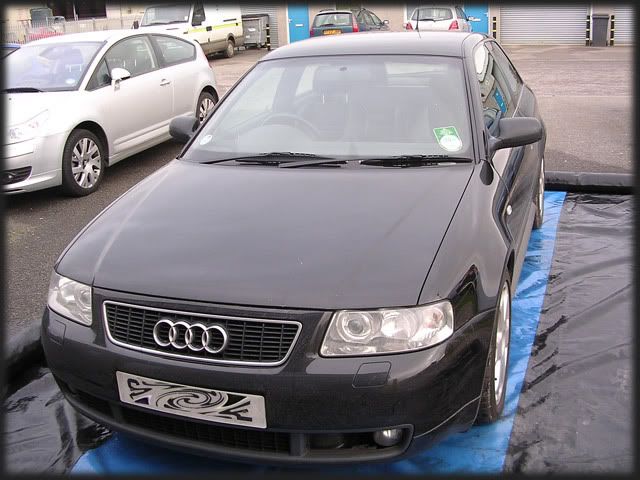
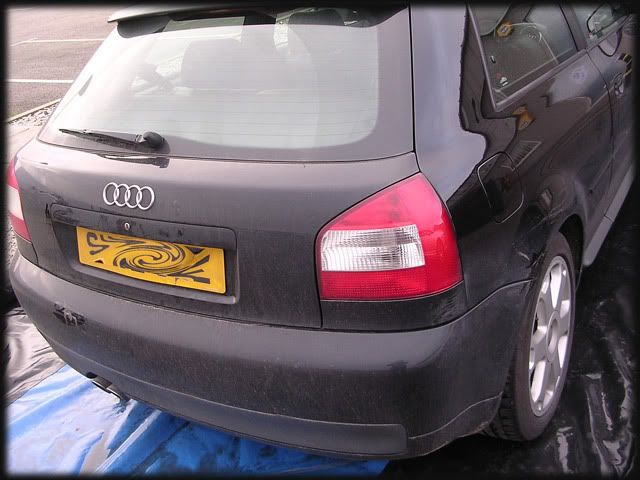
As you can see, it was in need of a thoroughly good detail!


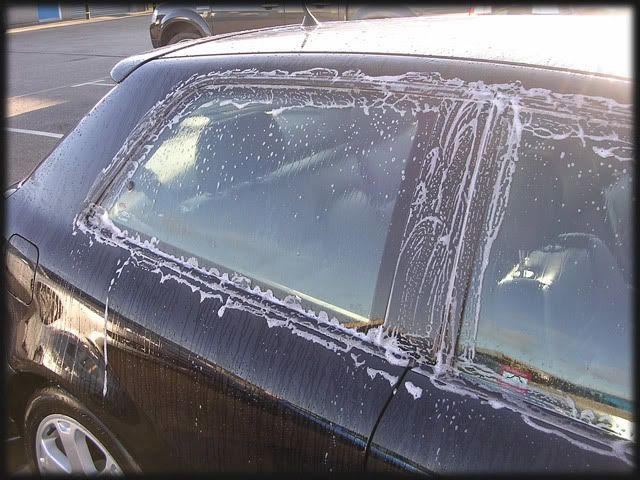
First up with the pre-foam - Megs APC at @ degrees:


C10.jpg


Left to dwell for 5 minutes and then rinsed off at high pressure:


C11.jpg


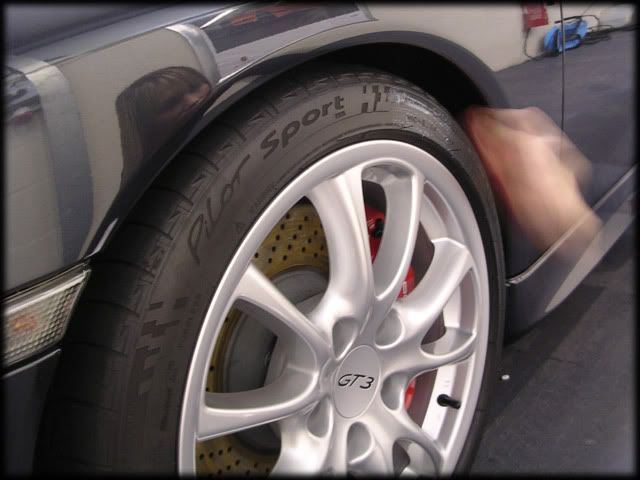
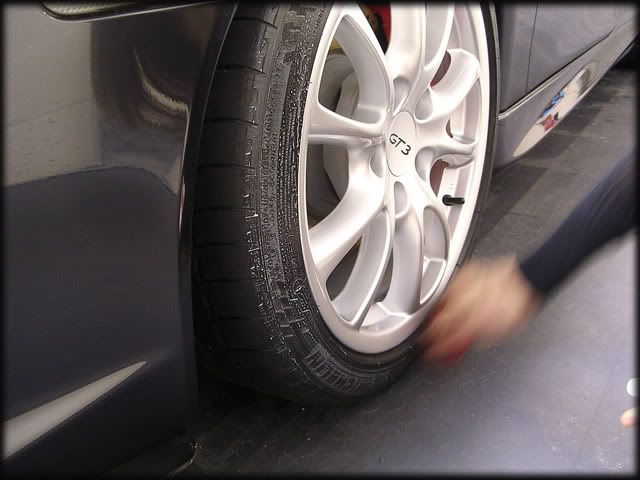
The wheels were cleaned up as well as I could but they were far from perfect as they were in need of a refurb in all honesty:


C12.jpg


The tyres/arches were cleaned with Meguiars Super Degreaser as usual.


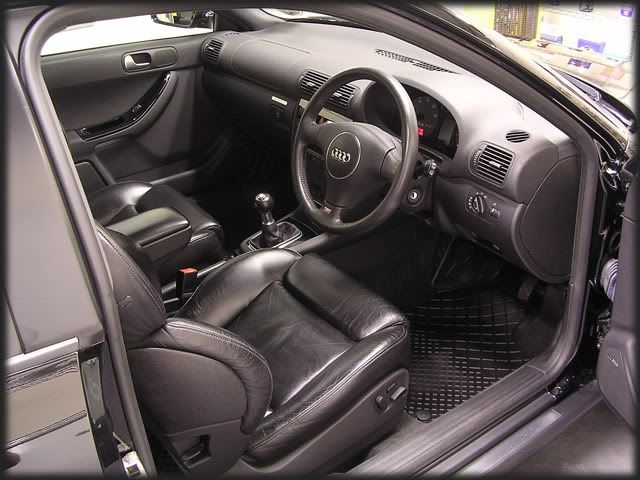
Shuts and exterior trim were sprayed and agitated with P21S:


C17.jpg


C18.jpg


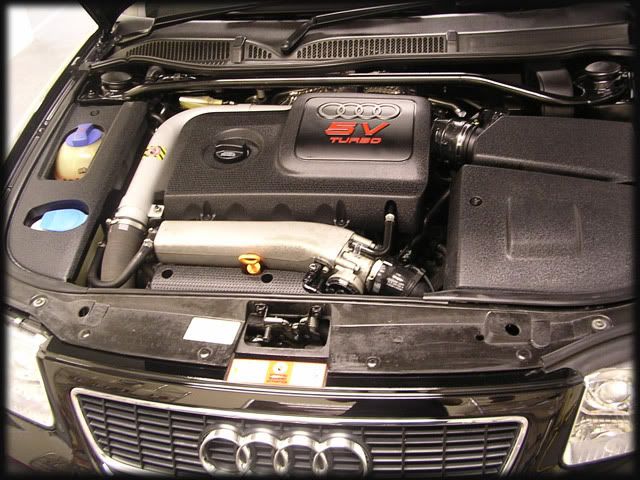
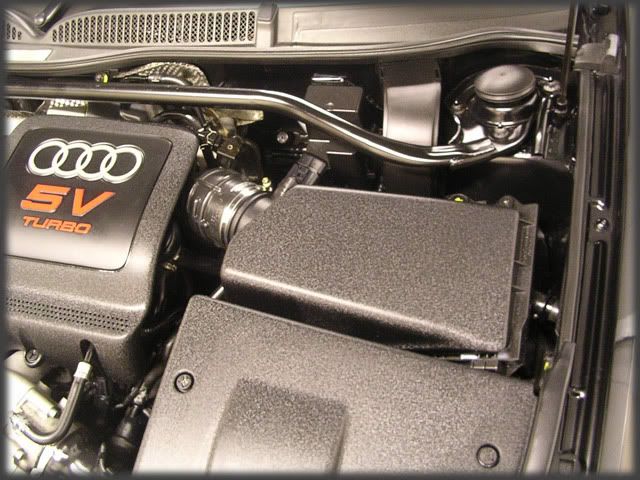
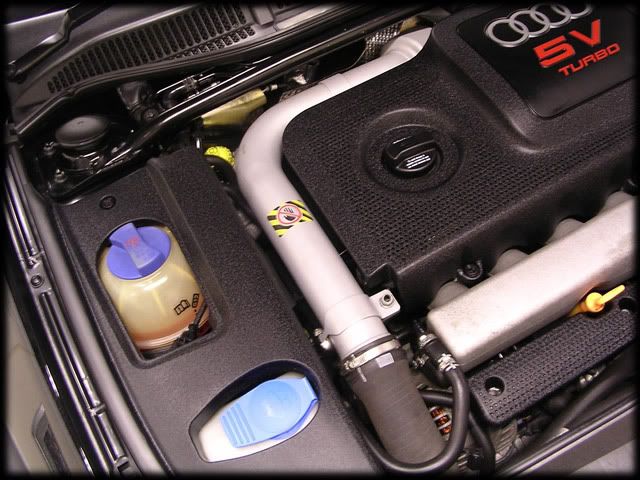
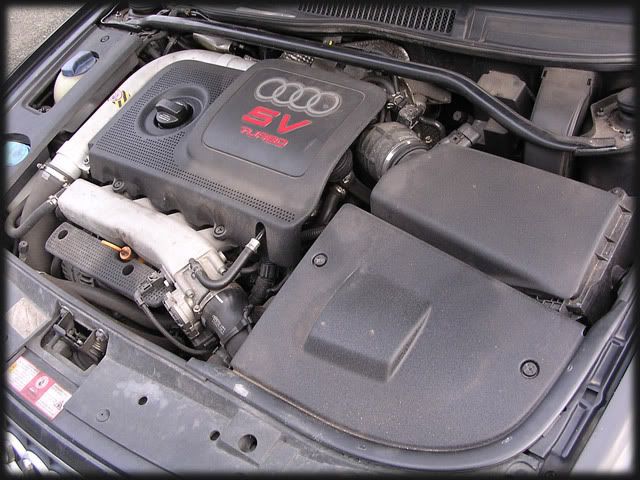
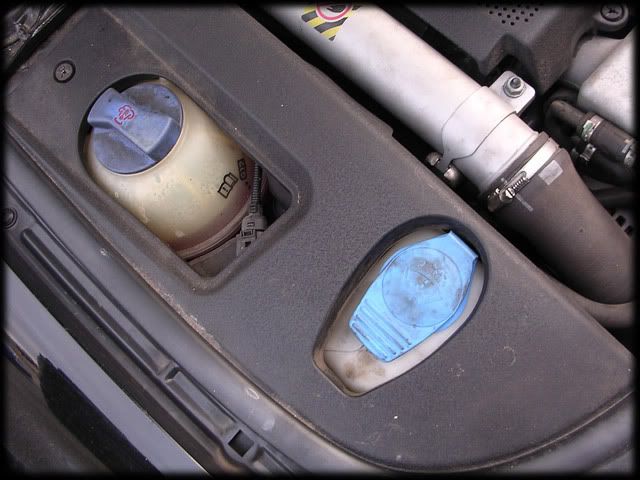
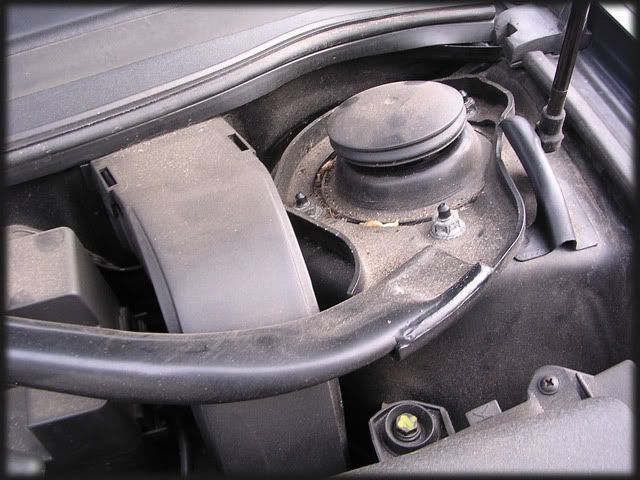
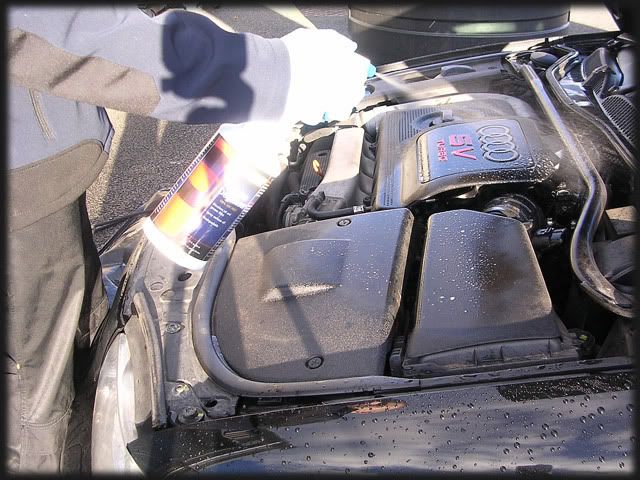
The engine was sprayed with Eimann Fabrik Engine Degreaser:


C13.jpg


Then agitated...


C14.jpg


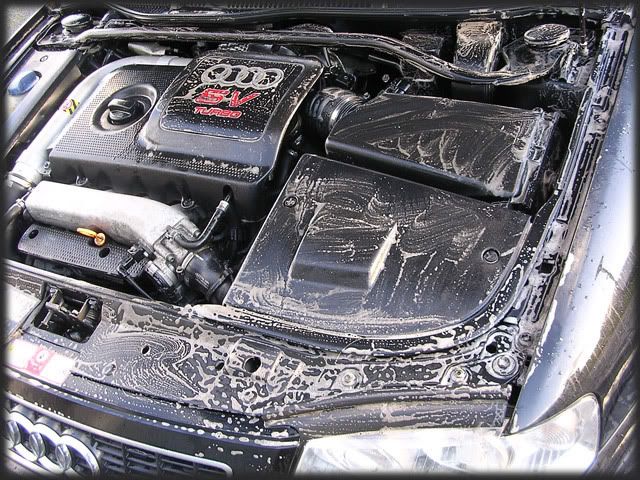
Then rinsed at medium pressure:


C15.jpg


C16.jpg


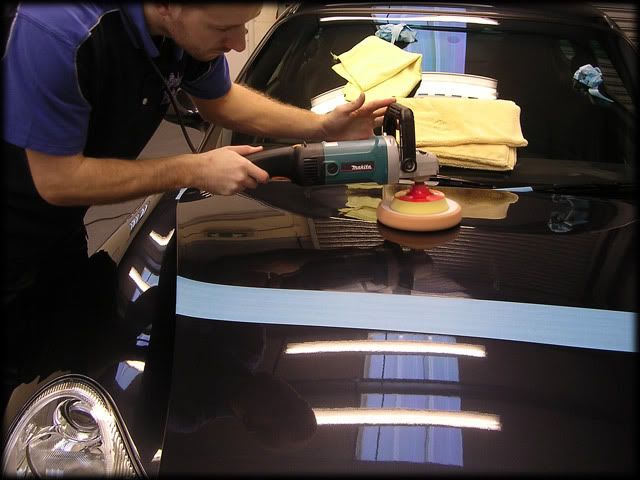
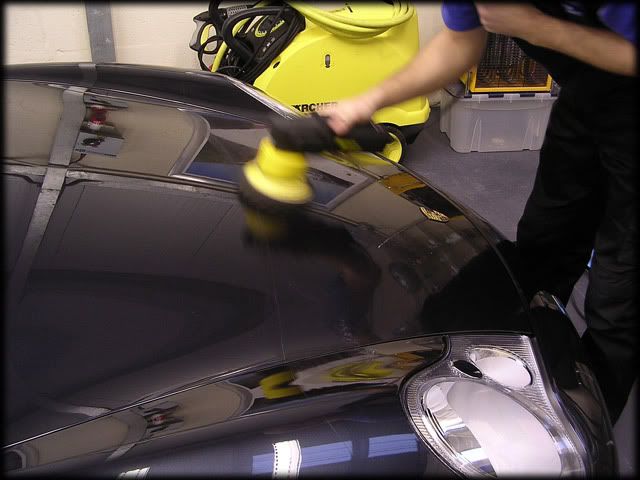
The car was then washed with the 2 Bucket Method and Gloss-It shampoo, then rinsed:


C19.jpg


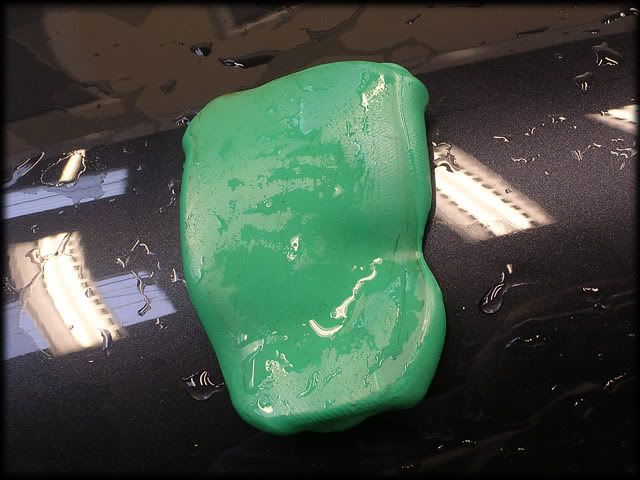
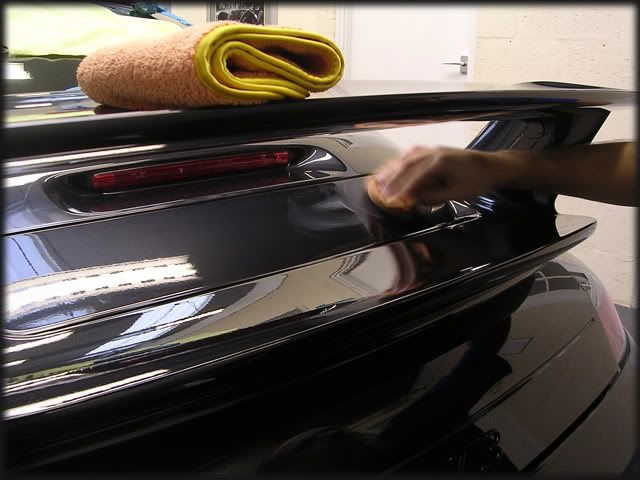
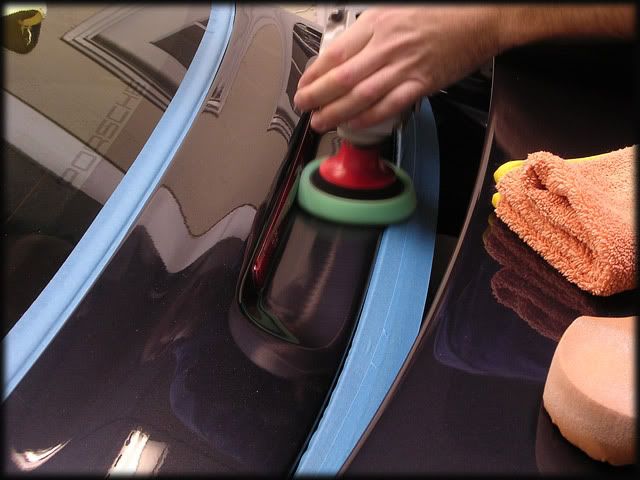
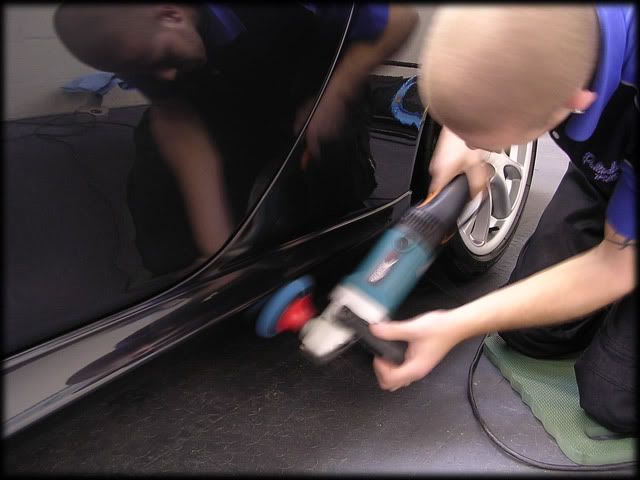
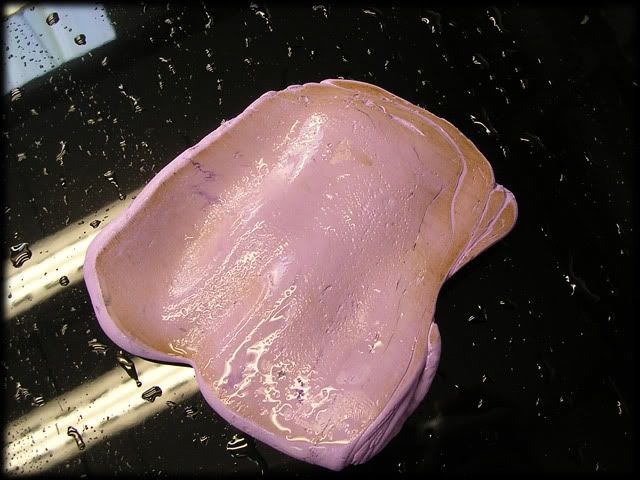
After going round with Autosmart Tardis and rinsing again, I put the car inside and clayed with Gloss-It aggressive clay. This removed a considerable amount of contamination:


C20.jpg


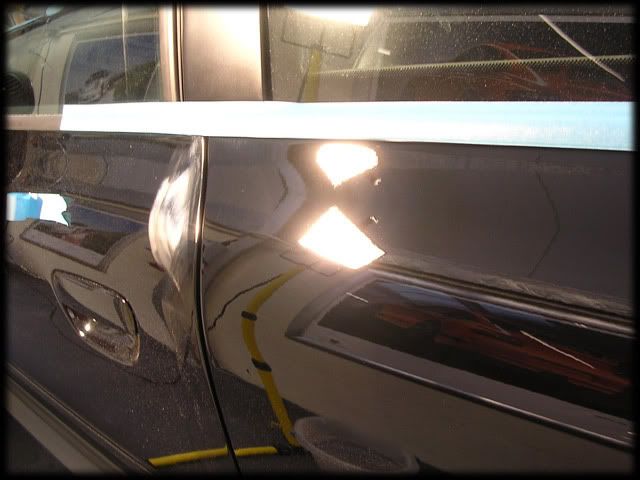
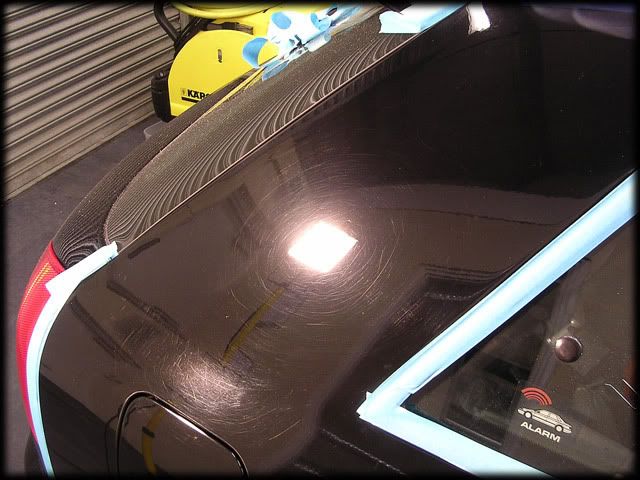
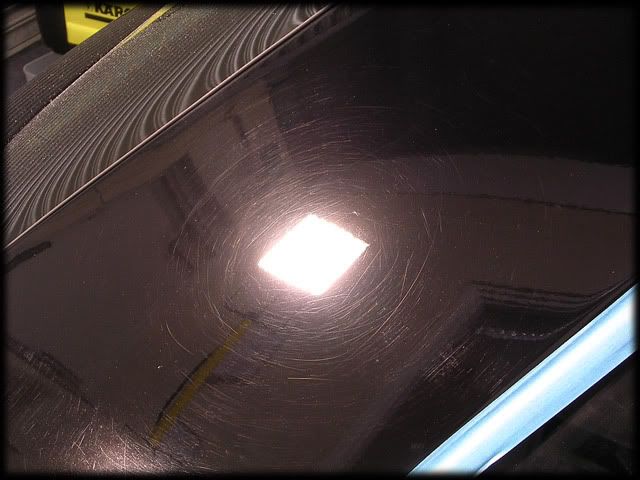
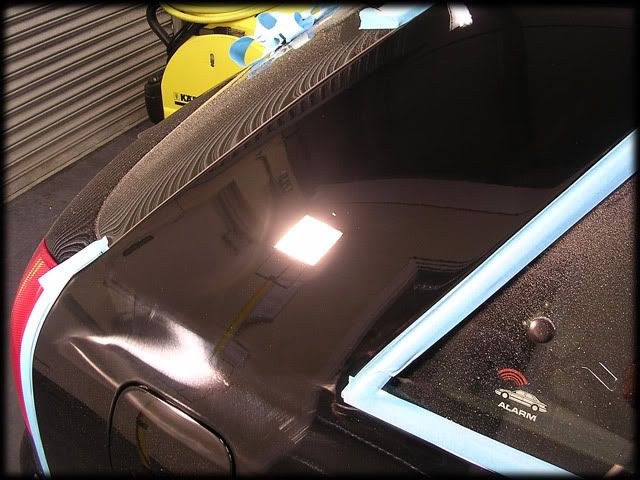
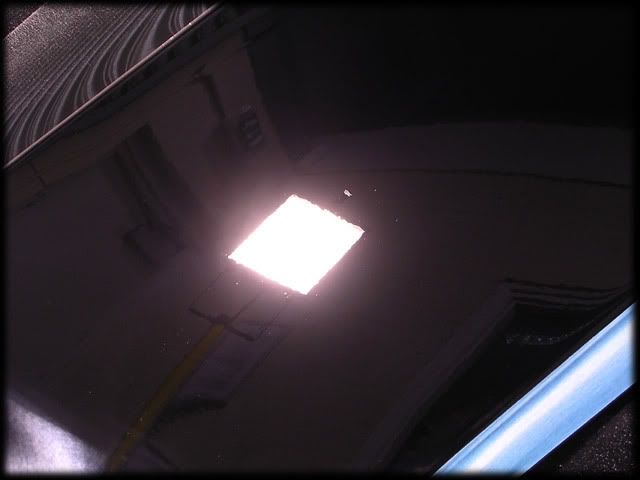
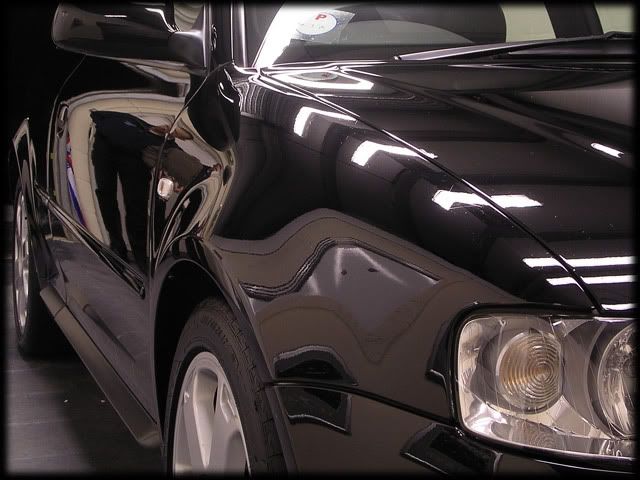
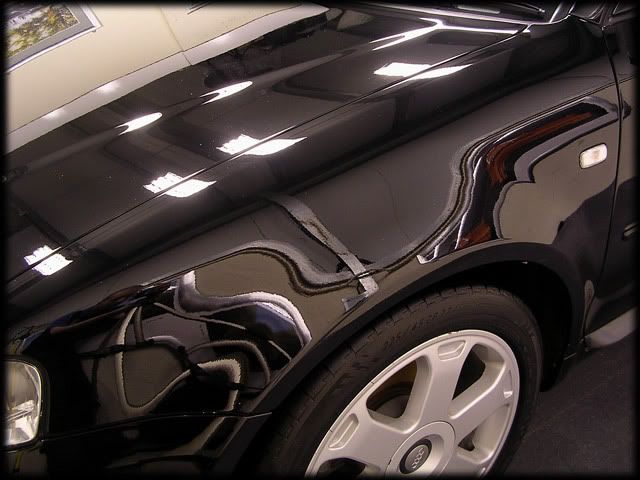
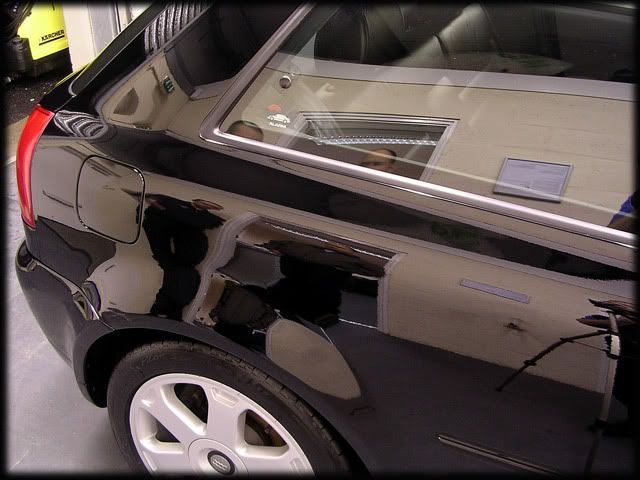
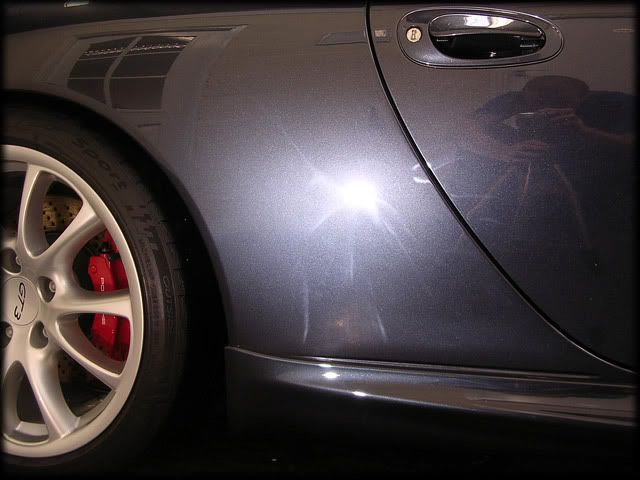
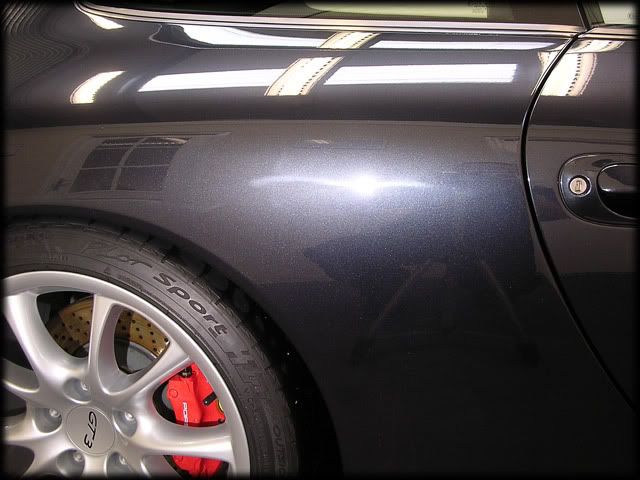
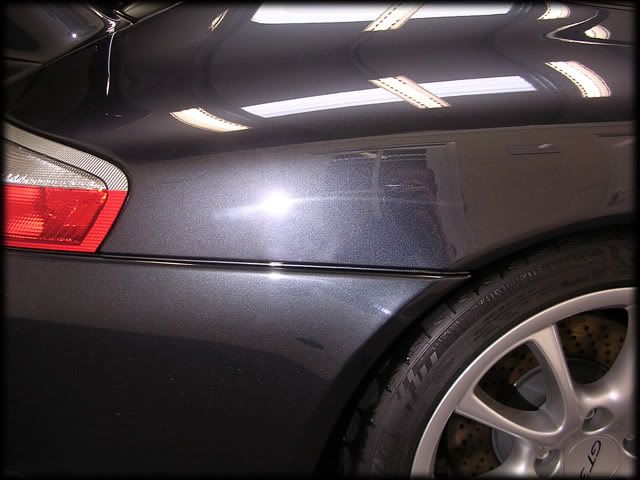
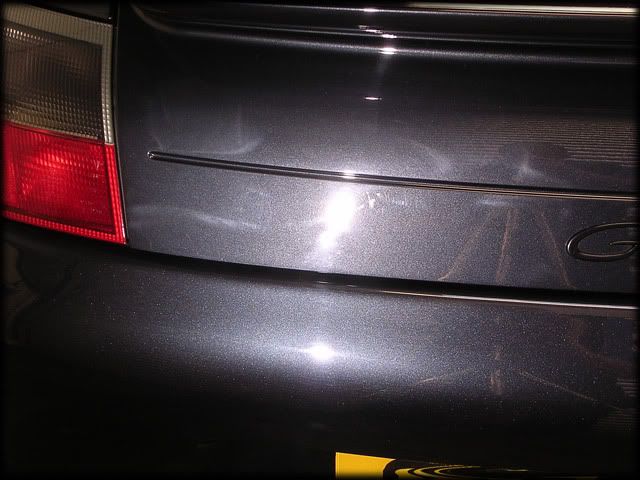
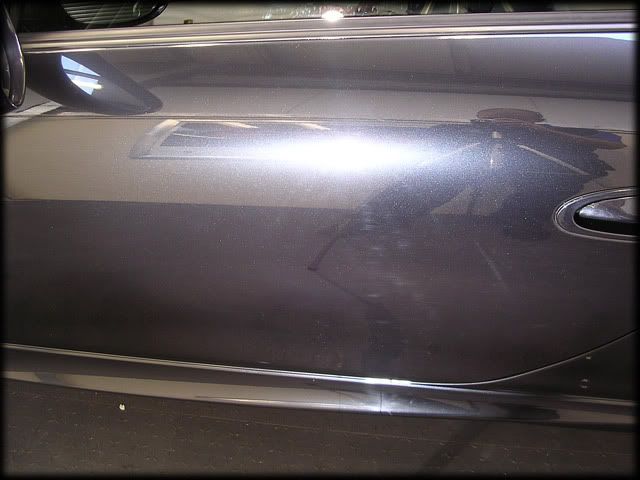
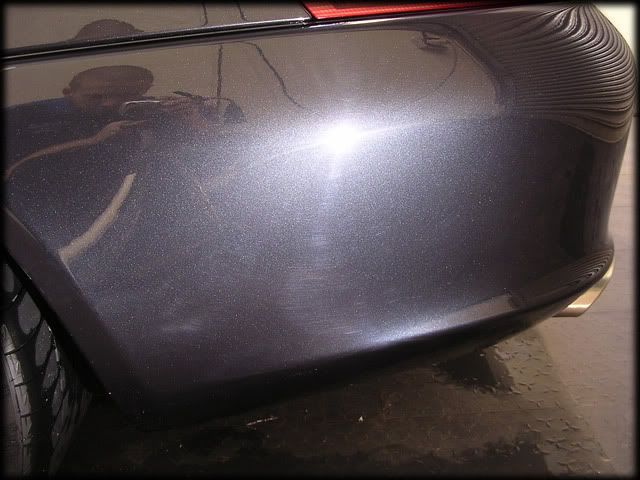
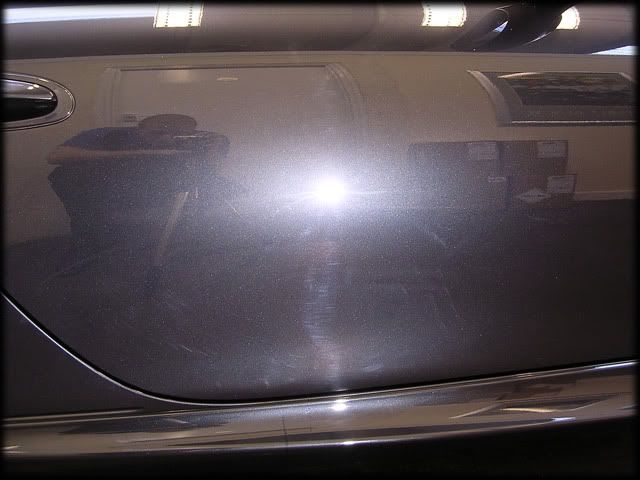
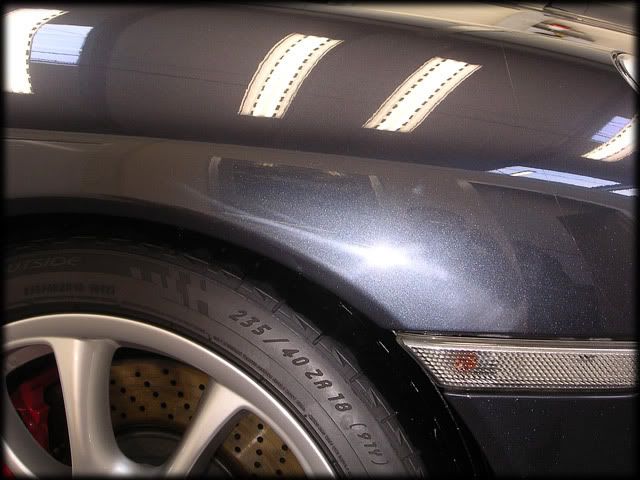
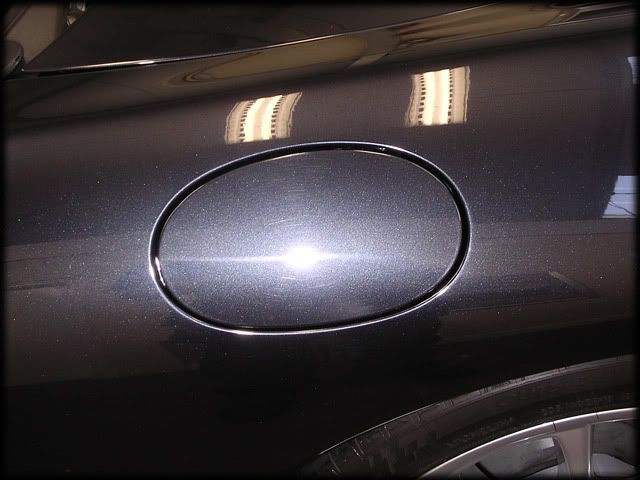
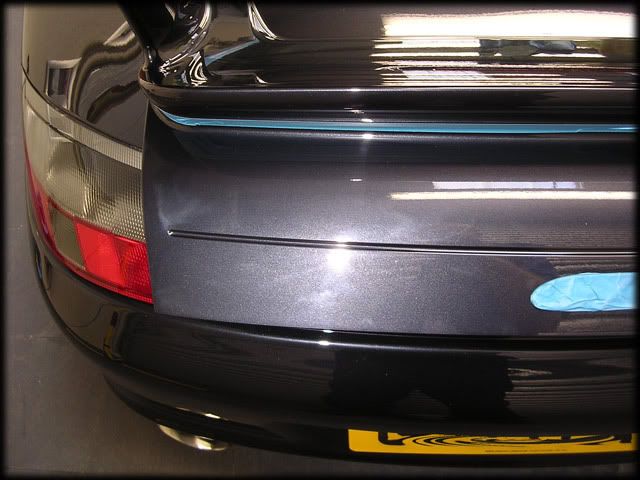
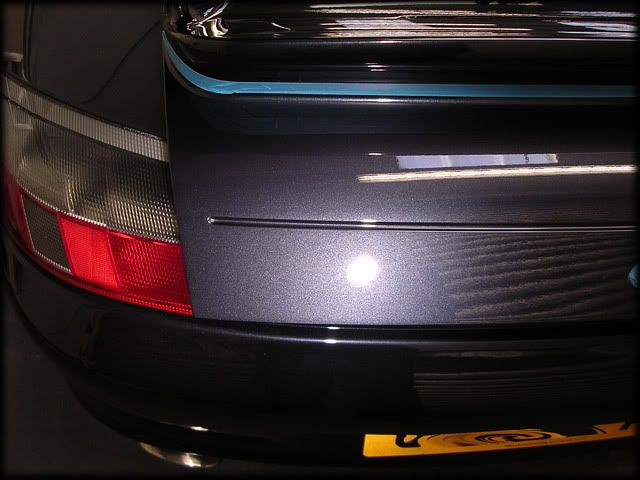
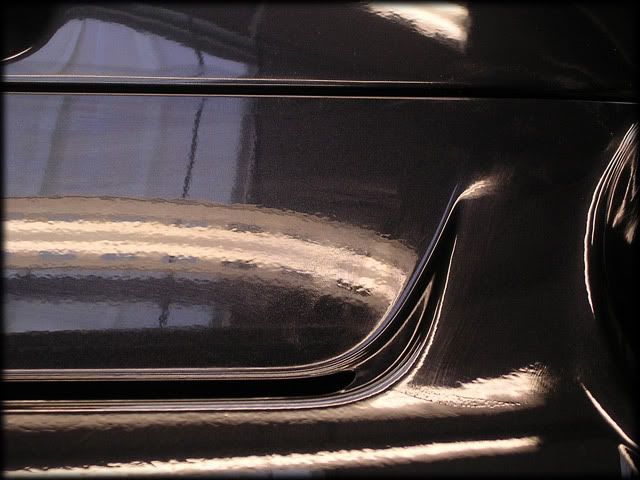
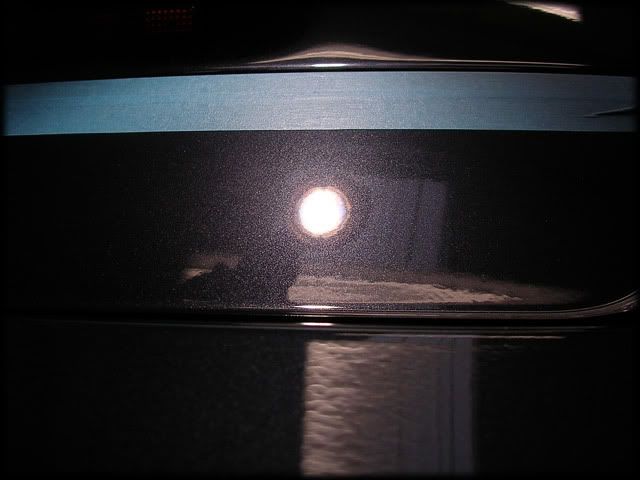
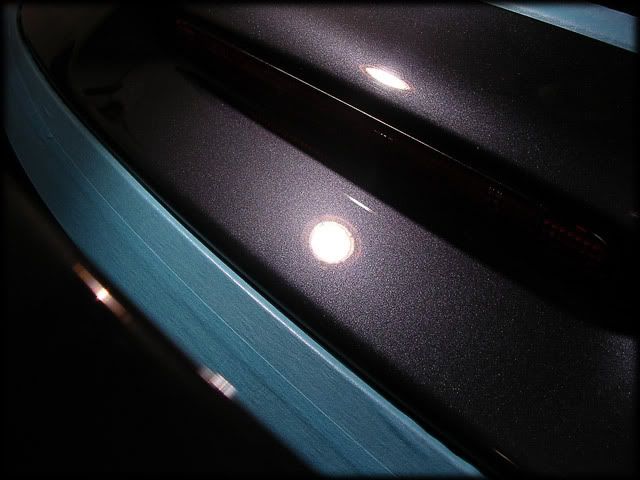
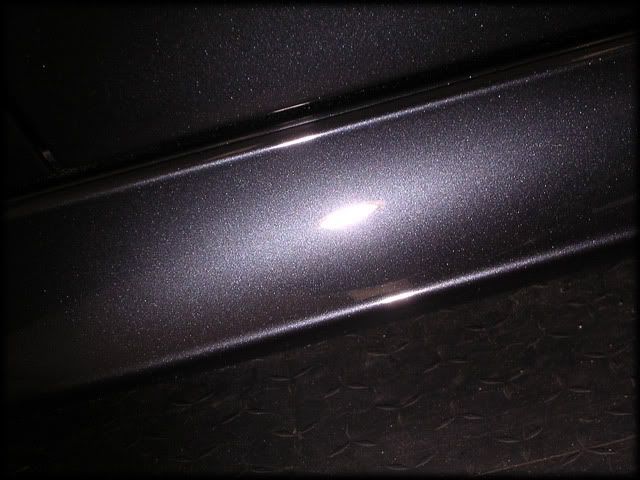
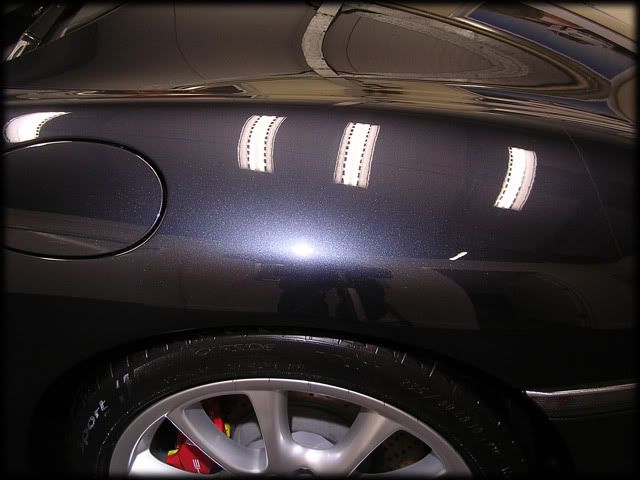
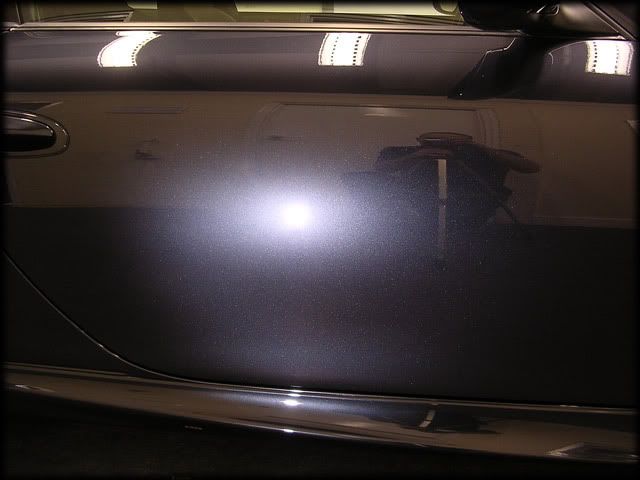
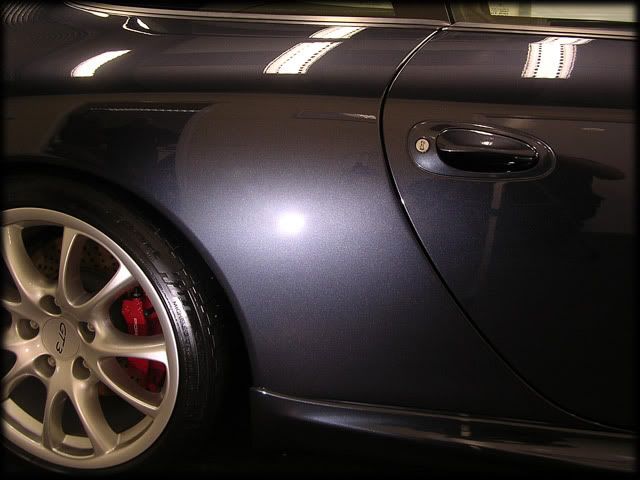
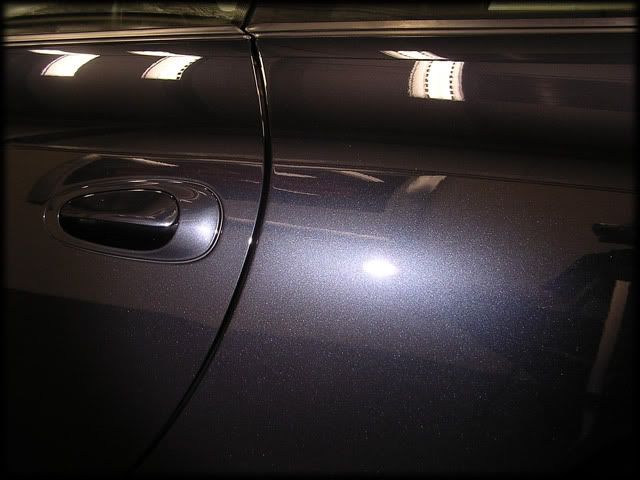
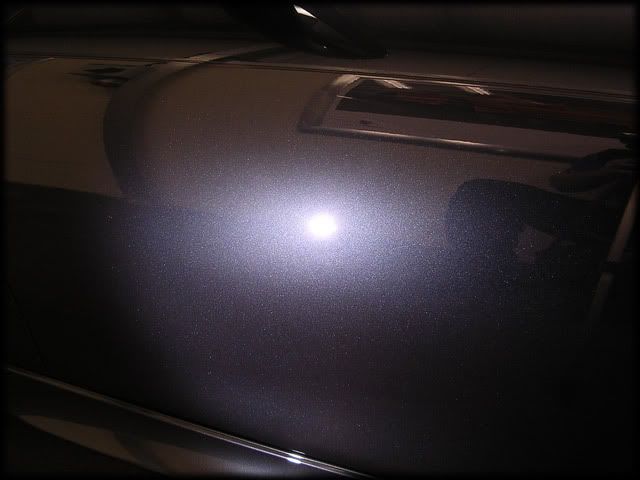
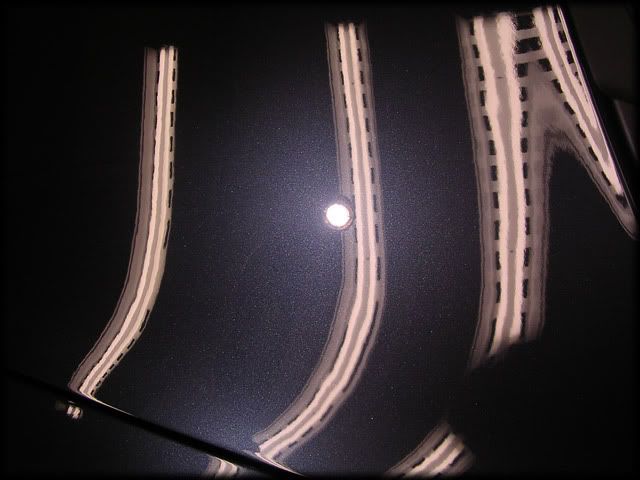
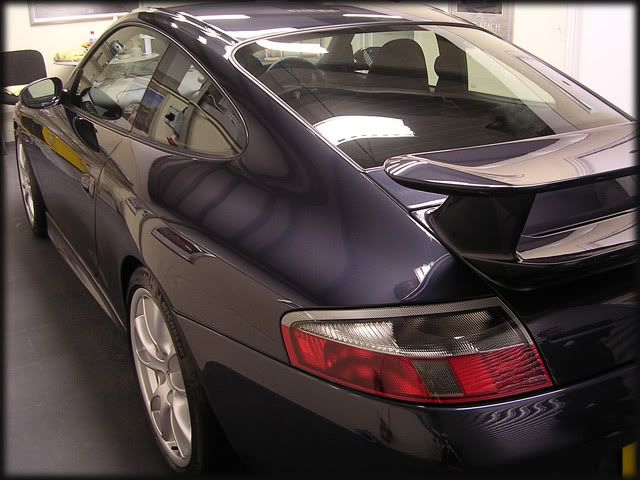
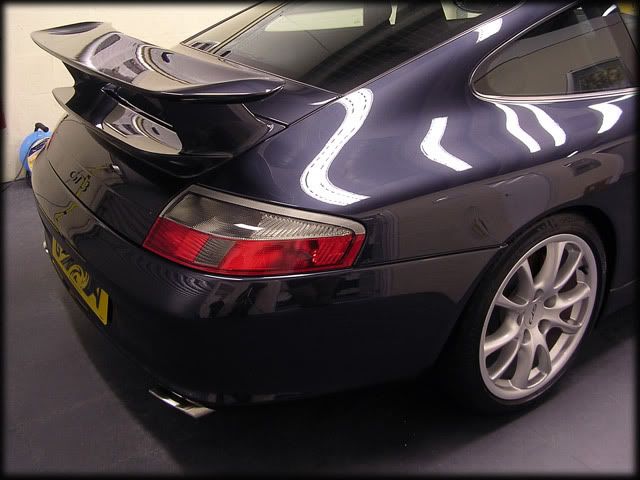
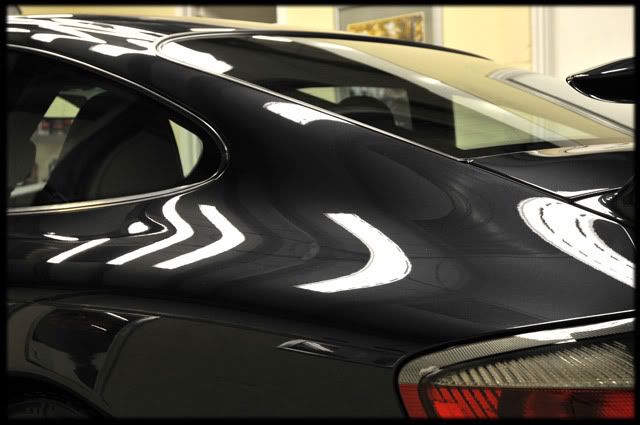
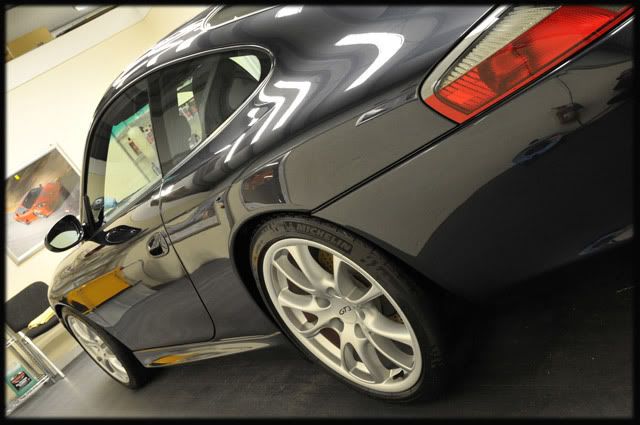
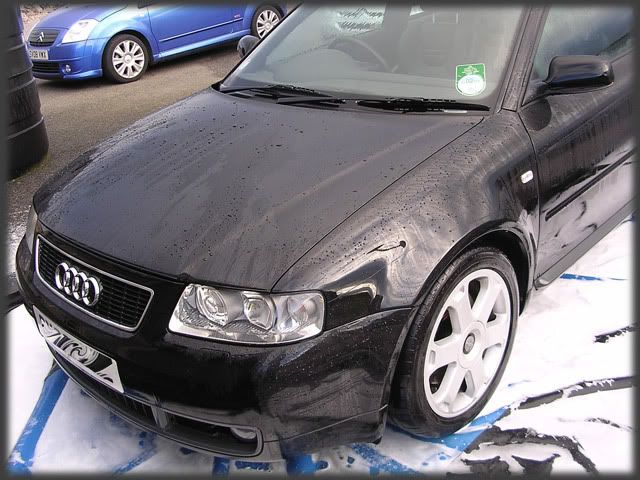
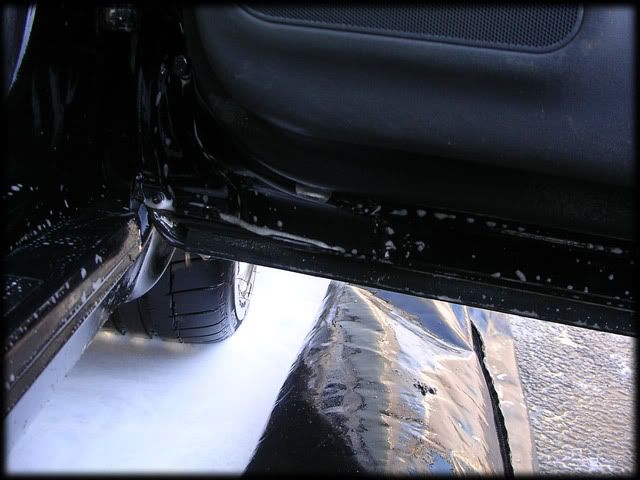
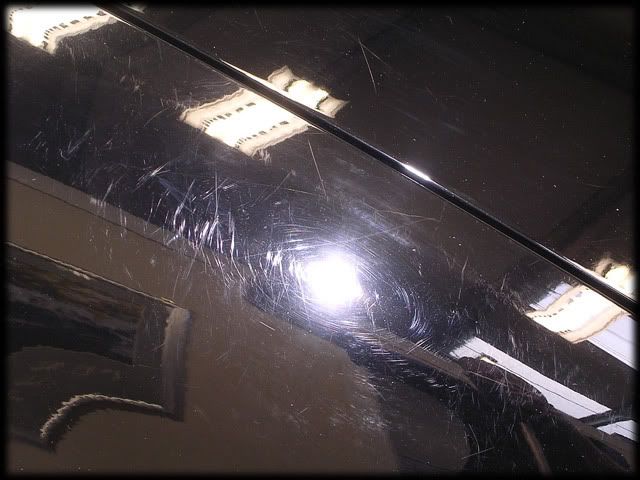
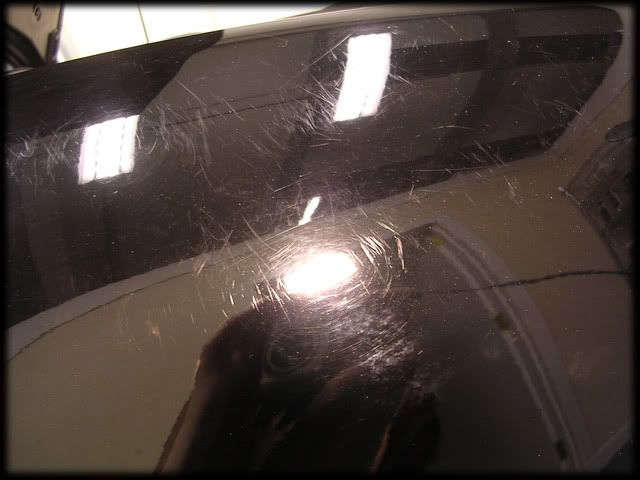
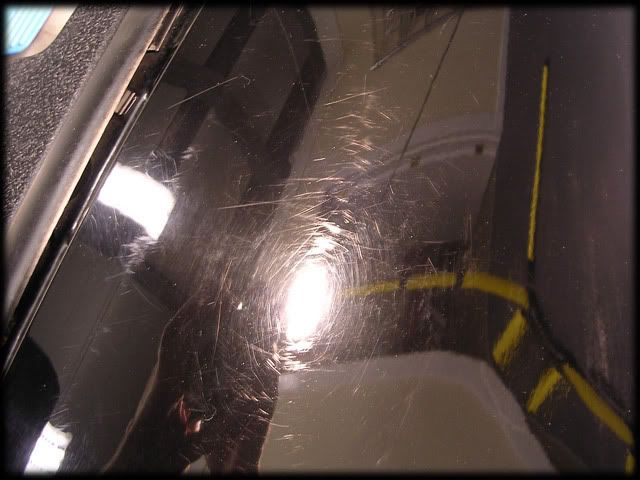
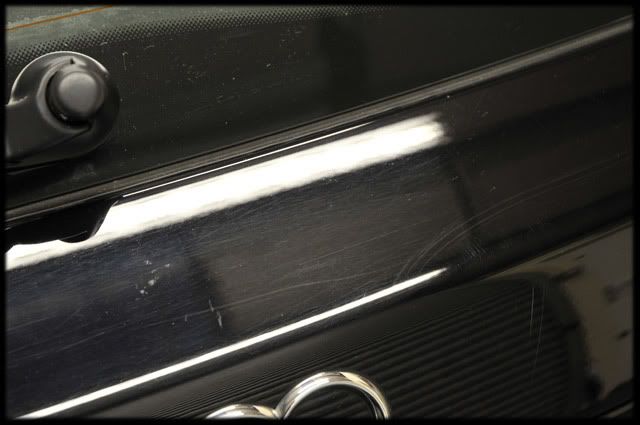
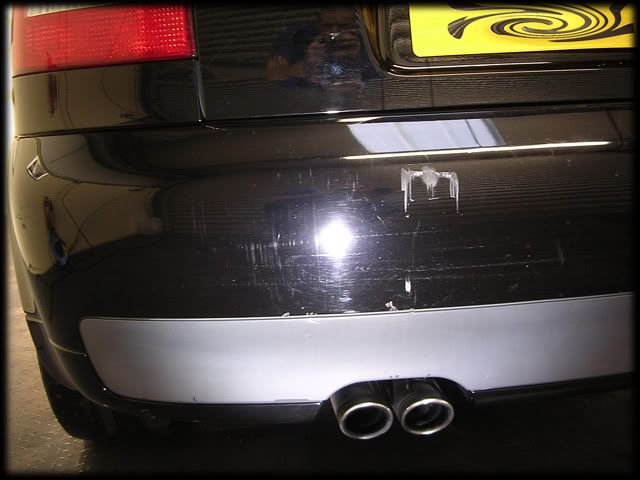
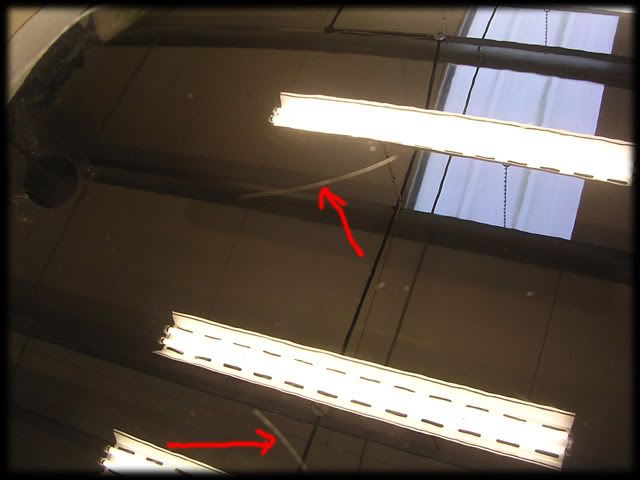
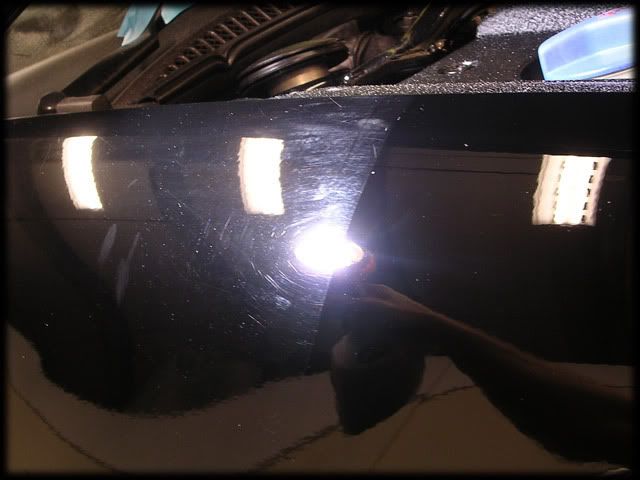
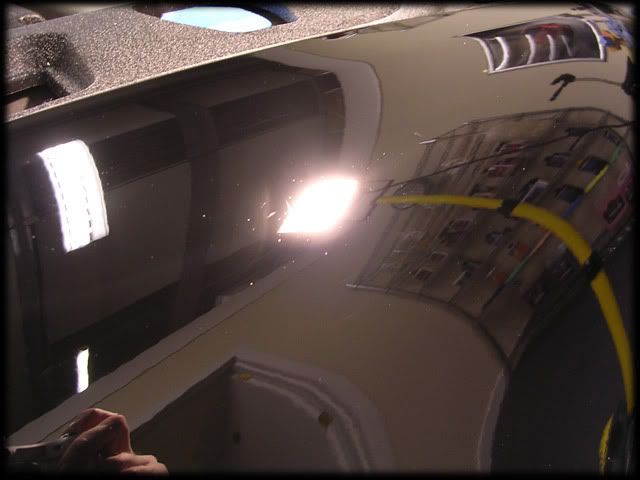
Now dried off and with paint readings taken (average of 130 microns in most places), I then went round the car to take some pics of the defects.


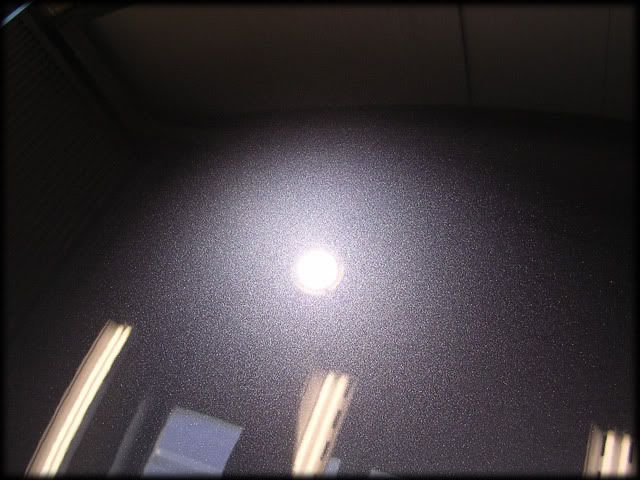
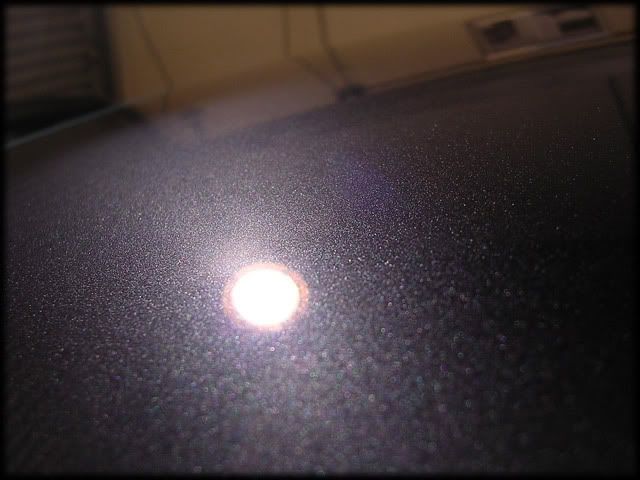
I should probably mention at this point that the car has been washed with a brush since new...


C21.jpg


C23.jpg


C24.jpg


C25.jpg


C26.jpg


C27.jpg


C28.jpg


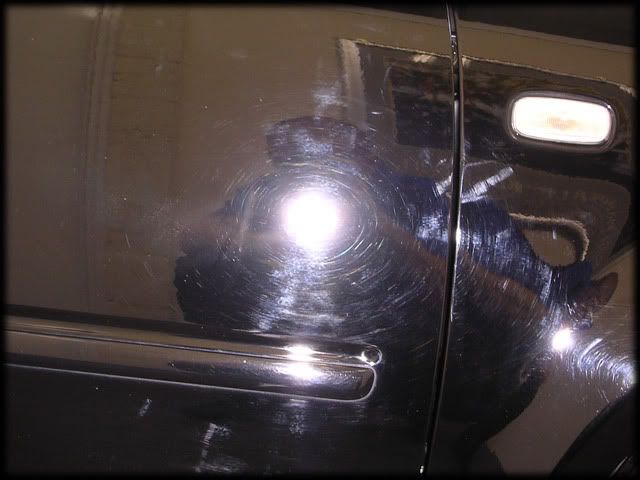
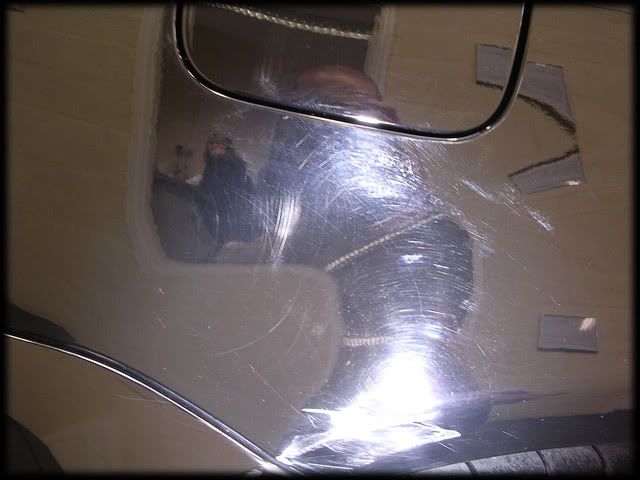
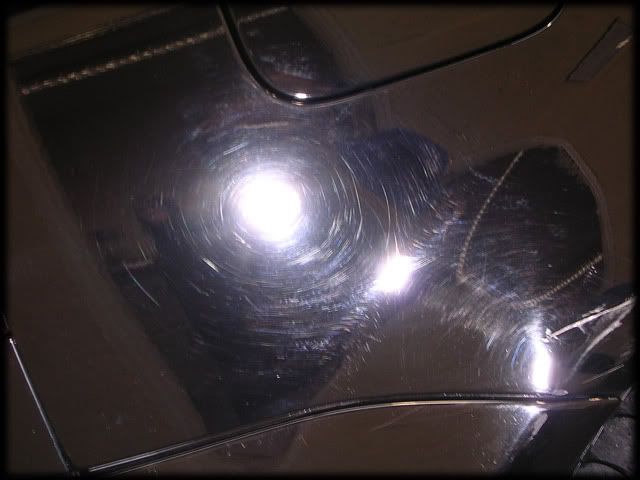
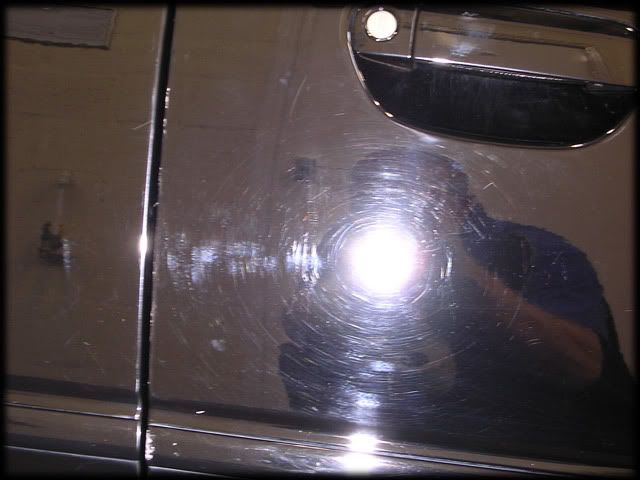
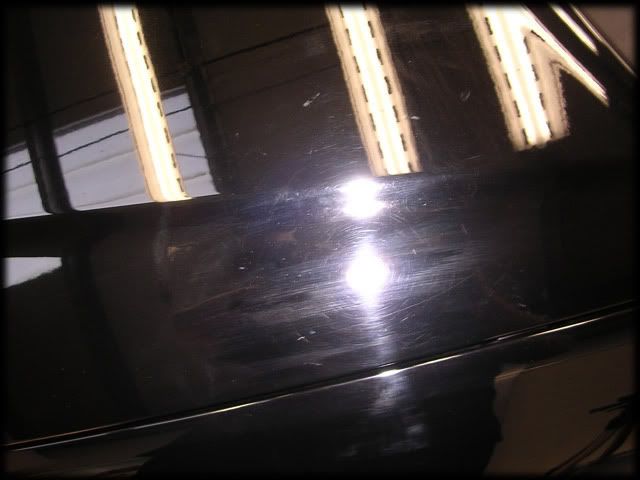
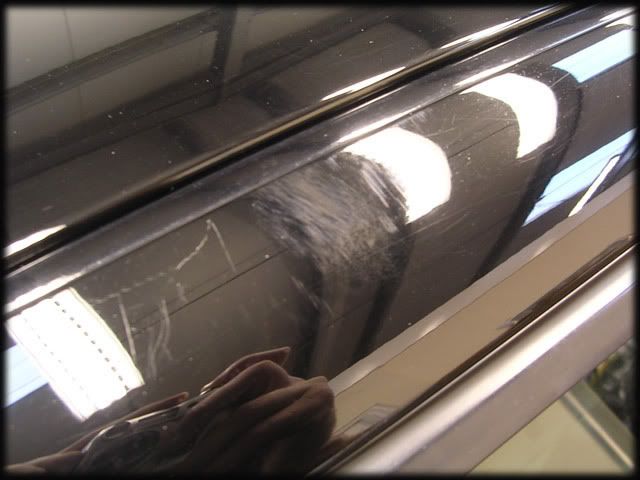
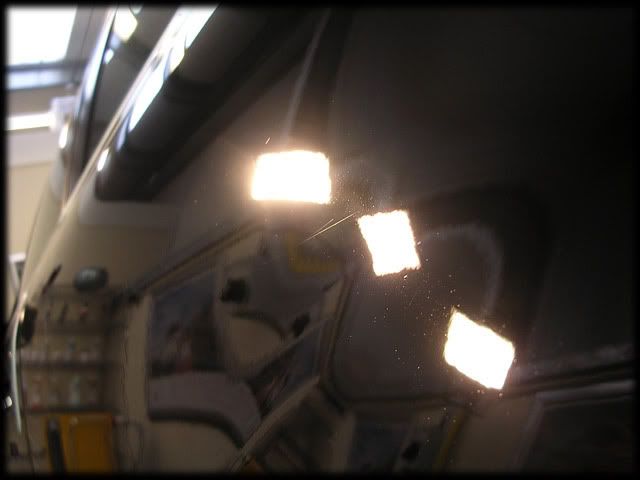
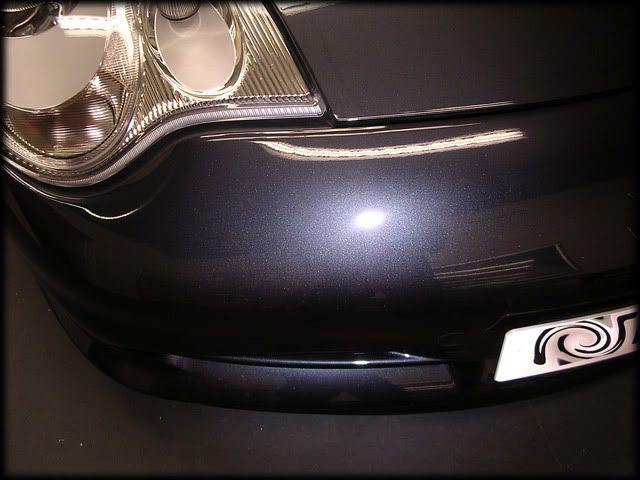
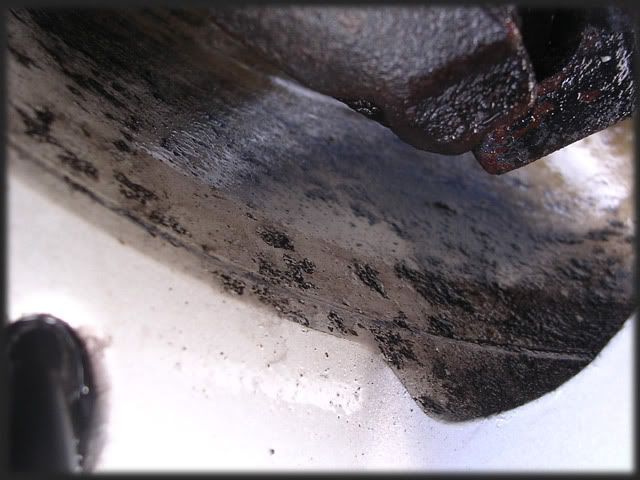
These pics are probably as good as any to demonstrate why you shouldn’t let the overhead lance from petrol station pressure washers hit your paintwork...


C29.jpg


C30.jpg
 
C31.jpg


C42.jpg


The back bumper had several scrapes along the back of it which had broken the paint so this would get corrected with the G220 and Gloss-It Extreme Cut and One step polish with the Menzerna Compounding/Polishing pads:


C22.jpg


So, as you could see the car had seen a hard life of incorrect washing/drying techniques and I had my work cut out on this one. I knew I wasn’t going to get 100% correction as some of the RIDS were far too deep to even have a chance of removing.


Polish of choice was 3M Fast Cut Plus combined with a 3M Compounding Pad @2000rpm's (1500-1800 on the smaller areas):


C32.jpg


I'd decided to give each section 2 hits. What came out came out and what didn’t was going to have to stay put. With any remaining time left, I'd go back and polish the worst areas again if needs be.


Luckily, 2 hits gave decent results considering the state of the paintwork:


C33.jpg


C34.jpg


This pic (although out of focus) shows the kind of scratches left after polishing. Even without proper focus you can see they are fairly deep!


C36.jpg


Clarity and Gloss was restored nicely though:


C35.jpg


N/S wing after FCP stage:


C38.jpg


And on the other wing where those horrific scratches were:


C39.jpg


After correction:


C40.jpg


C41.jpg


Considering the state of the wing before hand, I was quite happy with the level of correction achieved without the need for wet sanding :)


Round the other side, midway through correction:


C44.jpg


C47.jpg


C46.jpg


C45.jpg


Again in the above pic you can see the deeper one or two RIDS remained after 2 hits.


Offside back 1/4 before:


C48.jpg


C49.jpg


After:


C50.jpg


C51.jpg


Once corrected, it was time to refine the finish and for this I used Menzerna PO85RD and a Polishing Pad @ 1500rpm's. As always, this produced superb clarity:


C52.jpg


Even though the wheels were past their best they were sealed anyways (to remove any polishing dust if nothing else) by Marsha, who also applied Gloss-It tyre dressing and polished up the exhaust with the Blackfire Metal Polishes.


The engine bay was dressed with 303 as always:


C53.jpg


C54.jpg


C55.jpg


The interior was fully detailed including feeding of the leather with Raceglaze Leather Balm and Werkstat Satin Prot on the mats, shuts polished and sealed with Werkstat Prime Strong. Interior glass cleaned with Eimann Fabrik and exterior glass done with Rain-X.


C68.jpg


Back to the paintwork, which after a wipe down with Top Inspection (Carefully! I get major paranoid when working on solid black about marring it!) was sealed with Gloss-It Signature Gloss and left for around 45 mins to make sure it cured properly in the cold temperatures.


That gave the following results (apologies for lack of quality pics as the owner turned up just before I finished):


C56.jpg


C57.jpg


C58.jpg


C59.jpg


C60.jpg


C61.jpg


C63.jpg


C64.jpg
 
C65.jpg


C66.jpg


C67.jpg


And from one of the worst cars I've seen for a while, to one of the cleanest :)


This GT3 was in for 2 days to have the paintwork machined only (no interior detail etc):


C1.jpg


C2.jpg


No pics of the wash process as my camera batteries were on charge but it was the usual pre-foam, 2 bucket wash, menz 7.5 on the wheels etc etc.


The car didn’t really need claying but I always prefer to do this step to make sure as you always find one or two bits that the clay pics up:


C3.jpg


A quick walk round with Sun Gun showed the defects:


C4.jpg


C5.jpg


C6.jpg


C7.jpg


C8.jpg


C9.jpg


C10.jpg


C11.jpg


C12.jpg


As you can see, the defects were fairly light, but not quite light enough to quickly buzz round the car with the likes of 85Rd on a finishing pad.


This gave me a perfect opportunity to further try out one of the new polishes from Menzerna - PO203S. It's kind of an in between of 106FA and 3.02 and it worked perfectly on this car, although some panels needed a couple of hits where the odd deeper scratch was.


Fully broken down and ready to buff:


C13.jpg


A wipe down with Top Inspection to ensure all the oils are removed:


C14.jpg


C15.jpg


C16.jpg


Whilst I was attending to the paintwork, Marsha had sealed the wheels and applied the Gloss-It tyre dressing. You can either mist it on to the tyre wall and leave it but the trigger that is supplied isn’t always ideally suited so sometimes it's easier to apply it to an applicator pad instead:


C17.jpg


C18.jpg


I've found that a couple of coats with 15/20 minutes (or even longer if you can) in between gives the best results :thumb:


Marsha also applied Gloss-It TRV to the front splitter.


I carried on with the machine work. The masking tape across the middle of the bonnet and wings are to protect the armour fend applied to the front end:


C19.jpg


C20.jpg


After a TI wipe down:


C21.jpg


Back end before:


C22.jpg


After:


C23.jpg


There are some bits where you just cant get the machine into so this has to be done by hand. The older USA version of Menzerna IP is great for this as the abrasives are more fragile and break down easier:


C24.jpg


Worked untill barely visible:


C25.jpg


Done:


C26.jpg


C27.jpg


C28.jpg
 
It's the little things like correcting the underneath of side skirts and bumpers etc that make all the difference and also what can contribute to the hours adding up on a detail:


C29.jpg


C30.jpg


C31.jpg


Once the paintwork was corrected, I nipped out any light marring on the armour fend with Blackfire Gloss Enhancing Polish with the G220:


C32.jpg


As it's been a while since I used it, I decided to apply Blackfire's Midnight Sun Wax as LSP:


C33.jpg


This was applied to the whole car and then buffed off after 10 minutes.


Then after a wipe down with Gloss-It QD, this was the results:


C34.jpg


C35.jpg


C36.jpg


C37.jpg


C45.jpg


C38.jpg


C39.jpg


C40.jpg


C41.jpg


C42.jpg


C43.jpg


C44.jpg


C60.jpg


C59.jpg


C58.jpg


C57.jpg


C56.jpg


C55.jpg


C54.jpg


C53.jpg


C52.jpg


C51.jpg


C50.jpg


C48.jpg


C47.jpg


C46.jpg


C49.jpg


Thanks for looking as always :thumb:


Clark
 
Simply stunning work. Polished Bliss threads have long set the standard in photography and readability. I am glad you guys are posting these on this side of the pond, great work!
 
jefftheman said:
Awesome work as usual.


The quality of the work, pictures, and shop rival many here in the US.


I know it is subjective, but to my eyes no one here on Autopia matches PB's quality.


Even their 2 step finishes look better then the 3 steps details posted here on Autopia.:bounce:bounce:bounce


:2thumbs:Well done Clark!!!!!:2thumbs:
 
cupra_clark said:
I carried on with the machine work. The masking tape across the middle of the bonnet and wings are to protect the armour fend applied to the front end:


C19.jpg


C20.jpg


Is "armour fend" the equivalent of 3M Clear Bra? Same concept?


If so, it's necessary to tape off the film during every detail? Can a rotary cause the film to lift?
 
Great Job, I like the idea of keeping the hood propped up with the menz bottle, and I really like the color of the GT3.


Brandon
 
tdekany said:
I know it is subjective, but to my eyes no one here on Autopia matches PB's quality.


Even their 2 step finishes look better then the 3 steps details posted here on Autopia.:bounce:bounce:bounce


:2thumbs:Well done Clark!!!!!:2thumbs:


What's remarkable as well is PB's level of professionalism. In comes through in every single write up. The pictures/write up are top notch as well as the attention to detail both Clark and Rich exude, From there extensive wash process to their outstanding paint correction ability. Even the shop they work is in kept in spotless condition, there are rarely any items on the floor or MF's scattered everywhere like many of us see in write ups (Im an offender of the messy garage write up). That to me is professionalism at its best, many consider PB as one of, if not the finest detail shop in the world and by the way they keep their shop it sure it deserving of such a title.


Phenomenal work on both the Audi and P-car Clark


:brit (first time I could use that smiley, lol)
 
Very nice work, great photos, and informative writeup as well. I also appreciate the fact that you knew when to say when on the Audi...some defects are better left to tell a story. The only problem though, is that steering wheel was on the wrong side! :)
 
Back
Top