Nizmo
New member
*Disclaimer - this is a $3,000 pickup, I would not do this to a decent vehicle or anything metallic without serious skill.
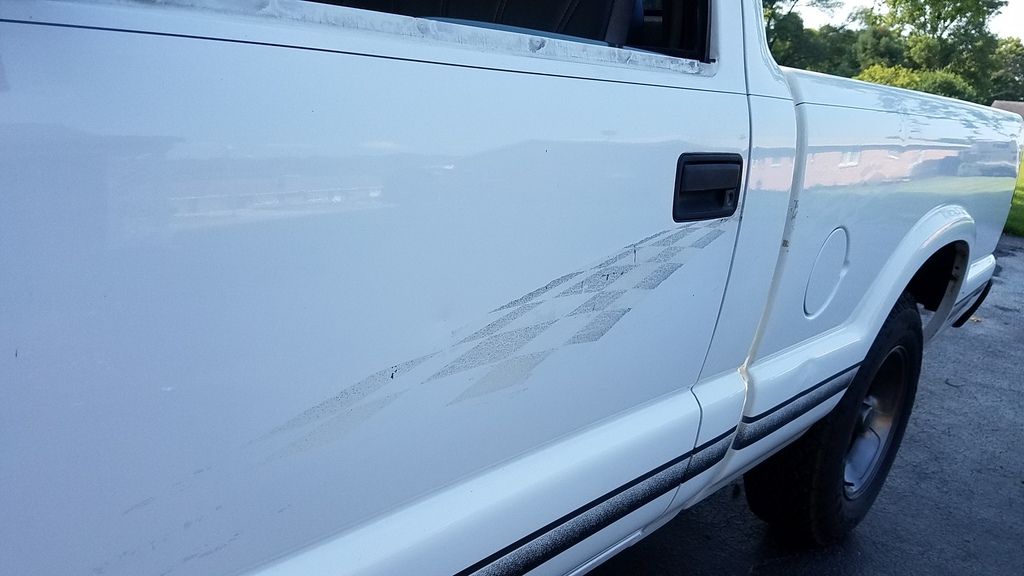
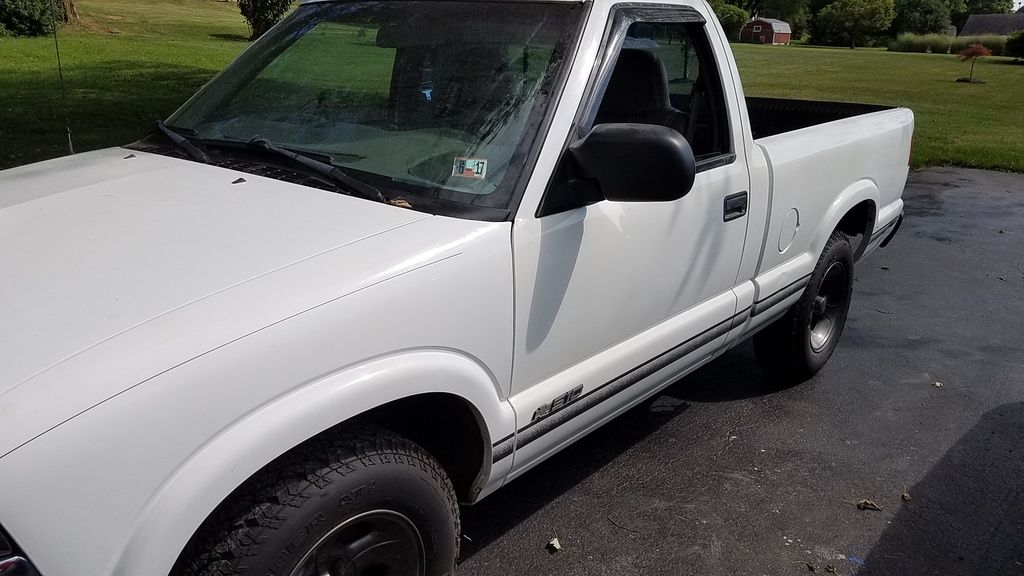
As many of you know, when I bought this truck it has some fugly graphics on the side. I tried to remove them, but they etched into the paint. While it is a "beater" its been bugging me. This is what you can do with some color matched spray bomb.
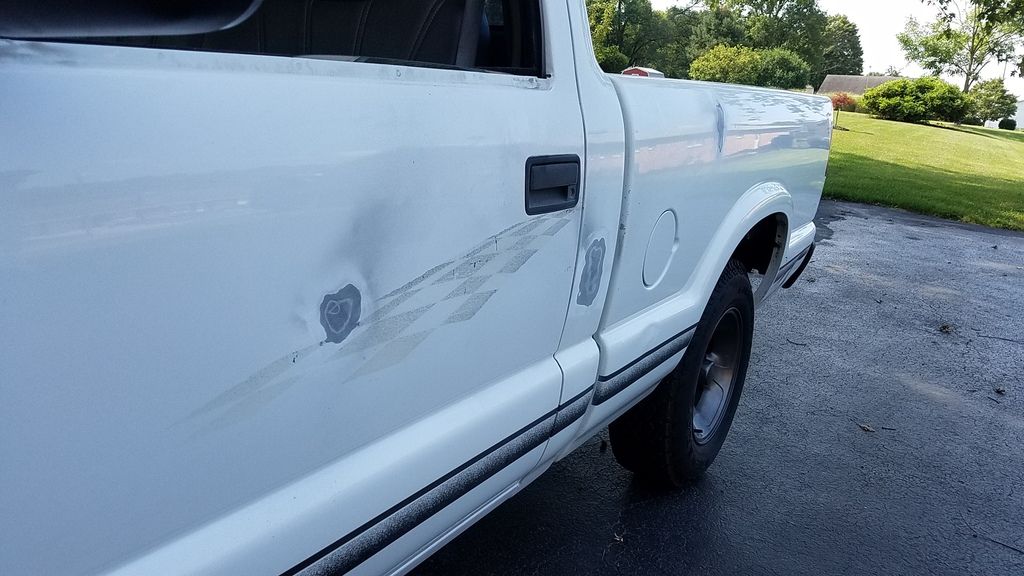
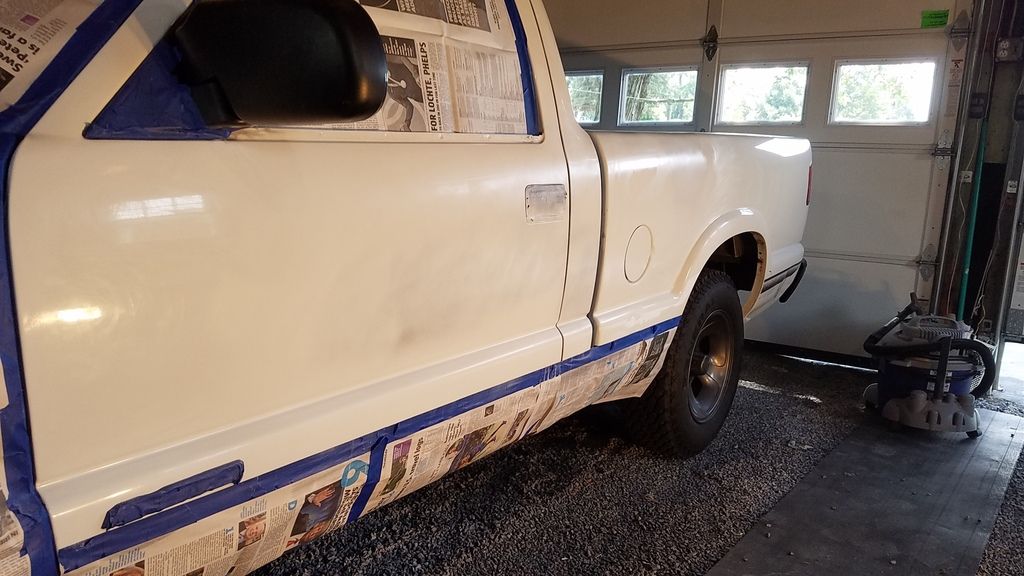
This is what we have to work with, removed the remaining pinstripe and there is a couple small dents I decided to fix while I was here.
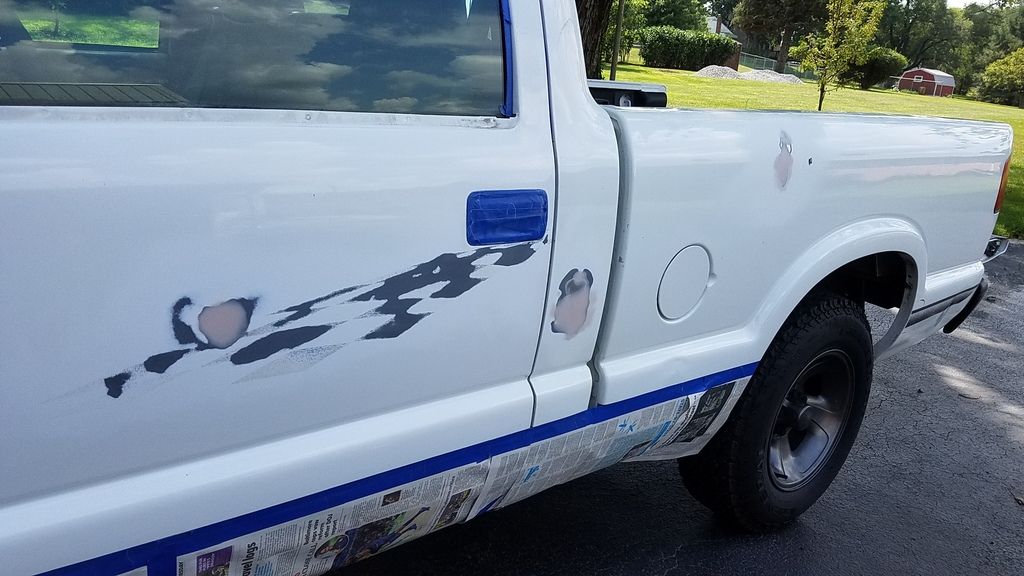
Sanded the dents down to metal for the body filler. Somebody`s been here before; I can tell the cab corners have been replaced professionally. The primer was on there thick! Factory primer coat GM`s for the era, not so much.
As a rule, you want the thinnest coat of filler. This was thinly spread and the whole area done with 120 followed with 320 on the DA. The messed up paint was also feathered out. You can also see my bucket there, it was soaking some 600 and 2000 grit paper. My newspapers that I "swiped" from various hotels came in handy too!

600 grit pass
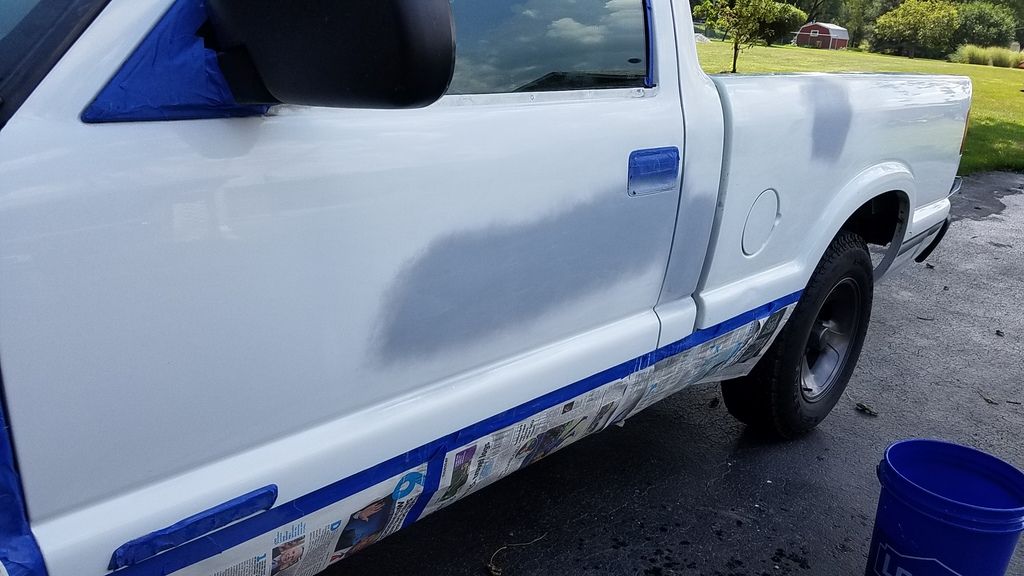
Several heavy coats of filler primer was applied. This fills in any additional imperfections and makes sanding it easy. I sanded this area with 600 and the remaining areas with 2000 for clearcoat.
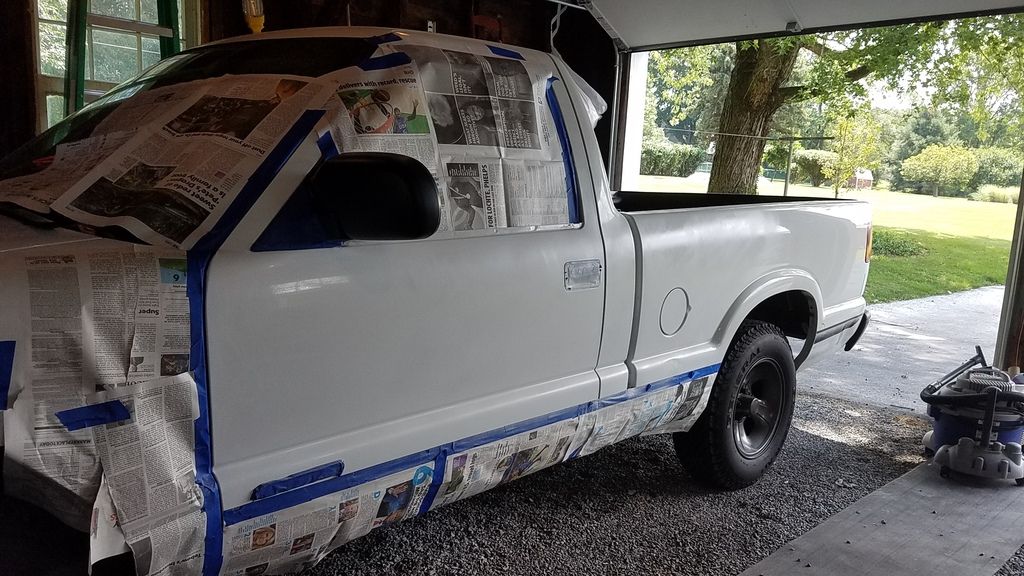
Lets pull this thing in the garage to avoid the wind and any dust. Well, I say dust, but with a gravel floor it happens. Atleast there was no breeze to mess me up. This is the first very light coat.

Couple more coats.
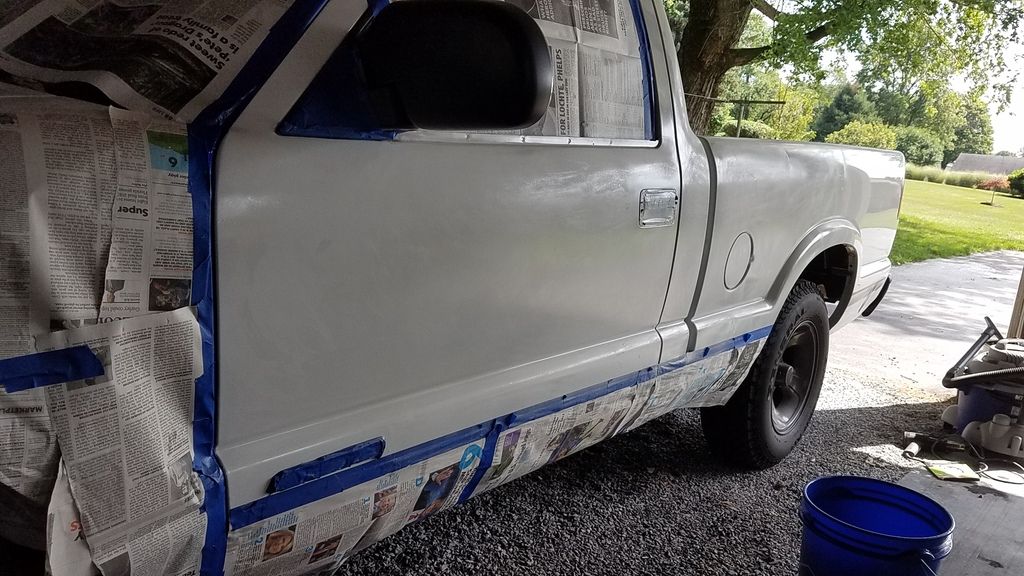
About 5 coats of white was applied. You can see the slightly shiny spots; that`s where the color was feathered into.

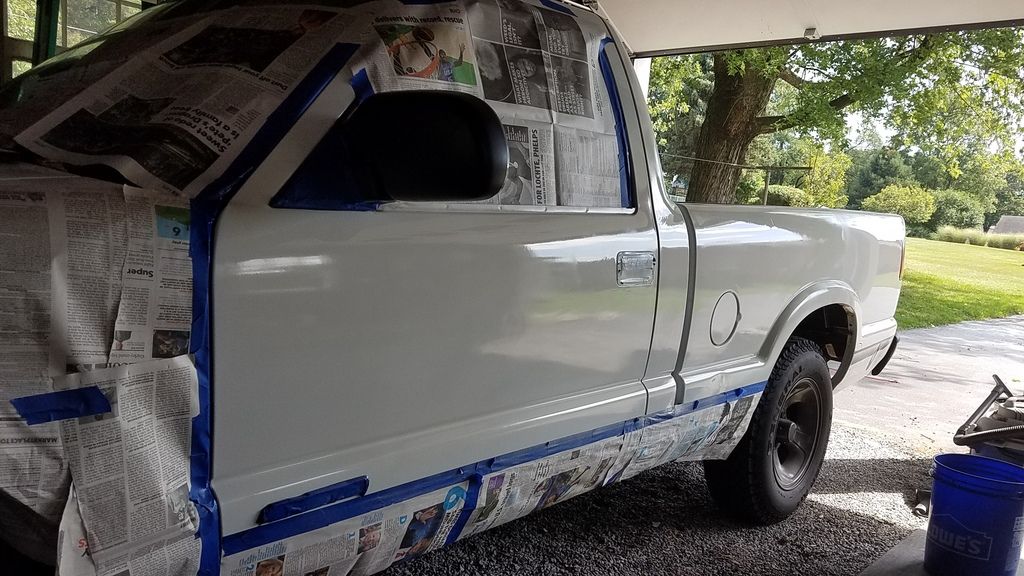
Clearing stage. Since this is spray clear, it is thinner than what comes out of a gun. This is 4 coats allowed to dry for an hour and wetsanded with 600 to smooth it out. No matter how hard you try, orange peel is an issue with spray cans.
Another 4 thick coats and it`s ready to dry a little and take off the masking!
Outside for the final inspection. Not too bad, the clear slightly yellowed the color, but that happens on white alot.
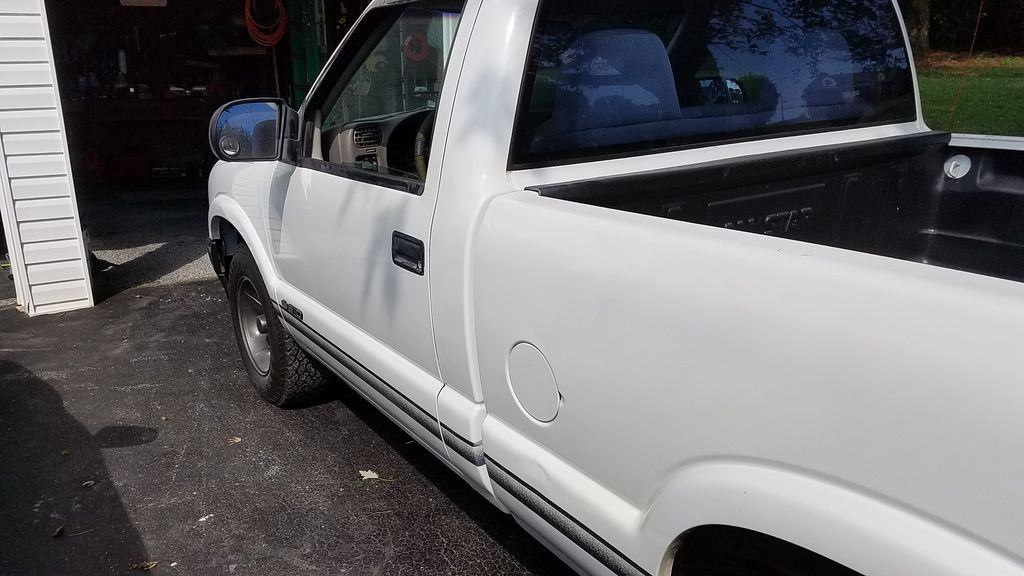
Overall materials cost roughly $100. Not bad considering it`s a "beater." After a week or so I will wetsand and compound it out to look even better. The passenger side is a little more beat, but will be done another month.
As many of you know, when I bought this truck it has some fugly graphics on the side. I tried to remove them, but they etched into the paint. While it is a "beater" its been bugging me. This is what you can do with some color matched spray bomb.
This is what we have to work with, removed the remaining pinstripe and there is a couple small dents I decided to fix while I was here.
Sanded the dents down to metal for the body filler. Somebody`s been here before; I can tell the cab corners have been replaced professionally. The primer was on there thick! Factory primer coat GM`s for the era, not so much.
As a rule, you want the thinnest coat of filler. This was thinly spread and the whole area done with 120 followed with 320 on the DA. The messed up paint was also feathered out. You can also see my bucket there, it was soaking some 600 and 2000 grit paper. My newspapers that I "swiped" from various hotels came in handy too!
600 grit pass
Several heavy coats of filler primer was applied. This fills in any additional imperfections and makes sanding it easy. I sanded this area with 600 and the remaining areas with 2000 for clearcoat.
Lets pull this thing in the garage to avoid the wind and any dust. Well, I say dust, but with a gravel floor it happens. Atleast there was no breeze to mess me up. This is the first very light coat.
Couple more coats.
About 5 coats of white was applied. You can see the slightly shiny spots; that`s where the color was feathered into.
Clearing stage. Since this is spray clear, it is thinner than what comes out of a gun. This is 4 coats allowed to dry for an hour and wetsanded with 600 to smooth it out. No matter how hard you try, orange peel is an issue with spray cans.
Another 4 thick coats and it`s ready to dry a little and take off the masking!
Outside for the final inspection. Not too bad, the clear slightly yellowed the color, but that happens on white alot.
Overall materials cost roughly $100. Not bad considering it`s a "beater." After a week or so I will wetsand and compound it out to look even better. The passenger side is a little more beat, but will be done another month.