Don
Darth Camaro 12/27/15
HOW TO: Replace bearings on PC D/A Polisher- w/pics
The backing pad on my PC recently developed a disturbing 'wobble.' I figured the bearings had worn out.
I looked up on the Porter Cable site and found the parts list as well as a generic instruction on how to disassemble the PC. I really didn't want to have to send my PC out for repair and have to wait even though detailing season is almost over and I surely didn't want to pay labor charges if it was as easy as it seemed. Of course the first step is to remove the backing plate using the flat wrench that should have come with your PC.
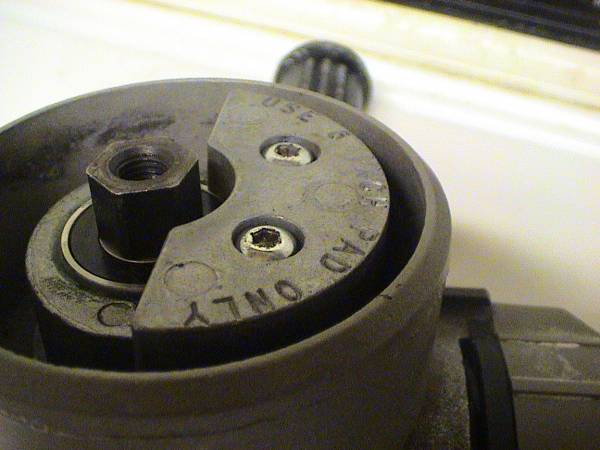
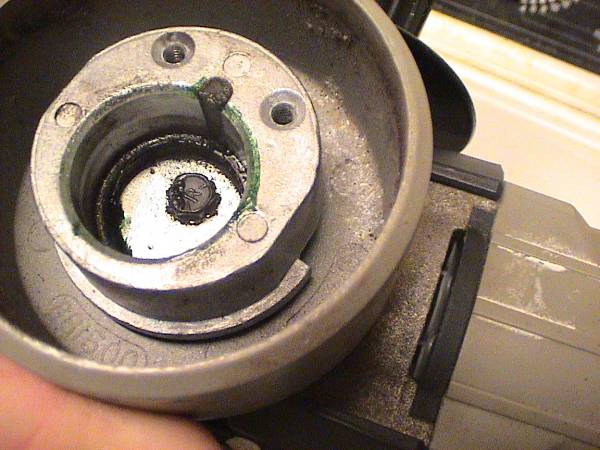
In the 2 below pictures, you can see the two torq-bit screws holding the counter weight. Sorry, but I'm not sure of the size. You can see me removing them with a bit from a cordless screwdriver. I prefer to tighten and remove the screws by hand since the PC is made of soft aluminum and it would be very easy to strip out the threads.

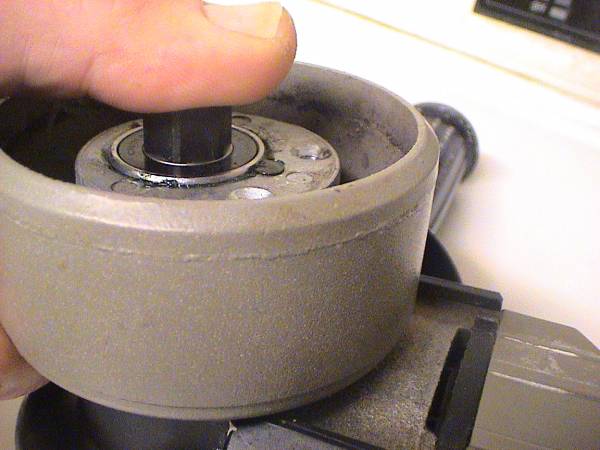
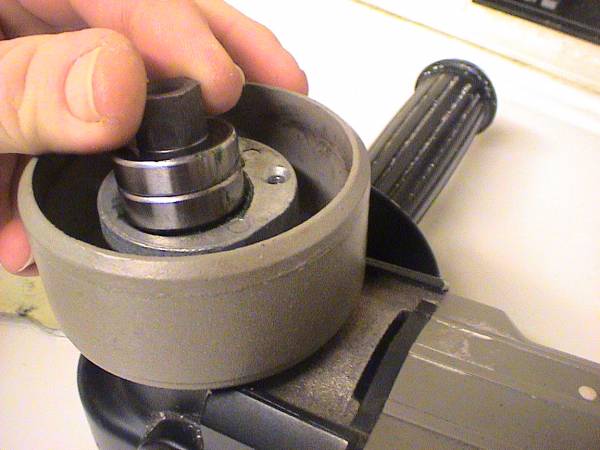
In the picture below, you can see the spindle/bearing unit is fully exposed with the removal of the weight. Now you need to reinstall the backing plate.
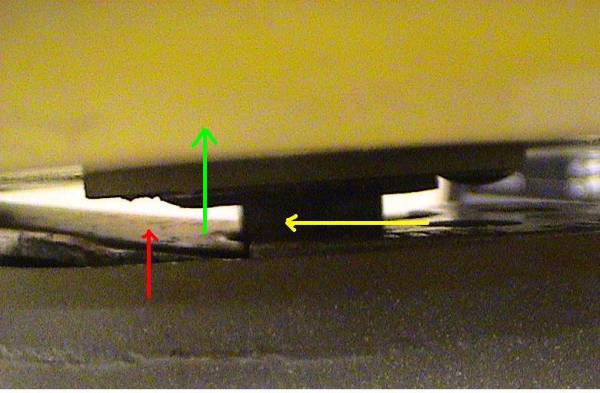
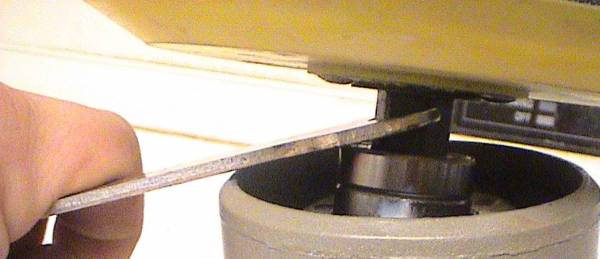
Below you can see the flat wrench is inserted between the backing plate and the buffer casing. The red arrow shows the flat wrench and the yellow is the spindle. For illustration purposes the green arrow shows how you will use the flat wrench as a lever, although in this picture the weight is still on. Not much pressure is need and the bearing assembly will slide out.
This next picture shows the socket where the bearings and spindle are housed. The screw that is visible is where you would continue disassembly. When I pulled the old bearings out, the sides had a bit of grease on them, so when I replaced the bearings, I smeared some brake caliper grease on the sides of the socket.
In this pic, I'm starting the new bearing assy into place. With the fresh grease on the walls of the socket, the new spindle & bearings popped right in almost effortlessly.
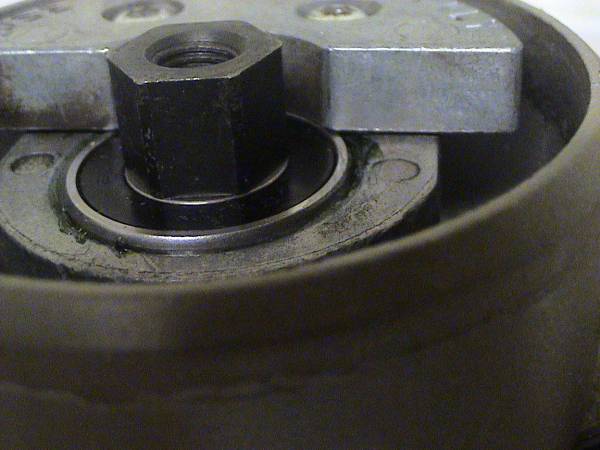
In this final pic, everything is reassembled and you can see that the bearing/spindle is held in place by the counter weight.
I found the bearing/spindle assembly by looking up the authorized repair sites and called a few until I found one that had the assembly in stock. It comes as a unit and cost just under $40.
The backing pad on my PC recently developed a disturbing 'wobble.' I figured the bearings had worn out.
I looked up on the Porter Cable site and found the parts list as well as a generic instruction on how to disassemble the PC. I really didn't want to have to send my PC out for repair and have to wait even though detailing season is almost over and I surely didn't want to pay labor charges if it was as easy as it seemed. Of course the first step is to remove the backing plate using the flat wrench that should have come with your PC.
In the 2 below pictures, you can see the two torq-bit screws holding the counter weight. Sorry, but I'm not sure of the size. You can see me removing them with a bit from a cordless screwdriver. I prefer to tighten and remove the screws by hand since the PC is made of soft aluminum and it would be very easy to strip out the threads.
In the picture below, you can see the spindle/bearing unit is fully exposed with the removal of the weight. Now you need to reinstall the backing plate.
Below you can see the flat wrench is inserted between the backing plate and the buffer casing. The red arrow shows the flat wrench and the yellow is the spindle. For illustration purposes the green arrow shows how you will use the flat wrench as a lever, although in this picture the weight is still on. Not much pressure is need and the bearing assembly will slide out.
This next picture shows the socket where the bearings and spindle are housed. The screw that is visible is where you would continue disassembly. When I pulled the old bearings out, the sides had a bit of grease on them, so when I replaced the bearings, I smeared some brake caliper grease on the sides of the socket.
In this pic, I'm starting the new bearing assy into place. With the fresh grease on the walls of the socket, the new spindle & bearings popped right in almost effortlessly.
In this final pic, everything is reassembled and you can see that the bearing/spindle is held in place by the counter weight.
I found the bearing/spindle assembly by looking up the authorized repair sites and called a few until I found one that had the assembly in stock. It comes as a unit and cost just under $40.
")