Todd@RUPES
Just a regular guy
One of my biggest fears has been wiper scratching or hazing that occurs on windshields from the use of wiper blades grinding dirt and particulate into the surface. My wife?s vehicle was particularly bad and was to the point that driving at night was becoming difficult (for me. She had apparently adjusted to not being able to see, which no matter how hard she convinced me never let me feel safe about her driving.
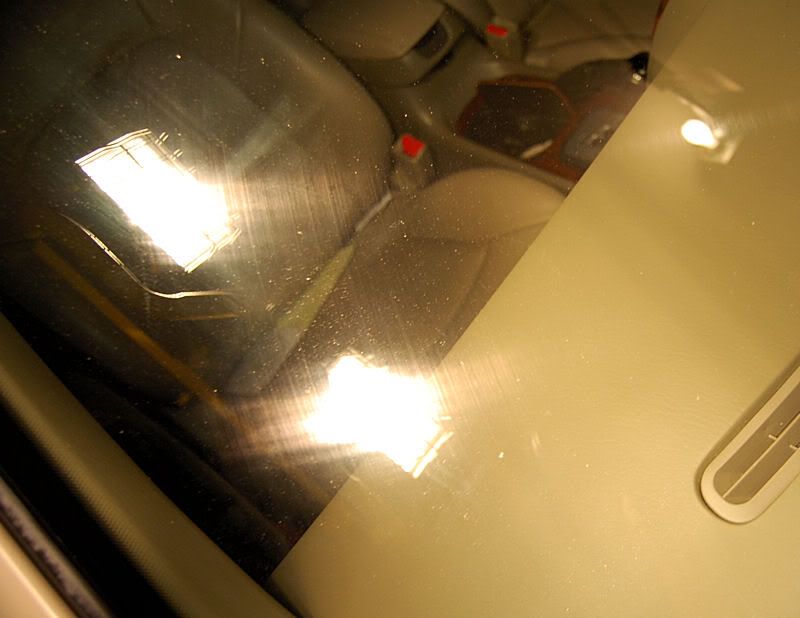
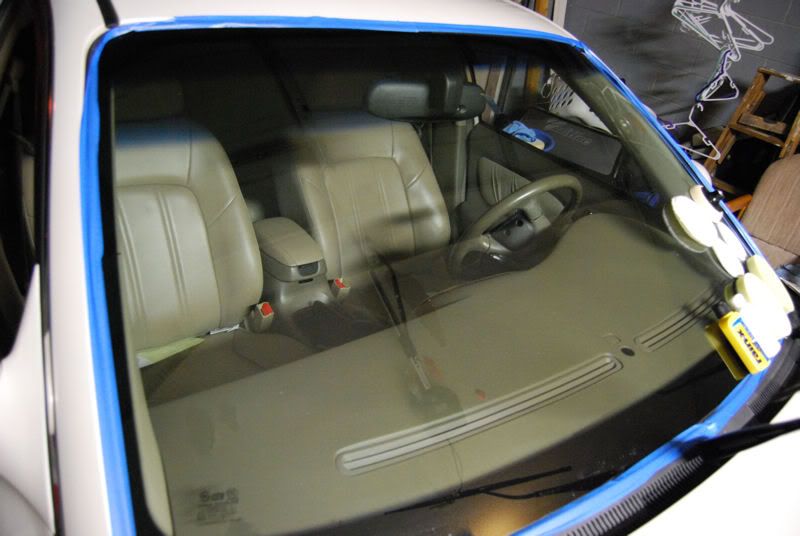
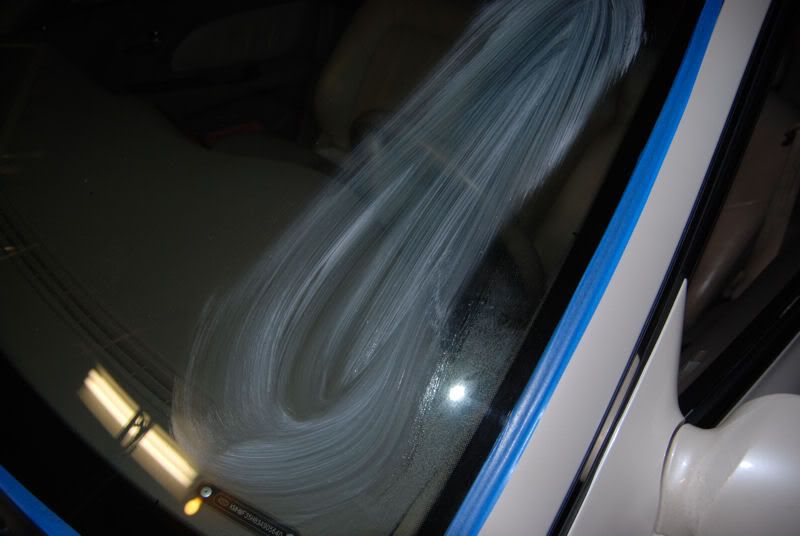
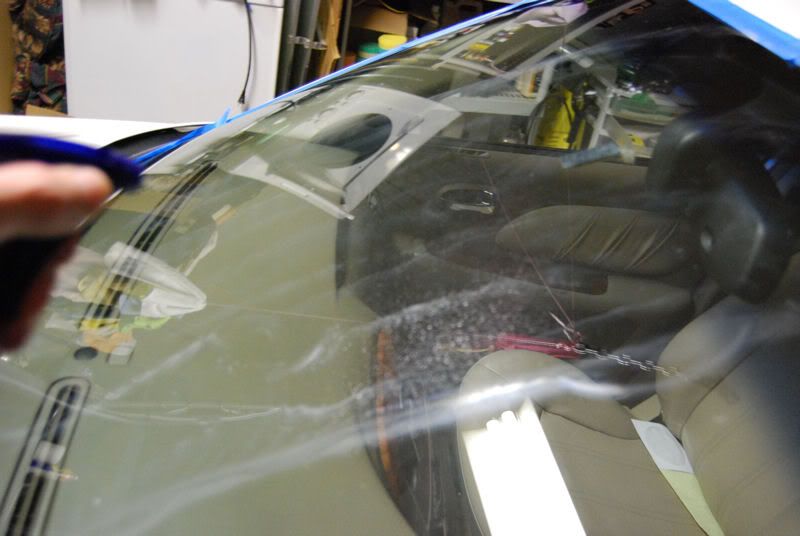
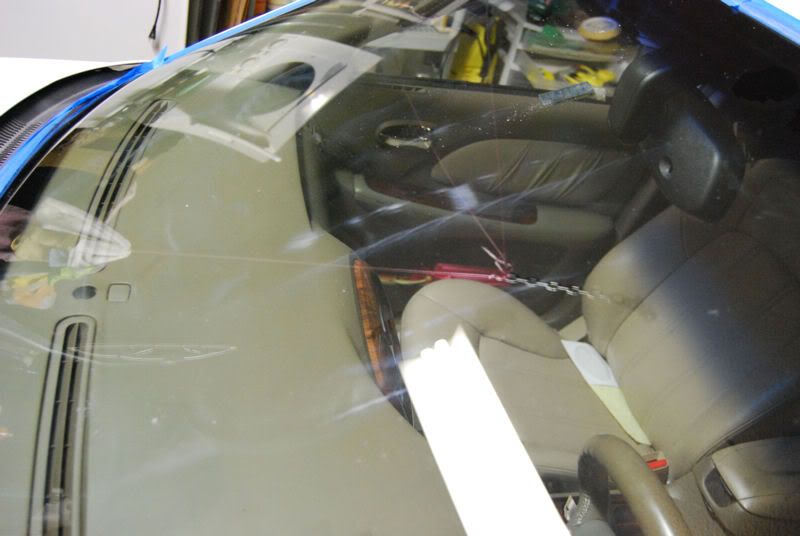
The windshield on my wife?s Hyundai Sonata was scratched in the wiper track area so bad that I could feel texture change with my fingernail.
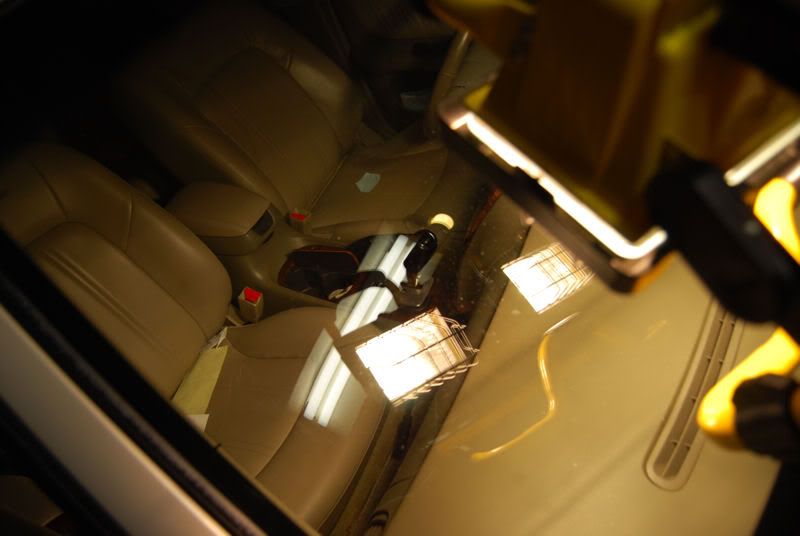
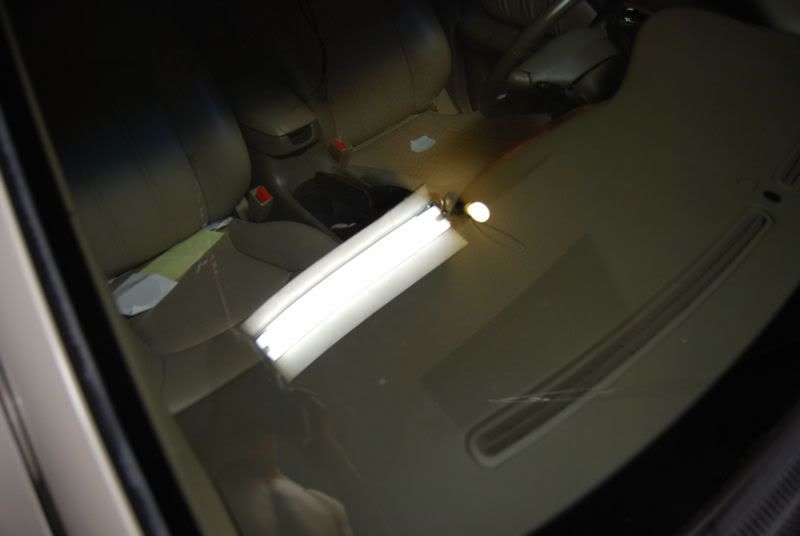
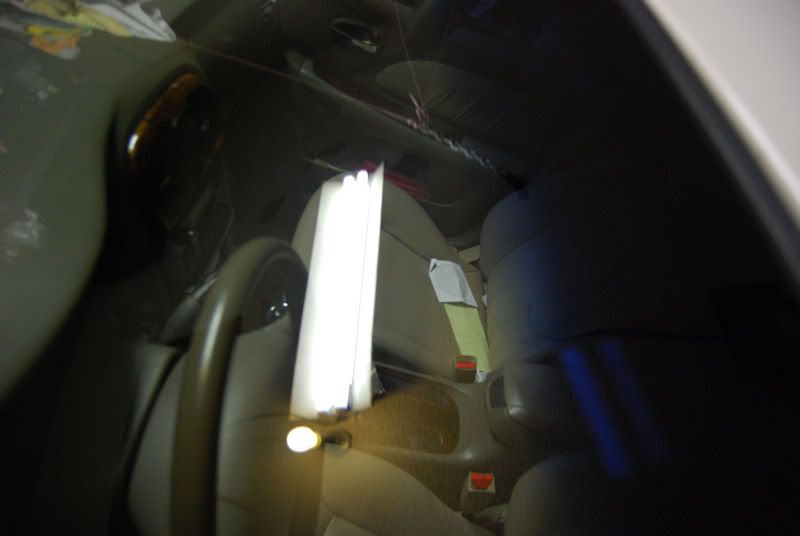
Even in incandescent lighting scratches and haze are clearly visible.

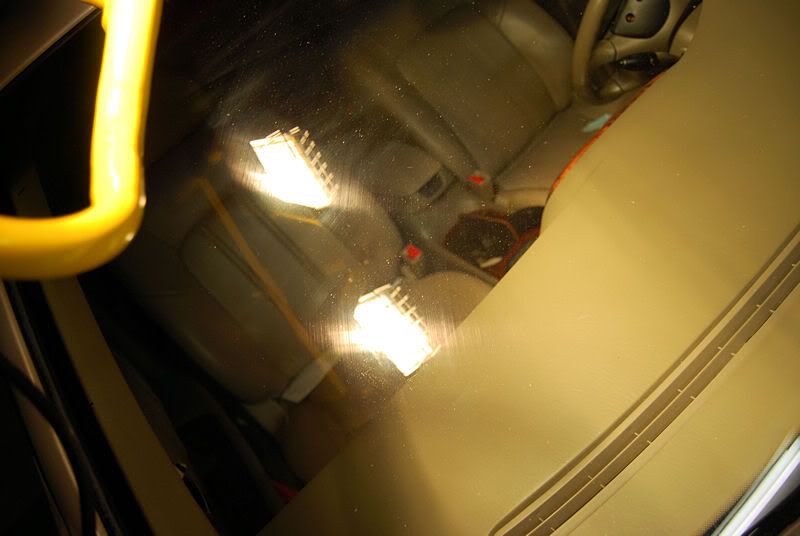
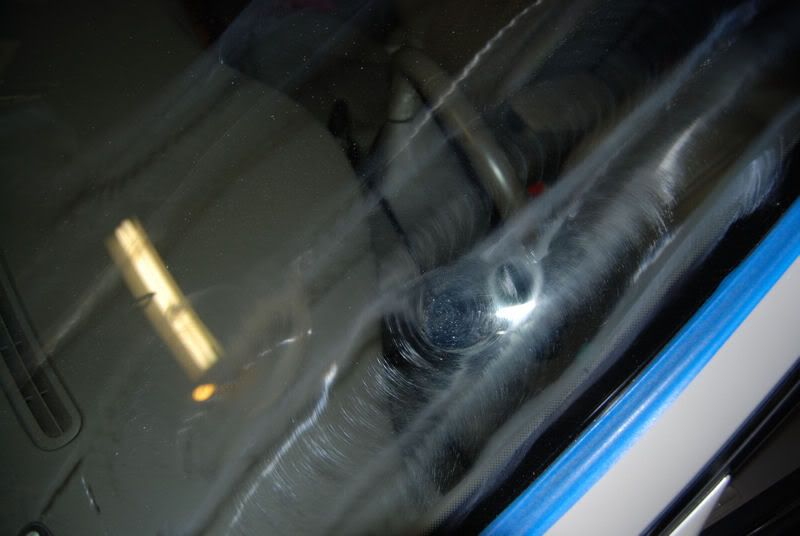
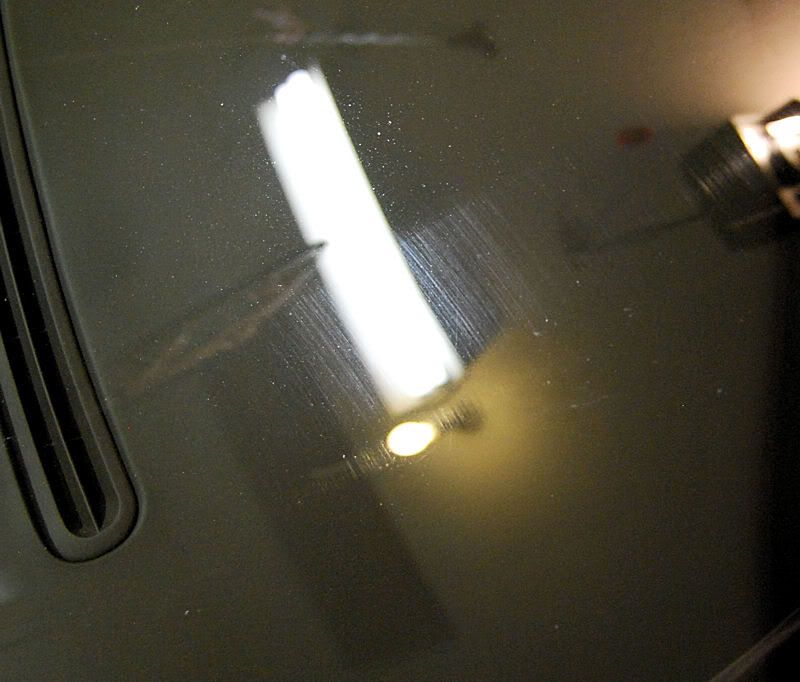
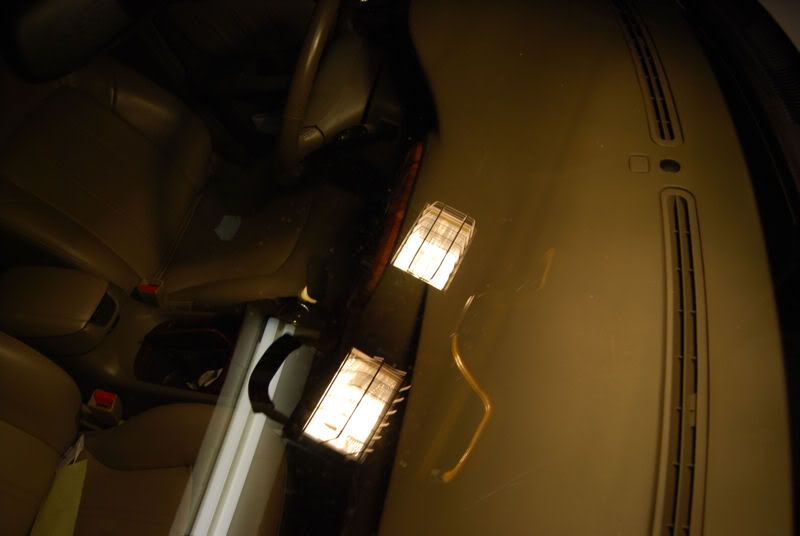
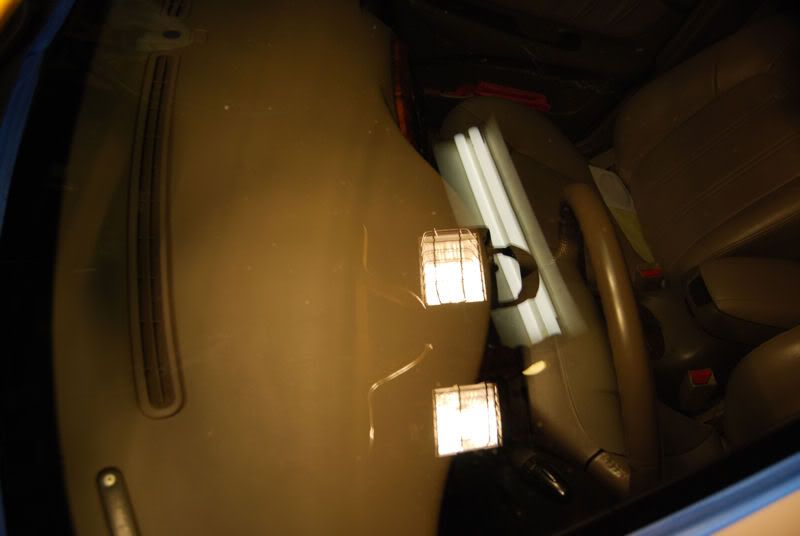
Under 500w halogen lighting the damage to the windshield is even more visible (my wife claims to be able to see through this with no problem!).
I remembered seeing on Lake Country?s website that they offered a glass polishing kit and found one for sale at properautocare.com. When the box arrived I opened it and read through the directions, which I didn?t find easy to understand. A quick call to Lake Country quickly cleared up any questions (as typical their customer service is outstanding!) I had and provided very clear directions on how to use the product.
Given that I did not find the instructions helpful, I have merged them with my conversation and experience to provide a review and hopefully instructions so that anybody with basic rotary experience can replicate my excellent experience with this kit.
Manufacturer?s Claims (from Lake Country?s website)
GPS PRO
Glass Polishing System
?Polish and restore automotive glass and other glass surfaces
?Machine powered system restores clarity by removing wiper tracks, light scratches
and other minor defects
?For use on: Windshields and Automotive Glass; most other glass surfaces
?For use with rotary buffers or D.A. machines
?Contains materials to polish and seal approximately 7,200 square inches
NOTE: The kit from Lake Country contains an adapter for use on a Porter Cable. CMA offers two separate kits (on for DA?s or one for Rotaries). Given that glass is often much harder then paint, I elected to select a rotary kit.
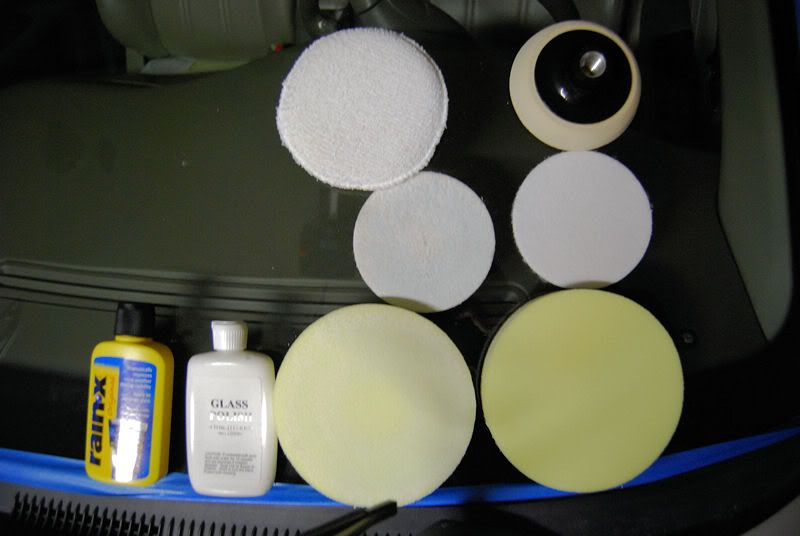
Contained in the kit- 4 oz of glass polish (cernium oxide)
- Rain x
- 2 felt cutting disks (used for removing deeper damage and heavy scratches
- 3.5 inch backing plate
- terry cloth applicator
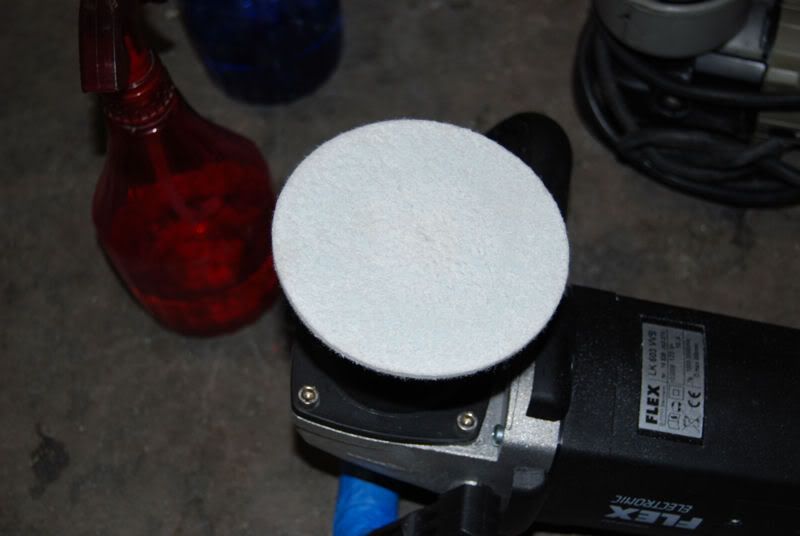
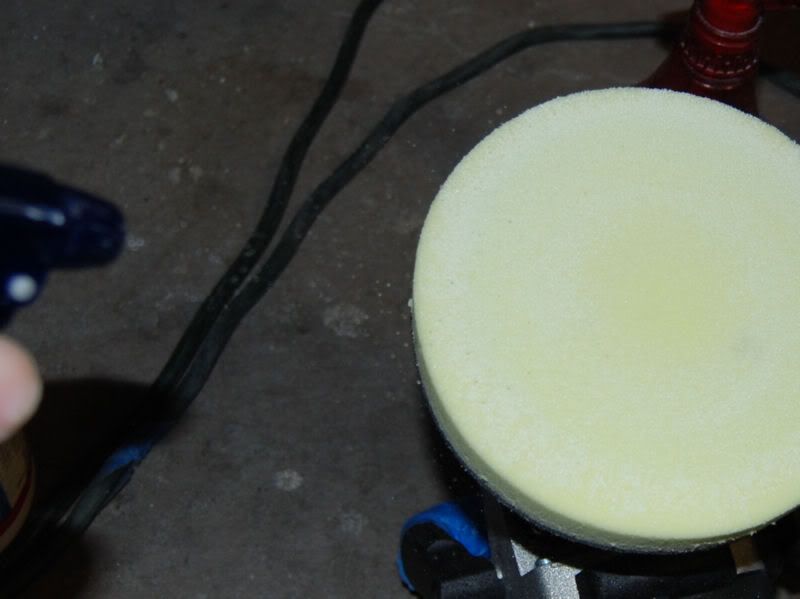
- PURCHASED SEPERATELY: 2 yellow foam pads (used for removing light marring, calcium deposits, and polishing the glass to high gloss, these pads are significantly different then the yellow foam used on paint)
Additional products needed
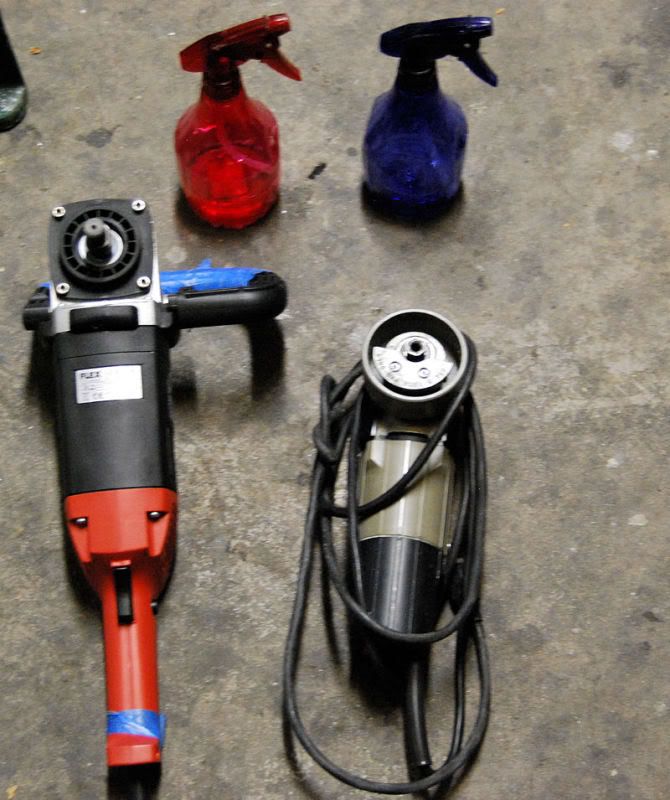
- Polishing machine (either a rotary or orbital PC style)
- Isopropyl Alcohol
- Water
- Assorted microfiber towels
To begin?.
Similar to removing swirl marks and damage from the paint, removing scratches and wiper damage from the glass requires ?re-leveling? the surface.
1) Thoroughly clean the glass surface using alcohol (or window cleaner) and remove all dirt, bug splatter, film, and chemicals. Contaminated glass may benefit from a couple minutes with a clay bar. We do not want a particulate remaining on the paint as it can become trapped between the pad and glass and cause more scratching.
2) Tape plastic trim and rubber seals around the perimeter of the glass.
3) Apply supplied backing plate to the rotary (or Porter Cable).
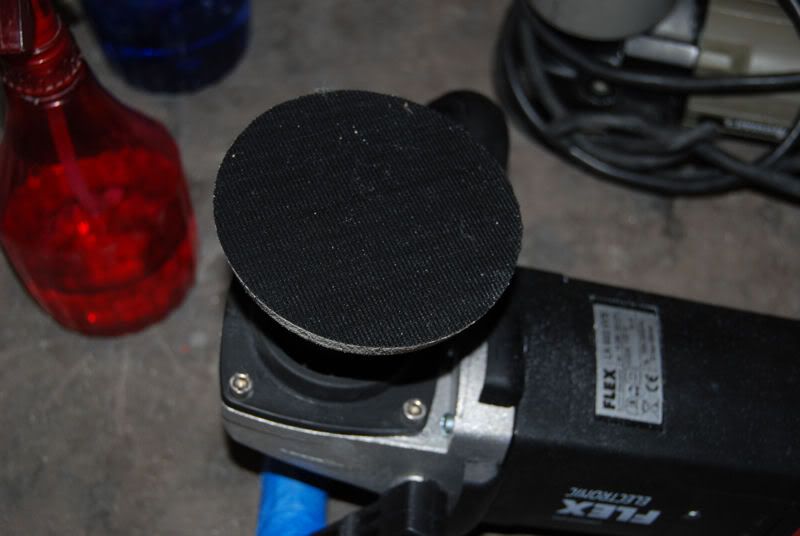
The defects on my wife?s glass could be felt my finger nail, they where deep and would require heavy cutting. I elected to start with the more aggressive, thin felt pad. Hook and loop backing means you simply press it against the backing plate (felt side up) to attach it to the machine.
4) Lightly mist the area to be polished with water (one light spray) and draw two thin beads of product on the glass (using the supplied glass polish).
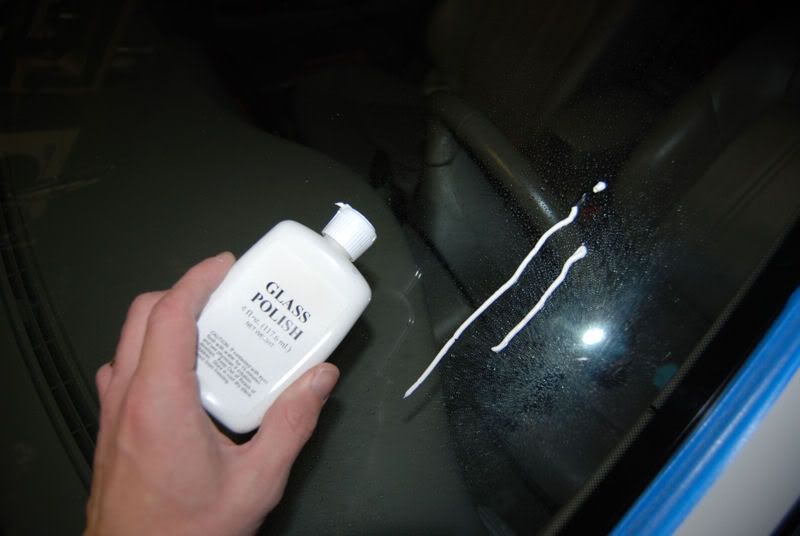
5) Spread the polish over the working section.
Now we are ready to begin polishing the glass.
To polish the glass?
NOTES: Modern automotive windshields contain a thin plastic sheet between two layers of glass (interior and exterior). The polishing process itself will transfer heat to the glass. If the windshield becomes to hot the plastic sheeting can warp leading to distortion. Removing defects from glass requires a lot of pressure which can build heat in a hurry. Stop to check the surface temperature of the paint occasionally by placing your hand on the surface. If it is hot to the touch, mist the area with water to cool it, before continuing.
6) Work the polish with slow arm speed and significant pressure (roughly 20lbs of down force). On a rotary polisher you will set the RPM between 1000-1500 rpm, on a Porter Cable aim for about 4000 OPM. Work a small section, roughly 1.5? x 1.5?. Keep constant pressure and polish over the section until it begins to flash off.
7) inspect the surface, if more polishing is required (scratching still visible), mist the area with water and continue polishing.
NOTE: Water is used for several reasons when polishing glass. One is to remove the heat buildup and the second is to work the polish longer. Cerium Oxide is a very hard abrasive and will often can take several minutes to break down. Too much water on the surface while polishing can greatly increase the time needed to remove the defects as well as cause splatter. Try to keep the consistency as thick as possible for maximum action, only adding water when necessary.
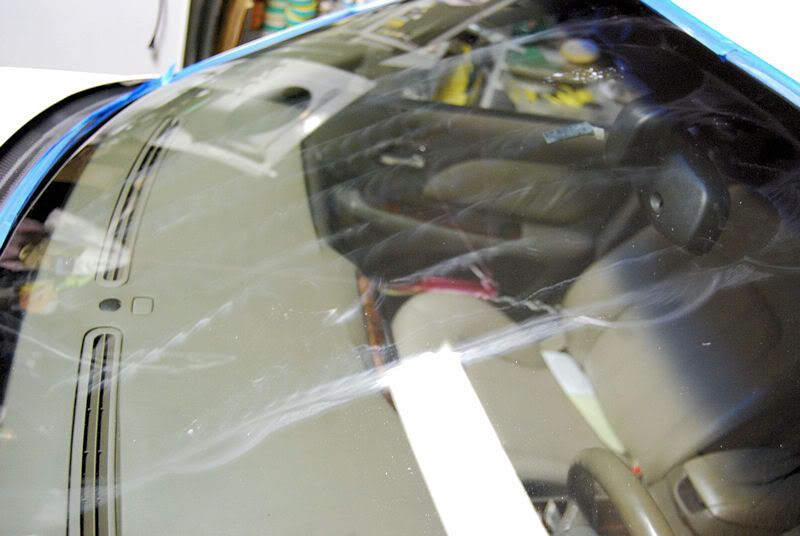
8) Once all the defects have been removed, mist the area lightly and polish with no pressure to fully break down the abrasives.

Remove the exhausted residue from the section before moving on to the next section. It may have caked on the surface. Window cleaner or IPA will quickly remove the residue. Be patience as it may take several minutes per section to fully remove the damage.
The windshield on my wife?s Hyundai Sonata was scratched in the wiper track area so bad that I could feel texture change with my fingernail.
Even in incandescent lighting scratches and haze are clearly visible.
Under 500w halogen lighting the damage to the windshield is even more visible (my wife claims to be able to see through this with no problem!).
I remembered seeing on Lake Country?s website that they offered a glass polishing kit and found one for sale at properautocare.com. When the box arrived I opened it and read through the directions, which I didn?t find easy to understand. A quick call to Lake Country quickly cleared up any questions (as typical their customer service is outstanding!) I had and provided very clear directions on how to use the product.
Given that I did not find the instructions helpful, I have merged them with my conversation and experience to provide a review and hopefully instructions so that anybody with basic rotary experience can replicate my excellent experience with this kit.
Manufacturer?s Claims (from Lake Country?s website)
GPS PRO
Glass Polishing System
?Polish and restore automotive glass and other glass surfaces
?Machine powered system restores clarity by removing wiper tracks, light scratches
and other minor defects
?For use on: Windshields and Automotive Glass; most other glass surfaces
?For use with rotary buffers or D.A. machines
?Contains materials to polish and seal approximately 7,200 square inches
NOTE: The kit from Lake Country contains an adapter for use on a Porter Cable. CMA offers two separate kits (on for DA?s or one for Rotaries). Given that glass is often much harder then paint, I elected to select a rotary kit.
Contained in the kit- 4 oz of glass polish (cernium oxide)
- Rain x
- 2 felt cutting disks (used for removing deeper damage and heavy scratches
- 3.5 inch backing plate
- terry cloth applicator
- PURCHASED SEPERATELY: 2 yellow foam pads (used for removing light marring, calcium deposits, and polishing the glass to high gloss, these pads are significantly different then the yellow foam used on paint)
Additional products needed
- Polishing machine (either a rotary or orbital PC style)
- Isopropyl Alcohol
- Water
- Assorted microfiber towels
To begin?.
Similar to removing swirl marks and damage from the paint, removing scratches and wiper damage from the glass requires ?re-leveling? the surface.
1) Thoroughly clean the glass surface using alcohol (or window cleaner) and remove all dirt, bug splatter, film, and chemicals. Contaminated glass may benefit from a couple minutes with a clay bar. We do not want a particulate remaining on the paint as it can become trapped between the pad and glass and cause more scratching.
2) Tape plastic trim and rubber seals around the perimeter of the glass.
3) Apply supplied backing plate to the rotary (or Porter Cable).
The defects on my wife?s glass could be felt my finger nail, they where deep and would require heavy cutting. I elected to start with the more aggressive, thin felt pad. Hook and loop backing means you simply press it against the backing plate (felt side up) to attach it to the machine.
4) Lightly mist the area to be polished with water (one light spray) and draw two thin beads of product on the glass (using the supplied glass polish).
5) Spread the polish over the working section.
Now we are ready to begin polishing the glass.
To polish the glass?
NOTES: Modern automotive windshields contain a thin plastic sheet between two layers of glass (interior and exterior). The polishing process itself will transfer heat to the glass. If the windshield becomes to hot the plastic sheeting can warp leading to distortion. Removing defects from glass requires a lot of pressure which can build heat in a hurry. Stop to check the surface temperature of the paint occasionally by placing your hand on the surface. If it is hot to the touch, mist the area with water to cool it, before continuing.
6) Work the polish with slow arm speed and significant pressure (roughly 20lbs of down force). On a rotary polisher you will set the RPM between 1000-1500 rpm, on a Porter Cable aim for about 4000 OPM. Work a small section, roughly 1.5? x 1.5?. Keep constant pressure and polish over the section until it begins to flash off.
7) inspect the surface, if more polishing is required (scratching still visible), mist the area with water and continue polishing.
NOTE: Water is used for several reasons when polishing glass. One is to remove the heat buildup and the second is to work the polish longer. Cerium Oxide is a very hard abrasive and will often can take several minutes to break down. Too much water on the surface while polishing can greatly increase the time needed to remove the defects as well as cause splatter. Try to keep the consistency as thick as possible for maximum action, only adding water when necessary.
8) Once all the defects have been removed, mist the area lightly and polish with no pressure to fully break down the abrasives.
Remove the exhausted residue from the section before moving on to the next section. It may have caked on the surface. Window cleaner or IPA will quickly remove the residue. Be patience as it may take several minutes per section to fully remove the damage.

")
")