Greg Gellas
I'm Greg :)
After, Finishing up kykiee BRZ Saturday I then moved on to a FRS on Sunday. I didn't have the time to do a full write up on Ky's car 
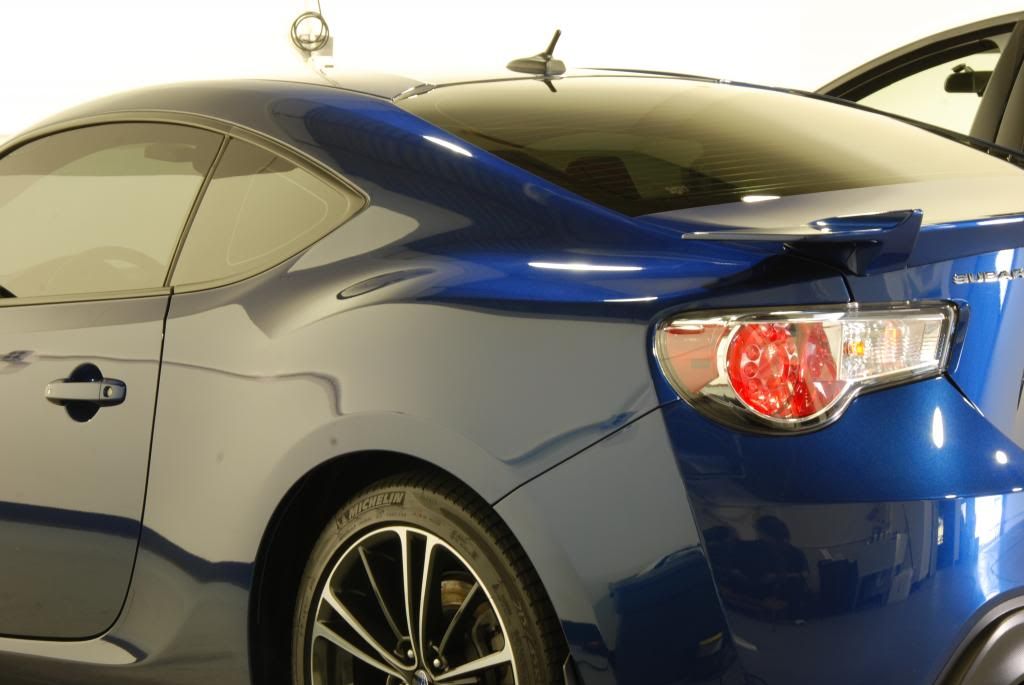
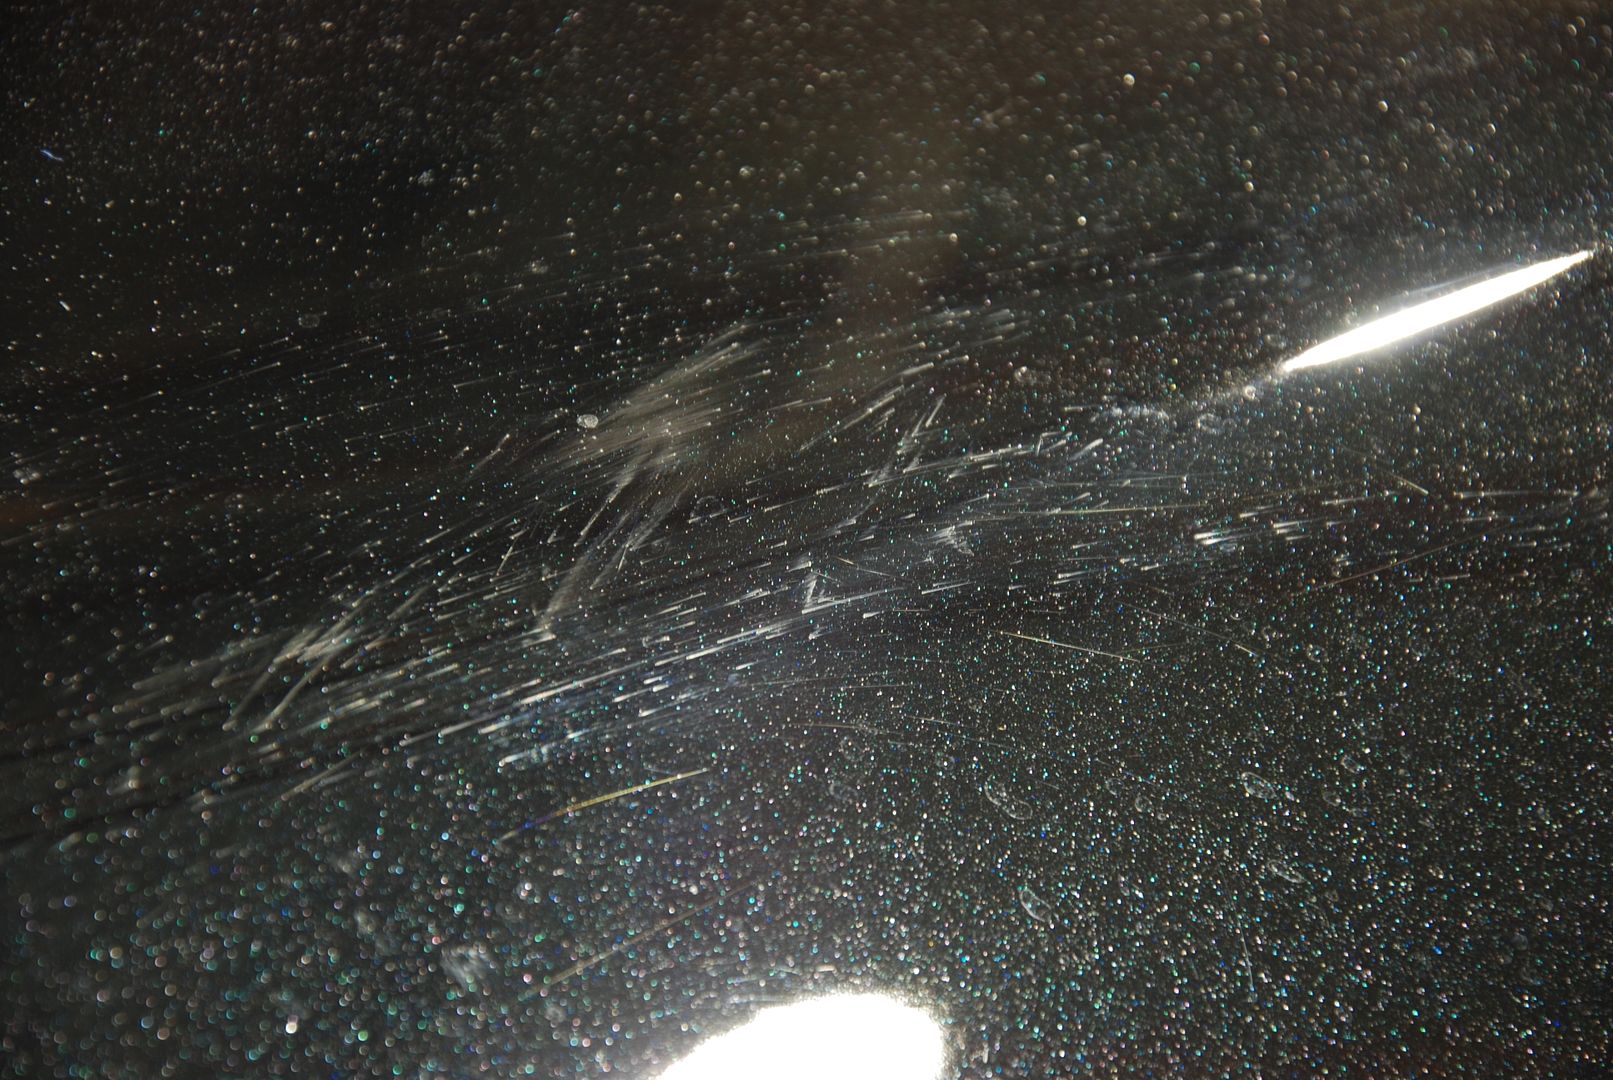
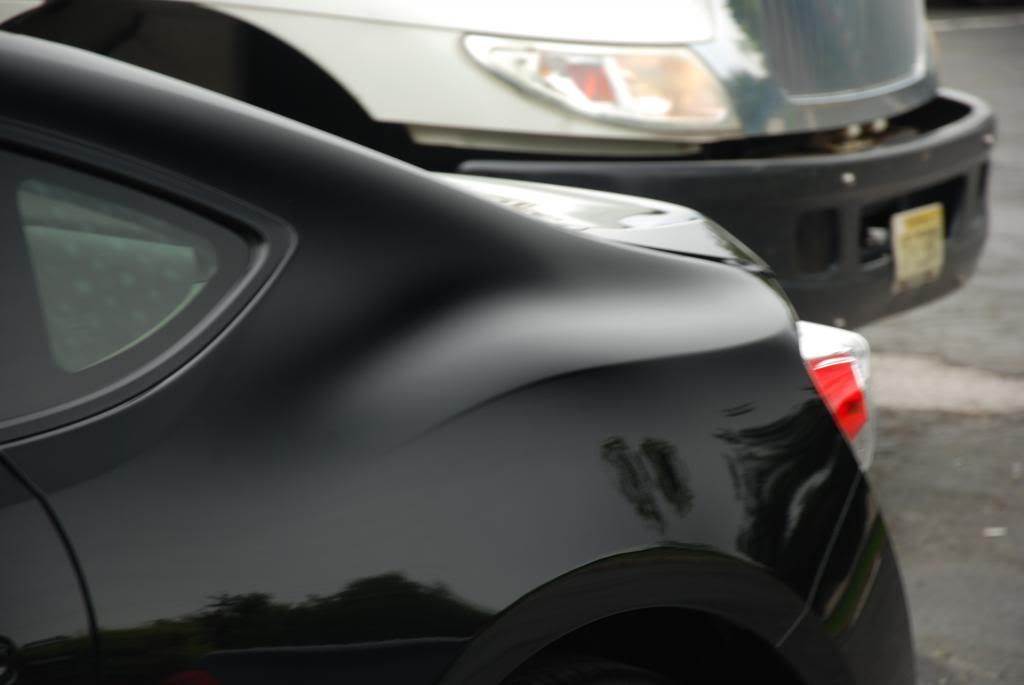
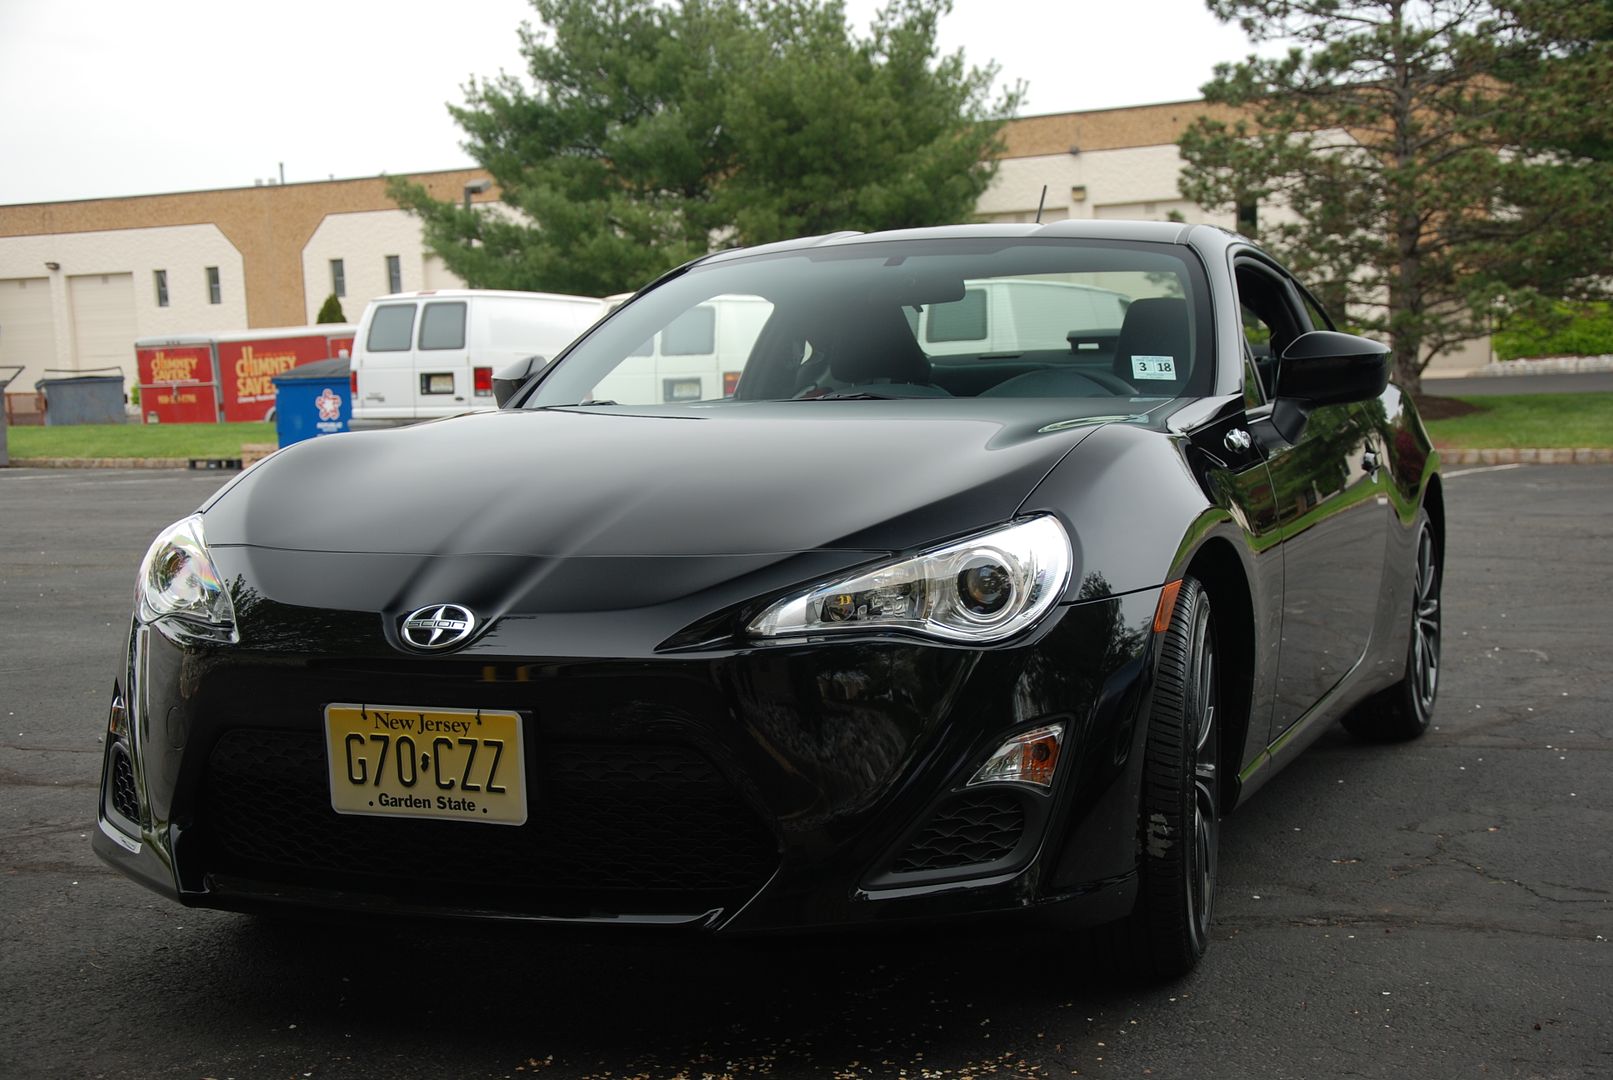
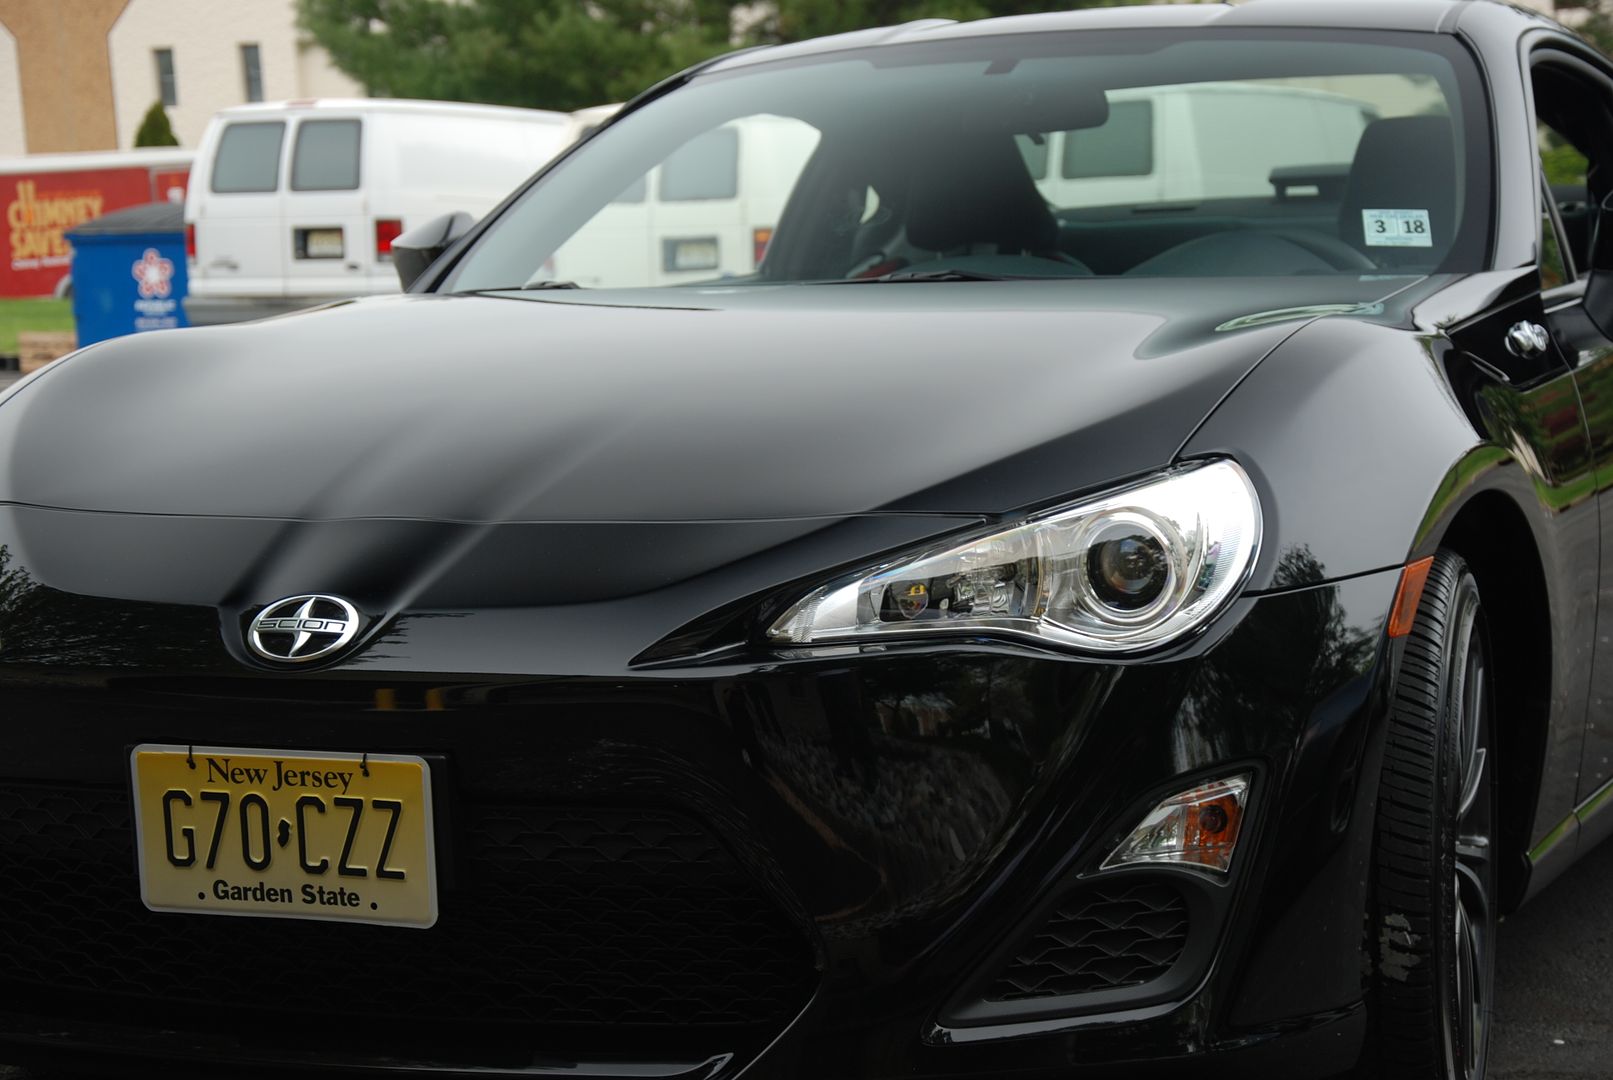
For Sunday I was taking care of a Raven Black FRS. My inspection showed light and deep swirls and scratches, along with contamination over the entire surface.
I began with the wheels and tires. The wheels where cleaned with Sonax Full Effect, wheel woolies, and a boars hair brush. The tires were scrubbed with Tuffshine tire cleaner and a Tuff shine tire brush. As you can see, the tires needed a good cleaning.

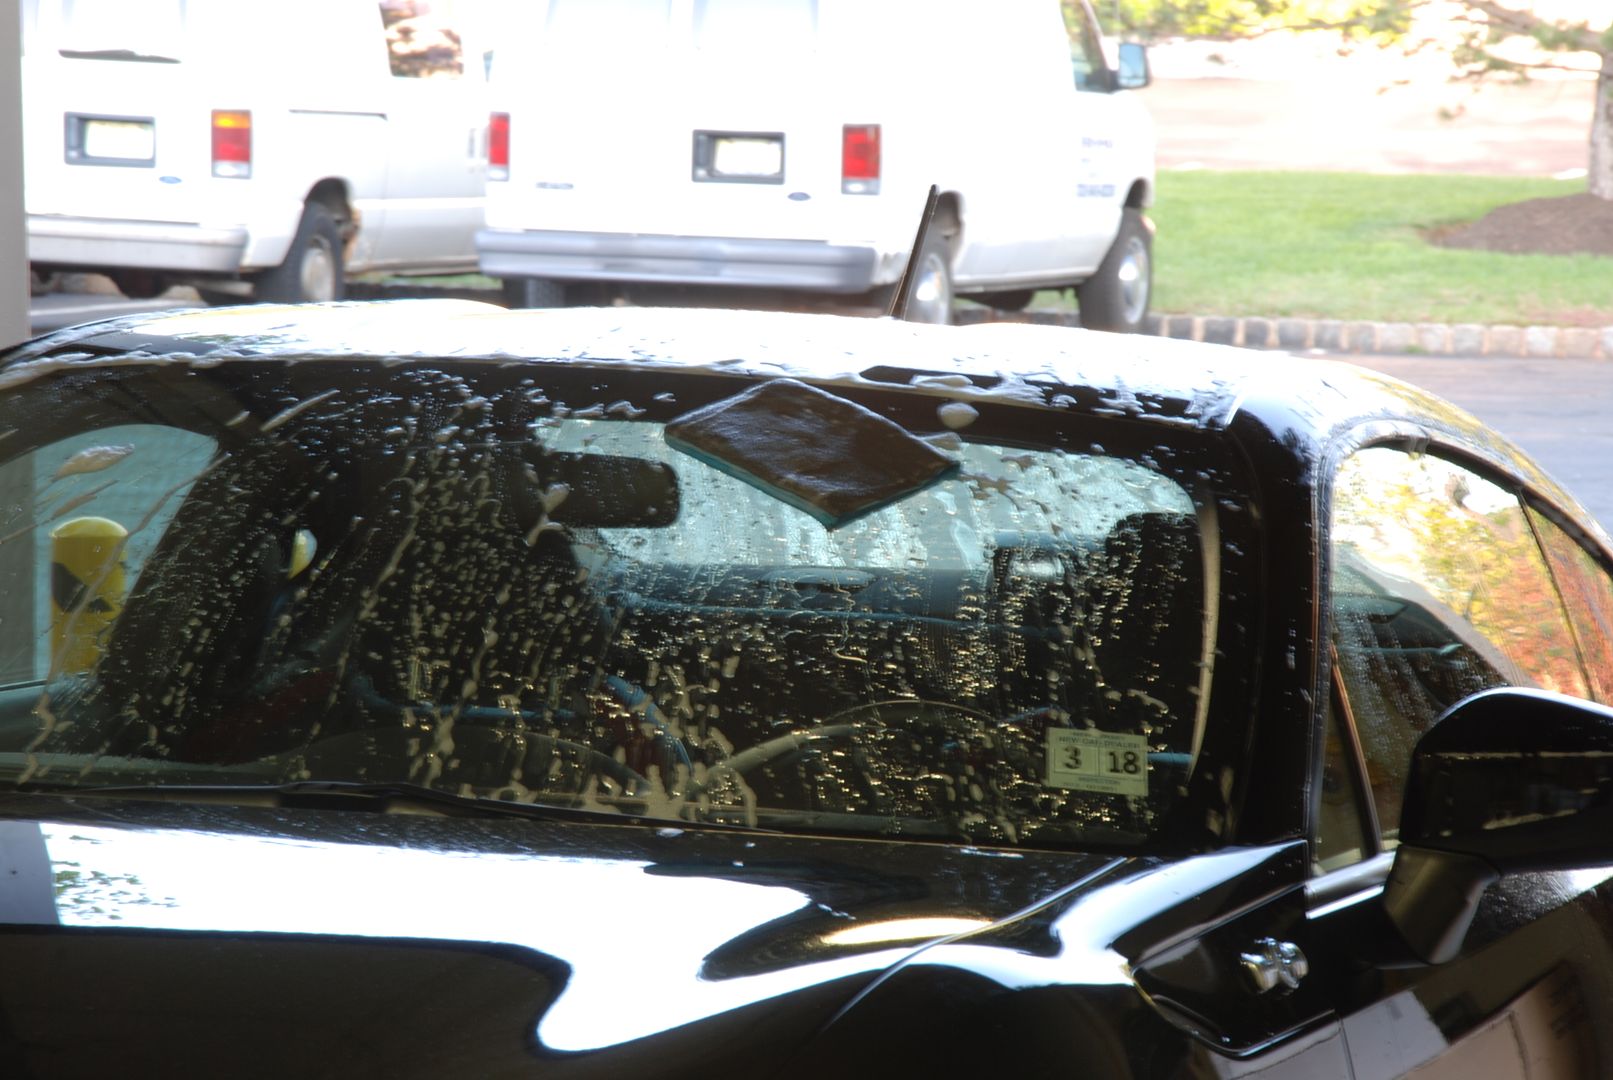
The entire car was splattered, in what I could only describe as a tar/sap like consistency contamination. It would smudge, but the only way to totally remove it was with a Nanoskin Autoscrub Wash Mitt.
I began with a foam wash to add lubrication.
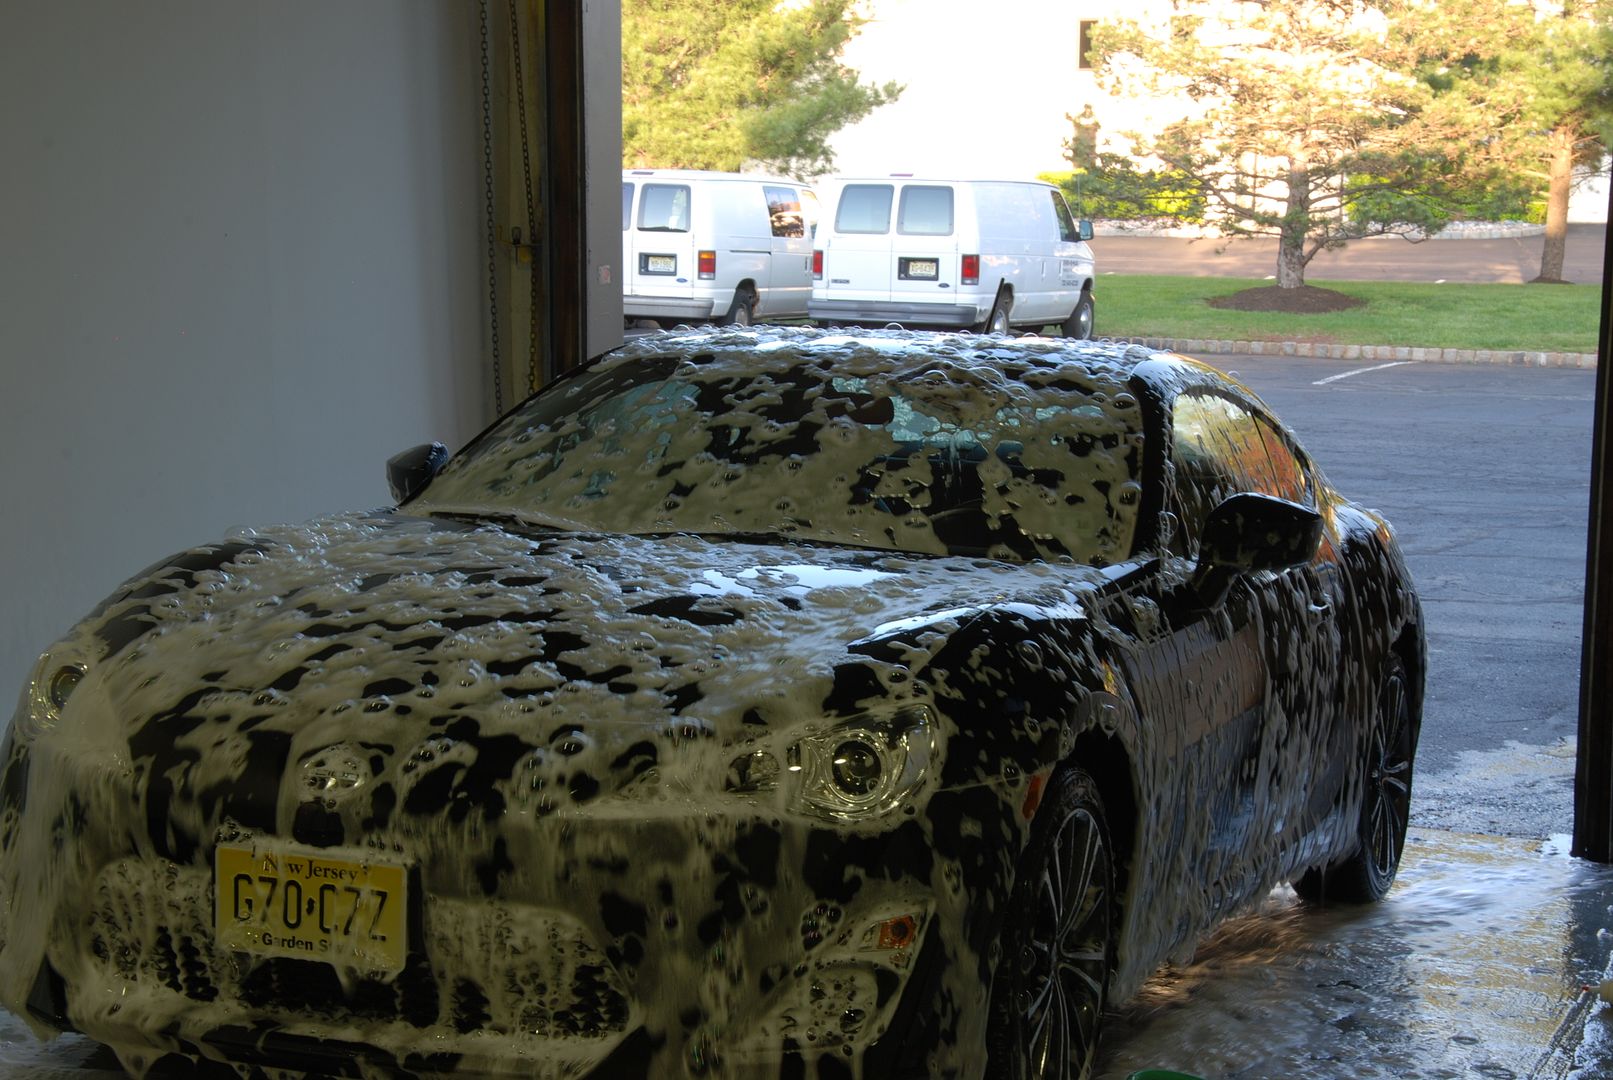
I then used the foam as a lubricant for the Nanoskin Wash Mitt. It removed all of the contamination from the surface. Slow, light movements are key, or else it can Marr the paint. This alone, full removal took what seemed like FOREVER.
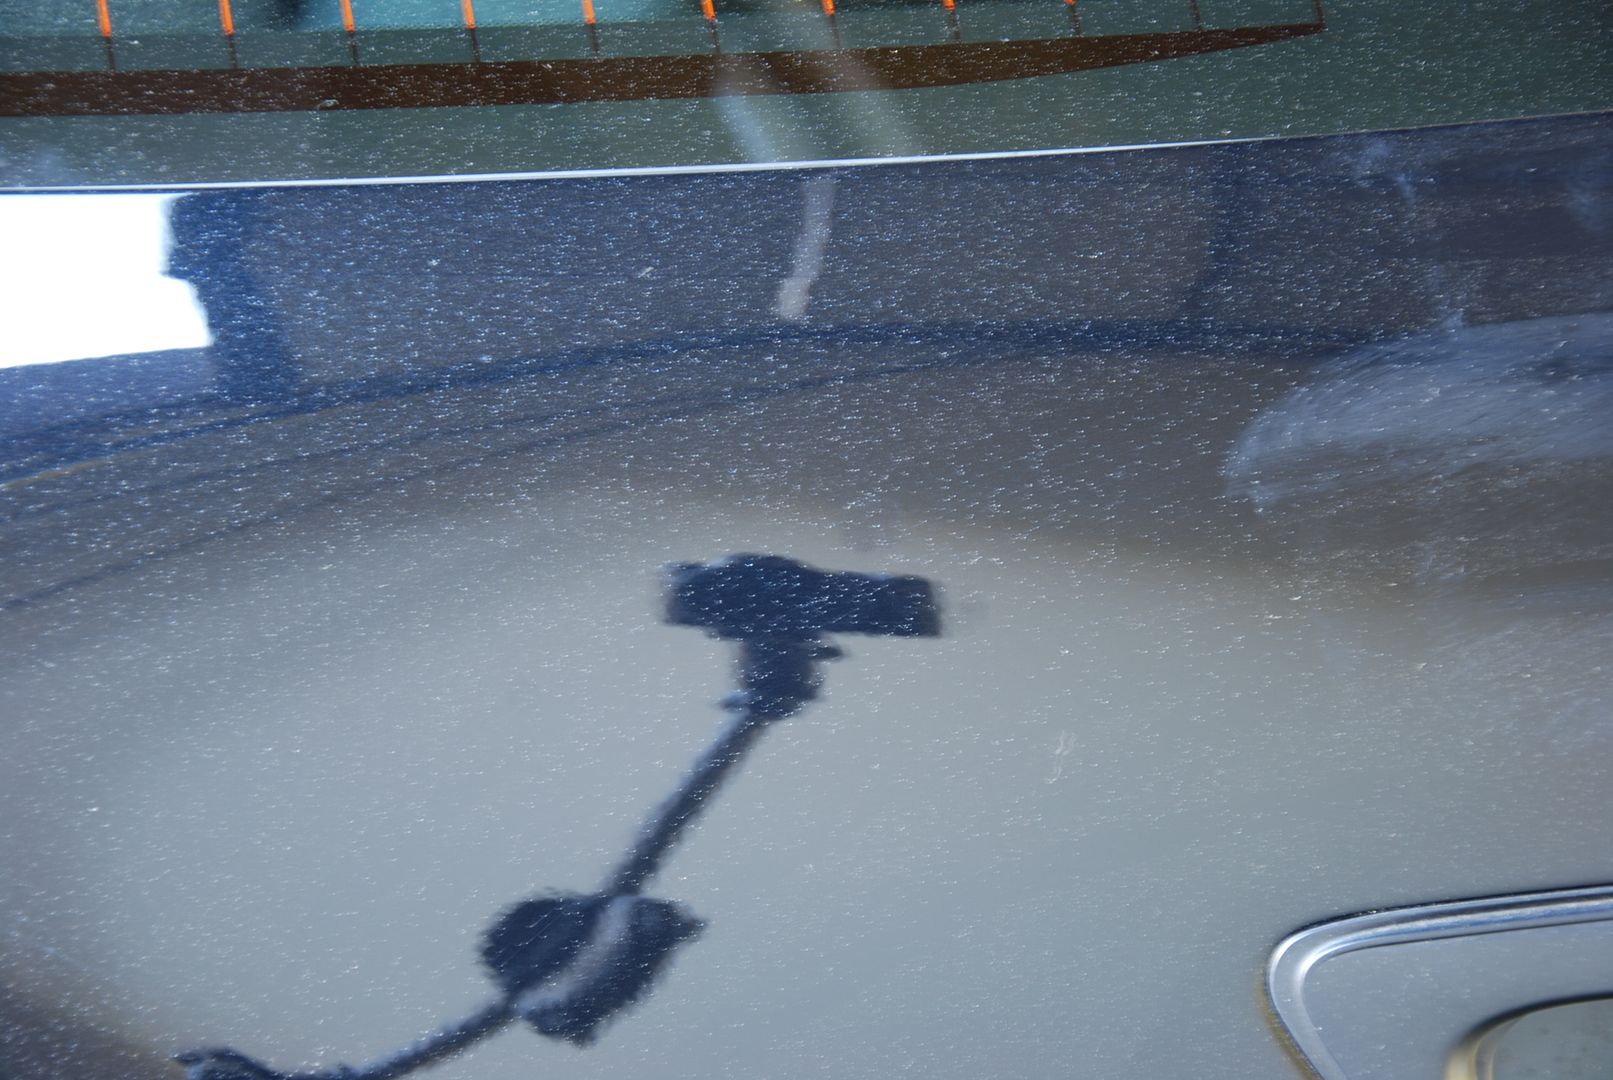
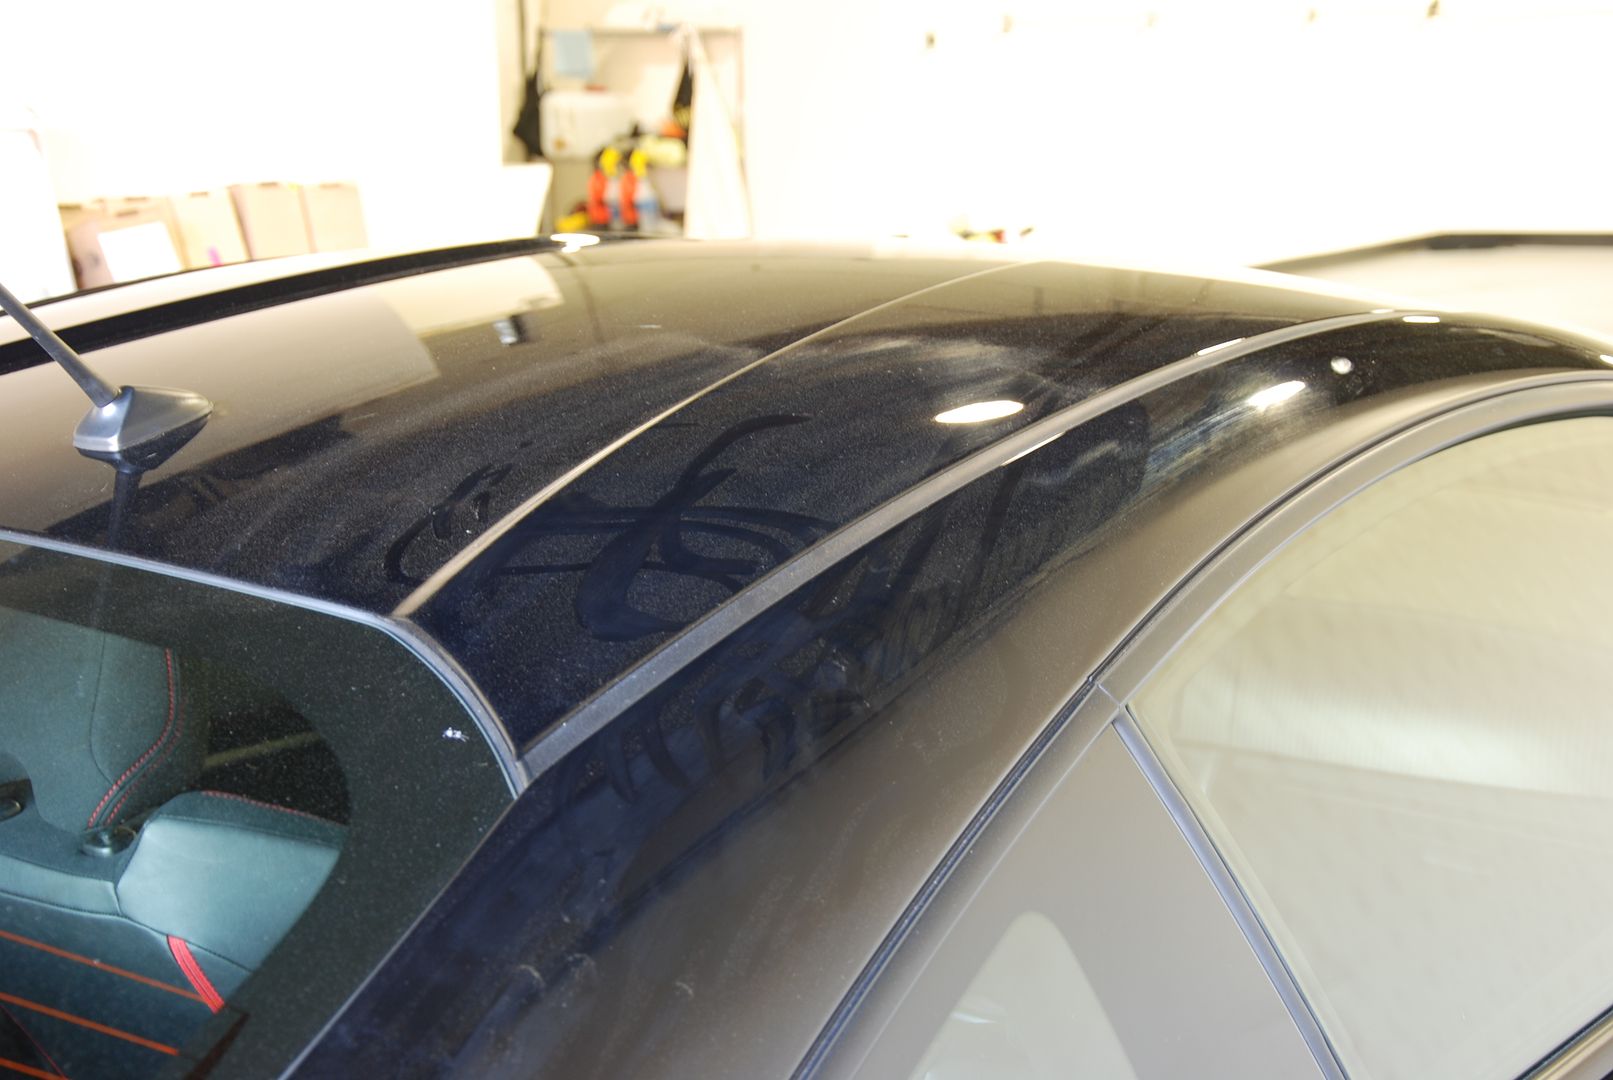
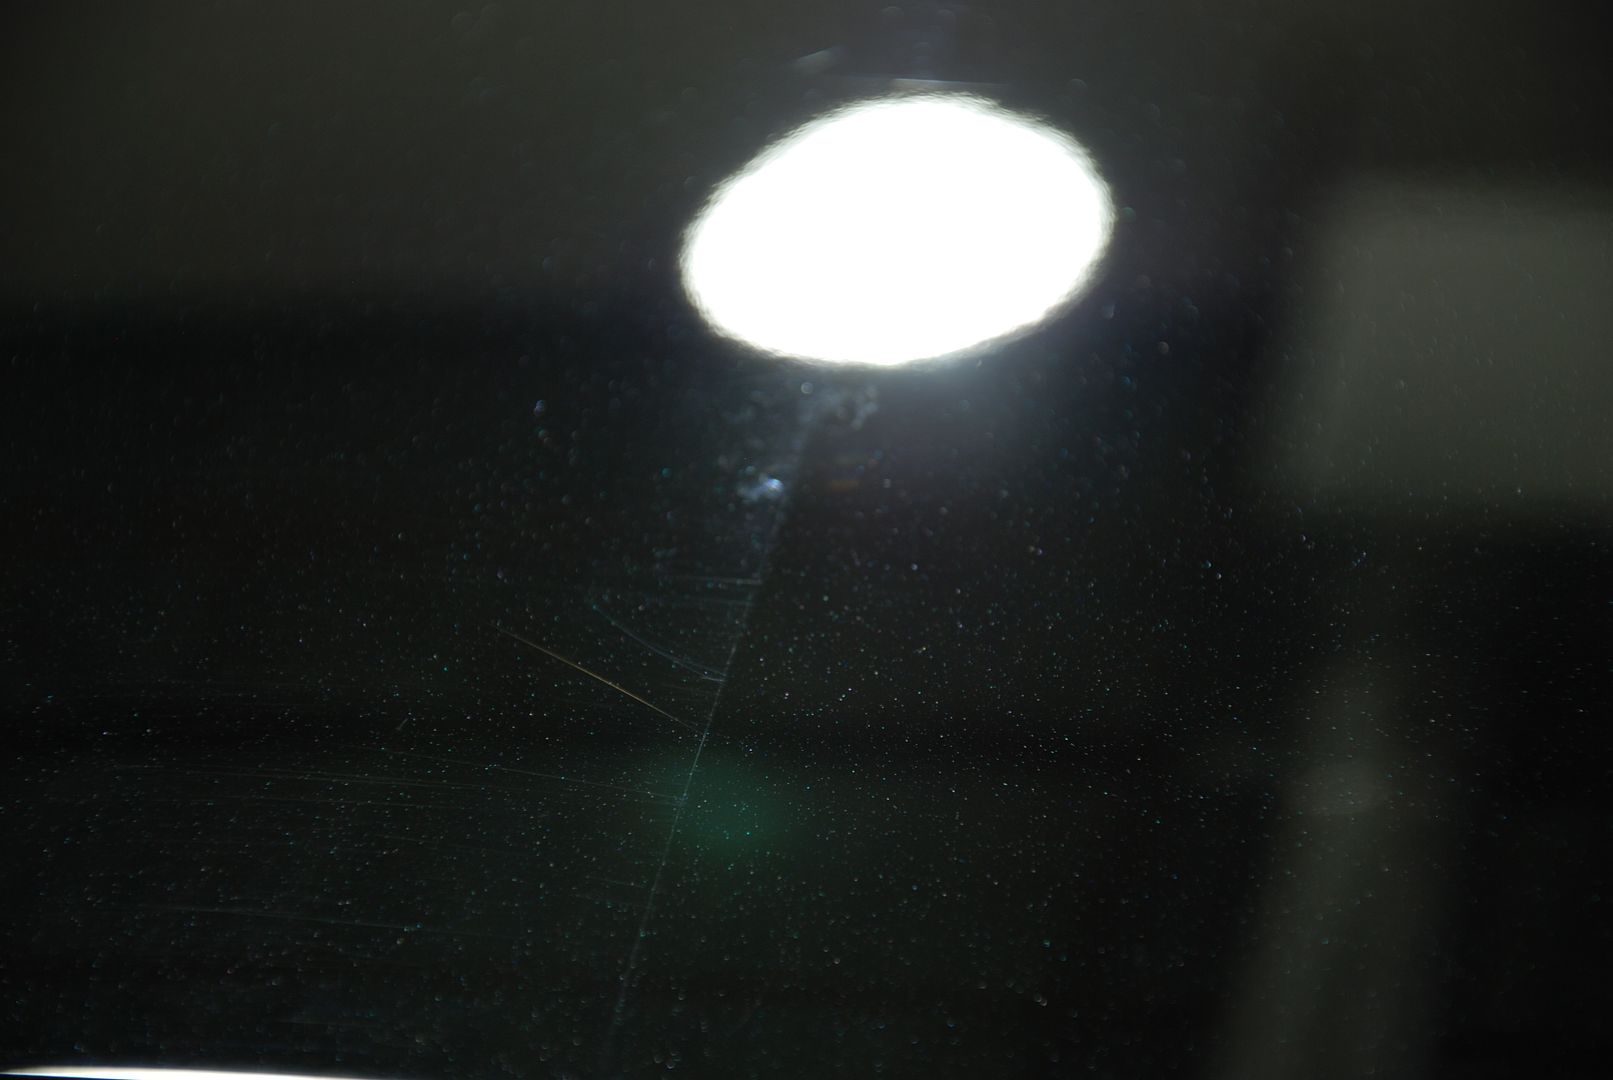
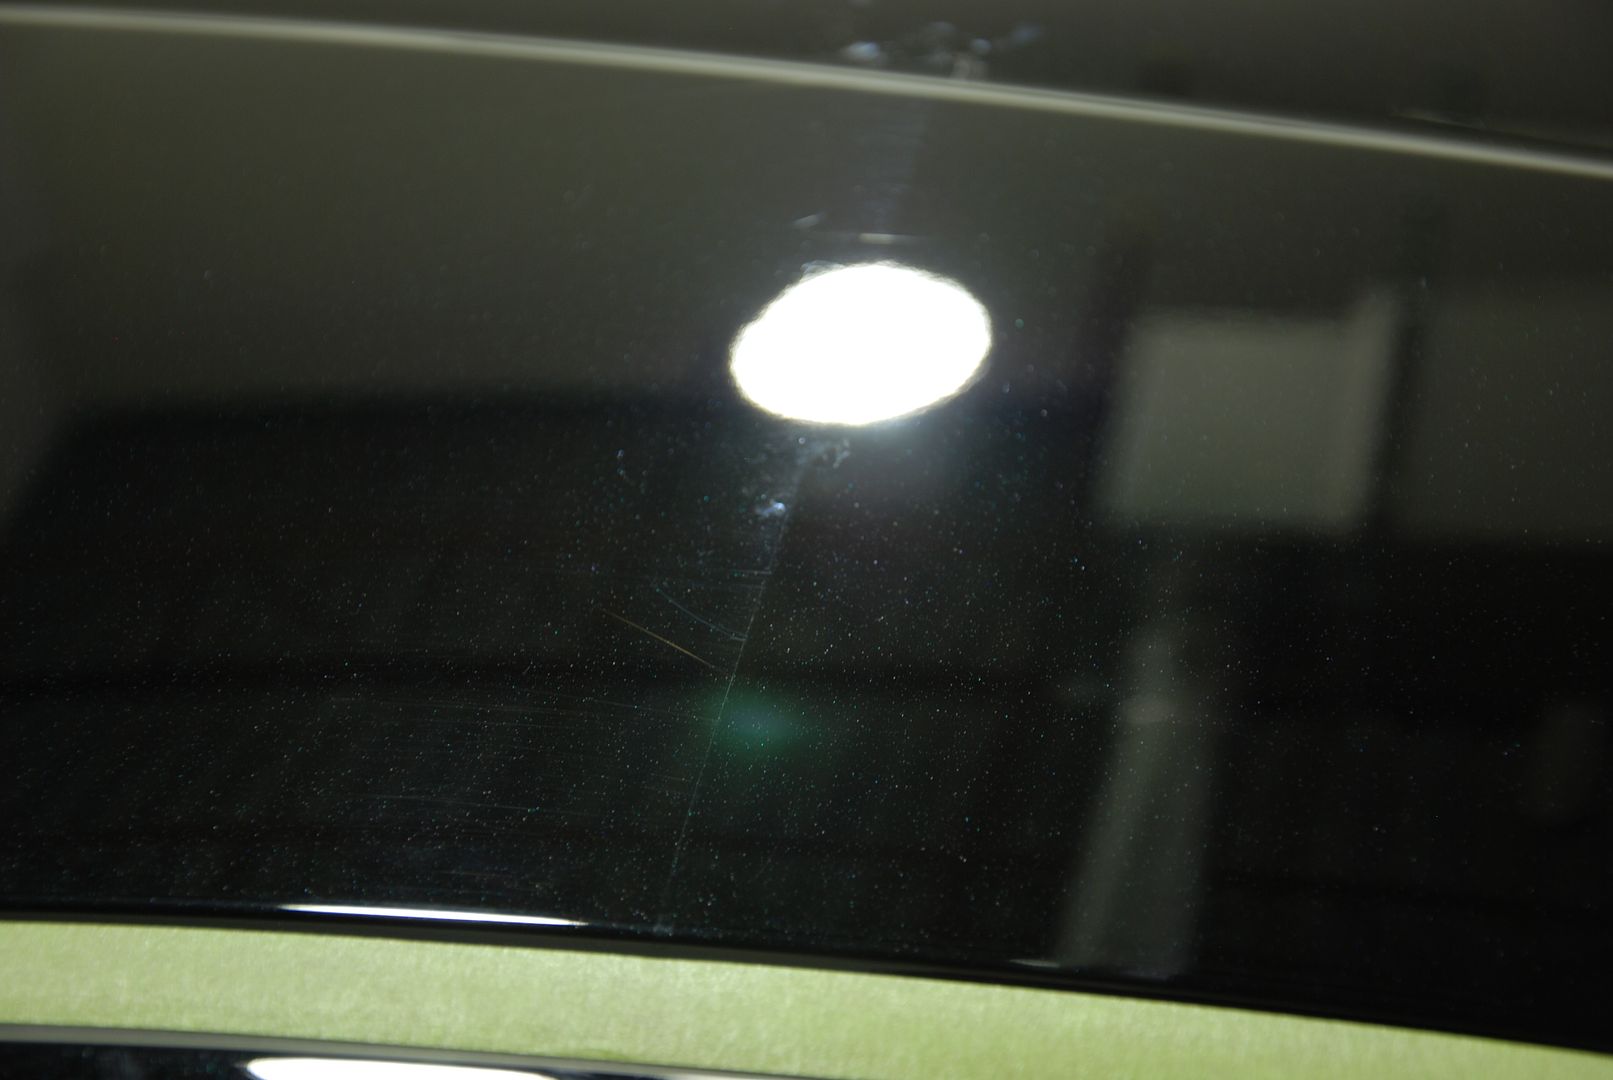
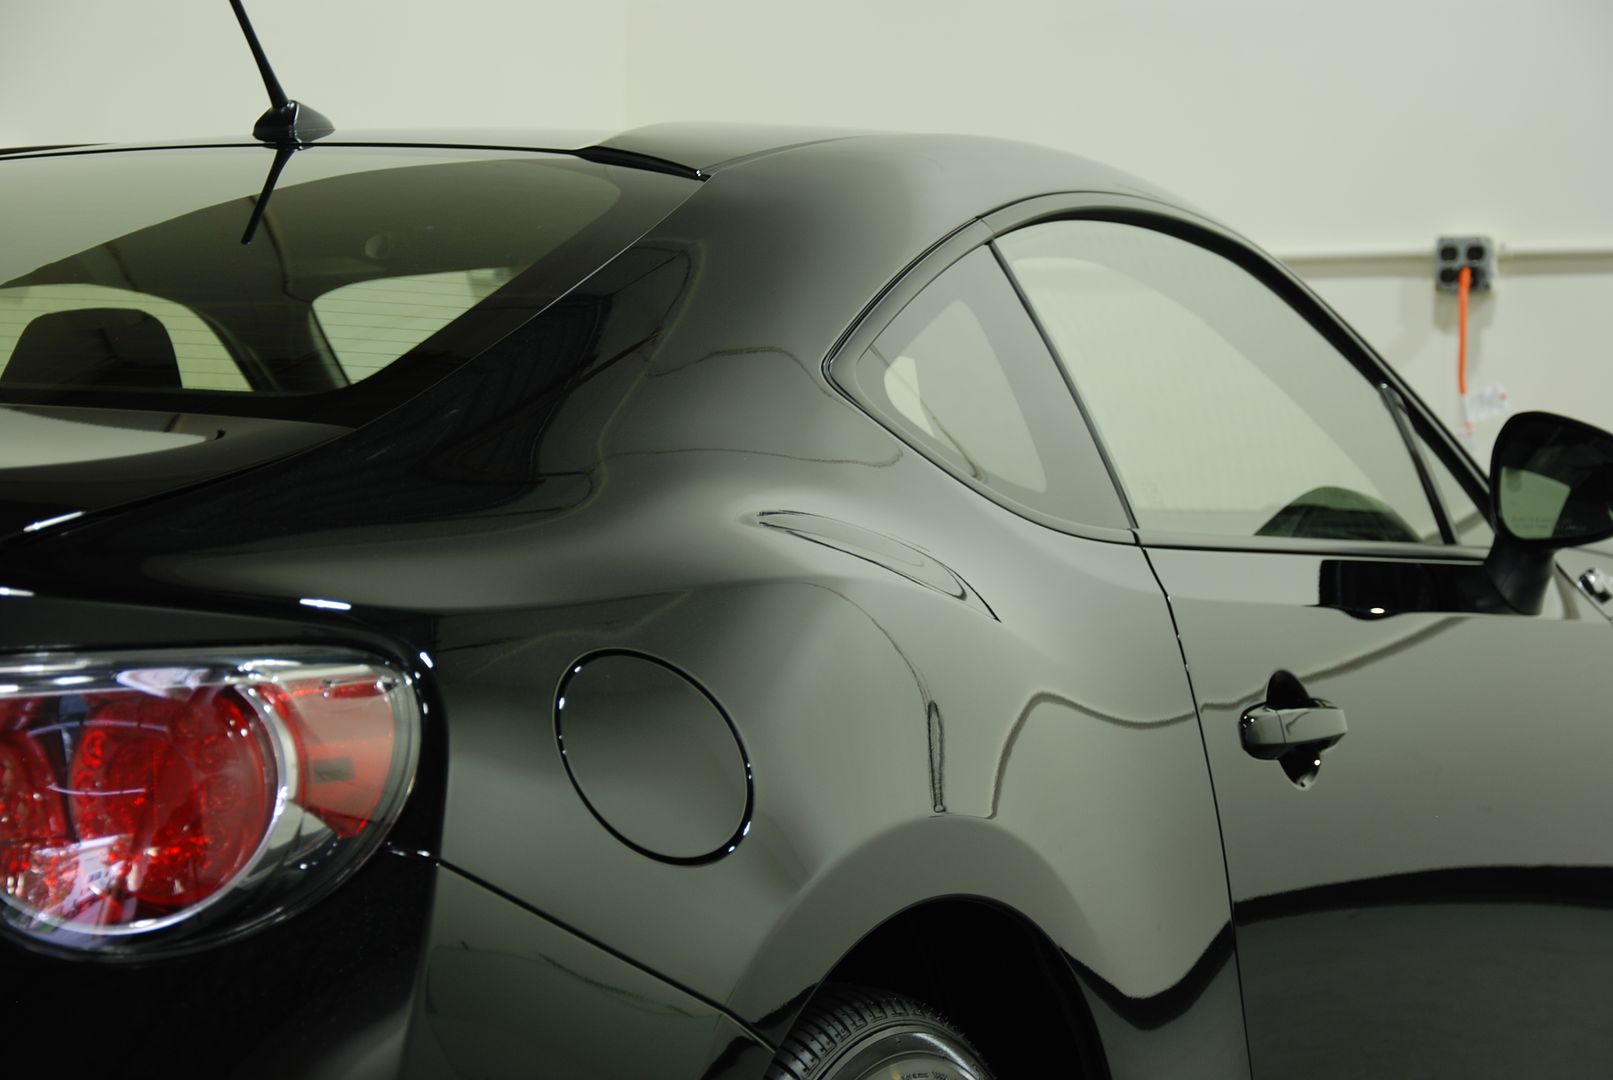
I dried the entire car using a waffle weave drying towel and my Chemical Guys Jet Speed blower for the cracks. I began correction using Sonax Perfect Finish and a Rupes Yellow pad on my Rupes LHR15. I chose the 15 over the 21 due to the curves the FRS has. I was only doing a 1 step correction but wanted to get as much as I can, as always. I decided to do a 50/50 showing exactly how much correction I was able to get with a 1 step. For a 1 step polishing I was able to get 90% of the defects out. Some of the deeper ones were still there, but you really had to look for them.
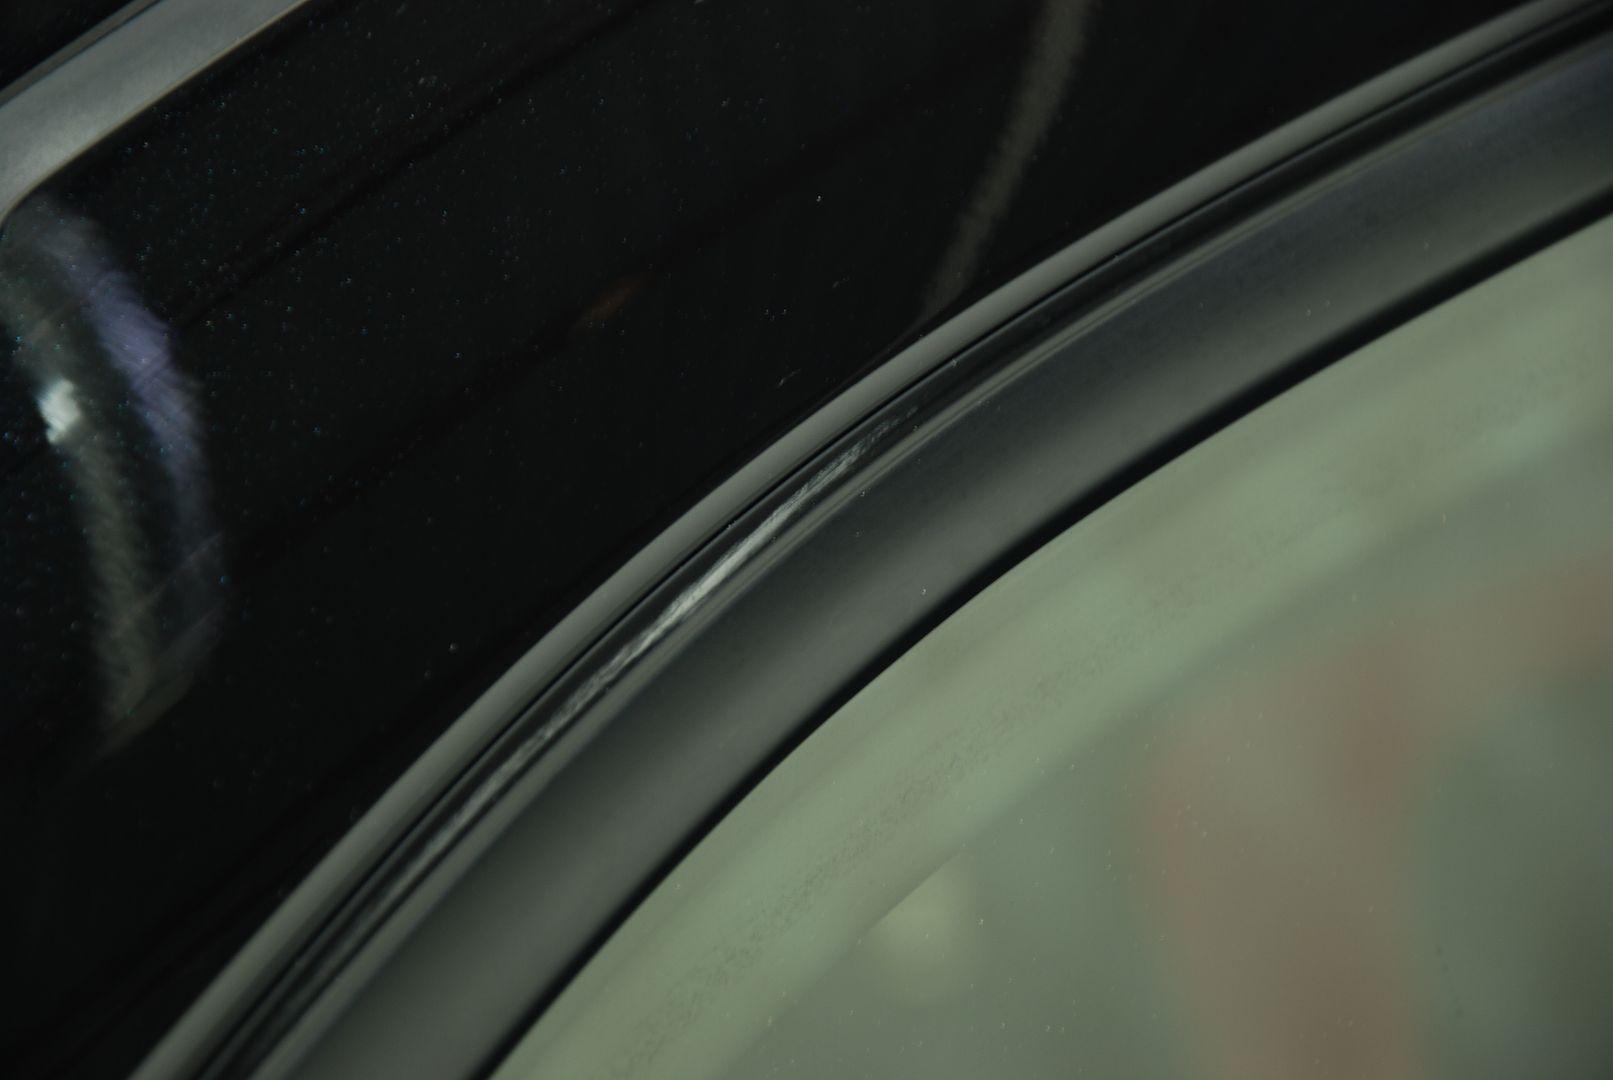
Following correction, I washed the entire car again to remove any dust and polishing oils. This was followed up with a complete IPA wipe down. I found some wax that needed to be removed. I then proceeded to coat everything with Opti-Coat Pro. This coated all of the paint, trim, and rear valence. I even went as far as adding Opti-Glass to the windshield.
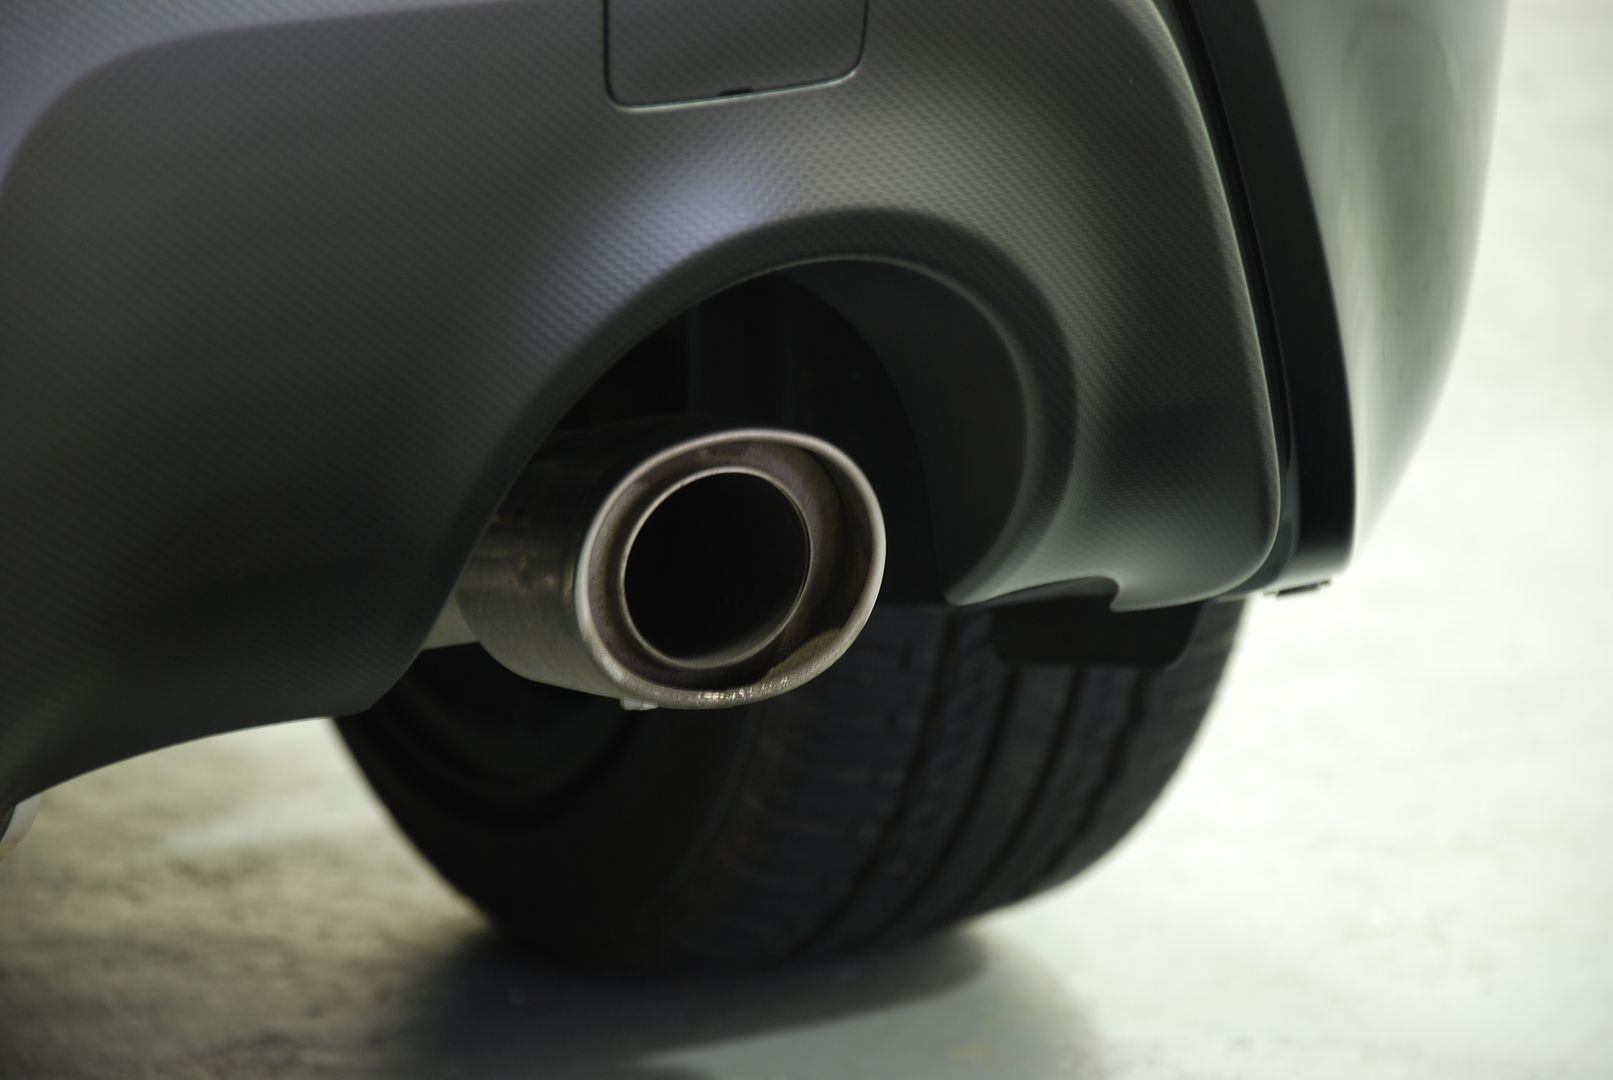
The Exhaust tips got cleaned up with Optimum's Metal Polish, and a MF towel.
For the tight areas a foam detailing stick was used. I dressed the tires with a wonderful tire gel made by Garry Dean.
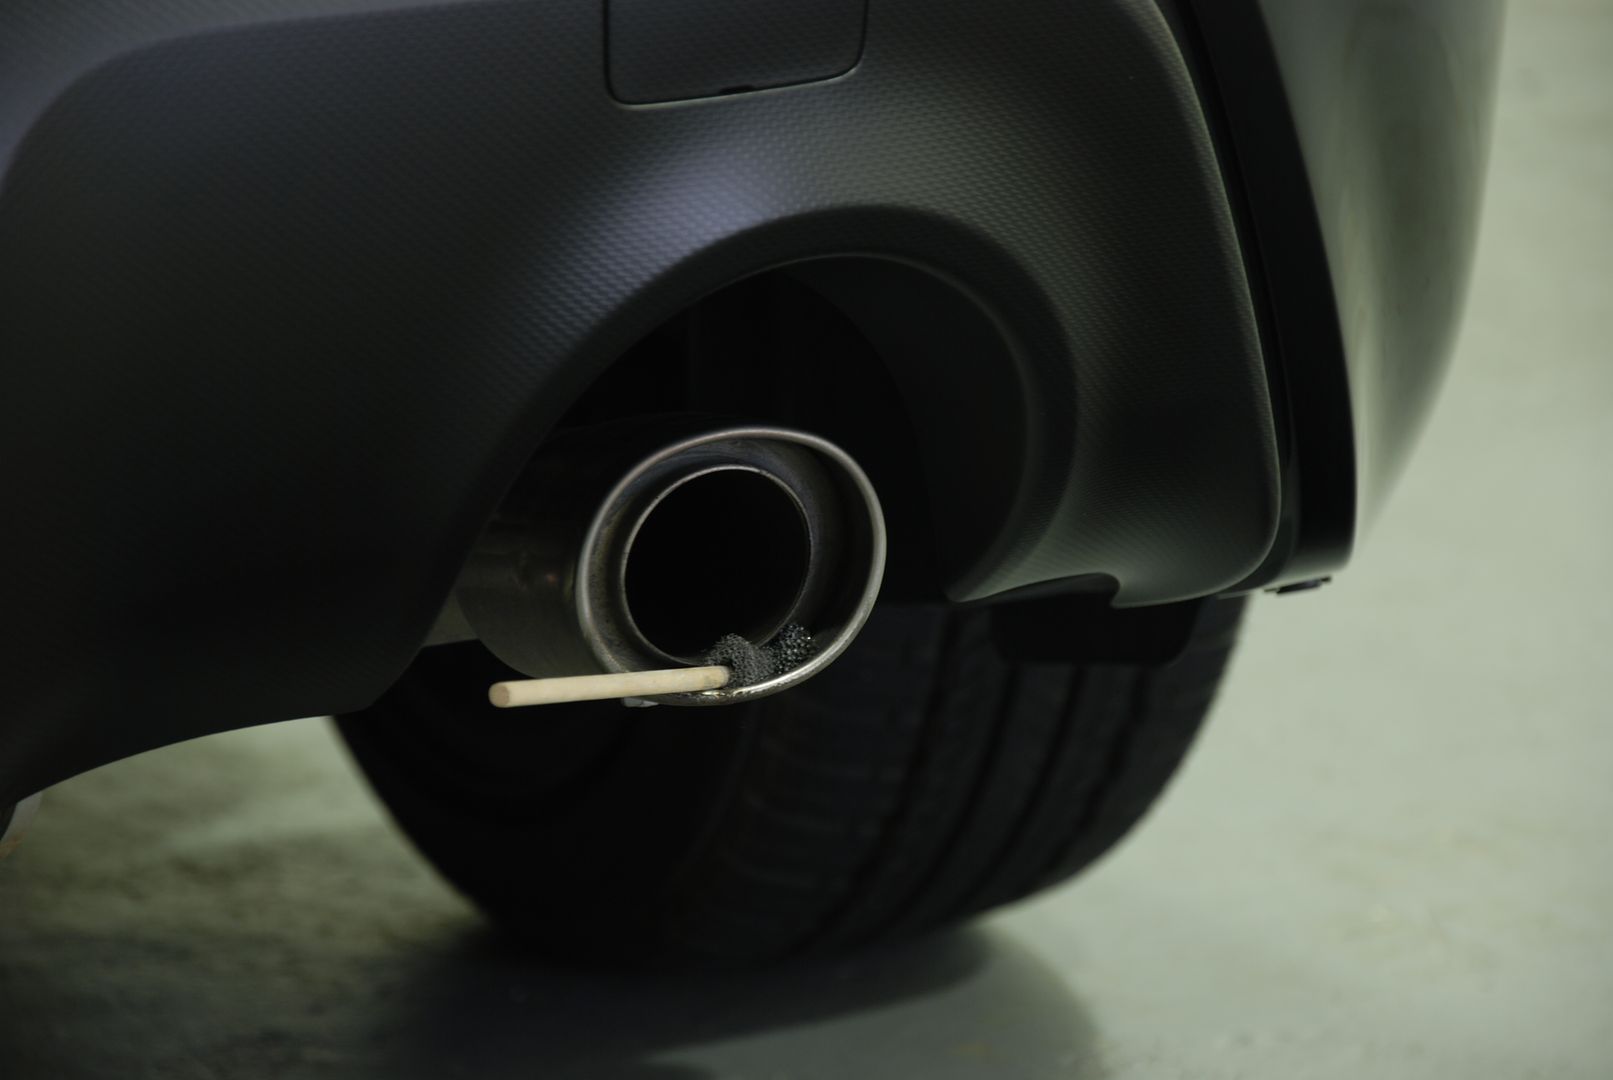
Please excuse the lack of afters on the exhaust tip, none came out. You can see the tips in some of the final pics.
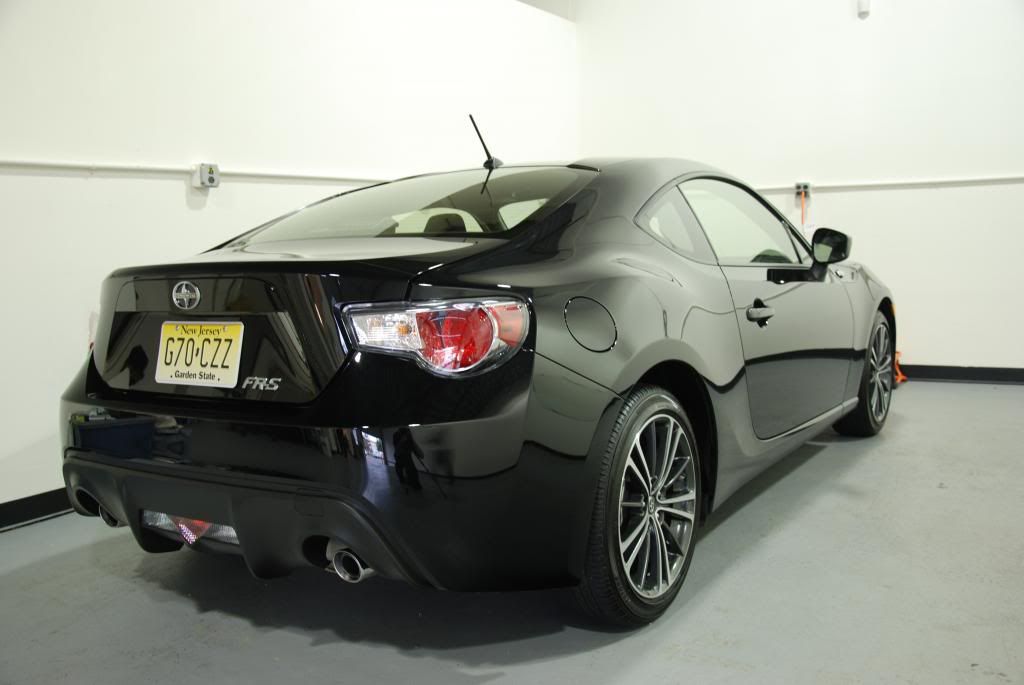
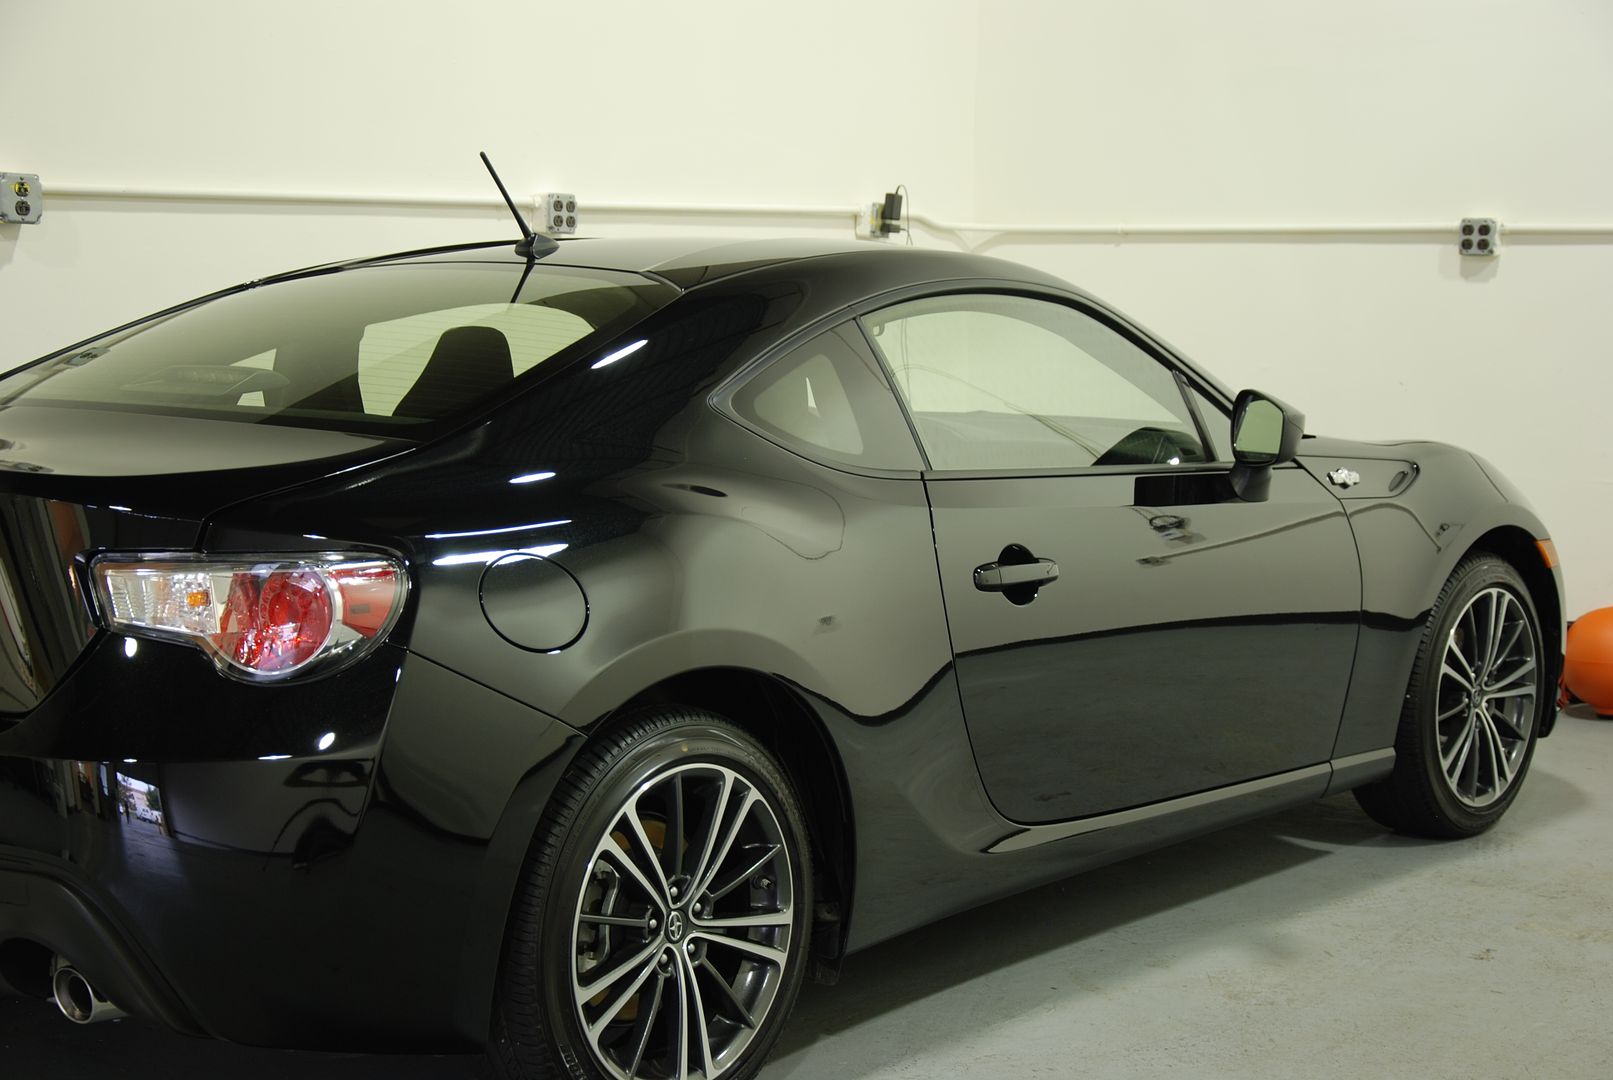
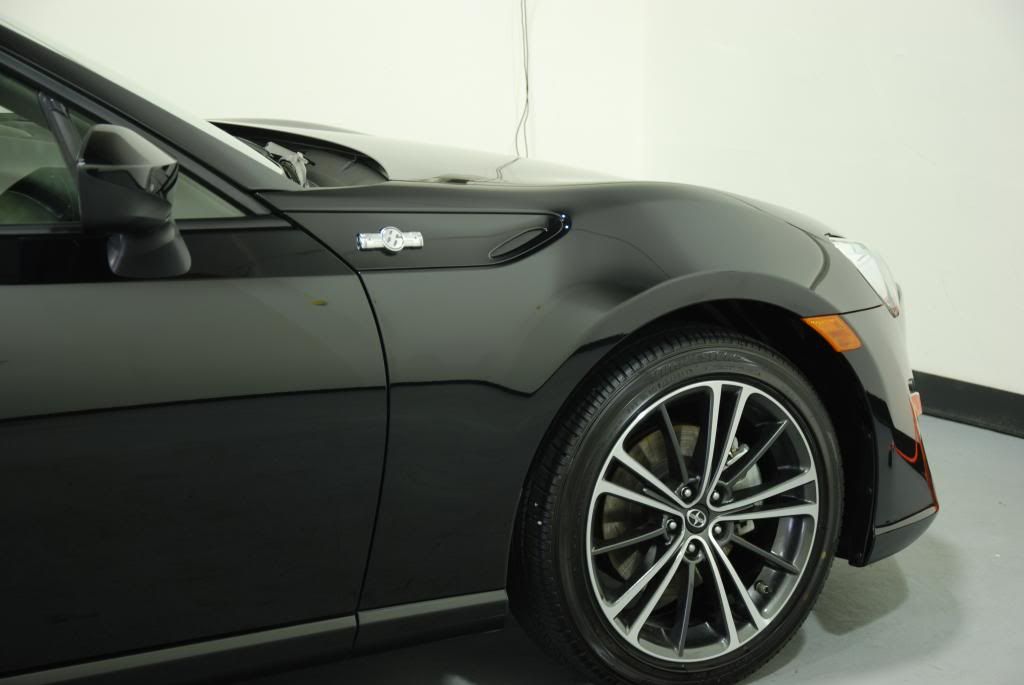
As always thanks for looking! Greg Gellas@SignatureDetailing
For Sunday I was taking care of a Raven Black FRS. My inspection showed light and deep swirls and scratches, along with contamination over the entire surface.
I began with the wheels and tires. The wheels where cleaned with Sonax Full Effect, wheel woolies, and a boars hair brush. The tires were scrubbed with Tuffshine tire cleaner and a Tuff shine tire brush. As you can see, the tires needed a good cleaning.
The entire car was splattered, in what I could only describe as a tar/sap like consistency contamination. It would smudge, but the only way to totally remove it was with a Nanoskin Autoscrub Wash Mitt.
I began with a foam wash to add lubrication.
I then used the foam as a lubricant for the Nanoskin Wash Mitt. It removed all of the contamination from the surface. Slow, light movements are key, or else it can Marr the paint. This alone, full removal took what seemed like FOREVER.
I dried the entire car using a waffle weave drying towel and my Chemical Guys Jet Speed blower for the cracks. I began correction using Sonax Perfect Finish and a Rupes Yellow pad on my Rupes LHR15. I chose the 15 over the 21 due to the curves the FRS has. I was only doing a 1 step correction but wanted to get as much as I can, as always. I decided to do a 50/50 showing exactly how much correction I was able to get with a 1 step. For a 1 step polishing I was able to get 90% of the defects out. Some of the deeper ones were still there, but you really had to look for them.
Following correction, I washed the entire car again to remove any dust and polishing oils. This was followed up with a complete IPA wipe down. I found some wax that needed to be removed. I then proceeded to coat everything with Opti-Coat Pro. This coated all of the paint, trim, and rear valence. I even went as far as adding Opti-Glass to the windshield.
The Exhaust tips got cleaned up with Optimum's Metal Polish, and a MF towel.
For the tight areas a foam detailing stick was used. I dressed the tires with a wonderful tire gel made by Garry Dean.
Please excuse the lack of afters on the exhaust tip, none came out. You can see the tips in some of the final pics.
As always thanks for looking! Greg Gellas@SignatureDetailing