THE NAME....people....said it ALL...
About 3 weeks ago while working on ANOTHER black 2013 ZL1 - I checked my phone and saw i had 2 calls from the same #. I though dang, someone wants to talk to me. Then I got another call at that same instant....I picked up and after introducing himself...and telling me he has a Black ZL1 Camaro ...he went on to say "I was told if anyone can save my car it's you guys"
...Yeah no pressure!
The owner went on to tell me that with under 3k miles...that his whole front bumper and the pop outs of the rear quarter panels (the ribbed areas) were covered with 100's of chips. This didn't surprise me since this paint seemed EXTRA soft (we found that out from the one we were currently working on at the time!) So, under warranty he had the front bumper and the sides (Front QP, doors, Rear QP...basically everything but the hood/roof/trunk) repainted.
Yes....repainted
Repainted cars are notorious for a few things....especially black ones...
Yeah...holograms...buffing trails....wool pad marks
These guys were thorough. Not only did they buff the repainted areas..they buffed the WHOLE DAMN CAR.
Ok, ok....thats not really true. See they did manage to actually MISS some areas completely and just leave the sanding marks there instead:
I mean really....whats a few sanding marks going to do...no big deal right?
You can only see it in the light...who cares about that!
The owner was probably just "one of those people"...you know...picky ones who want everything perfect. What nut would be worried about this on his car...i mean it's black after all and black just CANT be polished right?
They did a little art work....rotary buffer ghost flames:

By the way i lied.....they didnt just leave buffer marks...or sanding marks where they DIDNT buff...some spots well...they just didn't even sand.
"Didn't sand?" you might think...."Like what?"
Well...kinda like this drip right here:
I know i know...its just a little drip...hard to see. But you may notice a certain...reflection...or lack there of...around that drip. You know...a little peely peel if you will:
Ok maybe more than a little...maybe more like the whole area infront of the wheels on the bumper:
Do the wave!!!
*Sigh*...ok i'm having flash backs going through these pics...not good ones either. Anyway...back to my story. So...what the owner wanted to know was...could we save his car. Could we get it back to at least OEM condition. My reaction was...let us look at it first. We'll be straight with you..tell you what CAN be done...and what CANT be done. That's exactly what he wanted to hear...we spoke a bit more...he expressed in a pretty detailed fashion how displeased he was...then we hung up and i told him I'd be in touch.
But wait, remember those other 2 calls? Well...that was from a guy at the dealership...calling about the same car. This guy tried everything he could to get his guys to do the right thing with the paint job...he knew it wasn't right...he knew the owner wasn't going to be happy with it....but you can't do what you don't know...and these guys didn't know how to finish paint (or sand some of it either for that matter).
I spoke with him for a bit...we agreed to the same thing, Dani and I would go check it out, find out if it was doable or not...and then go from there.
After checking out the car...we called the owner...told him most of it we could fix, the exception being...some very small fish eyes we found here n' there. But the rest....we believed we could save...with the exception of ONE area....that damn front bumper I mentioned earlier. THAT...was our main question.
I told him when we first walked up that "We walked up to the bumper and put our light on it and we were like, is it even..." The owner ....in perfect harmony with me said "Even black!!!"
Yes, we weren't sure if it was even black lol. Why? Well cause it looked like this...
No this was not just a little road dirt...this was in the paint. We tried washing, clay barring and even compounding...it said nuh-uh. Not to mention the fact that it had the reflection of old asphalt. We hoped we could save it, but wouldn't know until we gave it a shot.
We arranged a drop off time and set aside from Friday afternoon to Monday afternoon for this car...it was going to be...a *****...period.
What to do in a situation like this? Well, you call the man himself, Mr Buff Daddy Buff Daddy - Kevin Brown. I spoke with kev a few times (once we finally quit playing phone tag!) He told me he'd send me all the discs i needed...gave me some advice on how best to use them and said anything i don't use just send back. His advice was greatly appreciated AND used...so just a quick shout out to him for this. Both before and during the detail..he was on standby for us if we had any questions/concerns. Which I did in a couple of circumstances...and he was there to help us out whenever needed.
The day before drop off...we received a package that was enough to "Totally sand down 2 full Corvettes!" as he put it lol. And it was!
But before we could get to that fun stuff...we had some clean up to do....there were also some water spots left all over...but not on the paint:
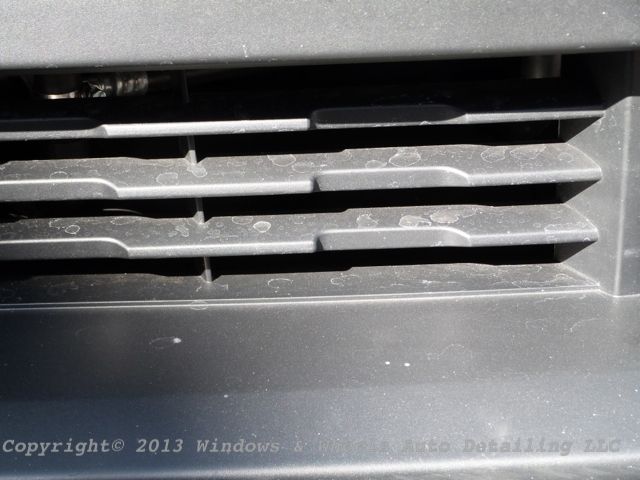
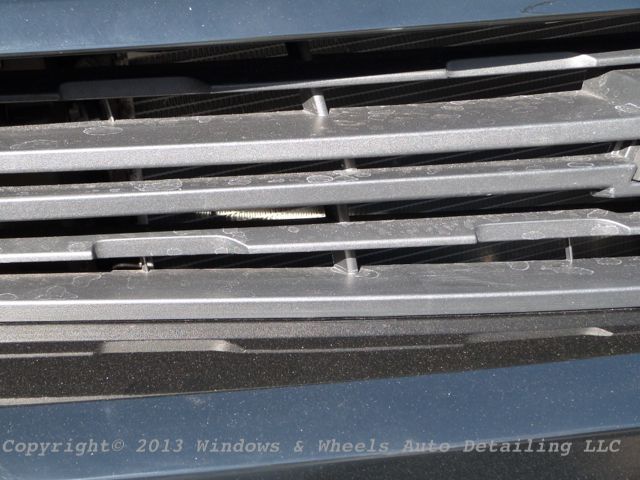
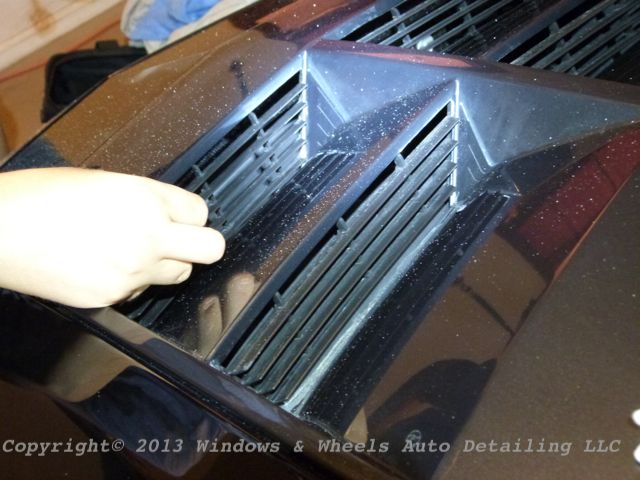
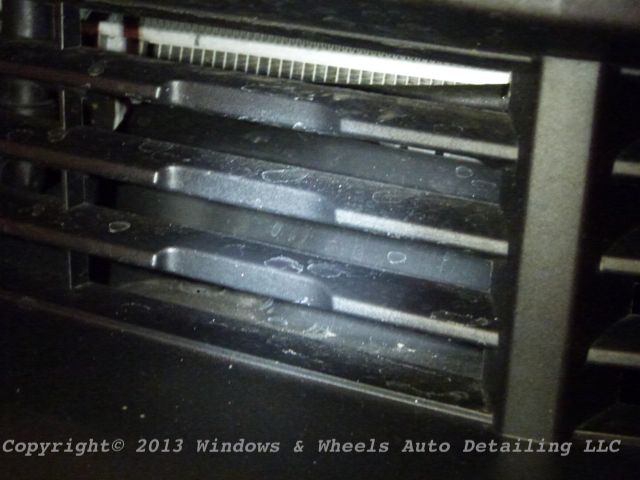
Yeah all these TIGHT little vents were covered in hard water spots.
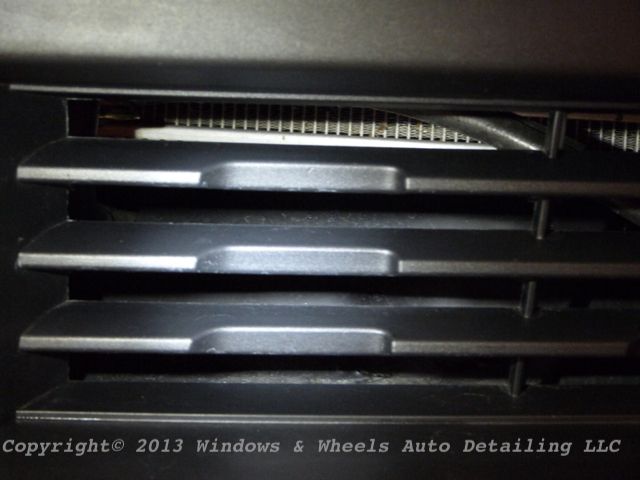
The back had the same deal:
I lied, they left some on the paint too...cause its hard to pop the trunk and just wipe under the spoiler edge:
Little compound dust here n' there along with some good stuff caked deep into some body lines:
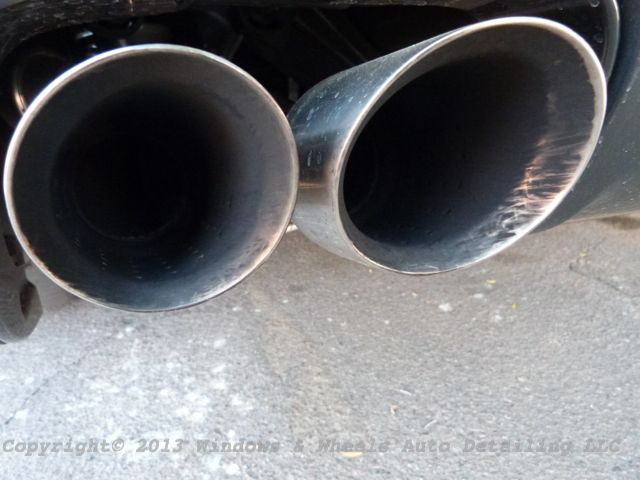
And of course the usual dirty exhaust tips...this thing IS a Super Charged ZL1 after all...and is pushing 715 HP from what the owner told me so...yeah..this is kind of expected lol:
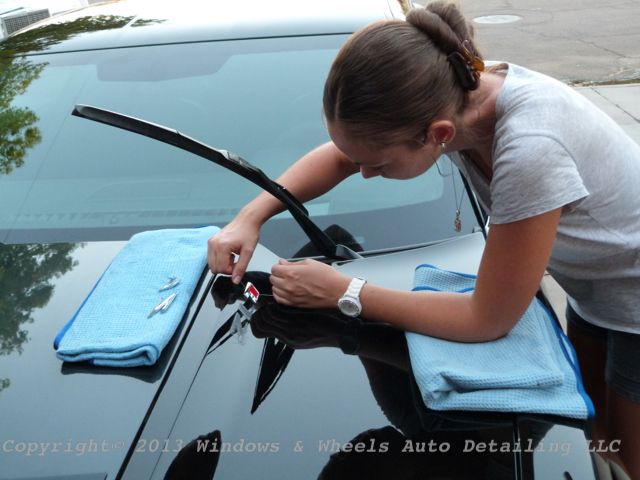
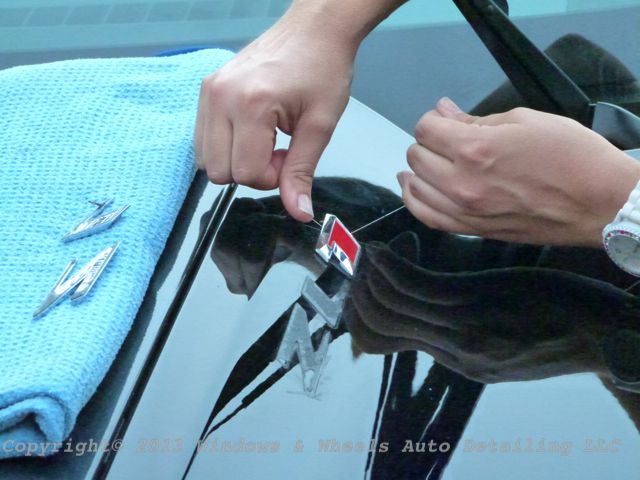
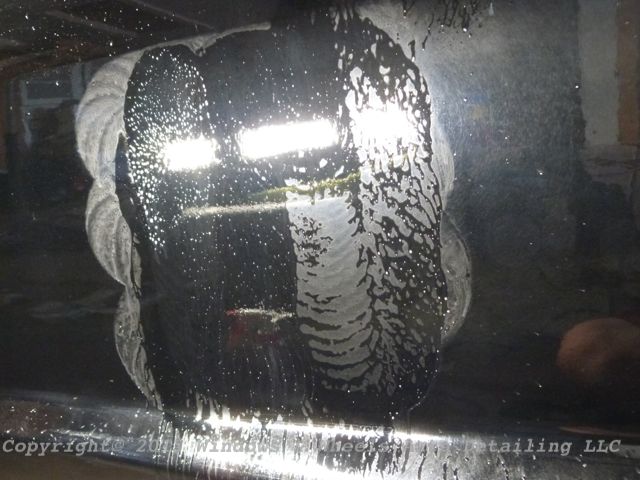
Now first thing was first on this thing...washing it and removing any fillers. Yeah those pics above....are PRE-WASH. We pre-sprayed each panel with Power Clean though and it removed anything on the paint quite easily. Next up...the owner asked if we would mind removing the badges for him as well...so thats what we did:
Well Dani mostly did lol...I did a couple.
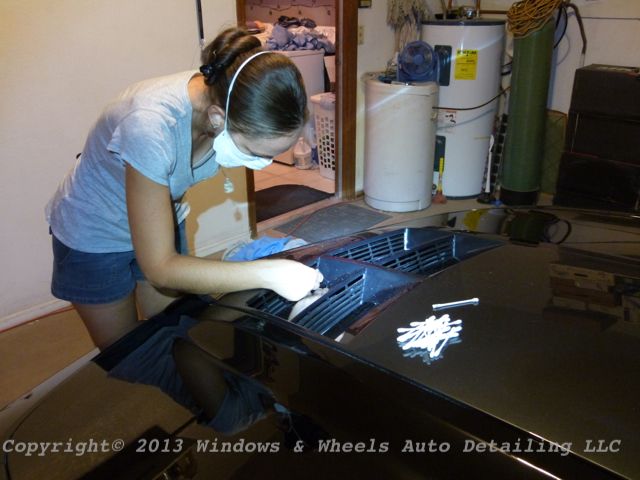
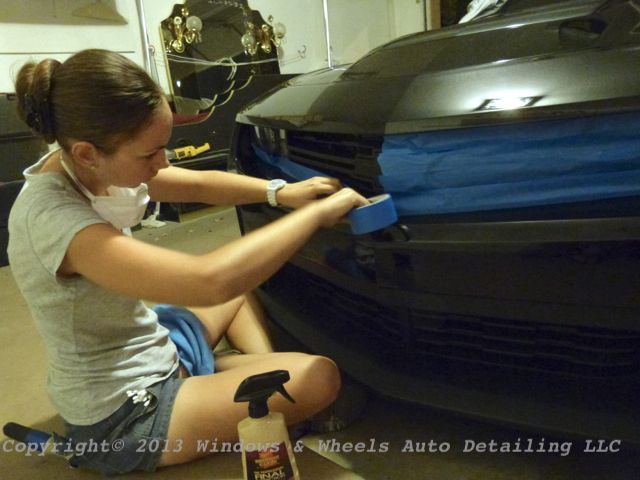
After they were off...it was time to pull it into the garage and get some spots off the plastic...again...Dani worked her magic...one vent at a time:
I went around and clayed everything to make sure any bodyshop dust was removed. By the time i was done Dani was onto another task...
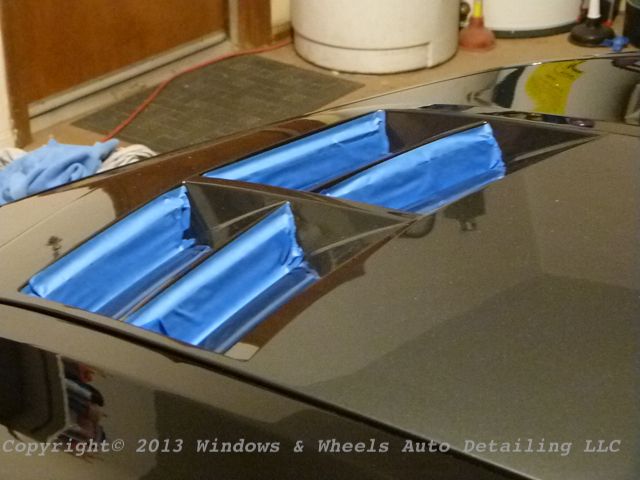
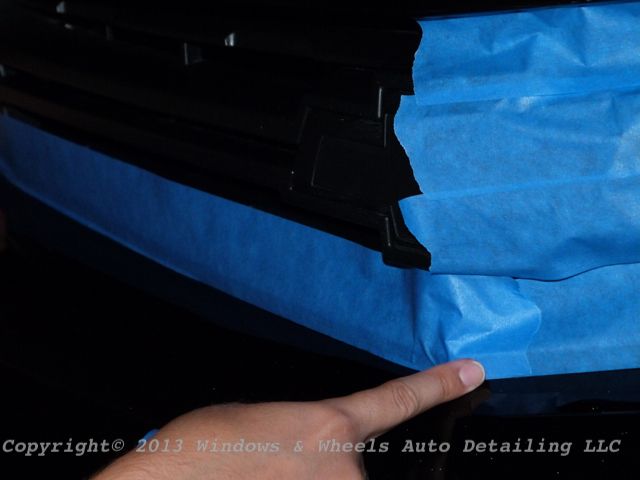
Still the vents...but, she started taping them up to be sure nothing more got on them during the next couple of days while we worked ourselves nearly to death:
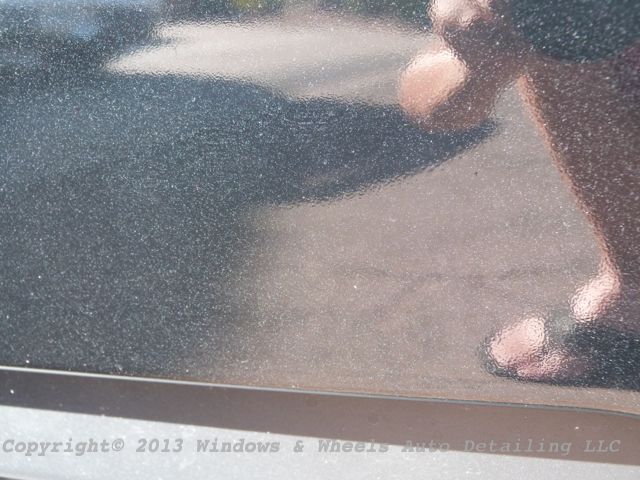
While Dani was working along doing that fun stuff...i needed to at least get an idea of how damn finicky the paint was. The last ZL1 we did was a NIGHTMARE...just wiping polish off caused an insane amount of towel marring...with THIS ZL1 we had two different types of paint...fun!
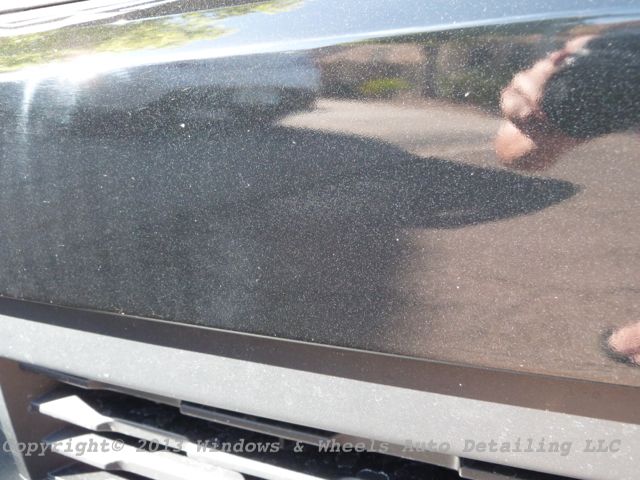
As stated before...they buffed the whole car...so even the OEM painted hood looked like this:
After working with our Rupes (thx again Kevin) along with some 105 and MF cutting disc...I was able to knock out most everything.
Again this:
Was turning into this:
And Dani was taping still...
Since i had a bit of relief knowing the OEM paint was going to at least CUT without too much fuss...i jumped back to help her finish up the plastic. She had most of it done...all that was left was the very bottom vents on the front bumper:
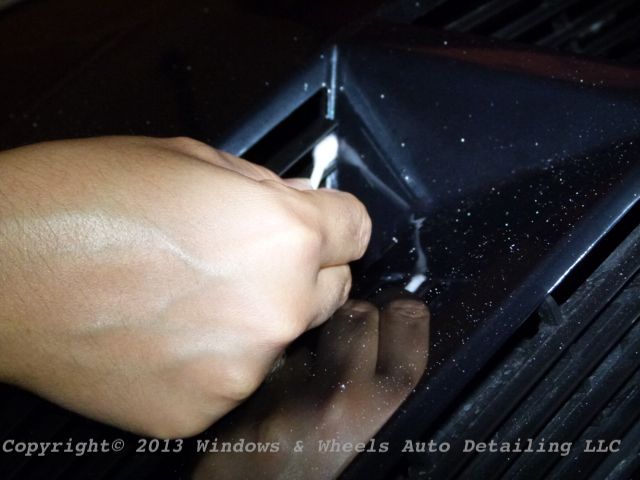
She had been using Final Inspection to clean most of it up...and it worked great. But of course when I tried it..it left some crap behind...guess i got the extra hard stuff that dripped all the way to the bottom -_- . So i i grabbed a little distilled vinegar and a microfiber towel and did a test spot....it took the spots out relatively easily (other than the insane amount of tight areas we had to work) and didn't dull the plastic at all:
After that was done...Dani was able to ...well...tape some more!
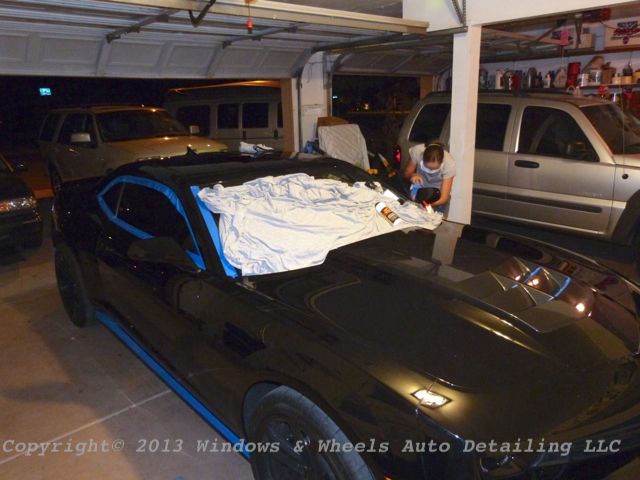
We were able to get the drivers side hood, roof and trunk CUT at least during the rest of that night. Then we tucked her in...covered the top panels up with soft sheets to be sure as little dust as possible settled on it over night..and went to get some rest before getting up early to start the next morning.
Oh yeah...there was one other little X Factor...we live in Arizona. So? So...that means even after the sun is DOWN...we still have this:
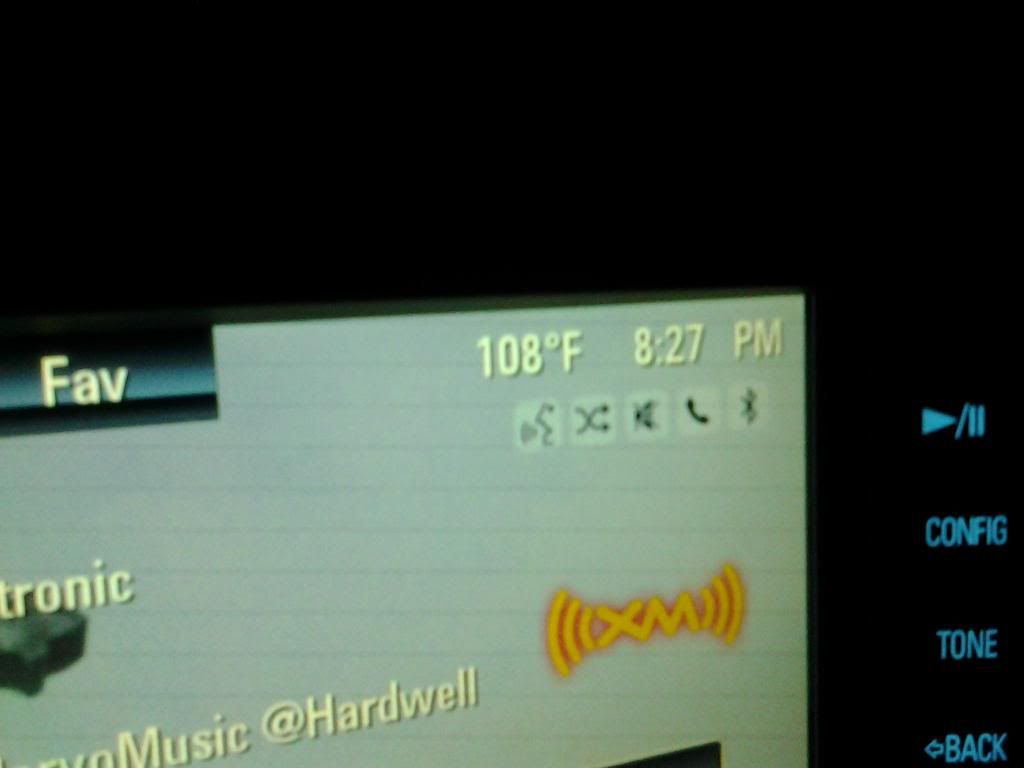
Yes...it was 8:30 and 108 degrees outside still...we were going to get up in the MORNING...and go into our easy bake oven (the garage)...with doors closed up and no AC...to work for 12 hours straight...great way to spend your Saturday!
Up and at it...thats what we were at 7-somethin in the morning. First up...that damn orange peel on the drivers side. I'd be working this...while Dani went on to compound the areas she was able to that didn't need sanding.
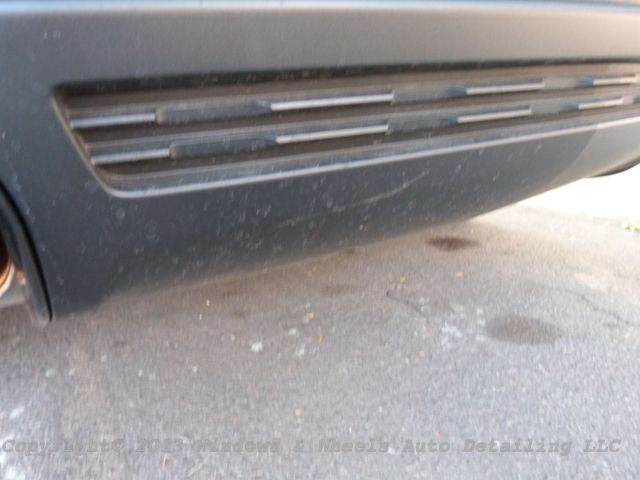
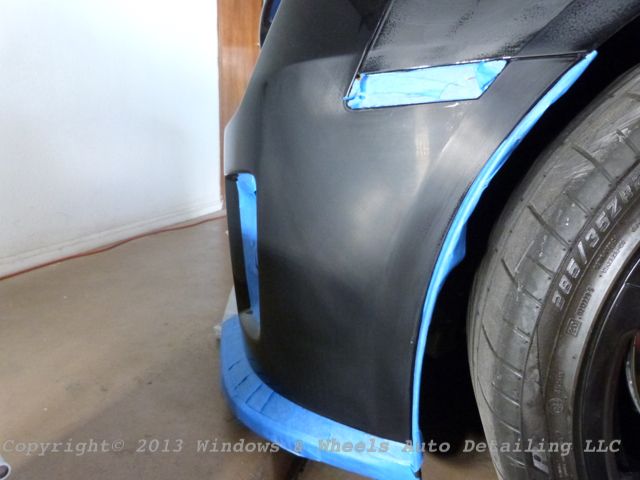
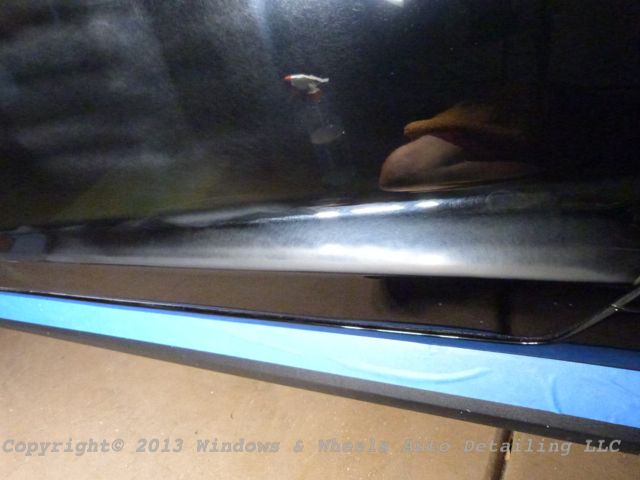
As i said earlier..the worst area...was the front bumper ...and the front half of the quarter panels...as you can see here just above the bumper on the QP...it was nice and bumpy:
Solution? Sand that sucker down. I started out easy by hand in this area just to get a feel for the paint ...2500...took a bit of time but, did the job:
Then moved my way up to the exceptionally bumpy quarter panel. Workin the peel away:
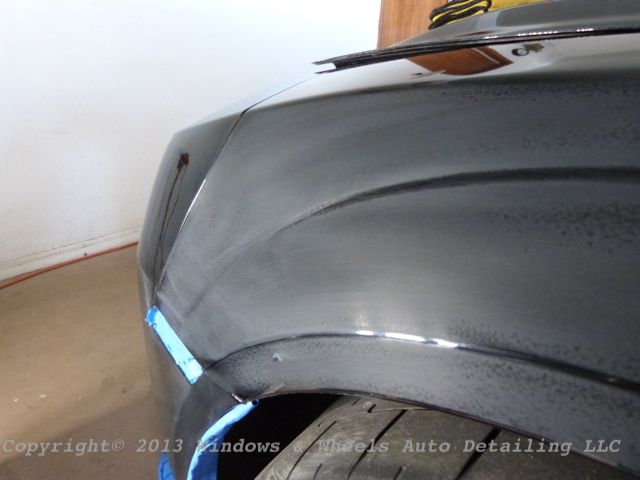
After getting it to a state to where i felt it was as even as possible (was a bit odd, didn't wanna go totally flat since the OEM paint was NOT flat...but obviously didn't want to leave it in the condition it was in...the real odd part was THEY had made certain areas totally flat...so we just had to use our best judgement for each area to try to make it look as even as possible) i compounded an area and well..it came out very well...and shiny :
Left was done....right was not.
And after some more compounding:
The quarter panel was coming out well.....the reflection was back..no more peel....it was just a matter of chasing down any left over sanding marks. There weren't a ton...but wanted to be sure all were removed.
Other areas were also sanded down where needed...again..just trying our best to make the car look as uniform as possible texture wise.

The hard stuff was the small..tight areas....which they obviously avoided in most cases. And if the did sand it...they didnt buff it....as I'm sure they didn't want to burn any edges. So we had to go in and refine that too:
Dani worked behind me, refining it down. The girl is bad ***..just sayin'

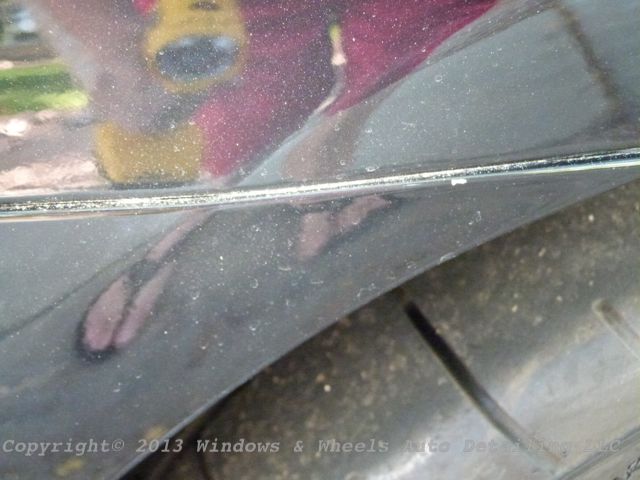
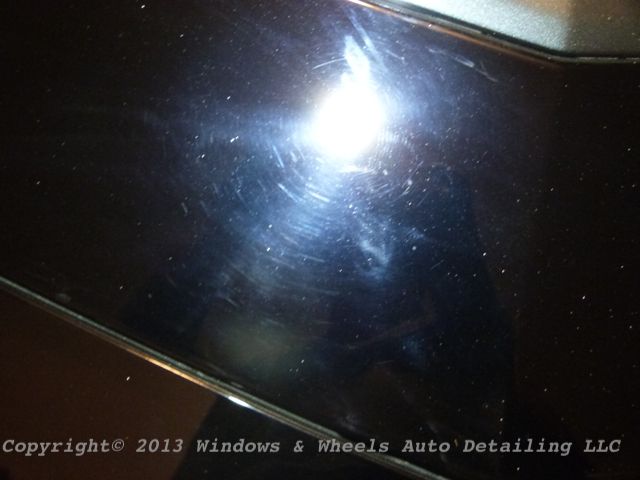
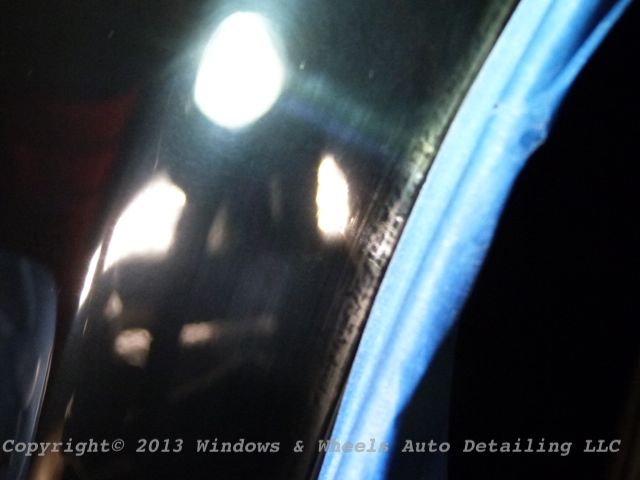
While she was working down my sanding marks...well...i was running into some of my own...left by them. Again...right near edges where the paint is thinner
I did however find a few tricks as i went along...you see some areas...like that front bumper....was very hard to compound right on the edge where it met with the plastic fender piece...the reason was my backing plate would just touch the plastic...which is a no-go:
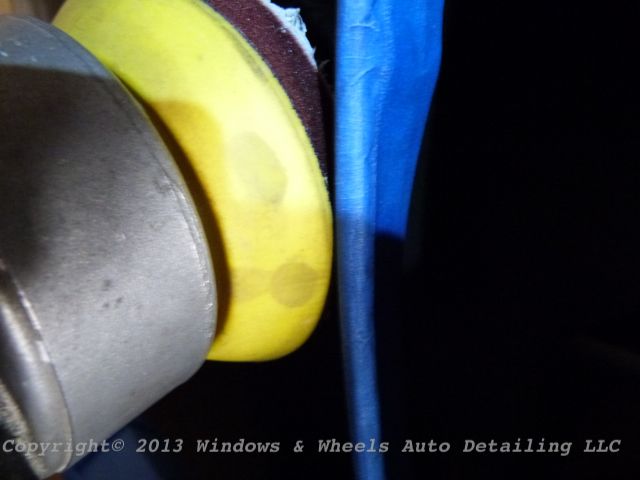
What to do? Well...Kev sent this little foam interface for the 3" discs....I however found it to be quite useful for compounding in this instant...to sort of serve as a type of washer/spacer between my backing plate and the trim piece:
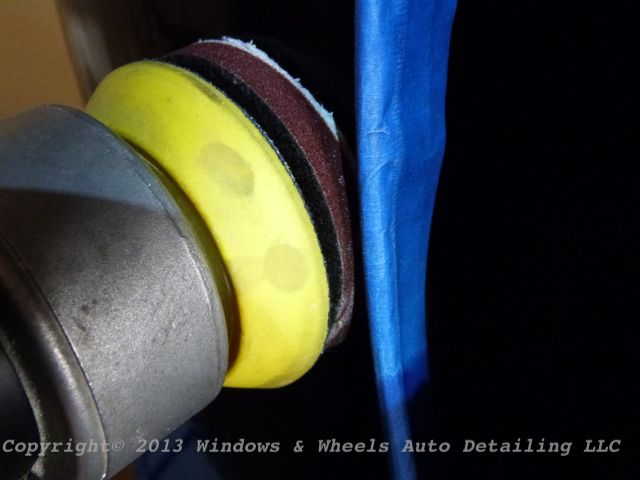
Ahhh...success. Even with this though...there was literally about 1/8" i didnt quite get:
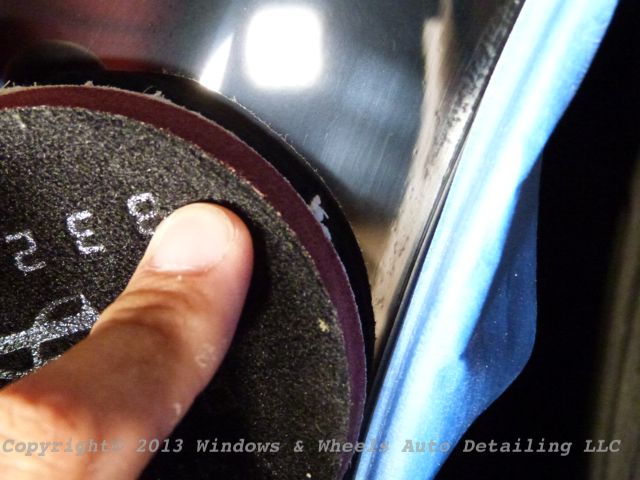
So...i used the oldest tool known to man

About 3 weeks ago while working on ANOTHER black 2013 ZL1 - I checked my phone and saw i had 2 calls from the same #. I though dang, someone wants to talk to me. Then I got another call at that same instant....I picked up and after introducing himself...and telling me he has a Black ZL1 Camaro ...he went on to say "I was told if anyone can save my car it's you guys"
...Yeah no pressure!
The owner went on to tell me that with under 3k miles...that his whole front bumper and the pop outs of the rear quarter panels (the ribbed areas) were covered with 100's of chips. This didn't surprise me since this paint seemed EXTRA soft (we found that out from the one we were currently working on at the time!) So, under warranty he had the front bumper and the sides (Front QP, doors, Rear QP...basically everything but the hood/roof/trunk) repainted.

Yes....repainted

Repainted cars are notorious for a few things....especially black ones...

Yeah...holograms...buffing trails....wool pad marks


These guys were thorough. Not only did they buff the repainted areas..they buffed the WHOLE DAMN CAR.
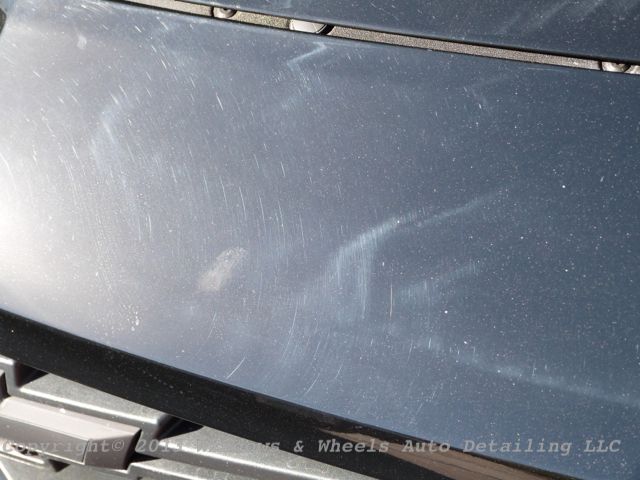
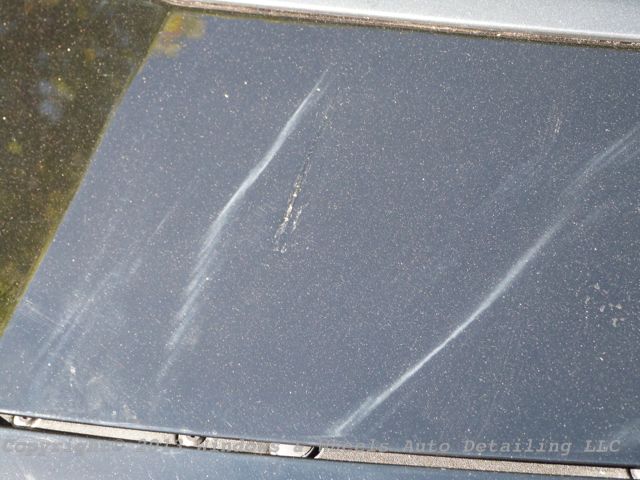
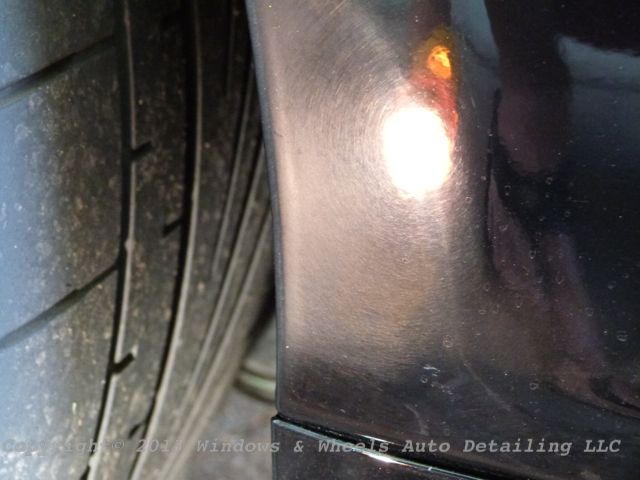
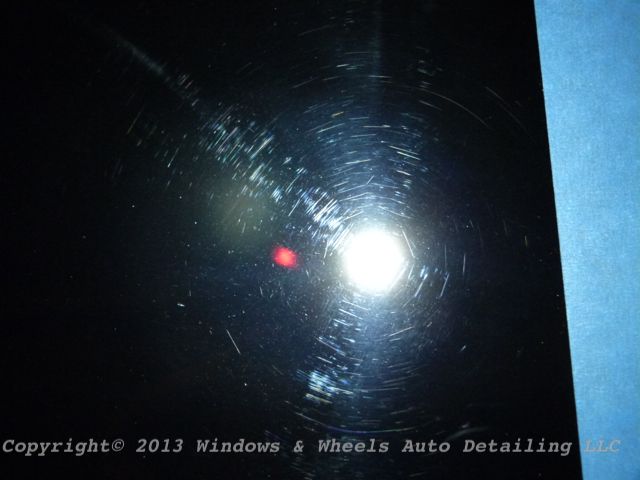
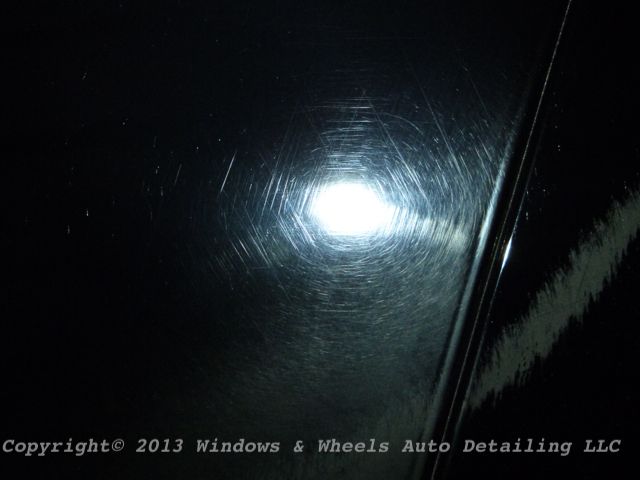
Ok, ok....thats not really true. See they did manage to actually MISS some areas completely and just leave the sanding marks there instead:

I mean really....whats a few sanding marks going to do...no big deal right?

You can only see it in the light...who cares about that!


The owner was probably just "one of those people"...you know...picky ones who want everything perfect. What nut would be worried about this on his car...i mean it's black after all and black just CANT be polished right?

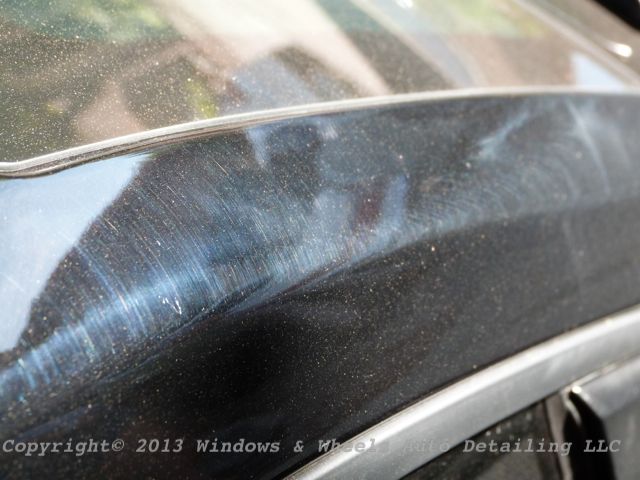
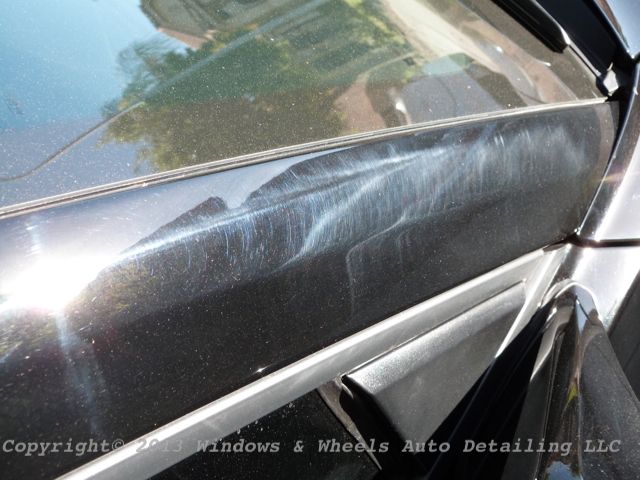
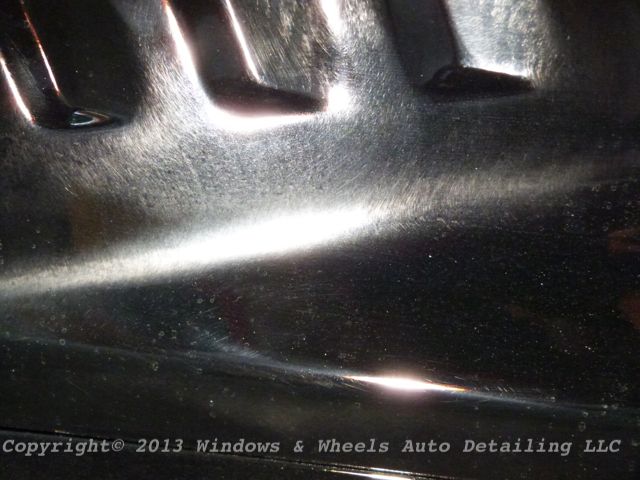
They did a little art work....rotary buffer ghost flames:

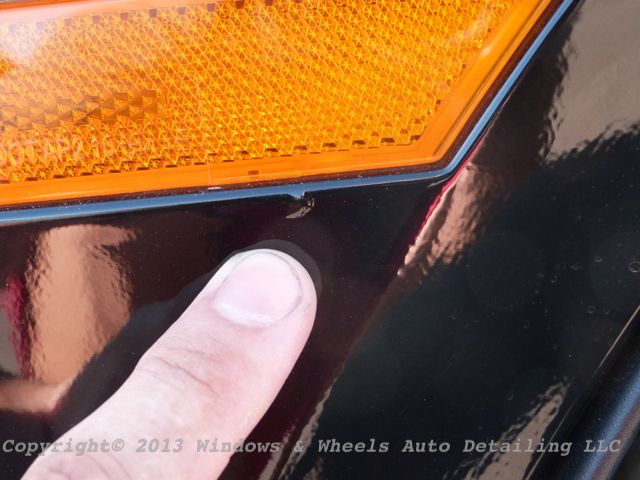
By the way i lied.....they didnt just leave buffer marks...or sanding marks where they DIDNT buff...some spots well...they just didn't even sand.
"Didn't sand?" you might think...."Like what?"
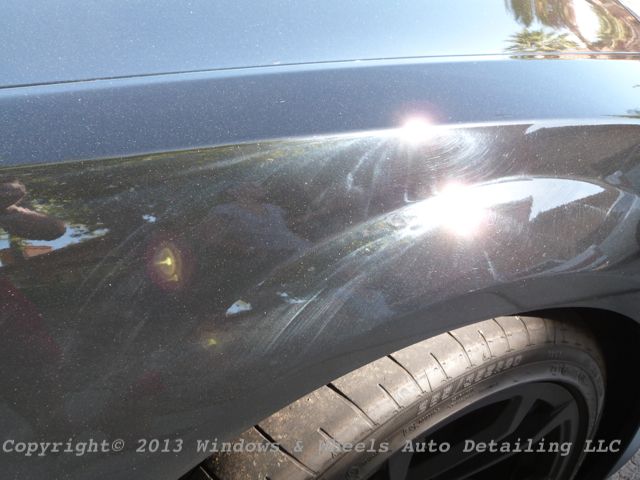
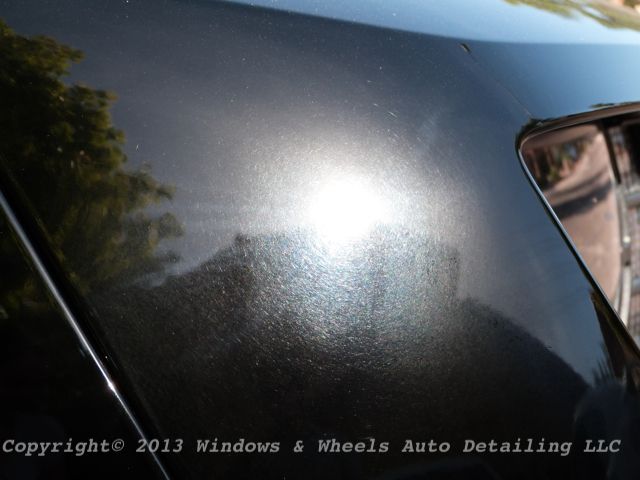
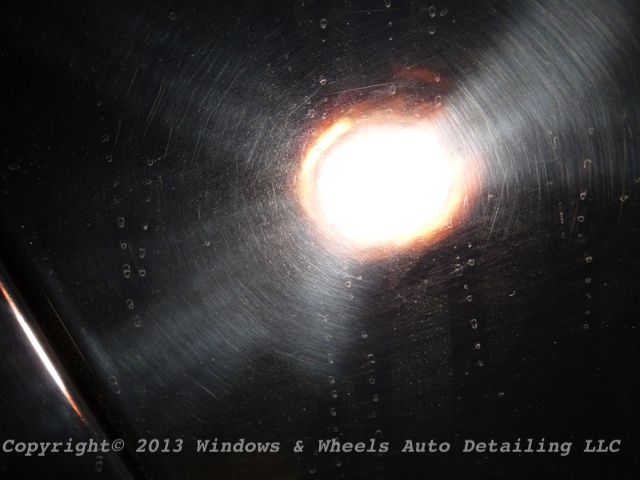
Well...kinda like this drip right here:

I know i know...its just a little drip...hard to see. But you may notice a certain...reflection...or lack there of...around that drip. You know...a little peely peel if you will:

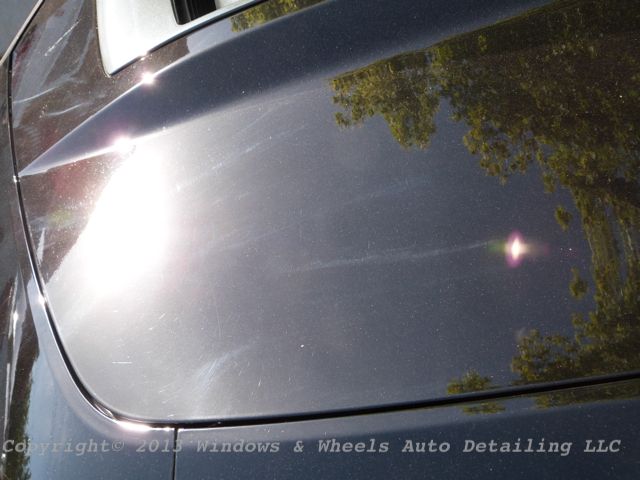
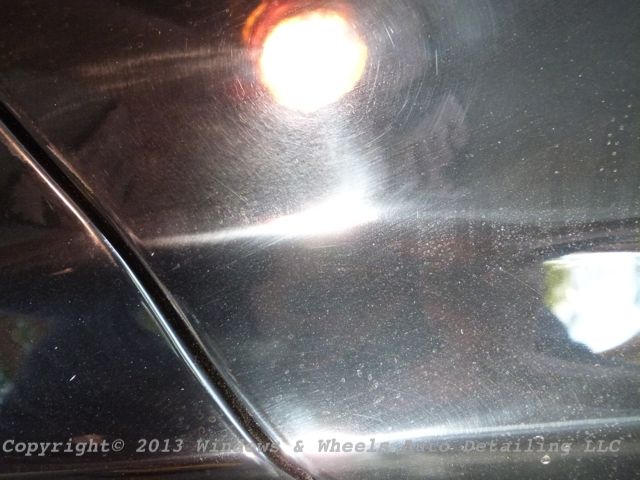
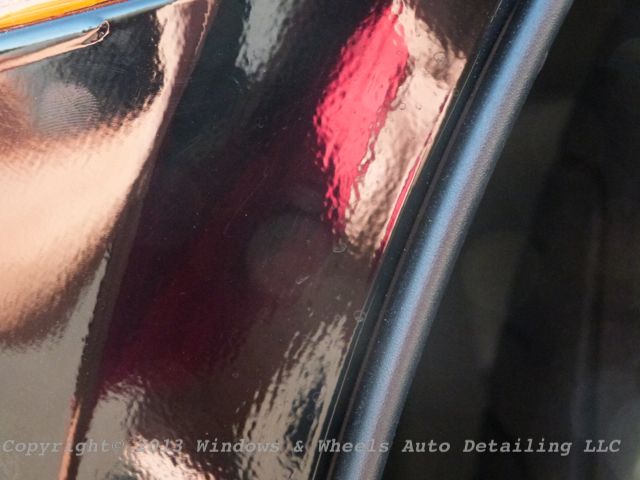
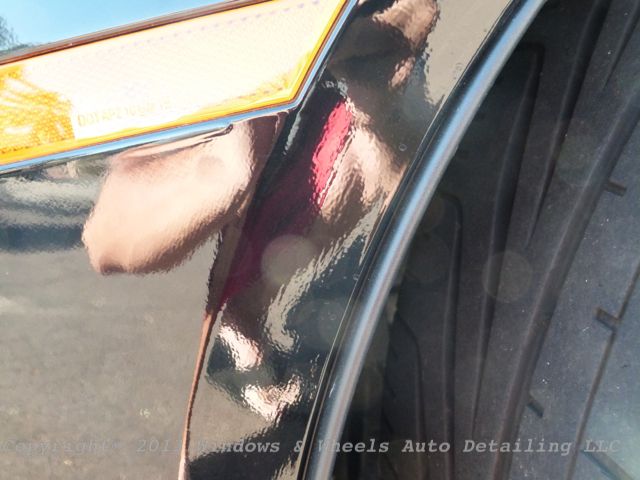
Ok maybe more than a little...maybe more like the whole area infront of the wheels on the bumper:

Do the wave!!!

*Sigh*...ok i'm having flash backs going through these pics...not good ones either. Anyway...back to my story. So...what the owner wanted to know was...could we save his car. Could we get it back to at least OEM condition. My reaction was...let us look at it first. We'll be straight with you..tell you what CAN be done...and what CANT be done. That's exactly what he wanted to hear...we spoke a bit more...he expressed in a pretty detailed fashion how displeased he was...then we hung up and i told him I'd be in touch.
But wait, remember those other 2 calls? Well...that was from a guy at the dealership...calling about the same car. This guy tried everything he could to get his guys to do the right thing with the paint job...he knew it wasn't right...he knew the owner wasn't going to be happy with it....but you can't do what you don't know...and these guys didn't know how to finish paint (or sand some of it either for that matter).
I spoke with him for a bit...we agreed to the same thing, Dani and I would go check it out, find out if it was doable or not...and then go from there.
After checking out the car...we called the owner...told him most of it we could fix, the exception being...some very small fish eyes we found here n' there. But the rest....we believed we could save...with the exception of ONE area....that damn front bumper I mentioned earlier. THAT...was our main question.
I told him when we first walked up that "We walked up to the bumper and put our light on it and we were like, is it even..." The owner ....in perfect harmony with me said "Even black!!!"
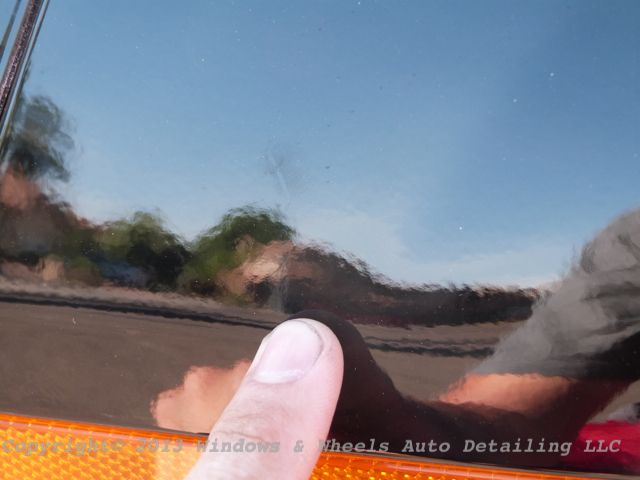
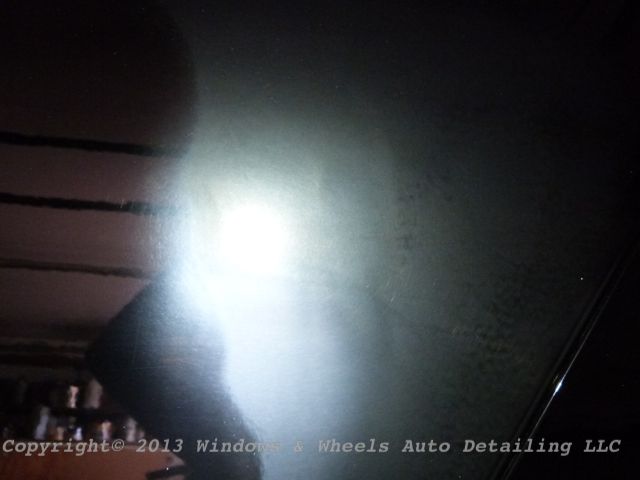
Yes, we weren't sure if it was even black lol. Why? Well cause it looked like this...


No this was not just a little road dirt...this was in the paint. We tried washing, clay barring and even compounding...it said nuh-uh. Not to mention the fact that it had the reflection of old asphalt. We hoped we could save it, but wouldn't know until we gave it a shot.
We arranged a drop off time and set aside from Friday afternoon to Monday afternoon for this car...it was going to be...a *****...period.
What to do in a situation like this? Well, you call the man himself, Mr Buff Daddy Buff Daddy - Kevin Brown. I spoke with kev a few times (once we finally quit playing phone tag!) He told me he'd send me all the discs i needed...gave me some advice on how best to use them and said anything i don't use just send back. His advice was greatly appreciated AND used...so just a quick shout out to him for this. Both before and during the detail..he was on standby for us if we had any questions/concerns. Which I did in a couple of circumstances...and he was there to help us out whenever needed.
The day before drop off...we received a package that was enough to "Totally sand down 2 full Corvettes!" as he put it lol. And it was!
But before we could get to that fun stuff...we had some clean up to do....there were also some water spots left all over...but not on the paint:


Yeah all these TIGHT little vents were covered in hard water spots.
The back had the same deal:

I lied, they left some on the paint too...cause its hard to pop the trunk and just wipe under the spoiler edge:

Little compound dust here n' there along with some good stuff caked deep into some body lines:


And of course the usual dirty exhaust tips...this thing IS a Super Charged ZL1 after all...and is pushing 715 HP from what the owner told me so...yeah..this is kind of expected lol:

Now first thing was first on this thing...washing it and removing any fillers. Yeah those pics above....are PRE-WASH. We pre-sprayed each panel with Power Clean though and it removed anything on the paint quite easily. Next up...the owner asked if we would mind removing the badges for him as well...so thats what we did:

Well Dani mostly did lol...I did a couple.

After they were off...it was time to pull it into the garage and get some spots off the plastic...again...Dani worked her magic...one vent at a time:


I went around and clayed everything to make sure any bodyshop dust was removed. By the time i was done Dani was onto another task...
Still the vents...but, she started taping them up to be sure nothing more got on them during the next couple of days while we worked ourselves nearly to death:

While Dani was working along doing that fun stuff...i needed to at least get an idea of how damn finicky the paint was. The last ZL1 we did was a NIGHTMARE...just wiping polish off caused an insane amount of towel marring...with THIS ZL1 we had two different types of paint...fun!
As stated before...they buffed the whole car...so even the OEM painted hood looked like this:

After working with our Rupes (thx again Kevin) along with some 105 and MF cutting disc...I was able to knock out most everything.

Again this:

Was turning into this:

And Dani was taping still...


Since i had a bit of relief knowing the OEM paint was going to at least CUT without too much fuss...i jumped back to help her finish up the plastic. She had most of it done...all that was left was the very bottom vents on the front bumper:

She had been using Final Inspection to clean most of it up...and it worked great. But of course when I tried it..it left some crap behind...guess i got the extra hard stuff that dripped all the way to the bottom -_- . So i i grabbed a little distilled vinegar and a microfiber towel and did a test spot....it took the spots out relatively easily (other than the insane amount of tight areas we had to work) and didn't dull the plastic at all:

After that was done...Dani was able to ...well...tape some more!

We were able to get the drivers side hood, roof and trunk CUT at least during the rest of that night. Then we tucked her in...covered the top panels up with soft sheets to be sure as little dust as possible settled on it over night..and went to get some rest before getting up early to start the next morning.
Oh yeah...there was one other little X Factor...we live in Arizona. So? So...that means even after the sun is DOWN...we still have this:

Yes...it was 8:30 and 108 degrees outside still...we were going to get up in the MORNING...and go into our easy bake oven (the garage)...with doors closed up and no AC...to work for 12 hours straight...great way to spend your Saturday!
Up and at it...thats what we were at 7-somethin in the morning. First up...that damn orange peel on the drivers side. I'd be working this...while Dani went on to compound the areas she was able to that didn't need sanding.
As i said earlier..the worst area...was the front bumper ...and the front half of the quarter panels...as you can see here just above the bumper on the QP...it was nice and bumpy:

Solution? Sand that sucker down. I started out easy by hand in this area just to get a feel for the paint ...2500...took a bit of time but, did the job:

Then moved my way up to the exceptionally bumpy quarter panel. Workin the peel away:

After getting it to a state to where i felt it was as even as possible (was a bit odd, didn't wanna go totally flat since the OEM paint was NOT flat...but obviously didn't want to leave it in the condition it was in...the real odd part was THEY had made certain areas totally flat...so we just had to use our best judgement for each area to try to make it look as even as possible) i compounded an area and well..it came out very well...and shiny :

Left was done....right was not.
And after some more compounding:

The quarter panel was coming out well.....the reflection was back..no more peel....it was just a matter of chasing down any left over sanding marks. There weren't a ton...but wanted to be sure all were removed.
Other areas were also sanded down where needed...again..just trying our best to make the car look as uniform as possible texture wise.


The hard stuff was the small..tight areas....which they obviously avoided in most cases. And if the did sand it...they didnt buff it....as I'm sure they didn't want to burn any edges. So we had to go in and refine that too:

Dani worked behind me, refining it down. The girl is bad ***..just sayin'

While she was working down my sanding marks...well...i was running into some of my own...left by them. Again...right near edges where the paint is thinner

I did however find a few tricks as i went along...you see some areas...like that front bumper....was very hard to compound right on the edge where it met with the plastic fender piece...the reason was my backing plate would just touch the plastic...which is a no-go:

What to do? Well...Kev sent this little foam interface for the 3" discs....I however found it to be quite useful for compounding in this instant...to sort of serve as a type of washer/spacer between my backing plate and the trim piece:


Ahhh...success. Even with this though...there was literally about 1/8" i didnt quite get:

So...i used the oldest tool known to man


")
 ).
).")