AcrylicWerks Test Car #2

Status
Not open for further replies.
AWMark said:
My intentions are to bring a new product to the table that most of you would have never encountered unless you were in military. We knew that the only way to convince folks of what this polish was capable of, was to do live demonstrations on the vehicles that pulled up. Eliminated the guessing game.


Hey Mark,


I'm sure you didn't mean to be insulting to other products, and you seem like a nice guy who believes in what he's selling. No hard feelings.


That said, you yourself say that it takes seeing the product in action to sell people on it. So have you thought about sending out samples?


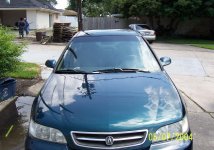
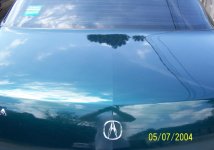
The photos and head-to-head with Anthony are great, and if you left him a bottle, he could post some longer-term results. However, there are still a million factors that don't come through in a picture. I personally don't have any oxidized beaters that I want to easily restore some luster to. And I really don't have any horribly swirled cars, though I (like many) do battle with swirling.


So, while I don't doubt that your product looks much better than oxidized paint, or can restore a neglected mirror-housing, I really will never see from pictures how your product will look on a deep, dark, metallic red in excellent shape with at most light spiderwebbing. Nor can I tell if it beads more than a coat of Blackfire, or looks deeper than a coat of Souveran, or lasts longer than a coat of Klasse SG (another acrylic).


If you were to send out samples or free bottles or something, that would go a long way towards solidifying peoples' opinions about your product.
 
OK here it is. I found a thrashed truck down the street that sits out in the sun and rain and Texas hail since the guy bought it home a couple of years ago. There is also overspray all over the truck.


It was very hot today and the truck had been in the sun all afternoon so I pulled it up in my driveway and followed the instructions on the bottle of Acrylic-Werks to the "T".


I started the AW side at 2:43 PM and I even washed it down first then clayed it to remove the overspray. I was going to see if the AW would remove the overspray on its own but it was too hot to mess around anymore than I had to. I applied the AW per the instructions on the bottle that Mark gave me. The surface was very hot and I am still amazed at how they recommend using it in the full sun. I figured that since it was designed in Germany their sun is nothing like my Texas heat and sun so it may be no problem for them.


The AW did put a gloss to the finish and made the surface smooth, but that is mainly due to the clay, but I coul dsee nothing being done to the scratches and swirls. I used several different towels and even a MF towel but nothing for the scratches. I even tried medium to light pressure but still nothing. So I called it quits at 3:17. A total time of 34 minutes.


Below will be 2 BEFORE pictures. The first one is before it was clayed.
 

Attachments

  • 000_0282.jpg
    000_0282.jpg
    83.3 KB · Views: 311
Here is the final picture of the AW side. I did a final rub down with a MF towel. The end result is a fairly nice gloss but some scratches/swirls were left. I am not sure if more rubbing would of done anything to eliminate the rest but it was just too hot and I wanted to get my side done before the rains came.
 

Attachments

  • cobrashine.jpg
    cobrashine.jpg
    85.8 KB · Views: 1,395
I did the same to my side at first. I washed it down then clayed it. My side also had the brunt of the overspray but the clay took care of that.


I was going to use only my PC and only store bought chemicals but then I thought no, I'll use what I would norammly use on a finish like this. Afterall this is the Professional Detailers thread so I'll treat it like I was doing it for real.


Here is my side before
 

Attachments

  • 000_0295 (2).jpg
    000_0295 (2).jpg
    68 KB · Views: 264
I first hit it with an orange pad at 1500 RPMs and Meguiars #4.


Then two passes with a polishing pad and Hi-Temps Light Cut at various speeds.


That's it!


There is no polish on my side and no wax or sealants.


You all be the judge
 

Attachments

  • 000_0296 (2).jpg
    000_0296 (2).jpg
    37.8 KB · Views: 260
Oh, I started my side at 3:40 PM and ended at 4:10 PM. So the times are just about the same but I believe the results are vastly different. Frankly after using the AW myself I can't see how anyone, professional or weekend warrior, would subject themselves to using this product out in the sun.


Also let me explain that Light Cut does have "polishing" qualities to it but there is no gloss enhancing polishes on my side as in Menzerna Final Polish, AIO, Vanilla Moose, no Poorboys nor any #7 or #9.


Anthony
 
Anthony,


It does look like the visibility of the swirls was reduced with the Acrylic Werks. While still visible, they are less noticeable. I wonder how long that lasts for, or if it is permanent?


On your side, you didn't get the sun in the panel as you did for the AW side. Would it be possible for you to take another shot of it tomorrow?


Also, does High-Temp Light Cut have any fillers? I mean, if you wiped the panel down with some alcohol and water, would some light swirling appear?


Thanks for posting up the picts. I would still be curious about non-photographable aspects of the AcrylicWerks, such as how it beads, looks, shines, and lasts. So far it sounds/looks a fair amount like that other acrylic: Klasse. AIO can cut through oxidation like a champ, and SG has a noticeable effect on the appearance of swirls without really removing them. But it has one benefit in that it is more flexible because SG can be re-added without it re-cleaning the paint. It would seem AcrylicWerks doesn't have that option.


Thanks!
 
Aurora,


First, Light Cut does not contain fillers, at least as far as I have tested with alcohol and water mixture. If it did I would be less likely to use it.


As for taking a picture with the sun in it, the sun had moved by the time I was done and we had some thunderstorms moving in but I did take another picture from a slightly different angle. You can see that in the panel just next to mine that the sun is caught on the egde just a bit and swirls/scratches are visible but none on the panel I did. If possible (if I don't get home to late) I'll take another picture of my panel with the sun directly in it.


I will also post another picture of the AW finished side with less sun in it but some slight swirls are still present. Now I am not bashing AW as just a horrible product because it did put a shine in the paint but I doubt it alone could remove the overspray and if it did then we know for sure it has an abrasive cleaner in it. My problem with AW is the time and effort one must put into it.


If I can take another picture tomorrow I will then also polish it and wax it.


Anthony
 
Just for my own clarification...


With the AW product you applied a single step product by hand in about 30 minutes.


On "your" side you applied 2 products by PC in about 30 minutes.


Is that correct?
 
Yes, I would like to see the AW side in direct sunlight. I would say that the finish will look a little glossy but all of the imperfections will still be there.


Brad
 
Mr. Clean,


Yes you are correct. The AW is a one step product and both application methods took about 30 minutes from washing the side down, claying and to the application of product(s).


Brad,


The AW side was taken in as much full sunlight as was available at the time and yes while it did have a glossy finish the swirls/scratches were still visible.


I am thinking that if I have the time tomorrow I will rub out the AW side once more and then mist it down with an alcohol water mixture to see if it has any filling qualities and perhaps update you all with more photos.


Anthony
 
EBP,


Good question. I had thought of trying that but an approaching thunderstorm plus dinner at my folks house took priority. I will try it out on a car and post the results


Anthony
 
Anthony, I got in a little while ago and just had the opportunity to check out the site. I want to say thank you for taking time out on a Sunday and trying the product for yourself. Nice pics also. If you do the truck tomorrow, try this procession of steps:

1) Wipe the acrylic in thoroughly. You might even rotate your washcloth a couple of times adding a small amount of acrylic each time.

2) Leave the acrylic on the surface.

3) Spritz the area with clay lubricant.

4) Move the clay in the same criss cross motion you applied the polish in. As the lubricant begins to dry, stop a fold the clay. Now pull the clay towards you and remove all the residue, basically leaving a shiney surface behind.

5) With a clean washcloth add a small amount of polish and begin rubbing the surface, just watch the surface, and reapply if needed. When you can look through the hazing and hopefully see the desired results, stop.

6) With a clean damp cloth, wipe the area down, leaving a small trail of water behind, then buff to finish.

This whole process shouldn't add any additional time, and if it does not very much.

Also, in the hands of the right person (professional) a buffer can be used.

Again, I want to say thank you to Anthony for going out and doing this and would be more than happy to make myself available tomorrow if Anthony would like me there. Anthony if you want to meet before the rain arrives just call and leave a message for me. I'm taking the day off tomorrow to catch up on paperwork.

Everyone, have a nice night and a prosperous tomorrow.


Mark G.
 
To all:


I removed AWMark's last post because he was "advertising" product samples. Sorry, but I have advertisers to answer to.


AWMark, if you want to offer free samples, please post it on your web site. Everyone knows how to get to you.


Thanks!

David
 
Status
Not open for further replies.
Back
Top