996 Turbo Cab: The Girl Next Door with Steven Pham

MarcHarris

New member
We're really getting behind in write-ups, so here we go!


You've seen her since the nice couple next door brought her home, and you've seen her over the years: more and more milers are on her but she always looks so beautiful. Now she's all grown up, but the downside of that is she's starting to show her age.


We took this beauty in for a face-lift. She's a beauty and is babied, but hasn't always recieved the care she deserves. Add in soft Porsche paint and you have a weathered look that takes away from the true beauty of such a great car.


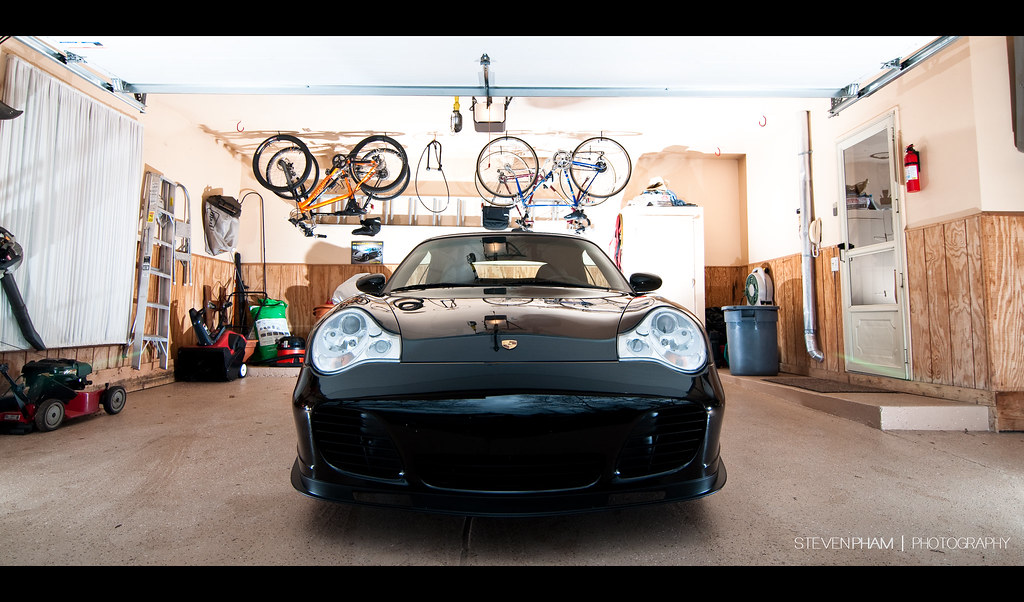
With the client's arrivial, we got to work by properly looking over everything to see what we had in store.


DSC02525.jpg


DSC02529.jpg


The convertible soft top was looking quite grey and dull, but luckily we already discussed proper care of it with the owner before hand and this was something we already had on the list of things to do.


DSC02531.jpg


Clean wheels? Well the faces sure looked fine... we'll see how clean they really are :)


DSC02533.jpg


The sun's reflection is too bright, but they driver's side keyhole had a lot of build-up that needed attention.


DSC02537.jpg


Halograms + Swirls = lack of clarity


DSC02538.jpg


Even her ears? No. Not her pretty little ears...


DSC02548.jpg


Yes. Even her poor pretty ears. *sigh* Let's fix this baby up!


Because the vehicle was driven to us, we needed to make sure the wheels and brake components were cool prior to starting. Here Jacob takes the temperature of a caliper.


DSC02558.jpg


Started with a quick vaccum of the soft top to remove the light stuff. This would allow Jacob to begin the initial foaming while I got started with more attention to the fabric.


DSC02556.jpg


Degreaser to the wheel wells, APC to the tires


DSC02560.jpg


DSC02561.jpg


I then came through with P21S Wheel Cleaner Gel and got to work on the lugs, calipers, wheel barrels, and faces


DSC02564.jpg


DSC02565.jpg


DSC02566.jpg


DSC02569.jpg


While Jacob was flushing each wheel, tire, and wheel well, I got busy with RaggTopp Top Cleaner and a brush on the pretty lady's hair. I continued to give her scalp a good massaging while Jacob began with the wash process.


DSC02575.jpg


DSC02576.jpg


DSC02579.jpg


The start of the Facial Cleansing while I finish with the shampooing


DSC02582.jpg


DSC02586.jpg


Here you can see her deep black hair had a much smoother and uniform look after the scalp massage and shampoo


DSC02588.jpg


Jacob's careful wash of her rough body not only removed the surface soil, but pulled away some oils as well.


DSC02590.jpg


Finally rinsed and prepped for her epidermus skin exfoliation, here we take a careful look at her shoulder under the Brinkmann dual LED


DSC02593.jpg


Ready to get started!


DSC02597.jpg
 
First Combo produced good clarity and got rid of a lot of defects, but we wanted more cut:


DSC02599.jpg


2nd Combo produced the best clarity of them all, but didn't give enough cut to remove all the deeper swirls, nor did it remove enough of the random isolated deep scratches (RIDS) :


DSC02600.jpg


3rd Combo produced the least defects, but clarity suffered as a result.


DSC02602.jpg


What to do? I called the client and let him know we were currently on pace to keep things in the budget, but because we were only scheduled for a 2-step polishing process it was going to mean a choice of best possibility clarity (which will give the best gloss / shine), or best correction (least amount of defects left).

We ended up working out a plan on give it all and stepped things up to a 3-step polishing process. This would give the optimal amount of defect removal with a finish of the ultimate clarity. Menzerna IP on a green LC pad with the Flex DA, followed by M205 on a white LC pad with a 3M Yellow Foam backing plate on the Makita, and ending with Menzerna 85RD on a blue LC pad with the Makita and 3M Grey Foam backing plate.


While we were working on the best combination of machine+backing plate+pad+polish, Jacob's dog, Enzo, came out to make sure the garage was safe.


DSC02606.jpg


50/50 Collection


DSC02611.jpg


(after initial heavy polishing, prior to final polish)


DSC02612.jpg


Got Clarity?


DSC02615.jpg


Indirect light difference in the finish:


DSC02619.jpg


50/50 showing final polishing steps


DSC02620.jpg


DSC02621.jpg


DSC02625.jpg


Exhaust tips getting some love


DSC02631.jpg


Action shot of the last step: Menzerna 85RD


DSC02636.jpg


Hydralic wing lifts needed some love


DSC02638.jpg


DSC02642.jpg


Final wash prior to sealing


DSC02643.jpg


Special attention given to cracks and crevices


DSC02651.jpg


Towel dry the big stuff, but using a blower doesn't only add volume and bounce, it also acts as a "Q-Tip" to get those trace amounts of water out.


DSC02658.jpg


Applied Powerlock via PC


DSC02660.jpg


DSC02665.jpg


Applying sealant to the underside of the wing, and don't forget those CLEAN hydralic lifts!


DSC02668.jpg


Being a lady that is driven daily, we applied Aquapel to the windshield while the sealant set


DSC02666.jpg


DSC02667.jpg


Key holes got taken care of with a toothbrush and P21S TAW turned out quite nice.


DSC02671.jpg
 
She's a pretty lady.


DSC02675.jpg


DSC02683.jpg


DSC02696.jpg


DSC02688.jpg


DSC02690.jpg


DSC02692.jpg


DSC02698.jpg


DSC02721.jpg


DSC02729.jpg


Leaving the house late, all parties knew the work wasn't over. We still had one last thing to do - apply convertible top protection to the top. We didn't do it right away simply because we wanted to insure the top was completely dry prior to application. There was no need to risk lowing the durability of the protection by appling it to a damp top. A couple of days later, we made it over to the owners house to finish the work and to get some quality shots of this baby.


When the day came, it was nice the beautiful 996 was sleeping tight in the garage, but sad to see an ugly, gloomy, rainy day was upon us. No full sun shots nor ability to take the car out to anywhere scenic for photos.


Here I eye down the prize while Steven, the photographer, figures out angles to see what he has to work with.


DSC02741.jpg


Draped off ready for the final conditioning.


DSC02731.jpg


DSC02734.jpg


Here you can see how deep and rich the black top looks on the right side of it while I make sure the finish is consistent.


4510329491_3bea5d155e_b.jpg


Steven was able to get the final Final shots.


Steven Pham said:
Weather, unfortunately, was not good for this day as it was cold, rainy, and cloudy. Michigan weather for you: it changes every five minutes. Location was limited to the clients garage because of the weather, so I had to work with what I had. If you know a little about black cars and photography; its hard to light the car itself as it reflects literally everything, so you have to light its surroundings.


The lights in the garage were not bright enough to light the car enough to show details or reflections, so I placed 4 Nikon flashes inside of the garage (all pointing up at an angle) to light the ceiling inside of the garage. Unfortunately, unlike a studio where the surrounds are nice plain and white, the garage had all sorts of objects to reflect upon.


The flashes light the garage as well as the car, showing better reflections. Generally ambient lighting from the sunset/sunrise would be better as it is nice, warm, and less harsh for black cars or any car in general.


4506057261_503218fbf1_b.jpg


4510951698_4ce4af8b8b_b.jpg


4506264878_b7d7cab411_b.jpg


4510300061_b414a42acb_b.jpg


4506742888_4570f44347_b.jpg


4510937456_eb7805294c_b.jpg


More interesting work by Steven, check out whereisstevenpham.com

More photos can be seen on his flick: flickr.com/sil3ntp8nd8/

contact Steven by emailing him: [email protected]


996 Turbo Cabriolet - The Car Next Door: Thanks for looking!


4504220914_233a766680_b.jpg


Don't you wish she was in your garage?
 
wow really great job guys! The clarity and reflections looking amazing. I love the way you restored the original factory look to the top!
 
Another phenomenal job guys! :2thumbs:


I'd like to take that girl out on a date sometime! ;)
 
I could see myself marrying a girl like this...


Awesome write up and pictures! Quick question: Any engine bay before/afters?
 
Ok this is it. With outstanding work again from the AutoLavish Duo Makes me think I need to step up my game now. How am I suppose to post here when you guys keep raising the bar with every post. Another outstanding detail, yet again. Thanks for sharing. I can only hope the Black Porsche I have coming in tonight will present itself this nice when I'm done. On a side note, What kinda of flooring does Jacob have in his garage?
 
Awesome work on a gorgeous car :) I take it you used Raggtopp protectant on the top? Did you spray it on and then went over it with a brush? I'm asking as I'm taking delivery of my new convertible next weekend and am new to the Raggtopp products :)


Very nice garage btw, looks like a great place to work in.
 
Gah! She doesn't look that old? does that mean you guys are pedifiles? or are car years kinda like dog years?haha! j/k amazing job!
 
My goodness, that is nice! I think that's one of the best plates I've evar seen...really likin' it!
 
Back
Top