3 Cars, 1 Garage, 1 Week, All Perfect PCar, NSX and some old Muscle...

So I had a black 993 one week, a 56 Bel Air to prep for a show the next week and an NSX a few days later.....


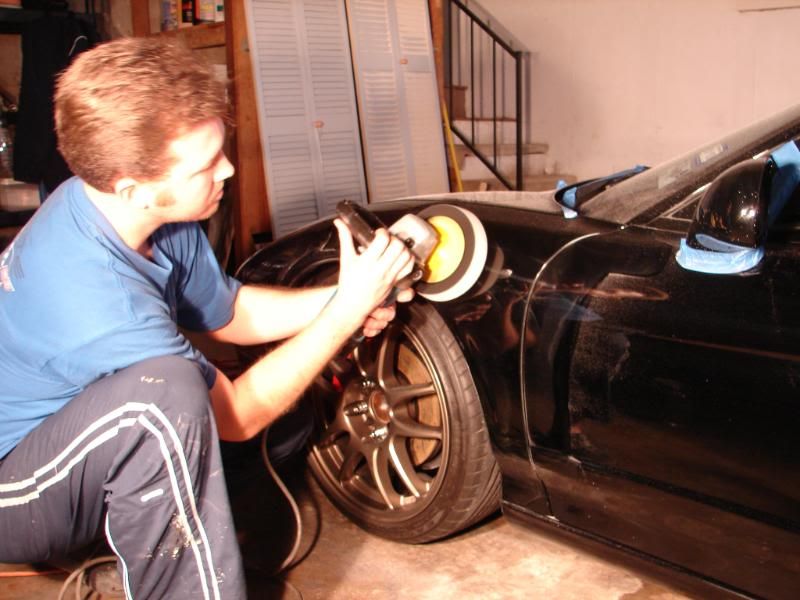
Problem is the 993 just stopped up with suspension work and came to me a week late so I got stuck with both 993 and 56 Bel Air the same week in my garage at the same time and then the NSX showed up...:buffing:


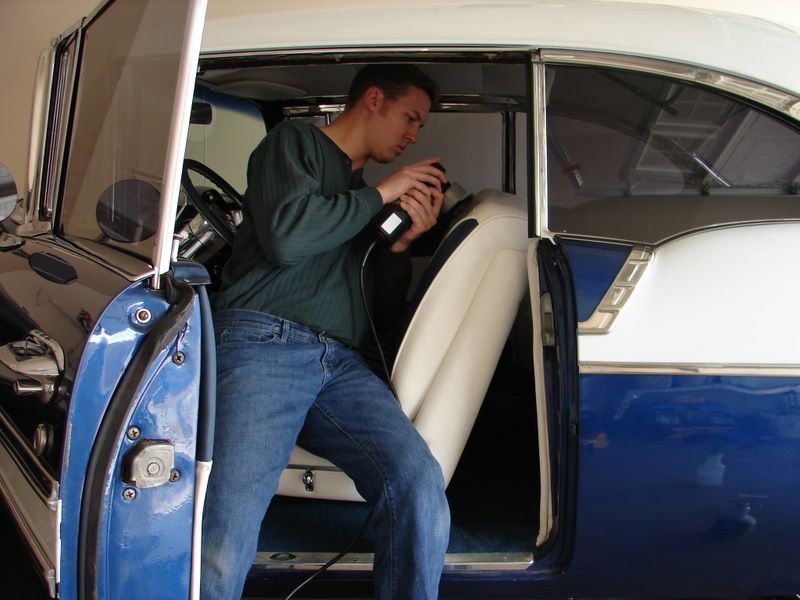
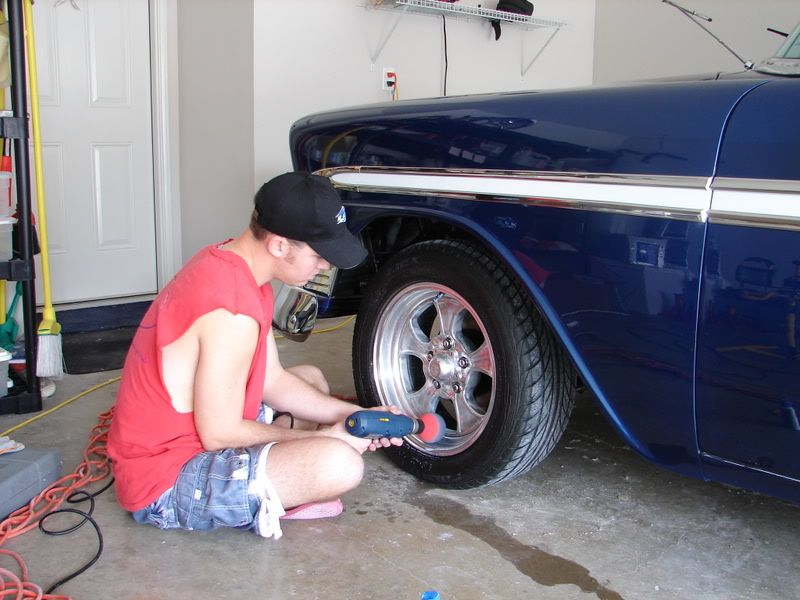
So here's what the garage looked like for a week or so, please forgive the crudeness of the nasty unfinished garage. We just moved into this home a few months ago and have been busy redoing the whole house unfortunately the garage will have to wait. But I will have it up to standards soon enough.


DSC01499.jpg


DSC01498.jpg


DSC01497.jpg


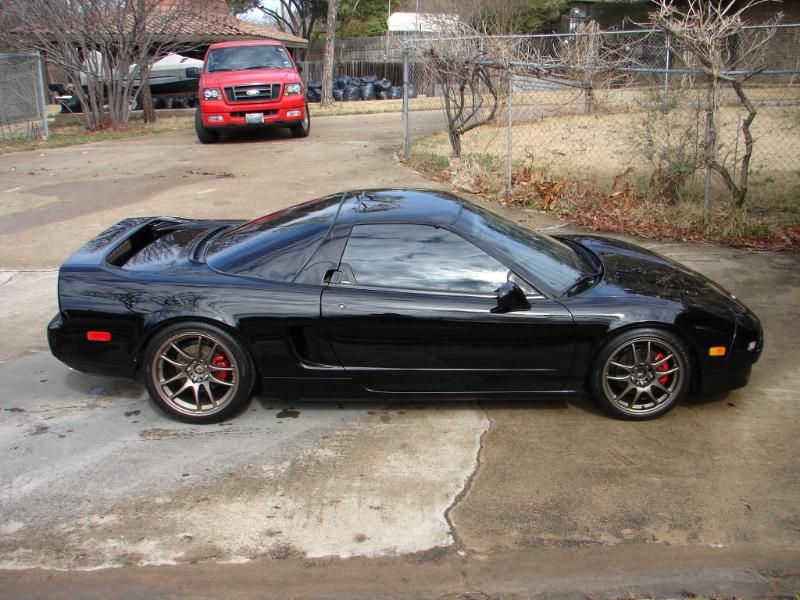
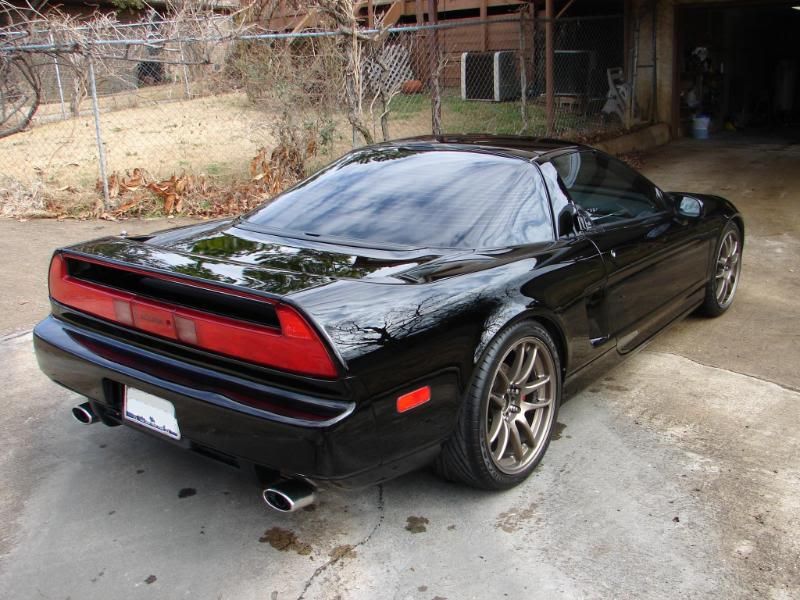
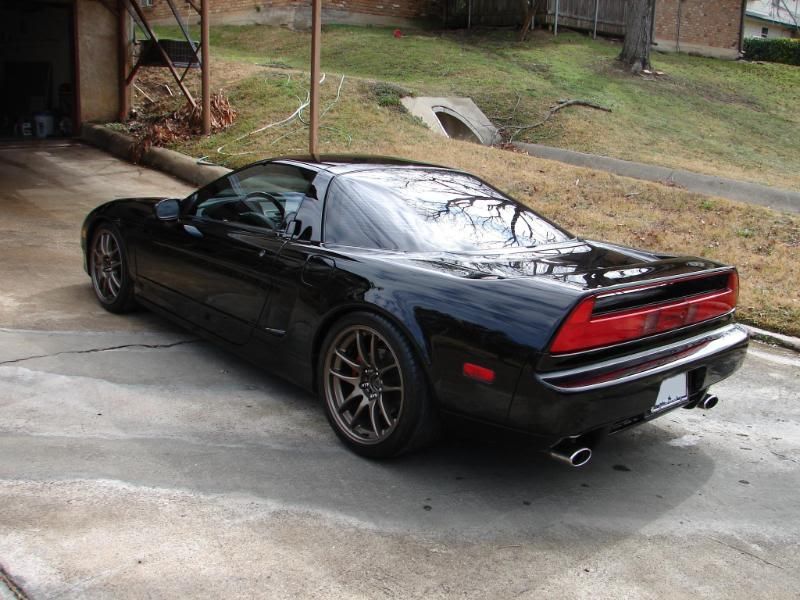
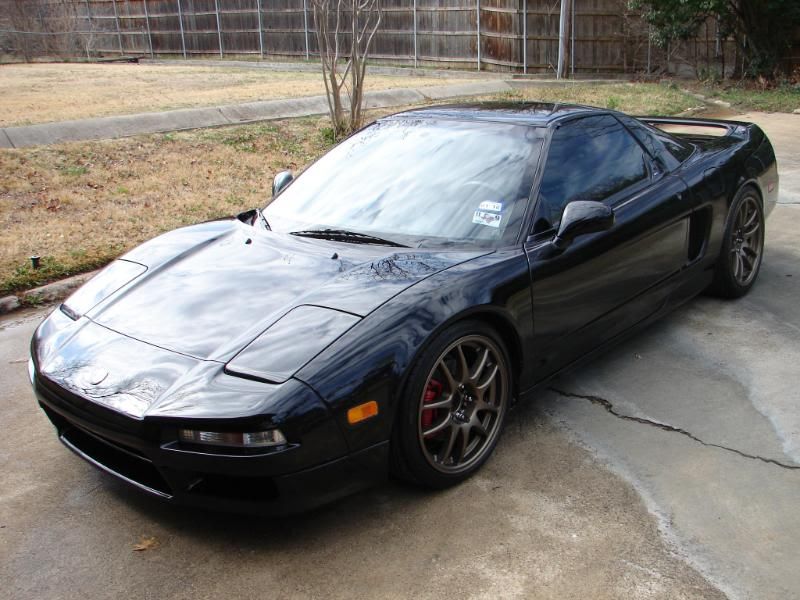
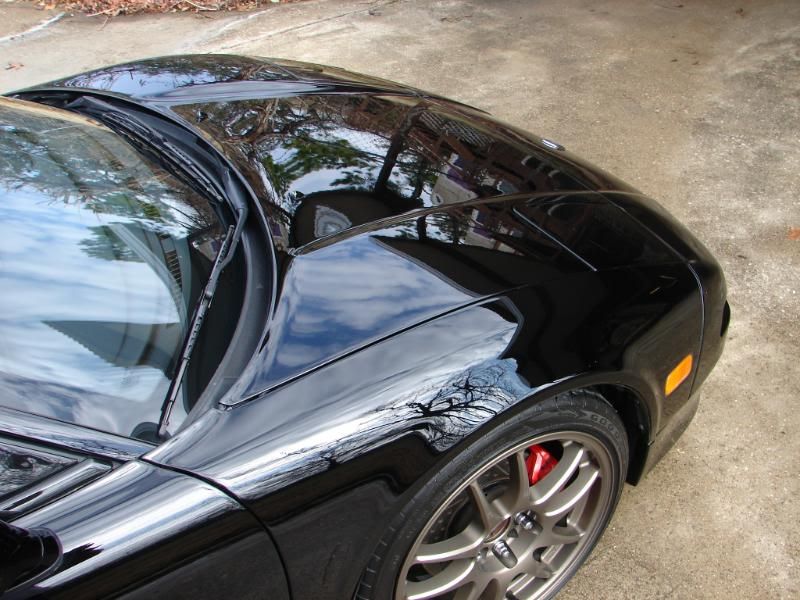
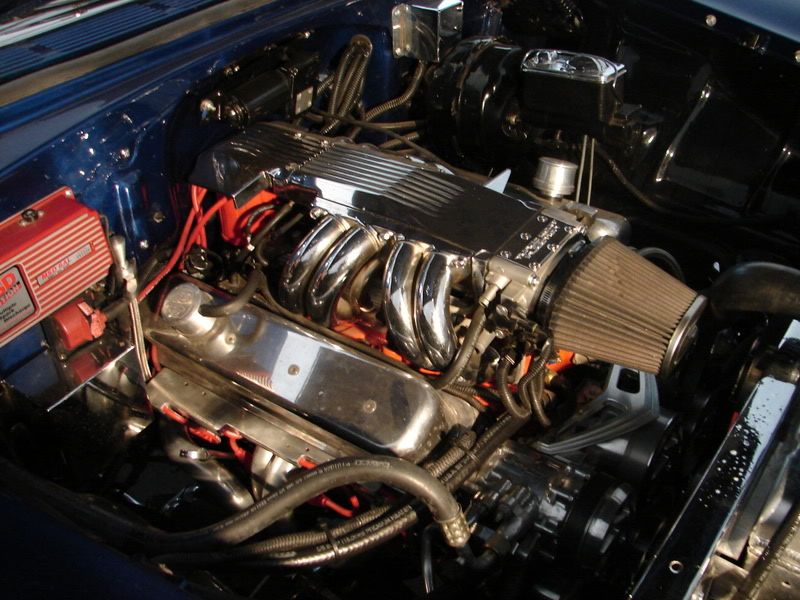
Here's my own little personal car show....btw they all placed first...:funnypost


DSC01504.jpg


DSC01503.jpg


DSC01624.jpg


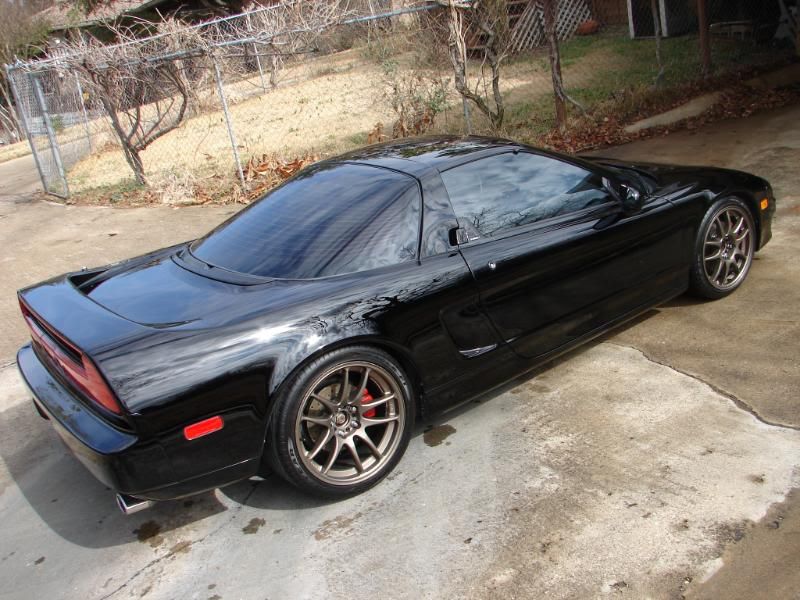
Funny how times have changed....

DSC01623.jpg


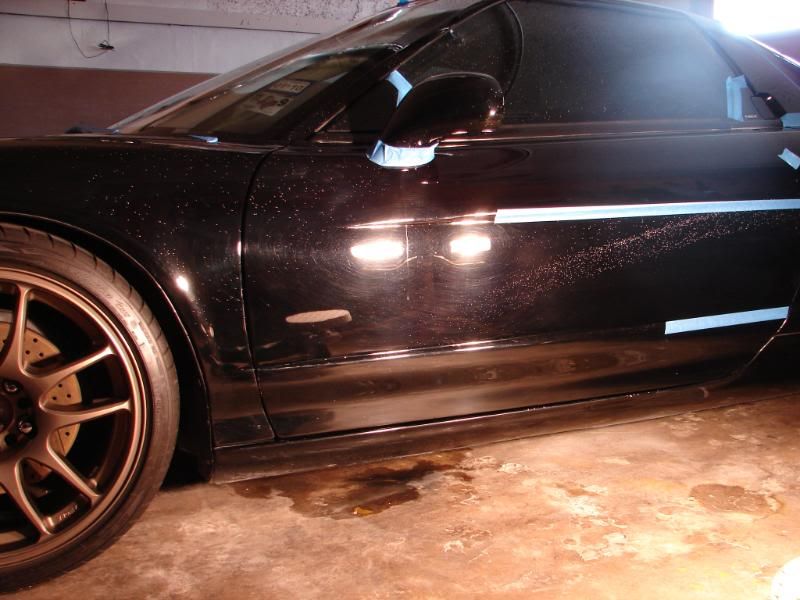
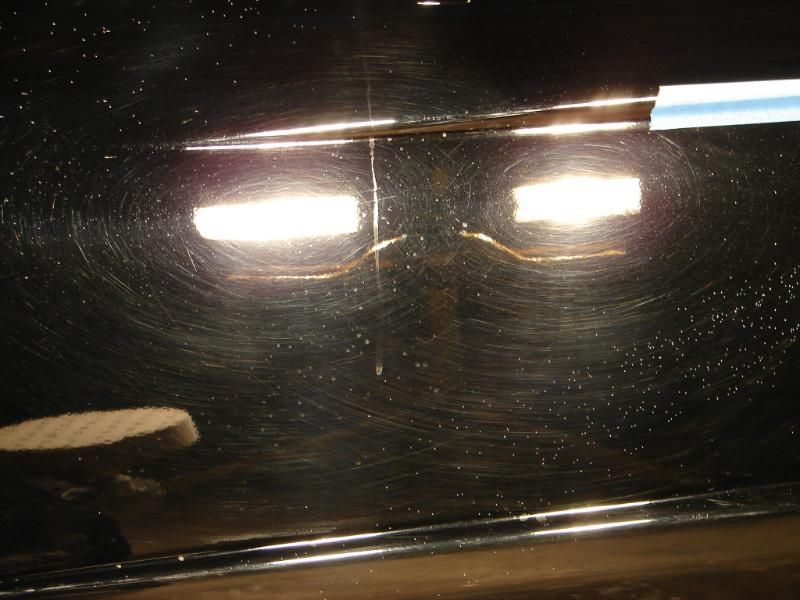
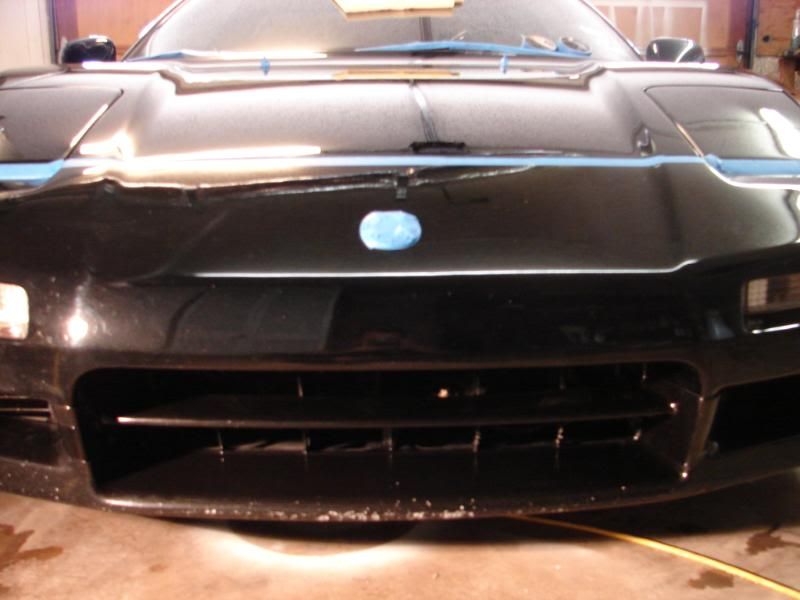
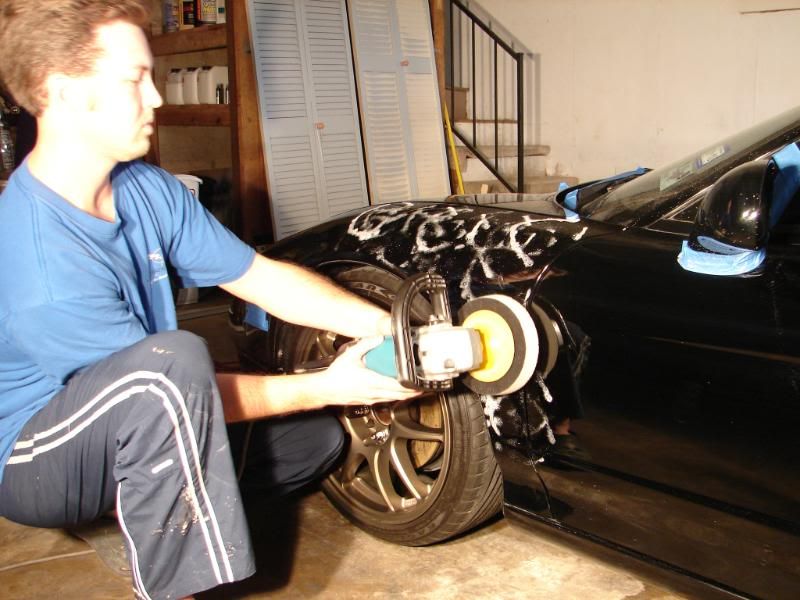
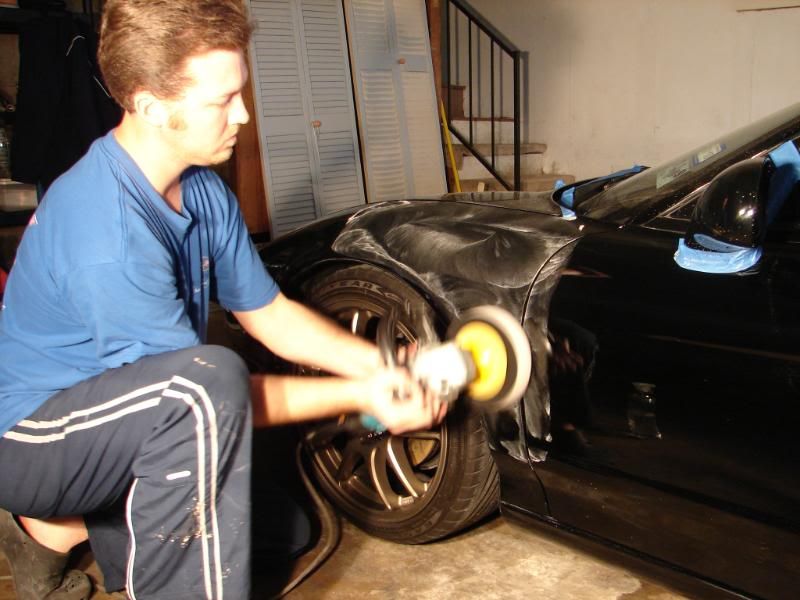
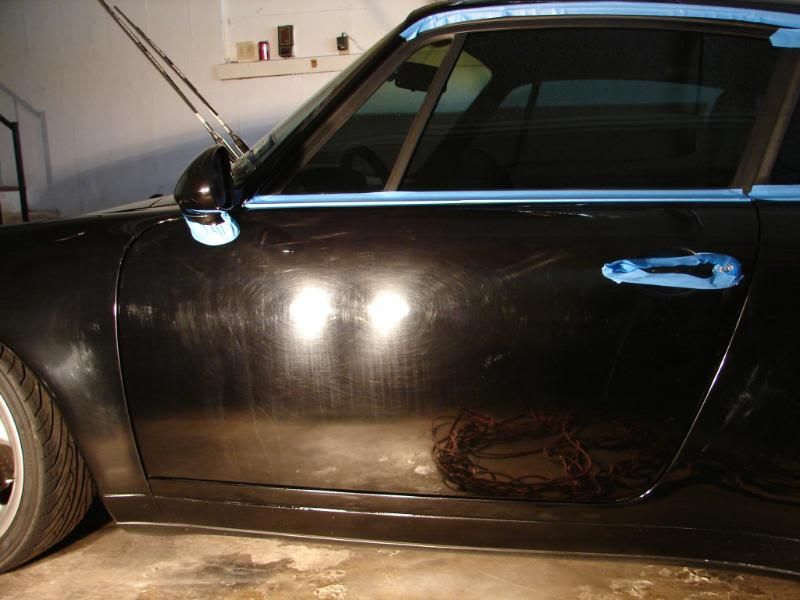
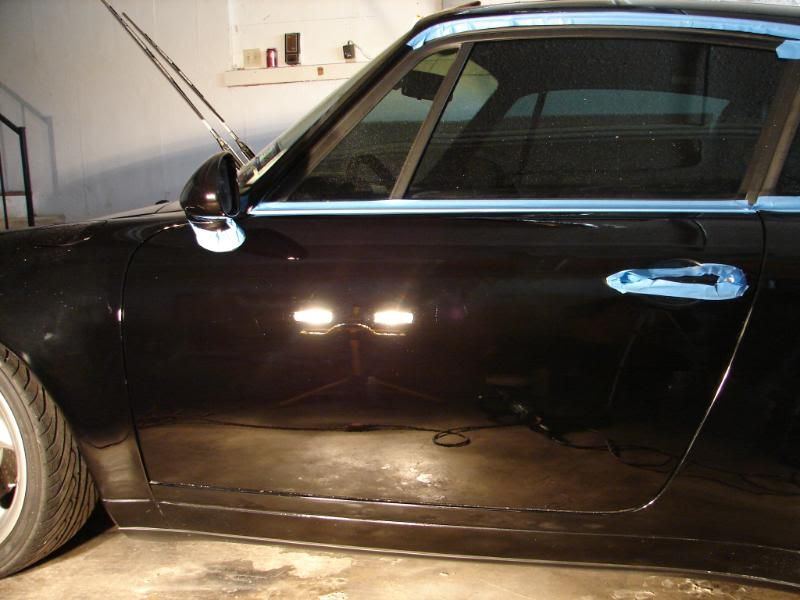
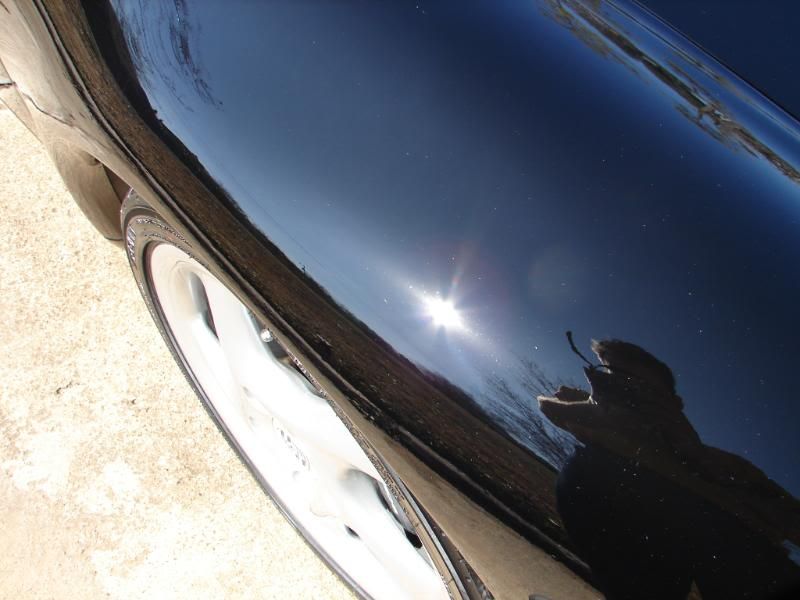
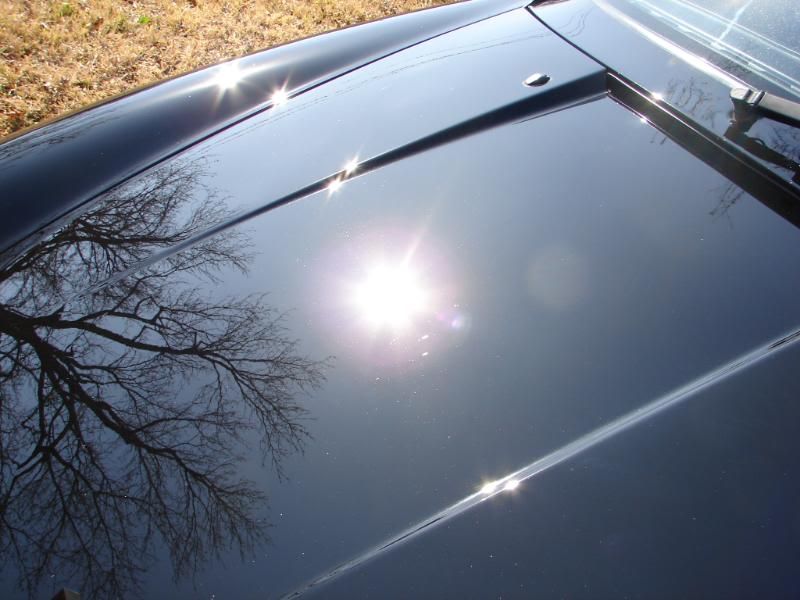
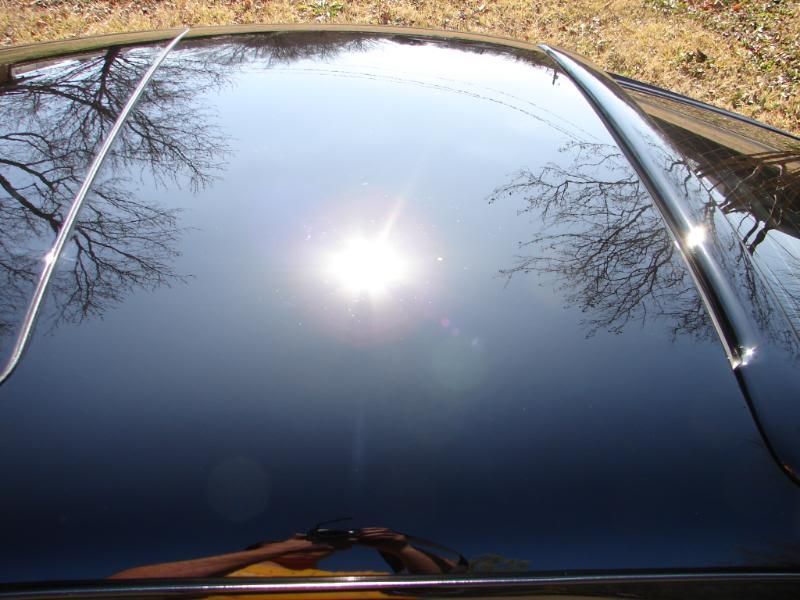
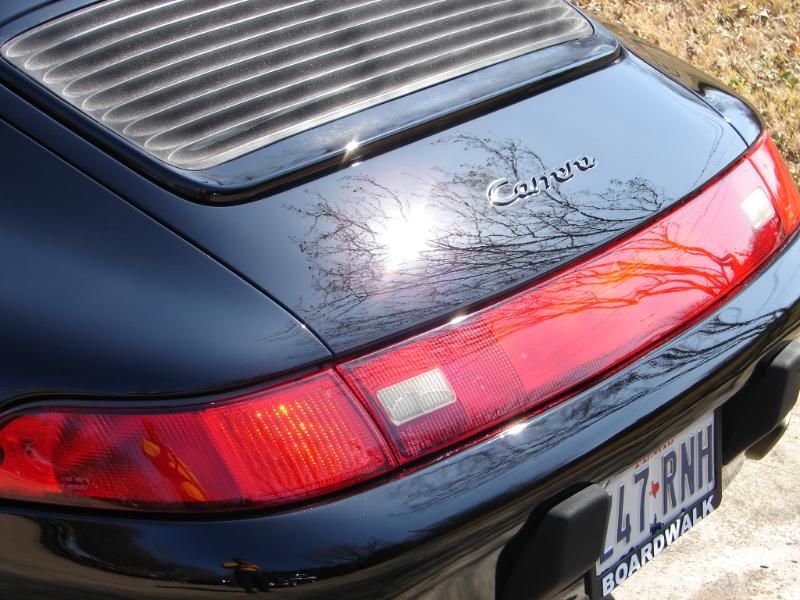
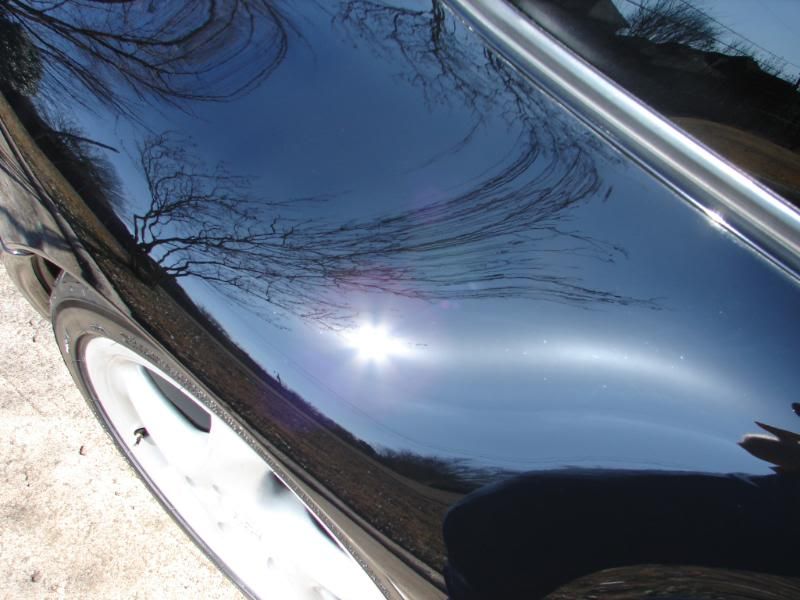
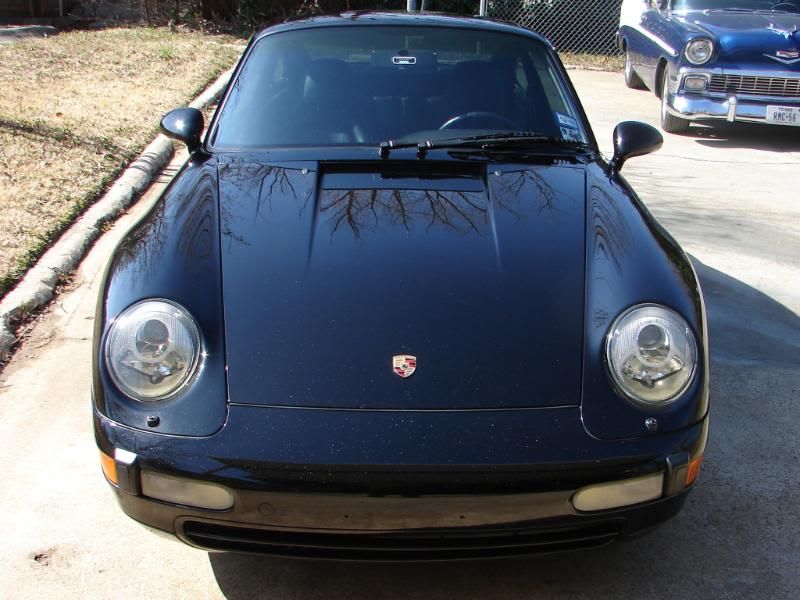
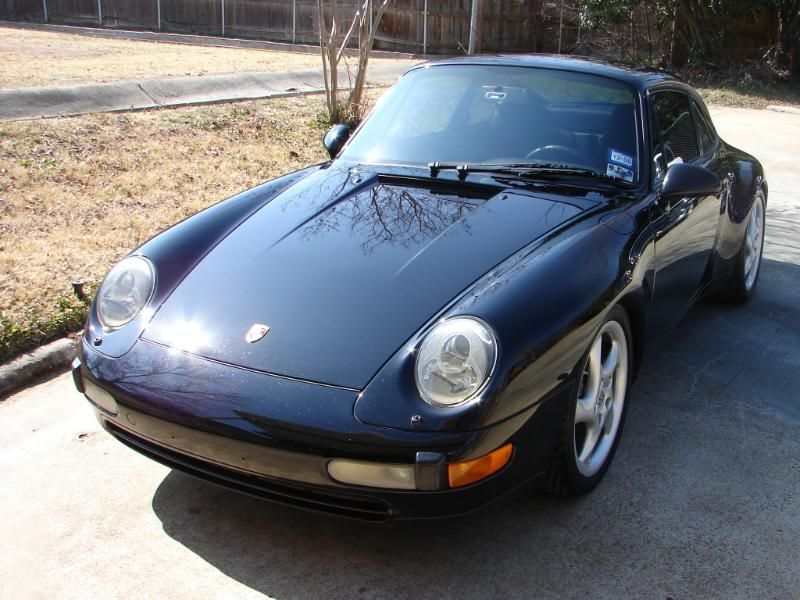
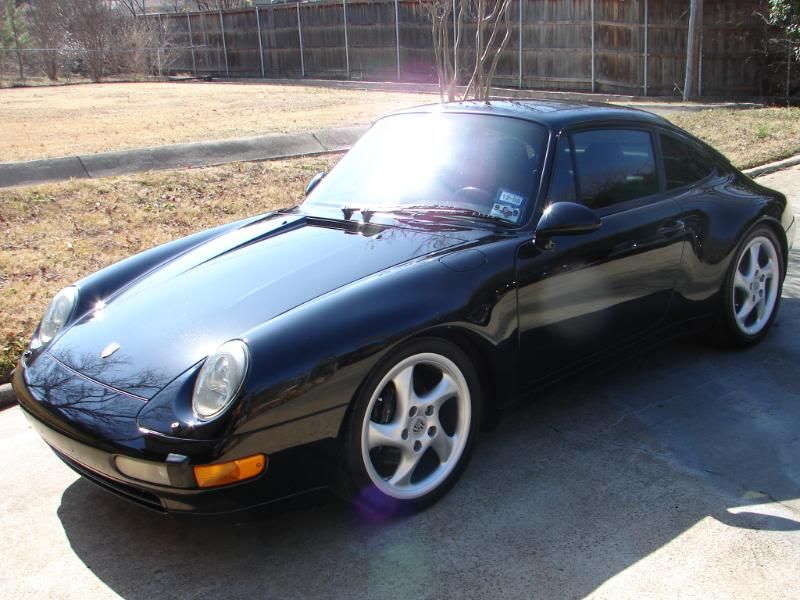
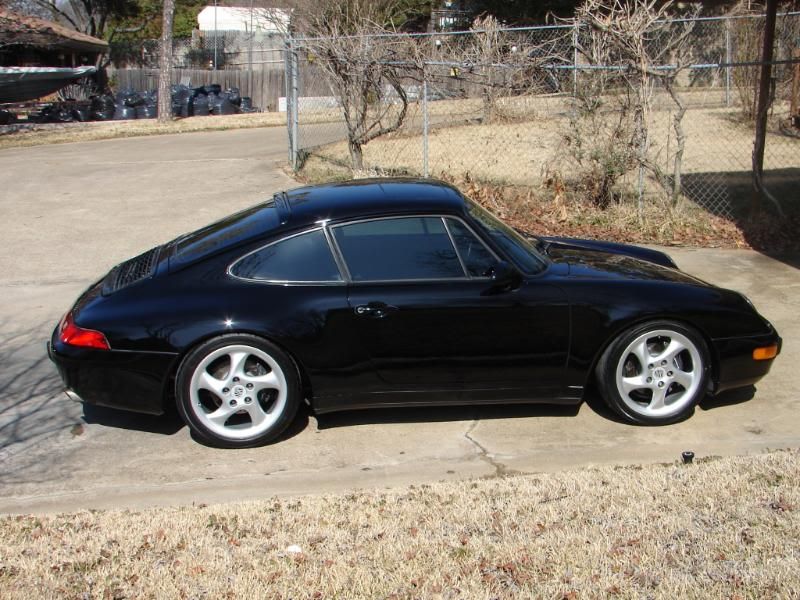
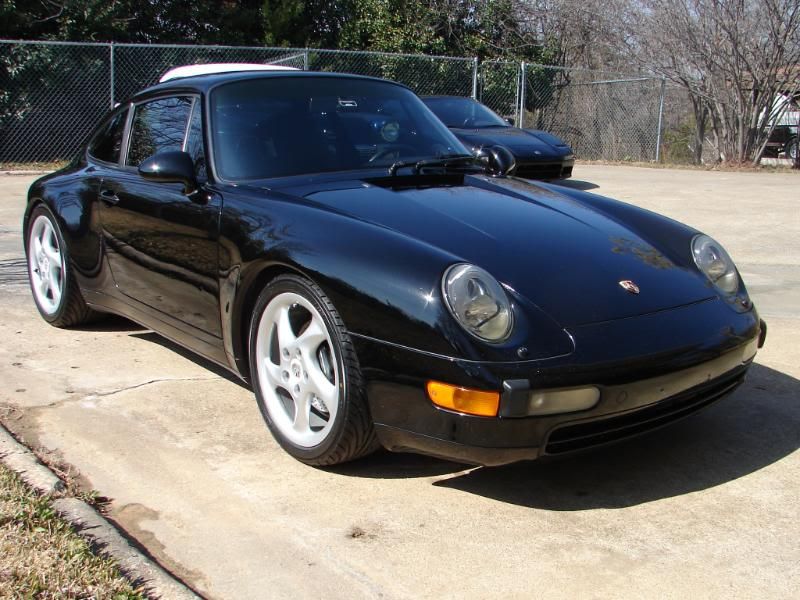
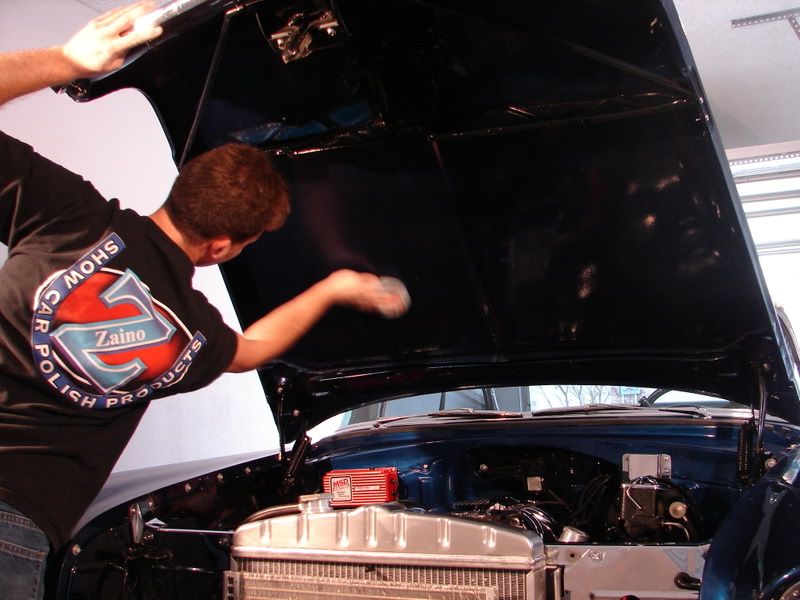
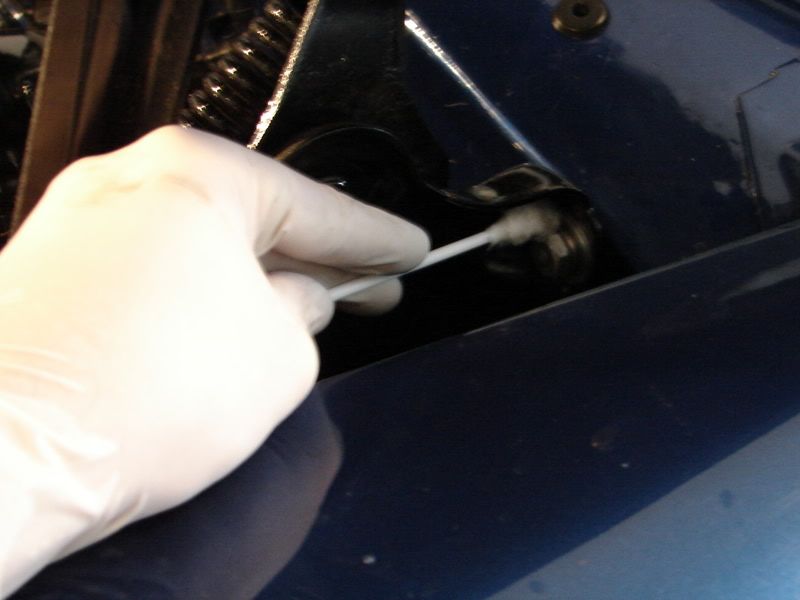
So I'll get started with the order I did them in. Basically the Bel Air came in first but I had the most time with it, so it got pushed to the end of the line and worked more on the Porsche first.


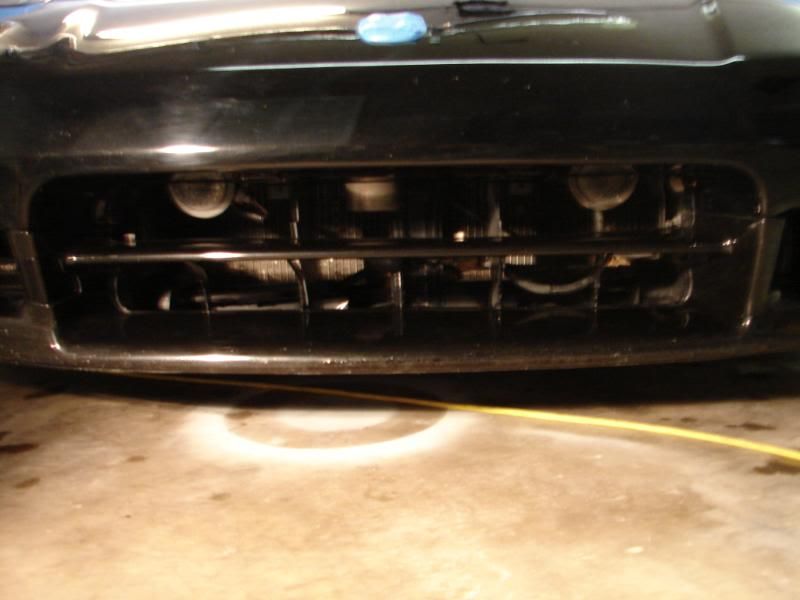
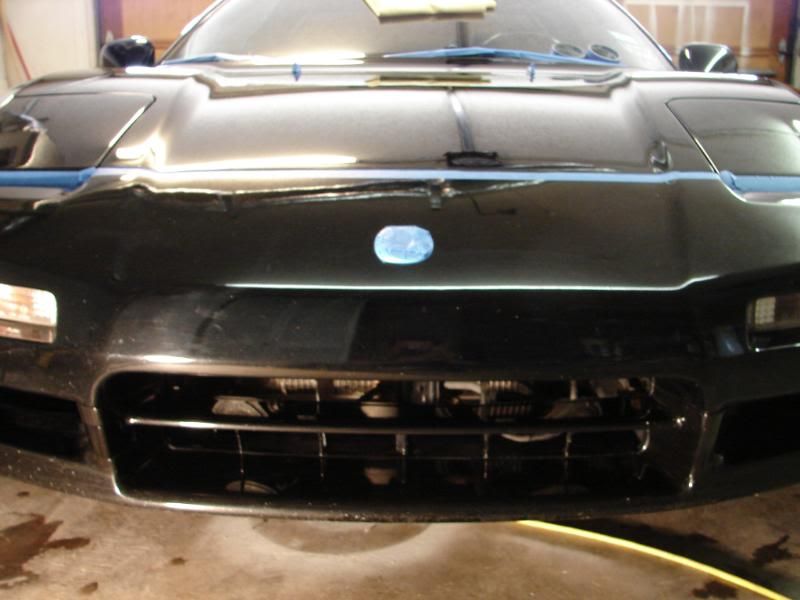
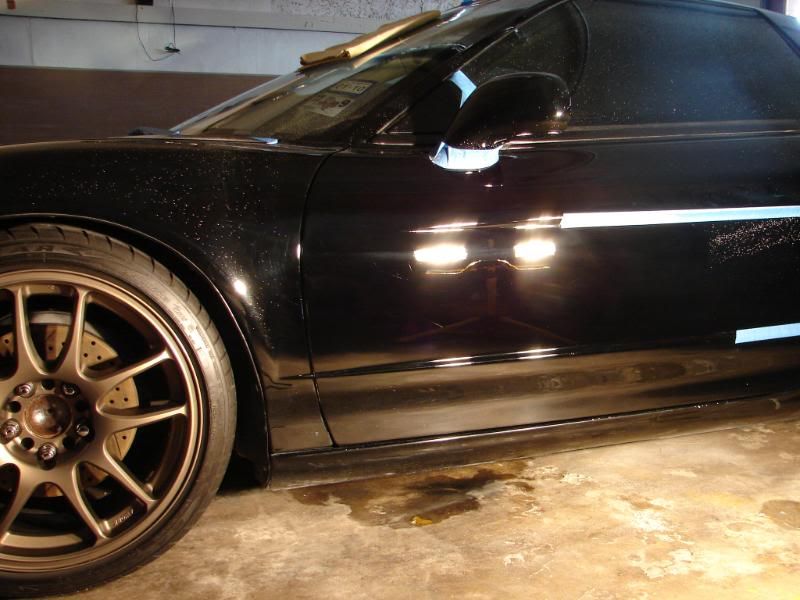
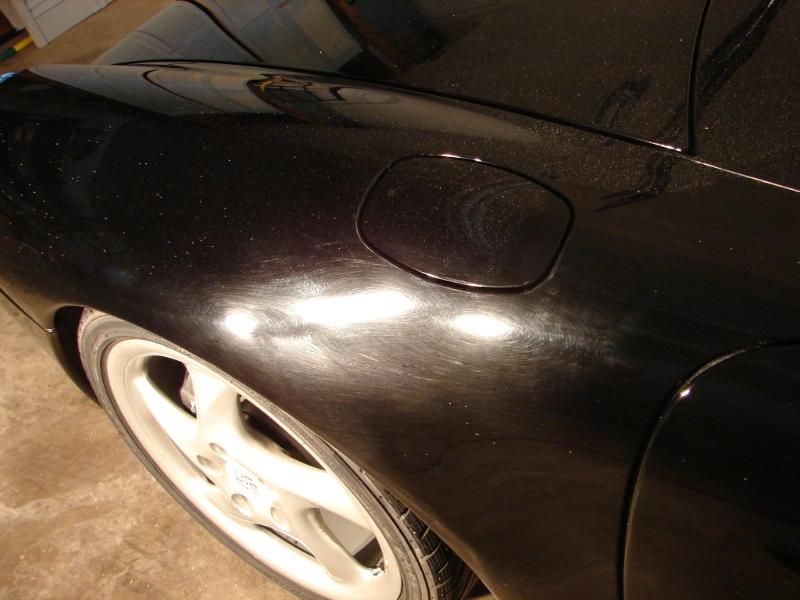
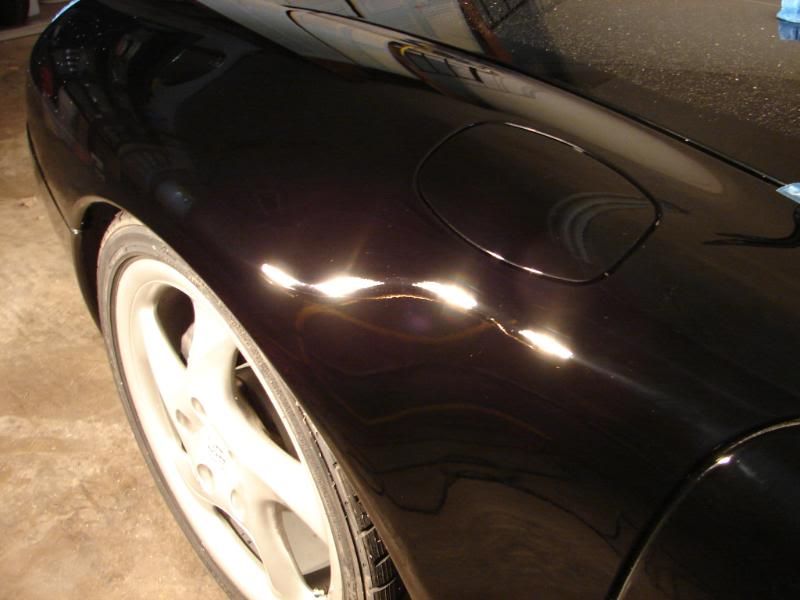
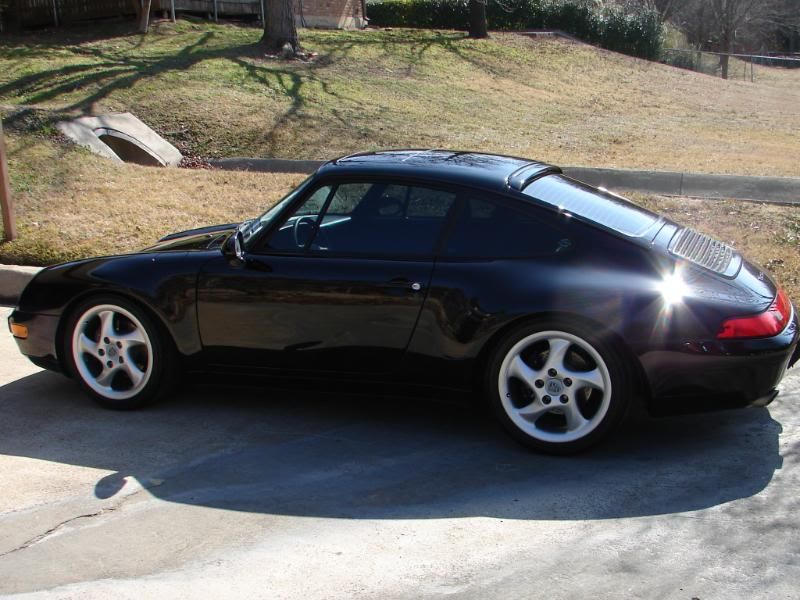
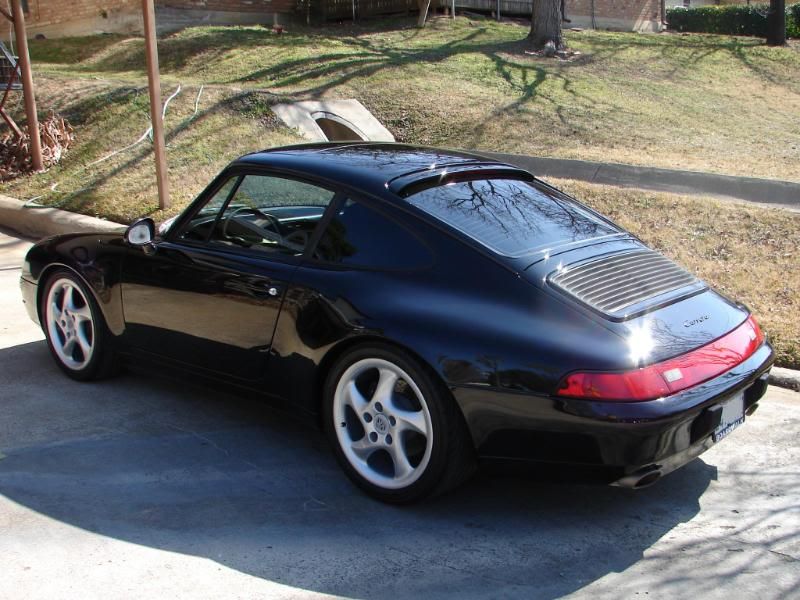
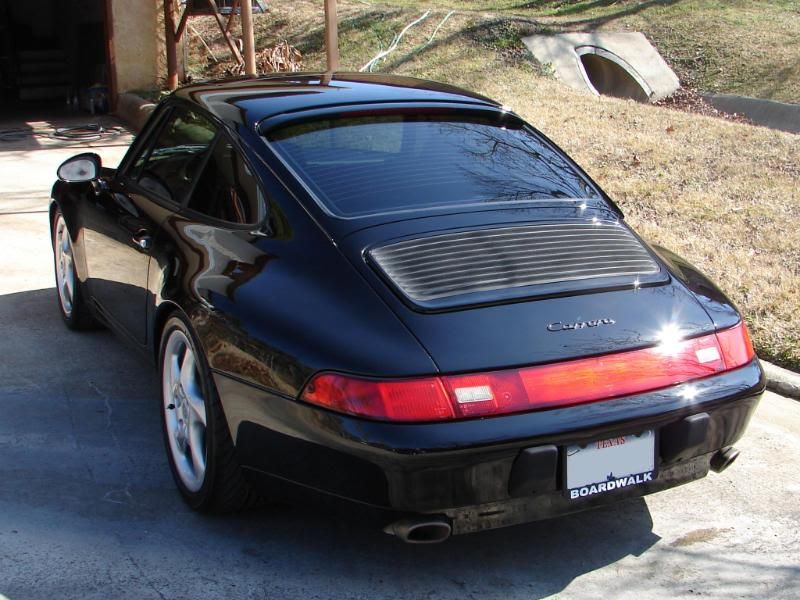
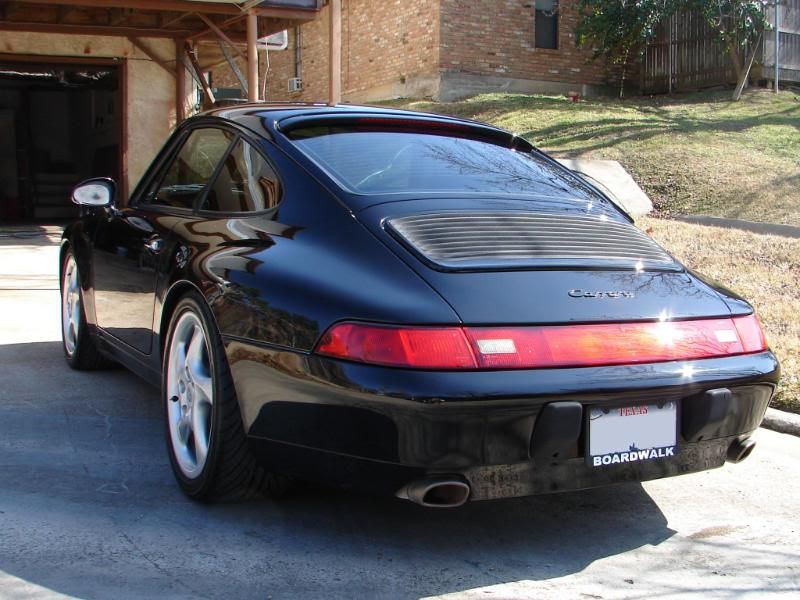
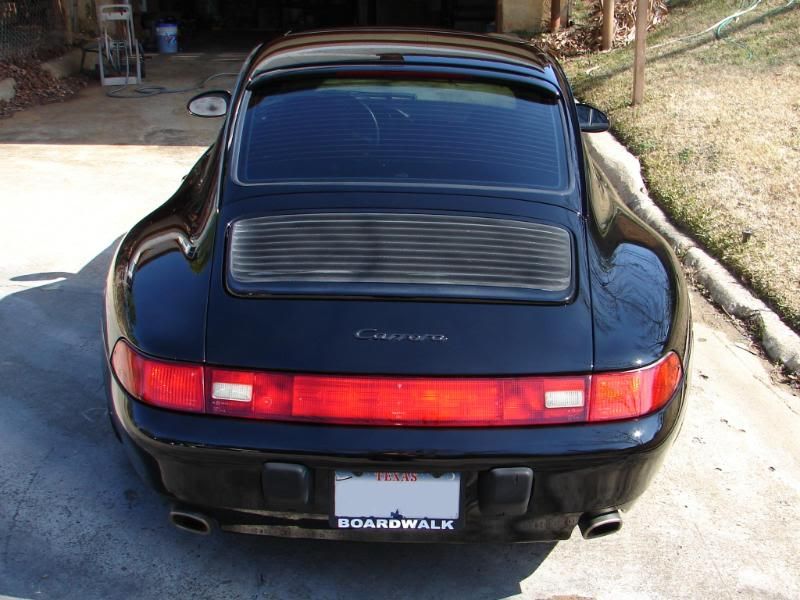
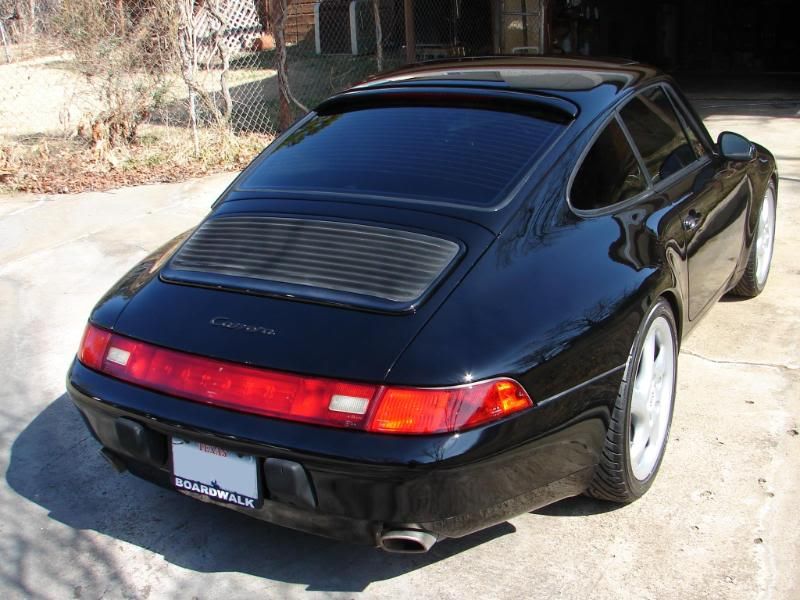
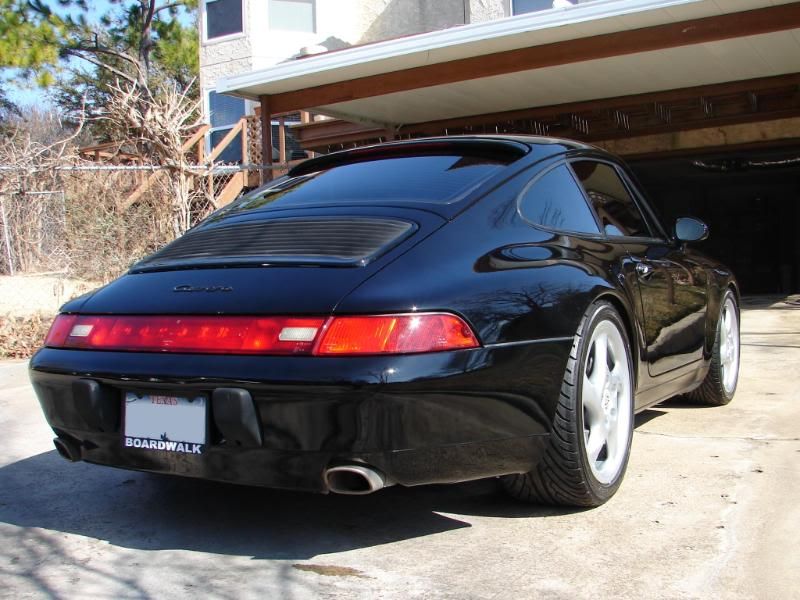
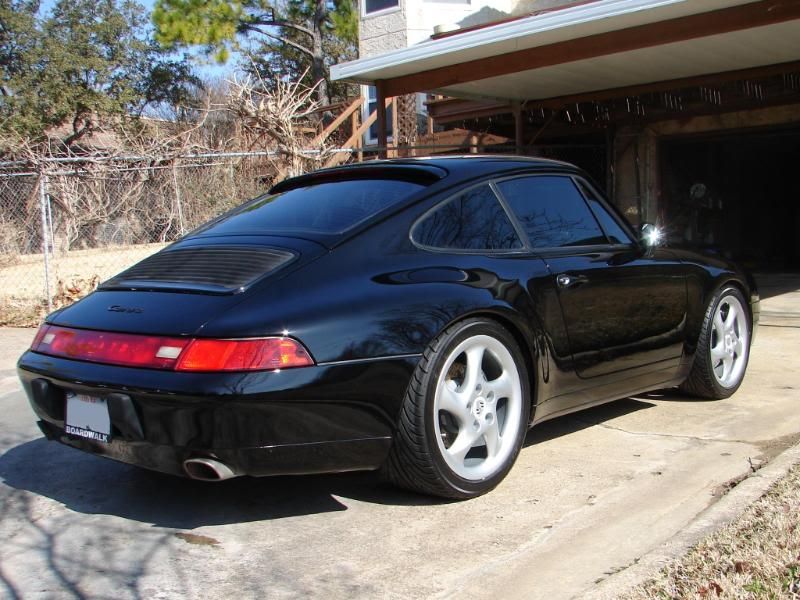
The 993 C2S was in bad shape and total time took me over 13 hours just on the paint, the owner was not concerned about the interior at all.
 
The swirls were pretty thick and both rear quaters had just been repainted.


Here's a few before pics, yes it's dirty and not yet washed but you can easily see the condition of the paint and swirls.


DSC01470.jpg


DSC01476.jpg


DSC01479.jpg


DSC01477.jpg


DSC01471.jpg


DSC01472.jpg


Notice the condition of the freshly paint quater panels? The paint was less then a week old too.

DSC01473.jpg


DSC01474.jpg


DSC01475.jpg


Soaking the car is dawn soap to prerinse the dirt.

I have noticed a signifcant difference in the dirty water bucket since I've started pre soaking cars this way. It just doesn't get near as dirty as much of the dirt rinses off the car prior to washing, if I had a real foam gun it would probably be even better.

DSC01480.jpg


DSC01481.jpg


After two bucket washing each panel thoroughly and rerinsing I clayed the panel.

DSC01482.jpg


Once it was completely washed and clayed I pulled it in for inspection with the hologens, not that they would show me anything different then the sunlight but I use them while polishing the car to inspect my paint correction process.

DSC01483.jpg


After thoroughly working in some Menz SIP with a LC white pad at 1500rpms then jeweling at 900 I reinspected the work before the final polishing, pretty nice results for the first step.


However the top surfaces were worse as the swirls were deeper and there were a few more RIDS so I compounded them with the PFW and M105 and then followed the above mentioned process. So the tops got a 3 step, and the sides only a 2 step.


DSC01484.jpg


DSC01485.jpg


It will still need a final step to ensure no holograms are left behind.


Here you can actually see where I overlapped the panel with the buffer as well as the next panel to perfect.

DSC01486.jpg


A little closer

DSC01488.jpg


DSC01487.jpg


After the first intial polishing step

DSC01490.jpg


A little closer

DSC01491.jpg


Here's another close up of the freshly paint driver rear quater.

DSC01492.jpg


After

DSC01493.jpg


Now that the intial correction is completed I can just jewel the surface with some Menz FPII and a black finish pad at 1100rpms and then turned down to 800rpms to finish off.


The results were about 98% perfection due to one deep scratch and front end being sand blasted over the years.
 
awesome collection right there. all very beautiful and very different cars. lots of diversity - and all very good for what they are. congrad's on the first place finishes!


(Edit: Sorry to jump the gun! looks like everything went well. u guys are really inspiring and do amazing work. thanx for sharing)

(Edit to the orginal edit:)

Grey porsche = not so pretty.

Black porsche = beautiful
 
The rims I used the Mothers Power Ball with some Zaino ZPC (fusion) to clean and polish the painted surface, then sealed them with some ZAIO to really make them pop.:bigups


Now for some pre LSP inspection with direct sunlight.


DSC01506.jpg


DSC01507.jpg


DSC01508.jpg


DSC01509.jpg


This is the area with the deep scratch.

Some of the little dots and blotches are just that along with some bird etching and a lot of chips and scuffs on the nose and hood so please don't mistake those issues for buffer trails or whatever. thanks

DSC01510.jpg


DSC01521.jpg


DSC01539.jpg


And onto the glamour shots

DSC01627.jpg
 
And finally finished ready for delivery back to the client.


The client was very busy at work and actually asked if I would drive it up to him about 20 miles away and he'd have someone bring me back..... NO PROBLEM!!!:drool::xyxthumbs


(for the record, I was very conserative and safe staying off of highways, I used to own a Vette so I've had my thrills already, plus the owner knows me and trusts I would never joyride in a clients vehicle):bigups


DSC01629.jpg


DSC01630.jpg


DSC01631.jpg


DSC01632.jpg


DSC01633.jpg


DSC01634.jpg


DSC01635.jpg


DSC01636.jpg


DSC01637.jpg


DSC01638.jpg


DSC01639.jpg


DSC01640.jpg


DSC01642.jpg


DSC01643.jpg


That's the Pcar, forgive my summerizing, but there's just always so much more that goes into making a car look this way then what can be typed up.


Plus I've still got to post up the NSX and Bel Air.
 
Now what I wanted to do was the NSX next but the Bel Air was going into a show and needed to be picked up in 3 days, but those days are all showing rain and the owner called and asked if he could pick it up early, so I hired my cousin to come and help out for a day or two..... or three....:lol


He basically washed, clayed and did the interior on the NSX to free up some time for me to take care of the Bel Air. He also helped out with the Bel Air with polishing rims and chrome and such which freed up more time for me to polish the paint.


So the Bel Air is for the Show so it has to be perfect inside out and everywhere else.


I'll try to keep it short and to the point.


I previously prepped this car a year ago for the same show and spent over 35 hours on it. Since it's a trailer queen, it doesn't see much road time and has spent the year in a shop getting upgraded suspension, power windows and such so the paint was still in great shape along with everything else I had reconditioned as it was well preserved.


The interior however was greased up from the mechanics so I had to redo it all.


All in all it only took me 15 hours to prep this year compared to the 35 hours it took me last year.


I did not take many before and after since I already had many of this car but here's what I got.:xyxthumbs


After washing and claying I focused on the interior as it was in the worst shape.


I had to pull out the PC with the bristled brush attachment to reshampoo all the seats then wiped them down with 303 Aerospace and Zaino Leather Cleaner.

DSC03820.jpg


They turned out white again.

DSC01435.jpg


DSC01436.jpg


New armrests and door panel covers.

DSC01437.jpg


After the shampooing, everything had to be rewiped down with Z9 and 303 since the PC spins off a lot of dirt onto other parts.


Once the vynal was perfect, I started with all the chrome trim on the interior, eveything from the dash to the frame around the windows was hand polished with MF towels and Blue Magic then sealed with ZAIO.


EVERYTHING was hand polished and sealed....

DSC01421.jpg


DSC01420.jpg


DSC01422.jpg


back windows

DSC01423.jpg


I had to be very careful not to get the metal polish on the vynal or it would stain it.

DSC01424.jpg


DSC01425.jpg


So that's basically one side done.... took me over 4 hours to do the interior.


Also had to polish the painted dash. For this I used ZPC, for it's unique ability to break down quickly and not leaving any marring behind when used by hand. I had to rub it in as fast as humanly possible to try to re-enact the motions and ability the buffer used.


In these pics I am applied the LSP used ZAIO. It turned out well.

ZPC by hand on all interior painted surfaces. Obviously these shots are staged as there's no way I could polish and take pics at the same time but this shows you what was done and where.

DSC01426.jpg


DSC01432.jpg


Even the painted underside of the dash got polished.

DSC01431.jpg


DSC01430.jpg


DSC01429.jpg


DSC01428.jpg


After the polishing is completed and wiped down I sealed it with ZAIO.

DSC01433.jpg


DSC01434.jpg


Now for the interior after pics.
 
This is the interior after completion and about 4+ hours.


Yes, all the knobs and handles were polished.


DSC01438.jpg


DSC01439.jpg


DSC01446.jpg


DSC01445.jpg


All the gauges and trim and steering wheel column were polished.

DSC01444.jpg


DSC01443.jpg


DSC01442.jpg


DSC01441.jpg


DSC01451.jpg


DSC01452.jpg


DSC01454.jpg


Yes, polished

DSC01461.jpg


DSC01462.jpg


DSC01464.jpg


DSC01455.jpg


DSC01459.jpg


DSC01457.jpg


Okay, so now that the interior's complete I can move onto polishing the paint and engine bay.
 
The paint was still in relatively great shape, but there were a few new scratches from where the mechanics climbed around on it....


The hood and trunk basically got a 2 step process starting with M105 and PFW pad worked in @1700rpms and then Menz IP and LC white pad worked in @ 1500 then jeweled @ 900rpms. The paint is pretty hard so I could easily finish down the whole car with Menz IP and a LC white pad. It looked great again after completed. Unfortunately I don't have any before and afters of the paint this go around, but do have quite a few from a year ago.


The rims got cleaned and then #0000 Steel Wool to remove any oxidation then polished with Mother's Power Ball and Blue Magic metal polish.


Here's me last year polishing the rims.

DSC04141.jpg


The engine bay was still in great shape as well so it only needed to be shampood and rewaxed to sparkle again.


Everything you see was polished by hand and sealed with ZAIO.

DSC03926.jpg


DSC03925.jpg


DSC03920.jpg


DSC03918.jpg


DSC03912.jpg


DSC03913.jpg


DSC03937.jpg


DSC03936.jpg


DSC03927.jpg


Since I did not document my paint steps, I'll throw in one from last year.

DSC04121.jpg


DSC04133.jpg


Now the car is finished and a couple coats of ZAIO followed by Z5 are on I will show the final results.
 
Unfortunately it was overcast and the sun was going down but I still managed to snap a couple shots before the owner picked up the car.


Good news is that I finished it two days ahead of due date to avoid rain.:xyxthumbs


DSC01550.jpg


DSC01554.jpg


DSC01555.jpg


DSC01556.jpg


DSC01557.jpg


DSC01558.jpg


DSC01653.jpg


DSC01647.jpg


DSC01646.jpg


DSC01652.jpg


DSC01651.jpg


DSC01650.jpg


DSC01649.jpg


DSC01648.jpg


Now that the Porsche and ol Chevy are done I can finally consentrate on the 92 NSX.
 
Dude... hurry up man... I'm dying to get to the NSX!!! Great job, so far but the NSX is my favorite of the three!


I'm may have to "bump" this a few times to get you onto page 2.
 
So this is a 92 Acura NSX with 135,000 miles on it and the owner wants it to look it's best. He's in the final process of restoring the car to his liking and the paint is one of the final pieces in the puzzle.


After a personal inspection and conversation with the owner he decided to pull the trigger.


This car is black and took me over 12 hours.


As mentioned previously I hired my cousin to help take some of the load as I was up till 2am for a week straight working on these 3 cars in order to get them all finished in time.


This NSX is half repainted, the doors all the way to the front bumper are newly painted within the last few years and the roof, hatch and rear quarters are all origional paint but they need to match perfectly so no one can tell. No problem....:faint:


My cousin decontaminated the car and touched up the interior while I kept busy on other things.


After that it was pulled in for further inspection under the 500W.


Here's what I found....... SWIRLS??? no surprise.:rofl

DSC01566.jpg


DSC01567.jpg


Now previous work on newer NSX would tell me that the paint is the softest I've ever dealt with, but this being half respray and half new throws a whole new game plan into effect.


The new half (doors and front) were soft, but not crazy soft as the newer NSX's and the back half (origional paint) was medium soft, not hard, but not too soft.


Before I start the correction the owner expressed wanting me to touch up some rough areas first so I did.


The nose was horribly chipped and it being black made for a more easy fix.

DSC01542.jpg


DSC01543.jpg


So I got some black touch up and went to town.

DSC01545.jpg


DSC01544.jpg


I also touched up a few of the larger chips on the nose, hood and mirrors and such.


Now onto polishing. First to tape up the entire car.


NSX's have many extreme angles and lots of rubber trim so to ensure I do not burn any paint or trim I tape off a lot of them as most of you know.


DSC01561.jpg


DSC01562.jpg


DSC01563.jpg


DSC01564.jpg


DSC01565.jpg


Now onto paint polishing.
 
So since there are two different paints on this car I must perform two different test sections. And the results were the front half is a bit softer then the back half forcing me to slightly change up my game plan on the back half.


For the front half I simply polished it with Menz IP with LC white pad at 1500rpms then turned down to 900rpm. I follow this same process for most of my cars to get an idea of how hard or soft the paint is. This really did the trick to cleaning the swirls off the front half. Then of course I follow up with Menz FPII and a LC black pad at 1100 jeweled down to 700rpms to finish it off hologram free.


Here is some pics of me working in and breaking down the Menz IP on the front fender.


DSC01570.jpg


Pay no attention to the overgrown uncombed bed head.:bigups

This is blotting it onto the paint just before spreading it around.

Next I spritz a few times with water to help lubricate then start working it in.

DSC01572.jpg


Working in. Notice how the polish is still white and not yet broke down.

DSC01573.jpg


Here the polish is completely broke down and I'm done working it in so I turn it down to about 900rpms and jewel it further. You must be cautious and ensure the doors and panels are properly aligned cause if one is lined up higher then another you can burn the edge. If that were the case I would tape off the higher edge.

DSC01575.jpg


After polishing the first step.

DSC01576.jpg


door

DSC01566.jpg


DSC01568.jpg


There were quite a few rids on this car but I did not do any wetsanding to remove them as the owner was only looking for 95% perfect as I explained what that other 5% takes to make perfect and we concluded 95% would be just fine.:lol


Now I did not document the second half as it is pretty repetative, but basically the paint was a little tougher and slightly more damage so I did an additional pass on the side as well as used a bit more down pressure to heat to really get under it more.


The roof and hatch/trunk required a PFW pad with M105 to get up some deeper scratches and water etching but after that it was the same process as the rest.


Here's the final results.
 
I forget to mention a lot of my steps due to how much goes into each car, but they were all rewashed after polishing to get lubes and such off before applying LSP's.


Tires all got Meg's Hyper Shine 2.5:1 ratio and exhaust on NSX got #0000 steel wool. Interiors get alot of 303 wipe downs, Zaino Z10 leather conditioner and dusted, vacuumed....etc.....


back to the show...

I polished, inspected, final polished, rewashed, inspected in the sun then LSP'd.:faint:


So here are the final pics.


My favorite:drool::drool::drool::drool::drool::drool::drool:

DSC01621.jpg


I tried getting sun pics but you can tell from the reflections that it was cloudy. As soon as the sun would peak through I tried to get it but really to no avail.


Here's the best sun shots I could get.

DSC01610.jpg


DSC01612.jpg


DSC01613.jpg


DSC01583.jpg


DSC01584.jpg


DSC01585.jpg


DSC01586.jpg


DSC01581.jpg


DSC01587.jpg


DSC01588.jpg


DSC01592.jpg


DSC01593.jpg


DSC01597.jpg


Cloudy cloudy day.:cry:

DSC01598.jpg


DSC01599.jpg


DSC01600.jpg


DSC01601.jpg


DSC01603.jpg


DSC01604.jpg


A few more to come.
 
Back
Top