RaysWay
Autopia Specialist
This was a welcome change to the usual vehicles I get to work on. This is a 2016 Honda Accord Hybrid with all the bells and whistles brand new from the dealership. This job came to me as a referral from a previous Coating Detail on an Infiniti G37. He wanted the same coating applied to his vehicle - Optimum Gloss-Coat.

He contacted me a few days before picking up his Accord to figure out the best course of action for his ride. He was going to have pinstriping installed and wanted to know if it would be best to apply it before or after the coating was installed. I told him to go ahead and apply the pinstriping first since the installer would likely have to remove the coating for proper adhesion. Also, if the installer left any light scratches or scuff marks from the installation, I would be able to remove them completely.

I walked around the vehicle with the customer and verified everything we talked about. In the past, I've made the mistake of not walking around the vehicle with the customer and we ended up on different pages. He was under the impression that the engine bay was included in his price. He called me the next day and I apologized for the confusion and told him to bring it back that night for a full engine detail. Since then, I've gone out of my way to make sure the customer is on the same page with me. Once I finalize my logo, I'll make my own Vehicle Inspection Form to give to the customer. Mike Phillips has a great template on AGO if you're looking for one.
This is also a great opportunity to UPSELL. For example, point out their oxidized headlights and offer a headlight restoration. I've had great success telling the customer "while I have your car, how about I restore these headlghts? Or those are nice wheels, you should consider upgrading to a wheel coating or sealant for better protection; etc etc". Headlight restorations, interior steam cleaning, engine details and wheel protectants are some of my most popular upsells. If you're not upselling, you're not maximizing your profits. I know when I'm purchasing a service, I try and leave a little wiggle room in my budget; it's the sellers job to squeeze out as much out of me as possible.

Here's the car upon delivery. Overall it was in great shape, but it did NOT pass the baggie test.


The customer wanted any dealership propaganda removed.


I started with a foam bath using 3D Pink Car Soap in an Autopia Foamaster Gun. When prepping a car for a full paint correction, the surface needs to be clean of any waxes or conditioner or gloss enhancers for best correction results. 3D Pink Car Soap contains no fillers, waxes, or gloss enhancers, so it rinses easily leaving a clean surface to compound or polish. (Note: The wheels and tires are also cleaned in this step)

I wanted to be as gentle to the paint as possible to avoid putting any more swirl marks or scratches into the paint. This client was trusting me with their brand new car and I wanted to leave as much clearcoat on the paint as possible. I normally save the Koala Wash Mitt for when I'm maintaining my own car, but I used it on this new car. I was extra careful around the fresh pinstriping, since I knew it had been installed very recently. The last thing I wanted to do is make a phone call apologizing that I had damaged the pinstriping! The long-hair Merino wool wash mitt was the perfect tool for the job.
For decontamination, I started with Optimum FerreX applied to the entire vehicle to dissolve the first layer of contaminants. This would help my clay bar to be more effective while minimizing the chance of scratching the paint and making more work for myself. For the clay, I normally use a Nanoskin Medium Grade Wash Mitt to make quick work of this step; but since I wanted to be as gentle as possible I used a Pinnacle Ultra Poly Clay Bar with Optimum No Rinse diluted in a Kwazar Mercury Pro Double Action Spray Bottle.
This is a shot of the clay bar after only the hood we clayed. I like to document as much of the detail as possible for any skeptical future customers that say their new car doesn't need to be clay barred. This is the perfect example of a car with less than 50 miles on the clock, yet requires a full decontamination before a coating can be applied. Keep in mind, this was AFTER using Optimum FerreX. The contaminants found on the clay bar would have been worse if I didn't use FerreX first.

After washing, I used a DP Turbo Car Dryer to blow dry the majority of the Honda along with a Duragloss Plush Microfiber Drying Towel to make sure any pesky water wouldn't leech its way out from behind an emblem or between a door panel.

Driving a car that makes almost no sound on start up is an eery feeling. I drove the car inside and used my 2600 Lumen 5000k Light Stand to magnify any defects in the paint.

Overall, the paint was in excellent condition, but I was able to find scuff marks around the car.

Since the car was in great shape to begin with, I was able to really take my time and find any tiny defect. It sounds like this would be an easy job, but I think taking a vehicle from 90% to 100%, is just as difficult as taking a car from 40% to 90% because ANY defect sticks out like a sore spot. I wanted to make this car perfect (or as close to perfect as possible).

I used 3D AAT Finishing Polish to remove the light defects with a Buff and Shine Black Foam Finishing Pad on a Griots Garage 6 inch Dual Action Polisher.

The dealership logo was remover by carefully weakening the adhesive with a heat gun, then a 3M Eraser Tool. This metallic type of adhesive was super difficult to remove by hand. I saved myself a lot of time by using the eraser tool on a Milwaukee drill.

(The dealership sticker is no longer below the Accord logo)

The entire car was polished thoroughly while paying extra attention to the pin striping.

Meguiars #10 was all I needed to by hand with a microfiber applicator to clean up all of the exterior plastic.

Love the headlights on the car. He told me the blue accent trim is an added option.


CarPro CQuartz was applied to the wheels (upsell") )
)

CQuartz Fabric and Leather Coating was applied to the interior.

CarPro PERL was applied to the tires.

After polishing the paint, the car was wiped down with a 20% dilution of IPA (Isopropyl Alcohol) to prep the surface for Optimum Gloss-Coat.
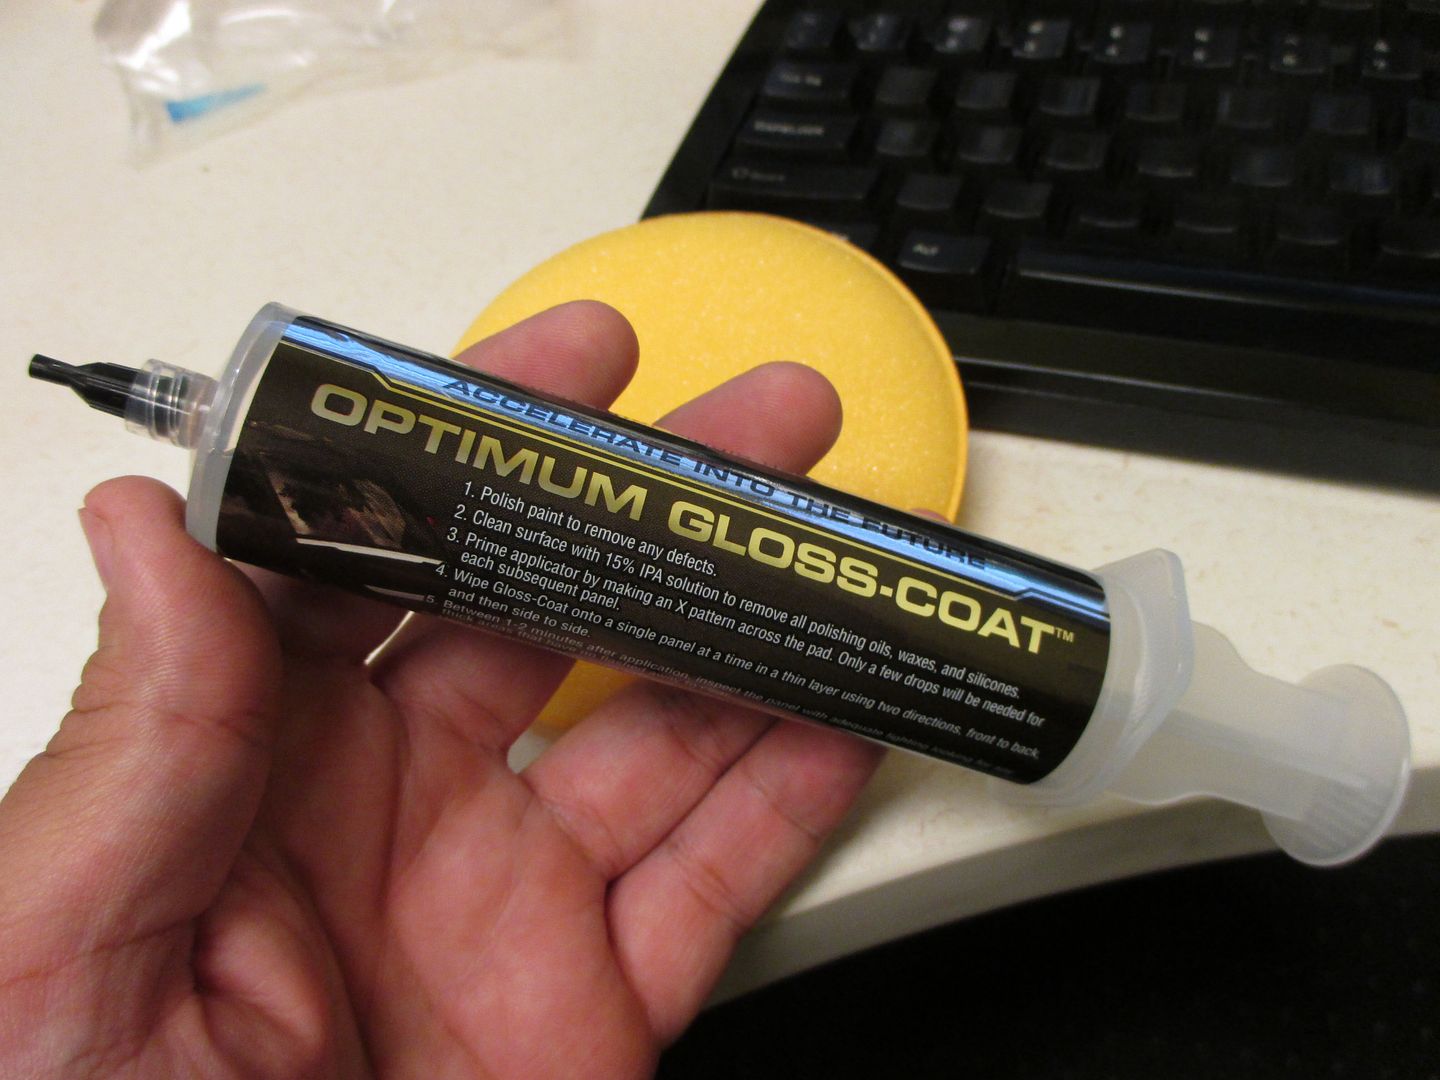
After Optimum Gloss-Coat was applied to the paint, I setup a custom made DIY wind tunnel to expedite the curing time.

Optimum Gloss-Coat was the cherry topping for this detail. I love the amount of gloss and protection it adds. This coating should keep the car looking good for a long time.


Bonus walkaround video:
The customer arrived and was ecstatic with the condition. He must have been happy because he referred me to a fishing friend who will be dropping off his Lexus later tonight.
Thanks for reading!
If you have any questions, let me know.
He contacted me a few days before picking up his Accord to figure out the best course of action for his ride. He was going to have pinstriping installed and wanted to know if it would be best to apply it before or after the coating was installed. I told him to go ahead and apply the pinstriping first since the installer would likely have to remove the coating for proper adhesion. Also, if the installer left any light scratches or scuff marks from the installation, I would be able to remove them completely.
I walked around the vehicle with the customer and verified everything we talked about. In the past, I've made the mistake of not walking around the vehicle with the customer and we ended up on different pages. He was under the impression that the engine bay was included in his price. He called me the next day and I apologized for the confusion and told him to bring it back that night for a full engine detail. Since then, I've gone out of my way to make sure the customer is on the same page with me. Once I finalize my logo, I'll make my own Vehicle Inspection Form to give to the customer. Mike Phillips has a great template on AGO if you're looking for one.
This is also a great opportunity to UPSELL. For example, point out their oxidized headlights and offer a headlight restoration. I've had great success telling the customer "while I have your car, how about I restore these headlghts? Or those are nice wheels, you should consider upgrading to a wheel coating or sealant for better protection; etc etc". Headlight restorations, interior steam cleaning, engine details and wheel protectants are some of my most popular upsells. If you're not upselling, you're not maximizing your profits. I know when I'm purchasing a service, I try and leave a little wiggle room in my budget; it's the sellers job to squeeze out as much out of me as possible.
Here's the car upon delivery. Overall it was in great shape, but it did NOT pass the baggie test.
The customer wanted any dealership propaganda removed.
I started with a foam bath using 3D Pink Car Soap in an Autopia Foamaster Gun. When prepping a car for a full paint correction, the surface needs to be clean of any waxes or conditioner or gloss enhancers for best correction results. 3D Pink Car Soap contains no fillers, waxes, or gloss enhancers, so it rinses easily leaving a clean surface to compound or polish. (Note: The wheels and tires are also cleaned in this step)
I wanted to be as gentle to the paint as possible to avoid putting any more swirl marks or scratches into the paint. This client was trusting me with their brand new car and I wanted to leave as much clearcoat on the paint as possible. I normally save the Koala Wash Mitt for when I'm maintaining my own car, but I used it on this new car. I was extra careful around the fresh pinstriping, since I knew it had been installed very recently. The last thing I wanted to do is make a phone call apologizing that I had damaged the pinstriping! The long-hair Merino wool wash mitt was the perfect tool for the job.
For decontamination, I started with Optimum FerreX applied to the entire vehicle to dissolve the first layer of contaminants. This would help my clay bar to be more effective while minimizing the chance of scratching the paint and making more work for myself. For the clay, I normally use a Nanoskin Medium Grade Wash Mitt to make quick work of this step; but since I wanted to be as gentle as possible I used a Pinnacle Ultra Poly Clay Bar with Optimum No Rinse diluted in a Kwazar Mercury Pro Double Action Spray Bottle.
This is a shot of the clay bar after only the hood we clayed. I like to document as much of the detail as possible for any skeptical future customers that say their new car doesn't need to be clay barred. This is the perfect example of a car with less than 50 miles on the clock, yet requires a full decontamination before a coating can be applied. Keep in mind, this was AFTER using Optimum FerreX. The contaminants found on the clay bar would have been worse if I didn't use FerreX first.
After washing, I used a DP Turbo Car Dryer to blow dry the majority of the Honda along with a Duragloss Plush Microfiber Drying Towel to make sure any pesky water wouldn't leech its way out from behind an emblem or between a door panel.
Driving a car that makes almost no sound on start up is an eery feeling. I drove the car inside and used my 2600 Lumen 5000k Light Stand to magnify any defects in the paint.
Overall, the paint was in excellent condition, but I was able to find scuff marks around the car.
Since the car was in great shape to begin with, I was able to really take my time and find any tiny defect. It sounds like this would be an easy job, but I think taking a vehicle from 90% to 100%, is just as difficult as taking a car from 40% to 90% because ANY defect sticks out like a sore spot. I wanted to make this car perfect (or as close to perfect as possible).
I used 3D AAT Finishing Polish to remove the light defects with a Buff and Shine Black Foam Finishing Pad on a Griots Garage 6 inch Dual Action Polisher.
The dealership logo was remover by carefully weakening the adhesive with a heat gun, then a 3M Eraser Tool. This metallic type of adhesive was super difficult to remove by hand. I saved myself a lot of time by using the eraser tool on a Milwaukee drill.
(The dealership sticker is no longer below the Accord logo)
The entire car was polished thoroughly while paying extra attention to the pin striping.
Meguiars #10 was all I needed to by hand with a microfiber applicator to clean up all of the exterior plastic.
Love the headlights on the car. He told me the blue accent trim is an added option.
CarPro CQuartz was applied to the wheels (upsell
)
CQuartz Fabric and Leather Coating was applied to the interior.
CarPro PERL was applied to the tires.
After polishing the paint, the car was wiped down with a 20% dilution of IPA (Isopropyl Alcohol) to prep the surface for Optimum Gloss-Coat.
After Optimum Gloss-Coat was applied to the paint, I setup a custom made DIY wind tunnel to expedite the curing time.
Optimum Gloss-Coat was the cherry topping for this detail. I love the amount of gloss and protection it adds. This coating should keep the car looking good for a long time.
Bonus walkaround video:
The customer arrived and was ecstatic with the condition. He must have been happy because he referred me to a fishing friend who will be dropping off his Lexus later tonight.
Thanks for reading!
If you have any questions, let me know.