2005 Black Corvette Makeover

Richard@BlackWOW

New member
Today's detail is a 2005 Black Corvette with around 15,000 miles on it. Overall it was in pretty good shape. There were some light scratches and swirls in the paint, and two major scuffs. One was on the right rear fender and passenger mirror where the owner had backed into a garage and hit a wooden post.


162896804_55a811b5b7_o.jpg


On the front right side, there was also a scrape from a driveway. The white area above the bumper lip is a reflection. The scraped area is on the front and underside of the bumper.


162896826_8e9917c6d2_o.jpg


This scrape happened recently from trying to back into a garage. Can it be fixed or atleast minimized?


162897083_c844002cf1_o.jpg


162897092_b4fc870422_o.jpg


Sadly the Corvette lives on the street and has been egged twice. You can see the damage an egg does to the paint. All of those white areas were cuts in the paint.


162897033_b948913186_o.jpg


162897040_3e356682e8_o.jpg


My Swirl Finder light showed me the real condition of the finish. I did a test spot and determined that using M83 and a W8006 pad would get the job done right.

162897120_e6529ff6d8_o.jpg


162897139_026f6e0b43_o.jpg


I arrived at 9:30AM and didn't begin polishing until 1:30pm. What happened during those 4 hours? Well here was the first challenge. I needed to wash the car. I had a 15' hose and my pressure washer. When I saw where the spigot was (next to washing machine), I realized my hose wasn't going to reach.


162897058_ab257db44a_o.jpg


162897070_2b60a90526_o.jpg


I decided QEW (ProtectAll's Quick Easy Wash) was going to be the method. Seeing that the car was covered in a lot of dust, I measured out 4L of water and 2 cap fulls of QEW. I used a Microfiber sponge as the applicator, and a second bucket of clean water with a gritguard to rinse the applicator of contaminants. I dried with a Meguiar's Ultrasuede Microfiber drying towel. I worked on a body panel at a time.
 
I washed off the painted body panels. Then I washed the wheels. I used a soft body brush with flagged ends to get into the deep socket wells of the wheels. I used different bristle brushes and my bug sprayer to get the inside of the wheels clean--just brush the brake dust and immediately rinse with bug spray washer. For the soap, I used Meguiar's Gold Class car wash soap.


162896845_19aa8e5eb7_o.jpg


162896861_56171eca28_o.jpg


Exhaust tips before polishing with NXT Metal Polysh

162896876_9e773f8c26_o.jpg


162896900_0d3b18e3d0_o.jpg


162896933_23647af6ff_o.jpg


162896970_46449275bc_o.jpg


162897000_006d6adc2b_o.jpg


162897013_75942e5c3e_o.jpg
 
I also washed off the engine using a nylon brush, APC, and a small pump up bug sprayer. I covered up the alternator with a towel and was careful where I sprayed water. Now the engine was already pretty clean. It was covered in dust and road debris, but the result of cleaning and dressing is dramatic!


BEFORE

162897154_4868acfcaf_o.jpg


BEFORE

162897166_8eee47b735_o.jpg


BEFORE

162897179_3784bb14b7_o.jpg


Pretty subtle improvement but the customer certainly noticed!

AFTER

162897228_5a8448854d_o.jpg


AFTER

162897237_8685b52fdb_o.jpg


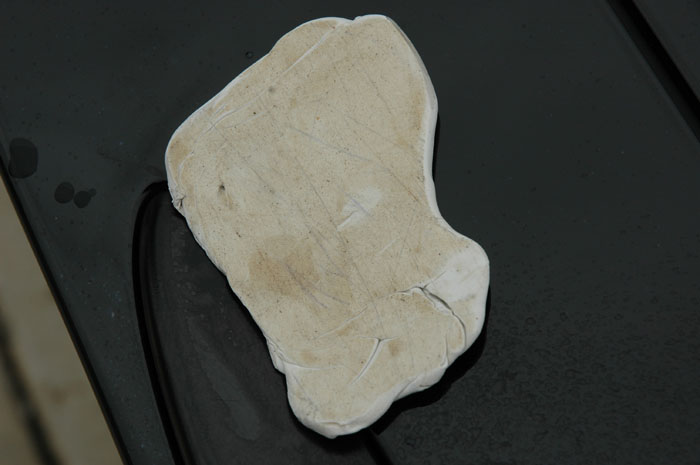
Then I proceeded to clay the entire car, and all the glass (front windshield, rear windshield, and top. Once that was glassy smooth, I began working the defects. I had to run the clay over for quite awhile to pick up all the embedded contaminants.


162897257_c2791812e0_o.jpg


162897268_482318954f_o.jpg
 
Using Meguiar's Quik Clay system the improvement was dramatic! Notice the edge of the wheel well. All of the brown coloring was removed with only clay. Even the scratches seemed to be minimized.


162897281_97c6bcb867_o.jpg


162897288_aaf4fe584a_o.jpg


162897298_cc0379ce86_o.jpg


Clay removed all hints of transferred color, and the remaining defects were easy to buff out.


162897317_a482500b1d_o.jpg


Not a lot of color was transferred to the clay so it took many many passes to remove it all.

162897249_c1bdcdb496_o.jpg


162897320_2feea11c4d_o.jpg


162897325_ceb59626aa_o.jpg


162897345_707b042a57_o.jpg


162897358_69c661c0ee_o.jpg


But some areas of the paint like the trunk lid were really filthy!

162897333_fd57ca769e_o.jpg
 
I know the Vette looks pretty good already, and all I've done is wash and clay for 4 hours.


162897373_6e8163ef50_o.jpg


162897397_335d884f7d_o.jpg


162897404_829e321009_o.jpg


Ok time for some REAL fun. I made newspaper wheel covers and taped off the car using blue painters tape. I only taped the areas that couldn't be accessed by lifting the panel.


162897427_55dde8a899_o.jpg


162897443_86cbd39289_o.jpg


162897451_3ce99f7875_o.jpg


162897467_18f67b6e24_o.jpg


I did a test spot using a W7006 pad, M84, and my Makita buffer to see how effective it would be on those scratches on the rear panel. After several tests, I decided I would wetsand using 2500 grit Unigrit. I did this very carefully, then used the W7006 pad, M84, and RB to remove the sanding marks. I followed that with M83 and a W8006 pad then with the PC with M80 and also a W8006 pad.


What remained were 3 deep grooves but all the finer scratches were completely removed. From most angles you couldn't see the defects any longer and actually what stood out more were two little dots of where the paint actually came off from the initial impact.


162897510_1b04ff52d2_o.jpg
 
Sanding Marks

162897480_f297f66114_o.jpg


Sanding Marks

162897490_7bfd8999a0_o.jpg


All buffed out and looking pretty sharp!

162897529_73c7bfb4a2_o.jpg


Where did that scrape go?

162897548_64d8604619_o.jpg


Remember it used to look like this!

162897268_482318954f_o.jpg


162897561_31d6dc00d9_o.jpg


162897575_c9204247b1_o.jpg


Here's the engine compartment all detailed and ready for presentation!

162897584_4f354cf359_o.jpg


162897594_65b7d7fd1d_o.jpg


162897608_bef4ccf1fc_o.jpg
 
Tires were dressed with Meguiars Endurance High Gloss Gel


162897630_c15fa21099_o.jpg


162897638_cd3a3959b8_o.jpg


162897655_169d9bfe0e_o.jpg


162897672_5db99dc5ed_o.jpg


All done! It's 8:30pm (11 hour later). I used two coats of M21 to seal the finish. Sadly I didn't get good pix of the front bumper but I buffed the majority of the scratches out and all that remained was a dime sized patch of missing paint.


Here is a summary of my steps. All are Meguiar's products.


M83 with RB with W8006 pad

M82 with RB with W9006 pad

M80 with PC with W8006 pad

M21 with PC with W9006 pad (2 coats)

Removed with PC and W7006 pad and MF bonnet


Defect Removal used 2500 Unigrit

Sanding Mark Removal using M84 with W7006 pad and RB

M83 with RB W8006 pad

M80 with PC W8006 pad


The interior was vacuumed and wiped down with Quik Interior Detailer Wipes. The dog hair extractor brush was used to remove stray dog hairs from the carpets.


The next day the owner of the Corvette called me to tell me how fanastic the finish looked and how pleased she was with my work. I told her that she was going to get noticed, and that's what happened! People commented how they could use her car as a mirror now, and loved how smooth the finish was. Already, I got booked for my next job as a referral from her, though the next one won't be as exciting as this black Corvette, I was just really glad she was so pleased with the finish and wanted to tell the world! [:D]
 
Octaneguy,


Your work it amazed me. I seen some of your work you did on MOL forum :bow How you stuff everything on that Mini :soscared: I hope you didnt brang a 5' alum ladder, did you :D
 
Great work Richard! Your write ups are always extremely detailed and well written.
 
that vette (B4's) looked like it just finished a NASCAR race,,, who does this to a new C6??


love that car though,,and nice work. hope you charged accordingly !!
 
Wow... that's pretty freakin impressive. I've never gotten into removing scratches like that (sanding) but you sure made it look easy. was that a wet sand or dry? I'm assuming dry...
 
... only in America would someone park a $50,000.00 car on the street, just to store a few hundred dollars worth of crap in the garage...
 
great job and nice write up. i think i may cross post this on clubrsx so some of the newbs can see your process.
 
Thanks everyone!


klnyc

Nope no ladder this time! But I did have my 10x10 EZ UP and my freestanding vertical light with me!


MikeyC

Thanks! It took me all day to do this writeup! I think I'm getting lazy as I'm getting selective to which details I want to post about! My next writeup is of a black E500 Mercedes that I maintain a few times a month and the horrid before state! Holidays and other things got in the way of our normal schedule so rain, bird poo, and mud was all over it when I saw it.


Steck

I charged a fair amount, not as much as I normally would for a Vette. This job came off a referral of another job that was quoted many months ago for very low, and to make the story short, the customer was initially shocked to find that I was charging more than that lowball price for the other customer. But once it was all finished, she said it was more than worth it and was very pleased. Best of all, she immediately referred me to several friends, and so I'm already booked for next week from that.


Infamous DX

Oh it was a definite wet sand. I soaked the Unigrit in my bucket of car wash solution for around 15 minutes, then very gently sanded in the direction of the scratches. I lubricated it with a spray bottle of Last Touch. I could have just dipped it in the bucket of car soap, but I really wanted to drench the area constantly.


Slick61

To the owners defense, she doesn't park it in the garage because it's so narrow. Even with the junk removed, she has to deal with a narrow entrance, and the angle of her driveway scrapes her airdam, so she needs to have it repaved as well. She did buy a good quality car cover though right after the detail as per my recommendation.


Seth812

Sure no problem!
 
OctaneGuy said:
Sadly the Corvette lives on the street and has been egged twice. You can see the damage an egg does to the paint. All of those white areas were cuts in the paint.


162897033_b948913186_o.jpg


162897040_3e356682e8_o.jpg


Amazing work! I take it you were succesful in fixing the damage caused by the eggs? I have two of those marks on my car also but had no idea what caused it or what to do a search on until I saw this post. What was your method on fixing the egging marks?
 
Sadly the only thing that would have fixed the egging was touch up paint. Those white marks are equivalent to stone chips. They were much less visible when I was done with the car, but they were still there.


Richard


GASPowered said:
Amazing work! I take it you were succesful in fixing the damage caused by the eggs? I have two of those marks on my car also but had no idea what caused it or what to do a search on until I saw this post. What was your method on fixing the egging marks?
 
Awesome work. I love the detailed writeup; amazing what some clay will do on scuffs, huh? It's obvious you really took your time and it shows.


RE: eggs; unfortauntely guys when the egg does that it's like thousands of little stone chips into the paint. Not much you can do for it outside a repaint. :(
 
amazing what a little bit of time and thoughfull action... result is exceptional to say the least!!!!!!! :bow :bow :bigups
 
Back
Top