1993 MB from hell!

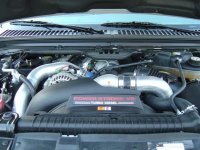
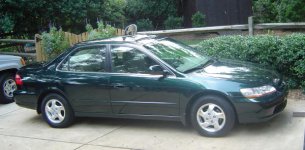
I went back and looked at th epics I posted and noticed a red tinge in a few. Those are in the picture itself and not the carpets, must have been from the flash or something.


Scott,


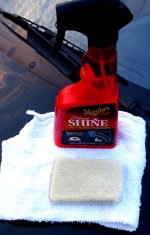
I tried the same cloth I sent you on some windows today and man I was very impressed with the results. I used it on windows without a cleaner, just buffed them out with the cloth.


I wonder how it works for product removal? It has an odd feel to it eh?


Now for the glaze......it is a water based/solvent (oddly enough) and is designed specifically for body shop use. It has acrilycs in it and is designed to semi-seal paint, remove swirls (2500 grit and above) but still allow paint to cure.


I have found that it adds a very nice "pop" and gloss to paint after it has been prepped BUT do not place a solvent wax over it, like Blitz. It may cloud the finish. Waxes like Trade Secret, S100, P21S and perhaps even the Carnauba Wax sent to us by Everett will work fine as a topper.


I probably would not use this glaze in conjunction with a polymer unless you experiment first on a tester car or panel to see how it bonds. As I wrote in the instructions....use very little!


Please let me know what you think,

Anthony
 
Well I finally got to start the exterior of this MB and it is a wreck. Lots of scratches, I mean thousands of fine scratches all over, especially on the top portions and very dull finish.


Turns out that it has never been buffed nut only passed through the car wash tunnel. This is bad in the sense that it is obviously neglected but also good in the sense that I have some paint to work with.


The first shot here is of the driver side profile, first is from the front to the back and the second one is from the back to the front.


Notice the beautiful deep gloss and shine on that paint? (snicker, snicker;) )
 

Attachments

  • waterspot3.jpg
    waterspot3.jpg
    16.6 KB · Views: 151
This shot is of the trunk. Even though it looks bad in the picture in person it really looks bad:down


I am sad to say that I have no AFTER shots yet but maybe Friday I'll get to post a few.
 

Attachments

  • g.jpg
    g.jpg
    58.1 KB · Views: 123
Last BEFORE pic is of the hood and you can see what I mean by a "wreck" I was able to start on the roof and trunk this afternoon and I really had to buff this paint.


1800 rpms, orange pad and Menzernas Powergloss are what I am using to tackle this paint with. The more I buff the thinner the paint gets and the more difficult it will be to remove the swirls so I am not sure how the AFTER pics will be:nixweiss


Here is a beauty....
 

Attachments

  • pict0019.jpg
    pict0019.jpg
    137.7 KB · Views: 284
Hey Anthony, does you middle name begin w/ an I? If so your initials would be AIO...hahaha. Can you tell I'm at work and bored to death?


Your before & after pic are always informative. I look forward to seeing the results.


Eric
 
Hey Eric,


It is about 80% done as of today. The trouble is that this client is another doctor who is in and out of the hospital so getting our timing down is a problem. Another bump in the road to completion has been this cruddy overcast-rainy weather we have had for several weeks now and I want it to be nice and sunny for the AFTER shots.:up


It was partly sunny yesterday and I took some BEFORE shots of a BMW I detailed and will finish it today but once again we have a thick blanket of grey clouds and no sun:angry


So I predict AFTER shots of that MB by next week and I'll just post the pics of the BMW today even if it's cloudy.


Adios and thanks asking:)

Anthony
 
If the paint is getting thinner, making it difficult to remove all the swirls, why not follow up with a pure glaze that will hide the remaining swirls and lock down with a long lasting cleaner free wax?


That has happened to me with single stage paint and I have followed with #7 then Blitz or Collinite 476 and the results were very good and will last many months.


Just a thought, but I'm not one to say what you should do! I know you have your routine!


Post those after pics!
 
Well I am pretty much done with this Mercedes Benz from hell:bounce


I worked on it last Friday and then it started raining real hard so I packed it up and went home. Today was just beautiful so I did a few washes and one quick detail and then got to work a bit longer on this Mercedes. The interior is all done and just need to touch up a few areas, mainly the emblems, door jambs, and maybe buff over the trunk area once more.


I hope to post some AFTER pics tomorrow evening so check back:D


Anthony
 
Anthony-that Benz has a single stage paint job, right? If so, the paint is pretty thick...at least thicker than just the clear coat on a 2 stage paint job.


I detailed a 1989 white Taurus today and I know I removed a ton of old dead paint. Absolutely no shine, the paint looked like chalk when I started. Clearkote's Blue Moose x 2 on all horizontal surfaces and x 1 on all vertical, then DACP x 1, SFP x 1, VM x 1 and topped with the pure sealant version of Poorboy's EX and :eek: 
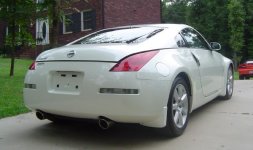
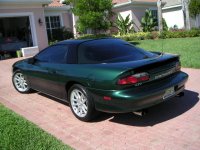
I thought the lady who owned it was going to cry she was so happy (her boss paid for the detail, btw). I think I got some pretty good before, during and after pics. It kept going from cloudy to sunny though and with dropping temps and a 20-30 mph NW wind, it was pretty unpleasant working conditions.


You will probably get your pics posted before me though....
 
Here are some of the AFTER pics. I apologize that the pictures were not more in the sun but I didn't get a chance to take pics until a bit later in the day.


The doctor left the car but no keys so I had to track him down and after I did and then spruced up a few areas it was kinda late so here are the AFTERS.


Anthony
 

Attachments

  • new 006 (small).jpg
    new 006 (small).jpg
    57.4 KB · Views: 101
Overall the car came out pretty nice but I wish I could of spent a bit more time on some certain areas.


Orange pad with Powergloss, polishing pad with Powergloss, Light Cut and the Cyclo and then AIO followed by some Trade Secret

Remember that ugly trunk? Well it looks a bit better now.
 

Attachments

  • tools.jpg
    tools.jpg
    48.7 KB · Views: 1,263
Back
Top