Todd@RUPES
Just a regular guy
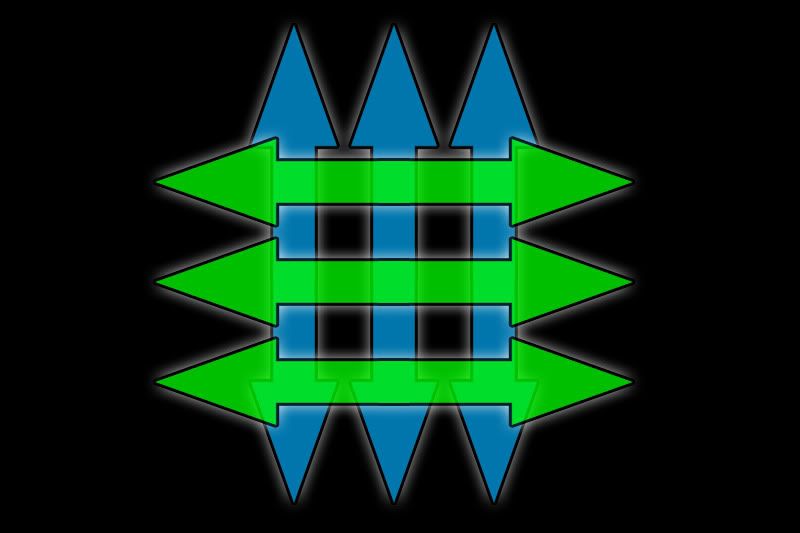
From About.com: Crosshatching is an extension of hatching, which uses is the use of fine parallel lines drawn closely together, to create the illusion of shade or texture in a drawing.
Crosshatching is the drawing of two layers of hatching at right-angles to create a mesh-like pattern.
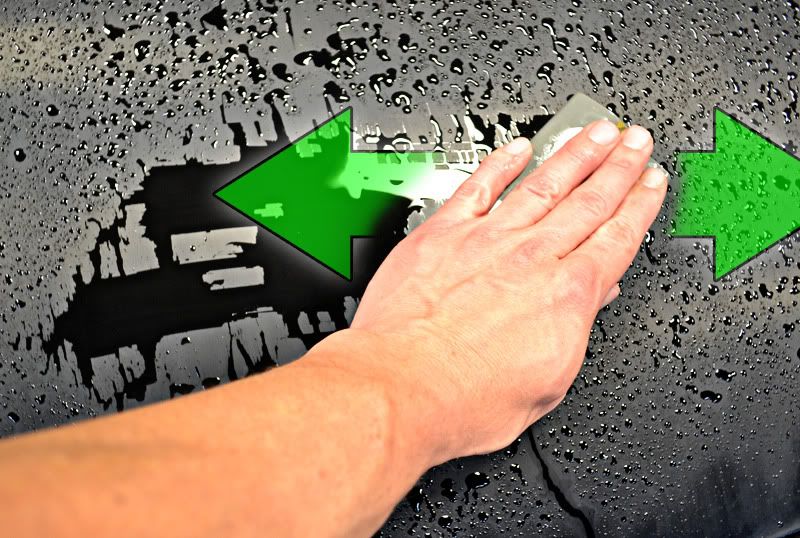
Cross Hatch Sanding is a method of sanding we subsequent grits of sandpaper (finer and finer) are used at right-angles to each other, which allows the user to gauge the progress they are using.
Cross Hatch Sanding offers several benefits to sanding in one direction:
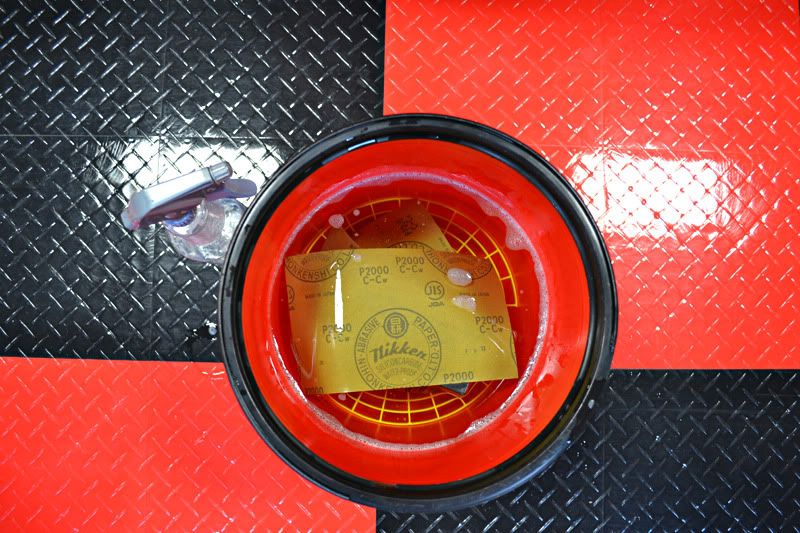
To demonstrate Cross Hatch Sanding I started by placing three sheets of Meguiar's Unigrit Sand Paper (1200, 2000, 3000 grits) in a bucket of soapy water. A couple of drops of Pinnacle XMT Gel Shampoo & Conditioner in the water reduces surface tension and provides more lubricity. A spray bottle was filled with the same mixture. With Meguiar's Unigrit paper it is important to let them soak for 5-10 minutes prior to use.
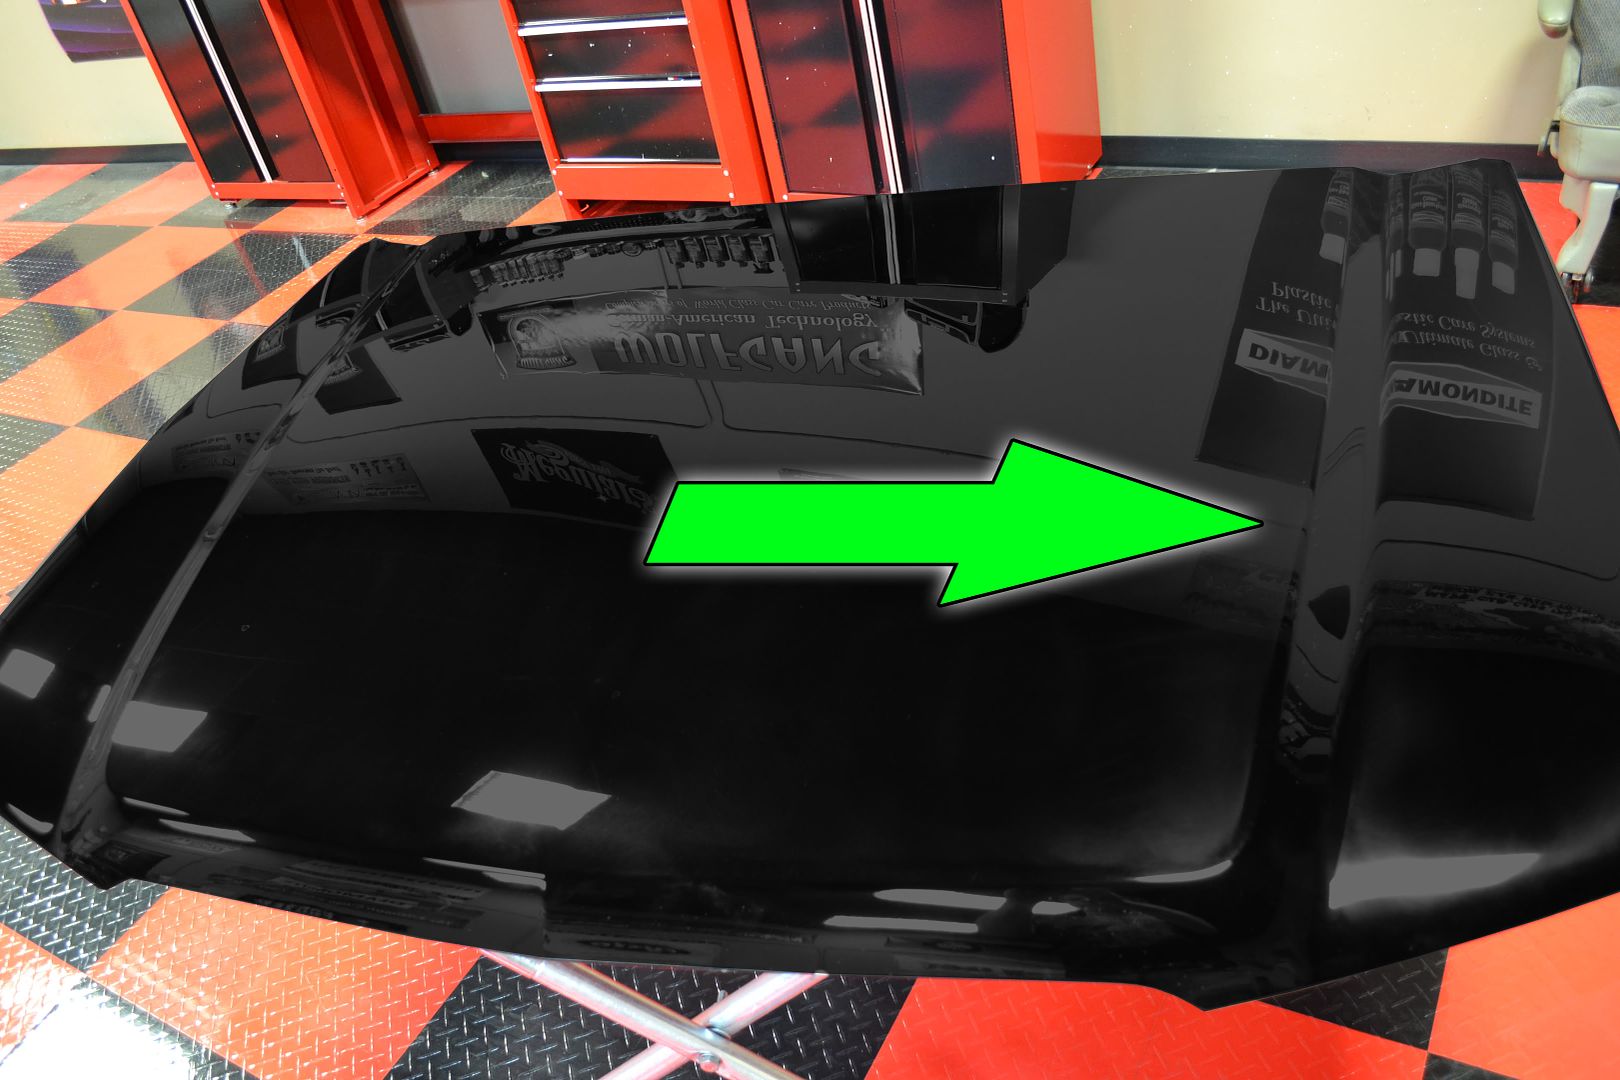
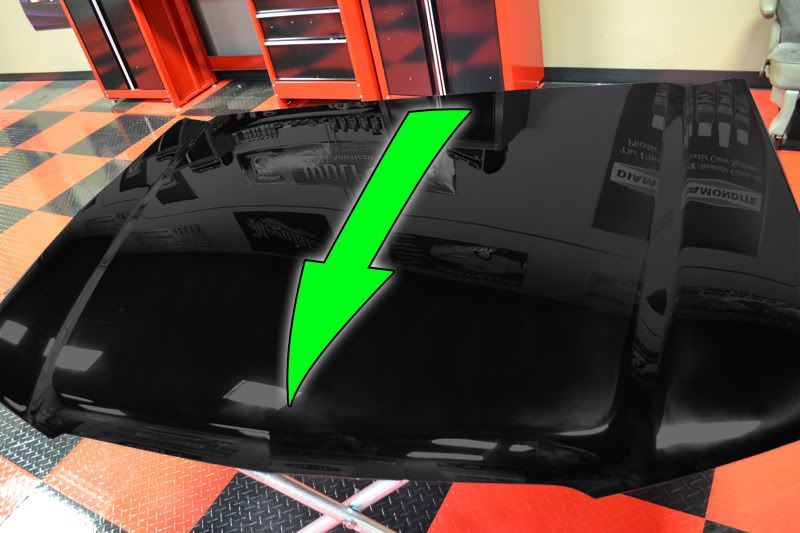
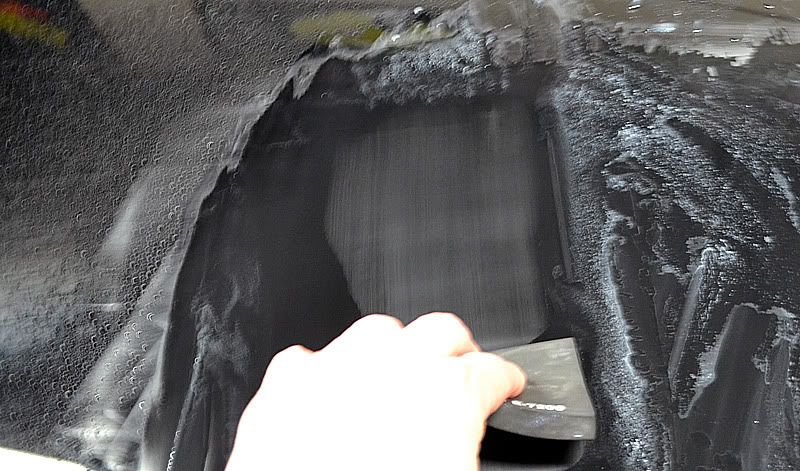
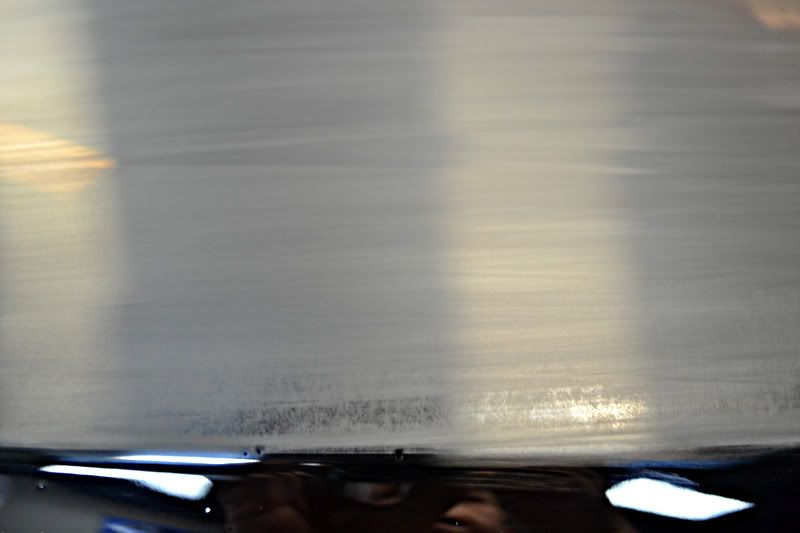
For the first pass, the leveling pass, I will used Meguiar's 1200 grit Unigrit Sand Paper wrapped around a Meguiar's Sanding Pad. All polishing was done in a East and West motion relative to the hood.
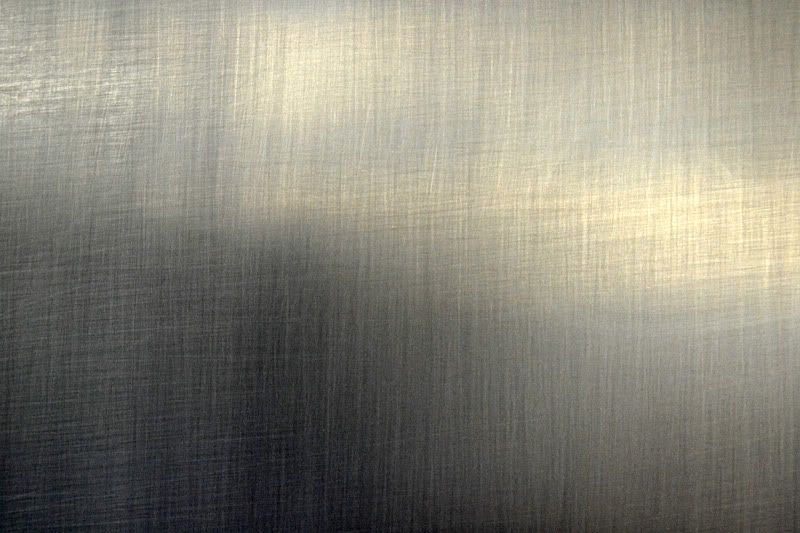
Wiping away the water revealed the a dull surface where the sanding scratches were in one direction.
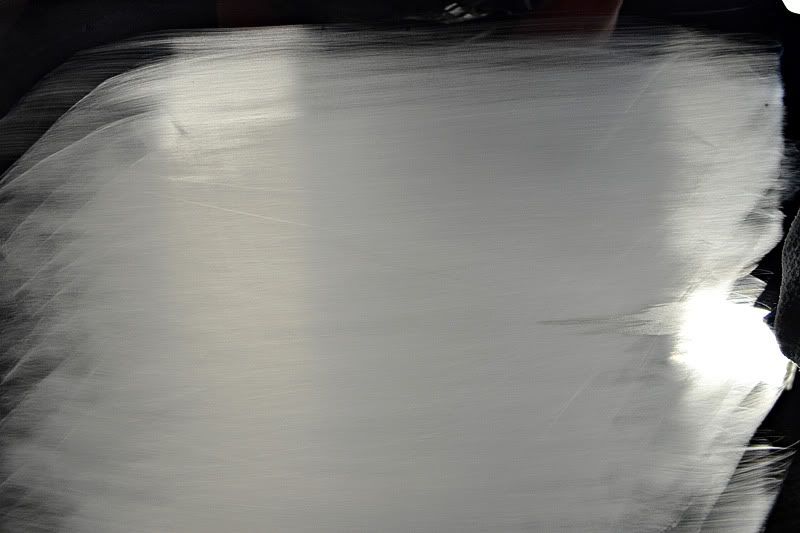
A closer view.
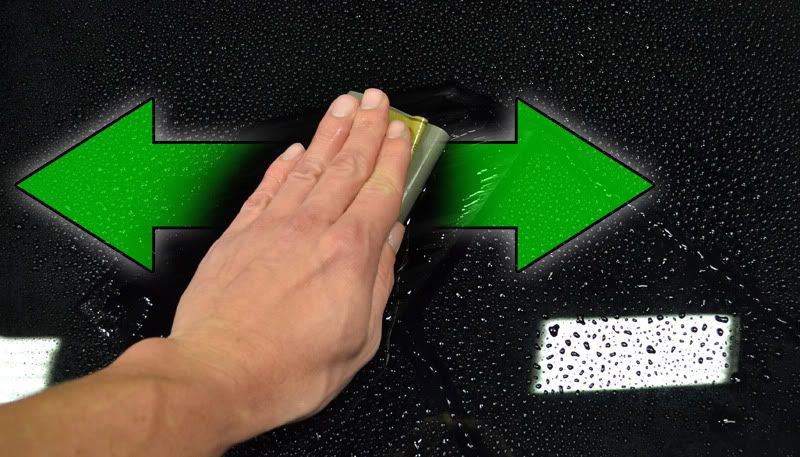
For the second pass, using a finer 2000 grade of Meguiar's Unigrit, I used a North and South direction. If were to continue sanding in the same direction as before it would be very difficult to gauge my progress.
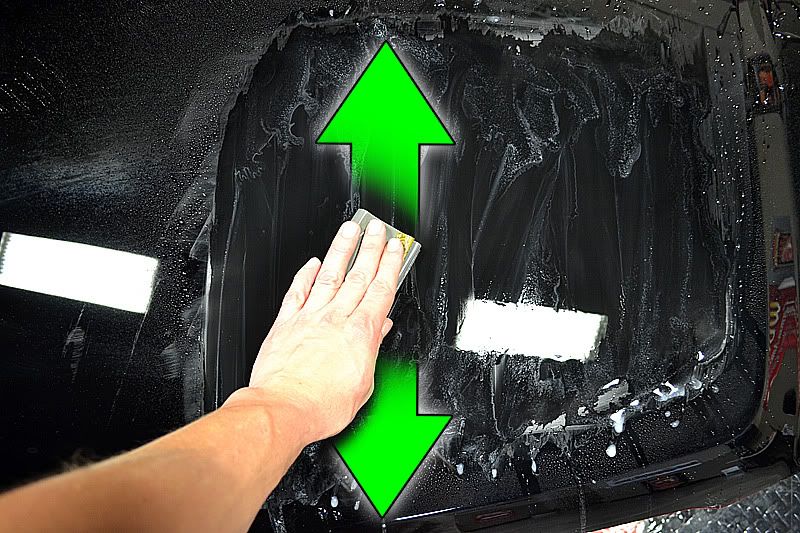
The Meguiar's Sanding Pad also doubles as a squeegee. It is important when Cross Hatch Sanding to ensure that all of the previous lines have been removed. Frequently checking your work not only guarenettes results but it prevents sanding to much. Your process becomes more efficient by eliminating the guess work.
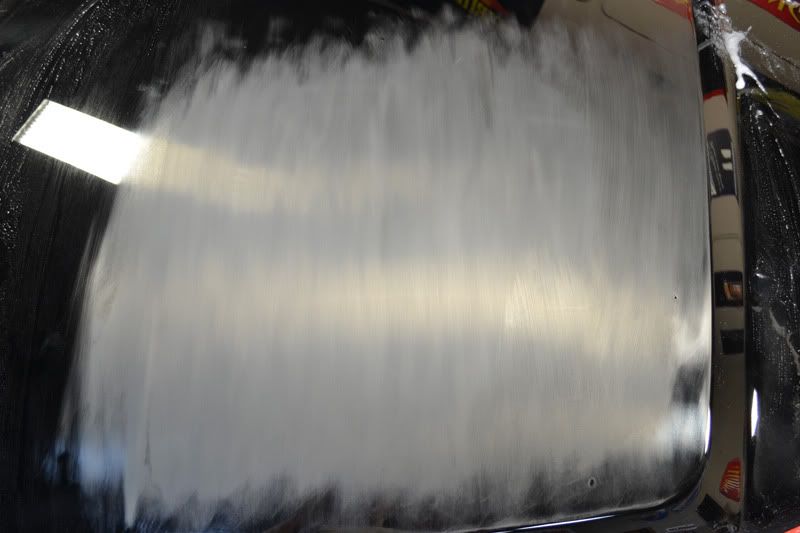
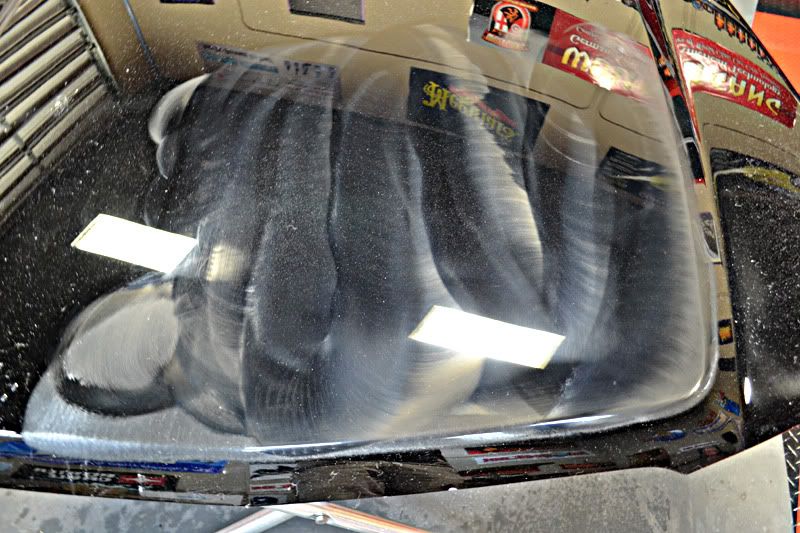
I lightly rubbed the 2000 grit (North and South) over the area then inspected. You can clearly see that not all of the 1200 grit marks have been removed as vertical (East and West) lines are still visible. Failure to completely remove the 1200 grit marks will make machine polishing the area extremely difficult as the non-removed marks will appear as scratches (also known as tracers).
I continued sanding with 2000 grit in a North and South movement until all of the East and West 1200 grit lines were removed.
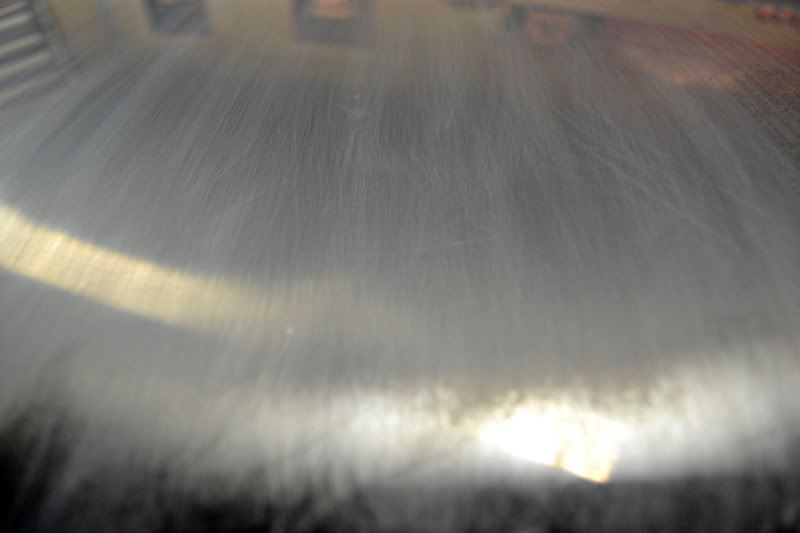
Close up of the sanded area.
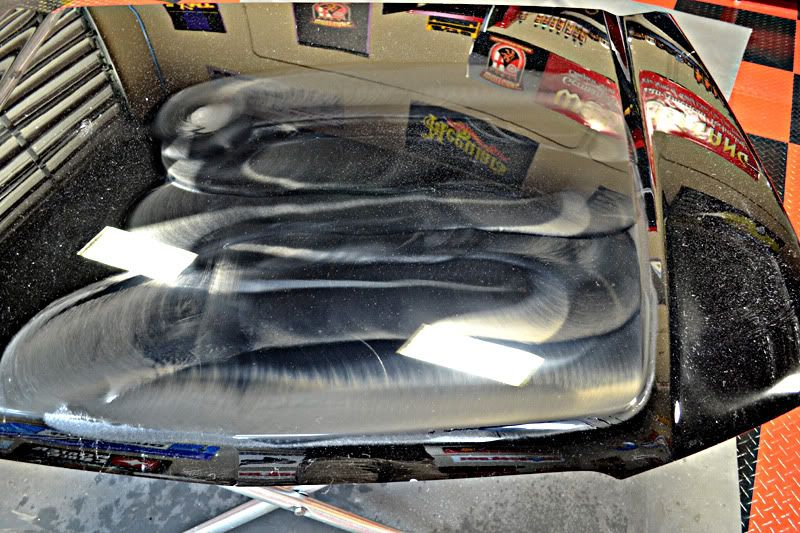
For the final pass I am going to use 3000 grade Meguiar's Unigrit Sandpaper, against returning to the East and West direction.

The final result is a completely flat and uniform surface that will be easy to polish and no hidden surprises like tracer scratches.

Other uses of cross hatching.
Many people like polish in a cross-hatch pattern to ensure uniform material removal from the paint's surface.
Crosshatching is the drawing of two layers of hatching at right-angles to create a mesh-like pattern.
Cross Hatch Sanding is a method of sanding we subsequent grits of sandpaper (finer and finer) are used at right-angles to each other, which allows the user to gauge the progress they are using.
Cross Hatch Sanding offers several benefits to sanding in one direction:
- You can be assured that that all sanding marks from the previous (coarser) grit have been removed.
- Reduces the chance of creating a channel like texture in the paint.
- Prevents over sanding the panel.
To demonstrate Cross Hatch Sanding I started by placing three sheets of Meguiar's Unigrit Sand Paper (1200, 2000, 3000 grits) in a bucket of soapy water. A couple of drops of Pinnacle XMT Gel Shampoo & Conditioner in the water reduces surface tension and provides more lubricity. A spray bottle was filled with the same mixture. With Meguiar's Unigrit paper it is important to let them soak for 5-10 minutes prior to use.
For the first pass, the leveling pass, I will used Meguiar's 1200 grit Unigrit Sand Paper wrapped around a Meguiar's Sanding Pad. All polishing was done in a East and West motion relative to the hood.
Wiping away the water revealed the a dull surface where the sanding scratches were in one direction.
A closer view.
For the second pass, using a finer 2000 grade of Meguiar's Unigrit, I used a North and South direction. If were to continue sanding in the same direction as before it would be very difficult to gauge my progress.
The Meguiar's Sanding Pad also doubles as a squeegee. It is important when Cross Hatch Sanding to ensure that all of the previous lines have been removed. Frequently checking your work not only guarenettes results but it prevents sanding to much. Your process becomes more efficient by eliminating the guess work.
I lightly rubbed the 2000 grit (North and South) over the area then inspected. You can clearly see that not all of the 1200 grit marks have been removed as vertical (East and West) lines are still visible. Failure to completely remove the 1200 grit marks will make machine polishing the area extremely difficult as the non-removed marks will appear as scratches (also known as tracers).
I continued sanding with 2000 grit in a North and South movement until all of the East and West 1200 grit lines were removed.
Close up of the sanded area.
For the final pass I am going to use 3000 grade Meguiar's Unigrit Sandpaper, against returning to the East and West direction.
The final result is a completely flat and uniform surface that will be easy to polish and no hidden surprises like tracer scratches.
Other uses of cross hatching.
Many people like polish in a cross-hatch pattern to ensure uniform material removal from the paint's surface.
