Gurge
New member
Recently was contacted concerning a 2013 WRX that was in need of attention. The owner wanted his currently swirly paint to look as good as possible with a pro coating to offer protection going forward. After discussion some options, we agreed to a multi step paint correction followed by Opti-Coat Pro
No photos of the initial wash & decon but the paint was pretty rough. CarPro TRIX & IronX on the paint followed by Clay Magic Blue. The wheels were done with Sonax FE (with brushes), rinsed and then gone over with Tarminator (by hand with MF towel). I also polished the exhaust tips with S100 polishing soap and much like the wheels, went over once more with Tarminator
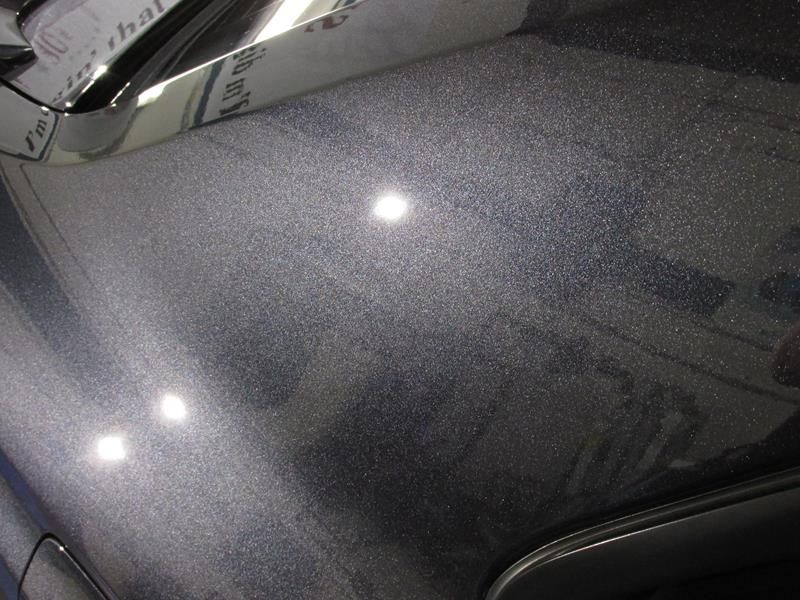
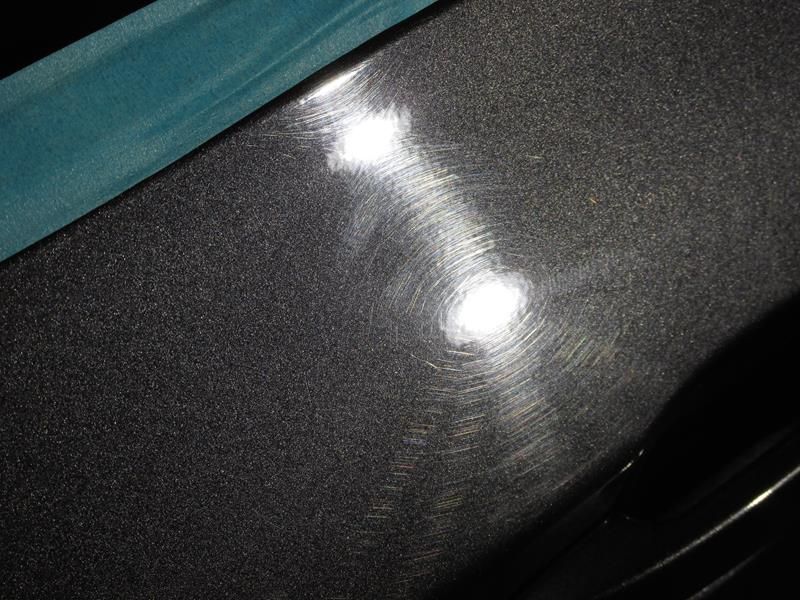
Taped off the trim and really got a look at the paint under my LED lights. It was a mess! That's what you came for isnt it?! Let the horror show begin!
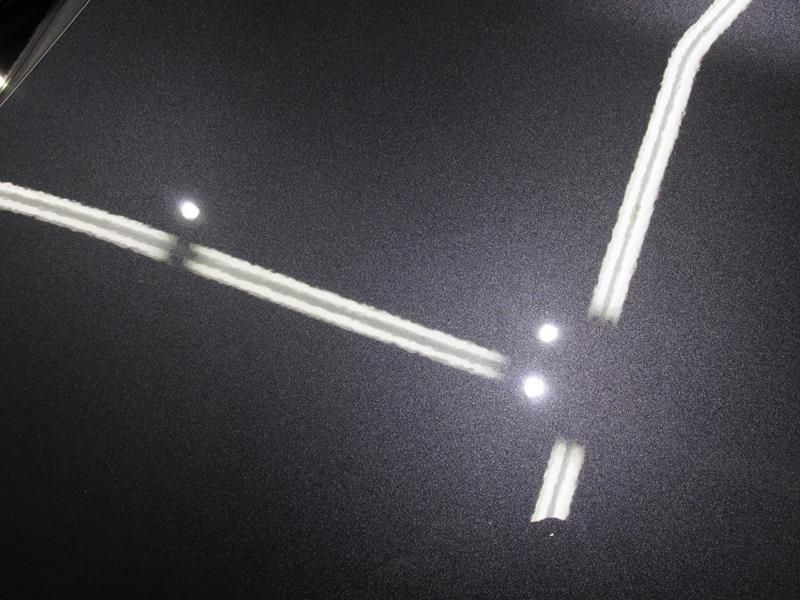
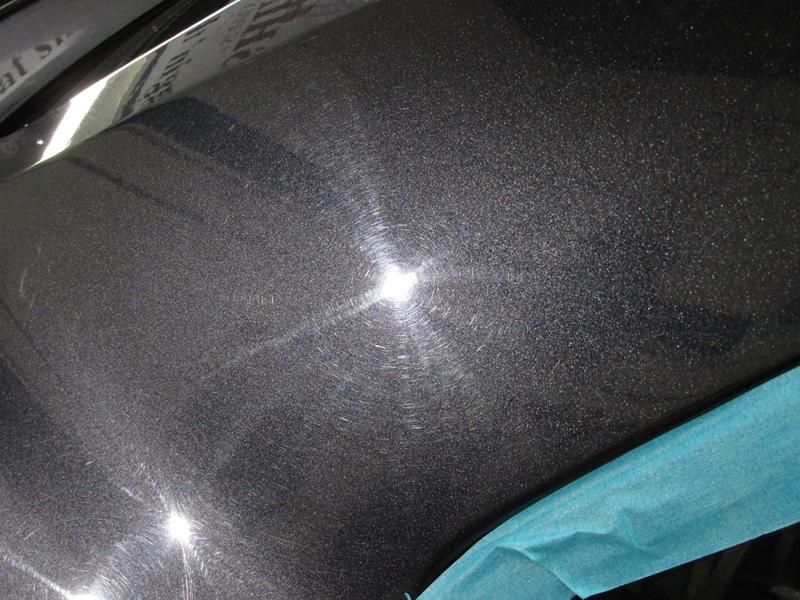
The hood
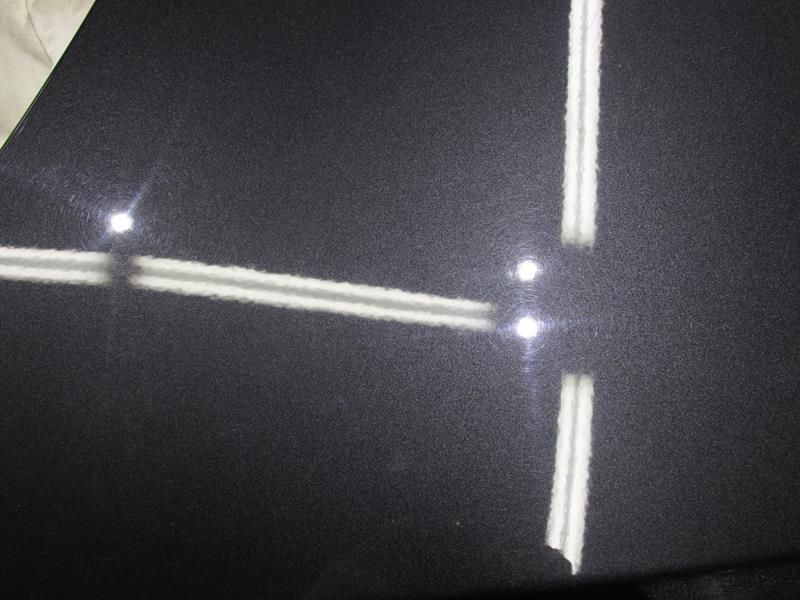
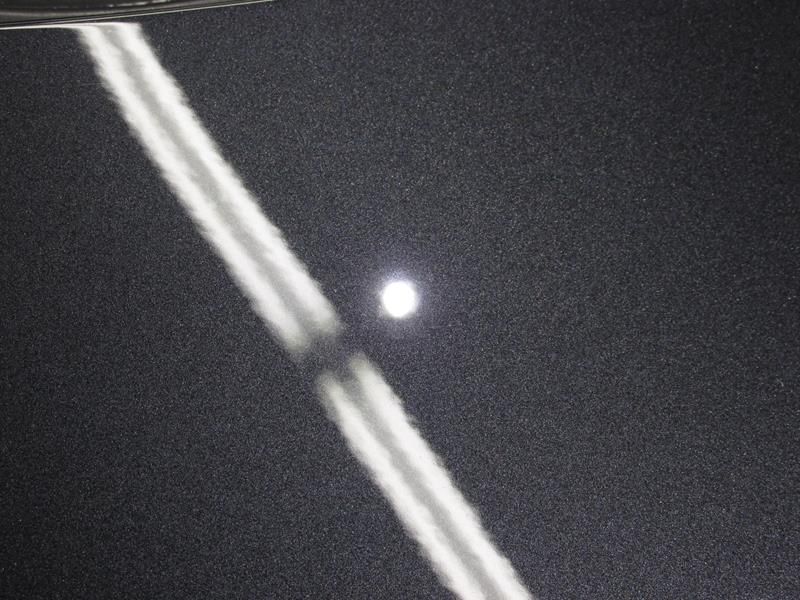
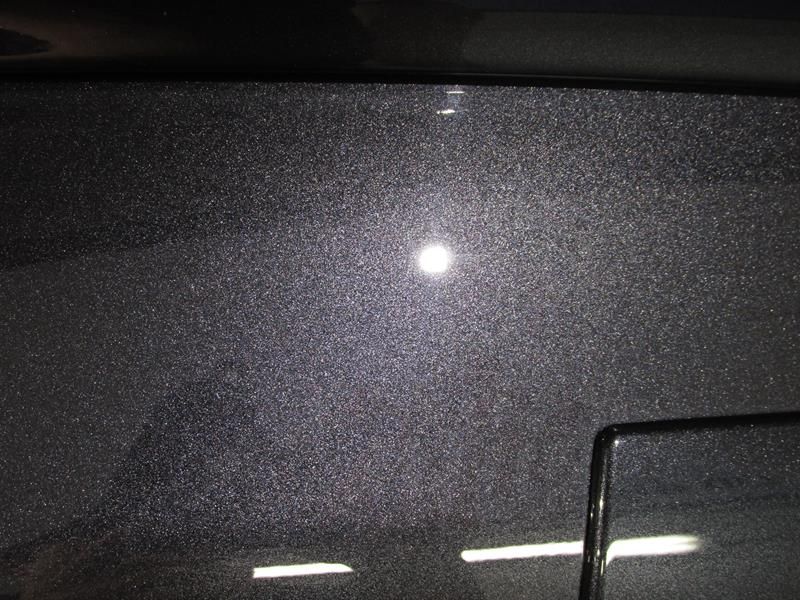
Closeup
Did a couple test spots and ultimately found a nice 2 step combo that got me where I wanted. Some areas definitely had to be gone over repeatedly but for the most part the car was done with
Flex 3401 / Griots DA / Porter Cable (6in - 5in - 3in pads) + Megs MF cutting pads + Shine Supply Classic Cut
then
LC White + Opti-Coat Primer Polish
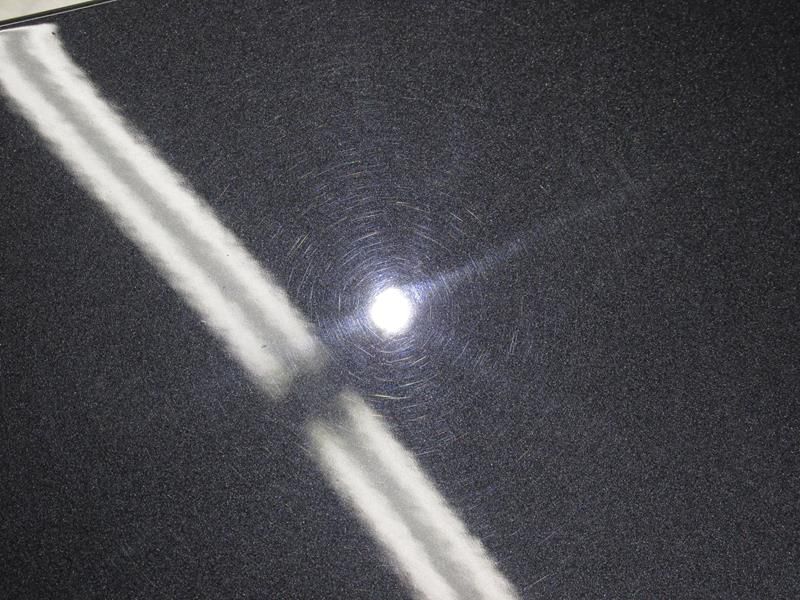
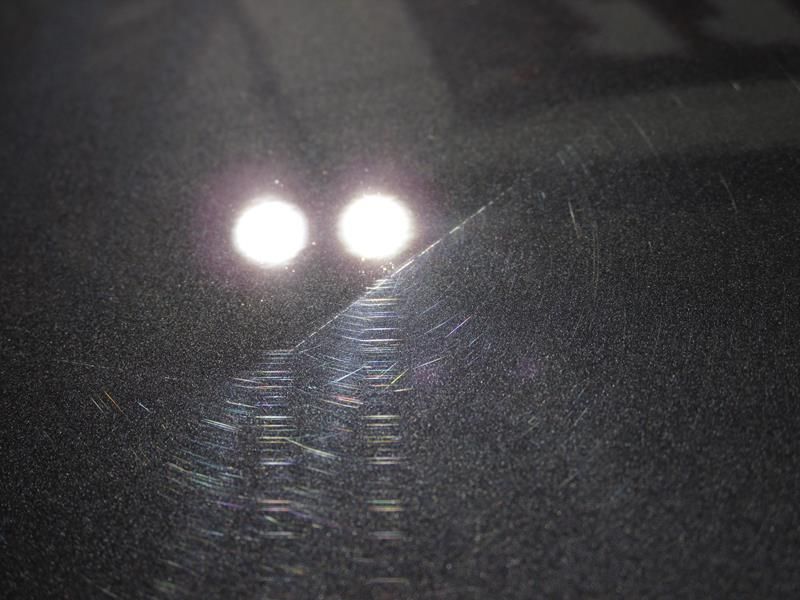
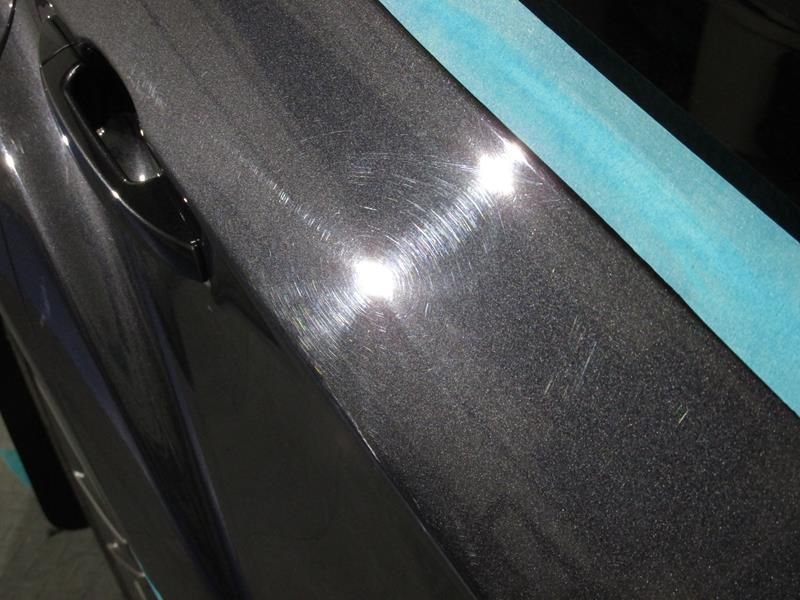
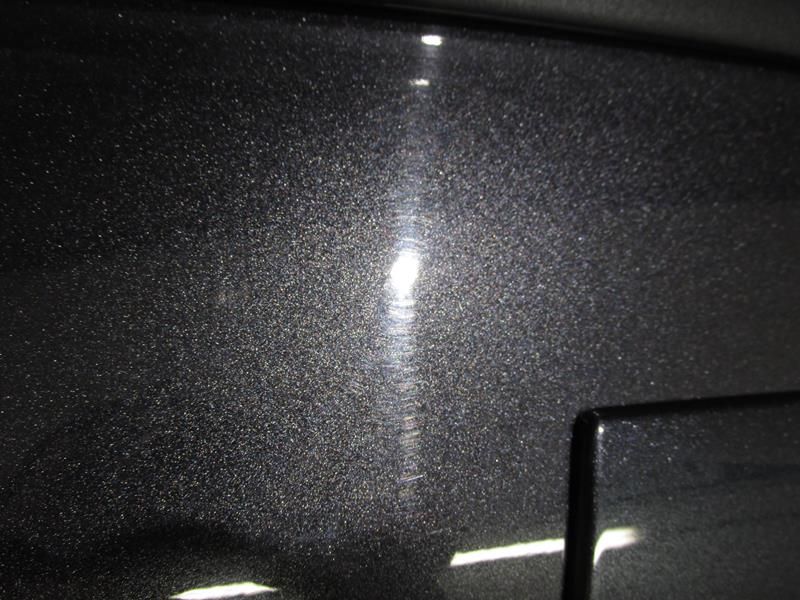
A good look at the test spot. Note the shallow angle. I find on metallic paints this is the best way to visualize defects. Inspection under LED lighting of course

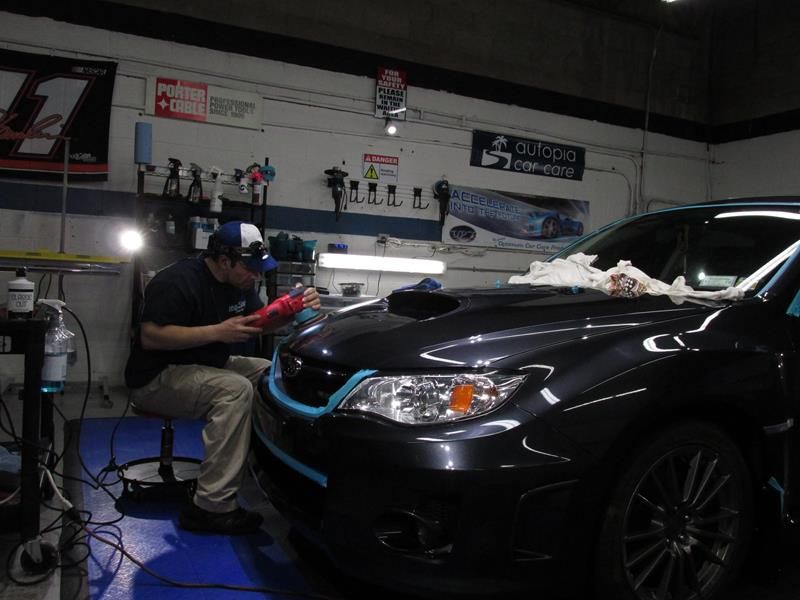
Got settled in for the long road ahead (fenix headlamp & mp3 player) then got to work
I will mention that this paint was a bit soft but the bigger issue was the stickiness. I've heard others complain and not encountered it that bad. This Subie had it. Any heat during cutting and the wipe off was BRUTAL. Tried a few things and it wasn't the polish or the pad or the air conditions. Just the paint. Everything behaved nicely on the glass - which I also quickly polished along the way. I had to consistently prime the pad with a mist of ONR solution to keep the temps down. Even still here and there I would need some help from CarPro Eraser to get it clear. This was more during the initial defect removal and not the finishing polish
Enough geek talk - show starts now
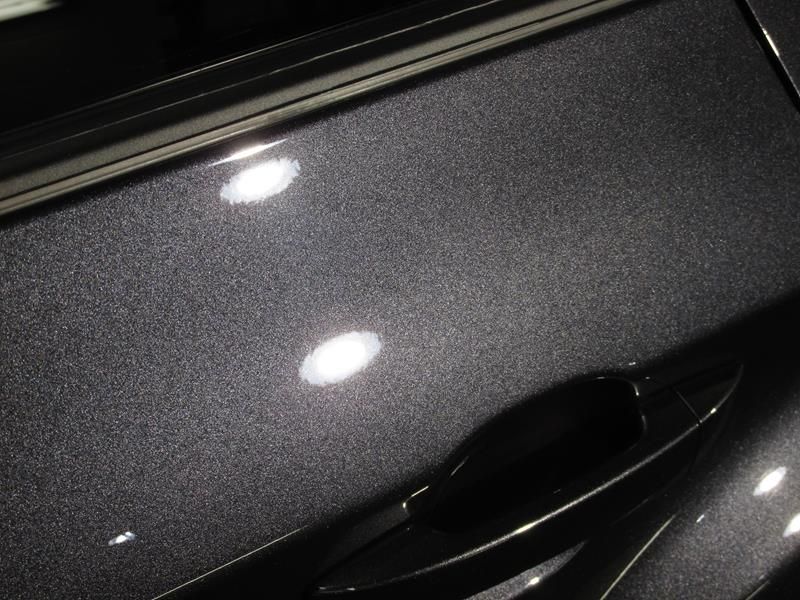
The hood AFTER
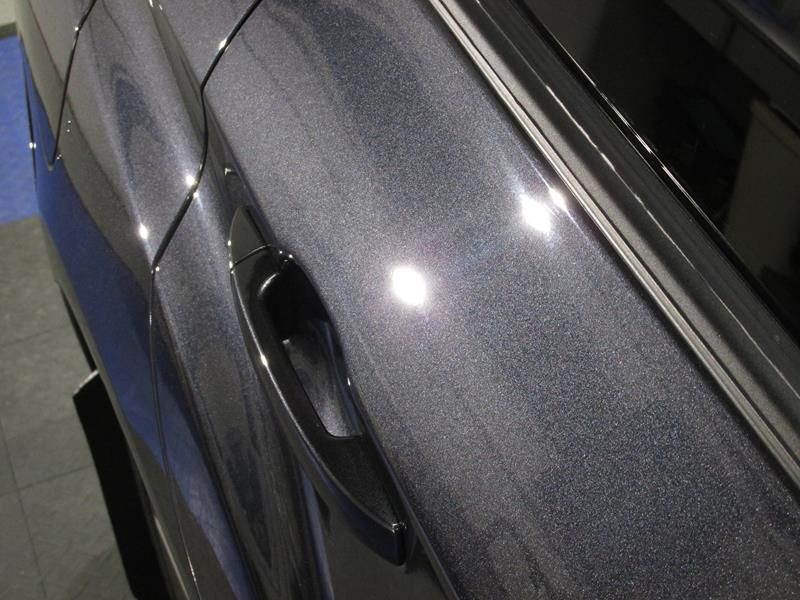
Passenger door
BEFORE
AFTER
Quarter Panel
BEFORE
AFTER
Trunk lid (rear facing - closeup - this area barely fits a 3in pad)
Driver Door
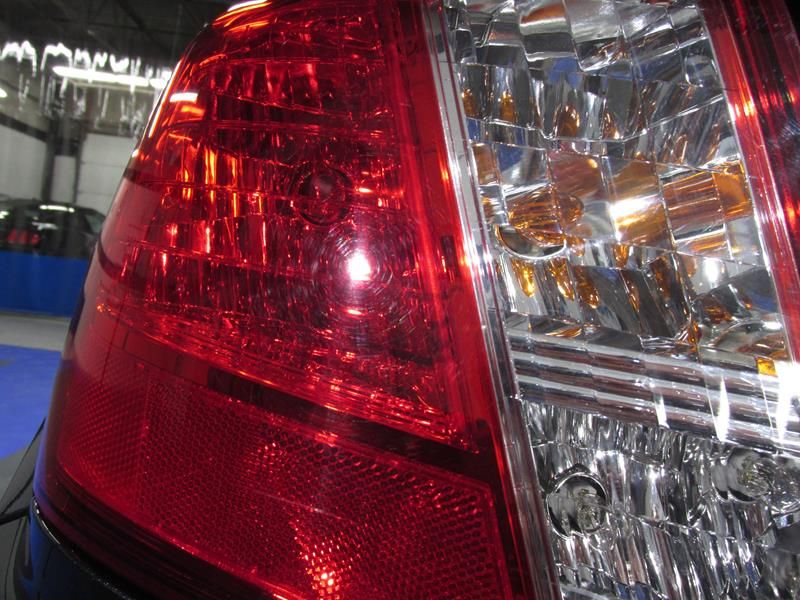
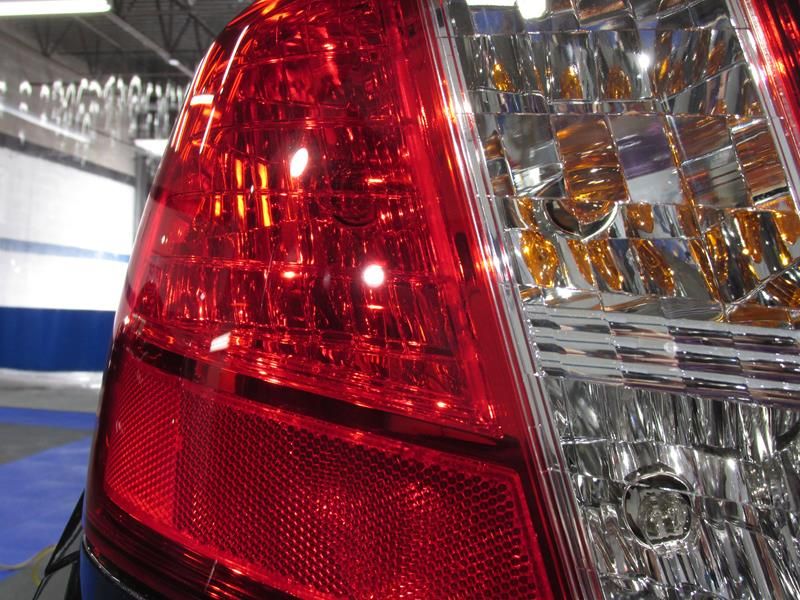
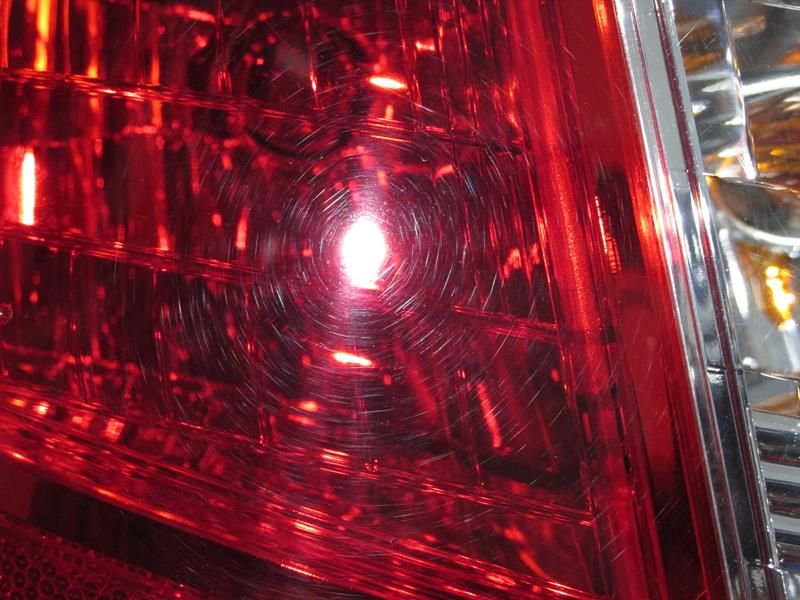
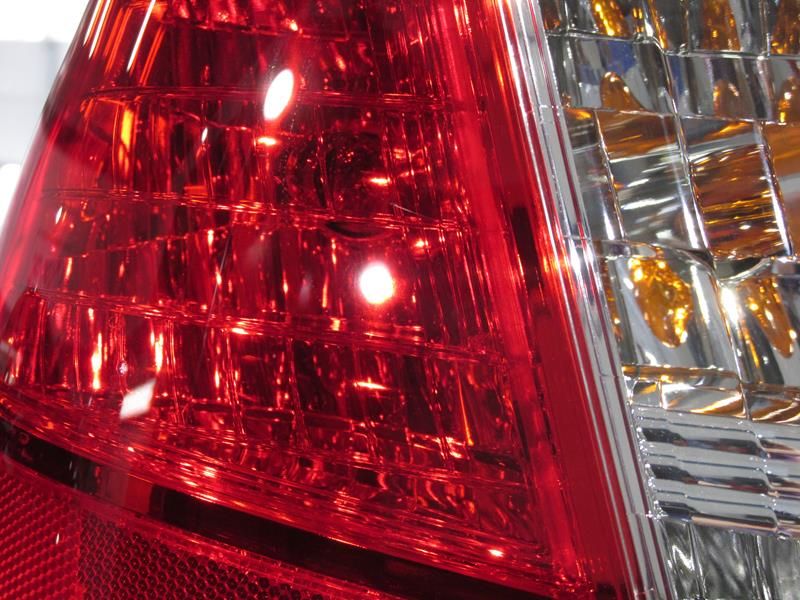
Tailights too...
After all that - vehicle was very dusty. Brought to the wash area and rinsed with DI water then dried with the finest Korean microfibers
Tires dressed with Blackfire Total Eclipse tire shine spray. Final prep with CarPro Eraser. Applied Opti-Glass Pro to all exterior glass. Opti-Coat Pro applied to all exterior paint, exterior trim, exhaust tips and wheel face
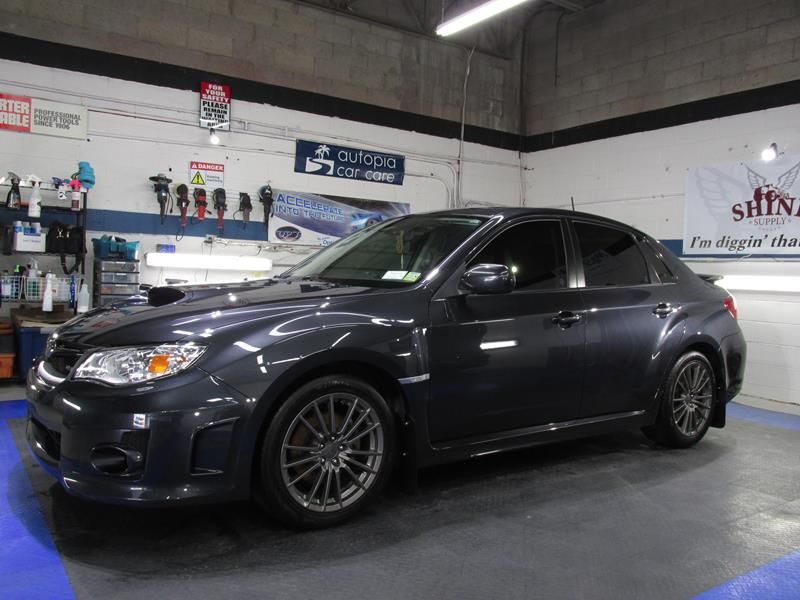
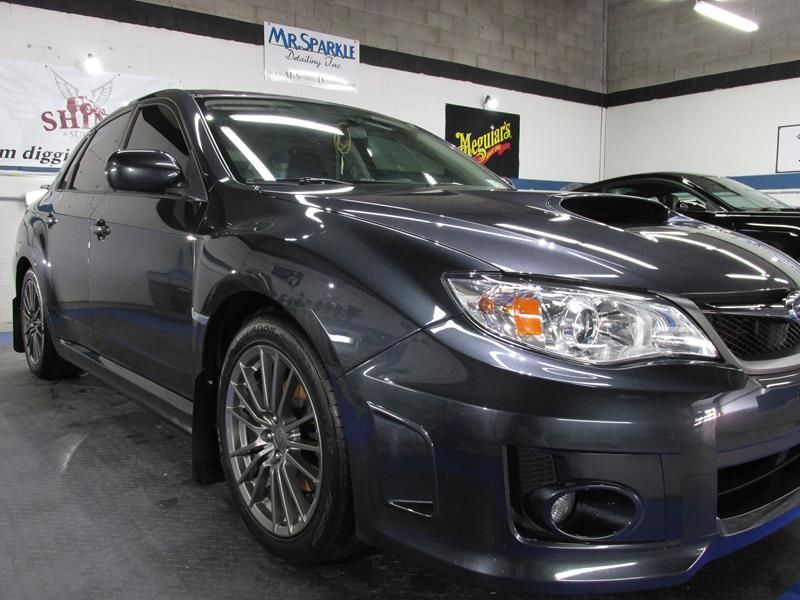
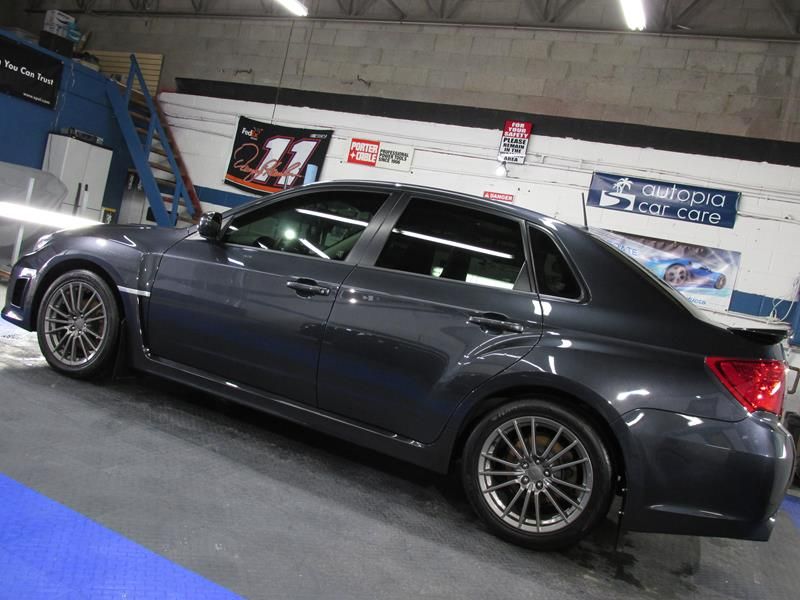
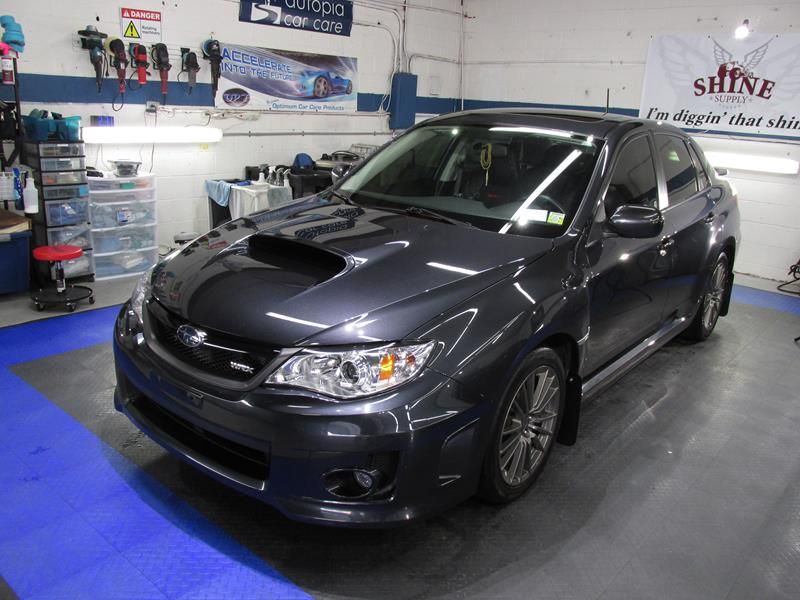
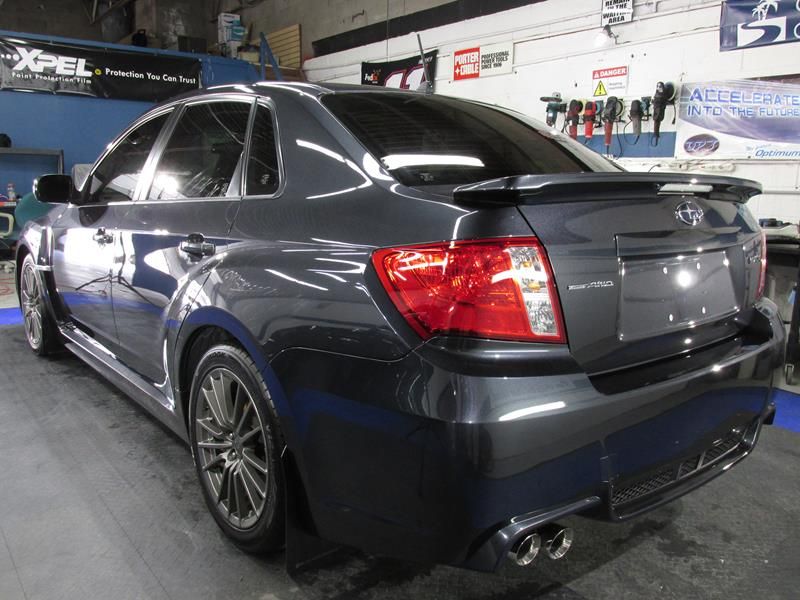
Registered the 5yr warranty with Optimum Polymer Technologies and took glamour shots
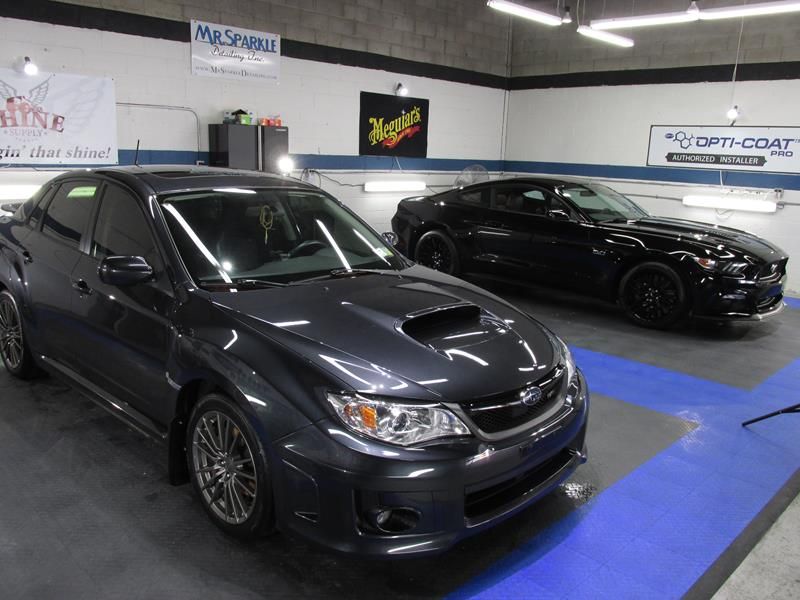
Also in the shop at the time was a 2015 Mustang GT awaiting pickup after install of Xpel Ultimate paint protection film and Blackfire Wet Diamond Sealant
Reporting from the home of the swirl free finish here in West Babylon, New York
www.MrSparkleDetailing.com

No photos of the initial wash & decon but the paint was pretty rough. CarPro TRIX & IronX on the paint followed by Clay Magic Blue. The wheels were done with Sonax FE (with brushes), rinsed and then gone over with Tarminator (by hand with MF towel). I also polished the exhaust tips with S100 polishing soap and much like the wheels, went over once more with Tarminator
Taped off the trim and really got a look at the paint under my LED lights. It was a mess! That's what you came for isnt it?! Let the horror show begin!
The hood

Closeup

Did a couple test spots and ultimately found a nice 2 step combo that got me where I wanted. Some areas definitely had to be gone over repeatedly but for the most part the car was done with
Flex 3401 / Griots DA / Porter Cable (6in - 5in - 3in pads) + Megs MF cutting pads + Shine Supply Classic Cut
then
LC White + Opti-Coat Primer Polish
A good look at the test spot. Note the shallow angle. I find on metallic paints this is the best way to visualize defects. Inspection under LED lighting of course


Got settled in for the long road ahead (fenix headlamp & mp3 player) then got to work

I will mention that this paint was a bit soft but the bigger issue was the stickiness. I've heard others complain and not encountered it that bad. This Subie had it. Any heat during cutting and the wipe off was BRUTAL. Tried a few things and it wasn't the polish or the pad or the air conditions. Just the paint. Everything behaved nicely on the glass - which I also quickly polished along the way. I had to consistently prime the pad with a mist of ONR solution to keep the temps down. Even still here and there I would need some help from CarPro Eraser to get it clear. This was more during the initial defect removal and not the finishing polish
Enough geek talk - show starts now
The hood AFTER


Passenger door
BEFORE

AFTER

Quarter Panel
BEFORE

AFTER

Trunk lid (rear facing - closeup - this area barely fits a 3in pad)


Driver Door


Tailights too...


After all that - vehicle was very dusty. Brought to the wash area and rinsed with DI water then dried with the finest Korean microfibers
Tires dressed with Blackfire Total Eclipse tire shine spray. Final prep with CarPro Eraser. Applied Opti-Glass Pro to all exterior glass. Opti-Coat Pro applied to all exterior paint, exterior trim, exhaust tips and wheel face
Registered the 5yr warranty with Optimum Polymer Technologies and took glamour shots


Also in the shop at the time was a 2015 Mustang GT awaiting pickup after install of Xpel Ultimate paint protection film and Blackfire Wet Diamond Sealant

Reporting from the home of the swirl free finish here in West Babylon, New York
www.MrSparkleDetailing.com

