JustJesus
New member
Tested: Ultima Flawless Finish System (Beta Test Kit)
I was fortunate enough to be selected to do some beta testing of this new system. Thank you Paul, Autopia, and Ultima for the opportunity.
Following is my experience using/testing the Beta Test Kit
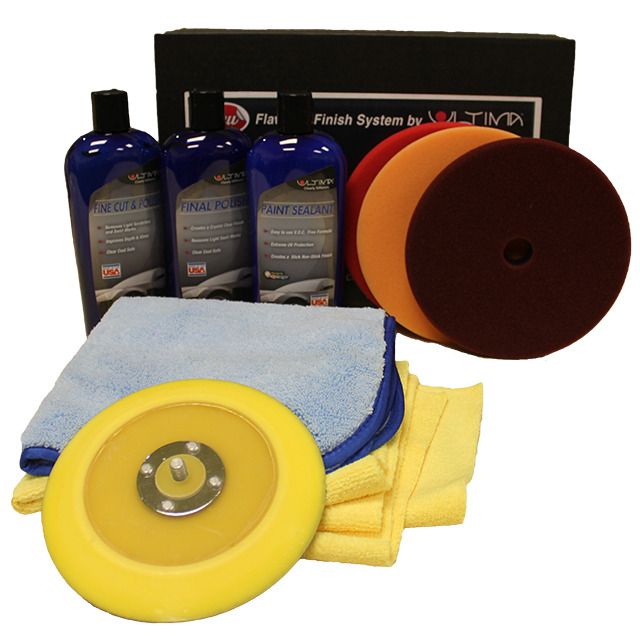
The kit includes the following ULTIMA Products:
Ultima Fine Cut & Polish (NEW) – 12oz
Ultima Final Polish (NEW) – 12oz
Ultima Paint Sealant (NEW) – 12oz
(2) Yellow Edgeless Microfiber Towels
Blue Silk Edge Microfiber Towel
6" Ultima Backing Plate
Red Foam Pad
Maroon Foam Pad
Orange Foam Pad
From Autopia Forum thread
From Autopia Forums:
Ultima Fine Cut & Polish
Designed to remove light scratches and swirls while improving depth, gloss and clarity on light or dark colored painted or clear-coated surfaces. Best results are achieved using a dual action or circular polisher. Silicone free formula shows true results. Extremely soft finishes may require using ULTIMA FINAL POLISH to create a deep crystal clear finish followed by applying ULTIMA PAINT SEALANT to lock in a long lasting protective shine.
Ultima Final Polish
An ultra-fine show car polish designed to remove light swirls and produce exceptional depth, gloss and clarity on light or dark colored painted or clear-=coated surfaces. Best results are achieved using a dual action or circular polisher. Silicone free formula shows true results.
Ultima Paint Sealant
Formulated using Polycharger polymers to create a long lasting protective barrier on paint, glass, wheels and chrome surfaces. Creates a silky smooth slick protective finish which resists contaminates from sticking and protecting from UV rays. Neglected surfaces will first require claying to remove contaminates followed by polishing with Ultima Final Polish to remove swirls and oxidation creating a clean, clear finish which enables proper bonding.
[Note: Minor corrections made and emphasis added to the three descriptions]
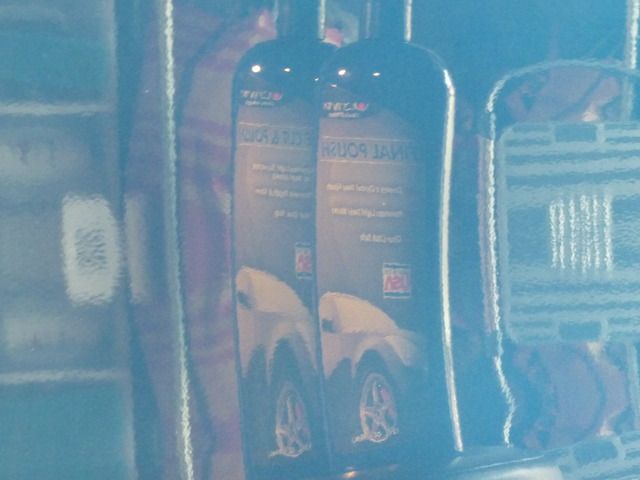
The Liquids
First off, I got to say I really dig the 12oz bottles. The shape was cool. I like the blue color, as well as the flip top. 12oz might be small for some, but they work for me. 16oz bottles (i.e. Poorboys, 3D/HD also work well for me). It’s when you start getting to the 32oz sizes that they start getting cumbersome.
Fine Cut & Polish
Consistency: Thick liquid, not runny or watery.
Color: Light oranage (think creamsicle)
Scent: almost creamsicle
Notes: Scent-wise, one member thought it smelled like WD-40, while another said it was citrus. I thought it was a combination of the two! I couldn’t see how WD-40 came to the member’s head..until I took a whiff. LOL, yeah, WD came to my head first thing.
Final Polish
Consistency: Thick liquid, not runny or watery
Color: A bit on the purple side (lavender?)
Scent: Sort of a grape-scented polish meets grape candy. Not quite the grape of PBBH or Megs Endurance Tire Shine.
Notes: One member mentioned that both correction products were a bit watery, and “…they did seem to want to run off [the] pad.” I didn’t get that experience at all. I thought they were fairly thick, but flowed well. In one pic, you’ll see the product didn’t really run off my pad, although it was near vertical for enough time for me to get my camera and pose the polisher and snap a pic.
Paint Sealant
Consistency: Same as the others
Color: off white
Scent: Nothing stood out
Backing Plate
The BP had a hard plastic type center with a rubbery edge. This edge was tapered and had a bit of flex to it. The edge wasn’t super easy to move, but I can see it working well when your pad starts to meet some curved panels. Overall, it felt solid.
The Pads
Holy smoking stiffness, Batman! These suckers have a dense “interface” or something bonded to the foam part. You’ll see in the pic, as it’s the black part where the hook-n-loop part is. This black section was dense and firm on all three pads. One member pointed out that it is likely not possible to wring out these pads. Well, since I hand clean my pads, I did just this. They were crazy hard to squeeze like a taco, and I couldn’t get them as closed as I do my other foam pads. Stiff suckers indeed.
They attach to the backing plate, AND STAY THERE. These pads take the Kung Fu Grip to a whole new level. Are they the pit-bull bite of the foam pad world? Yeah, I think so. The pads, to me, were quite hard to remove. I pretty much used both hands to remove the pads from the backing plate. If I were doing an entire car with several of these pads, I might get annoyed at the difficulty of removal. If I were using a long-throw polisher (never have) then I might feel more secure knowing these pads won’t come off. Trade-offs, right?
Orange (cut) Foam Pad
It’s orange. No, for real. This cut pad is dense. Squeezing it between my fingers was nowhere as easy as some other foam cut pads I’ve used (most notably, the CG Hexlogic line). The foam part itself had an obvious cut structure. I ran it against the back side of my hand and arm. Remember those “Indian Burns” you did as a kid? This pad will be a clear champ in that game! It cuts.
Maroon (polish) Foam Pad
It’s nuts that different MFGs use different colors. It kept throwing me off that this polish pad was about the same color as Meguiar’s Maroon pad which is their cut pad. Just got to stay alert (and one of the reasons I kept the instruction sheet on the windshield throughout the process!).
This pad is softer in feel and not as dense as the Orange Foam Pad.
Red (finishing) Foam Pad
Now here’s a familiar feel. Nice, soft pad. Not much to say about this pad. It’s soft. Okay, I’ll add a bit more. Although it’s soft, it’s still attached to the dense “interface” part that hooks the pad to the backing plate. That’s all I got.
Microfiber Towels
Yellow Edgeless – I’ll be honest (I’ve been so, and will continue to be so). I thought these might be cheap Costco-style MF towels. I first saw them in the sealed bag. I lifted the bag and they felt very light. The color reminded me of the Costco towels, hence my thoughts. Well, I WAS WRONG. They were on the thin and light side, but they were softer than Costco towels. They were also edgeless. I inspected both towels (just prior to each respective use, otherwise, they were kept in the bag until the absolute last minute). No traces of lint. They were not the softest towels I’ve felt, but they were still pretty soft. And beyond that: I ABSOLUTELY love these towels. I still haven’t been able to put a finger on it, but love ‘em. I do appreciate how easily they fold and remain a pretty flat, even square.
Blue Silk Edge – This towel came sealed in its own bag. It was thicker, more plush, and softer than the Yellows. It was dual pile, though I only used the thicker pile when I removed the Paint Sealant. I did like that this towel matched the color of my daily driver Yaris. Hey, sometimes it’s the little things that make me smile!
*** In Use ***
Test 1 – 2006 Mitsubish Lancer Evolution (EVO iX)
Location: Fountain Valley, Ca (approx. 6.5 miles from the nearest beach)
Note: I’m listing locations as I’ve found it *can* make a difference, even when it’s not that far from each other. Case in point: Megs 105 behaved quite different when used outdoors in Fountain Valley, to inside an open garage in South Gate. Even more so in F.V. on a hot and humid summer day (Kevin Brown method used that time)
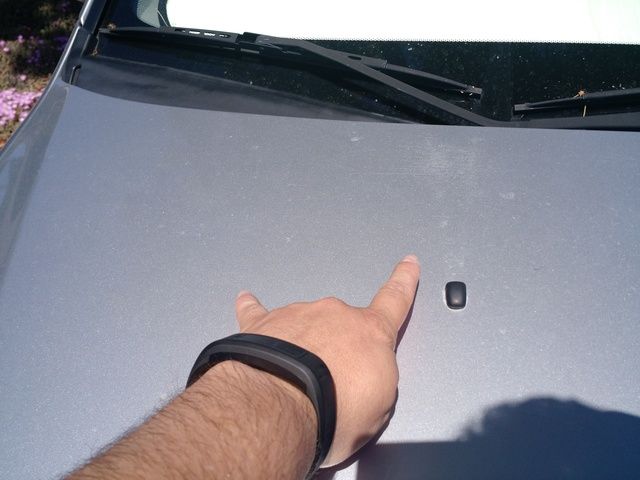
This EVO was washed prior to delivery. It wasn’t washed all that well. It had some fairly bad chips in the paint, some minor scratches, some deeper ones, and the hood had almost no gloss to it. I wasn’t sure if the Fine Cut & Polish would remove the scratches, as it is designed to ” to remove light scratches and swirls while improving depth, gloss and clarity”
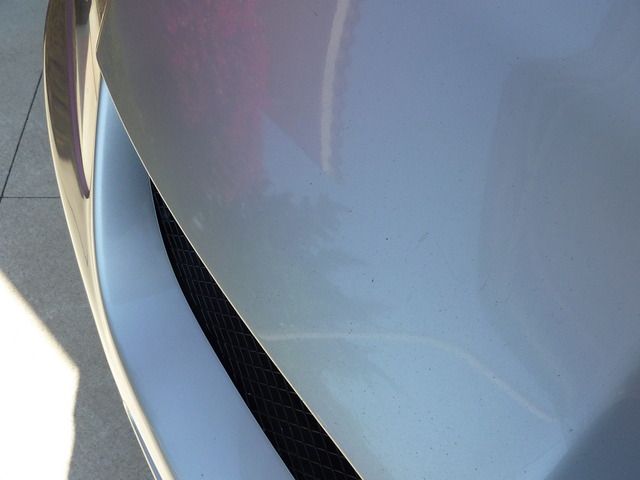
*****BEFORES*****
Note the scratches and wrinkled paint. Those few circular spots in the paint are beyond "correction"
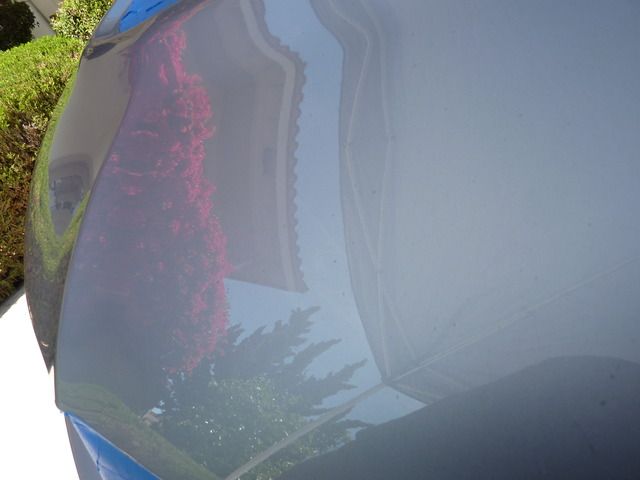
Compare the flower reflection on the windshield to that of the hood. Where's the Distinction of Image (DOI)??
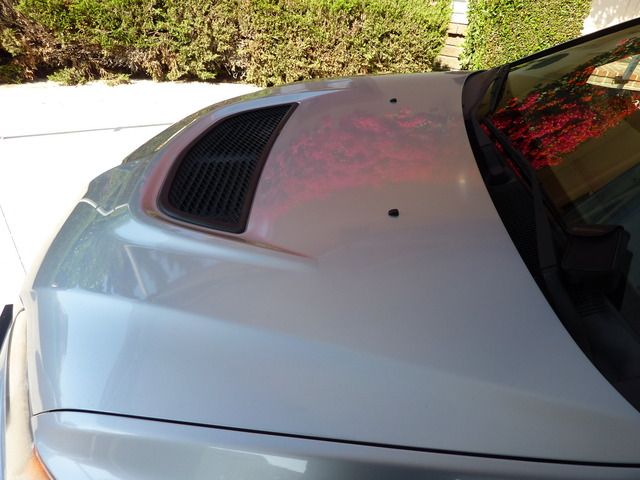
Another angle of the hood.

Here are two parallel scratches running near the top of the fender. Would a Fine Cut remove these?

Another angle showing lack of DOI
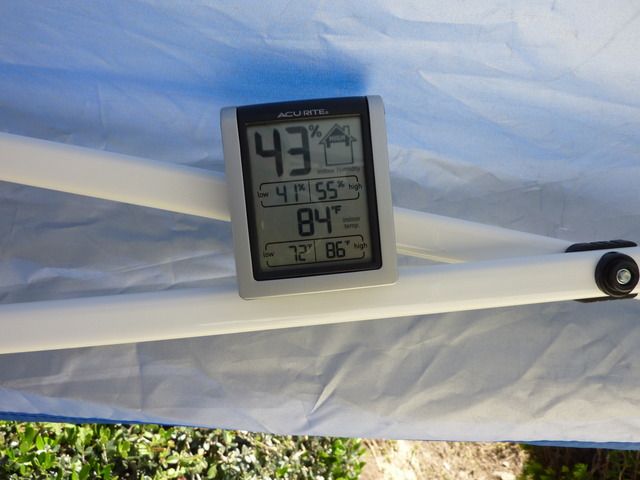
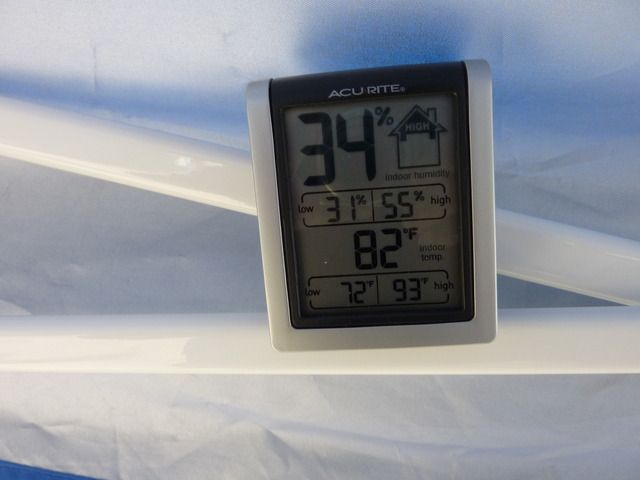
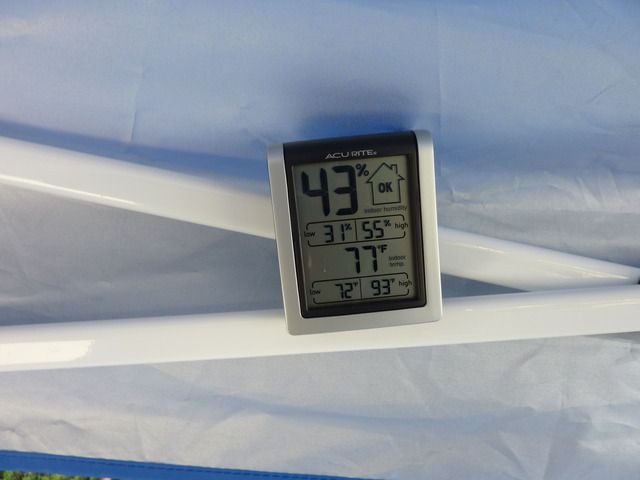
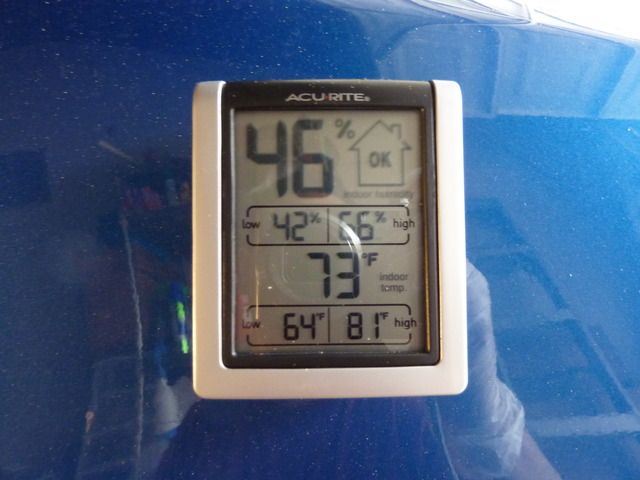
Starting conditions. Humidy percentage on top, current temp at bottom
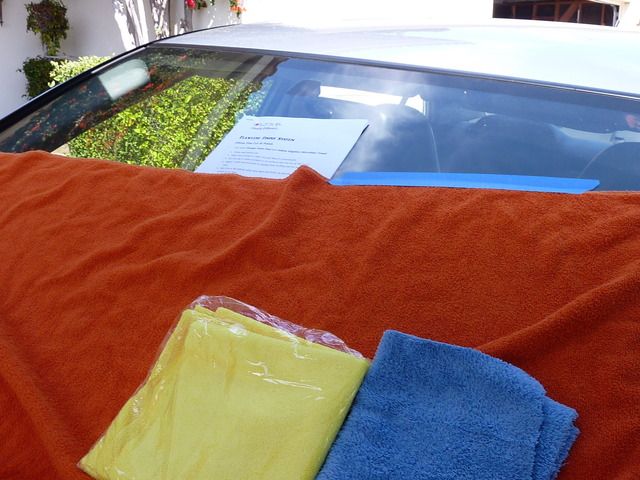
My towels within reach, instructions read multiple times, and on standby for each step
<<< CRUD....forgot I had a short video clip. WIll have to add that later >>>
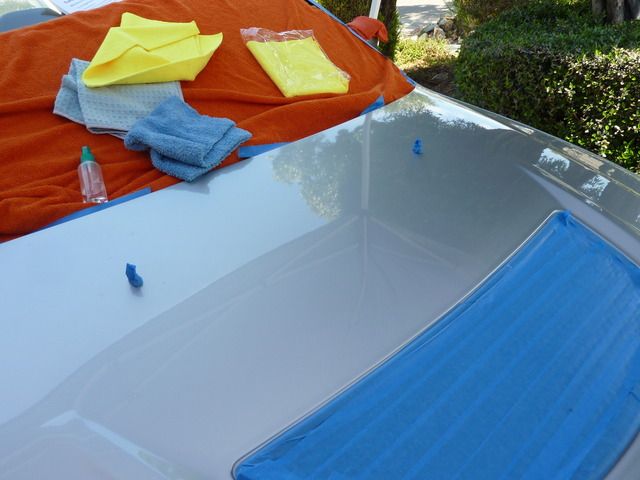
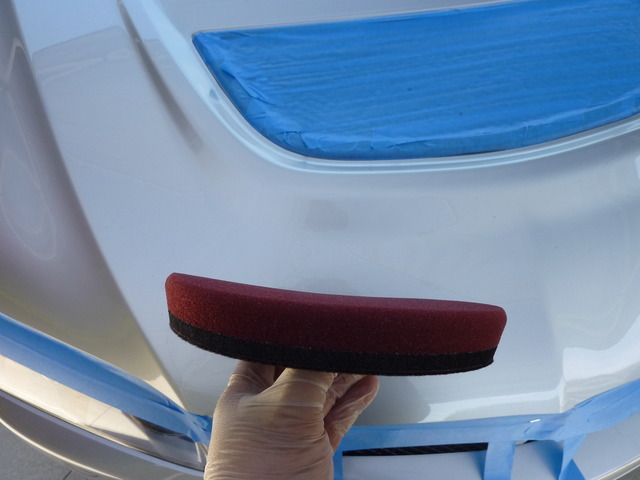
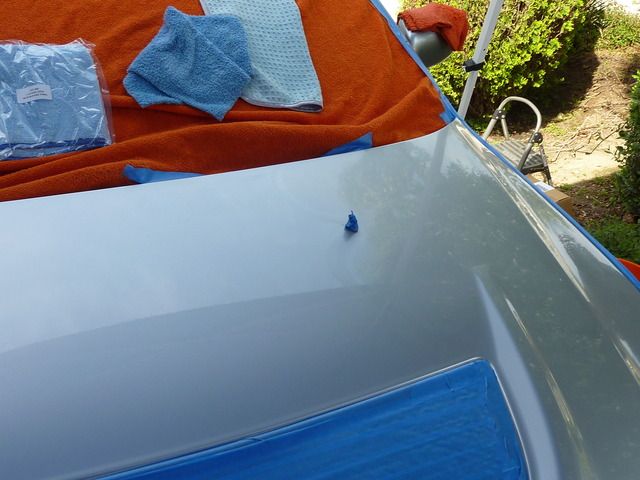
With only one pad for each step, cleaning on the fly is a must!

Looking better!
Pleasant surprise. The scratches were removed!
Some sections asked for a second section pass. Current stats, and I adjusted amount of product (testing, after all) ^_^
MOVING TO POLISHING STEP - Current stats
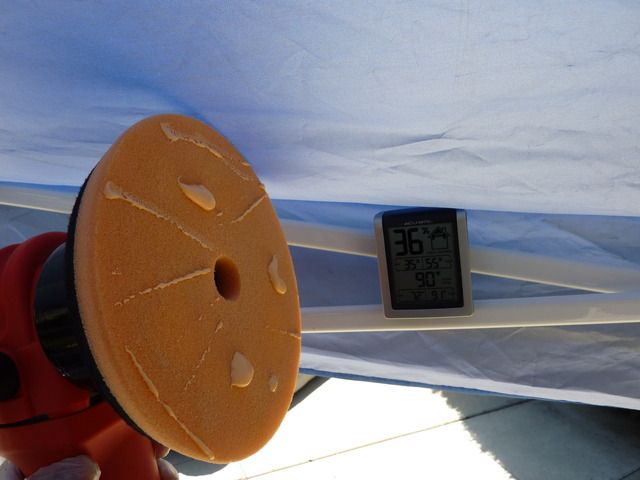
The pads were completely flat when I received them! I guess it got a bit warm for the pads in the box? Performance not affected as they were flat against the backing plate. (see? Those suckers really stick together!!)
More paint defects removed! Niiiice, yes?
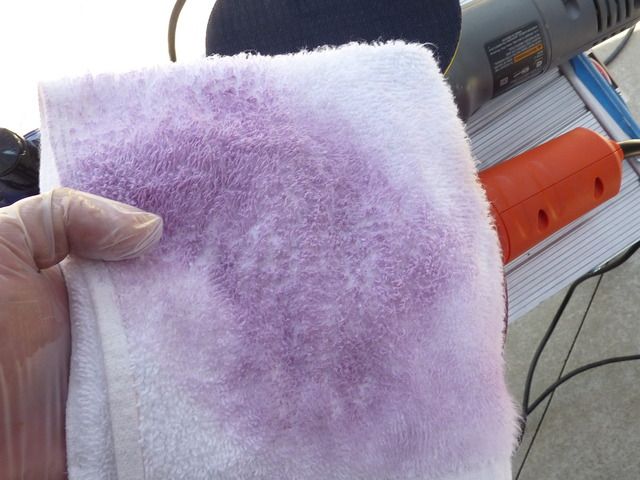
Cleaning on the fly. Purple Passion
Results after the polishing step

Stats just prior to Paint Sealant
The sealant curing on the paint (I let it go for 40 minutes. Instructions call for 15-30 min, I believe). Removal was still a breeze.
Stats AFTER sealant removed. Note the highs and lows for that day!
Final results. DOI is present and accounted for! Gloss? Check. Clarity? Check.
BONUS: For you bead lovers out there! The following morning, the morning dew left me some beads (car sat outside overnight).
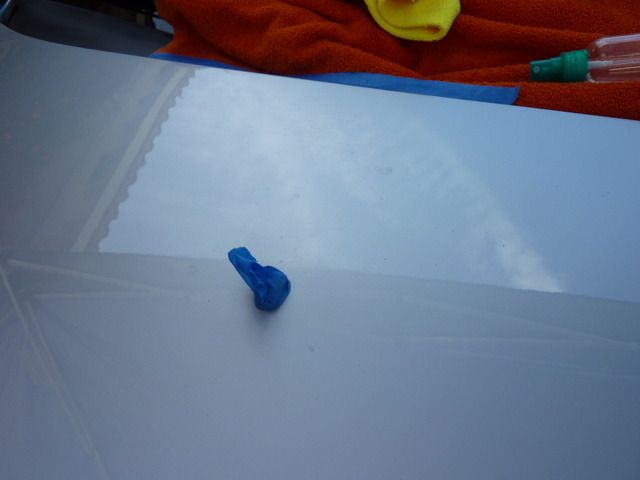
These are some tiny beads!!! (that's a close up of the washer fluid nozzle)
Test 2- 2008 Toyota Yaris
Location: Cudahy, CA (approx. 15.75 miles from nearest beach)
Ahhhhhh yes. My lovable daily driver Yaris. My test bed. My autoX car. My off roader. This little guy has seen some abuse. Lately, its main function is to serve as my test bed for various products and daily driver. It’s got its fair share of rock chips, rubber transfer (from lousy driver’s car’s tires), scratches (from off road), etc. The color makes it hard to see swirls or cob webs, unless seen from certain angles and with certain light, and you have to be up close.
Before shots and temp readings
The 50/50 shot after one pass of Fine Cut & Polish

Following shots, including sun shots, are after the Cut phase *ONLY*

Sun shots. Is it LSP ready? I would say HECK YEAH

Begin Final Polish phase
Next up is the Paint Sealant. Let it cure for 30 minutes before I wiped it off (easy wipe off)
Conclusion: Fine products. All of them.
Being that the Fine Cut & Polish isn't a heavy compound, I was a bit surprised that it did cut some of the scratches out. It also finished off quite nicely, and I would have left the Yaris alone after the first step. However, this is testing after all and proceeded with the Final Polish. And wow. WOW. It made the metal flake pop. I must have spent 20 minutes just looking at the finish. My reflection, taking pics, different angle viewing The pics I was able to capture don't do the finish any justice. I wanted to finish off the Yaris completely, and held back as I'm still testing products on it. Bummer. Another time.
I do believe the Paint Sealant added just a bit more of something to the overall look as well. Not sure what, but maybe it's that "sealant" look? This was the first time I used a sealant.
Speaking of firsts. Also my first time using larger pads (6") and a speed of more than 5 on my GG6. That made for an interesting time! More vibration than I'm used to? Perhaps.
All three liquids performed well. I did adjust the amount and eventually settled on FOUR drops instead of the per-instructions THREE drops. I found it worked longer, was easier to work with, and when worked over til it was almost clear/gone, made wipe off even easier. Don't get me wrong, wipe off was easy enough as it was.
Dusting? Initially, I did manage a tiny amount of dust, but that was before I dialed in my process with THIS product, on THESE cars, and on THESE days. I was fighting the intermittent rain that we had in So Cal recently.
Anyway. To close, I'd like to say I enjoyed working with these products. The finish was lovely. I'd say the Final Polish will be giving HD Polish and Megs 205 a run for their money!
Thank you to Paul, Autopia, and Ultima for the chance to work with this product. Aside from the amount of time spent on this write up, the experience was fun!
Thank you all for reading. Hope you were able to take something away from this.
I was fortunate enough to be selected to do some beta testing of this new system. Thank you Paul, Autopia, and Ultima for the opportunity.
Following is my experience using/testing the Beta Test Kit
The kit includes the following ULTIMA Products:
Ultima Fine Cut & Polish (NEW) – 12oz
Ultima Final Polish (NEW) – 12oz
Ultima Paint Sealant (NEW) – 12oz
(2) Yellow Edgeless Microfiber Towels
Blue Silk Edge Microfiber Towel
6" Ultima Backing Plate
Red Foam Pad
Maroon Foam Pad
Orange Foam Pad
From Autopia Forum thread

From Autopia Forums:
Ultima Fine Cut & Polish
Designed to remove light scratches and swirls while improving depth, gloss and clarity on light or dark colored painted or clear-coated surfaces. Best results are achieved using a dual action or circular polisher. Silicone free formula shows true results. Extremely soft finishes may require using ULTIMA FINAL POLISH to create a deep crystal clear finish followed by applying ULTIMA PAINT SEALANT to lock in a long lasting protective shine.
Ultima Final Polish
An ultra-fine show car polish designed to remove light swirls and produce exceptional depth, gloss and clarity on light or dark colored painted or clear-=coated surfaces. Best results are achieved using a dual action or circular polisher. Silicone free formula shows true results.
Ultima Paint Sealant
Formulated using Polycharger polymers to create a long lasting protective barrier on paint, glass, wheels and chrome surfaces. Creates a silky smooth slick protective finish which resists contaminates from sticking and protecting from UV rays. Neglected surfaces will first require claying to remove contaminates followed by polishing with Ultima Final Polish to remove swirls and oxidation creating a clean, clear finish which enables proper bonding.
[Note: Minor corrections made and emphasis added to the three descriptions]
The Liquids
First off, I got to say I really dig the 12oz bottles. The shape was cool. I like the blue color, as well as the flip top. 12oz might be small for some, but they work for me. 16oz bottles (i.e. Poorboys, 3D/HD also work well for me). It’s when you start getting to the 32oz sizes that they start getting cumbersome.
Fine Cut & Polish
Consistency: Thick liquid, not runny or watery.
Color: Light oranage (think creamsicle)
Scent: almost creamsicle
Notes: Scent-wise, one member thought it smelled like WD-40, while another said it was citrus. I thought it was a combination of the two! I couldn’t see how WD-40 came to the member’s head..until I took a whiff. LOL, yeah, WD came to my head first thing.
Final Polish
Consistency: Thick liquid, not runny or watery
Color: A bit on the purple side (lavender?)
Scent: Sort of a grape-scented polish meets grape candy. Not quite the grape of PBBH or Megs Endurance Tire Shine.
Notes: One member mentioned that both correction products were a bit watery, and “…they did seem to want to run off [the] pad.” I didn’t get that experience at all. I thought they were fairly thick, but flowed well. In one pic, you’ll see the product didn’t really run off my pad, although it was near vertical for enough time for me to get my camera and pose the polisher and snap a pic.
Paint Sealant
Consistency: Same as the others
Color: off white
Scent: Nothing stood out
Backing Plate
The BP had a hard plastic type center with a rubbery edge. This edge was tapered and had a bit of flex to it. The edge wasn’t super easy to move, but I can see it working well when your pad starts to meet some curved panels. Overall, it felt solid.
The Pads
Holy smoking stiffness, Batman! These suckers have a dense “interface” or something bonded to the foam part. You’ll see in the pic, as it’s the black part where the hook-n-loop part is. This black section was dense and firm on all three pads. One member pointed out that it is likely not possible to wring out these pads. Well, since I hand clean my pads, I did just this. They were crazy hard to squeeze like a taco, and I couldn’t get them as closed as I do my other foam pads. Stiff suckers indeed.
They attach to the backing plate, AND STAY THERE. These pads take the Kung Fu Grip to a whole new level. Are they the pit-bull bite of the foam pad world? Yeah, I think so. The pads, to me, were quite hard to remove. I pretty much used both hands to remove the pads from the backing plate. If I were doing an entire car with several of these pads, I might get annoyed at the difficulty of removal. If I were using a long-throw polisher (never have) then I might feel more secure knowing these pads won’t come off. Trade-offs, right?
Orange (cut) Foam Pad
It’s orange. No, for real. This cut pad is dense. Squeezing it between my fingers was nowhere as easy as some other foam cut pads I’ve used (most notably, the CG Hexlogic line). The foam part itself had an obvious cut structure. I ran it against the back side of my hand and arm. Remember those “Indian Burns” you did as a kid? This pad will be a clear champ in that game! It cuts.
Maroon (polish) Foam Pad
It’s nuts that different MFGs use different colors. It kept throwing me off that this polish pad was about the same color as Meguiar’s Maroon pad which is their cut pad. Just got to stay alert (and one of the reasons I kept the instruction sheet on the windshield throughout the process!).
This pad is softer in feel and not as dense as the Orange Foam Pad.
Red (finishing) Foam Pad
Now here’s a familiar feel. Nice, soft pad. Not much to say about this pad. It’s soft. Okay, I’ll add a bit more. Although it’s soft, it’s still attached to the dense “interface” part that hooks the pad to the backing plate. That’s all I got.
Microfiber Towels
Yellow Edgeless – I’ll be honest (I’ve been so, and will continue to be so). I thought these might be cheap Costco-style MF towels. I first saw them in the sealed bag. I lifted the bag and they felt very light. The color reminded me of the Costco towels, hence my thoughts. Well, I WAS WRONG. They were on the thin and light side, but they were softer than Costco towels. They were also edgeless. I inspected both towels (just prior to each respective use, otherwise, they were kept in the bag until the absolute last minute). No traces of lint. They were not the softest towels I’ve felt, but they were still pretty soft. And beyond that: I ABSOLUTELY love these towels. I still haven’t been able to put a finger on it, but love ‘em. I do appreciate how easily they fold and remain a pretty flat, even square.
Blue Silk Edge – This towel came sealed in its own bag. It was thicker, more plush, and softer than the Yellows. It was dual pile, though I only used the thicker pile when I removed the Paint Sealant. I did like that this towel matched the color of my daily driver Yaris. Hey, sometimes it’s the little things that make me smile!
*** In Use ***
Test 1 – 2006 Mitsubish Lancer Evolution (EVO iX)
Location: Fountain Valley, Ca (approx. 6.5 miles from the nearest beach)
Note: I’m listing locations as I’ve found it *can* make a difference, even when it’s not that far from each other. Case in point: Megs 105 behaved quite different when used outdoors in Fountain Valley, to inside an open garage in South Gate. Even more so in F.V. on a hot and humid summer day (Kevin Brown method used that time)
This EVO was washed prior to delivery. It wasn’t washed all that well. It had some fairly bad chips in the paint, some minor scratches, some deeper ones, and the hood had almost no gloss to it. I wasn’t sure if the Fine Cut & Polish would remove the scratches, as it is designed to ” to remove light scratches and swirls while improving depth, gloss and clarity”
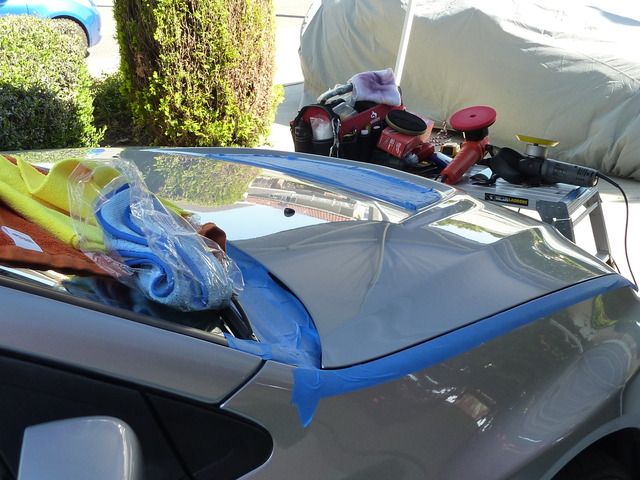
*****BEFORES*****
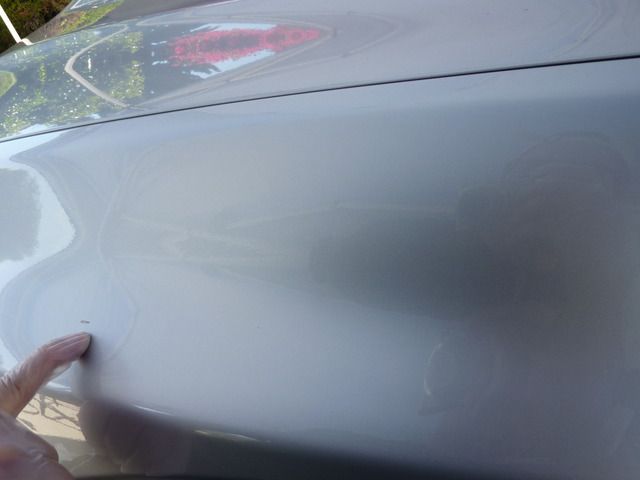
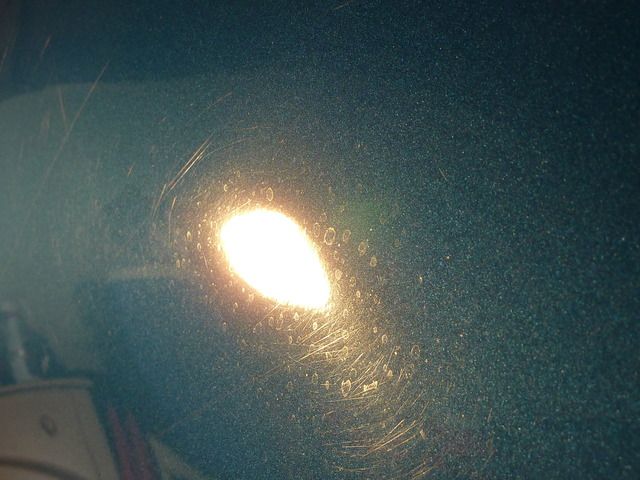
Note the scratches and wrinkled paint. Those few circular spots in the paint are beyond "correction"

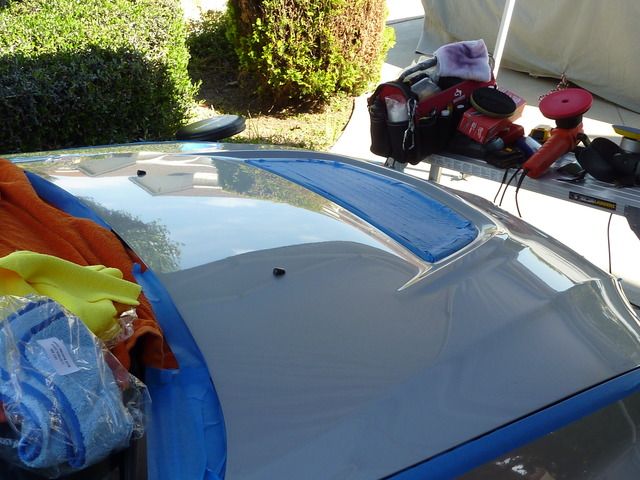
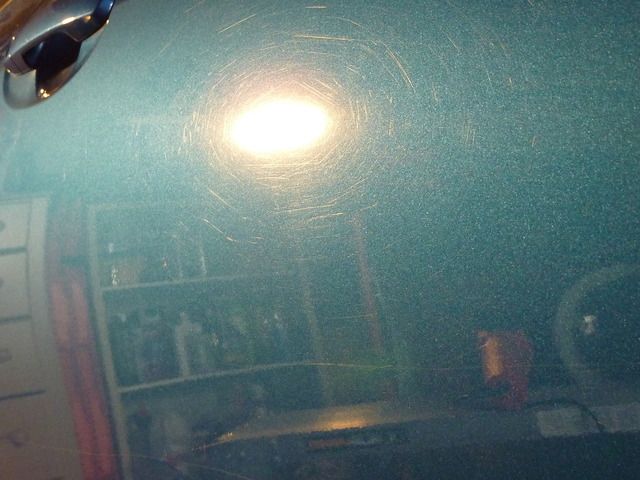
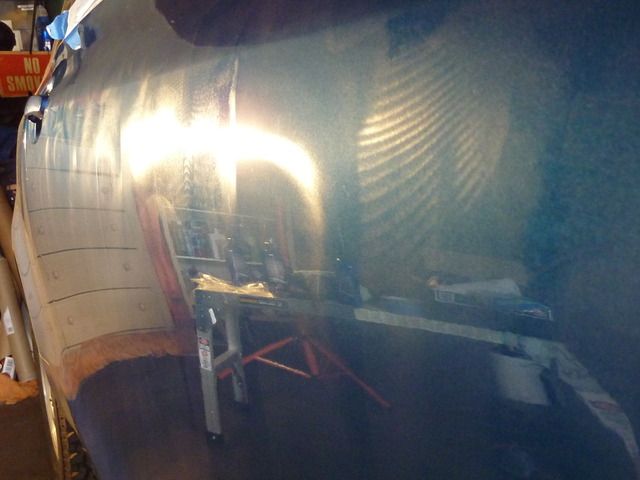
Compare the flower reflection on the windshield to that of the hood. Where's the Distinction of Image (DOI)??

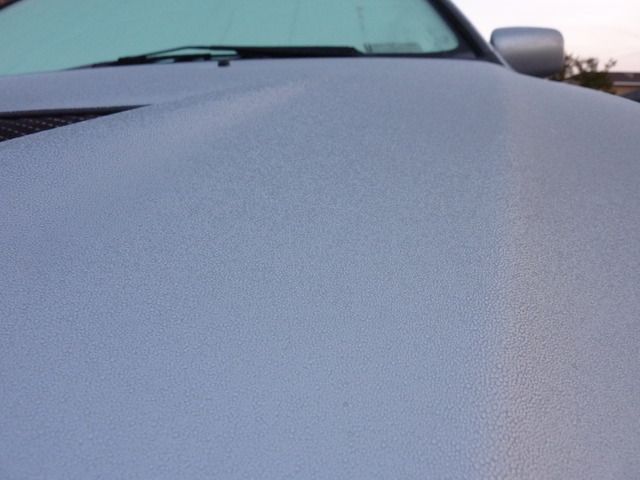
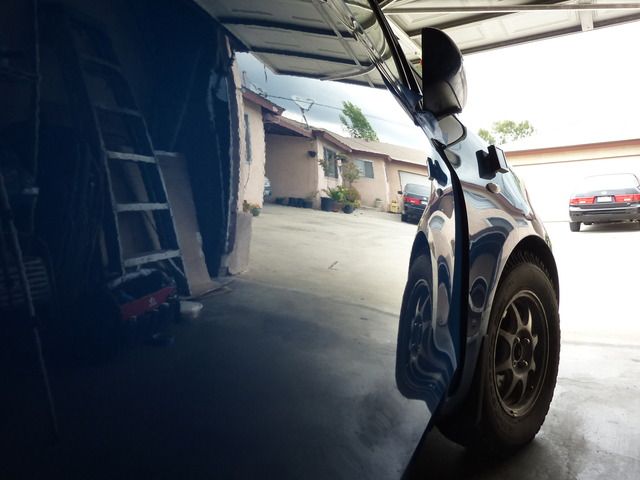
Another angle of the hood.

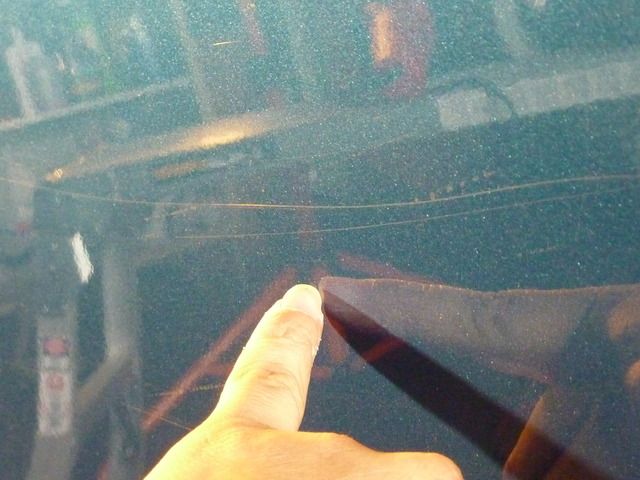
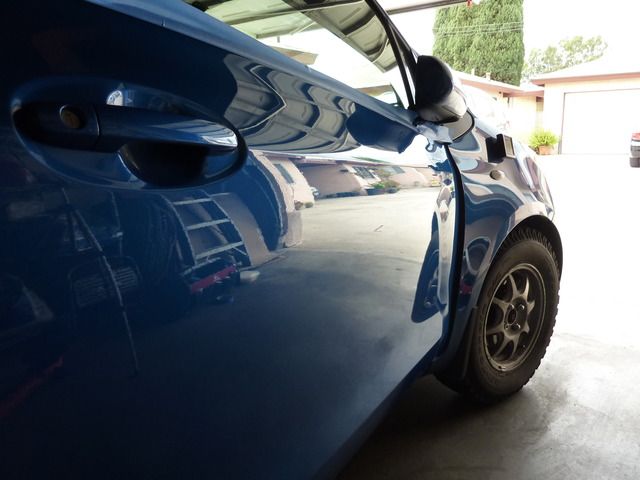
Here are two parallel scratches running near the top of the fender. Would a Fine Cut remove these?

Another angle showing lack of DOI

Starting conditions. Humidy percentage on top, current temp at bottom

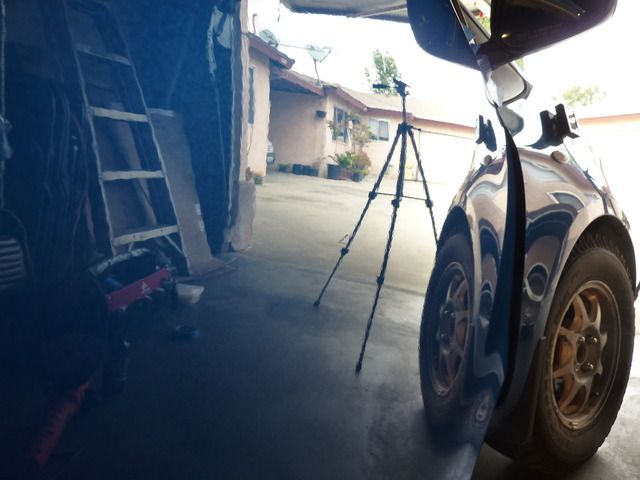
My towels within reach, instructions read multiple times, and on standby for each step

<<< CRUD....forgot I had a short video clip. WIll have to add that later >>>
With only one pad for each step, cleaning on the fly is a must!

Looking better!


Pleasant surprise. The scratches were removed!

Some sections asked for a second section pass. Current stats, and I adjusted amount of product (testing, after all) ^_^

MOVING TO POLISHING STEP - Current stats

The pads were completely flat when I received them! I guess it got a bit warm for the pads in the box? Performance not affected as they were flat against the backing plate. (see? Those suckers really stick together!!)

More paint defects removed! Niiiice, yes?

Cleaning on the fly. Purple Passion

Results after the polishing step

Stats just prior to Paint Sealant

The sealant curing on the paint (I let it go for 40 minutes. Instructions call for 15-30 min, I believe). Removal was still a breeze.

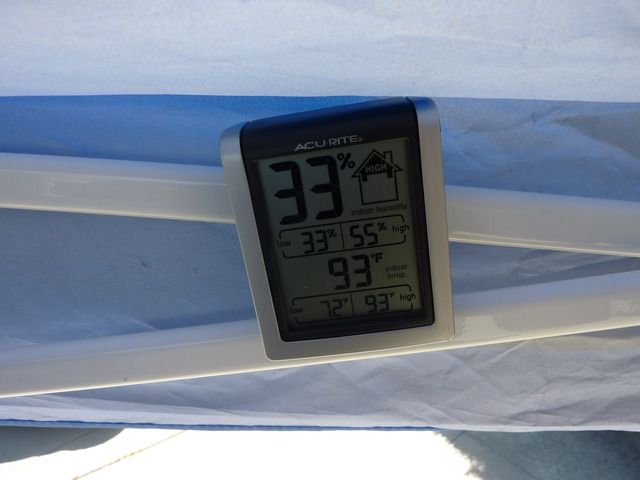
Stats AFTER sealant removed. Note the highs and lows for that day!

Final results. DOI is present and accounted for! Gloss? Check. Clarity? Check.


BONUS: For you bead lovers out there! The following morning, the morning dew left me some beads (car sat outside overnight).

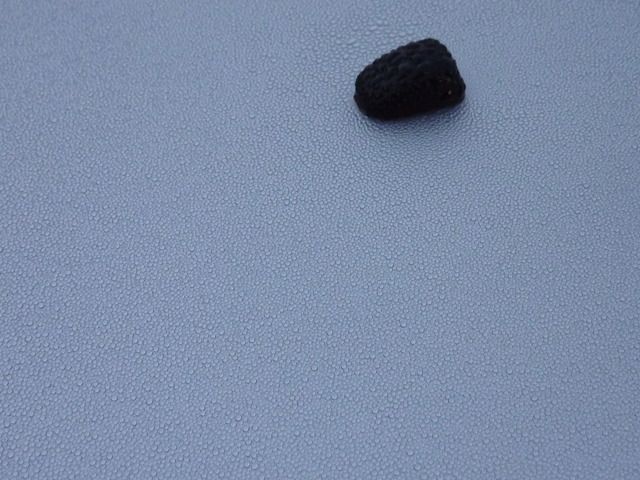
These are some tiny beads!!! (that's a close up of the washer fluid nozzle)

Test 2- 2008 Toyota Yaris
Location: Cudahy, CA (approx. 15.75 miles from nearest beach)
Ahhhhhh yes. My lovable daily driver Yaris. My test bed. My autoX car. My off roader. This little guy has seen some abuse. Lately, its main function is to serve as my test bed for various products and daily driver. It’s got its fair share of rock chips, rubber transfer (from lousy driver’s car’s tires), scratches (from off road), etc. The color makes it hard to see swirls or cob webs, unless seen from certain angles and with certain light, and you have to be up close.
Before shots and temp readings


The 50/50 shot after one pass of Fine Cut & Polish

Following shots, including sun shots, are after the Cut phase *ONLY*


Sun shots. Is it LSP ready? I would say HECK YEAH

Begin Final Polish phase


Next up is the Paint Sealant. Let it cure for 30 minutes before I wiped it off (easy wipe off)


Conclusion: Fine products. All of them.
Being that the Fine Cut & Polish isn't a heavy compound, I was a bit surprised that it did cut some of the scratches out. It also finished off quite nicely, and I would have left the Yaris alone after the first step. However, this is testing after all and proceeded with the Final Polish. And wow. WOW. It made the metal flake pop. I must have spent 20 minutes just looking at the finish. My reflection, taking pics, different angle viewing The pics I was able to capture don't do the finish any justice. I wanted to finish off the Yaris completely, and held back as I'm still testing products on it. Bummer. Another time.
I do believe the Paint Sealant added just a bit more of something to the overall look as well. Not sure what, but maybe it's that "sealant" look? This was the first time I used a sealant.
Speaking of firsts. Also my first time using larger pads (6") and a speed of more than 5 on my GG6. That made for an interesting time! More vibration than I'm used to? Perhaps.
All three liquids performed well. I did adjust the amount and eventually settled on FOUR drops instead of the per-instructions THREE drops. I found it worked longer, was easier to work with, and when worked over til it was almost clear/gone, made wipe off even easier. Don't get me wrong, wipe off was easy enough as it was.
Dusting? Initially, I did manage a tiny amount of dust, but that was before I dialed in my process with THIS product, on THESE cars, and on THESE days. I was fighting the intermittent rain that we had in So Cal recently.
Anyway. To close, I'd like to say I enjoyed working with these products. The finish was lovely. I'd say the Final Polish will be giving HD Polish and Megs 205 a run for their money!
Thank you to Paul, Autopia, and Ultima for the chance to work with this product. Aside from the amount of time spent on this write up, the experience was fun!
Thank you all for reading. Hope you were able to take something away from this.
")


