Rotor Glow Orange Evo X detailed in Puerto Rico by AutoLavish

MarcHarris

New member
Rotor Glow Orange Evo X detailed in Puerto Rico by AutoLavish


Written by Jacob...

This was the 5th car in sequence we detailed on our Trip to Puerto Rico in December 2009, but we wanted to show it as soon as possible! First, we have to thank our bros at Predator Performance (predator-performance.com) for receiving us and letting us use the shop for detailing while in the Metropolitan Area (Greater San Juan). Rafa, Omar, and Abdiel are typical crazy car guys with a good sense for running a business and client relations, are master tuners, and are great guys to talk to. They own and run Predator Performance. For those on the Island, Predator is the place to go for tuning your Evo or STi, and has the only chassis dyno on the island set up to be able to run in 4 wheel mode for FWD or RWD vehicles, which means not having to go through and figuring out how to work around modern Electric Stability Controls on cars like Porsche and MBs for road load tuning and drag strip simulations. They are the exclusive AMS dealer in the Island, and keep a close relation ship to the Chicago headquarters, with frequent visits by AMS tuners for special occasions. They built a car for the owner of the Evo X featured here a little while ago, and it was the first Evo X to break the 10 second barrier, anywhere.


DSC09110.jpg
... in the world.


DSC09108.jpg


DSC09114.jpg


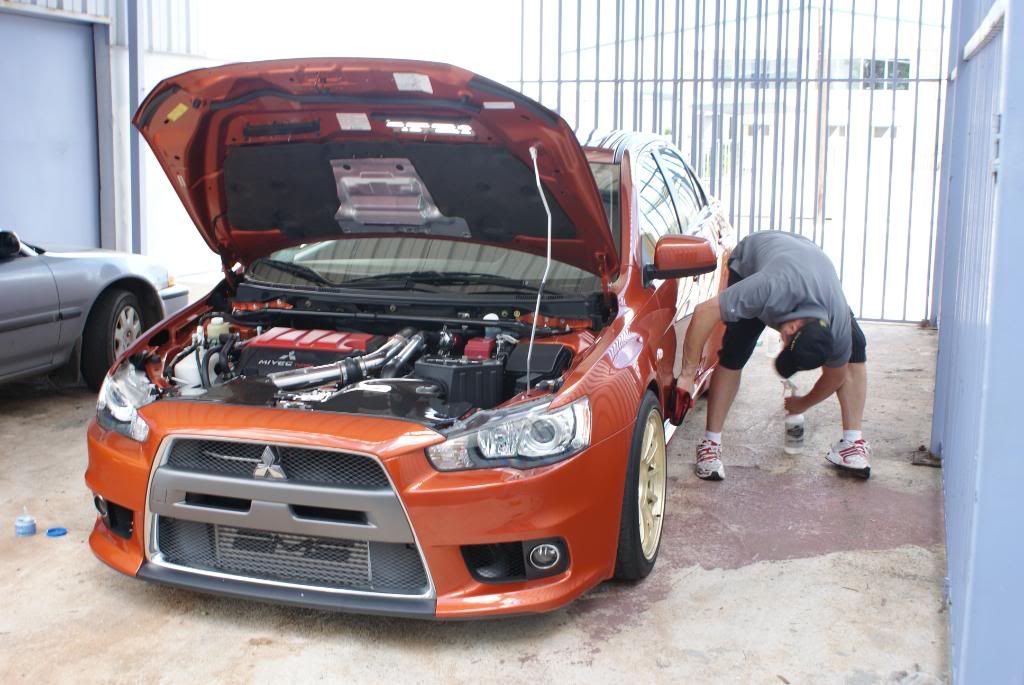
Since then, he sold the blue X and got this one. So far the mods under the hood have been mild...


Fast forward to today. It is now 10:00 am as we arrive at Predator Performance in Bayamon, Puerto Rico. It is already 90+ degrees. The sky is clear and crisp, not a cloud in sight. It is a beautiful day.


DSC08786.jpg


The X is sitting outside, in a small patch of shade. An older Red Evo is on the Dyno, getting strapped down. Clients and Staff are moving about swiftly. The shop is bustling. We get out of the Van... "smells like high octane". Marc smiles.


DSC08788.jpg


DSC08794.jpg


DSC08795.jpg


DSC08806.jpg


DSC08810.jpg


DSC08800.jpg


DSC08803.jpg


Omar notices our non-local skin colour (as in pale), and greets us, hands us the keys to the X, and points to the areas for electricity and water hookups. He has to run off, promising to get back in a few minutes. We walk back out and scope the place for our spot, as the Red Evo on the Dyno revs to life.


DSC08808.jpg


Omar comes back around to check up and make sure we got everything we needed. We already have the Evo in the corner by the hose. The shade is vanishing quickly. Sweat has been running down our faces for awhile now, as we run to get the X washed ASAP.


With limited supplies on hand, we opted for Meguiar's NXT Wash in the foam gun...


DSC08859.jpg
 
We hit the 18-lb SSR Type-F Wheels (+15 front / +18 rear offsets) with P21S Gel and a generic wheel brush we picked up at the local auto store. It was barely enough to reach the inner edges of the wheel barrel, all 10.5 inches of it. We followed by using Meg's Super Degreaser sprayed on the fender wells, and agitated with a black SchMITT. Meg's APC at 4:1 was used on the 275-wide tires, which had significant slime buildup from high-shine dressings.


before:


DSC08842.jpg


DSC08841.jpg


DSC08843.jpg


during:


DSC08854.jpg


DSC08857.jpg


DSC08858.jpg


after:


DSC08860.jpg


DSC08861.jpg


DSC08862.jpg


Super Degreaser was sprayed on the engine and Finish Kare 1 #1119 on the underside of the hood, then agitated and rinsed. The Red Evo provides the soundtrack as it goes through a warm up cycle on the Dyno. The sun is shining, there is a slight breeze, and we are busting *** as the sun squeezes us like some detailing vampires (the real kind that die in the sun).


before:


DSC08845.jpg


DSC08828.jpg


DSC08831.jpg


DSC08833.jpg


DSC08837.jpg


during:


DSC08849.jpg


DSC08850.jpg


As the foam gun starts up, all attention in the Dyno area is distracted. Just for a second, then the crew gets back on tuning. The Red Evo does its first pull of the day as we shut down the washer to let the foam dwell. Loud as hell! We rinse the X and foam again for a massage with a new MF Dreadlock Mitt. By now the sun is in full force on us. The washer is on constantly, I keep everything wet and cool as Marc washes. Ambient temp is about 95 degrees.


DSC08869.jpg


DSC08870.jpg


(oh no! It got on the dash!)

DSC08879.jpg


DSC08892.jpg


DSC08894.jpg


We did a futile attempt at drying the car, and drove it to the back of the building for some shade. We had scoped out a nice “porch” with ample space in the back of the building earlier. The X was littered with tar specs and tire rubber. Running very wide tires and wheels tends to do this. I knew clay would take too long, or require a very aggressive rubbing. So I opted to wipe off as much as I could first with Meg’s Body Solvent. I sprayed it on, let it dwell for a minute, and tried to rub off as much as possible. Some areas required constant re-spraying while wiping. But the real trick here was to get as close as possible to the body panel and see all the specs. How close? Well, Body Solvent does not taste as good as it smells. But it worked! Now, normal claying with fine grade clay would be sufficient to get the rest of the embedded road dust off the car.


Specs:


DSC08955.jpg


DSC08958.jpg


DSC08962.jpg


Starting with clay:


DSC08938.jpg


DSC08940.jpg


DSC08995.jpg


Moving on to Body Solvent:


DSC08971.jpg


DSC08973.jpg


DSC08976.jpg


For the door jambs we opted to use Finish Kare 1 #1119. This stuff rinses off very easily where Meg’s Body Solvent, although stronger at cleaning heavy grease, needs to be wiped off and takes some effort to rinse off completely. #1119 was more than sufficient for the un-aged grime this vehicle had. After cleaning, rinsing, and wiping dry, I polished with Klasse AIO by hand with a foam applicator and let haze before wiping off.


before:


DSC08823.jpg


DSC08826.jpg


DSC08847.jpg
 
By now it is noon. We had already finished the 3 gallon jug of drinking water in the office, and needed more. Maybe even lunch. We lock up the X and rally the Van to find a convenience store. “Deme 4 botellas de agua, por favor. Si, las grandes!”


McD’s is not my favorite option, but it is the closest. We walk in and are greeted by a guy that looks just like the “JakeSully” Avatar in the poster above him, with hair slicked back and a similar nose, his blue shirt making his skin look bluish too. This has to be on purpose. It gets hard to hold in the giggles as we order. Deluxe no mayo, diet, medium. And lots of cookies. Damn those McD’s chocolate chip cookies! Traffic is crazy, we rally back to The Shop.


The X awaits, ready for tape. We cover the wheels and start sticking. There is a lot to cover: fender vents, diffusers, hood vents, sunroof, door window trim, etc. It takes about an hour to tape the car up and clean up the exhaust tips...


DSC08996.jpg


DSC09004.jpg


DSC09005.jpg


I also managed to wipe-down the engine bay and apply Dodo Juice Red Mist Tropical to the underside of the hood and exposed painted panels around the engine. Marc followed by hand polishing the aluminum charge pipes and intake. Meg’s Spray Trim Detailer adds a nice touch to the engine cover, the rubber hoses, and the wiring looms. The engine is now matte, non sloppy, smooth and dry.


engine clean but not detailed:


DSC08902.jpg


beginning to look better:


DSC08943.jpg


DSC08947.jpg


nice!


DSC08948.jpg


DSC08952.jpg


The exhaust tips had been beaten by the force of thousand degree exhaust gases their entire life:


DSC08907.jpg


APC dwelling:


DSC08911.jpg


APC + Steel Wool #0000:


DSC08915.jpg


DSC08921.jpg


after:


DSC08930.jpg


DSC08933.jpg


(see more of the exhaust tips in the final pictures)


Marc cuts out a test panel on the hood. He then fires up the Makita rotary with a green LLC Constant Pressure Pad and 3M Germany yellow foam-backing plate. M205 is massaged into the paint to clear up the defects.


The X has a carbon fiber deck lid (trunk lid) that is painted to match the body in a manner that the carbon weave is still visible. One way of doing this is to prep the surface less. Less primer or bonding agents means more of the original surface texture comes through. Using a slightly more liquid paint color solution when spraying is also a method. Either would mean a high risk of delicate paint. We were not going to risk twisting off the paint and opted to massage the M205 with the PC7424. I started slow and felt how the paint was reacting. The trunk felt well painted. I upped the speed to 6 and increased my arm movements to compensate for the friction-generated heat.


DSC09019.jpg


The X also has very low paint thickness readings. Although typical for Evo’s, this Evo’s roof is beyond the 90-micrometer range and measures in at the low 80-micrometer range. It had severe water etching from the very hard (250-350 ppm) San Juan water, frequent volcanic ash from active and nearby islands in the Caribbean, and acid rain in the most densely populated area of the Island. Marc finessed the Makita rotary and green pad with great skill...


Etching on roof:


DSC08898.jpg


example of paint thickness on hood:


DSC09016.jpg


example of paint thickness on body:


DSC09021.jpg


DSC09023.jpg


before:


DSC08807.jpg


DSC08900.jpg


during:


DSC09033.jpg


DSC09034.jpg


DSC09037.jpg


DSC09038.jpg


I was following Marc's M205 pass with my own special combo. 3M Ultrafina is designed for use on a rotary tool, but we have found it to work quite well on a DA with an equal pad. I applied the refining polish to a yellow 3M refining pad and worked it into the paint. Results:


after:


DSC09044.jpg


DSC09051.jpg


The sun in now low enough to cover the front of the building in shade. We move the X back to the corner where the water hook up is, and foam it up. This time it is Dodo Juice Supernatural Shampoo in the foam gun. Supernatural Shampoo is a good choice for final washing prior to LSP, although it is expensive and low-er foaming. It is designed to be as pure a shampoo as possible, with no shine enhancers or excessive sudsing agents, no perfumes or dyes. Based off Born To Be Mild Shampoo, it does have sheeting agents and anti-static agents to aid in rinsing and keeping the surface dust free until we can seal over. A quick wipe down and a rinse later, and all the polish residue on the surface and in the crevices is either blown out or dissolved. The paint is ready for sealing.


DSC09052.jpg


DSC09053.jpg


DSC09059.jpg
 
The plan was to top the sealant with wax with no other reason the the most important reason: because. Our sealant of choice was Danase Paint Sealant 2.0, which says to have an instant cure time. We love the gloss, and the slickness is second to none. The PC 7424 with a blue LLC pad at speed 3 was guided over the finish with a few drops per panel. Once hazed (like all 5 seconds or so), we used a few Eurow Shag MF towels (which had been washed 6 times prior to usage to rid on any lint) to remove the DPS 2.0. We took a pause and dressed the tires and plastic trim. On the way back from a detail the previous day, we found a local store that carried Meguiar's Trim Detailer in spray form, and Black Magic Matte Tire Shine. It was fate. The amount of plastic on the X would take away from the look of the paint if the plastic were to remain with TOGW residue and other minor blotching. Trim detailer evens out the color and makes it look rich, blending into the gloss of the paint and making the plastic less noticeable. Perfect.


DSC09063.jpg


DSC09067.jpg


the reveal looking good:


DSC09068.jpg


DSC09069.jpg


Now it is time for the excess! Supernatural applied by hand:


DSC09075.jpg


...and the finale:


DSC09077.jpg


DSC09080.jpg


DSC09081.jpg


DSC09085.jpg


DSC09087.jpg


DSC09089.jpg


DSC09093.jpg


DSC09097.jpg


among family:


DSC09099.jpg


DSC09104.jpg


Thanks for reading!


DSC09117.jpg
 
Sick! Looks awesome, and an awesome shop they have there!


How long do you think this took you? Just exterior I'm assuming?


How come you clayed before polishing? Just so your not grinding that stuff into the paint?
 
HLxDrummer said:
Sick! Looks awesome, and an awesome shop they have there!


How long do you think this took you? Just exterior I'm assuming?


How come you clayed before polishing? Just so your not grinding that stuff into the paint?


Thanks a lot. We spent around 8 hours on this one, and it paid off well by the end of things.

Claying in important prior to polishing because some contaminates won't be removed with polishing alone, let alone risking contamination of your pads.


TimG said:
Looks great, Marc. Thanks for the share; infact after the RUF detail, I was looking forward to the X. :woot:


Thanks a lot for following our work and glad you enjoyed this one. Check back in a few days, and I hope to have another one posted.


evolutionwc3 said:
Awesome work Guys! The Supernatural really set the orange off. Thanks for sharing.

-Brent


Much appreciated. The Supernatural really pushed the paint over the top and the owner was very pleased to say the least.


Bimmerdude said:
great write up and fantastic work.....love that color!


Thank you :)
 
Back
Top