LawrenceSA
New member
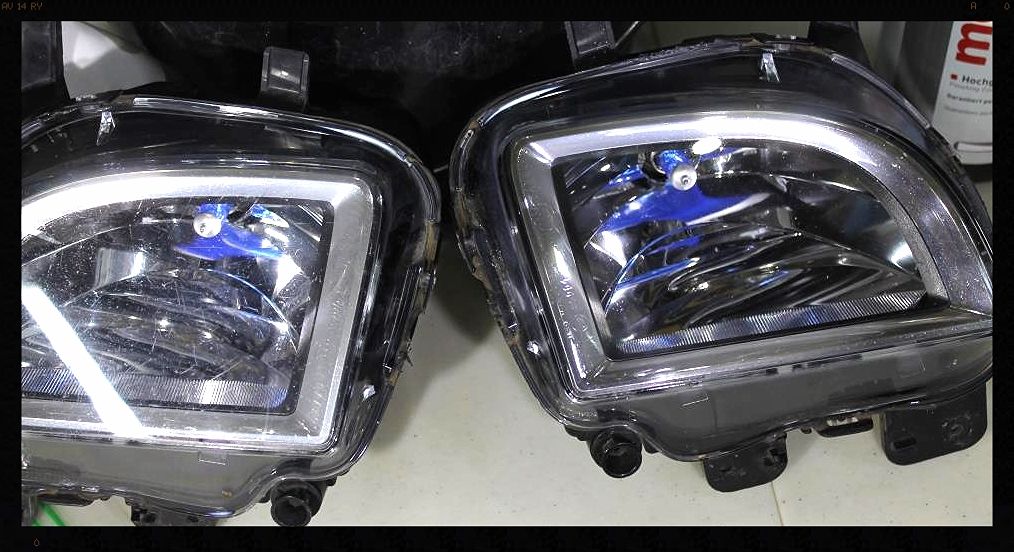
A few nights before the car was dropped off for the detail, the owner had the front bumper off and bought the fog lights through to me to try and get them looking better for once the car was detailed.
With the owner waiting, snapping pics wasn't high on my priority list, but I did manage one which shows the transformation - albeit not the best of pics.
Anyway, one of the lights only required wetsanding with 3000 grit and then compounding with FG400 on a 4" Orange LC CCS Pad, followed by SF4000 on a 4" White LC CCS Pad to bring it to the point that the owner was happy. We had discussed how again, much like polishing paint, there is only a finite amount of plastic (Polycarbonate) to be polished before you start messing with the structural integrity of the light, and so we were not looking for perfection, just a decent improvement.
The other side (the untouched one in the pic below) required wetsanding starting at 1500, followed by 2500 followed by 3000 then the same compounding and polishing as mentioned above.
The person who will be doing the actual washing of the vehicle was dropped off early Saturday morning so that I could teach him to properly maintain the car once I had finished detailing it. The owner wanted the front arches to be cleaned of the fair build up of tar and so the car was placed on jack stands and the wheels removed.
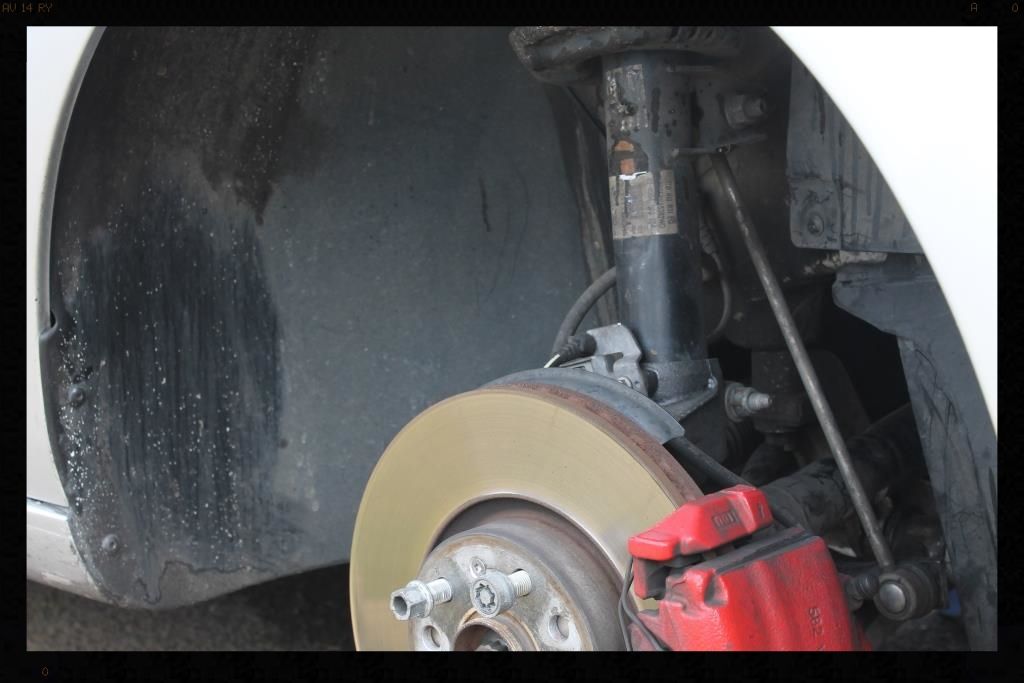
The arches were sprayed with some Cyclo APC which was left to dwell for a few minutes before being agitated with a Mothers Fenderwell Brush. The owner bought along some Wurth Tar Remover which seemed to work really well and is equally priced to most others. Once that was finished I used Autoglym Intensive Tar Remover, liberally and repeatedly, to get rid of all the tar. They would later be dressed with Glossworx Extreme Tire Shine.
The brake calipers were cleaned using Cyclo APC as well as Valet Pro Dragon's Breath and the later coated with Gyeon Wet Coat.

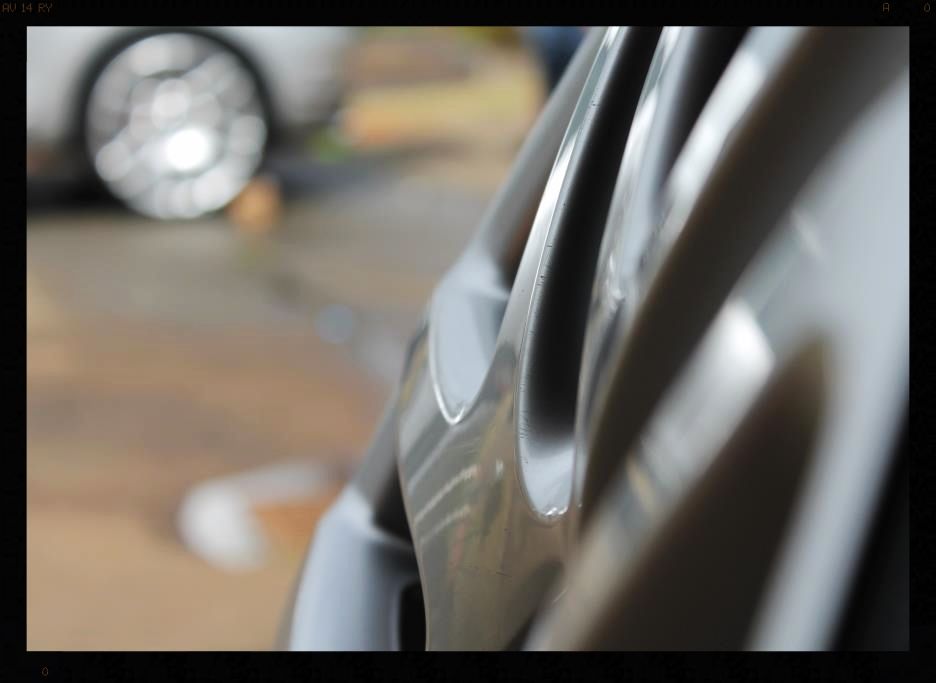
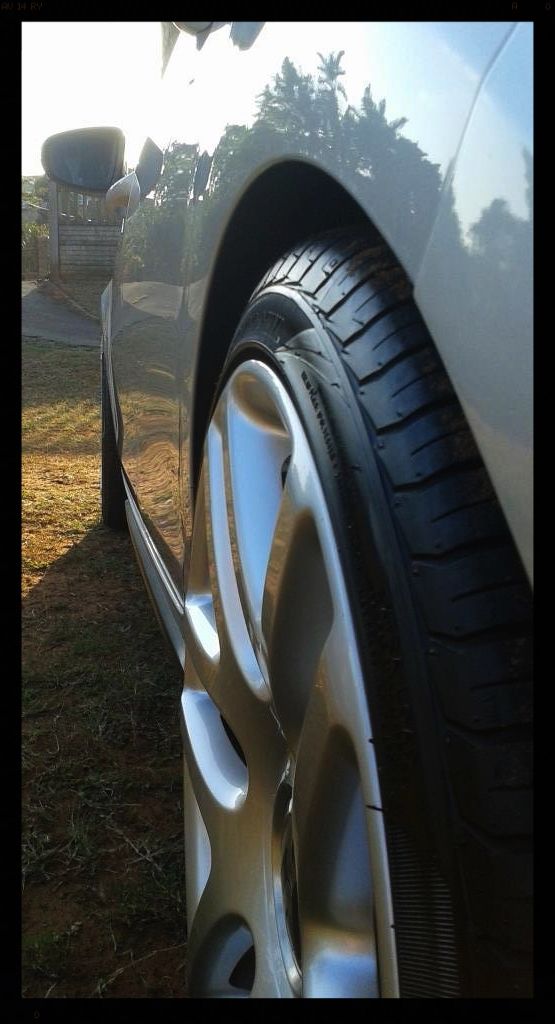
It is always nice to be able to actually get a wheel off the car to clean it, because you can take something that looks like this

And make it look like this

Tire clean - Meguiars All Wheel and Tire Cleaner
Tire dressing - 2 coats of Autofinesse Gloss
Wheel wash - Valet Pro Billbery Wheel Cleaner / Daytona Jnr wheel brush / Valet Pro Boars Hair Brushes
Wheel tar removal - Autoglym Intensive Tar Remover
Wheel iron removal - Valet Pro Dragons Breath
Wheel protection - Gyeon Wet Coat
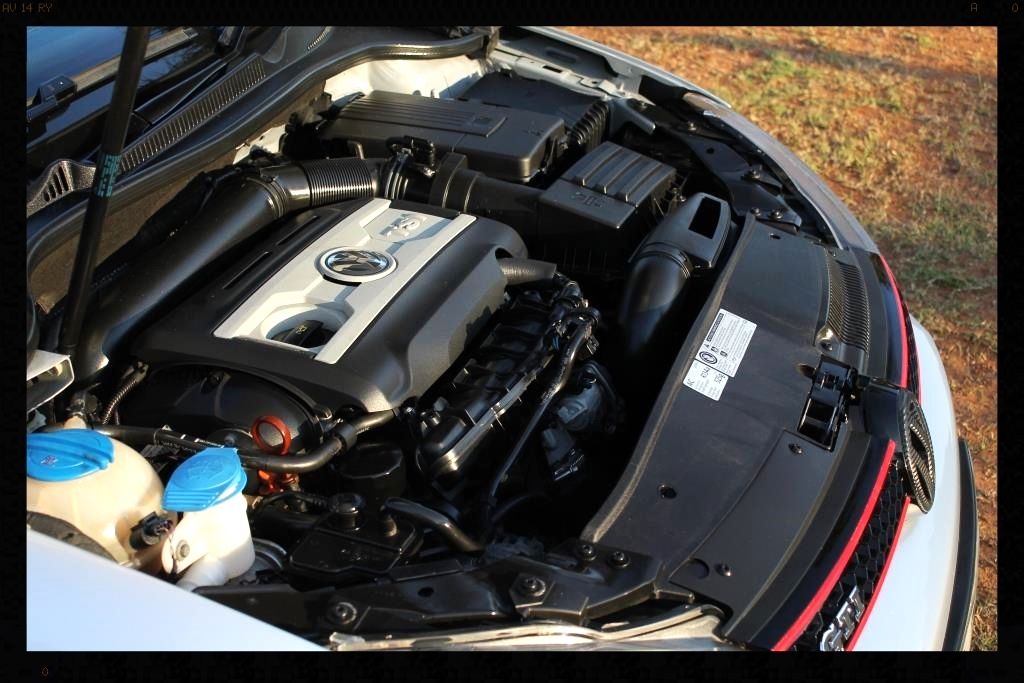
The car was then placed on the ground and the engine bay tackled, which had the usual build up of dust and dirt.


Cyclo APC was used in conjunction with various brushes to clean, and the bay was then dressed using Shield Sheen.
The car was then washed and dried
-Valet Pro Citrus pre-wash to lower half
-HP Rinse
-Maxi Suds II / MTM Hydro
-HP Rinse
-Maxi Suds II / MTM Hydro
-Gyeon Bathe / Lambswool wash mitts / 2 Buckets / Grit guards
-HP Rinse
-Sheet dry
-WW Drying towel / Glossworx Quick Detailer
Decontamination:
-Tar removed using Autoglym Intensive Tar Remover
-Iron removed using Valet Pro Dragon's Breath
-Remaining contamination removed using Shield Heavy Duty Clay with ONR as lube
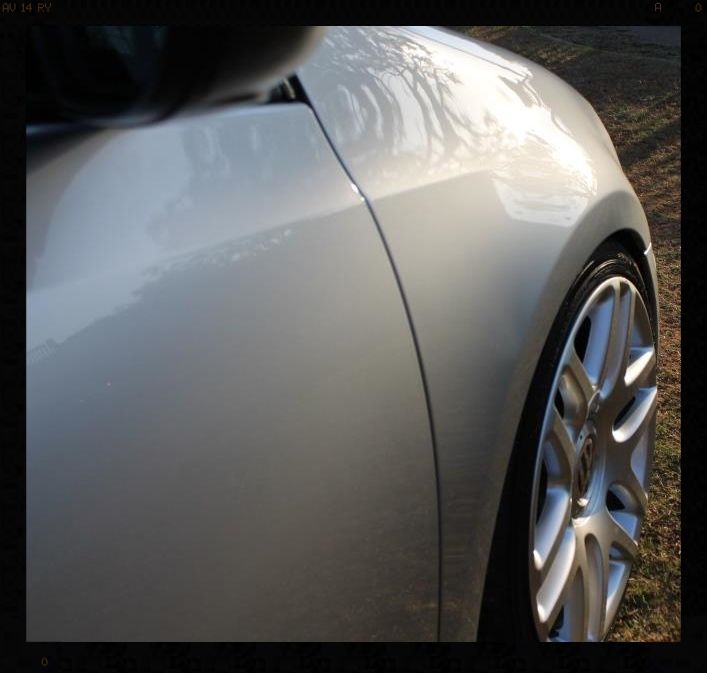
I had taken paint thickness readings a few months ago when the owner came for an initial inspection and quote. I re-measured just to make sure and nothing had changed. The driver fender ranged from 97μ to 124μ (avg 113μ) and on every other panel, I really had to struggle to find anything under 300μ and on a lot of the panels, couldn't.
The problem with whomever re-sprayed the car was a few (a lot less than I usually see on re-sprays) sanding marks, but more so just a completely flat finish - I dunno what they used to do their last polish with?
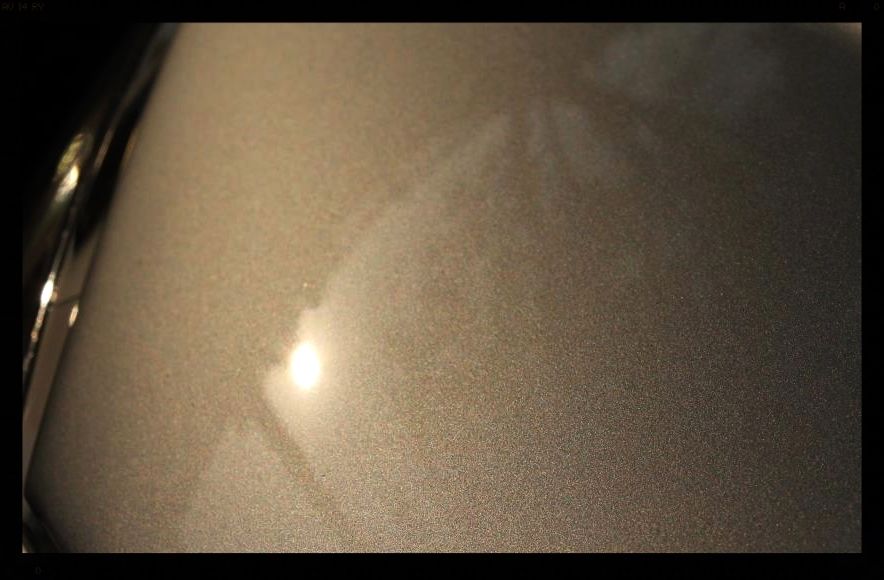
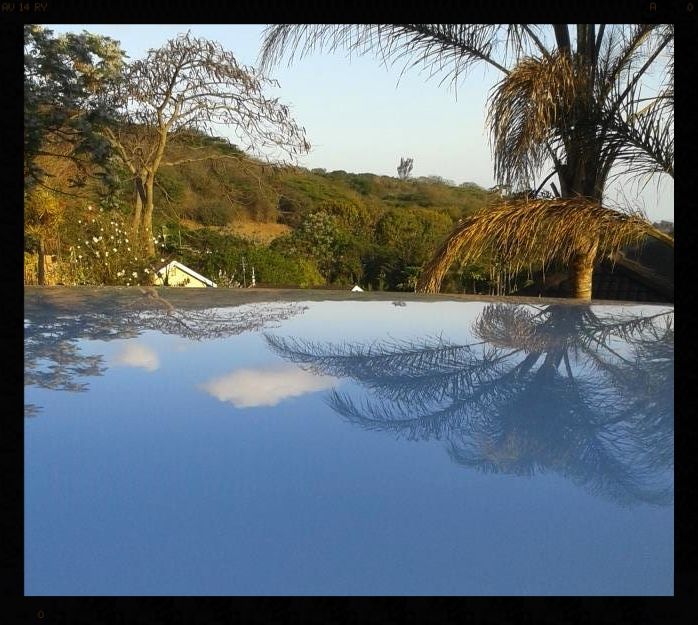
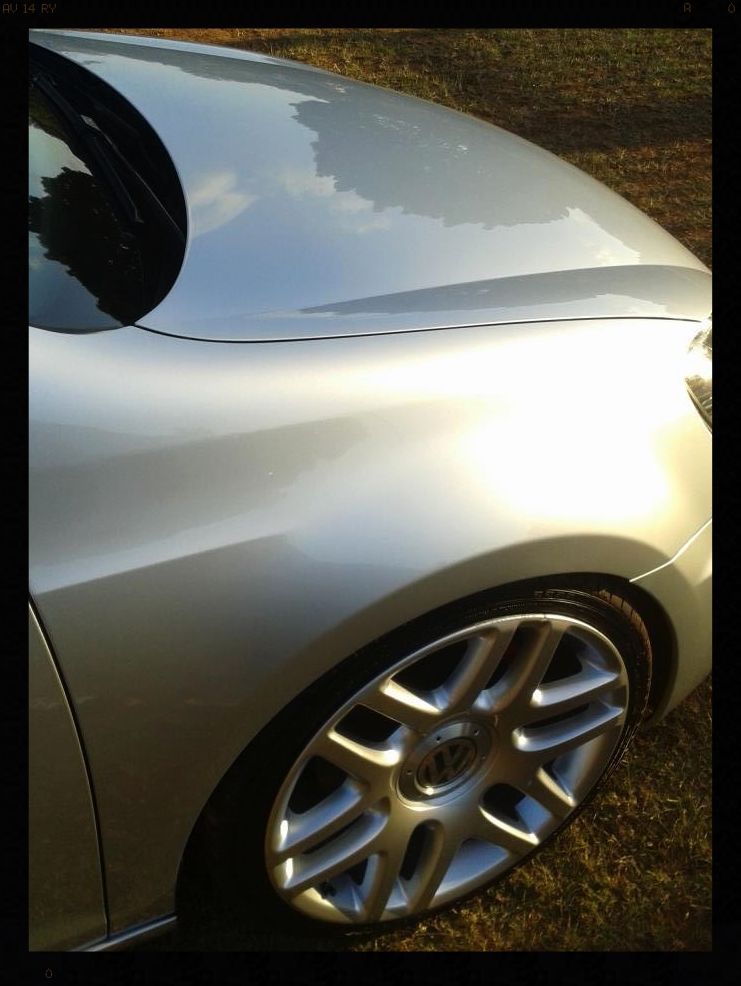
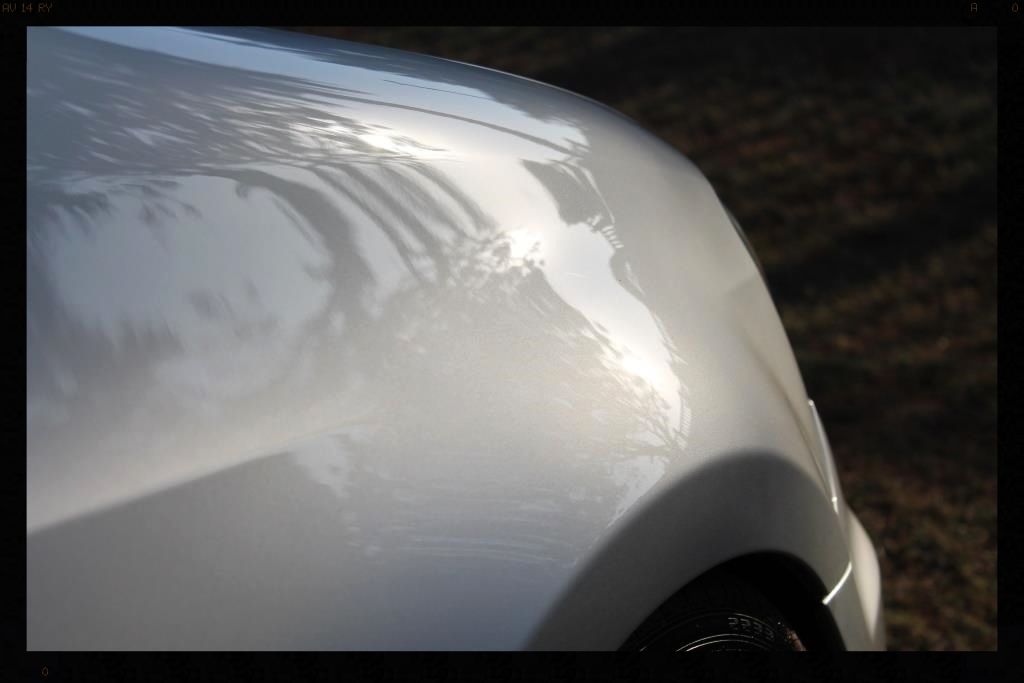
The best way I can illustrate the change in the paint is by showing you the reflection of an overhead energy saving single bulb on my garage roof.
On this side of the tape mark I have worked FG400 on a 5'5" LC Cyan Hydrotech pad with a flex at speed 3.5 for 6 passes. Notice how you can see the design of the actual bulb in the reflection.
Now on the other side which has not yet been polished you can't even make out what the light source actually is.

This would be followed with Menzerna PF2500 on a 5.5" LC Tangerine Hydrotech pad using the Flex at speed 5. A Shield DA using 4" LC Orange and White CCS pads with the same polishes would be used on the smaller areas, with only the last of these steps being necessary to bring the B-pillars and Tail Lights back to an acceptable condition.These and the paint would be protected using Menzerna Powerlock.
Then the rest of the items were dealt with
Exhaust Tips: Meguiars NXT All Metal Polish.
Leather Cleaning: Cyclo APC
Leather Protection: Collinite 855
Plastic Cleaning: Valet Pro Citrus Pre Wash
Plastic Protection: Aerospace 303
Door & Window Rubbers : Shield Vinyl and Rubber Cleaner / Aerospace 303
Glass : Glossworx Glass Cleaner
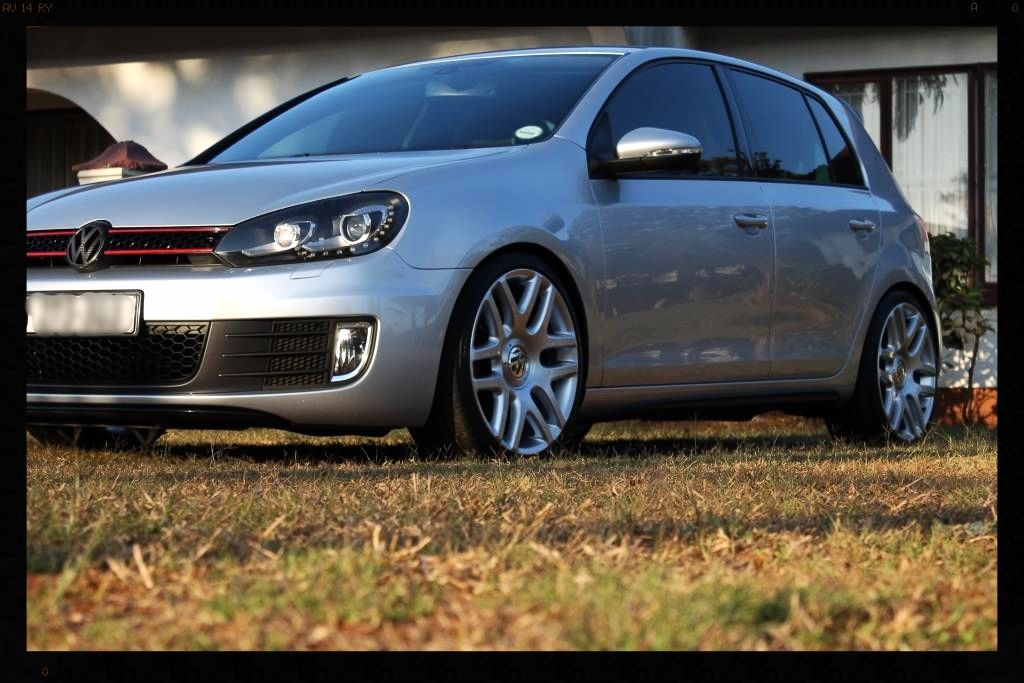
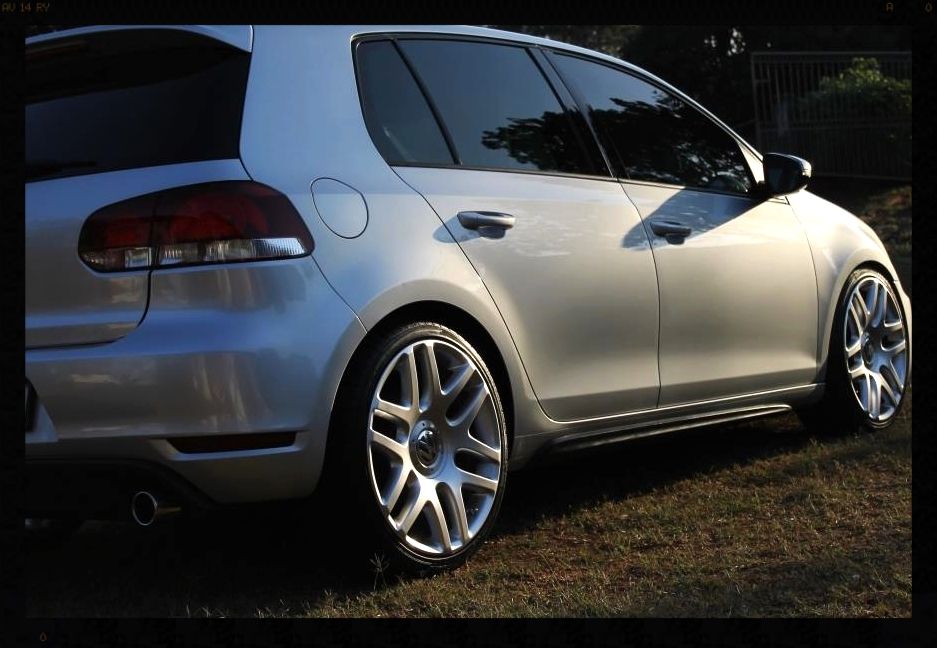
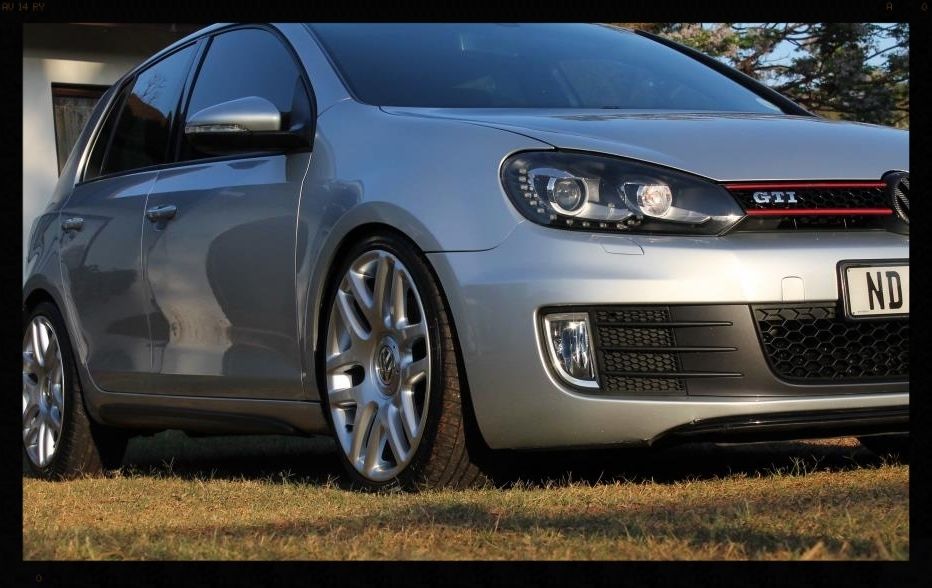
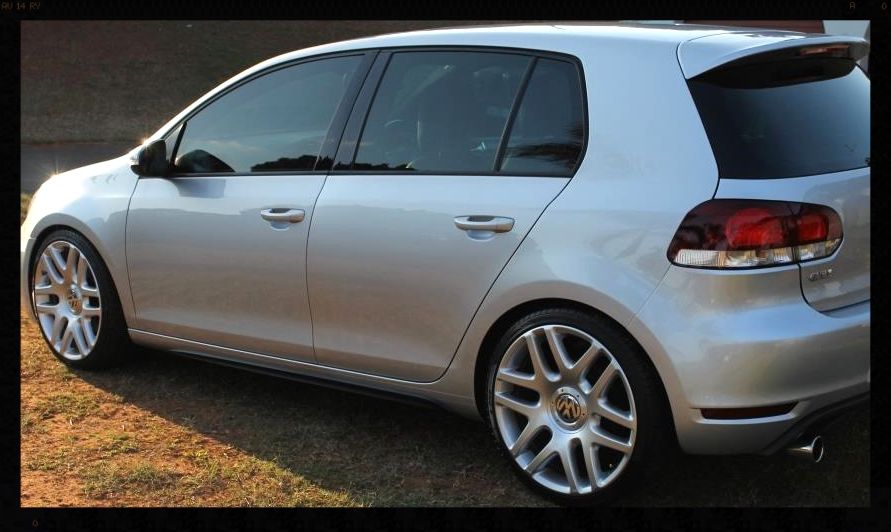
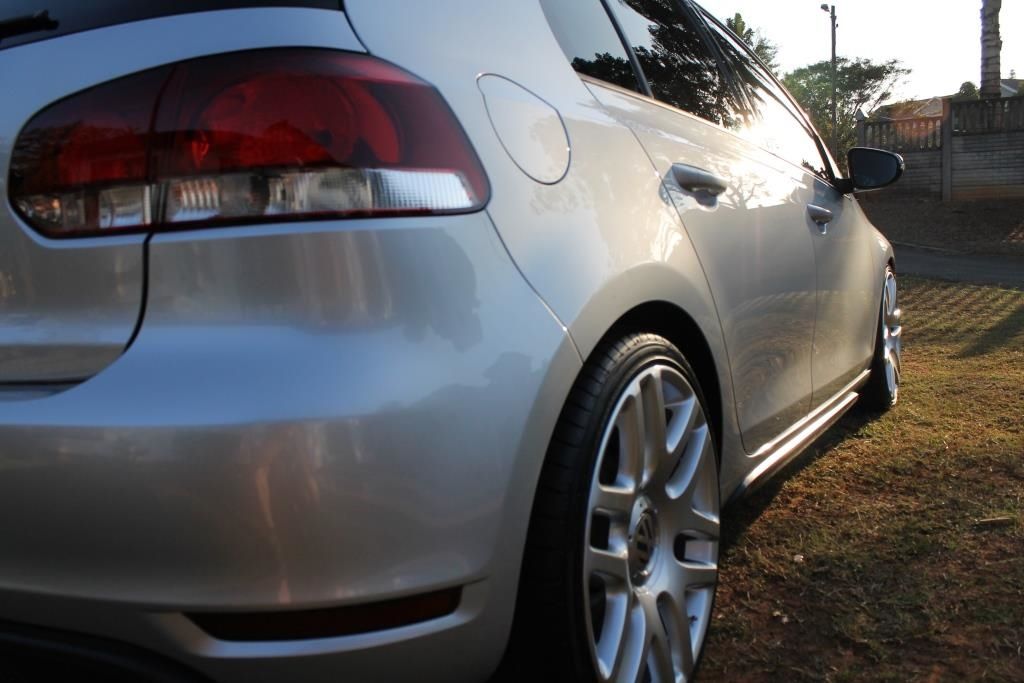
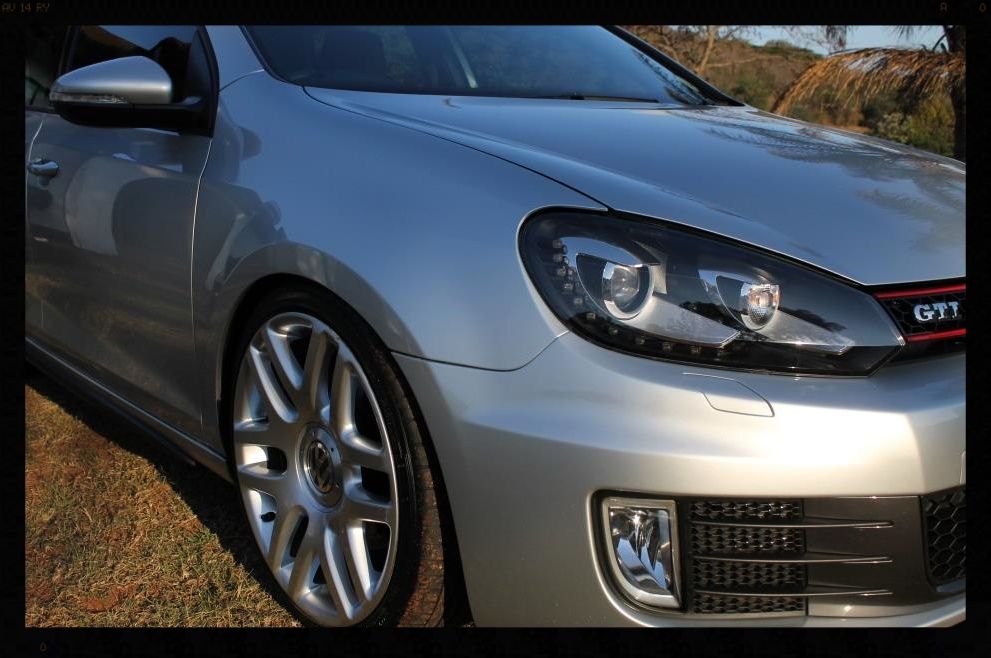
Here are a few pics of the finished car


Total time spent = 31 hours
Thanks for looking and as always and comments or questions are welcome.
With the owner waiting, snapping pics wasn't high on my priority list, but I did manage one which shows the transformation - albeit not the best of pics.
Anyway, one of the lights only required wetsanding with 3000 grit and then compounding with FG400 on a 4" Orange LC CCS Pad, followed by SF4000 on a 4" White LC CCS Pad to bring it to the point that the owner was happy. We had discussed how again, much like polishing paint, there is only a finite amount of plastic (Polycarbonate) to be polished before you start messing with the structural integrity of the light, and so we were not looking for perfection, just a decent improvement.
The other side (the untouched one in the pic below) required wetsanding starting at 1500, followed by 2500 followed by 3000 then the same compounding and polishing as mentioned above.
The person who will be doing the actual washing of the vehicle was dropped off early Saturday morning so that I could teach him to properly maintain the car once I had finished detailing it. The owner wanted the front arches to be cleaned of the fair build up of tar and so the car was placed on jack stands and the wheels removed.
The arches were sprayed with some Cyclo APC which was left to dwell for a few minutes before being agitated with a Mothers Fenderwell Brush. The owner bought along some Wurth Tar Remover which seemed to work really well and is equally priced to most others. Once that was finished I used Autoglym Intensive Tar Remover, liberally and repeatedly, to get rid of all the tar. They would later be dressed with Glossworx Extreme Tire Shine.
The brake calipers were cleaned using Cyclo APC as well as Valet Pro Dragon's Breath and the later coated with Gyeon Wet Coat.
It is always nice to be able to actually get a wheel off the car to clean it, because you can take something that looks like this
And make it look like this
Tire clean - Meguiars All Wheel and Tire Cleaner
Tire dressing - 2 coats of Autofinesse Gloss
Wheel wash - Valet Pro Billbery Wheel Cleaner / Daytona Jnr wheel brush / Valet Pro Boars Hair Brushes
Wheel tar removal - Autoglym Intensive Tar Remover
Wheel iron removal - Valet Pro Dragons Breath
Wheel protection - Gyeon Wet Coat
The car was then placed on the ground and the engine bay tackled, which had the usual build up of dust and dirt.
Cyclo APC was used in conjunction with various brushes to clean, and the bay was then dressed using Shield Sheen.
The car was then washed and dried
-Valet Pro Citrus pre-wash to lower half
-HP Rinse
-Maxi Suds II / MTM Hydro
-HP Rinse
-Maxi Suds II / MTM Hydro
-Gyeon Bathe / Lambswool wash mitts / 2 Buckets / Grit guards
-HP Rinse
-Sheet dry
-WW Drying towel / Glossworx Quick Detailer
Decontamination:
-Tar removed using Autoglym Intensive Tar Remover
-Iron removed using Valet Pro Dragon's Breath
-Remaining contamination removed using Shield Heavy Duty Clay with ONR as lube
I had taken paint thickness readings a few months ago when the owner came for an initial inspection and quote. I re-measured just to make sure and nothing had changed. The driver fender ranged from 97μ to 124μ (avg 113μ) and on every other panel, I really had to struggle to find anything under 300μ and on a lot of the panels, couldn't.
The problem with whomever re-sprayed the car was a few (a lot less than I usually see on re-sprays) sanding marks, but more so just a completely flat finish - I dunno what they used to do their last polish with?
The best way I can illustrate the change in the paint is by showing you the reflection of an overhead energy saving single bulb on my garage roof.
On this side of the tape mark I have worked FG400 on a 5'5" LC Cyan Hydrotech pad with a flex at speed 3.5 for 6 passes. Notice how you can see the design of the actual bulb in the reflection.
Now on the other side which has not yet been polished you can't even make out what the light source actually is.
This would be followed with Menzerna PF2500 on a 5.5" LC Tangerine Hydrotech pad using the Flex at speed 5. A Shield DA using 4" LC Orange and White CCS pads with the same polishes would be used on the smaller areas, with only the last of these steps being necessary to bring the B-pillars and Tail Lights back to an acceptable condition.These and the paint would be protected using Menzerna Powerlock.
Then the rest of the items were dealt with
Exhaust Tips: Meguiars NXT All Metal Polish.
Leather Cleaning: Cyclo APC
Leather Protection: Collinite 855
Plastic Cleaning: Valet Pro Citrus Pre Wash
Plastic Protection: Aerospace 303
Door & Window Rubbers : Shield Vinyl and Rubber Cleaner / Aerospace 303
Glass : Glossworx Glass Cleaner
Here are a few pics of the finished car
Total time spent = 31 hours
Thanks for looking and as always and comments or questions are welcome.