Barry Theal
New member
Paint Leveling.
As a professional detailer, one of the biggest questions that I get is “ How do you make that paint perfect?” Under the assumption that the paint is properly prepped. This includes a complete decontamination to remove all loose debris and embedded contaminants. My goal with today’s lesson is to teach the many ways to level paint. From a detailers perspective all cars are different and all paint is different.. Throughout my career I have worked on every car that can come to mind. These cars range from priceless super cars like Ferrari F40’s to cars that even shouldn’t be driven anymore. When looking into the task at hand you need to exam the paint. Remember paint is paint don’t be afraid. In the past 15 years technology has changed vastly in our field. From the wool pad and Rotary driven machines to Random Orbital machines and foam pads. Then the introduction of fine sand paper has tremendously changed the game.
Now lets talk about common defects in paint.
SWIRLS
Swirls are probably the biggest issue in today’s modern clear coats. Swirls basically are generated from improper washing techniques. Any time a particle crosses the plain of depth on the paint it can cause swirls. Foreign objects such as towels, dirt, wash mitts, or whatever can cause these affects.
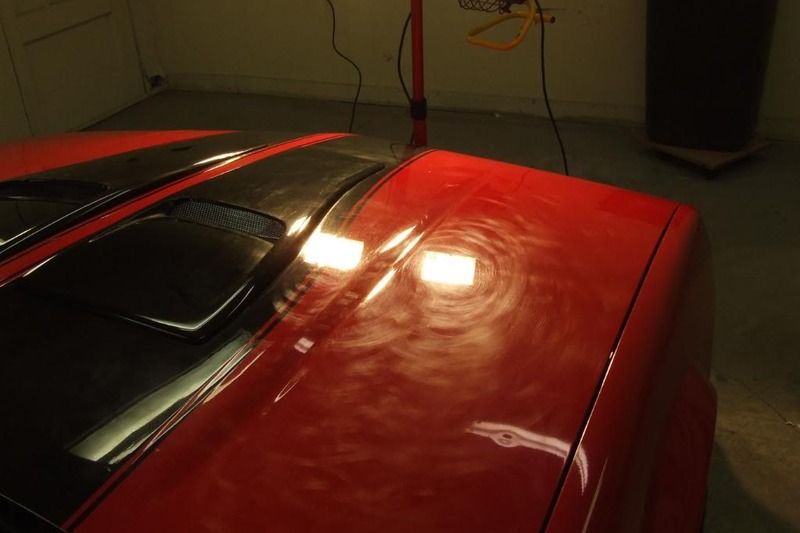
Below is a picture of a 1992 Camaro that had an extreme case of swirls issues. This car I detailed roughly two years ago. It’s funny I never seem to forget cars like this. The swirls on this car were rather deep. Threw the course of properly leveled paint it turned into a very nice car.
Here is the paint properly leveled and polished.
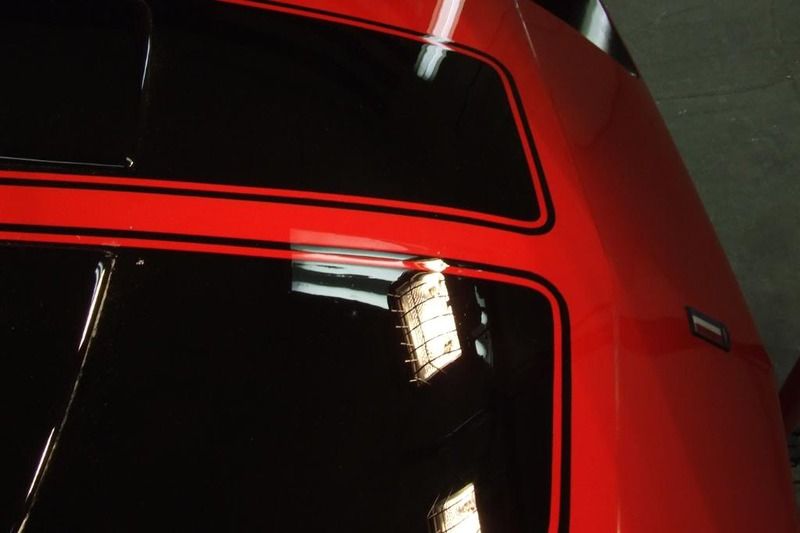
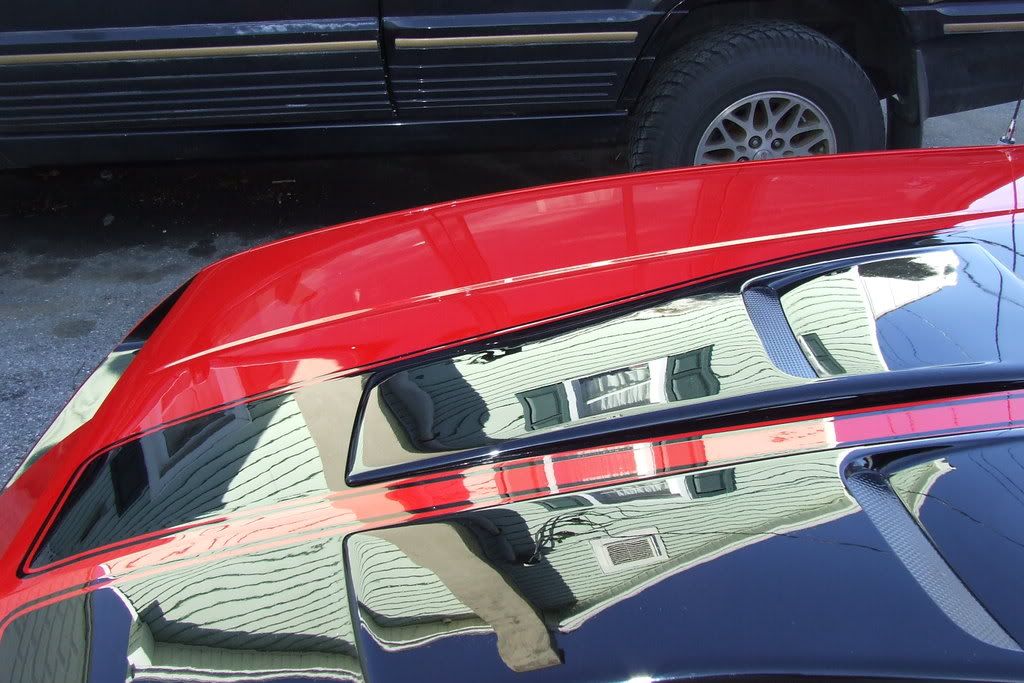
Here she is outside in the sun showing its fullest potential. The paint now has gloss like it should. The reflections on this car were deep and crisp.
If your interested in seeing more of this car transformation in depth please feel free to check out this old thread here on autopia. It was one of my first ones I ever posted. Camaro Car Detail in Lancaster Pa by Barry Theal of Presidential Details
OXIDATION
What is Oxidation in paint? Here is the technical term.
Oxidation: the process of oxidizing; the addition of oxygen to a compound with a loss of electrons; always occurs accompanied by reduction
Now lets make it real simple to understand. Pretty much oxidation is caused on single stage untreated paints. Years ago when paint consisted of primer and color, unlike today’s modern paint which are primer, color, clear coat. The paint was oxidized. Often your red cars would turn pink and black cars would turn grey. A comon cause for this was when the car was left in the sun untreated for times. Generally speaking we really don’t see these issues today unless your working on what now is considered to be a vintage car.
Below is an extreme case of oxidation. This older Mercedes was about one of the toughest cars I was challenged with in my career: In the below picture you will notice the white residue on the paint. The shiny spot was a test spot. This white stuff is a major case of Oxidation that built up on the paint. This was above the surface of the paint and bonded in to a thin layer of the paint. Threw machine compounding I was able to remove the oxidation and restore a like new finish to the paint. All with careful paint leveling.

In the next photo you will notice that one half of the hood was going threw a paint leveling process. This was done with some compounding, while using both wool and foam pads.

Here is the paint leveled, refined, and polished to a like new finish. Notice once again that by using proper paint leveling procedures that this car now has the look it should.

To view more of this paints amazing transformation please feel free to check out Car paint oxidation removal in Lancaster PA by Barry theal of Presidential Details.
Holograms
Holograms are one of the easiest paint defects to point out in a car. These are caused by unequal pressure during the machine polishing process. While often pads that consist of a wool nature are the biggest culprits people tend to say. Is actually not the pads itself as opposed to the technician performing the service. Often in experienced machine technicians will tilt a polisher to dig into the paint by tilting the pad as opposed to letting the pad and product. Running the machine at improper speed or lack of training will result in a finish that looks three dimensional. You can literally see how the machine was passed over in the paint. These are holograms.
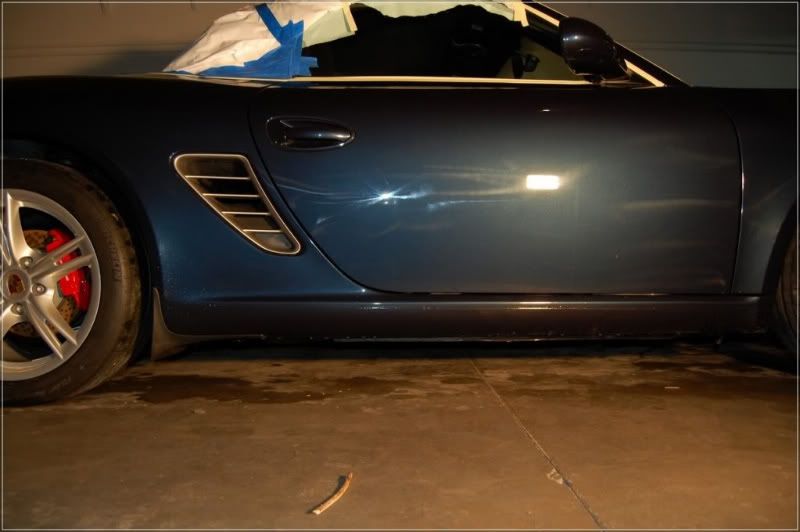
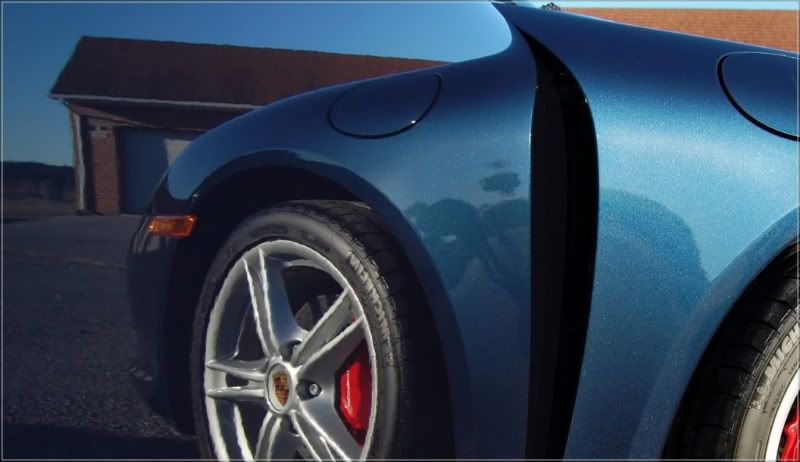
Here in this Porsche Boxter is a prime example of holograms. Take note of the three dimensional look. You see traces left behind from the unskilled technician.
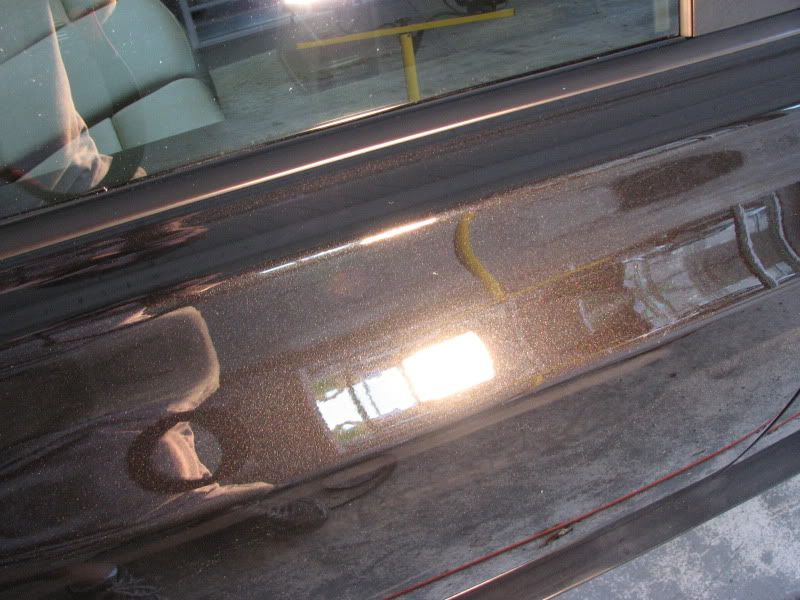
In the next photo you will see a 50/50 shot of the exact panel close up. Notice how by using proper paint leveling this finish left behind was proper resulting in no more holograms. The light is your focus. Notice the left side is untouched and the right side is corrected and leveled.
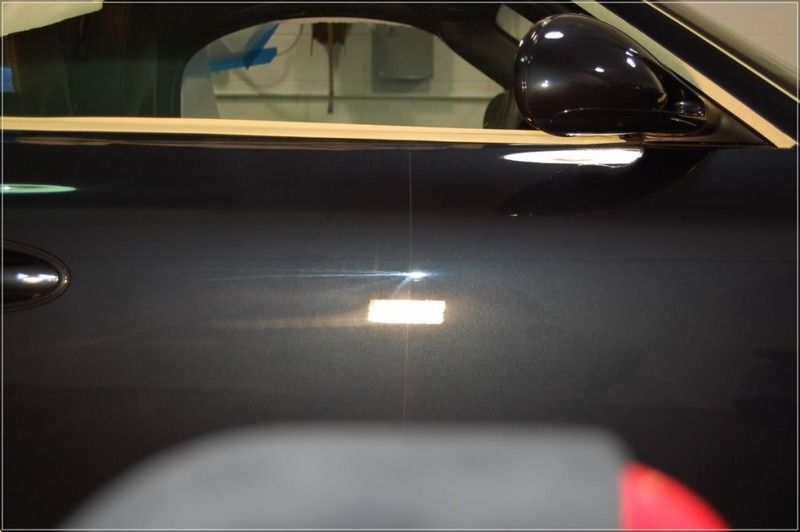
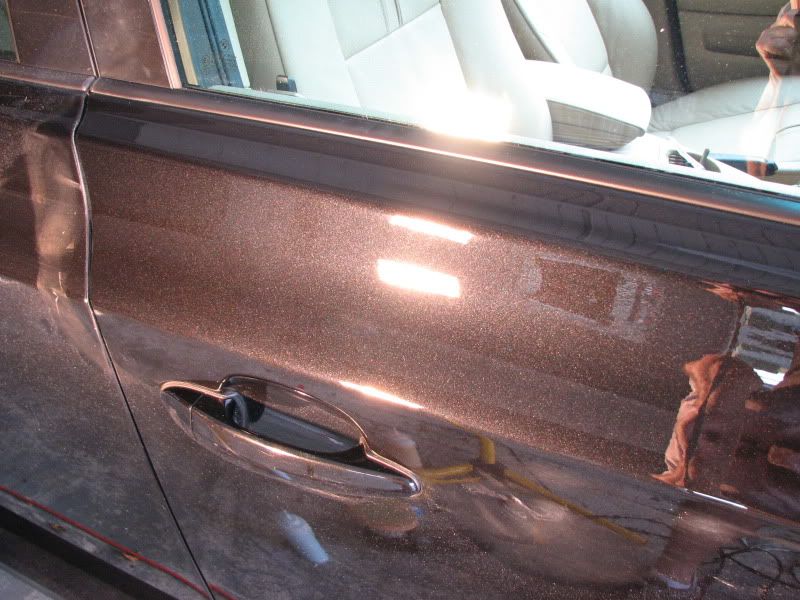
After spending the proper amount of time to level paint and really polishing this car out, you can see the crystal clear reflections. The depth in the paint was phenomenal. Notice how you can see the tire in the door.
To view more of this car and too see how I removed the holograms please check out the thread.
How to remove paint holograms by Barry Theal of Presidential Details in Lancaster PA
Now that you seen some common paint issues, lets talk technology. First things were done with a heavy compound and wool pad, followed by a medium abrasive foam pad and a medium polish. Then everything was finished down with a final polish and final polishing pad. Three steps were the common to get the finish dialed in perfect.
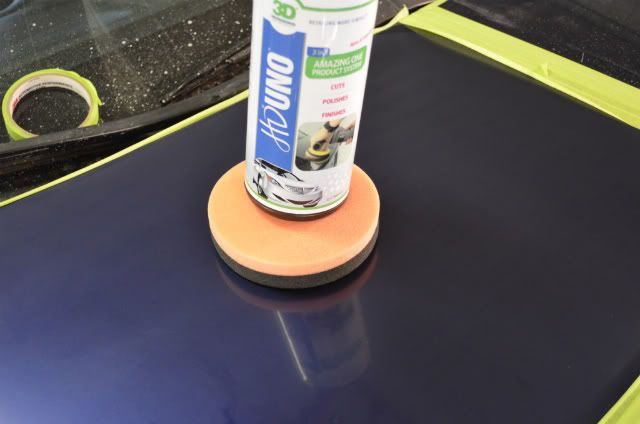
Once in a while a game changing product surfaces in the detailing industry. Over the last few years 3d International came out with HD UNO. So what is HD UNO? Its a non diminishing abraisive designed to be a compound, and polish in one. While the abrasive of the liquid remains the same, The amount of leveling can be controlled by the application process. The application would be assumed by a mechanical operation. In this event it would evolve around pressure, speed, and pad content. This part of the process is managed by the person doing the work. Considering no one detailer is alike, we all practice general guidlines and often thinking outside the box to make our lives easier. Individual results will vary from detailer to detailer.
Now lets talk about why I feel HD UNO is unlike nothing I have tried. First off, HD UNO has been reformulated to be a little more user friendly. Its virtually dustless. It has a strong abrasive, but yet can finish down like a pure polish. Extreamly user friendly. Its almost sacary considering I have practiced my whole life to become the best that I can often challenging myself to become that 1% better daily. This has got to be the most user friendly product I have used to date. Making it a great novice product as well as a professional product.
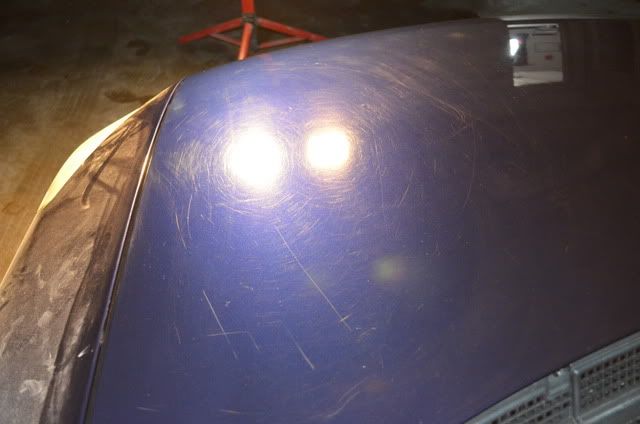
After reading all this, I thought maybe I could show you Just how effective it is. In the below photo is a picture of a Blue Honda Accord. This hood is scheduled for a repaint due to some heavy scratches and stone chips in the front. So before it went to be refinished I thought. Lets have some fun and see how Incredible HD UNOreally is!
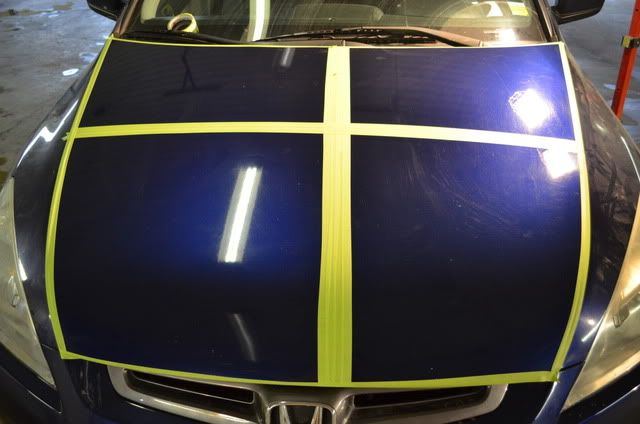
I first started by dividing the hood of the Honda Accord into sections. I divided it so I wuld have four seperate area's to work with.
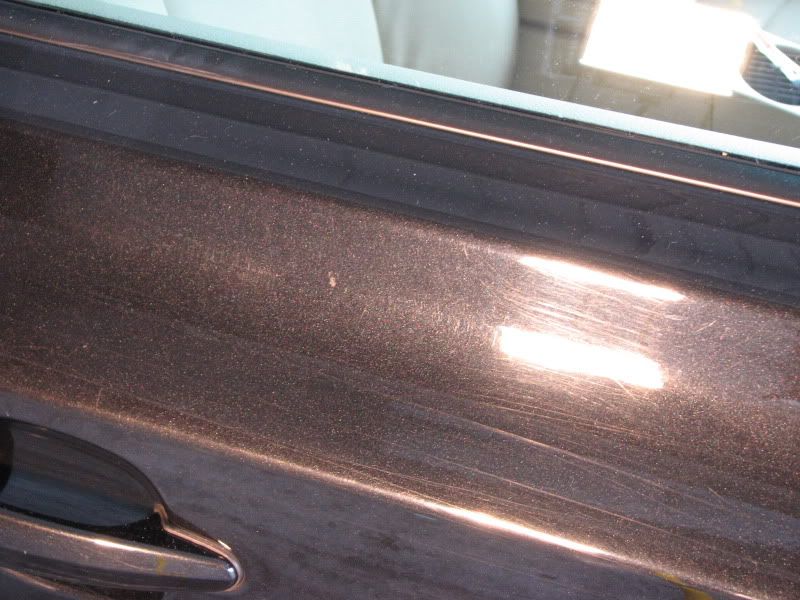
Here is the hood and some of its defects prior to masking.
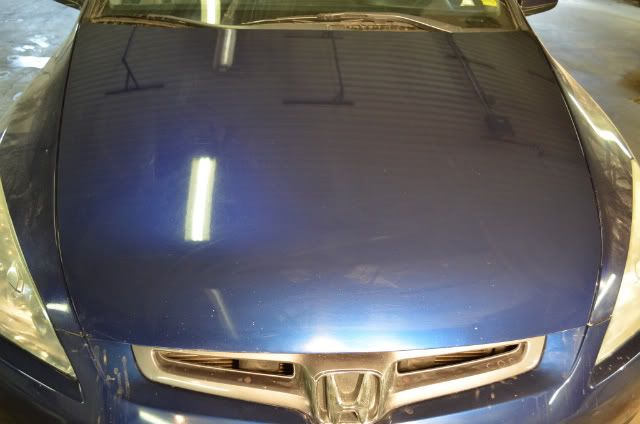
As you can see this hood had a large amount of defects. So my objective is to show you several ways to level paint using 1 liquid and still acheive perfect results. Now onto the masking. Nothing fancy just something to get the point across off having seperate area's on one panel t work with.
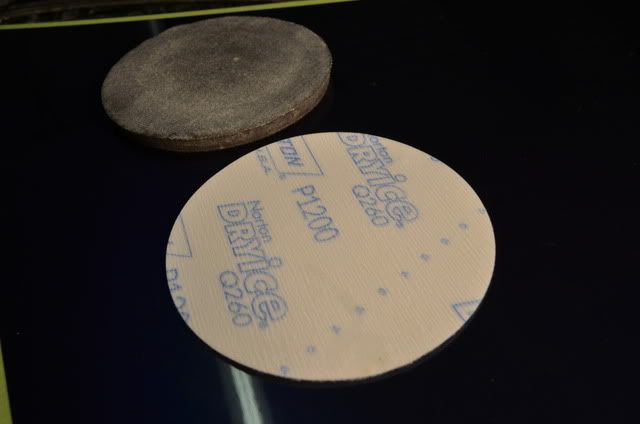
First I waned to see how effective HD UNO is in terms of cutting and finishing in one step of polishing. I started on the top left corner of the panel. My goal was to level paint fast and effectively. I used 1200 grit film sanding paper to dry sand the defects. A quarter inch interface pad was used.

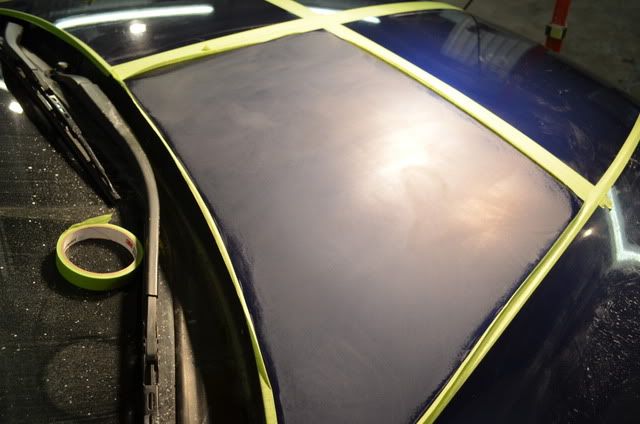
Here is how the finished look in section after dry sanding with 1200 grit film disk. Notice the lack of clarity and dull look to the finish.
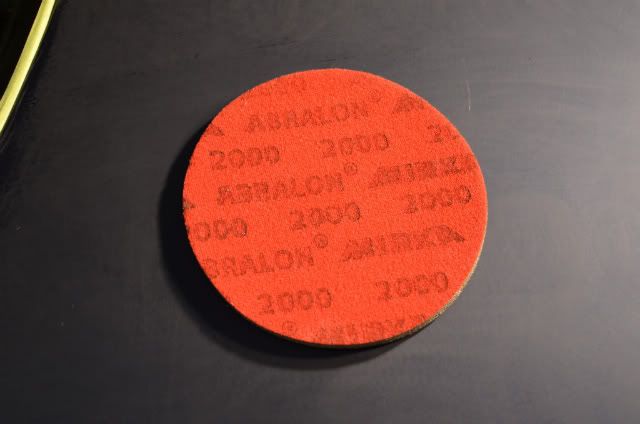
Next I wanted to further refine the finish, so I choose to use Mirka Abralon 2000 grit sanding abrasive and water to damp sand the panel.
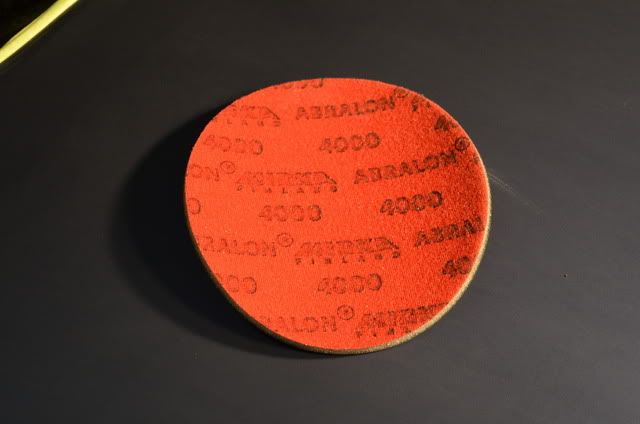
Using the same process as above I used 4000 grit Mirka Abralon to further refine the finish.
Here you can notice the clarity beginning to somewhat return.
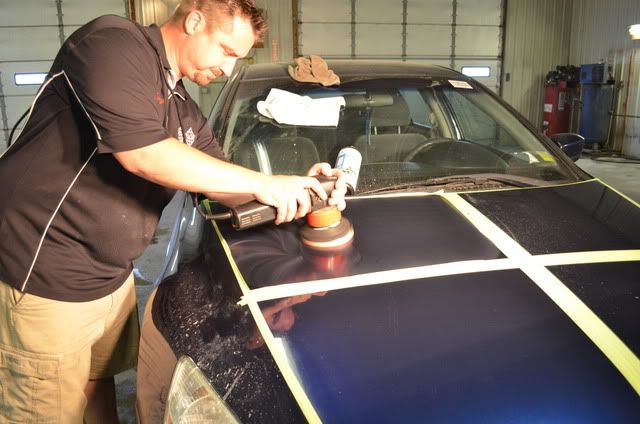
Normally in this step I would use a wool pad and rotory. I wanted to see if HD UNO had what it would take to remove the defects using a random orbital polisher. So for this part of the demonstration I used the DA Foam Pad Kit along with a Surehold Polisher.
I applied the polisher at speed 3 and then kicked it up to speed 6 with pressure and working the pass. I then backed it down to speed 3 to finish. Remember when using HD UNO you don't want to work it till it drys.
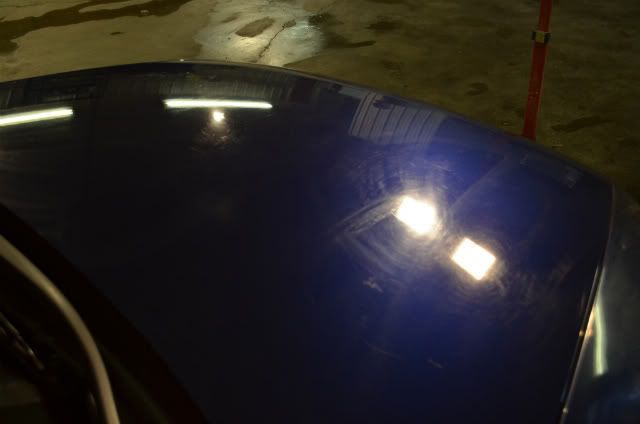
Now in one step I was in complete shock! I was done and didn't need to go any further. This was remarkable. Take notice of the clarity and depth added to the paint. Now keep in mind this was sanded with 1200 grit.
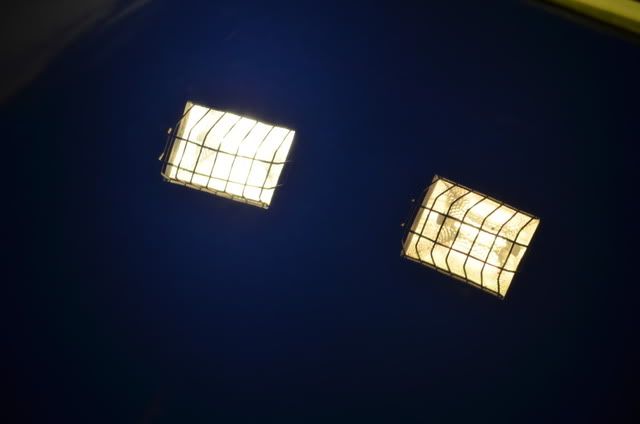
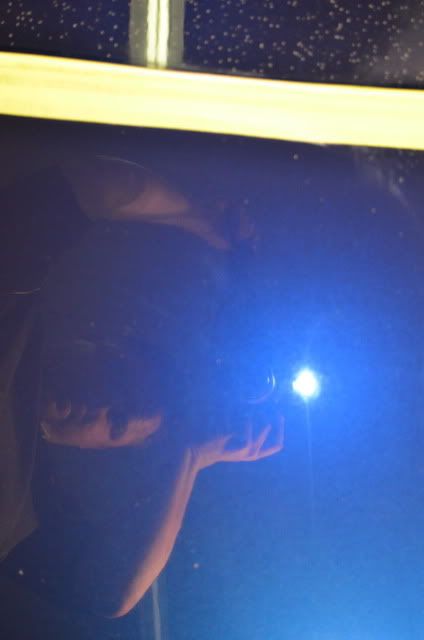
A perfect camera flash to show the true correction in one step.
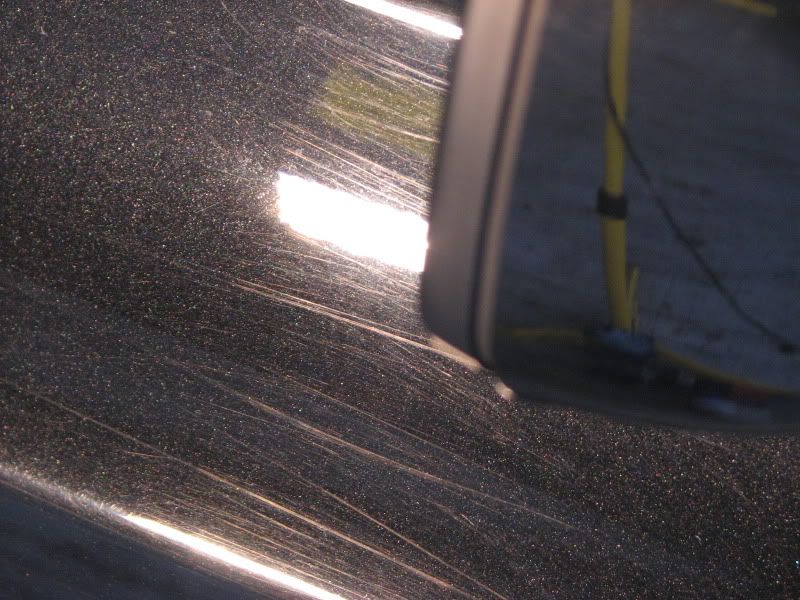
Up next I went to the lower section to try using HD UNO with a wool pad for paint leveling and defect removal. For this step I used a Festool rotory machine with a festool pad. This was my first experiance with the Festool pad itself. An absolutely incredible pad, but a little salty in price. Here is how the paint looked prior to correction and leveling.
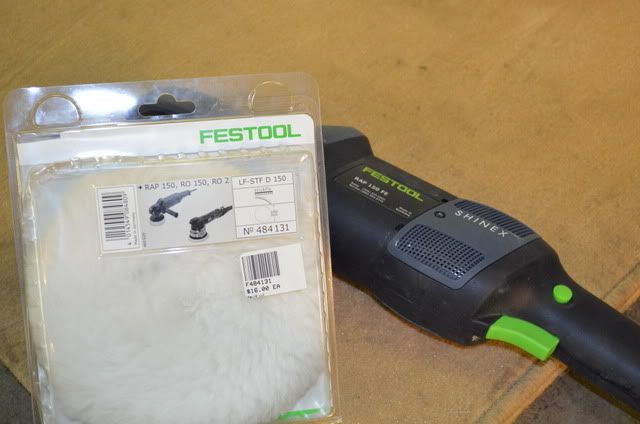
The tools of trade for this part of the demonstration.
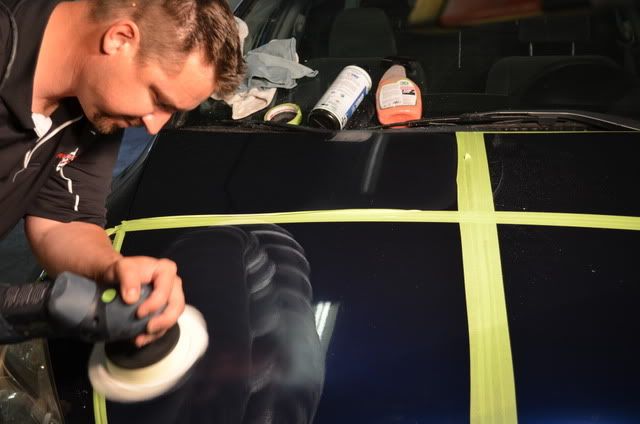
Here I am working HD UNO. I started out at speed 2 to spread the polish and bumped it up to about speed 4 or 1500 rpms and back down to speed 2. The end result again was superb. Only slight hologram was left behind, but no wool pad hazing was left behind.
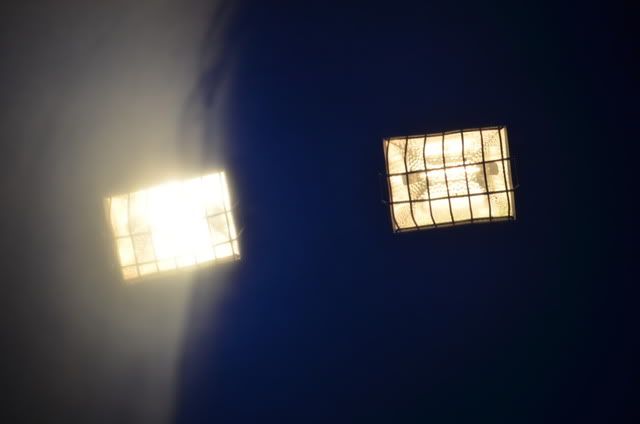
The finish after the wool pad application.

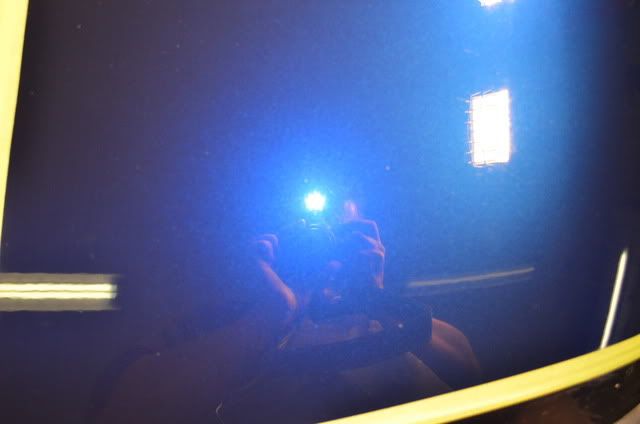
You can clearly see the paint was leveled, but this shot showed the hologramming. Look at the camera flash it should be a prefect flash , but light hologramming was present.
Next I finished with a light pass using a griots DA and the orange foam pad from the DA Foam Pad Kit and perfection it was.
In conclusion I have found HD UNO is probally one of the best polishes out there. So far I haven't found a situation where it has't worked. The more I use it, comfort of ease really sets in. I think this product is gonna have change the way we look at polishing in the future. The best part is right now 3D has it on sale for 24.99. You can buy one quart of HD UNO and get HD POXY for free. Buy one HD UNO and Get HD Poxy for fee!!!!!" Stay tuned for more articles. I got a good one in the works. Its gonna be interesting. Thanks for your time.
Barry Theal of Presidential Details. A car detailing company in Lancaster PA.
As a professional detailer, one of the biggest questions that I get is “ How do you make that paint perfect?” Under the assumption that the paint is properly prepped. This includes a complete decontamination to remove all loose debris and embedded contaminants. My goal with today’s lesson is to teach the many ways to level paint. From a detailers perspective all cars are different and all paint is different.. Throughout my career I have worked on every car that can come to mind. These cars range from priceless super cars like Ferrari F40’s to cars that even shouldn’t be driven anymore. When looking into the task at hand you need to exam the paint. Remember paint is paint don’t be afraid. In the past 15 years technology has changed vastly in our field. From the wool pad and Rotary driven machines to Random Orbital machines and foam pads. Then the introduction of fine sand paper has tremendously changed the game.
Now lets talk about common defects in paint.
SWIRLS
Swirls are probably the biggest issue in today’s modern clear coats. Swirls basically are generated from improper washing techniques. Any time a particle crosses the plain of depth on the paint it can cause swirls. Foreign objects such as towels, dirt, wash mitts, or whatever can cause these affects.
Below is a picture of a 1992 Camaro that had an extreme case of swirls issues. This car I detailed roughly two years ago. It’s funny I never seem to forget cars like this. The swirls on this car were rather deep. Threw the course of properly leveled paint it turned into a very nice car.
Here is the paint properly leveled and polished.
Here she is outside in the sun showing its fullest potential. The paint now has gloss like it should. The reflections on this car were deep and crisp.
If your interested in seeing more of this car transformation in depth please feel free to check out this old thread here on autopia. It was one of my first ones I ever posted. Camaro Car Detail in Lancaster Pa by Barry Theal of Presidential Details
OXIDATION
What is Oxidation in paint? Here is the technical term.
Oxidation: the process of oxidizing; the addition of oxygen to a compound with a loss of electrons; always occurs accompanied by reduction
Now lets make it real simple to understand. Pretty much oxidation is caused on single stage untreated paints. Years ago when paint consisted of primer and color, unlike today’s modern paint which are primer, color, clear coat. The paint was oxidized. Often your red cars would turn pink and black cars would turn grey. A comon cause for this was when the car was left in the sun untreated for times. Generally speaking we really don’t see these issues today unless your working on what now is considered to be a vintage car.
Below is an extreme case of oxidation. This older Mercedes was about one of the toughest cars I was challenged with in my career: In the below picture you will notice the white residue on the paint. The shiny spot was a test spot. This white stuff is a major case of Oxidation that built up on the paint. This was above the surface of the paint and bonded in to a thin layer of the paint. Threw machine compounding I was able to remove the oxidation and restore a like new finish to the paint. All with careful paint leveling.
In the next photo you will notice that one half of the hood was going threw a paint leveling process. This was done with some compounding, while using both wool and foam pads.
Here is the paint leveled, refined, and polished to a like new finish. Notice once again that by using proper paint leveling procedures that this car now has the look it should.
To view more of this paints amazing transformation please feel free to check out Car paint oxidation removal in Lancaster PA by Barry theal of Presidential Details.
Holograms
Holograms are one of the easiest paint defects to point out in a car. These are caused by unequal pressure during the machine polishing process. While often pads that consist of a wool nature are the biggest culprits people tend to say. Is actually not the pads itself as opposed to the technician performing the service. Often in experienced machine technicians will tilt a polisher to dig into the paint by tilting the pad as opposed to letting the pad and product. Running the machine at improper speed or lack of training will result in a finish that looks three dimensional. You can literally see how the machine was passed over in the paint. These are holograms.
Here in this Porsche Boxter is a prime example of holograms. Take note of the three dimensional look. You see traces left behind from the unskilled technician.
In the next photo you will see a 50/50 shot of the exact panel close up. Notice how by using proper paint leveling this finish left behind was proper resulting in no more holograms. The light is your focus. Notice the left side is untouched and the right side is corrected and leveled.
After spending the proper amount of time to level paint and really polishing this car out, you can see the crystal clear reflections. The depth in the paint was phenomenal. Notice how you can see the tire in the door.
To view more of this car and too see how I removed the holograms please check out the thread.
How to remove paint holograms by Barry Theal of Presidential Details in Lancaster PA
Now that you seen some common paint issues, lets talk technology. First things were done with a heavy compound and wool pad, followed by a medium abrasive foam pad and a medium polish. Then everything was finished down with a final polish and final polishing pad. Three steps were the common to get the finish dialed in perfect.
Once in a while a game changing product surfaces in the detailing industry. Over the last few years 3d International came out with HD UNO. So what is HD UNO? Its a non diminishing abraisive designed to be a compound, and polish in one. While the abrasive of the liquid remains the same, The amount of leveling can be controlled by the application process. The application would be assumed by a mechanical operation. In this event it would evolve around pressure, speed, and pad content. This part of the process is managed by the person doing the work. Considering no one detailer is alike, we all practice general guidlines and often thinking outside the box to make our lives easier. Individual results will vary from detailer to detailer.
Now lets talk about why I feel HD UNO is unlike nothing I have tried. First off, HD UNO has been reformulated to be a little more user friendly. Its virtually dustless. It has a strong abrasive, but yet can finish down like a pure polish. Extreamly user friendly. Its almost sacary considering I have practiced my whole life to become the best that I can often challenging myself to become that 1% better daily. This has got to be the most user friendly product I have used to date. Making it a great novice product as well as a professional product.
After reading all this, I thought maybe I could show you Just how effective it is. In the below photo is a picture of a Blue Honda Accord. This hood is scheduled for a repaint due to some heavy scratches and stone chips in the front. So before it went to be refinished I thought. Lets have some fun and see how Incredible HD UNOreally is!
I first started by dividing the hood of the Honda Accord into sections. I divided it so I wuld have four seperate area's to work with.
Here is the hood and some of its defects prior to masking.
As you can see this hood had a large amount of defects. So my objective is to show you several ways to level paint using 1 liquid and still acheive perfect results. Now onto the masking. Nothing fancy just something to get the point across off having seperate area's on one panel t work with.
First I waned to see how effective HD UNO is in terms of cutting and finishing in one step of polishing. I started on the top left corner of the panel. My goal was to level paint fast and effectively. I used 1200 grit film sanding paper to dry sand the defects. A quarter inch interface pad was used.
Here is how the finished look in section after dry sanding with 1200 grit film disk. Notice the lack of clarity and dull look to the finish.
Next I wanted to further refine the finish, so I choose to use Mirka Abralon 2000 grit sanding abrasive and water to damp sand the panel.
Using the same process as above I used 4000 grit Mirka Abralon to further refine the finish.
Here you can notice the clarity beginning to somewhat return.
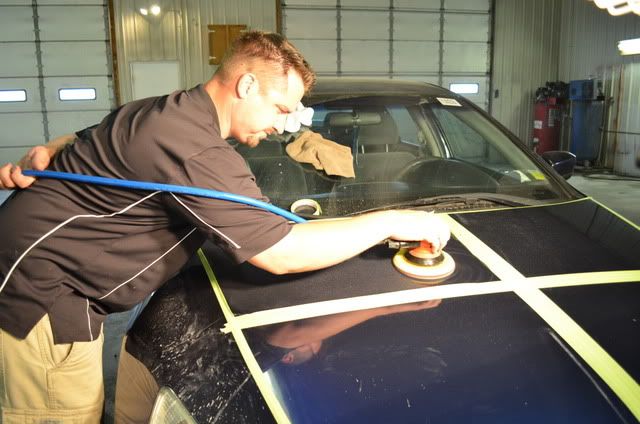
Normally in this step I would use a wool pad and rotory. I wanted to see if HD UNO had what it would take to remove the defects using a random orbital polisher. So for this part of the demonstration I used the DA Foam Pad Kit along with a Surehold Polisher.
I applied the polisher at speed 3 and then kicked it up to speed 6 with pressure and working the pass. I then backed it down to speed 3 to finish. Remember when using HD UNO you don't want to work it till it drys.
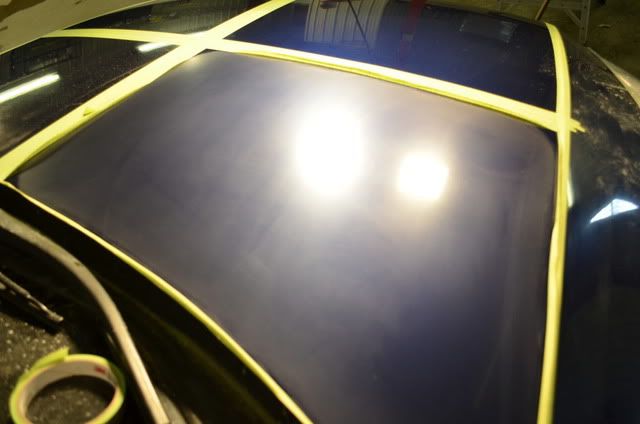
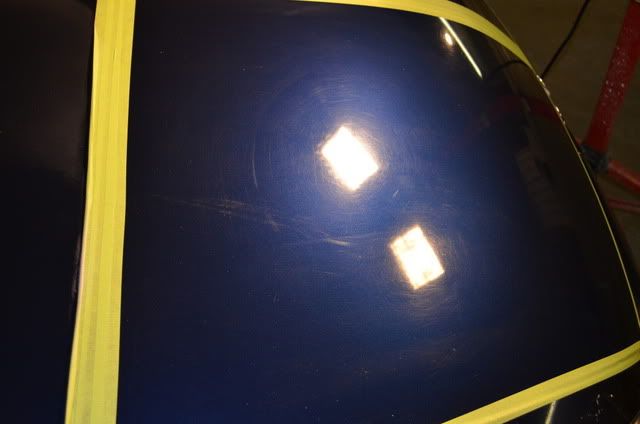
Now in one step I was in complete shock! I was done and didn't need to go any further. This was remarkable. Take notice of the clarity and depth added to the paint. Now keep in mind this was sanded with 1200 grit.
A perfect camera flash to show the true correction in one step.
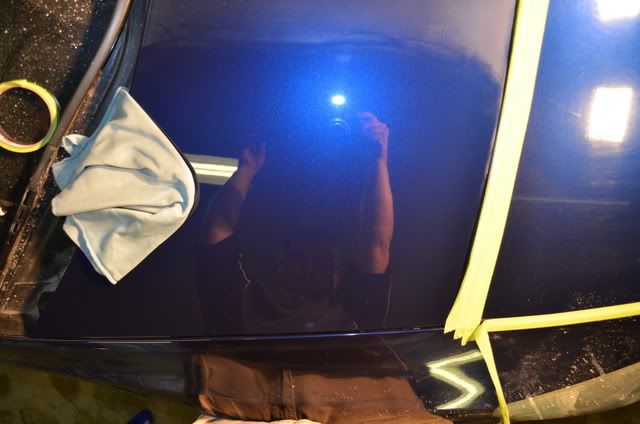
Up next I went to the lower section to try using HD UNO with a wool pad for paint leveling and defect removal. For this step I used a Festool rotory machine with a festool pad. This was my first experiance with the Festool pad itself. An absolutely incredible pad, but a little salty in price. Here is how the paint looked prior to correction and leveling.
The tools of trade for this part of the demonstration.
Here I am working HD UNO. I started out at speed 2 to spread the polish and bumped it up to about speed 4 or 1500 rpms and back down to speed 2. The end result again was superb. Only slight hologram was left behind, but no wool pad hazing was left behind.
The finish after the wool pad application.
You can clearly see the paint was leveled, but this shot showed the hologramming. Look at the camera flash it should be a prefect flash , but light hologramming was present.
Next I finished with a light pass using a griots DA and the orange foam pad from the DA Foam Pad Kit and perfection it was.
In conclusion I have found HD UNO is probally one of the best polishes out there. So far I haven't found a situation where it has't worked. The more I use it, comfort of ease really sets in. I think this product is gonna have change the way we look at polishing in the future. The best part is right now 3D has it on sale for 24.99. You can buy one quart of HD UNO and get HD POXY for free. Buy one HD UNO and Get HD Poxy for fee!!!!!" Stay tuned for more articles. I got a good one in the works. Its gonna be interesting. Thanks for your time.
Barry Theal of Presidential Details. A car detailing company in Lancaster PA.
 off somehow, it was meant to be a joke.
 ")