"NS-Sex-On-Wheels" by AutoLavish featuring Chris Amos

MarcHarris

New member
CBA_0557-1.jpg


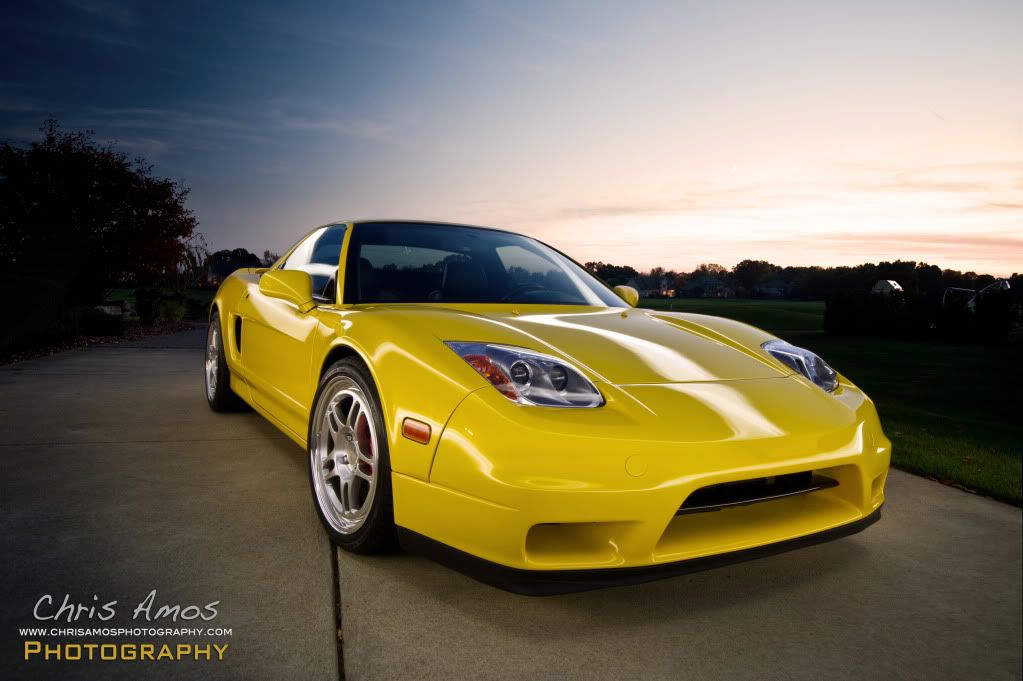
Honda's NSX had a major impact on the exotic car market when it hit the American shores in 1991. The first all-aluminum body car meant reduced weight while Variable Valve Timing and Lift Electric Control helped to provide extra power to the naturally aspired engine. Today the car remains relivent because of its timeless design, bulletproof reliability, historic relevance, and ability to still give a modern car a run for their money, especially after being modified.

This particular '97 NSX features a turbo system from one of the best NSX modifying companies, Michigan's own LoveFab, that puts horsepower to nearly 500 at the wheel. In addition to the go-fast goodies from LoveFab, the brakes have been upgraded with a Stoptech big brake kit grabbing onto slotted and drilled rotors, lightweight Fiske wheels wearing summer Bridgestone's provide contact with the road, and a conversion has been installed changing from the pop-up headlights (which many feel are a signature of the 90's) to fixed headlight housing with projector High Intensity Discharge lamps that the Acura NSX began switching to starting in 2002.


Because we originally met with the client prior to the work start, we knew we'd be scheduled for as much work as we could schedule in a single day. With a planned 10-11 hours of work planned, we hired a photographer to come along with us and document the work. This would allow us to concentrate on the work at hand, maximizing the amount of work we could complete (and bill for), while getting great pics of how things came along from an outsider's point of view.


Arriving at 9:30AM, and here's what we have; a Spa Yellow NSX is terrific over-all condition. Less than 25k miles, with a very informed and caring owner who does an outstanding job with maintaining both the mechanical and aesthetic aspects of his vehicle.


DSC09219.jpg


DSC09224.jpg


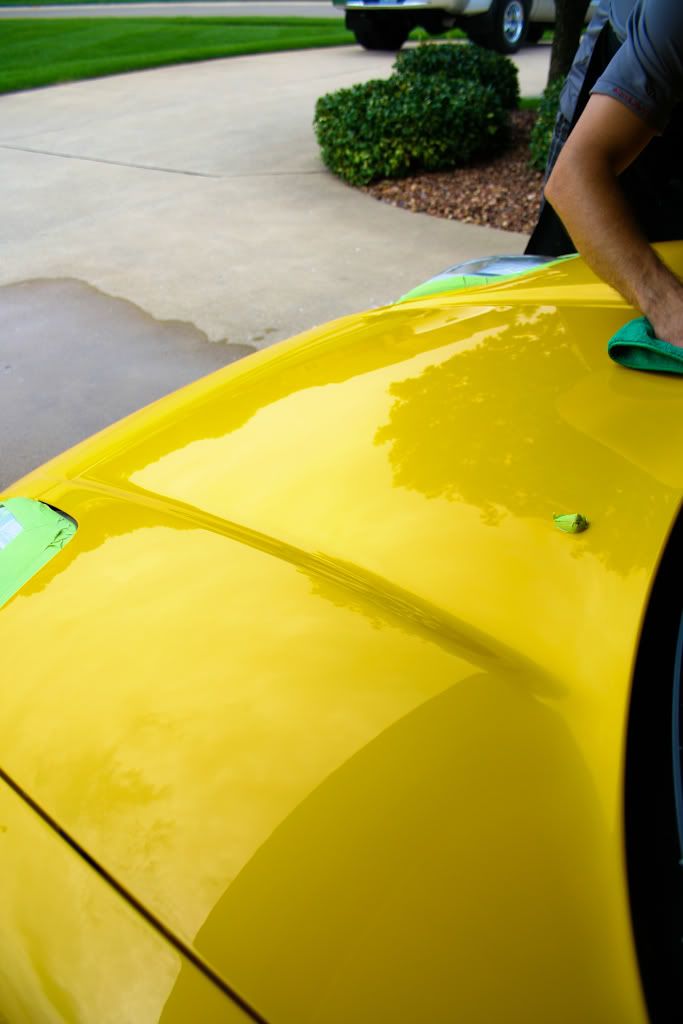
Please excuse our dirty lens, and focus on the reflections of the lower right of this pic. This is part of the front bumper, and while shiny, you can see how the reflection is slightly distorted. The shop that repainted the front end of the vehicle worked hard to do the best job possible to match the OEM color, but they blended from the bumper and hood onto the fenders, then clear-coated over the entire front end (not an unusual or bad practice), resulting in slightly more orange peel than the OEM finish. One of our goals on this day was to minimize any apperance of excessive orange peel to give the car a seemless transition in texture.


DSC09228.jpg


Wheel faces clean... but not inside the barrel or lugs.


DSC09230.jpg


Piano black trim doesn't camoflauge swirls.


DSC09235.jpg


Light swirling as a whole, and of course, because of the color, it was hard to see.


DSC09236.jpg


DSC09238.jpg


Exhaust tips clean... but not on the inside.


DSC09243.jpg


Reflections... but not absolute clarity.


DSC09262.jpg


DSC09264.jpg


Hinges lightly dirty.


DSC09269.jpg


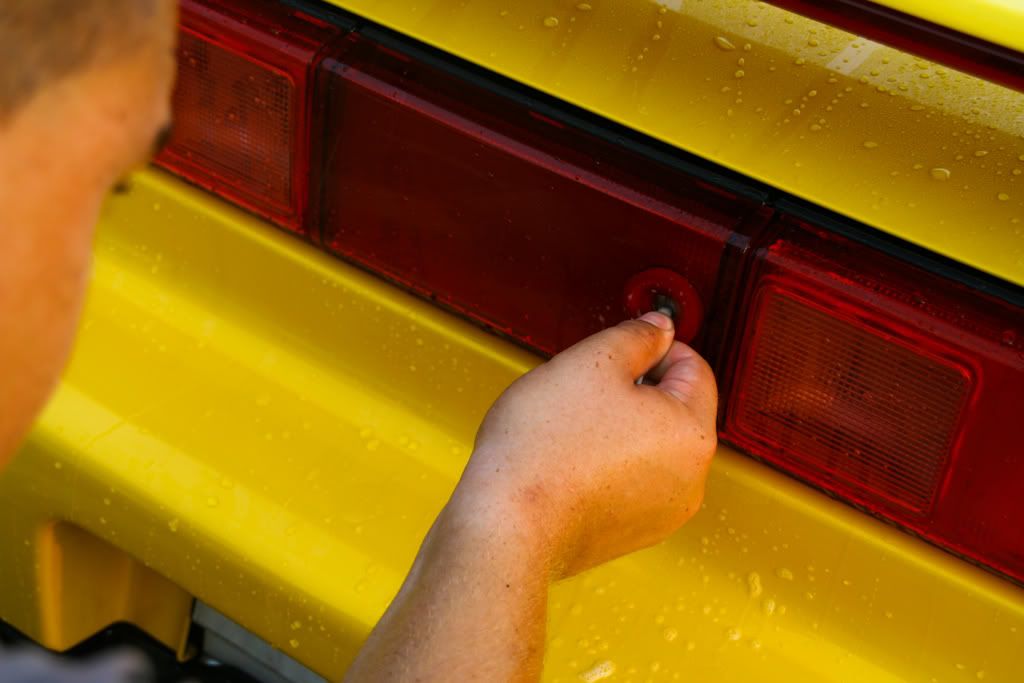
Underside of the door... slightly dirty. It's a hard to reach area that rarely gets love. Luckily for her, AutoLavish would provide that love on this day :)


DSC09274.jpg


Wax residue.


DSC09287-1.jpg


We first pulled the car out of the sun to cool off. Despite the light color, the surface temp still quickly absorbed a lot of heat.


nsxdetail014.jpg


Ten minutes later, the max temperature dropped over 20 degrees Fernenheit. Water / soap won't dry as quickly lessening the chance of water marks.


nsxdetail016.jpg


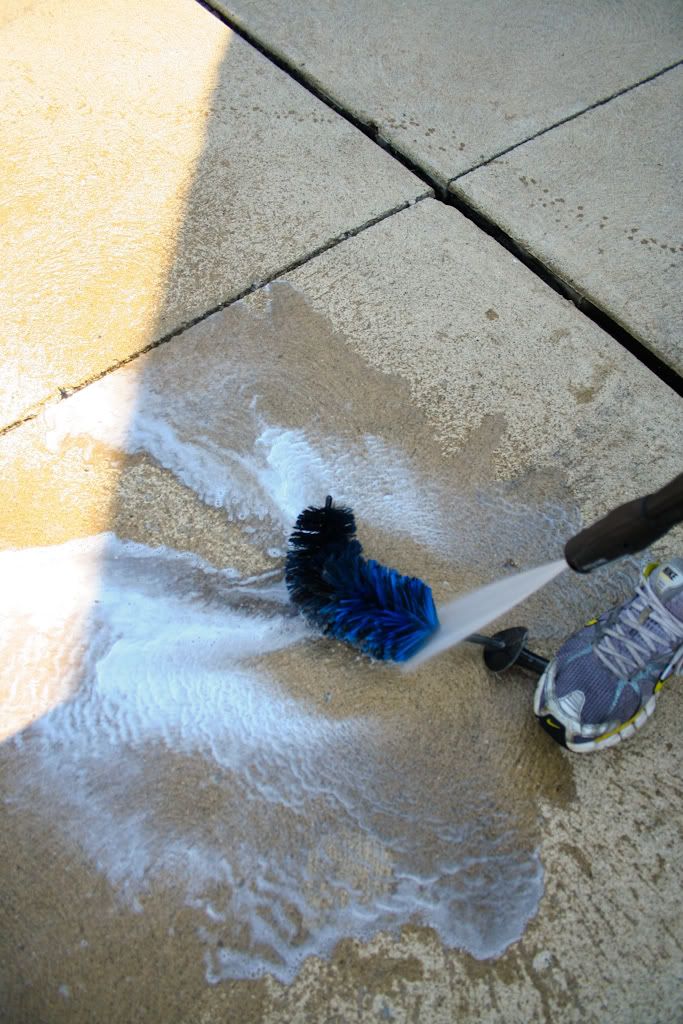
P21S Gel Helped to clean the wheels.


nsxdetail018.jpg


While I worked the wheels with a boar's hair brush, a Swissvax wheel brush, and an EZ Detail brush, Jacob used P21S Total Auto Wash and another boar's hair brush to gently lift off dirt, grime, and residue off the jambs.


nsxdetail020.jpg


nsxdetail021.jpg


nsxdetail022.jpg


nsxdetail023.jpg


A toothbrush helped to relieve grime from various gaskets and hinges.


nsxdetail028.jpg
 
Q-tip used to remove gunk from behind the side mirrors.


nsxdetail100.jpg


When coupled with P21S Total Auto Wash and a boar's hair brush, the grime can easily be flushed away from the surface.


nsxdetail029.jpg


Thoroughly rinsing brushes directly after use insures that cleaners AND grime are quickly and effectively removed for the next use. Here you see afters of the two-brush method where one brush is kept straight while the other is kept bent to clean quicker with less stress to the metal material used at the core of these brushes.


nsxdetail030.jpg


nsxdetail032.jpg


There's no reason to have this much gunk on the hood latch. Excess was removed for a cleaner look that wouldn't attract excess dirt in the future.


nsxdetail033.jpg


nsxdetail034.jpg


Removal of the wax residue and other build up under the "Second hood" with soft brushes and cleaners.


nsxdetail035.jpg


nsxdetail036.jpg


The benefits of a two-man system: two sets of eyes to spot anything that needs attention, and twice the cleaning power.


nsxdetail037.jpg


Other various cleaning pictures to include the foaming pre-treatment process.


nsxdetail039.jpg


nsxdetail043.jpg


The fuel door is another often-forgotten area that many times needs attention. I was able to clean this area while Jacob was flushing the pre-foam treatment from the car, prior to being washed.


nsxdetail045.jpg


Washed, then blown dry.


nsxdetail044.jpg


nsxdetail048.jpg


Once dried, painter's tape was used to mask off delicate areas as caution against damage or polish residue. This doesn't just make the work we perform safer, it makes clean-up much quicker, which saves time in the long run.


nsxdetail052.jpg


Welding shades dim down light so the eye isn't stressed and can better analyse the paint's surface and how it is responding to different Pad+polish+machine+speed+pressure+backing plate combinations.


nsxdetail058.jpg


Front end thickness measurements. Doesn't match the typical readings of 120-140 from the OEM paint.


nsxdetail061.jpg


nsxdetail067.jpg


Above the tape line has slightly tigher reflections. Notice the subtle difference in the reflection form the top edge of the garage.


nsxdetail064.jpg


Jacob continued to finesse away the clear on the front end while I continued to polish out the OEM paint.


nsxdetail069.jpg


nsxdetail071.jpg


nsxdetail072.jpg


nsxdetail073.jpg


Even the plastic tail lights would be massaged back to absolute clarity.


nsxdetail077.jpg


The owner was very concerned with the condition of the leather seats, which actually were great but needed some light cleaning. As Jacob continued to refine the finish, I cared for them using Leather Master products; mainly Strong Cleaner and Protection Cream. 1Z Cockpit Premium would handle the other interior surfaces for a clean matte finish.


nsxdetail079.jpg


nsxdetail082.jpg


nsxdetail084.jpg


About done!


nsxdetail087.jpg


We turned the halogen lights off and got the NSX ready to pull out for the final wash to remove dust and oils from the paint.


nsxdetail097.jpg


During the final wash, we made sure the clean the key holes and then kept on to the final engine bay cleaning and wipe down.


nsxdetail102.jpg


nsxdetail104.jpg


nsxdetail106.jpg
 
Dew setting in past 9PM as we finish the engine bay.


DSC09304.jpg


Tips coming along...


DSC09305.jpg


Jacob pulling off the rest of the metal polish from various engine bay pieces...


DSC09308.jpg


...while I dress the tires with Optimum Tire Shine.


DSC09310.jpg


Finishing while Blackfire Wet Diamond sets on the paint.


DSC09311.jpg


Cleaning the inside glass, and appling Aquapel to the rear window and windshield once pulled in to avoid the dew point.


DSC09317.jpg


DSC09321.jpg


Sealant cured, the paint is wiped clean, and the metal sealant is buffed off the exhaust tips.


DSC09323.jpg


DSC09325.jpg


Final inspection with the client to show the difference made and to check for any residue not wiped off. The true reflections of the finish and the pearl in the paint coming alive was amazing.


DSC09331.jpg


DSC09338.jpg


DSC09355.jpg
 
To freeze this work in time, we contacted a photographer to capture the results. Chris Amos is best known in automotive photography for the work he does for Winding Road Magazine, but has a diverse portfolio that reflects his flexibility. We were very confident he would be able to bring the best out this beauty, but still ended up shocked by the amazing pictures.


CBA_0490-1.jpg


Chris Amos said:
First off, I want to say that this car is stunning in person. My goal was to represent this as best as I could with my photos. I’d never photographed a car this clean before, and it was liberating to be able to capture every inch of it without shame.

One of the biggest challenges for me was in post-processing. Spa Yellow is a very finicky color to keep consistent in different lighting conditions. I wanted to accurately represent it in different types of light we encountered (direct sun, shade, and fluorescent).


CBA_0386-1.jpg


CBA_0456-1.jpg


CBA_0578-1.jpg


CBA_0574-1.jpg


CBA_0658-1.jpg


CBA_0646-1.jpg


CBA_0611-1.jpg


CBA_0477.jpg


CBA_0588-1.jpg


CBA_0554-1.jpg


CBA_0585-1.jpg


CBA_0468-1.jpg


CBA_0575-1.jpg


CBA_0454.jpg


CBA_0460.jpg


CBA_0417.jpg


Chris Amos said:
For the night shots, I used a technique called light painting. I set my camera on a tripod and set it for a 20-30 second exposure. While the shutter is open, I use a light source to walk around the car and “paint” light on the subject. For my light source I use a 48” shop light with two 40-watt fluorescent bulbs. That is plugged into a portable battery in my backpack. Light painting is a lot of fun because every time you flip the switch there’s a different result. While I was doing these shots on the driveway, I invited the owner outside to take part in the process. He thoroughly enjoyed watching the show!


CBA_0770-1.jpg


CBA_0786-1.jpg


CBA_0754-1.jpg


CBA_0777-1.jpg


CBA_0772-1.jpg


CBA_0796-1.jpg


LPSunset.jpg


Thanks to the owner for allowing us to take this project so far, to Chris Amos for the great photography work, and to you for lending us your time to look at our work!

-Marc and Jacob from AutoLavish


CBA_0559-1.jpg
 
Bam!!! Thats how it is done. Welcome to hollywood fella's! That guys photography is off the hook! Insane attention to detail! I would compliment both of you more, but Marc's head is already big enough:grinno: Awesome work guys! Im proud to know both of you!
 
Wow thats a great job...and the professional photographer has some serious skills! But yeah you guys had some serious attention to detail on that job!
 
Incredible write up! Photography is amazing, sure shows off your workmanship! How many man hours? I would guess 20+


Cheers,

GREG
 
Back
Top