Todd@RUPES
Just a regular guy
Low Budget Fix- Using Wurth's Silver Wheel Paint to restore the look of wheel covers
This weekend I was washing a friends car and noticed the factory wheel covers were pretty damaged. Believe it or not, factory wheel covers can be fairly expensive to replace, and going to low cost aftermarket covers, with their faux metal finishing and poor fit isn't always the best option. Luckily I had a can of Wurth's excellent Silver Wheel Paint handy. With a couple hours invested and a little time I had restored the wheel covers to near new factory condition.
Products Needed:
Wheel Cleaner (Optimum Power Clean)
Sandpaper -To smooth any scratches- I used generic 240 grit
Primer (Wurth Self Etch Primer)
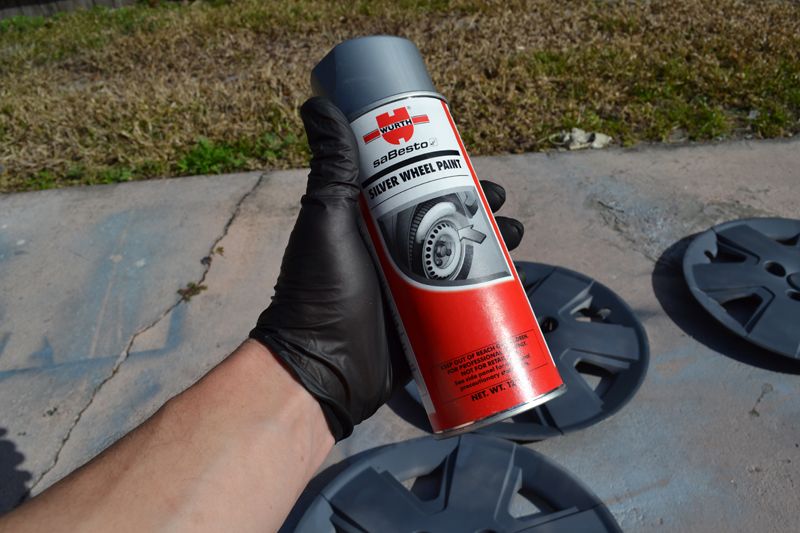
Paint (Wurth Silver Wheel Paint)
Tools To Remove Wheel Covers
Misc-
1 inch Round Detail Brush
Nitrile Detailing Gloves
Time:
2-3 Hours (most of this is down time as coats dry)
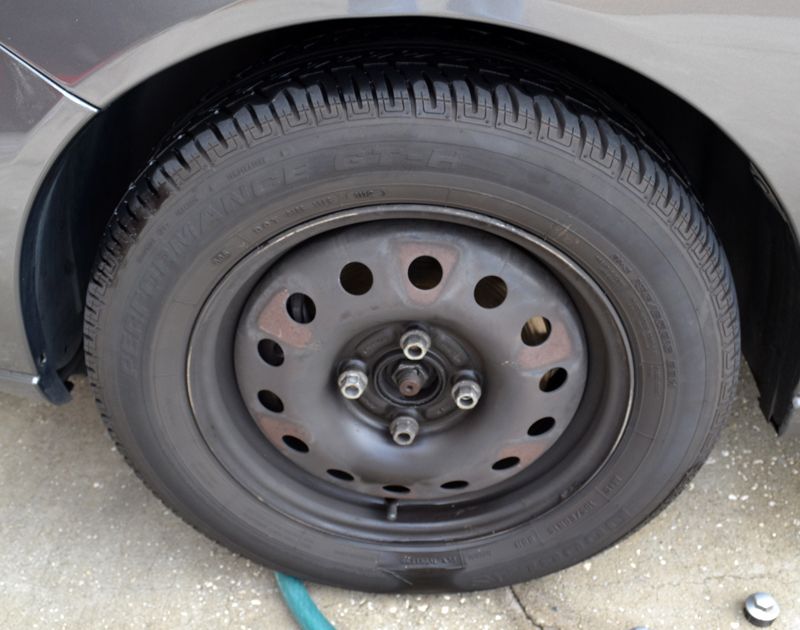
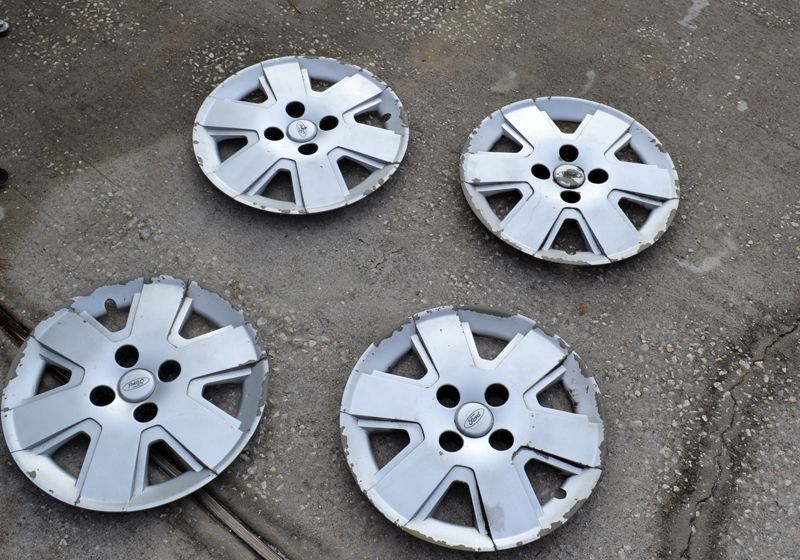
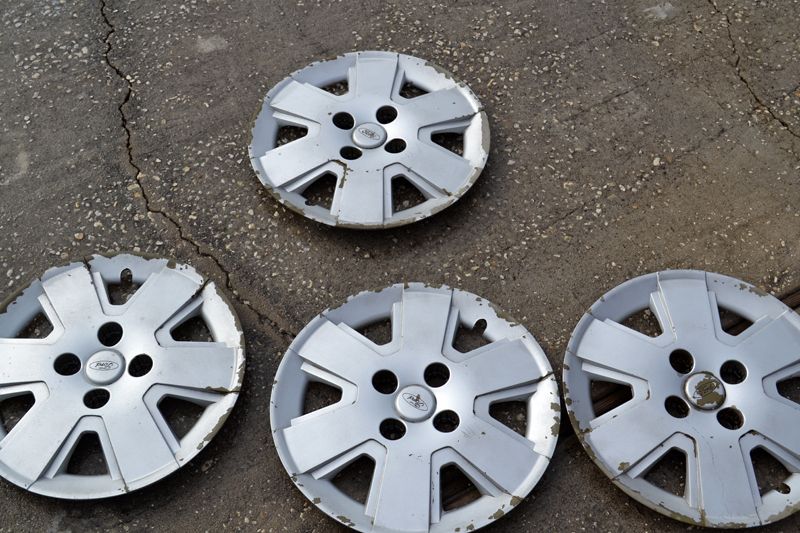
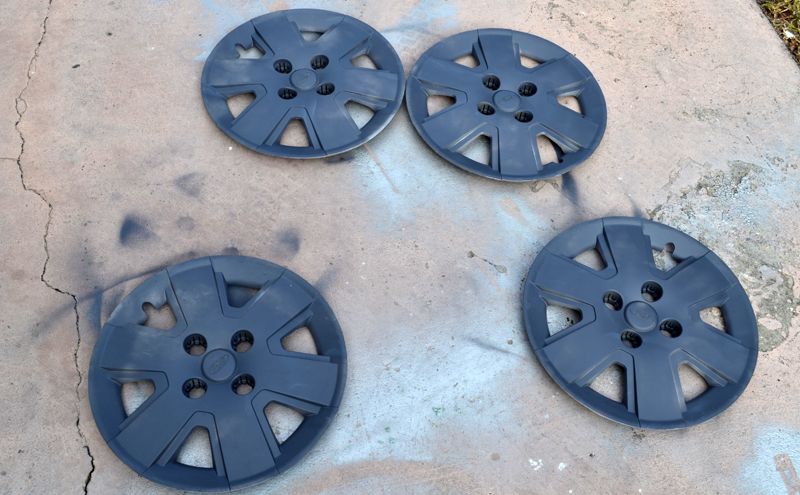
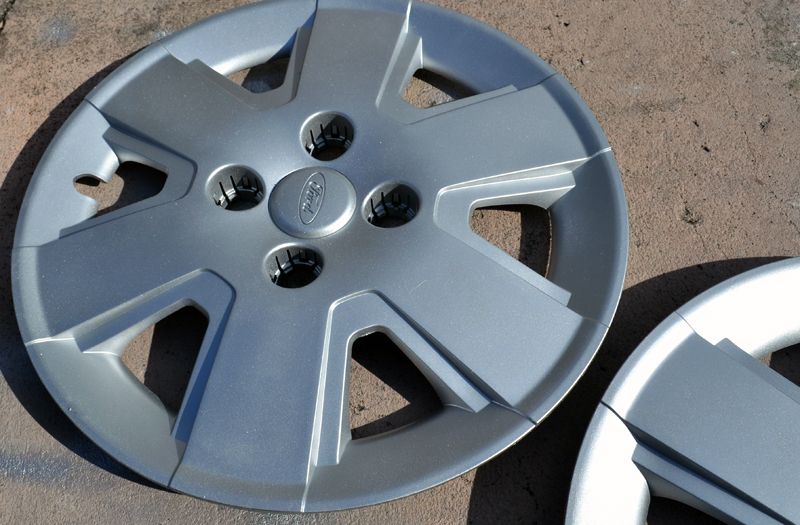
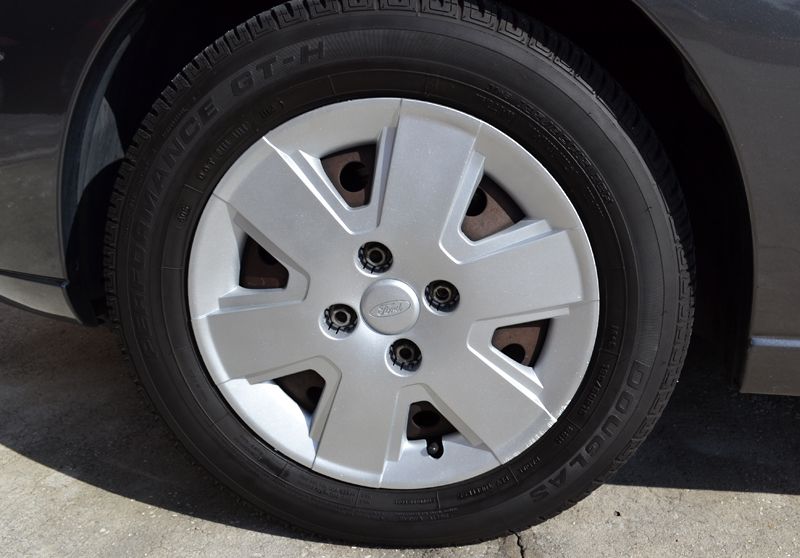
Plastic wheel covers (just like wheels) need to be maintained to have a long aesthetic life. Unfortunately the wheel covers on this Ford Focus had been neglected. Caustic brake dust was allowed to sit too long and infrequent cleaning required heavy wheel acids which quickly took a toll on the wheel's finish.
Ultimately the finish had worn off and began to fail on the corners of the wheels and on some spots on the face.

The FIRST STEP is to remove the wheel covers. I washed them prior to removal just to make handling easier. Some wheel covers simply pop off, some have special lug nut covers that hold them on, and some (like this one) require removing the lug nuts completely to remove.
With the car on the ground, I removed the plastic lug covers, then the lug nuts, removed the wheel covers, before replacing (and re-torquing) the lugs nuts. If you don't feel comfortable removing the lug nuts with the vehicle siting on the ground you can lift each wheel (one at a time) until you remove the wheel covers.
Luckily, even the wheel covers that require you to remove the lug nuts, fit back onto the wheel by a snap fit. I re-torqued the wheels to the factory recommended settings of 75 ft. lbs. and moved on.
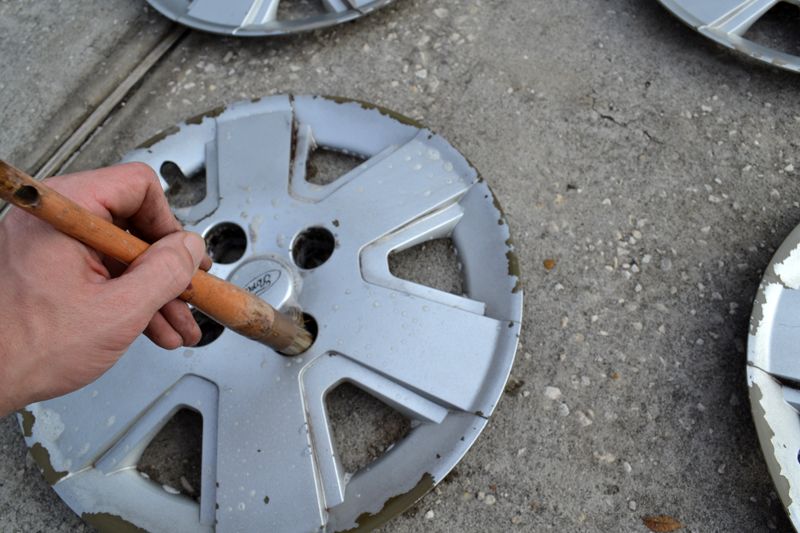
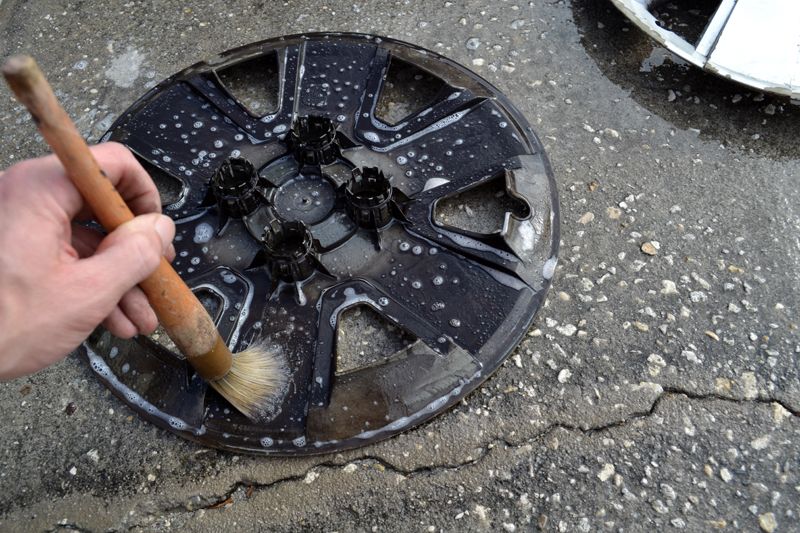
With the wheel covers off, the SECOND STEP is to again clean the wheels, this time more thoroughly. Remove all brake dust residues. I used a 1 inch Detail Brush and Optimum Power Clean (diluted 1:1)
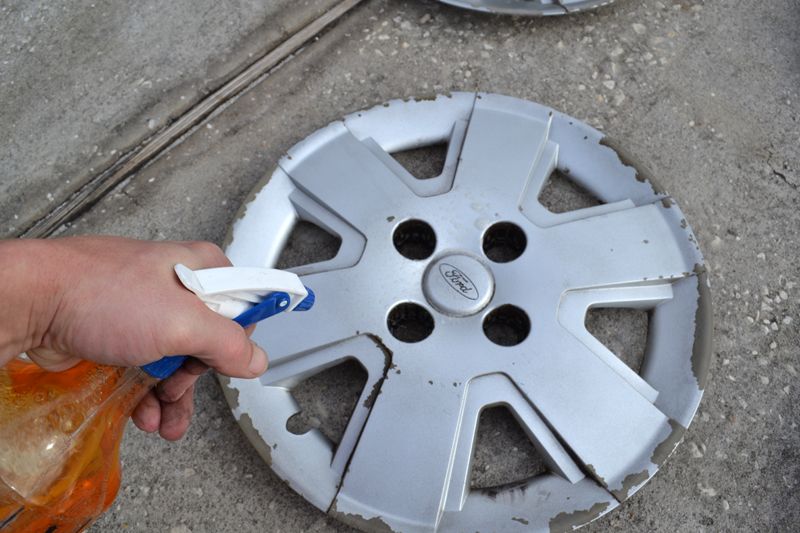
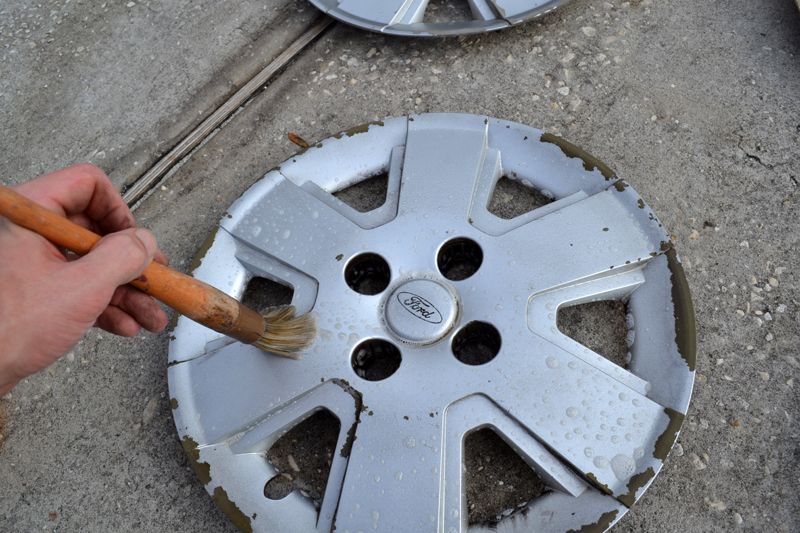
The 1 inch Detail Brush allowed me to reach those hard to get to spots around the lug sockets.
I cleaned the back side of the wheels (lightly) to make handling easy. I wasn't going for a perfect clean, but rather I wanted to clean up any lose dust that would stain my hands as I moved the parts around.
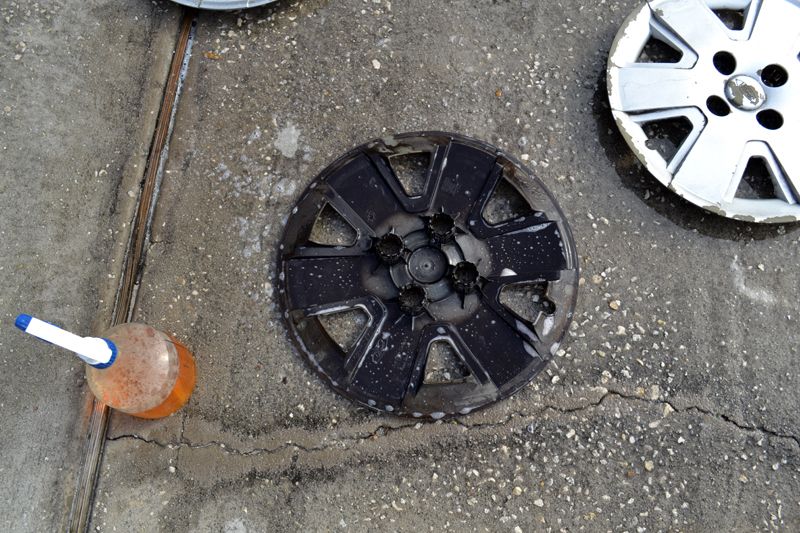
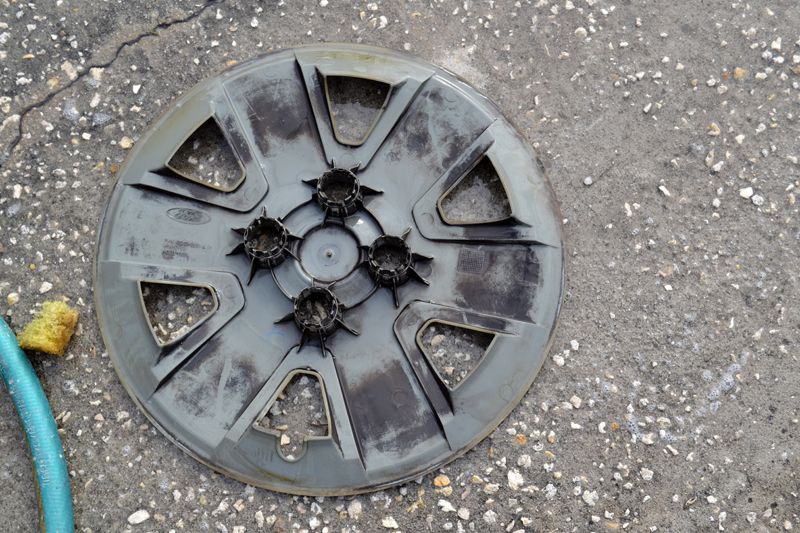
The wheel covers, cleaned.... If you have an air compressor or Metro Blaster you can use it to blow the wheels dry. Make sure they are dry (and no trapped water is lurking, waiting to drip down and ruin freshly applied paint).
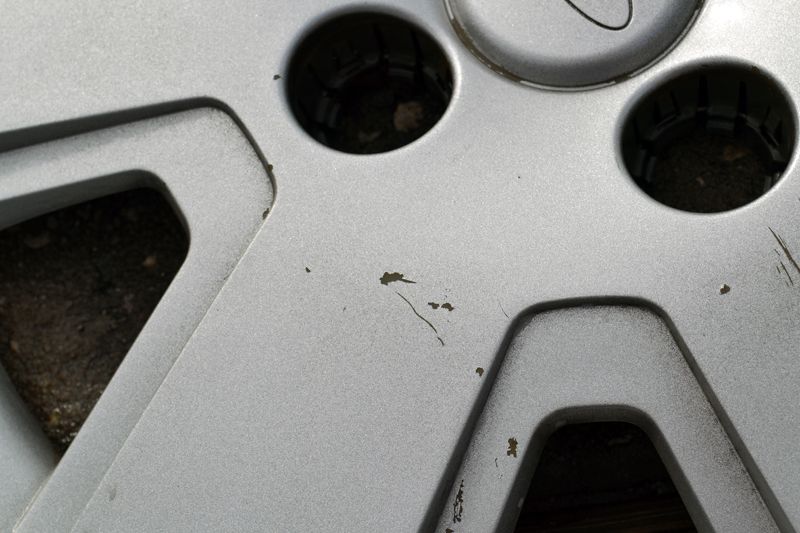
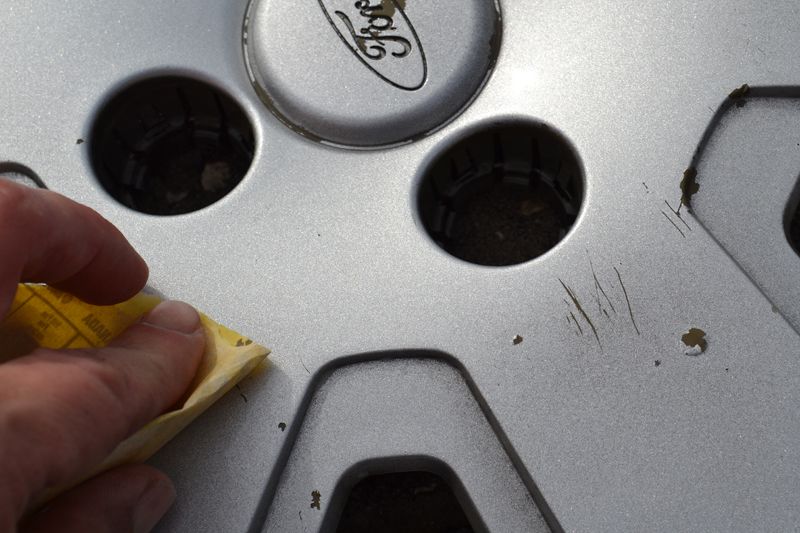
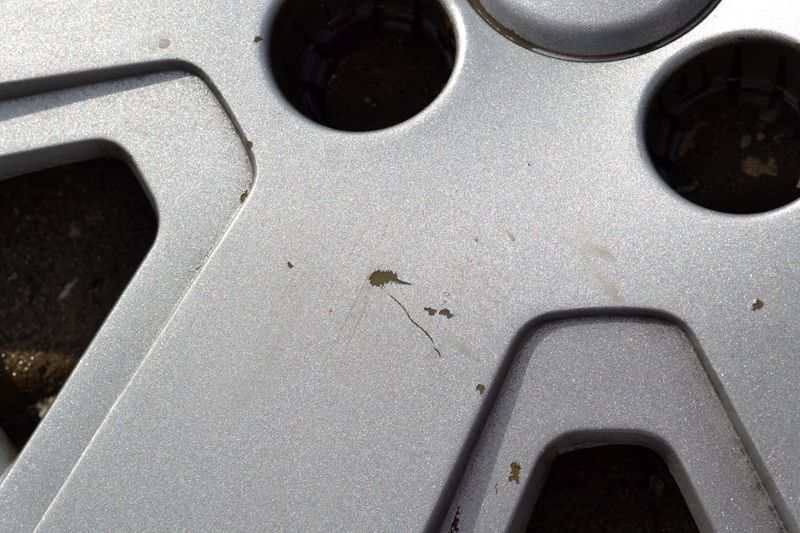
STEP THREE is to prepare the wheel covers for painting. You can invest as much times as want into the step. These wheel covers had some scratches from curb rash and special fillers (similar to Bondo) exist that allow you fill in any deep gouges. Given that these were wheel covers going on a Ford Focus, and I wanted to spend my Saturday riding my motorcycle, I decided to invest just a little time on prepping the wheel covers. They wouldn't be perfect but they would be MUCH better.
I lightly sanded (using a generic 240 grit/grade sandpaper) any rough edges from chips in the missing finish.
STEP FOUR is to prime the material prior to painting. I used Wurth Self-Etching Primer. After sanding I wiped each wheel down with 10/90 diluted isopropyl alcohol to remove any oil from my hands and covered my hands in Nitrile Gloves to prevent future contamination.
Following the directions I sprayed 3 light coats onto each wheel cover.
Note: As mentioned above, this was a quick fix of some wheel covers. If you desire an even better result apply your last coat of primer “thick” or “wet” and allow to dry completely. Then sand the surface with 400 grit sand paper prior to painting. One of the benefits of Wurth Self-Etching Primer is that it sprays even and leaves a fairly level surface that doesn't require sanding (but would benefit from it).
STEP FIVE is to paint the wheel covers. Make sure that the primer is completely dry to the touch. I shook the Wurth Silver Wheel Paint for 1 minute, as the directions recommend. Luckily it was a nice day out, but if it is cool outside, you can let the can sit in warm water for several minutes prior to use.
Spraying is relatively straight-forward. Hold the can and depress the trigger (from about 8 inches away). I recommend spray 3 coats, the first 2 light, and the third slightly thicker (but not thick). On the first coat I made sure to cover all of the indents, crevices, and detail areas. The next coat and the final coat were sprayed flat to the surface for an even finish. I found it easiest to hold the wheel with one gloved hand and spray towards the bottom, then rotate the wheel a third and spray, and finally rotate the wheel the final third.
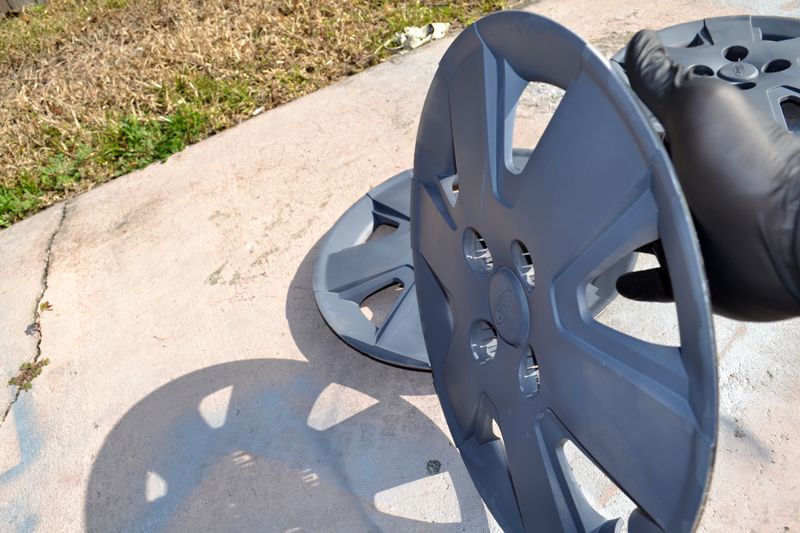
The Wurth Silver Wheel Paint has great coverage and dries quickly. Here is a sprayed wheel cover(1 coat) next to the primed wheel cover.
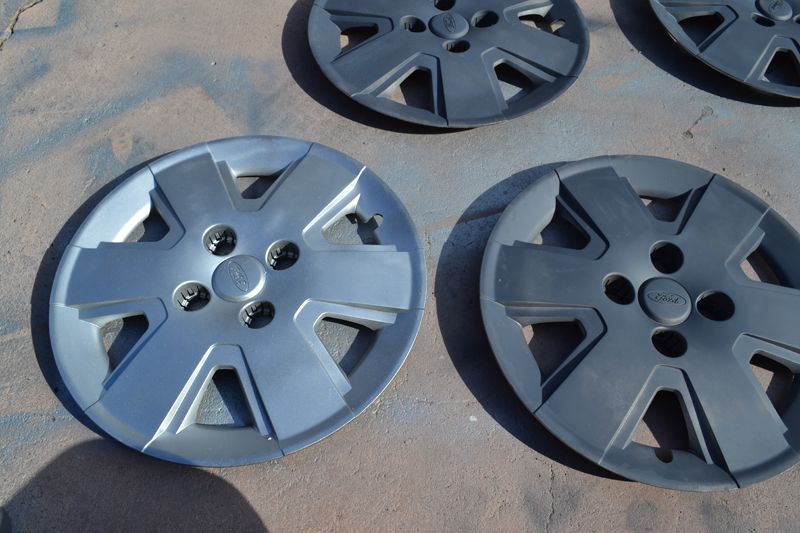
After two coats the wheel looked great. All that was left was a thicker third coat to even out the surface. You don't want to spray so thick that you get runs.
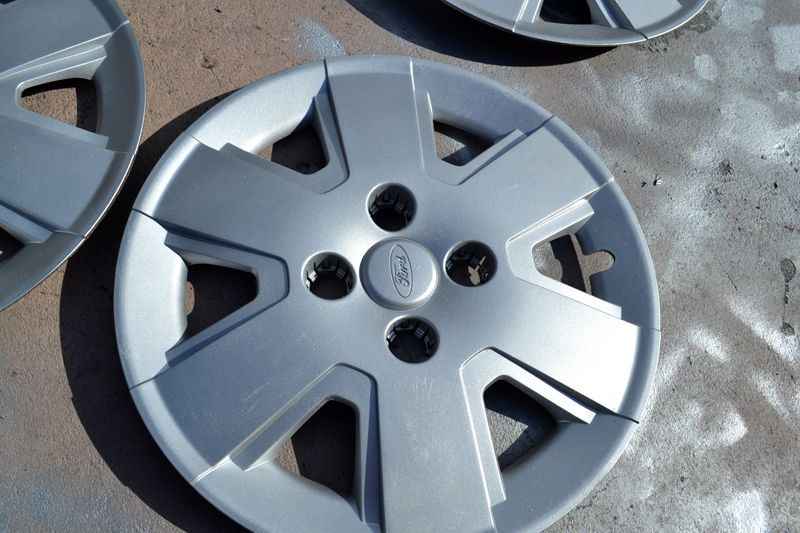
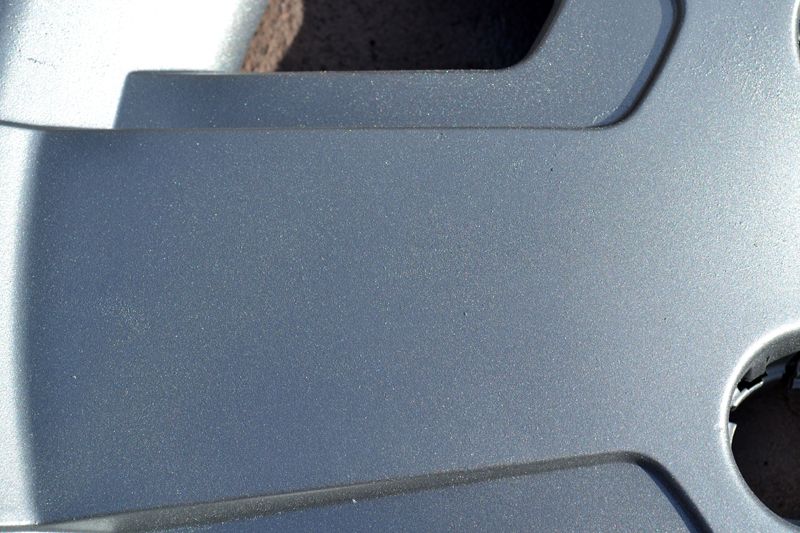
After three coats the wheels had a near factory finish with just the amount of metal flake.
The SIXTH STEP, which is the last step, was to reinstall the wheel covers (after they dried). I also dressed the tires with BLACKFIRE Total Eclipse Tire Spray for a nice contrast. These wheels simply snapped back over the lug nuts.
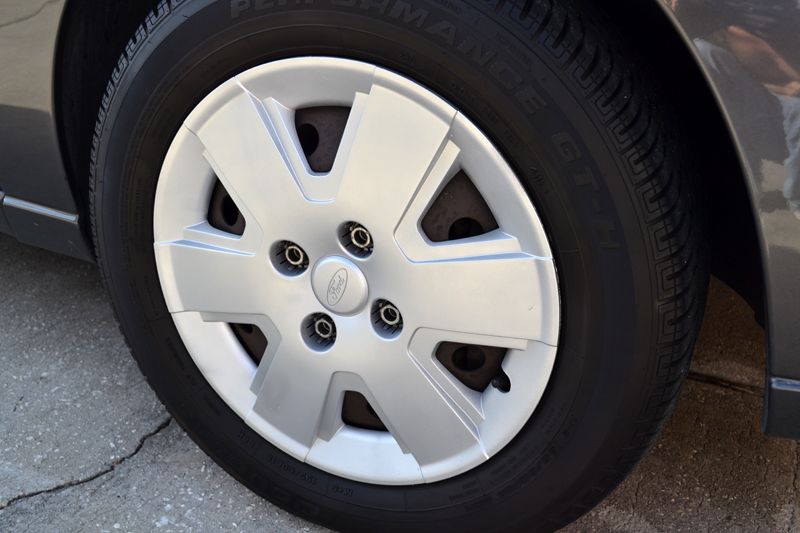
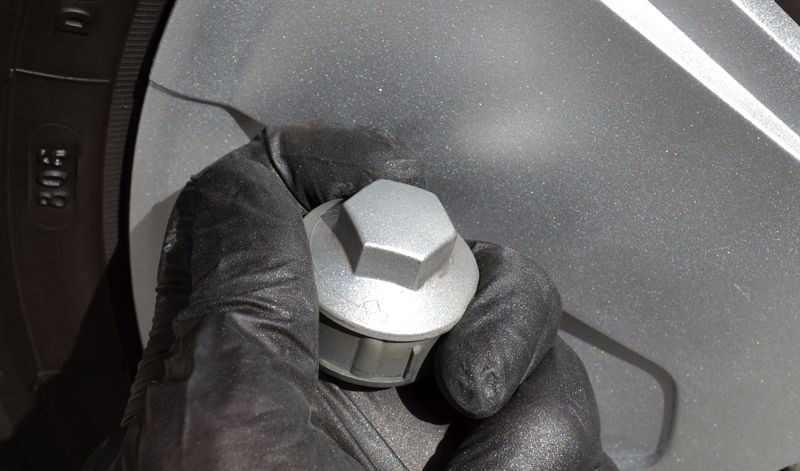
Here is a pic of the lug nut cover nuts (still with a factory finish). You can see they are near identical in color, flake, and sheen.
This weekend I was washing a friends car and noticed the factory wheel covers were pretty damaged. Believe it or not, factory wheel covers can be fairly expensive to replace, and going to low cost aftermarket covers, with their faux metal finishing and poor fit isn't always the best option. Luckily I had a can of Wurth's excellent Silver Wheel Paint handy. With a couple hours invested and a little time I had restored the wheel covers to near new factory condition.
Products Needed:
Wheel Cleaner (Optimum Power Clean)
Sandpaper -To smooth any scratches- I used generic 240 grit
Primer (Wurth Self Etch Primer)
Paint (Wurth Silver Wheel Paint)
Tools To Remove Wheel Covers
Misc-
1 inch Round Detail Brush
Nitrile Detailing Gloves
Time:
2-3 Hours (most of this is down time as coats dry)
Plastic wheel covers (just like wheels) need to be maintained to have a long aesthetic life. Unfortunately the wheel covers on this Ford Focus had been neglected. Caustic brake dust was allowed to sit too long and infrequent cleaning required heavy wheel acids which quickly took a toll on the wheel's finish.
Ultimately the finish had worn off and began to fail on the corners of the wheels and on some spots on the face.
The FIRST STEP is to remove the wheel covers. I washed them prior to removal just to make handling easier. Some wheel covers simply pop off, some have special lug nut covers that hold them on, and some (like this one) require removing the lug nuts completely to remove.
With the car on the ground, I removed the plastic lug covers, then the lug nuts, removed the wheel covers, before replacing (and re-torquing) the lugs nuts. If you don't feel comfortable removing the lug nuts with the vehicle siting on the ground you can lift each wheel (one at a time) until you remove the wheel covers.
Luckily, even the wheel covers that require you to remove the lug nuts, fit back onto the wheel by a snap fit. I re-torqued the wheels to the factory recommended settings of 75 ft. lbs. and moved on.
With the wheel covers off, the SECOND STEP is to again clean the wheels, this time more thoroughly. Remove all brake dust residues. I used a 1 inch Detail Brush and Optimum Power Clean (diluted 1:1)
The 1 inch Detail Brush allowed me to reach those hard to get to spots around the lug sockets.
I cleaned the back side of the wheels (lightly) to make handling easy. I wasn't going for a perfect clean, but rather I wanted to clean up any lose dust that would stain my hands as I moved the parts around.
The wheel covers, cleaned.... If you have an air compressor or Metro Blaster you can use it to blow the wheels dry. Make sure they are dry (and no trapped water is lurking, waiting to drip down and ruin freshly applied paint).
STEP THREE is to prepare the wheel covers for painting. You can invest as much times as want into the step. These wheel covers had some scratches from curb rash and special fillers (similar to Bondo) exist that allow you fill in any deep gouges. Given that these were wheel covers going on a Ford Focus, and I wanted to spend my Saturday riding my motorcycle, I decided to invest just a little time on prepping the wheel covers. They wouldn't be perfect but they would be MUCH better.
I lightly sanded (using a generic 240 grit/grade sandpaper) any rough edges from chips in the missing finish.
STEP FOUR is to prime the material prior to painting. I used Wurth Self-Etching Primer. After sanding I wiped each wheel down with 10/90 diluted isopropyl alcohol to remove any oil from my hands and covered my hands in Nitrile Gloves to prevent future contamination.
Following the directions I sprayed 3 light coats onto each wheel cover.
Note: As mentioned above, this was a quick fix of some wheel covers. If you desire an even better result apply your last coat of primer “thick” or “wet” and allow to dry completely. Then sand the surface with 400 grit sand paper prior to painting. One of the benefits of Wurth Self-Etching Primer is that it sprays even and leaves a fairly level surface that doesn't require sanding (but would benefit from it).
STEP FIVE is to paint the wheel covers. Make sure that the primer is completely dry to the touch. I shook the Wurth Silver Wheel Paint for 1 minute, as the directions recommend. Luckily it was a nice day out, but if it is cool outside, you can let the can sit in warm water for several minutes prior to use.
Spraying is relatively straight-forward. Hold the can and depress the trigger (from about 8 inches away). I recommend spray 3 coats, the first 2 light, and the third slightly thicker (but not thick). On the first coat I made sure to cover all of the indents, crevices, and detail areas. The next coat and the final coat were sprayed flat to the surface for an even finish. I found it easiest to hold the wheel with one gloved hand and spray towards the bottom, then rotate the wheel a third and spray, and finally rotate the wheel the final third.
The Wurth Silver Wheel Paint has great coverage and dries quickly. Here is a sprayed wheel cover(1 coat) next to the primed wheel cover.
After two coats the wheel looked great. All that was left was a thicker third coat to even out the surface. You don't want to spray so thick that you get runs.
After three coats the wheels had a near factory finish with just the amount of metal flake.
The SIXTH STEP, which is the last step, was to reinstall the wheel covers (after they dried). I also dressed the tires with BLACKFIRE Total Eclipse Tire Spray for a nice contrast. These wheels simply snapped back over the lug nuts.
Here is a pic of the lug nut cover nuts (still with a factory finish). You can see they are near identical in color, flake, and sheen.
")