Merlin
A Miracle Detailing
How to use Meguiar's Dual Action Microfiber Correction products

HOW TO USE:
It is necessary to completely prime the MF pads with correction compound before use so the MF pad has complete coverage and be sure your DA is set to 4800 OPM. (NO FASTER!)
I have included the pad priming information from Megs site to illustrate this process.
Set the DA to 4800 opm refer to your owners manual for the equivalent setting. Apply DA Microfiber Correction Compound directly to the microfiber cutting disc, using just a few drops of product to start. You use a lot less product with this system than with typical liquids and foam pads.

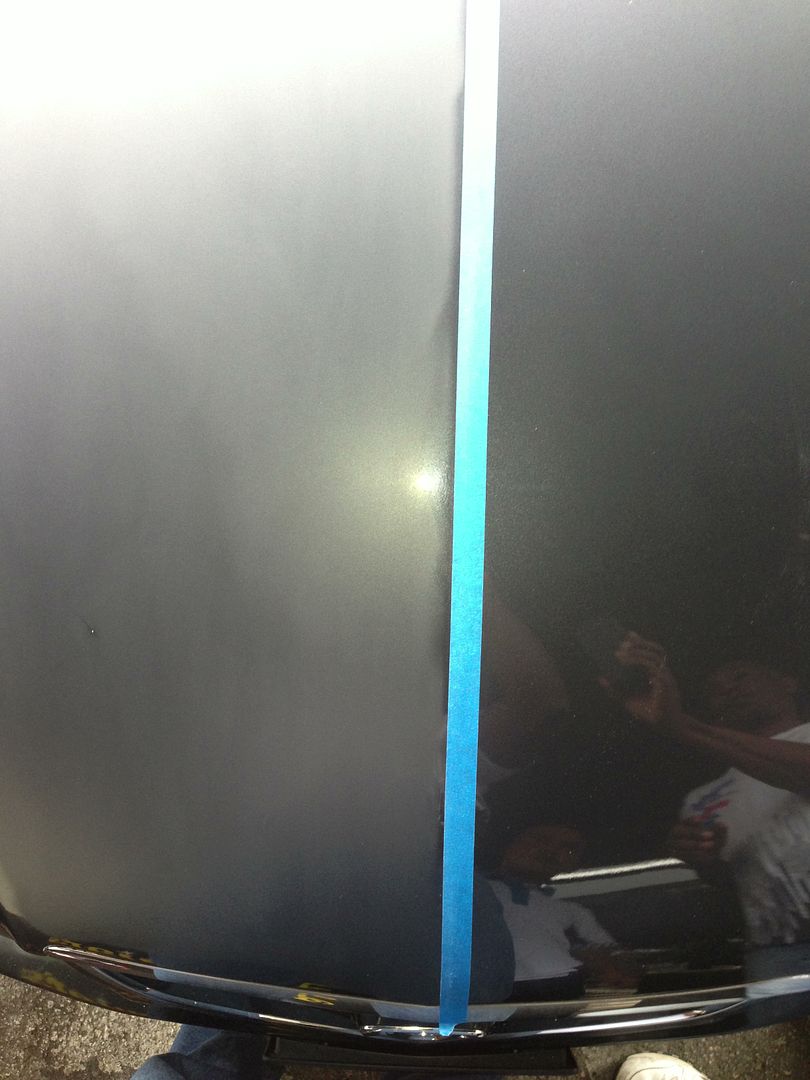
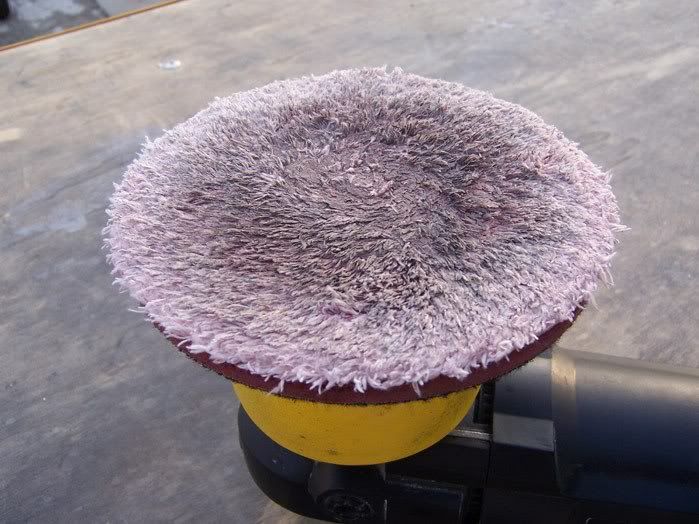
Now, place the pad flat on the paint, turn the tool on and begin working a 2’ x 2’ area with uniform pressure. At this point you are just beginning to prime the pad so don’t worry about defect correction just yet. After just a couple of quick passes turn the tool off and lift the pad off the paint. It should look like this.

Add a few more drops of product to the “clean” areas of the pad and repeat the above process. You want the entire face of the pad to be lightly but uniformly covered with product. Alternatively you could apply some product to the pad and work it in with your fingers, just make sure to NOT overuse the product and to uniformly cover the pad. At this point the pad is fully primed and you can get to work correcting defects.


To do that you want to start with 2 – 3 passes of moderate pressure then follow with 2 – 3 passes of light pressure over the same area. Work in the same small, roughly 24" x 24" area that you should be used to doing with foam pads. Just as with traditional liquids you do not want to go to a dry buff with this system. But you should see the product stay wet for a very generous period of time, and there will be almost no dust to deal with at all. Remove remaining residue using a microfiber towel and continue this process on all areas as necessary.
CLEANING THE MICROFIBER PADS:
For maximum cutting at all times, clean the microfiber disc frequently using compressed air, Meguiar's Professional Pad Conditioning Brush, or Meguiar's Pad Washer. This is a very critical step! With microfiber it is imperative that you clean the pads often and thoroughly. We can not stress this enough! You’ll see the fibers of the pad matt down pretty quickly, but cleaning will fluff them back up and remove excess product.
In the images below you can clearly see the fibers matted down prior to cleaning, and fluffed back up after either brushing or using compressed air.


The pad will stay primed, however, so subsequent applications of fresh product requires no more than a few pea sized drops. That’s it. Do not overuse this product! If ever there was a “less is more” situation, this is it!
Here’s another little deviation from what is generally done with foam pads on a D/A: if you find you need more cut, do not increase the speed of the tool. That’s right – leave it at 4800 opm. To increase cut simply increase the amount of pressure applied, slow down your arm speed over the surface, or both. You can actually use very heavy pressure with this system and still have rotation of the pad. If you do need this extra pressure, however, be sure to finish off with a light pass or two before moving on to the next area.
It’s also a good idea to use at least a bit of caution when removing the microfiber discs from the backing plate. Rather than pulling up just on the microfiber portion of the disc, grab the entire thickness so that you’re directly pulling on the foam to pull it off the hook and loop attachment system.

There really are only three ways you can go wrong here, and they are very easy to avoid but also require some adjustment if you’re used to using foam pads and traditional liquids:
1) Using too much product is a definite no-no. If you’re finding the product difficult to remove, this is the number one culprit. Remember, just a few drops of product per section is all that’s needed.
2) Short cycling is the next most common reason for difficult wipe off and insufficient defect removal. The Microfiber Correction Compound should stay wet for a long time, giving you a long buffing cycle. Take advantage of it and let the product work down to a thin film. Wipe off will be incredibly easy and there will be almost no dust.
3) Keep the pads clean. This just can not be stressed enough. If you aren’t keeping your foam pads clean right now, and you should be, you want to break that bad habit NOW. Keep the pads clean.
It is recommended to use compressed air to clean the MF pads after every section pass. I don't have an air compressor but I did find another method that works great.
BUG SPONGE CLEANING METHOD:
This is the use of a Bug Sponge and the cleaning on-the-fly method.
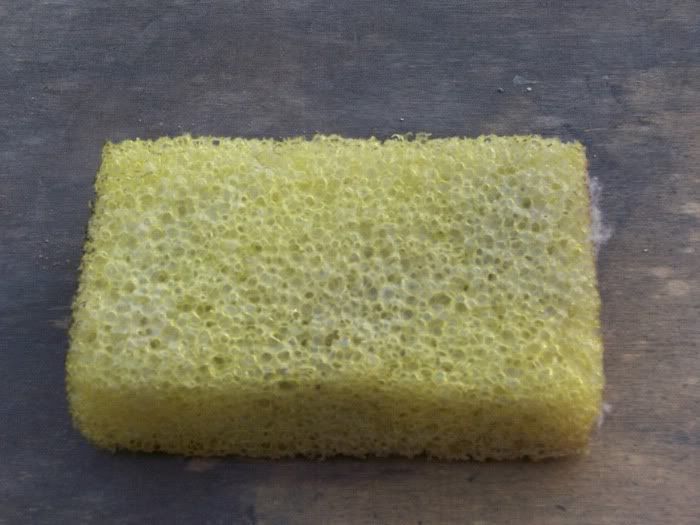
Here is a dirty MF pad. I have cleaned pads that were much more "loaded up" than this with the bug sponge.
To clean the MF pad turn on the machine and run the bug sponge over the face of the pad for about 15 seconds.
After the pad has been cleaned then a few more drops of products on your MF pad and your ready to do your next section pass.
You should be able to polish your entire vehicle with two MF cutting pads and then put 'em in the washing machine when your done.
HOW TO USE:
It is necessary to completely prime the MF pads with correction compound before use so the MF pad has complete coverage and be sure your DA is set to 4800 OPM. (NO FASTER!)
I have included the pad priming information from Megs site to illustrate this process.
Set the DA to 4800 opm refer to your owners manual for the equivalent setting. Apply DA Microfiber Correction Compound directly to the microfiber cutting disc, using just a few drops of product to start. You use a lot less product with this system than with typical liquids and foam pads.
Now, place the pad flat on the paint, turn the tool on and begin working a 2’ x 2’ area with uniform pressure. At this point you are just beginning to prime the pad so don’t worry about defect correction just yet. After just a couple of quick passes turn the tool off and lift the pad off the paint. It should look like this.
Add a few more drops of product to the “clean” areas of the pad and repeat the above process. You want the entire face of the pad to be lightly but uniformly covered with product. Alternatively you could apply some product to the pad and work it in with your fingers, just make sure to NOT overuse the product and to uniformly cover the pad. At this point the pad is fully primed and you can get to work correcting defects.
To do that you want to start with 2 – 3 passes of moderate pressure then follow with 2 – 3 passes of light pressure over the same area. Work in the same small, roughly 24" x 24" area that you should be used to doing with foam pads. Just as with traditional liquids you do not want to go to a dry buff with this system. But you should see the product stay wet for a very generous period of time, and there will be almost no dust to deal with at all. Remove remaining residue using a microfiber towel and continue this process on all areas as necessary.
CLEANING THE MICROFIBER PADS:
For maximum cutting at all times, clean the microfiber disc frequently using compressed air, Meguiar's Professional Pad Conditioning Brush, or Meguiar's Pad Washer. This is a very critical step! With microfiber it is imperative that you clean the pads often and thoroughly. We can not stress this enough! You’ll see the fibers of the pad matt down pretty quickly, but cleaning will fluff them back up and remove excess product.
In the images below you can clearly see the fibers matted down prior to cleaning, and fluffed back up after either brushing or using compressed air.
The pad will stay primed, however, so subsequent applications of fresh product requires no more than a few pea sized drops. That’s it. Do not overuse this product! If ever there was a “less is more” situation, this is it!
Here’s another little deviation from what is generally done with foam pads on a D/A: if you find you need more cut, do not increase the speed of the tool. That’s right – leave it at 4800 opm. To increase cut simply increase the amount of pressure applied, slow down your arm speed over the surface, or both. You can actually use very heavy pressure with this system and still have rotation of the pad. If you do need this extra pressure, however, be sure to finish off with a light pass or two before moving on to the next area.
It’s also a good idea to use at least a bit of caution when removing the microfiber discs from the backing plate. Rather than pulling up just on the microfiber portion of the disc, grab the entire thickness so that you’re directly pulling on the foam to pull it off the hook and loop attachment system.
There really are only three ways you can go wrong here, and they are very easy to avoid but also require some adjustment if you’re used to using foam pads and traditional liquids:
1) Using too much product is a definite no-no. If you’re finding the product difficult to remove, this is the number one culprit. Remember, just a few drops of product per section is all that’s needed.
2) Short cycling is the next most common reason for difficult wipe off and insufficient defect removal. The Microfiber Correction Compound should stay wet for a long time, giving you a long buffing cycle. Take advantage of it and let the product work down to a thin film. Wipe off will be incredibly easy and there will be almost no dust.
3) Keep the pads clean. This just can not be stressed enough. If you aren’t keeping your foam pads clean right now, and you should be, you want to break that bad habit NOW. Keep the pads clean.
It is recommended to use compressed air to clean the MF pads after every section pass. I don't have an air compressor but I did find another method that works great.
BUG SPONGE CLEANING METHOD:
This is the use of a Bug Sponge and the cleaning on-the-fly method.
Here is a dirty MF pad. I have cleaned pads that were much more "loaded up" than this with the bug sponge.
To clean the MF pad turn on the machine and run the bug sponge over the face of the pad for about 15 seconds.
After the pad has been cleaned then a few more drops of products on your MF pad and your ready to do your next section pass.
You should be able to polish your entire vehicle with two MF cutting pads and then put 'em in the washing machine when your done.