Todd@RUPES
Just a regular guy
AutopiaForums has multiple options that let you customize your post in numerous ways.
You can change the font in which your sentence is posted.
You can change the size of the font.
You can make your words bold, italicized, or underlined. You can even do all three.
You can justify your sentences to the left...
You can insert pictures, hyperlinks (links to other websites in text), or manage attachments.
And you can do any of the above in different colors.
How To Use Advanced Posting Features.
If you are unsure on how to post a reply please review this thread first: How To Post a New Thread and a Reply.
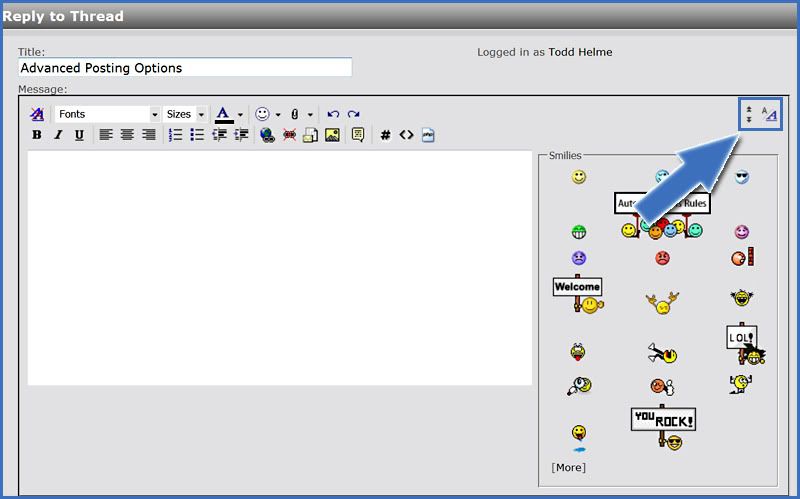
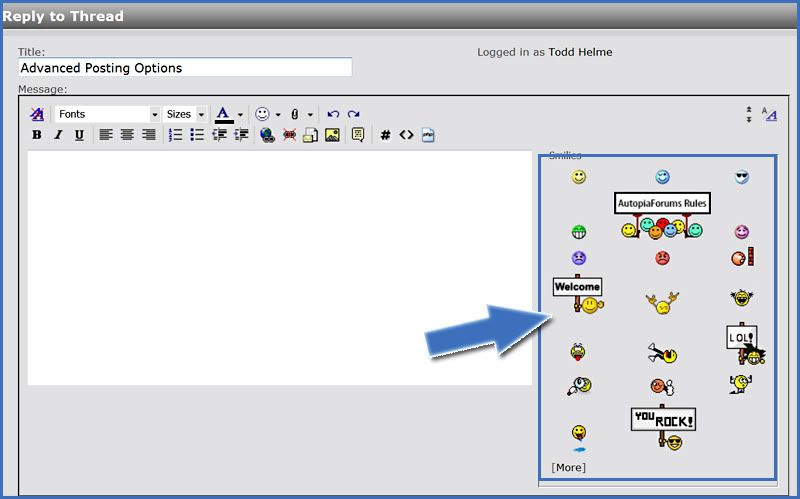
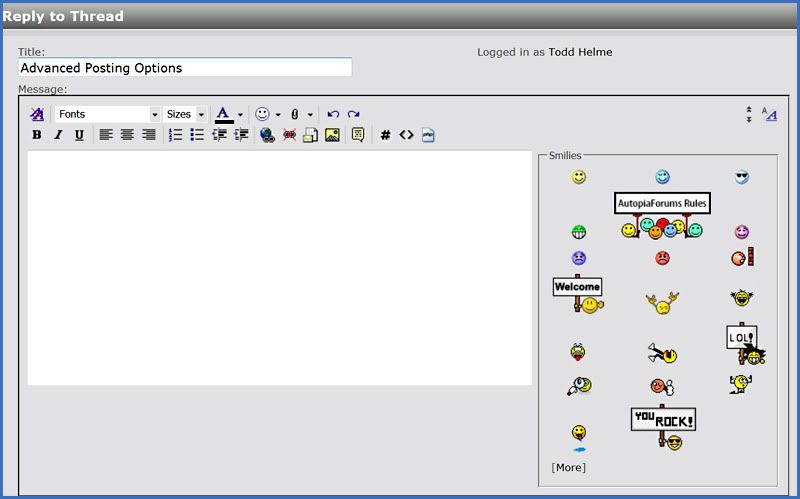
Here is the Post a Reply box as it appears on this forum.
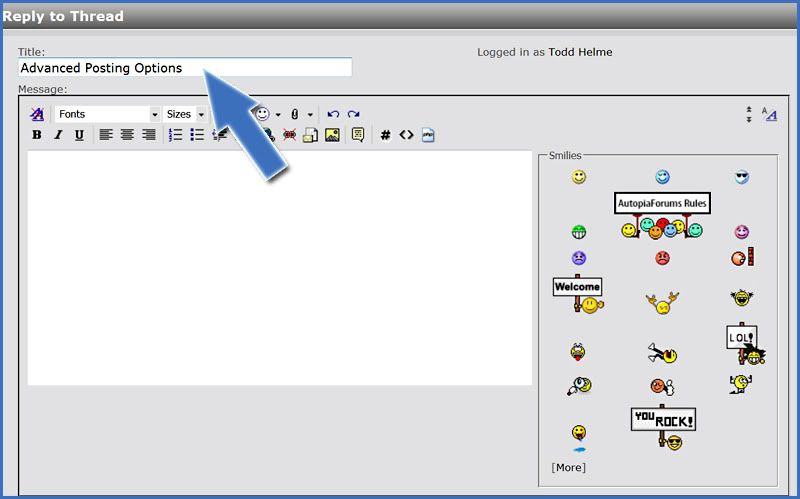
The first entry field (blue arrow) is the title. When you are creating a new thread this will be the title for the thread visible on the other forum pages. When posting a reply you can change the title to address a particular topic in the discussion.
The text/copy box is where you type the text you want displayed.
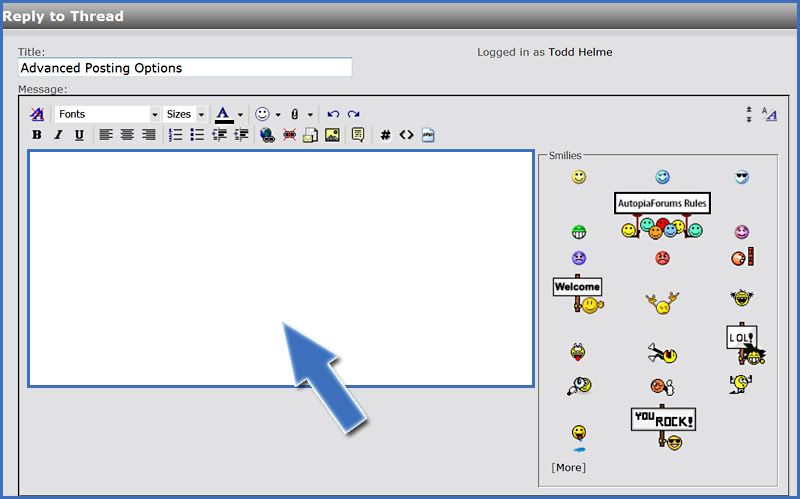
Just above the text/copy box is numerous icons that allow you do customize your post by placing your text in properly formatted tags.
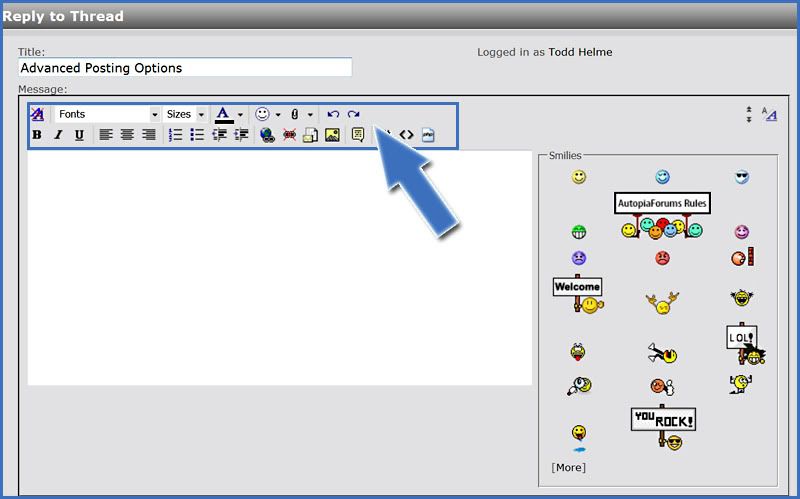
How to use the formatting icons.
When you type text into the text/copy box it will post in a default font in plain black. In order to alter the look of the text when posted it must be wrapped in the proper tags. Tags are like a disguise that allows the readers to see the text displayed how you want.
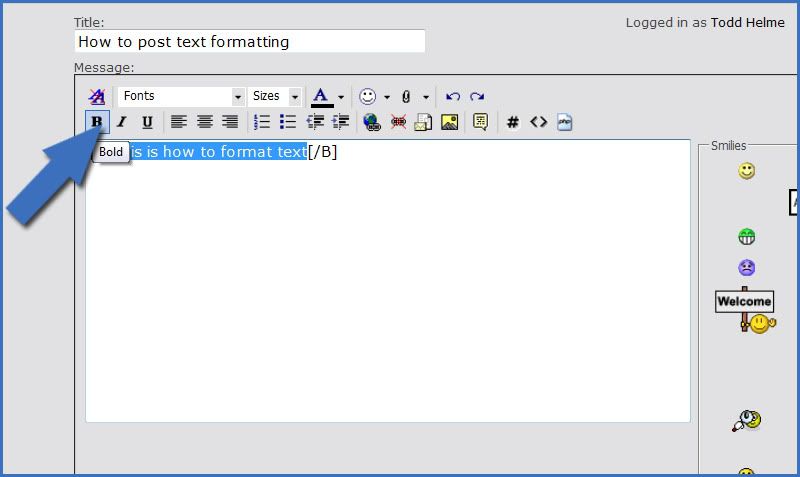
Let's say you want to make a sentence appear bold. Type the sentence into the text/copy box.
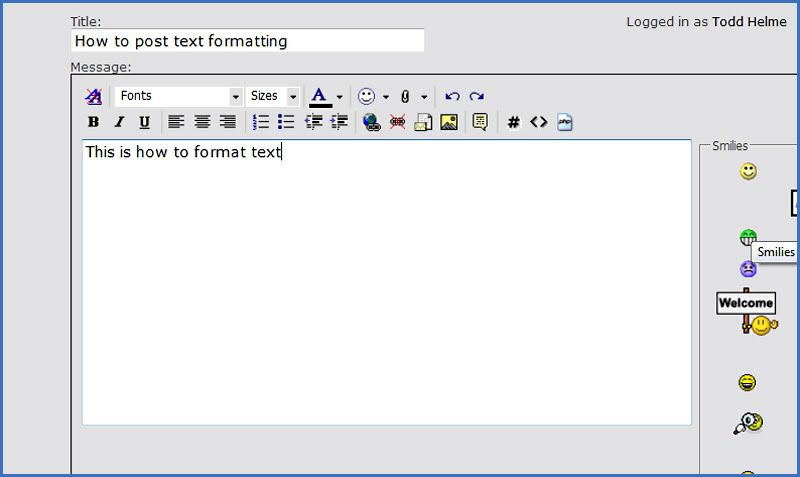
Before you can format the text using the tags, you must highlight the text so that AutopiaForums understands what you are trying to format. Click either the beginning or end of the sentence you want to form and hold the mouse button down. Now 'drag' it over the area to highlight it blue.
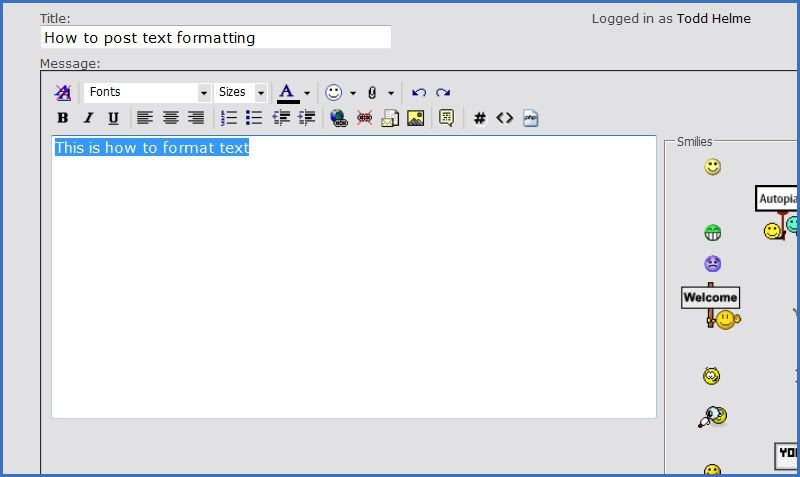
To insert the bold tags select the bold icon. This wraps the selected text with the appropriate tags.
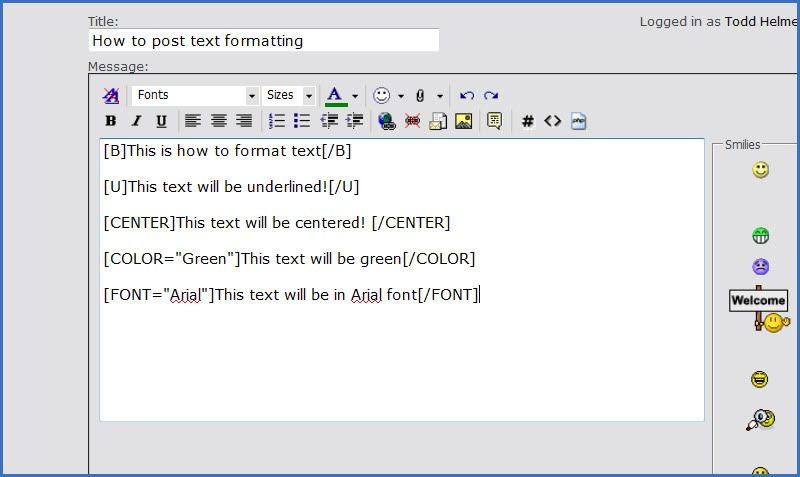
To get a little bit more fancy you can high light various parts and format them differently by using the correct icon.
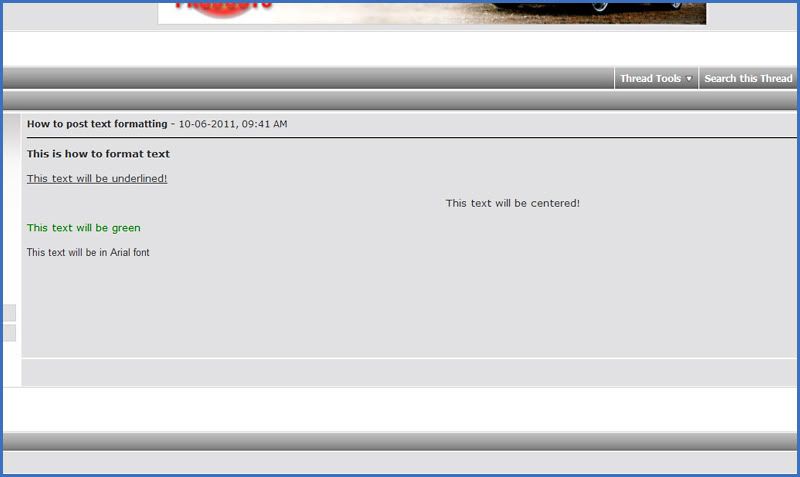
Here is what the text looks like after being published to the site by clicking the Submit New Reply button at the bottom of the page.
Understanding the Icons

Remove Text Formatting- Use this icon to remove any formatting tags from the selected text.
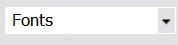
Font Selection- Use this icon to apply a different style of font to the selected text. Selecting the small drop arrow will bring up a drop down menu with a list of available texts.
 Sizes- Use this icon to change the size of the text selected. The default size is number 2.
 Colors- Use this icon to change the color of the selected text. Selecting the small drop arrow will bring up a drop down menu with various shades of color.
 Smilies- Use this icon to place a smiley face into the text. Some smiley faces are animated. Selecting the small drop arrow will bring up a drop down menu with various styles of smiley faces.
 Attachments- Use this icon to attach files or pictures to the bottom of your post that other forum members will be able to select.
 Undo- This icon will undo your previous action.
 Redo- This icon will redo your previous action.
 Bold- Use this icon to make your selected text appear bold.
 Italic- Use this icon to make your selected text appear italic.
 Underline- Use this icon to underline the selected text.
 Align Left- Use this icon to align the selected text to the left. This is the default setting.
 Align Center- Use this icon to align the selected text or pictures to the center.
 Align Right- Use this icon to align the selected text to the right side of the screen.
You can change the font in which your sentence is posted.
You can change the size of the font.
You can make your words bold, italicized, or underlined. You can even do all three.
You can justify your sentences to the left...
...the center...
...or to the right.
You can insert pictures, hyperlinks (links to other websites in text), or manage attachments.
And you can do any of the above in different colors.
How To Use Advanced Posting Features.
If you are unsure on how to post a reply please review this thread first: How To Post a New Thread and a Reply.
Here is the Post a Reply box as it appears on this forum.
The first entry field (blue arrow) is the title. When you are creating a new thread this will be the title for the thread visible on the other forum pages. When posting a reply you can change the title to address a particular topic in the discussion.
The text/copy box is where you type the text you want displayed.
Just above the text/copy box is numerous icons that allow you do customize your post by placing your text in properly formatted tags.
How to use the formatting icons.
When you type text into the text/copy box it will post in a default font in plain black. In order to alter the look of the text when posted it must be wrapped in the proper tags. Tags are like a disguise that allows the readers to see the text displayed how you want.
Let's say you want to make a sentence appear bold. Type the sentence into the text/copy box.
Before you can format the text using the tags, you must highlight the text so that AutopiaForums understands what you are trying to format. Click either the beginning or end of the sentence you want to form and hold the mouse button down. Now 'drag' it over the area to highlight it blue.
To insert the bold tags select the bold icon. This wraps the selected text with the appropriate tags.
To get a little bit more fancy you can high light various parts and format them differently by using the correct icon.
Here is what the text looks like after being published to the site by clicking the Submit New Reply button at the bottom of the page.
Understanding the Icons
Remove Text Formatting- Use this icon to remove any formatting tags from the selected text.
Font Selection- Use this icon to apply a different style of font to the selected text. Selecting the small drop arrow will bring up a drop down menu with a list of available texts.