radarryan
New member
Well, this all started when I got a bad scratch on my car. I was super bummed since my finger catches, but I was able to lessen the appearance (to the point where one day I couldn’t even see it without really trying to look) with Menzerna FG400 and a HydroTech Cyan cutting pad.
I previously had EXOv2 as the topcoat on top of C1, and I wanted to take this opportunity to add another layer or two of EXOv2 on top of the existing layers. I knew how to prep the area for the paint that was bare and polished, but I wasn’t sure about the area that had EXO already on it.
I posted a thread (Applying EXOv2 on top of previous layers. How to prep? - Auto Geek Online Auto Detailing Forum) to try to get the forum’s assistance on what the best course of action would be, and came away fairly certain that I knew what to do.
After washing the car, I decontaminated the paint with GTechniq Panel Wipe for the painted surfaces, and undiluted IPA for the clear bra. After everything had been wiped away, I felt confident that I could apply EXOv2 on top of the entire surface. I decided to use a microfiber applicator block on recommendation from GTechniq. They have said that it allows the EXOv2 to go even further, and with my experience I agree.
I opted for two coats of EXOv2, with about 45 minutes in between the coats. Everything was very simple with application and removal. It went even smoother than the first time I worked with the product, when I had streaks. The streaks just needed a bit of extra elbow grease to be removed, but luckily this didn’t happen this time.

One thing I noticed is the microfiber applicator above was thicker than the one that I used before. It is about twice as thick as the previous, and as such I believe that it absorbed more product than before. I think that I used more EXOv2 than if I were to use another, thinner microfiber applicator, makeup applicators, or suede cloth included with the EXOv2 package. I opted for the microfiber applicator based on my experience with it, and as such it proved to be an easy process, but may have contributed to using a few more mL of product than usual. That being said, with two coats of EXOv2, here’s how much product I used.

And a second view of the bottle.

So even with using more product than needed due to the applicator waste, there are still quite a few applications left in the bottle. I would think that out of the 30mL bottle, over 20mL remain. Now, my car is pretty small and doesn’t have a top, but if you think about the waste, I would say that an average of 5mL would be used per coat. That being said, I have heard some getting two coats on an average sized sedan out of 5mL.
To look at it per ounce, retail, it is about $1.67 per mL. So one coat of 5mL is about $8.35, making the two coats $18.70. I think it makes it a pretty economical product, especially since it lasts a long time – over two years and 600 washes, according to manufacturer tests.
So, with all that out of the way, now onto how it looks – the important stuff! Here’s the pictures.
Rear from the left.

Back with the badge, looking up.

Rear from the right.

Left side.

Front left.

Front.

Hood, close.

Hood, with reflection.

Front right.

Right side.

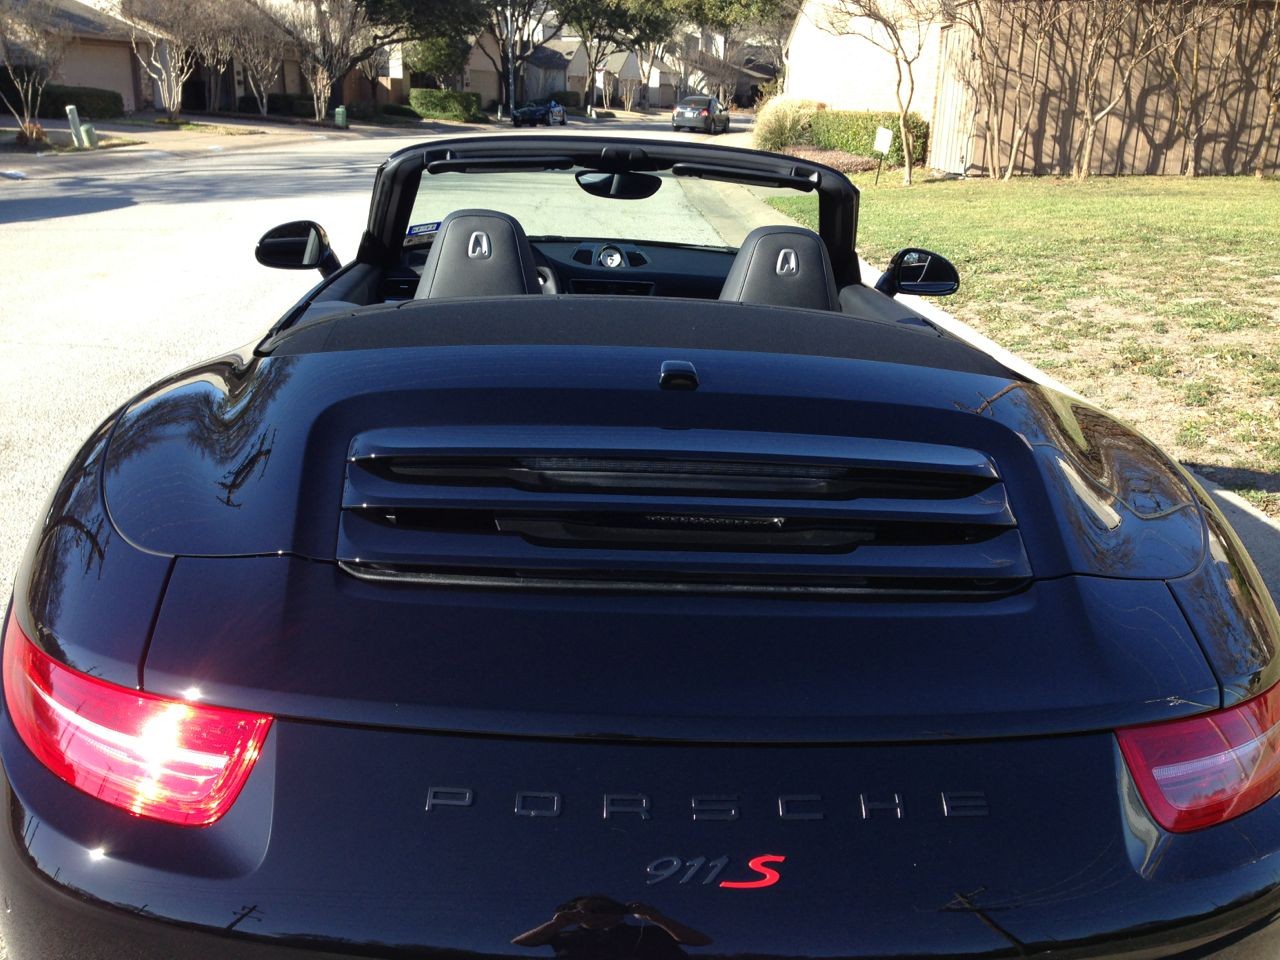
Back, eye level.
Left front, stretching.

Left, from afar.

Front, from afar.

Right, from afar.

Conclusion:
I think that the pictures speak for themselves. The reflections are crisp, the shine deep, the paint is slick and the overall look, in my opinion, is out of the world! From what I’ve heard, additional coats increase the gloss, but I’ve also read that two to three is really the optimal. I think you would be better off applying additional (more than the initial two) coats 6 months apart, rather than upfront, to kind of “refresh” the coating. As we’ve seen here, it is quite easy to add additional coats at any time – just wash, wipe down with a panel prep (Panel Wipe, Eraser, or IPA), and apply the coating. It’s really as easy that, and the look it gives is the reason why I bought the product in the first place. That, and the hydrophobic abilities make washing, and especially drying, a breeze.
I hope you all enjoyed looking at the pictures, and if you have any comments or questions, please don’t hesitate to ask. Happy detailing! :rockon
I previously had EXOv2 as the topcoat on top of C1, and I wanted to take this opportunity to add another layer or two of EXOv2 on top of the existing layers. I knew how to prep the area for the paint that was bare and polished, but I wasn’t sure about the area that had EXO already on it.
I posted a thread (Applying EXOv2 on top of previous layers. How to prep? - Auto Geek Online Auto Detailing Forum) to try to get the forum’s assistance on what the best course of action would be, and came away fairly certain that I knew what to do.
After washing the car, I decontaminated the paint with GTechniq Panel Wipe for the painted surfaces, and undiluted IPA for the clear bra. After everything had been wiped away, I felt confident that I could apply EXOv2 on top of the entire surface. I decided to use a microfiber applicator block on recommendation from GTechniq. They have said that it allows the EXOv2 to go even further, and with my experience I agree.
I opted for two coats of EXOv2, with about 45 minutes in between the coats. Everything was very simple with application and removal. It went even smoother than the first time I worked with the product, when I had streaks. The streaks just needed a bit of extra elbow grease to be removed, but luckily this didn’t happen this time.
One thing I noticed is the microfiber applicator above was thicker than the one that I used before. It is about twice as thick as the previous, and as such I believe that it absorbed more product than before. I think that I used more EXOv2 than if I were to use another, thinner microfiber applicator, makeup applicators, or suede cloth included with the EXOv2 package. I opted for the microfiber applicator based on my experience with it, and as such it proved to be an easy process, but may have contributed to using a few more mL of product than usual. That being said, with two coats of EXOv2, here’s how much product I used.
And a second view of the bottle.
So even with using more product than needed due to the applicator waste, there are still quite a few applications left in the bottle. I would think that out of the 30mL bottle, over 20mL remain. Now, my car is pretty small and doesn’t have a top, but if you think about the waste, I would say that an average of 5mL would be used per coat. That being said, I have heard some getting two coats on an average sized sedan out of 5mL.
To look at it per ounce, retail, it is about $1.67 per mL. So one coat of 5mL is about $8.35, making the two coats $18.70. I think it makes it a pretty economical product, especially since it lasts a long time – over two years and 600 washes, according to manufacturer tests.
So, with all that out of the way, now onto how it looks – the important stuff! Here’s the pictures.
Rear from the left.
Back with the badge, looking up.
Rear from the right.
Left side.
Front left.
Front.
Hood, close.
Hood, with reflection.
Front right.
Right side.
Back, eye level.
Left front, stretching.
Left, from afar.
Front, from afar.
Right, from afar.
Conclusion:
I think that the pictures speak for themselves. The reflections are crisp, the shine deep, the paint is slick and the overall look, in my opinion, is out of the world! From what I’ve heard, additional coats increase the gloss, but I’ve also read that two to three is really the optimal. I think you would be better off applying additional (more than the initial two) coats 6 months apart, rather than upfront, to kind of “refresh” the coating. As we’ve seen here, it is quite easy to add additional coats at any time – just wash, wipe down with a panel prep (Panel Wipe, Eraser, or IPA), and apply the coating. It’s really as easy that, and the look it gives is the reason why I bought the product in the first place. That, and the hydrophobic abilities make washing, and especially drying, a breeze.
I hope you all enjoyed looking at the pictures, and if you have any comments or questions, please don’t hesitate to ask. Happy detailing! :rockon
")