Hello everyone - I usually don't post here, as most of my questions are answered through just reading. Yesterday, after maybe a year of neglect, I detailed my engine bay and polished out my hazy headlights. I didn't think to take any "before" pictures, but rest assured it was pretty dirty. This is the first time I have really tried detailing the engine and polishing (wet sanding) the head lights, so I'd appreciate any critique of my work.
In the past I've only wiped down the engine bay, but I wanted to clean it a bit more thoroughly. I was disappointed that I wasn't able to clean all the painted sections, especially the lower parts of the firewall, and the areas behind the brake booster. I also didn't clean around the oil cooler and had trouble cleaning some areas beneath the intake manifold, and the lower parts of the engine bay in general. I'm not sure how "deep" most pros go when detailing an engine bay. I'd like to know if there was more I should've done, or any tricks to make it easier (I spent about 5 hours, but I worked fairly slowly, as I wanted to be careful)
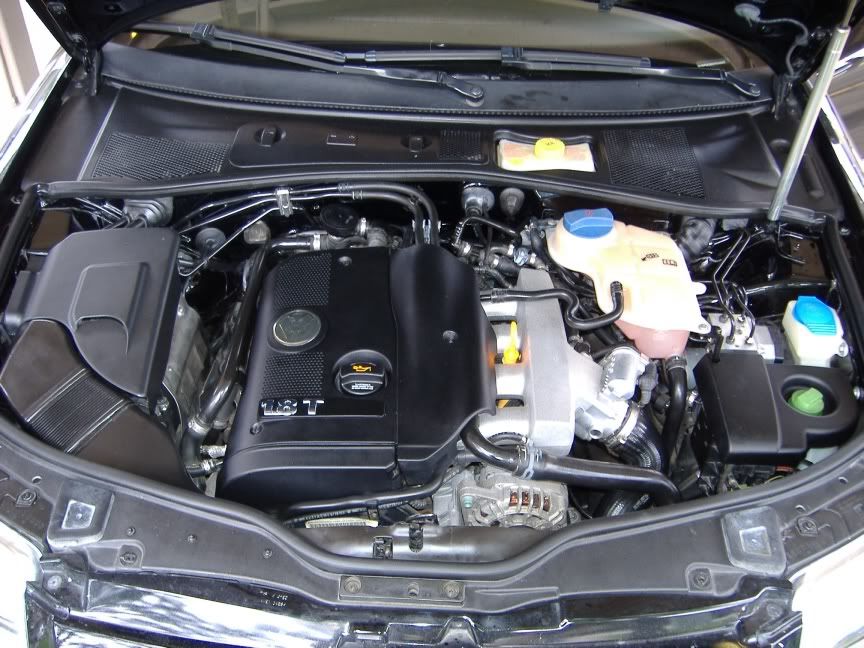
ENGINE BAY PROCESS:
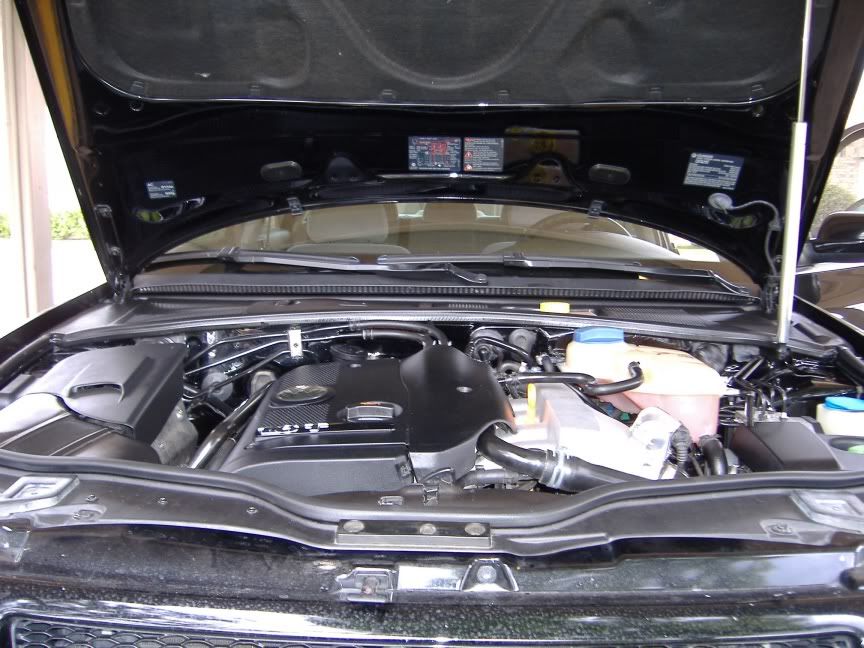
I started by removing all the plastic pieces, intake ducting, covers, and rubber seals and set them aside. Then I rinsed the large painted areas, and the crevice between the engine bay and hood (the area where the rubber seals sit), and washed it all down with regular car wash soap and water, and did the same for the underside of the hood (I did not remove the sound dampening pad. Wasn't sure if I'd be able to get it back on). Carefully rinsed it with a spray bottle and dried it. I found my self going back and spot cleaning various nooks and crannies I missed the first time. It's hard to get EVERY area clean.
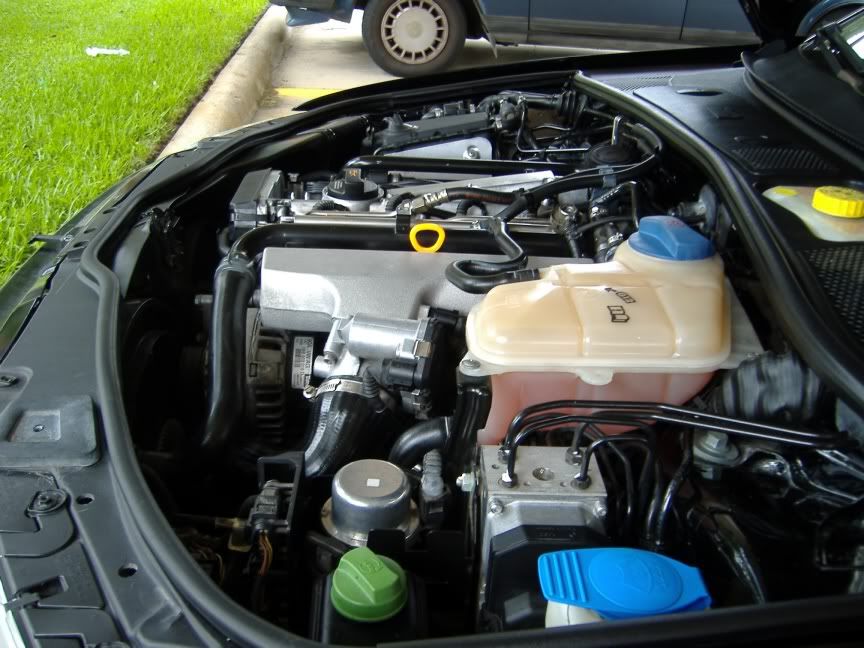
Then I wiped down the plastic fluid reservoirs, ECU box, brake booster, and I also removed the coolant tank and cleaned the area beneath that, wiped down the cables, hoses etc. Also, behind the driver side headlight, in front of the power steering fluid bottle is a plastic piece holding three electrical connectors. I removed that, and cleaned that area as best I could.
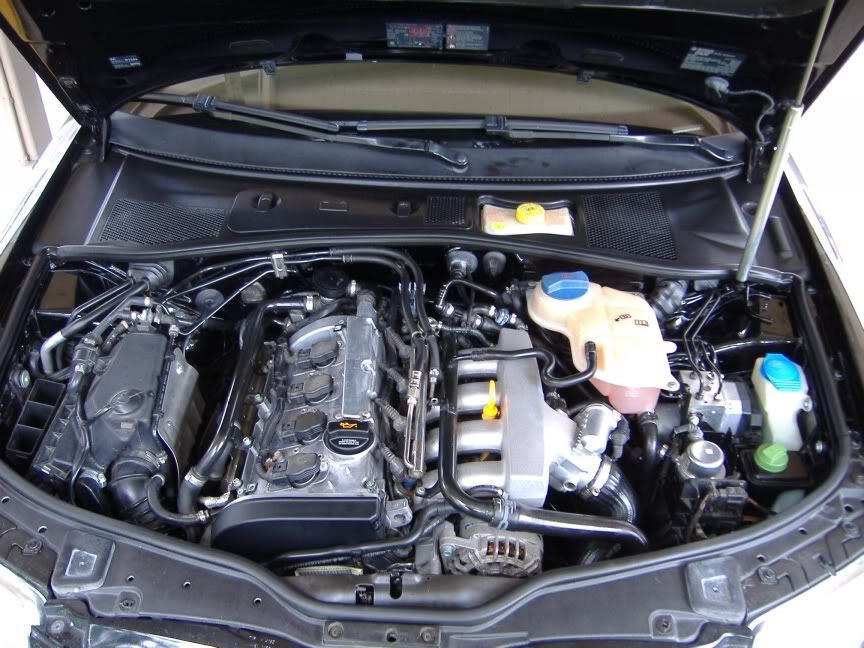
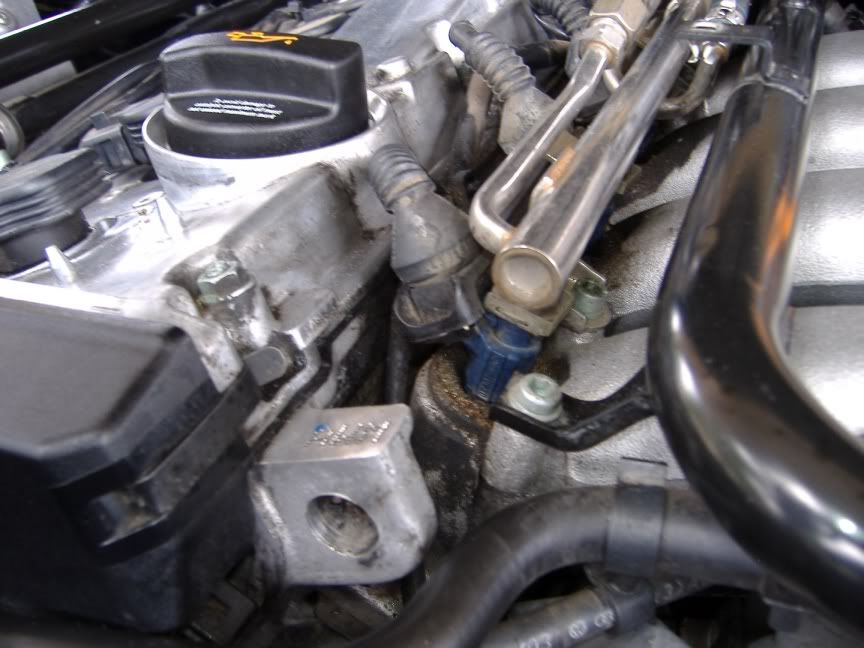
After that, I covered the alternator with a plastic garbage bag, and cleaned the intake manifold, and throttle body "housing" using a toothbrush and Simple Green. Following that I removed the coil packs, and covered the holes with paper towels, and carefully cleaned the valve cover with simple green and the same tooth brush. I had to be careful here because I didn't want to slop cleaner everywhere. This part was frustrating because I couldn't get every little area, and as you can tell in the pictures, I had a hard time getting the area near the fuel injectors clean. There was a LOT of dirt there. I also carefully wiped the dirt and grime around the oil filler cap, and tried getting as much dried oil off of the dipstick tube as I could. Again this was a tight area. Also removed the oil cap and cleaned it.
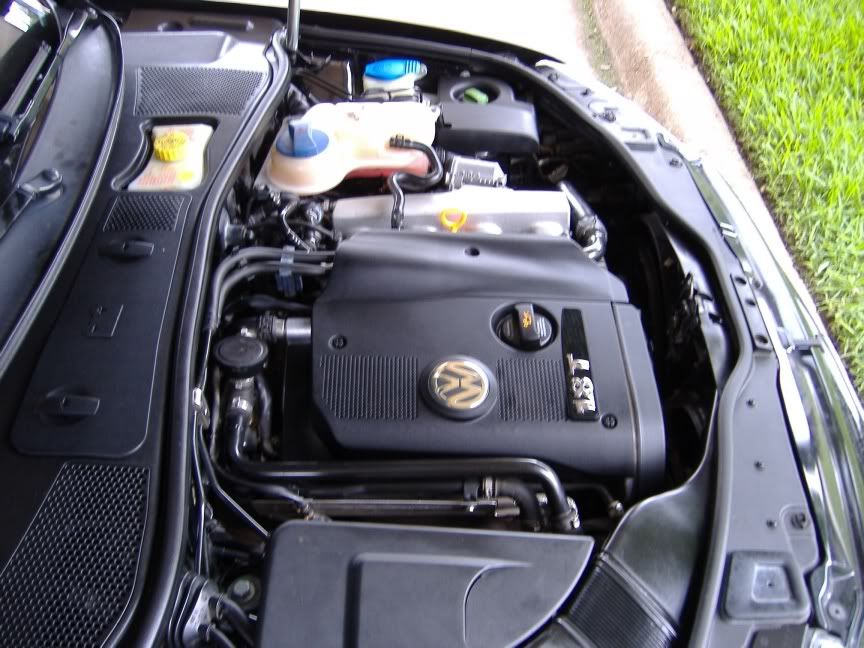
From there I spot cleaned any remaining areas I could get, went over the hood strut. Then I emptied and refilled my wash bucket, and cleaned off all those plastic covers, intake pieces, and rubber seals, followed by a thorough covering with 303 Aerospace Protectant. I then went over all the wires, and rubber hoses, plastic fluid reservoirs (coolant, brake fluid, PS fluid and washer fluid) and wiped those down with 303 as well.
At first I wasn't sure how much I wanted to do, so, stupidly, I neglected to remove the battery and clean under there. I'll just remember that for next time.

Couldn't get into all these areas. It made the brush I was using a nasty greasy mess. I wasn't sure if spraying Simple Green directly on to all of this would be a good idea. It looks better but still nasty:
--------------------------------
Headlights - On a scale of 1 - 10, with 1 being brand new, and 10 being completely yellow and hazy all over, my headlights were a 7. I did the right (passenger) side with the Micro Mesh kit a few months ago. Started with a much too aggressive pad and f****d it up. I re-did it and there are still some light scratches that dont come through in the pictures. The left (driver) I did with automotive grade wet sand paper, rubbing compound and plastic polish. (Also re-did the right side with this as well). It came out MUCH better the first time, but there is still a very very minor amount of light scratches, almost like the holograming or swirls you see in paint. Again, this is so light it doesn't really come out in the pictures. I was unable to get the bottom edges as good. I taped the painted surfaces off, but I still didn't want to go into it too hard.
Process:
Tape off painted areas
Alternate horizontal and vertical wet sanding strokes
600
800
1000
1500
2000
3M Perfect it II Rubbing compound (3-4 applications)
Mothers Plastic Polish (2 applications)
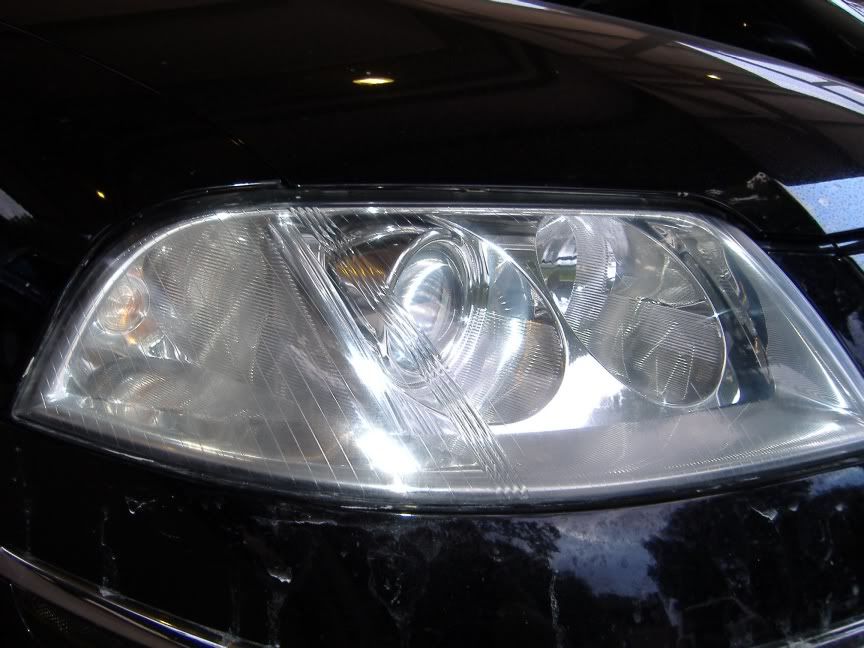
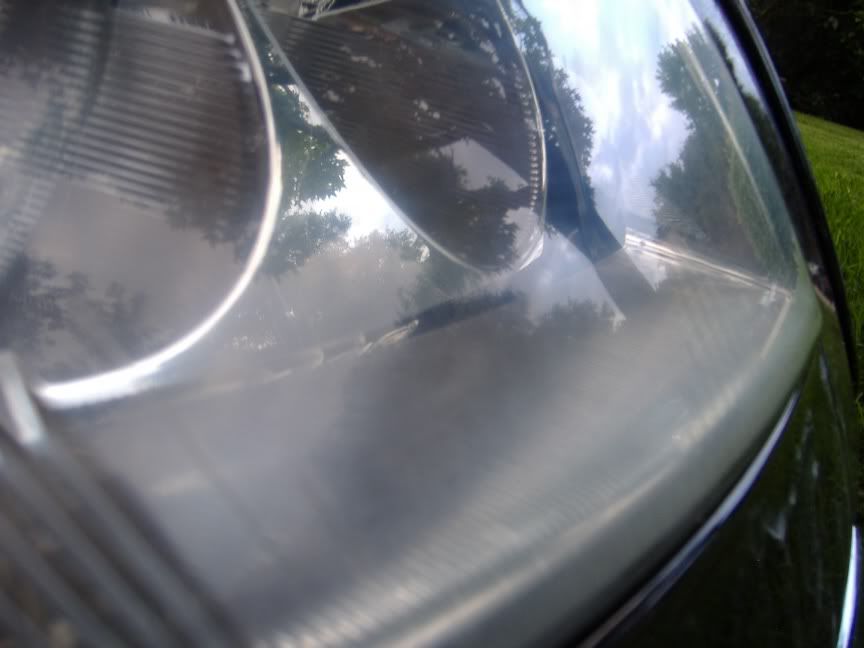
The only before pic I have (looks better than it actually was. The driver side was worse than the passenger, but hopefully you get the idea).

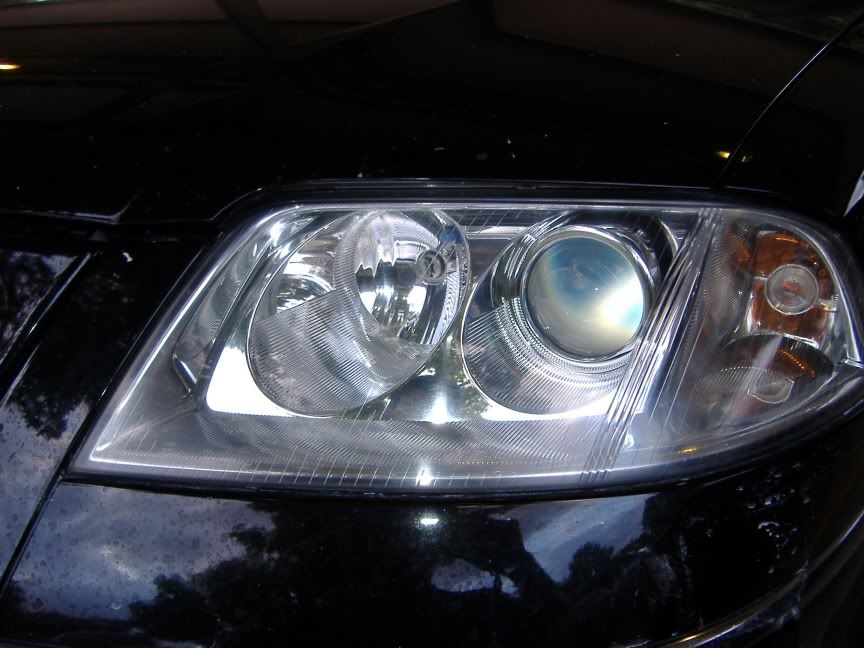
After:
Notice some hazy-ness on the corner. Thats from getting too aggressive the first time. It looks better but it isnt fully corrected.
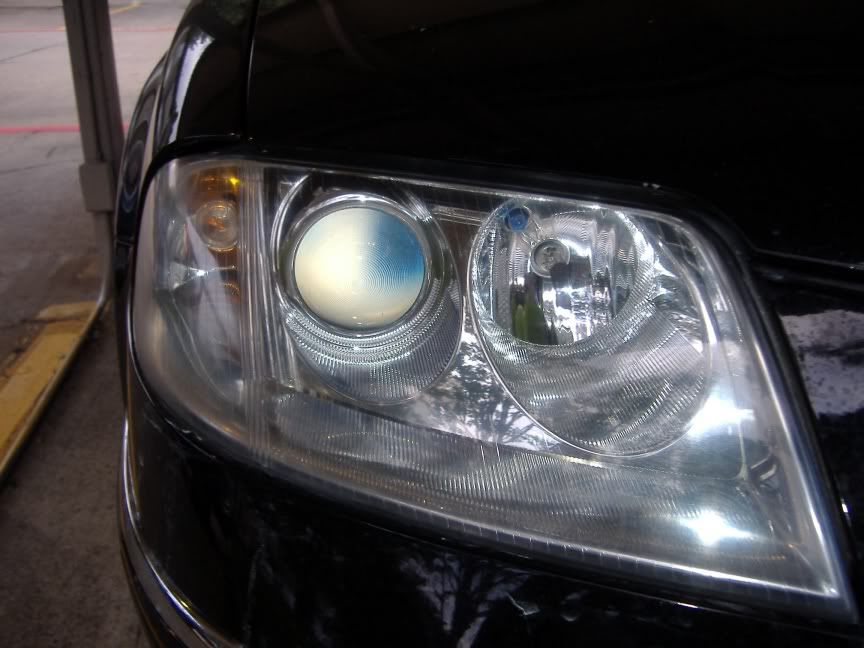
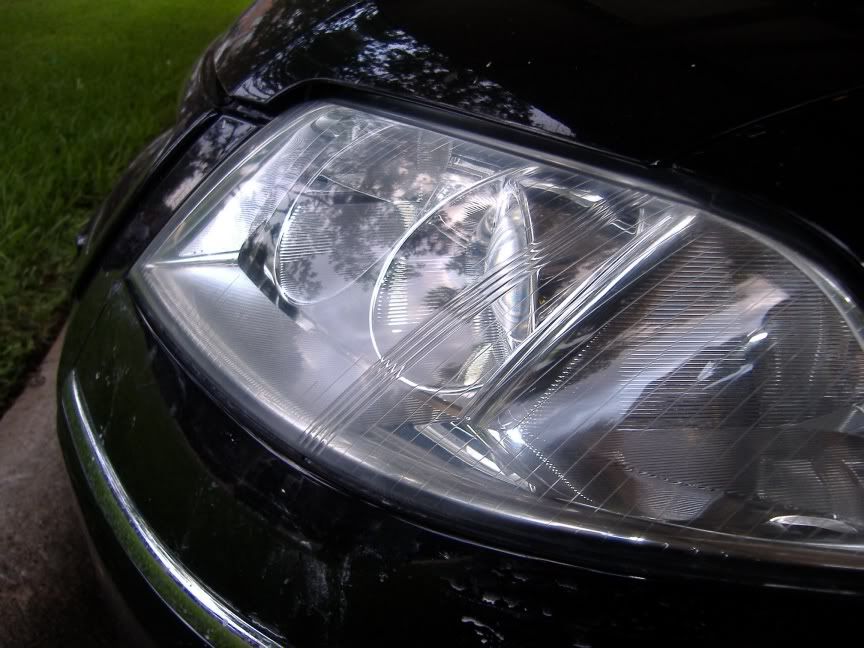
Still some haze on the bottom edge. I didn't want to go crazy and scratch through the tape, into the paint.
Finally, yes I know the exterior of the car is dirty, I wanted to get this done first because I knew water and crap was going to drip a little on the outside of the car. I just washed the exterior this morning. Scottwax detailed my car back in March and did a bang up job. It's been looking great but in the last few weeks I've been noticing some swirls and marring coming back, despite my attempts to be gentle, follow the"guide to detailing".
Thanks for looking and any help!
In the past I've only wiped down the engine bay, but I wanted to clean it a bit more thoroughly. I was disappointed that I wasn't able to clean all the painted sections, especially the lower parts of the firewall, and the areas behind the brake booster. I also didn't clean around the oil cooler and had trouble cleaning some areas beneath the intake manifold, and the lower parts of the engine bay in general. I'm not sure how "deep" most pros go when detailing an engine bay. I'd like to know if there was more I should've done, or any tricks to make it easier (I spent about 5 hours, but I worked fairly slowly, as I wanted to be careful)
ENGINE BAY PROCESS:
I started by removing all the plastic pieces, intake ducting, covers, and rubber seals and set them aside. Then I rinsed the large painted areas, and the crevice between the engine bay and hood (the area where the rubber seals sit), and washed it all down with regular car wash soap and water, and did the same for the underside of the hood (I did not remove the sound dampening pad. Wasn't sure if I'd be able to get it back on). Carefully rinsed it with a spray bottle and dried it. I found my self going back and spot cleaning various nooks and crannies I missed the first time. It's hard to get EVERY area clean.
Then I wiped down the plastic fluid reservoirs, ECU box, brake booster, and I also removed the coolant tank and cleaned the area beneath that, wiped down the cables, hoses etc. Also, behind the driver side headlight, in front of the power steering fluid bottle is a plastic piece holding three electrical connectors. I removed that, and cleaned that area as best I could.
After that, I covered the alternator with a plastic garbage bag, and cleaned the intake manifold, and throttle body "housing" using a toothbrush and Simple Green. Following that I removed the coil packs, and covered the holes with paper towels, and carefully cleaned the valve cover with simple green and the same tooth brush. I had to be careful here because I didn't want to slop cleaner everywhere. This part was frustrating because I couldn't get every little area, and as you can tell in the pictures, I had a hard time getting the area near the fuel injectors clean. There was a LOT of dirt there. I also carefully wiped the dirt and grime around the oil filler cap, and tried getting as much dried oil off of the dipstick tube as I could. Again this was a tight area. Also removed the oil cap and cleaned it.
From there I spot cleaned any remaining areas I could get, went over the hood strut. Then I emptied and refilled my wash bucket, and cleaned off all those plastic covers, intake pieces, and rubber seals, followed by a thorough covering with 303 Aerospace Protectant. I then went over all the wires, and rubber hoses, plastic fluid reservoirs (coolant, brake fluid, PS fluid and washer fluid) and wiped those down with 303 as well.
At first I wasn't sure how much I wanted to do, so, stupidly, I neglected to remove the battery and clean under there. I'll just remember that for next time.
Couldn't get into all these areas. It made the brush I was using a nasty greasy mess. I wasn't sure if spraying Simple Green directly on to all of this would be a good idea. It looks better but still nasty:
--------------------------------
Headlights - On a scale of 1 - 10, with 1 being brand new, and 10 being completely yellow and hazy all over, my headlights were a 7. I did the right (passenger) side with the Micro Mesh kit a few months ago. Started with a much too aggressive pad and f****d it up. I re-did it and there are still some light scratches that dont come through in the pictures. The left (driver) I did with automotive grade wet sand paper, rubbing compound and plastic polish. (Also re-did the right side with this as well). It came out MUCH better the first time, but there is still a very very minor amount of light scratches, almost like the holograming or swirls you see in paint. Again, this is so light it doesn't really come out in the pictures. I was unable to get the bottom edges as good. I taped the painted surfaces off, but I still didn't want to go into it too hard.
Process:
Tape off painted areas
Alternate horizontal and vertical wet sanding strokes
600
800
1000
1500
2000
3M Perfect it II Rubbing compound (3-4 applications)
Mothers Plastic Polish (2 applications)
The only before pic I have (looks better than it actually was. The driver side was worse than the passenger, but hopefully you get the idea).
After:
Notice some hazy-ness on the corner. Thats from getting too aggressive the first time. It looks better but it isnt fully corrected.
Still some haze on the bottom edge. I didn't want to go crazy and scratch through the tape, into the paint.
Finally, yes I know the exterior of the car is dirty, I wanted to get this done first because I knew water and crap was going to drip a little on the outside of the car. I just washed the exterior this morning. Scottwax detailed my car back in March and did a bang up job. It's been looking great but in the last few weeks I've been noticing some swirls and marring coming back, despite my attempts to be gentle, follow the"guide to detailing".
Thanks for looking and any help!