Flannigan
New member
Hi everyone, got a really special, at least to me, car to work on this weekend. It's a new Shelby GT-500. After a few improper washes, it got swirls up fairly bad. Nothing terrible, but certainly not what an iconic car like this should look like. The owner wanted to get the paint looking as perfect as possible, and learn how to care for it so that the swirls would not come back after the next wash.
As usual I started with the wheels, tires and wheel wells. I want to start by saying these wheels were the biggest PITA to clean due to all the spokes and holes throughout them. Nothing that was too terrible, but certainly on the tedious side of things. The wheels were cleaned with Iron X and an array of different brushes, while the tires and wheel wells were cleaned with Meguiars APC+. The wheels were sealed with 4* Paint Sealant, the tires were dressed with Blackfire Tire Gel, and the wells were dressed with Meguiars Hyper Dressing
Before:

Cleaning off the dealer applied tire shine:

I forgot to get a close up after on the wheels, so this one will have to do.

Next up was the engine bay. No before pictures because it was in fairly good shape to begin with. I wiped down all of the components, polished the underside of the hood with Optimum Poli Seal, and then dressed all the plastic and rubber with Sonus Trim and Motor Kote. Here is how it turned out.

Next up it was time to get the vehicle cleaned up and get a good look at the true condition of the paint. i started by foaming the vehicle with a mix of Meguiars Gold Class and APC to help remove any glaze or LSP that the dealership may have applied.

While the foam was left to dwell I used a soft RaceGlaze brush to agitate the emblems, body seams, trim, and fuel filler area to break up any build up dirt and grime.

The vehicle was then pressure washed off, and washed with Meguiars HyperWash and a Griots MF Wash Pad. Before drying I used a fine clay to remove a little bit of bonded contaminants. Most of the car was fairly clean, but a few of the lower panels had some bonded contaminants that were removed. Finally the vehicle was dried with the Masterblaster.
The first day the vehicle was dropped off it was already dark by the time I finished cleaning the vehicle, so the first couple of "sun" pics were taked with a hand heal LED light to show the swirls. The next morning I took a few pictures with the sun of the swirls that I had't gotten to yet.


So as you can see, the paint isn't in terrible condition, but it certainly needs to be taken care of. after some testing I came up with a two step approach. The first step was Menzerna SIP on a Yellow Uber pad with the Dewalt 849x, and the second step was Menzerna 106fa on a Green Uber pad with the Meguiars G110. Here is how it turned out.


i had the camera settings off on these two photos, and tried to lighten them up as best I could to show the sun shots. just wanted to let everyone know.


A few reflection pics.


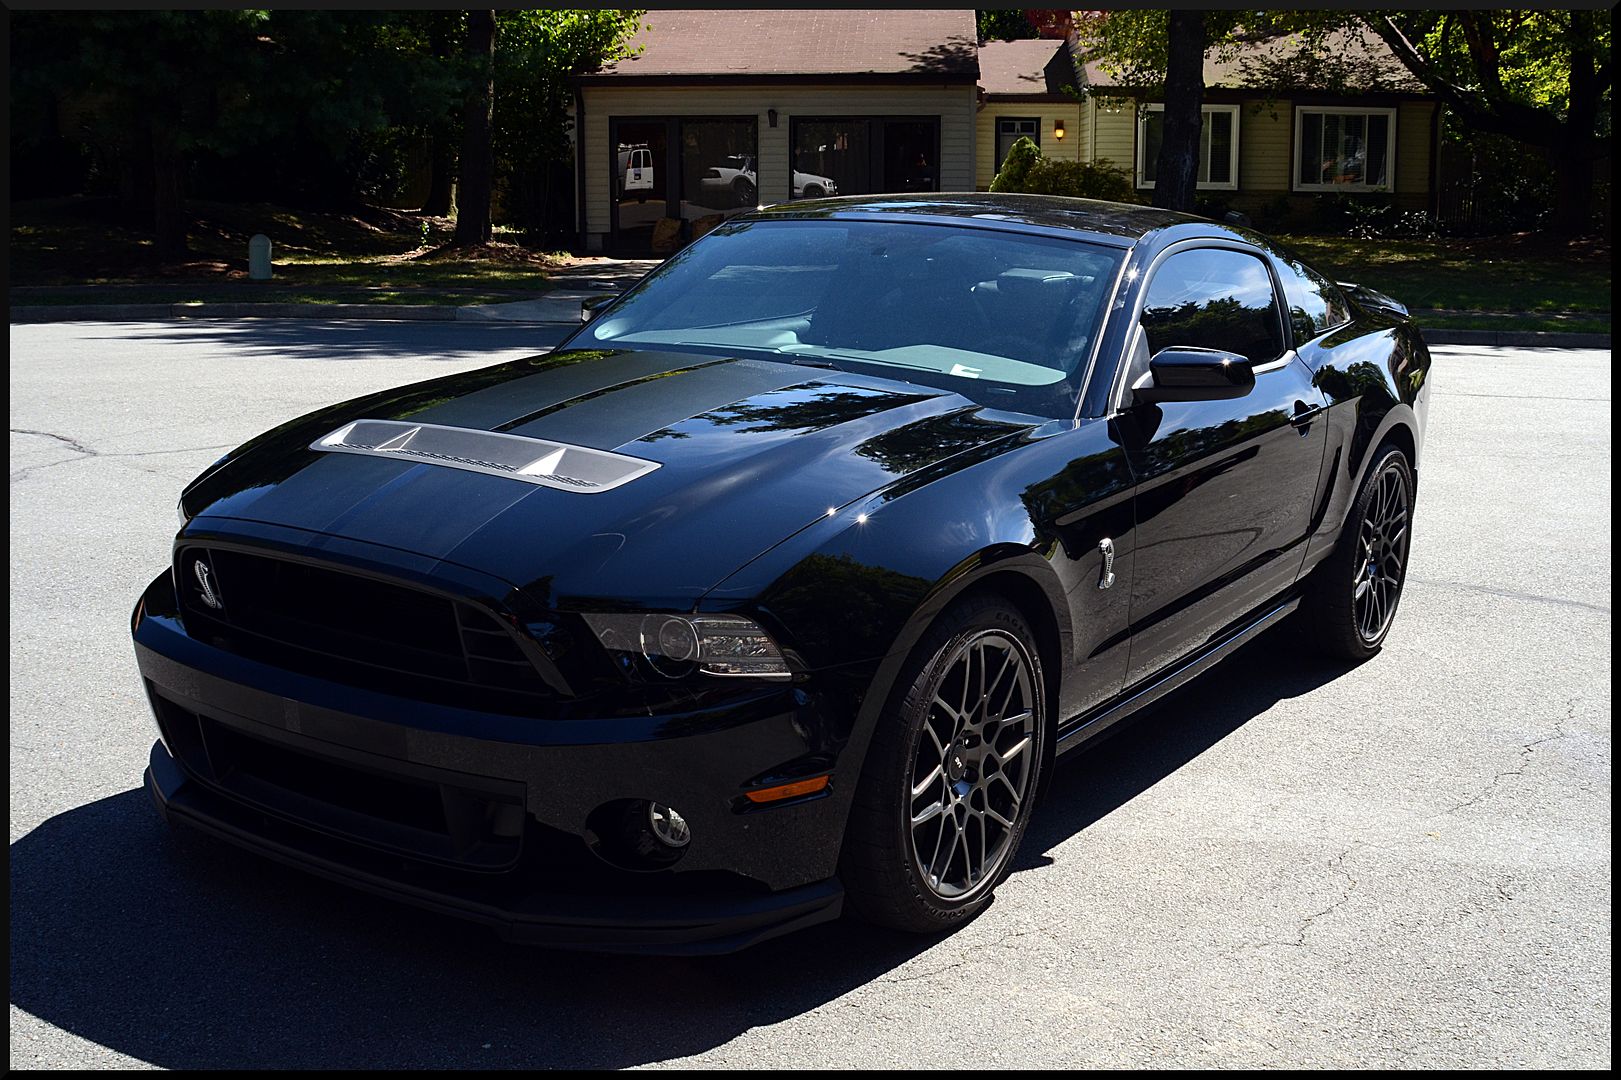
After all the polishing the vehicle was then washed again to remove all the polishing dust and any left over polishing oils that may have interfered with the bonding of the LSP. After it was dried I applyed two coats of Swissvax Crystal Rock. The trim was dressed with Auto Finesse Revive, the glass was cleaned with Meguiars Glass Cleaner, and the exhaust tips were polished with collinite Metal Wax. Here is how it all turned out.


I had some trouble with the camera settings on these two as well. It was a little difficult to adjust for the full sun on the top of the car, and the shadows under the front grill.

I loved working on this car. It is a personal favorite of mine, and I was a little sad to see it go, but the fact that the customer was so happy did soften the blow. Anyway, thanks for taking the time to read my write up, and I look forward to your feedback! Thanks!
As usual I started with the wheels, tires and wheel wells. I want to start by saying these wheels were the biggest PITA to clean due to all the spokes and holes throughout them. Nothing that was too terrible, but certainly on the tedious side of things. The wheels were cleaned with Iron X and an array of different brushes, while the tires and wheel wells were cleaned with Meguiars APC+. The wheels were sealed with 4* Paint Sealant, the tires were dressed with Blackfire Tire Gel, and the wells were dressed with Meguiars Hyper Dressing
Before:
Cleaning off the dealer applied tire shine:
I forgot to get a close up after on the wheels, so this one will have to do.
Next up was the engine bay. No before pictures because it was in fairly good shape to begin with. I wiped down all of the components, polished the underside of the hood with Optimum Poli Seal, and then dressed all the plastic and rubber with Sonus Trim and Motor Kote. Here is how it turned out.
Next up it was time to get the vehicle cleaned up and get a good look at the true condition of the paint. i started by foaming the vehicle with a mix of Meguiars Gold Class and APC to help remove any glaze or LSP that the dealership may have applied.
While the foam was left to dwell I used a soft RaceGlaze brush to agitate the emblems, body seams, trim, and fuel filler area to break up any build up dirt and grime.
The vehicle was then pressure washed off, and washed with Meguiars HyperWash and a Griots MF Wash Pad. Before drying I used a fine clay to remove a little bit of bonded contaminants. Most of the car was fairly clean, but a few of the lower panels had some bonded contaminants that were removed. Finally the vehicle was dried with the Masterblaster.
The first day the vehicle was dropped off it was already dark by the time I finished cleaning the vehicle, so the first couple of "sun" pics were taked with a hand heal LED light to show the swirls. The next morning I took a few pictures with the sun of the swirls that I had't gotten to yet.
So as you can see, the paint isn't in terrible condition, but it certainly needs to be taken care of. after some testing I came up with a two step approach. The first step was Menzerna SIP on a Yellow Uber pad with the Dewalt 849x, and the second step was Menzerna 106fa on a Green Uber pad with the Meguiars G110. Here is how it turned out.
i had the camera settings off on these two photos, and tried to lighten them up as best I could to show the sun shots. just wanted to let everyone know.
A few reflection pics.
After all the polishing the vehicle was then washed again to remove all the polishing dust and any left over polishing oils that may have interfered with the bonding of the LSP. After it was dried I applyed two coats of Swissvax Crystal Rock. The trim was dressed with Auto Finesse Revive, the glass was cleaned with Meguiars Glass Cleaner, and the exhaust tips were polished with collinite Metal Wax. Here is how it all turned out.
I had some trouble with the camera settings on these two as well. It was a little difficult to adjust for the full sun on the top of the car, and the shadows under the front grill.
I loved working on this car. It is a personal favorite of mine, and I was a little sad to see it go, but the fact that the customer was so happy did soften the blow. Anyway, thanks for taking the time to read my write up, and I look forward to your feedback! Thanks!