A couple of weeks ago I received an email from a client saying he had a black Z06 and that it looked like the previous owner had run it through the tunnel of death! Lots of swirls and paint defects and he was ready to get it detailed ASAP. We set a date for the following Monday for him to drop it off, us do our thing and him pick it up that night. He said he had seen some of our work in other write ups and wanted us to work our magic
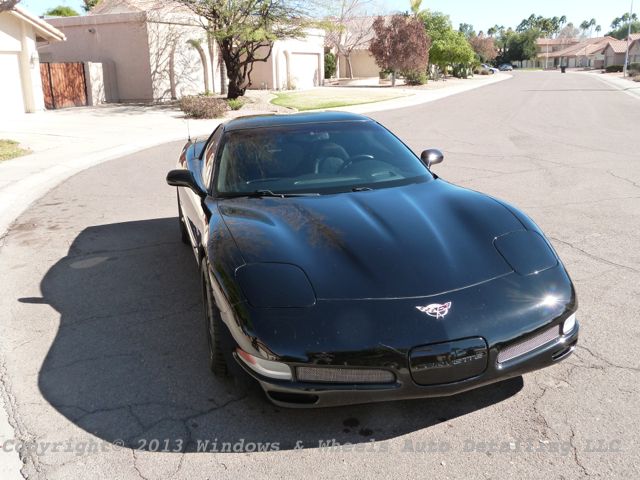
A few days later when he arrived we went out to meet him...and it was COLD (for us desert dwellers that is). It had dropped into the 20's the previous night and was still in the high 30's - low 40's when he arrived to drop it. From a distance it looked not so bad...just like most cars lol. We got close and it just started looking worse and worse.
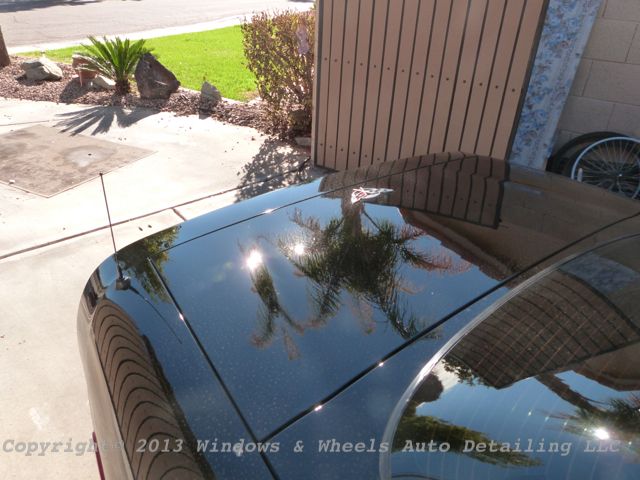
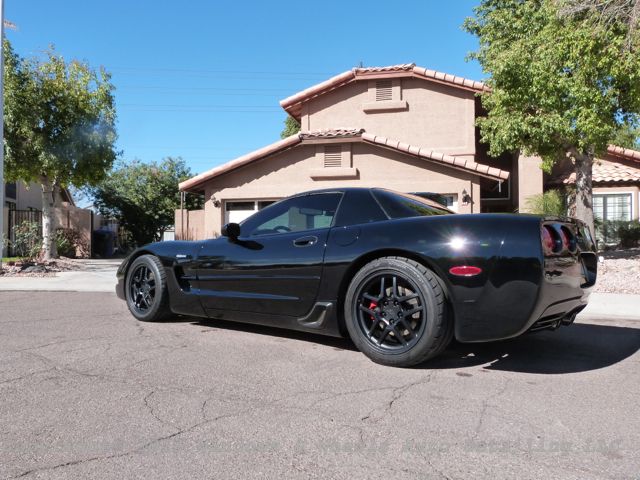
The approach...

Had some rather deep ones that not much could be done with, there were only a few luckily..this is a 10 yr old car after all:
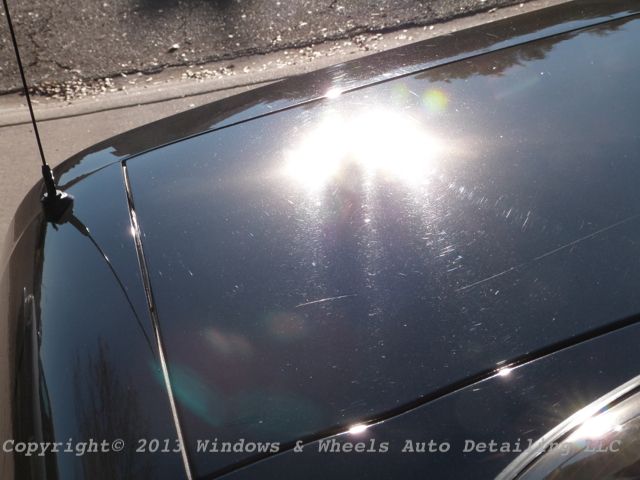
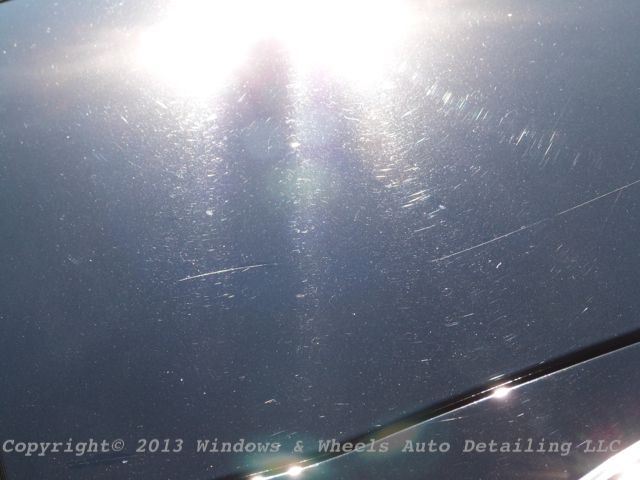
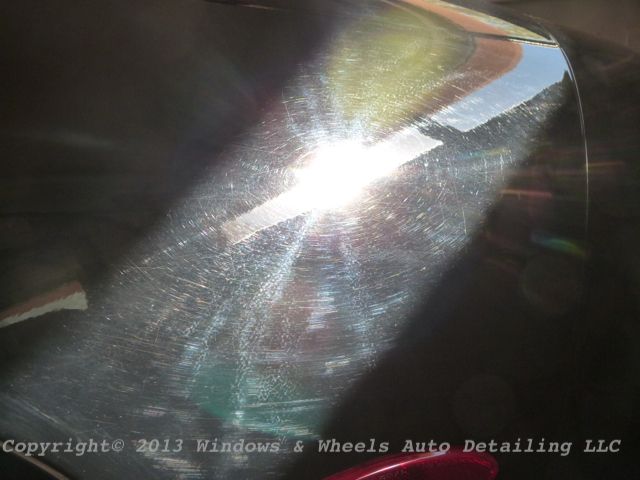
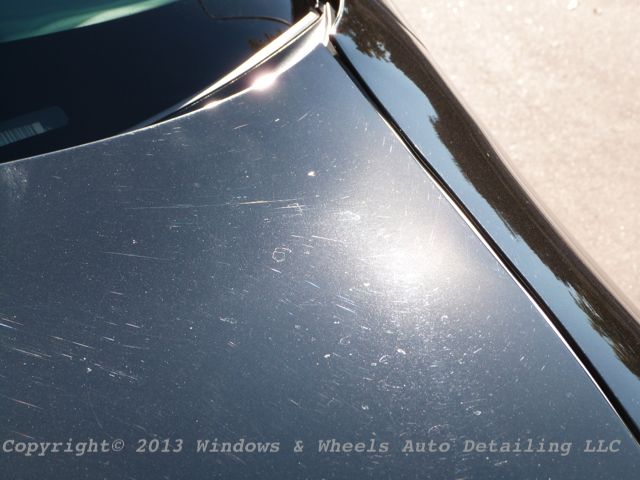
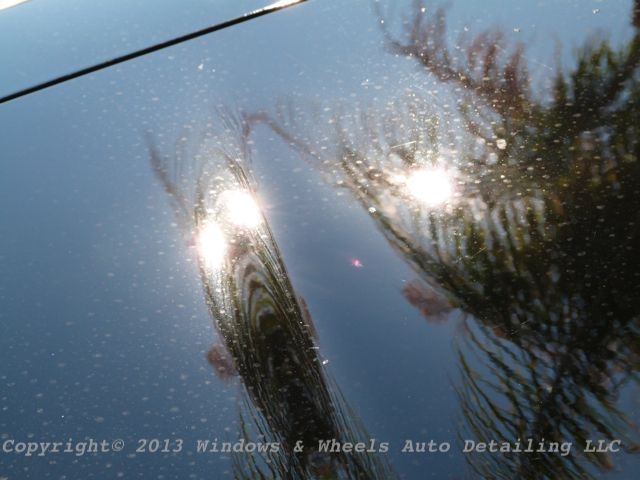
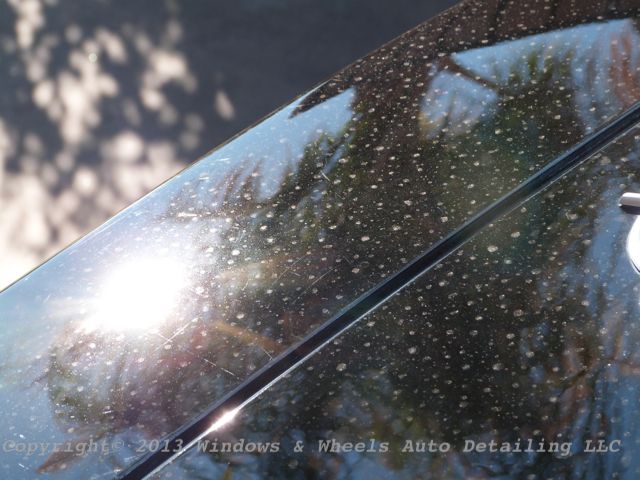
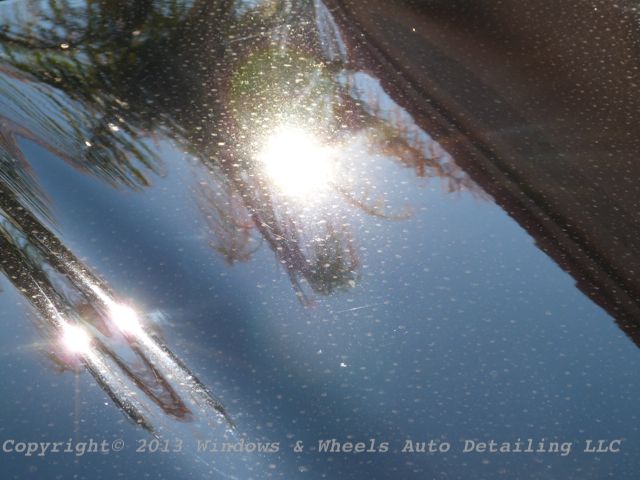
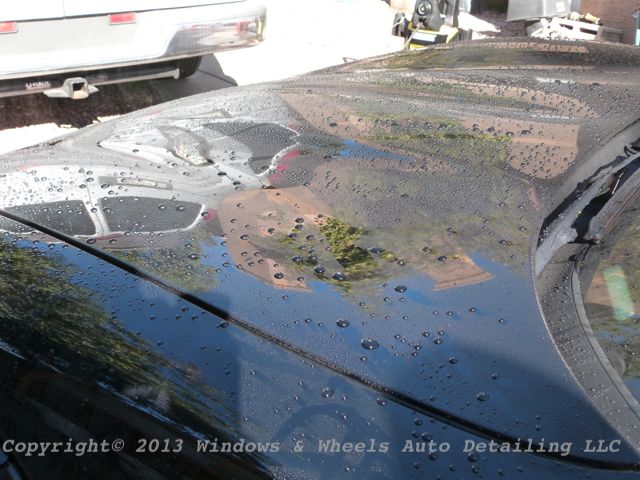
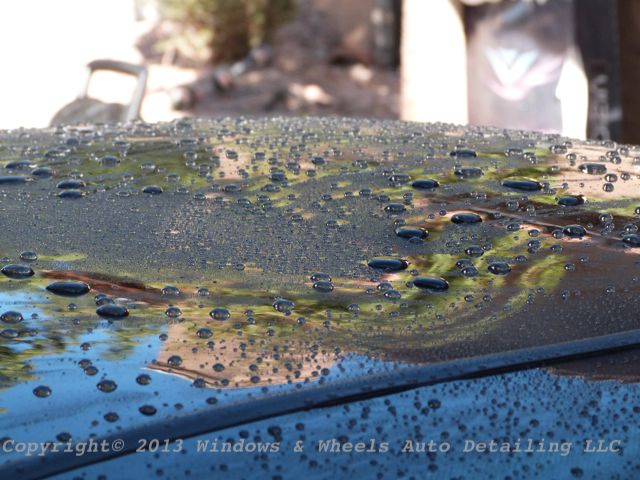
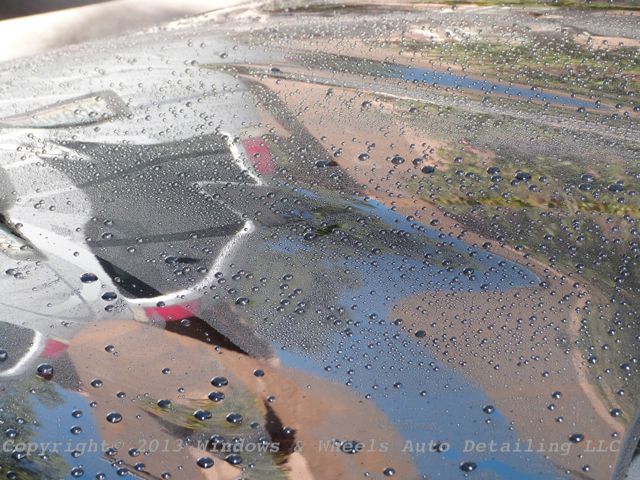
Some nice etching and deeper swirls were all over the horizontal panels:
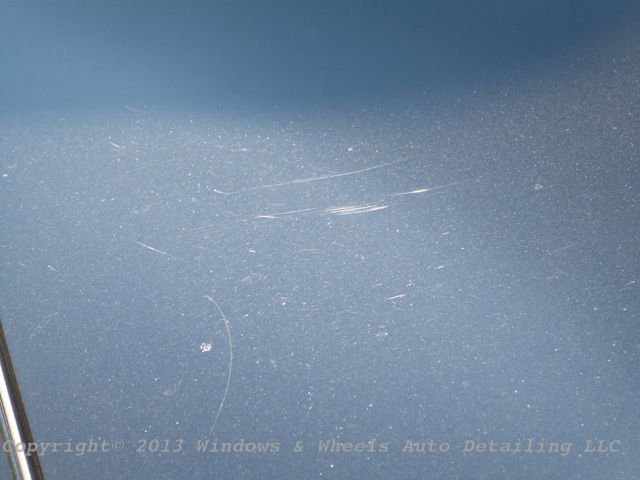
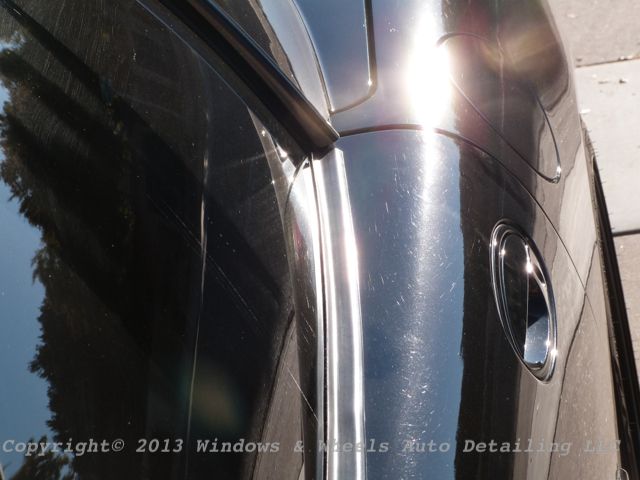
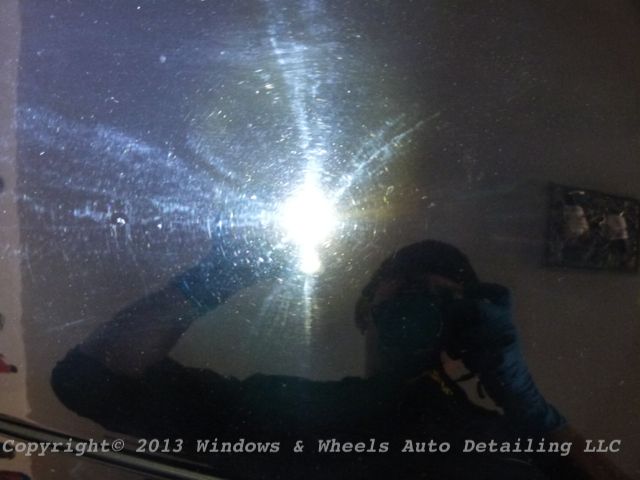
The sides didnt have so many spots, but had lots of deep scratches and swirls...not fun:
Oh yeah look at those babies!
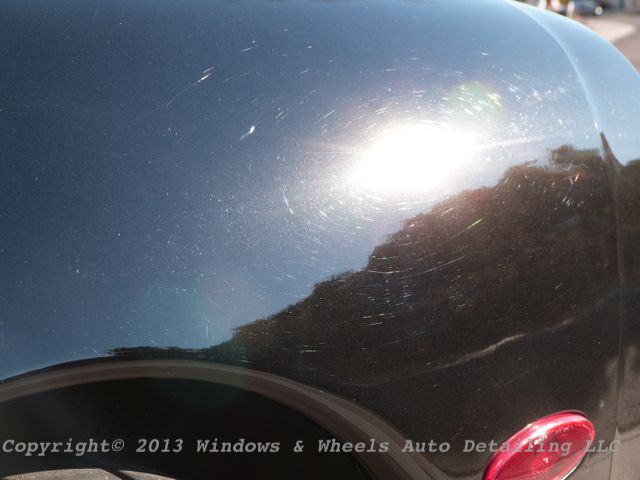
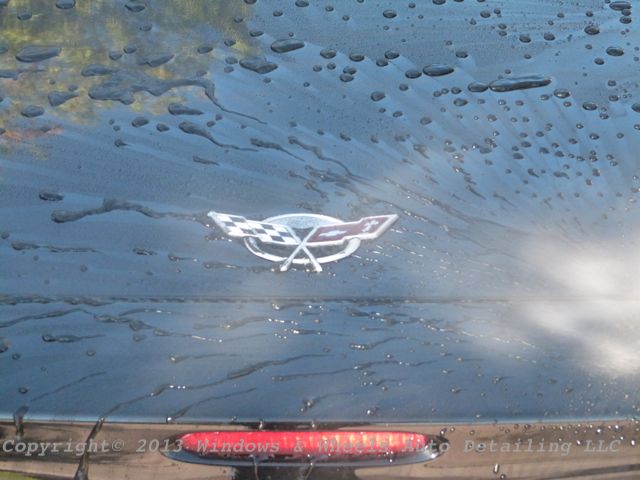
More swirls and spots on the back hatch:
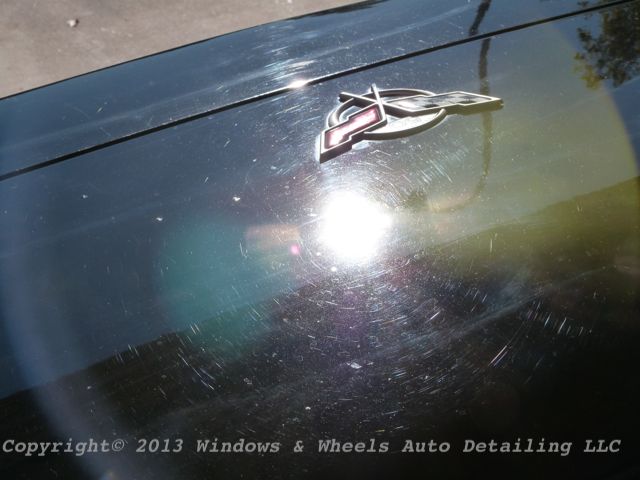
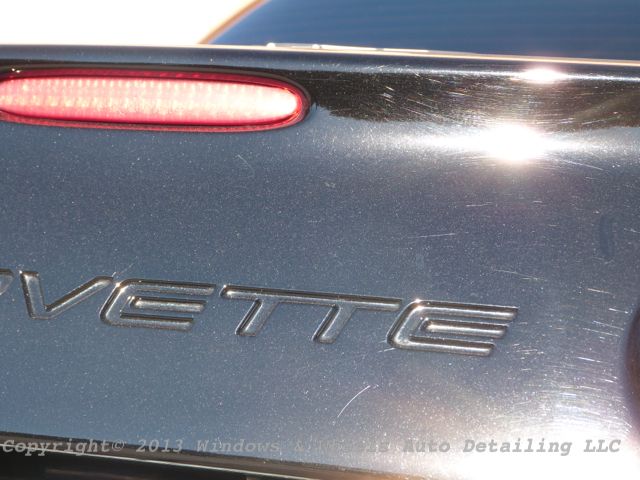
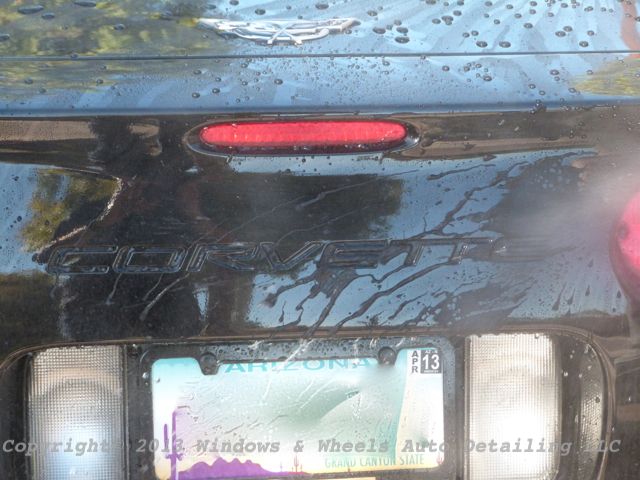
Even the Corvette engraving was swirled!!
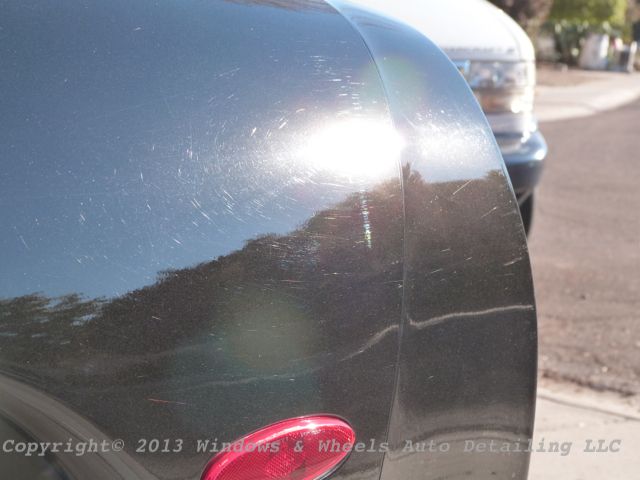
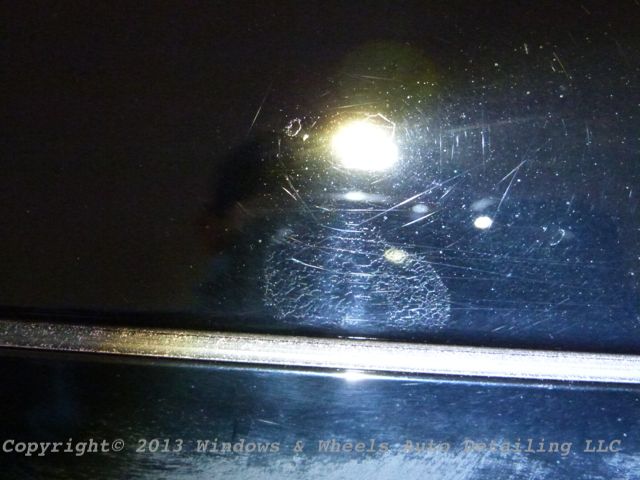
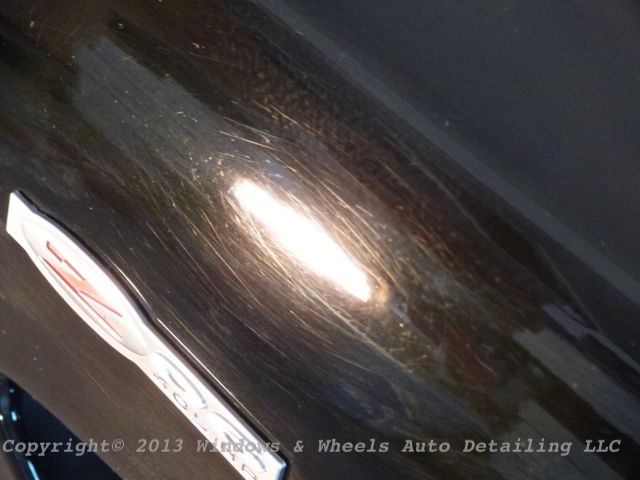
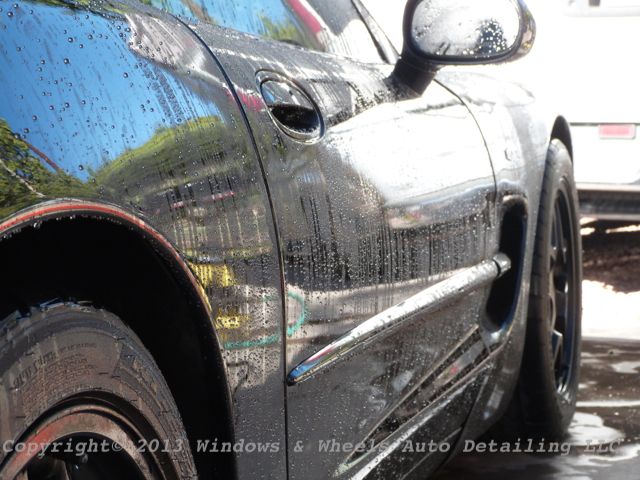
Door was lookin bad too:
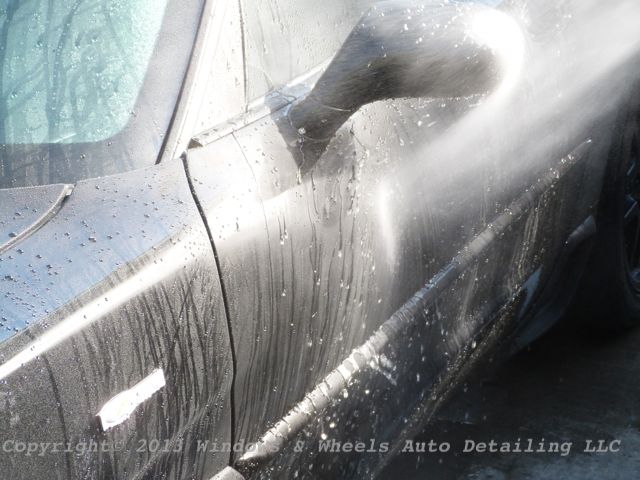
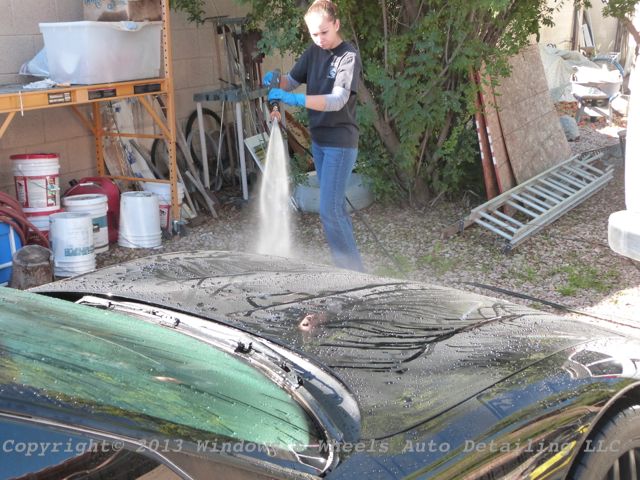
We pulled out our pressure washer to get ready to do our prep wash, but, the water inside it had frozen! So we had to go old school and get out the hose and, luckily, foam gun...it helped us out some") . Got her washed up, pulled into the garage, closed it up and DAMN ...it looked worse now that we could look at it in concentrated light...some was coming through the glass in the garage doors...not pretty:
. Got her washed up, pulled into the garage, closed it up and DAMN ...it looked worse now that we could look at it in concentrated light...some was coming through the glass in the garage doors...not pretty:
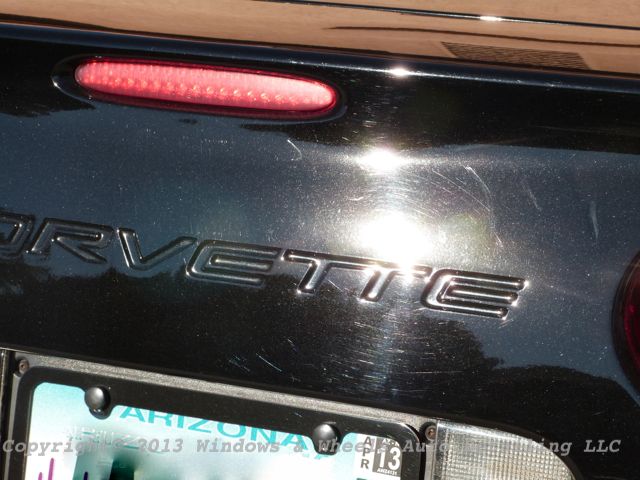
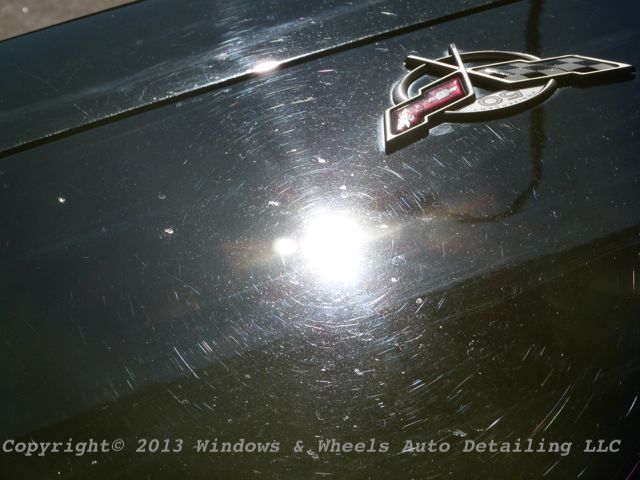
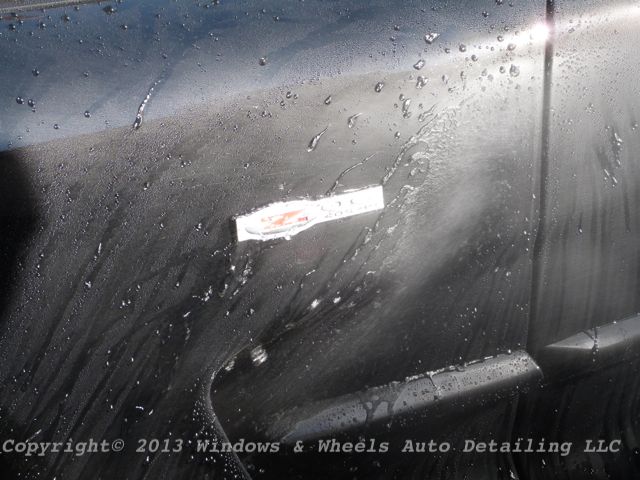
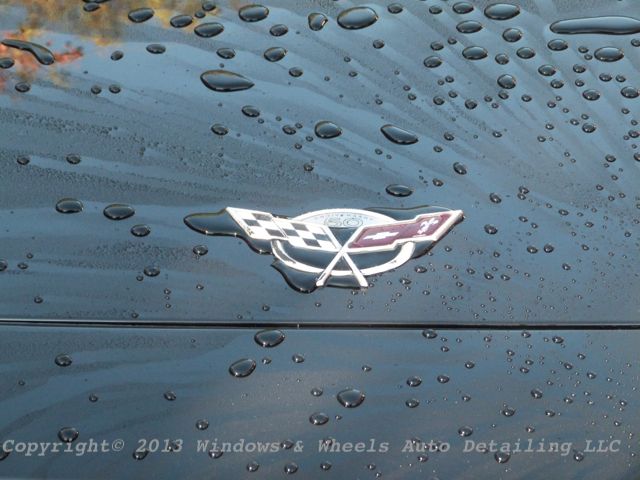
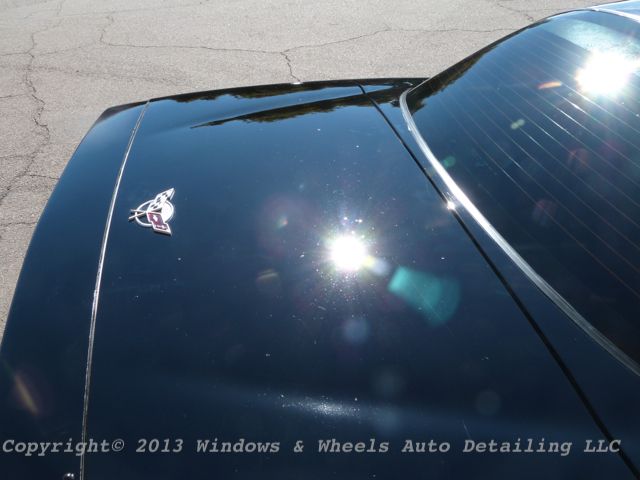
A look at the Z06 emblem...

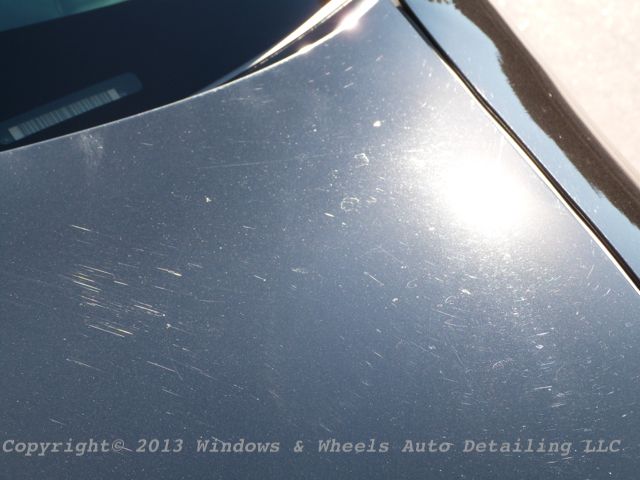
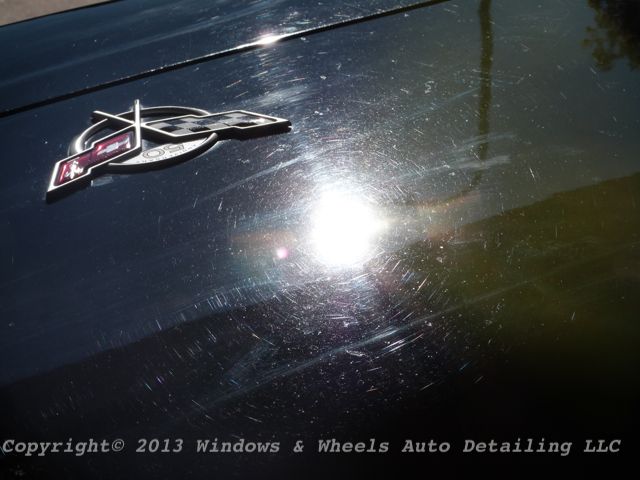
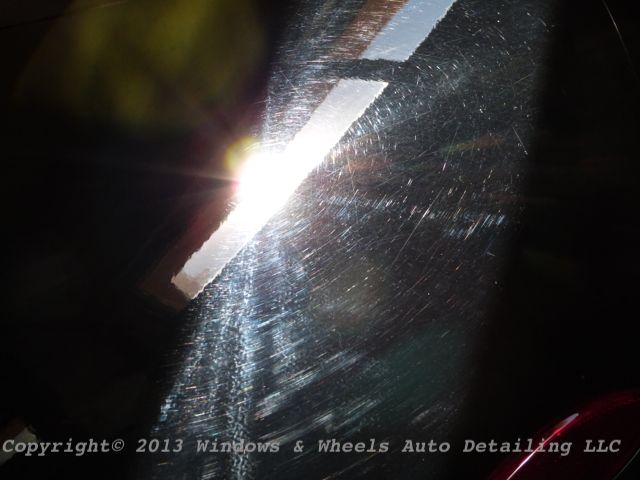
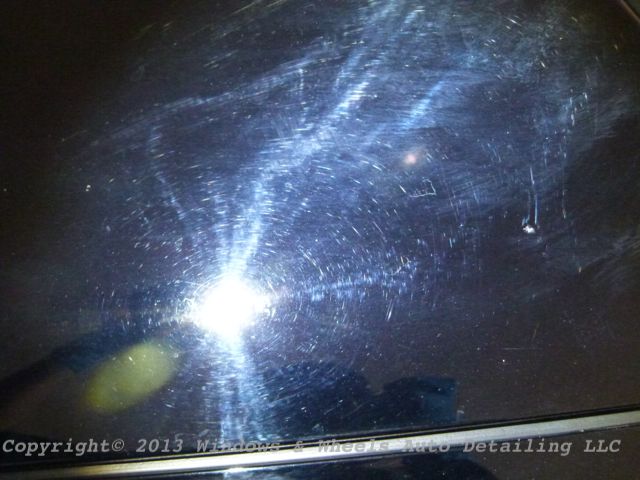
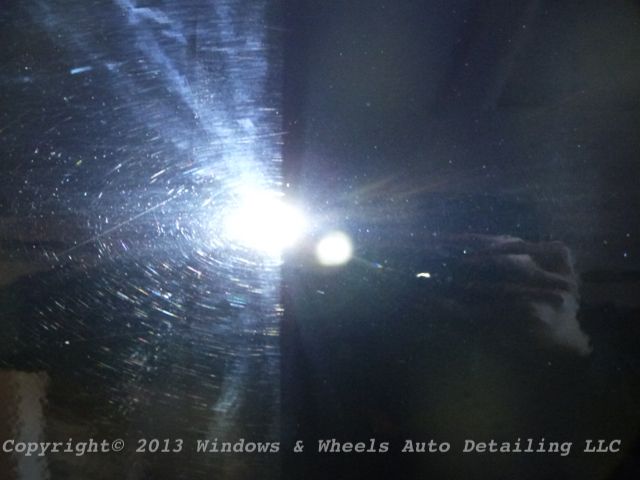
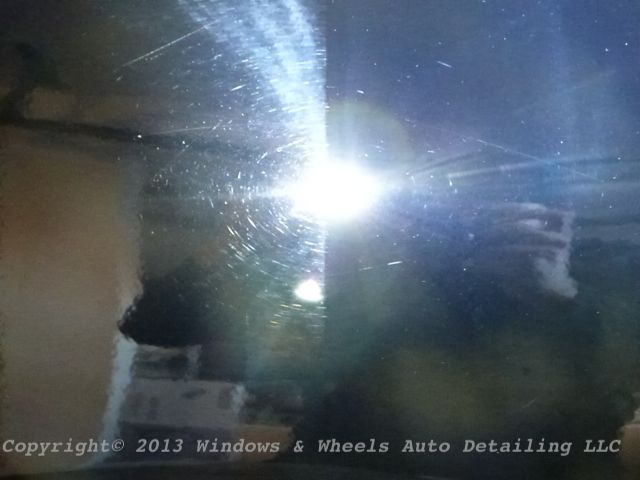
The hood was a WRECK under LED lights:
One spot was beyond repair...it had etched rather deep...either chemical, water spot or bird dropping that etched in nice and deep on the edge:
These water spots however would meet their match:

Lots of work ahead of us here in the cold Arizona desert lol!
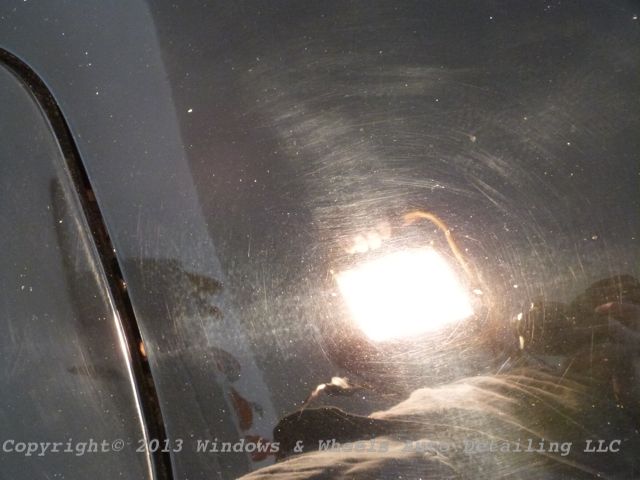
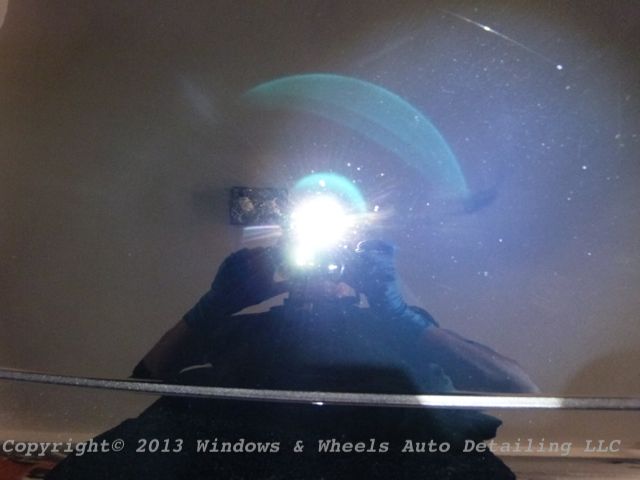
Halogens were good for swirl spotting at a distance too:
Ever look at some scratches and think...how the HELL did they scratch it THIS much in THAT spot:
So by now, you get the idea. It took a lot of time to correct this beast...near 12 hours with both of us going hard core. Meguiars 101 Compound got some heavy work out with our Megs cutting pads...it was very helpful with these super deep scratches though.
All dual action polisher work was done, which is the norm. for us...but what great results we were able to achieve.
We took a hatch that looked like this:
And the poor hood that looked like this:
Was brought back to life:
The drivers QP turned out sweet, this pic tells the whole story:
We didn't capture many other photos during the detail...this was one of those...petal to the metal all out get er' done details lol. After several hours of compounding, polishing and checking our results...we finally got around to performing a rinseless wash and IPA wipe down on the car. We noticed a few light marring spots still left on a couple of areas...Dani went around and touched those up with 205 and a B&S Green pad on the trusty ole' Porter Cable 7424.
Next we got to applying the Opti-Coat Pro (formerly known as Opti-Guard). Working a panel at a time...trying to get it as even as possible. We're a bit slower in our application than some others, but we just dont feel comfortable wiping it on and trying buff down high spots right away. Personally I feel like wiping it down too quickly doesn't allow for the thickest amount of coating to adhere to the surface. I may risk a couple extra high spots doing it this way, but at least theres a much better chance of a thicker layer bonding to the paint.
All of the horizontal surfaces we applied a 2nd coat to, just to be safe..since it gets beat on by the sun the most...and being that we're in Arizona and it'll be back to 115 degrees in just a few months, we figured it was for the best.
By the time we were done, it was DARK, so no after photos were possible, BUT since we offer a free follow up wash (to ensure beading/sheeting is as it should be and to double check for high-spots), we knew we'd get our chance to do that soon.
Forward to this past Monday, we set up a wash for first thing in the morning. It had been two weeks and it had rained and stormed on and off in that time frame...PERFECT!.
It drove up and DAMN was it BLACK...i mean BLACK...even though rain and dirt had hit it, it sure looked good.
Not too bad for dirty paint huh?
Well, if the tight dirt spots were any sign of how the water was beading, it looked like everything was good!
No swirls visible but it was dirty, a couple DEEP guys remained but, that was expected:
SO, it was time to get to testing and cleaning. We did the tires and rims first...then got to rinsing...i love rinsing Opti-Coated cars...i love it so much:
Not only does a fair majority of the dirt just rinse off, but it looks AWESOME:
Black Z06 hood, polished..and beading like crazy:
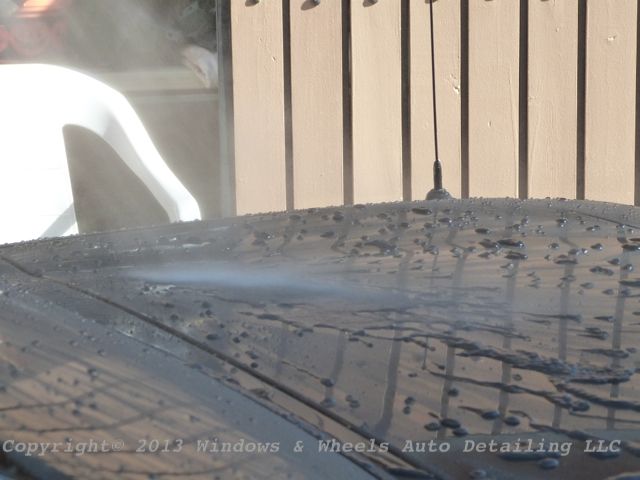
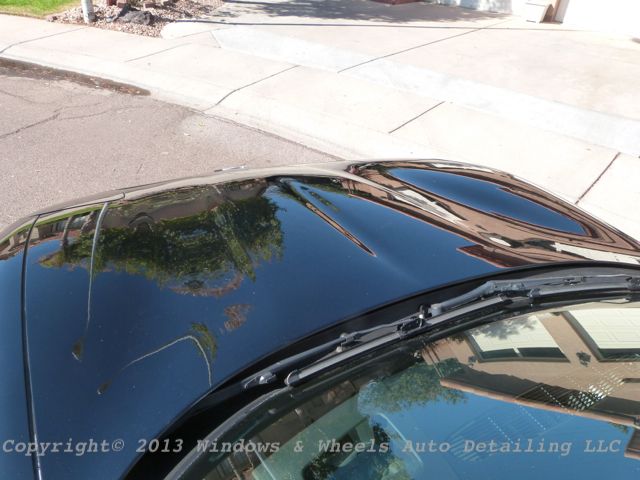
Roof beading:
I really liked this picture:
Beadin like crazy!:
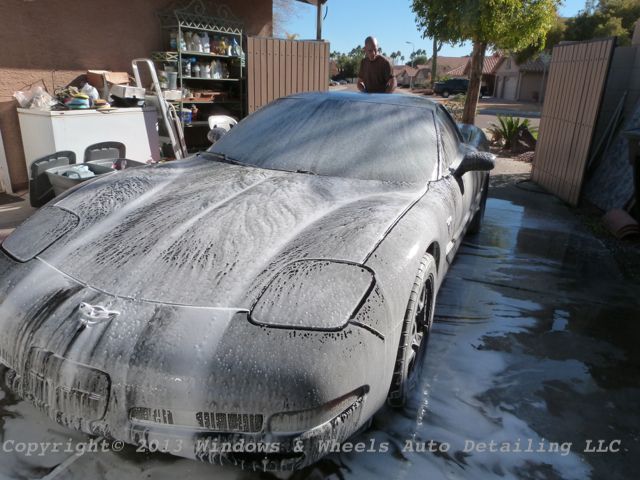
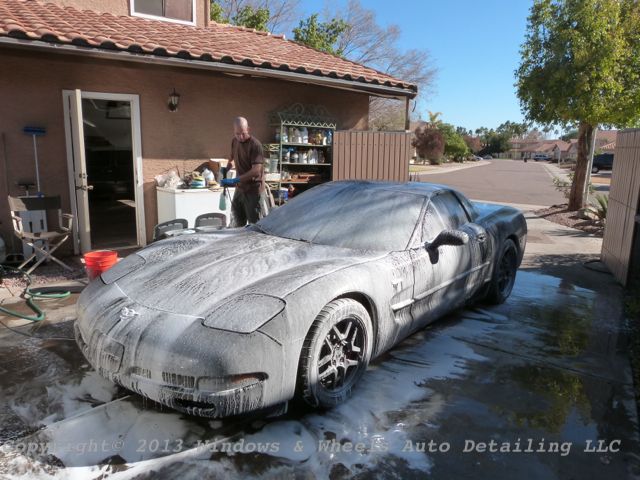
Then it was time to foam it up:
Now again, this car hadn't been washed in two weeks, was black...and it had rained and we also had blowing dust...all we had to do though was run our mitts over the paint...NO pressure...just the weight of the wet mitt was plenty enough to agitate the dirt, then it was rinse time:
Then i did a quick sheet to remove a good 80% of the standing water off the paint. Sheeting water off opti-coated paint is just...well...you gotta try it, thats all i can say lol. SO easy to clean:

After sheeting and drying we saw a few highspots on the paint. Light streaks on part of the hood and then just a couple dabs under the door handle and a small spot on the rear QP...a quick touch up with some HD polish and a finishing pad knocked them down in no time flat (no pun intended).
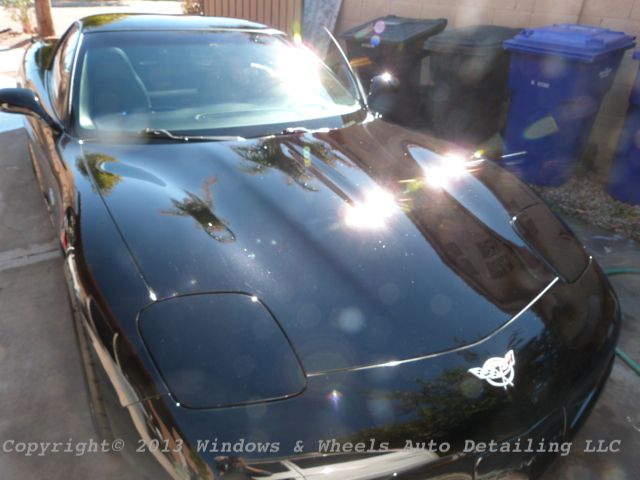
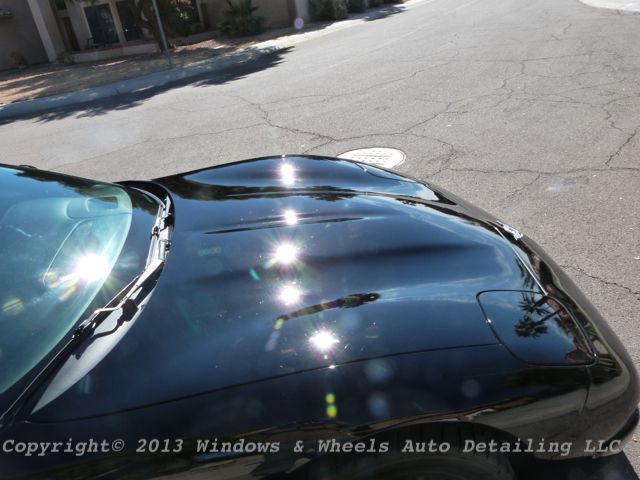
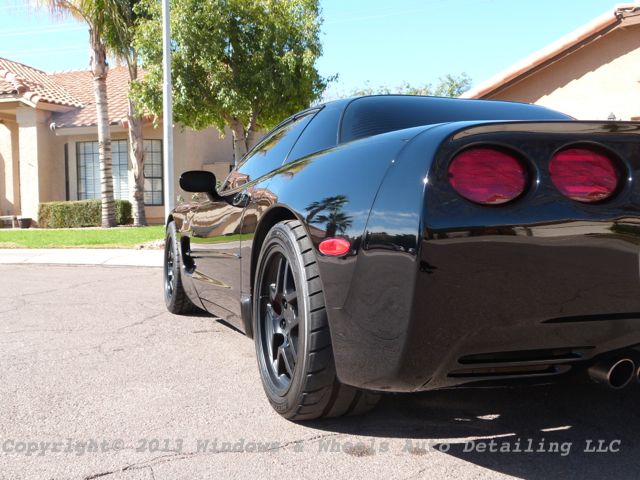
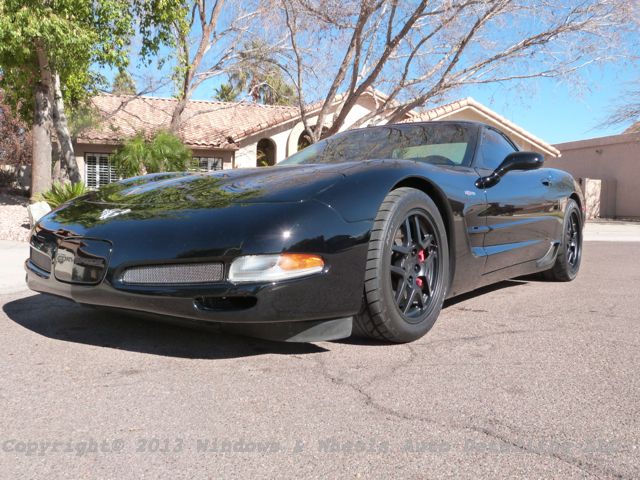
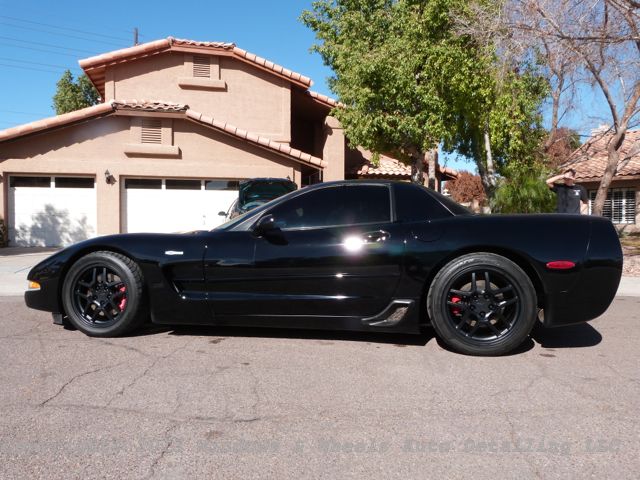
Then we got to stand back and check out our work...clean and in full sun:
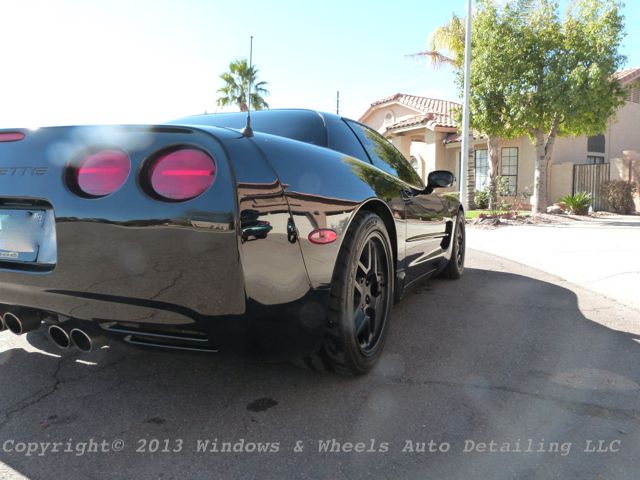
That back hatch didnt look ANYTHING CLOSE to what it looked like when we received it a couple weeks prior:
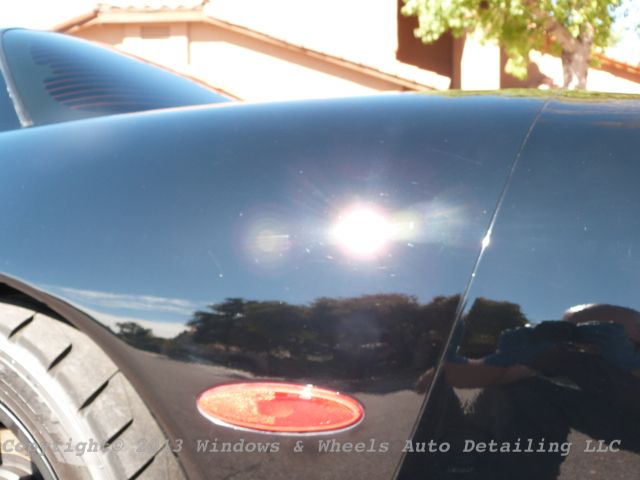
Gloss was...awesome?
Most of the car had some pitting or 'road rash'...just from age...but again compared to this:
THIS looked pretty damn good
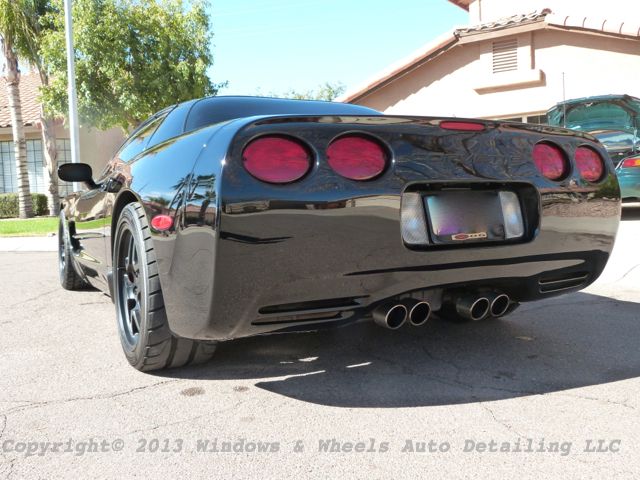
Beauty shot:
Did i mention that it looked BLACK
Good to go!
See ya pretty Z06:
The owner snagged some Optimum Car Wax from us, he wanted to use it periodically to give the gloss a little extra boost. It was a LONG haul to bring it back to this kind of shape, but it sure was worth it.
I told the owner as long as he took good care of it, it should last him years. I figure that in a couple of years (if well maintained) he should bring it back for a touch up polish (more than likely a 1-step if it stays well maintained) and re-application of Opti-Coat. While i know its classified as being permanent, I honestly just feel better about re-applying the coating if any polishing is to be done. Better safe than sorry.
And if it means it keeps the paint looking as good as it does in the photos above...and not having to worry about clear coat failure or irreversible etching from bird droppings or water spotting, its a small price to pay.
Hope you guys all enjoyed the write-up. I have 2 FR-S Opti-Coat write ups to do soon, as well as another yellow Z06 correction and Opti-Coat (WOW that one was a doozie!)
We also shot some video of how well the paint cleaned up and the water sheeted off during washing, once i get it edited and on YouTube I'll be sure to post it here.
Thanks for reading!
A few days later when he arrived we went out to meet him...and it was COLD (for us desert dwellers that is). It had dropped into the 20's the previous night and was still in the high 30's - low 40's when he arrived to drop it. From a distance it looked not so bad...just like most cars lol. We got close and it just started looking worse and worse.
The approach...
Had some rather deep ones that not much could be done with, there were only a few luckily..this is a 10 yr old car after all:
Some nice etching and deeper swirls were all over the horizontal panels:
The sides didnt have so many spots, but had lots of deep scratches and swirls...not fun:
Oh yeah look at those babies!
More swirls and spots on the back hatch:
Even the Corvette engraving was swirled!!
Door was lookin bad too:
We pulled out our pressure washer to get ready to do our prep wash, but, the water inside it had frozen! So we had to go old school and get out the hose and, luckily, foam gun...it helped us out some
. Got her washed up, pulled into the garage, closed it up and DAMN ...it looked worse now that we could look at it in concentrated light...some was coming through the glass in the garage doors...not pretty:
A look at the Z06 emblem...
The hood was a WRECK under LED lights:
One spot was beyond repair...it had etched rather deep...either chemical, water spot or bird dropping that etched in nice and deep on the edge:
These water spots however would meet their match:
Lots of work ahead of us here in the cold Arizona desert lol!
Halogens were good for swirl spotting at a distance too:
Ever look at some scratches and think...how the HELL did they scratch it THIS much in THAT spot:
So by now, you get the idea. It took a lot of time to correct this beast...near 12 hours with both of us going hard core. Meguiars 101 Compound got some heavy work out with our Megs cutting pads...it was very helpful with these super deep scratches though.
All dual action polisher work was done, which is the norm. for us...but what great results we were able to achieve.
We took a hatch that looked like this:
And the poor hood that looked like this:
Was brought back to life:
The drivers QP turned out sweet, this pic tells the whole story:
We didn't capture many other photos during the detail...this was one of those...petal to the metal all out get er' done details lol. After several hours of compounding, polishing and checking our results...we finally got around to performing a rinseless wash and IPA wipe down on the car. We noticed a few light marring spots still left on a couple of areas...Dani went around and touched those up with 205 and a B&S Green pad on the trusty ole' Porter Cable 7424.
Next we got to applying the Opti-Coat Pro (formerly known as Opti-Guard). Working a panel at a time...trying to get it as even as possible. We're a bit slower in our application than some others, but we just dont feel comfortable wiping it on and trying buff down high spots right away. Personally I feel like wiping it down too quickly doesn't allow for the thickest amount of coating to adhere to the surface. I may risk a couple extra high spots doing it this way, but at least theres a much better chance of a thicker layer bonding to the paint.
All of the horizontal surfaces we applied a 2nd coat to, just to be safe..since it gets beat on by the sun the most...and being that we're in Arizona and it'll be back to 115 degrees in just a few months, we figured it was for the best.
By the time we were done, it was DARK, so no after photos were possible, BUT since we offer a free follow up wash (to ensure beading/sheeting is as it should be and to double check for high-spots), we knew we'd get our chance to do that soon.
Forward to this past Monday, we set up a wash for first thing in the morning. It had been two weeks and it had rained and stormed on and off in that time frame...PERFECT!.
It drove up and DAMN was it BLACK...i mean BLACK...even though rain and dirt had hit it, it sure looked good.
Not too bad for dirty paint huh?
Well, if the tight dirt spots were any sign of how the water was beading, it looked like everything was good!
No swirls visible but it was dirty, a couple DEEP guys remained but, that was expected:
SO, it was time to get to testing and cleaning. We did the tires and rims first...then got to rinsing...i love rinsing Opti-Coated cars...i love it so much:
Not only does a fair majority of the dirt just rinse off, but it looks AWESOME:
Black Z06 hood, polished..and beading like crazy:
Roof beading:
I really liked this picture:
Beadin like crazy!:
Then it was time to foam it up:
Now again, this car hadn't been washed in two weeks, was black...and it had rained and we also had blowing dust...all we had to do though was run our mitts over the paint...NO pressure...just the weight of the wet mitt was plenty enough to agitate the dirt, then it was rinse time:
Then i did a quick sheet to remove a good 80% of the standing water off the paint. Sheeting water off opti-coated paint is just...well...you gotta try it, thats all i can say lol. SO easy to clean:
After sheeting and drying we saw a few highspots on the paint. Light streaks on part of the hood and then just a couple dabs under the door handle and a small spot on the rear QP...a quick touch up with some HD polish and a finishing pad knocked them down in no time flat (no pun intended).
Then we got to stand back and check out our work...clean and in full sun:
That back hatch didnt look ANYTHING CLOSE to what it looked like when we received it a couple weeks prior:
Gloss was...awesome?
Most of the car had some pitting or 'road rash'...just from age...but again compared to this:
THIS looked pretty damn good
Beauty shot:
Did i mention that it looked BLACK
Good to go!
See ya pretty Z06:
The owner snagged some Optimum Car Wax from us, he wanted to use it periodically to give the gloss a little extra boost. It was a LONG haul to bring it back to this kind of shape, but it sure was worth it.
I told the owner as long as he took good care of it, it should last him years. I figure that in a couple of years (if well maintained) he should bring it back for a touch up polish (more than likely a 1-step if it stays well maintained) and re-application of Opti-Coat. While i know its classified as being permanent, I honestly just feel better about re-applying the coating if any polishing is to be done. Better safe than sorry.
And if it means it keeps the paint looking as good as it does in the photos above...and not having to worry about clear coat failure or irreversible etching from bird droppings or water spotting, its a small price to pay.
Hope you guys all enjoyed the write-up. I have 2 FR-S Opti-Coat write ups to do soon, as well as another yellow Z06 correction and Opti-Coat (WOW that one was a doozie!)
We also shot some video of how well the paint cleaned up and the water sheeted off during washing, once i get it edited and on YouTube I'll be sure to post it here.
Thanks for reading!