'29 Ford Model A Roadster: Detailing Nirvana

MarcHarris

New member
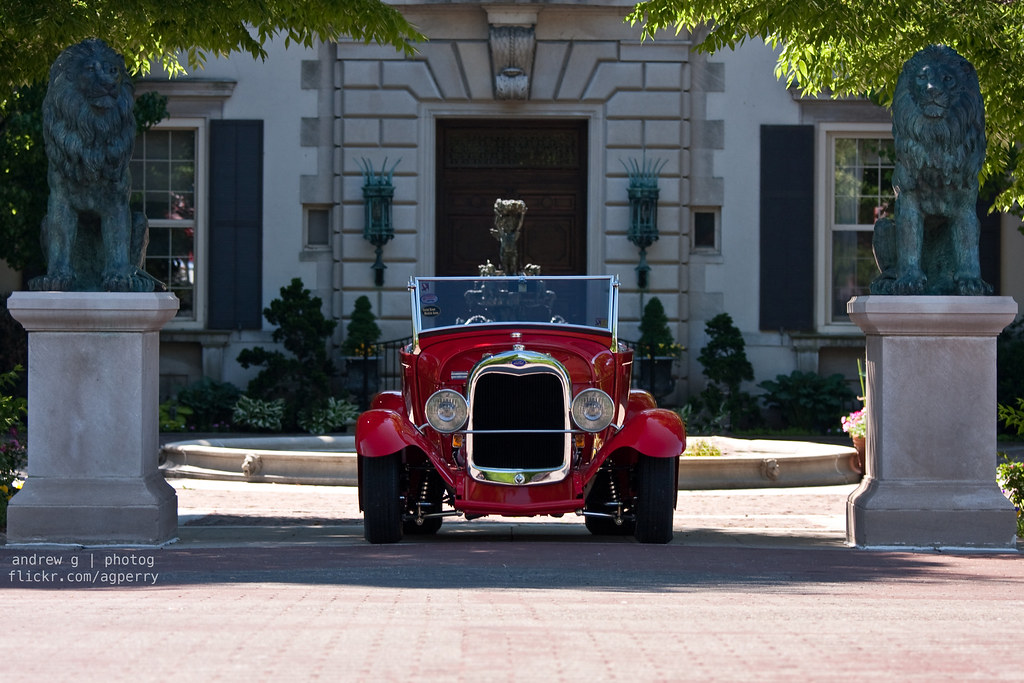
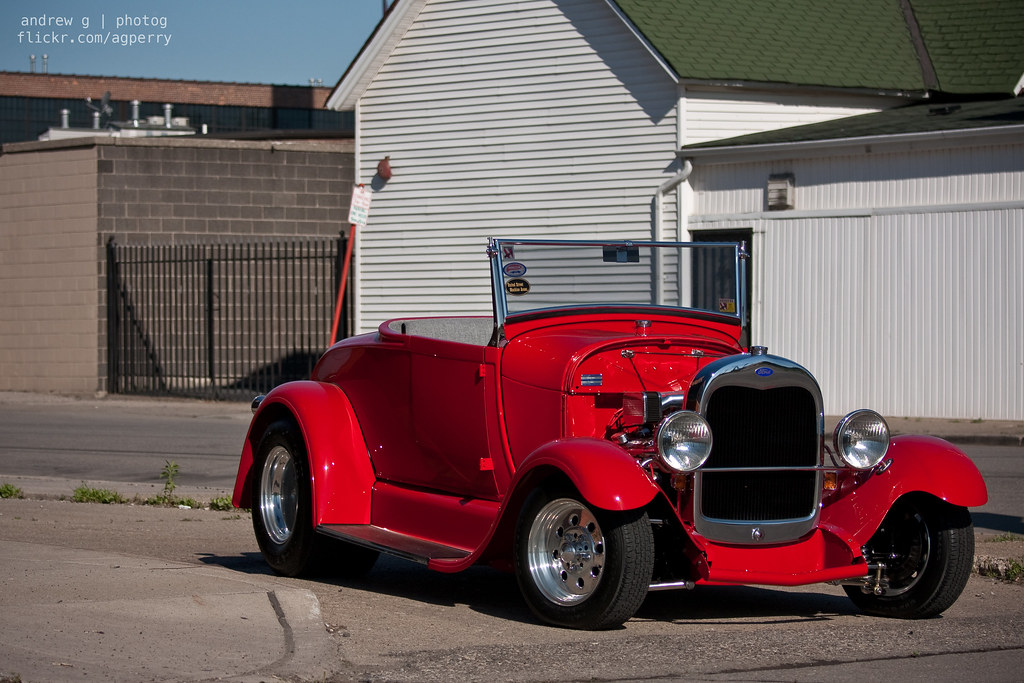
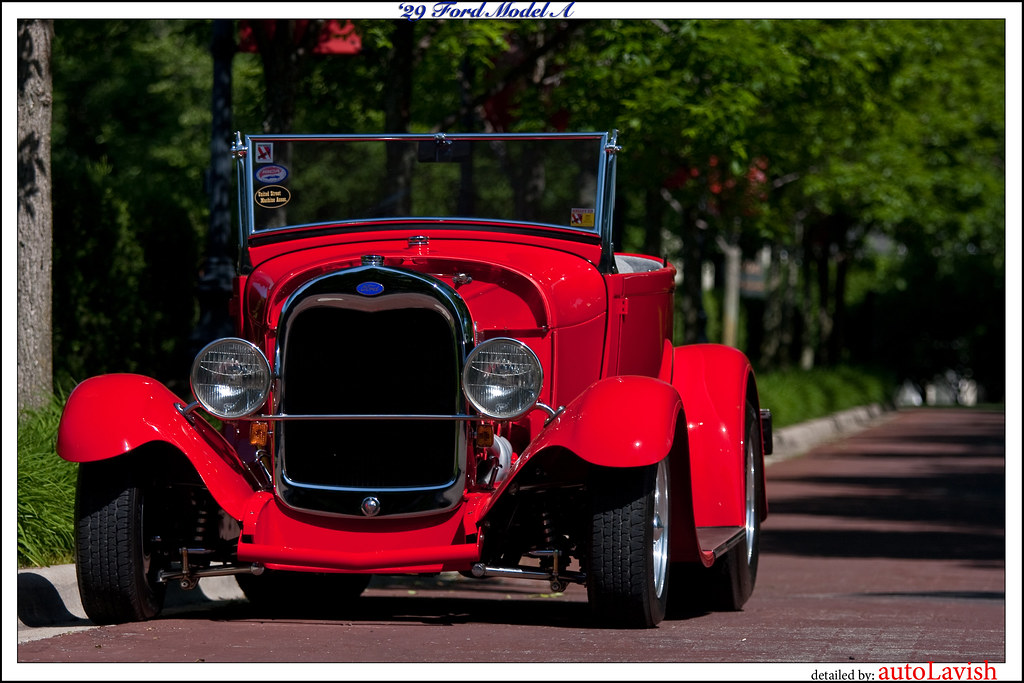
Early model Ford's likely did more to popularize automobiles than any other car that has ever been on the market. Henry Ford's Model T was a global hit and the Ford Motor Company was able to sell over 15 million of them worldwide. The car made such a name for itself that even today you can stop by the Henry Ford Museum in Dearborn and learn a few things about Model T repairs and manufacturing. Over one hundred years later, even children know this car's name and significance. By the time 1927 rolled through, the aged Model T was replaced with the slightly more updated Model A which was later replaced by the Model B in 1932.

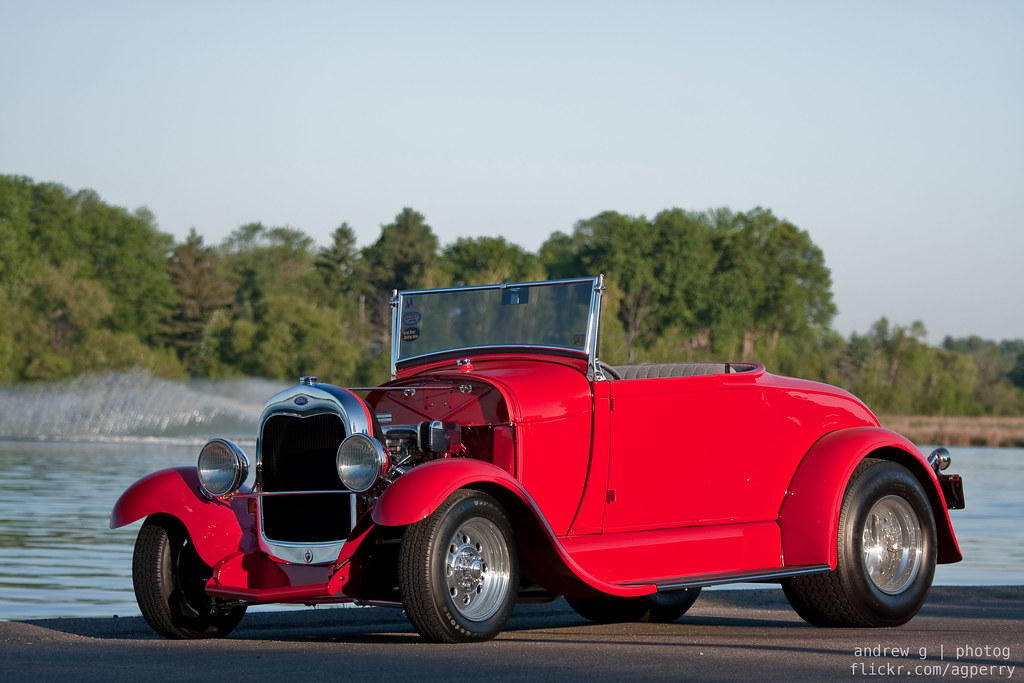
My own grandfather came to Detroit from Mississippi in search of a job with Ford whom he worked for over many many years before retiring from the company. Some 80+ years after he helped to make the originals, AutoLavish Fine Automobile Detailing would help a Ford Model A Street Rod rearch aesthetic perfection. This is the story of one beautiful Ford that continues to turn heads today.


4715369658_0e1f8ef8a2_b.jpg


The owners contact us to do a little work on the vehicle. They are undecided to sell, but know the car could not be shown in its current state to fetch top dollar. We are scheduled for 8 hours.


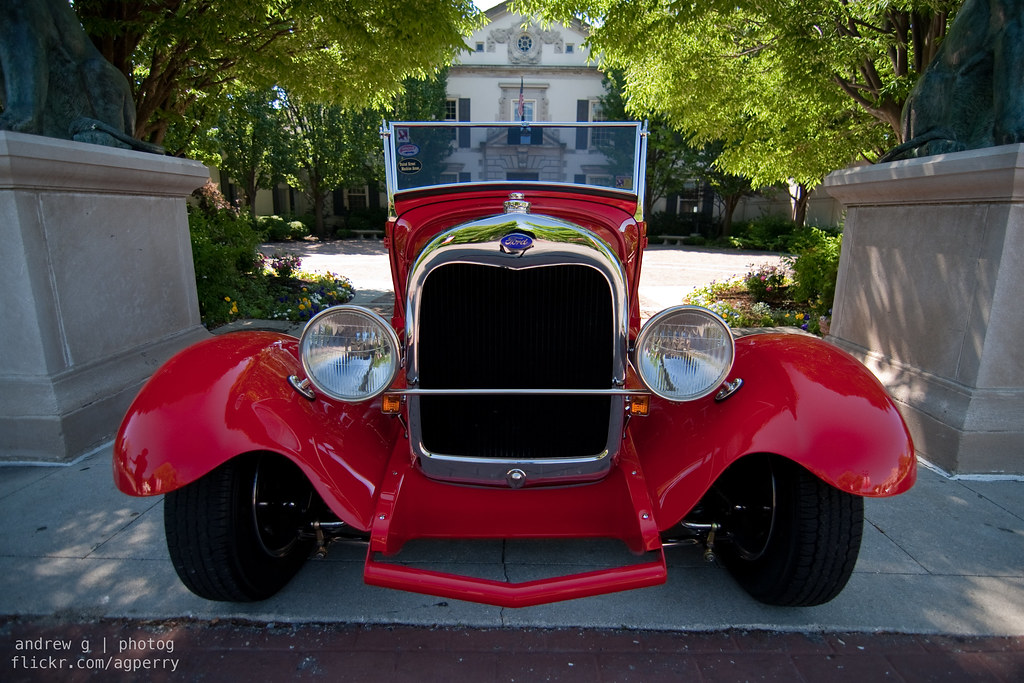
Then we arrived on location and see this: the car has its own room! Climate controlled, secure, and up on show stands 24/7. It is surrounded by trophies, medals, and other era specific car paraphernalia. Best of show, Best in Class, Best in... they go on and on. Impressive!


DSC00890.jpg


DSC00893.jpg


DSC00895.jpg


DSC01189.jpg


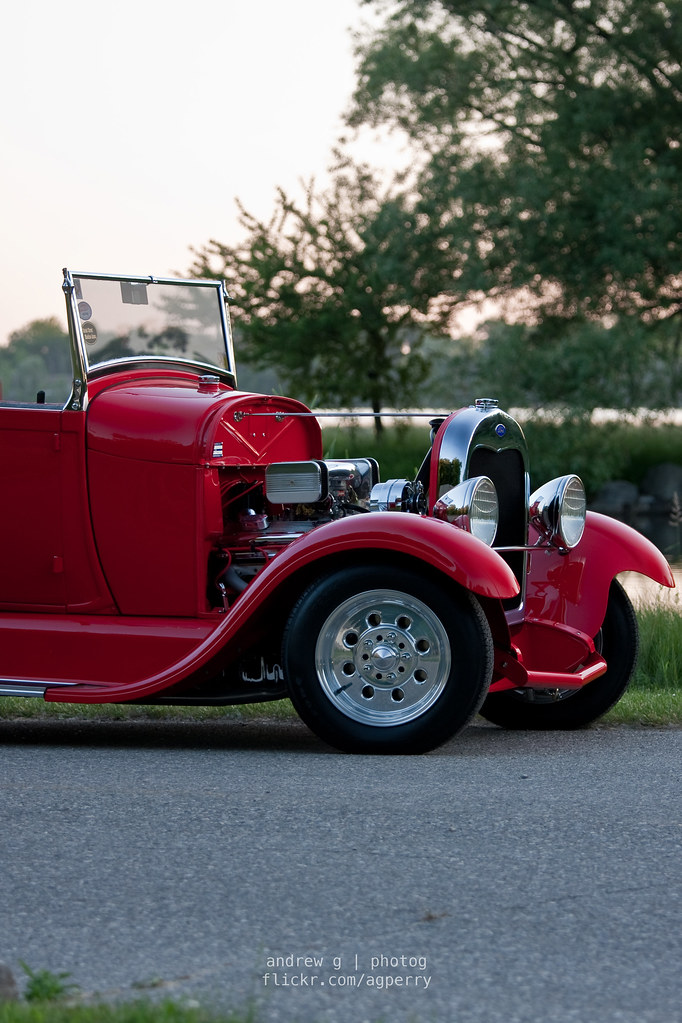
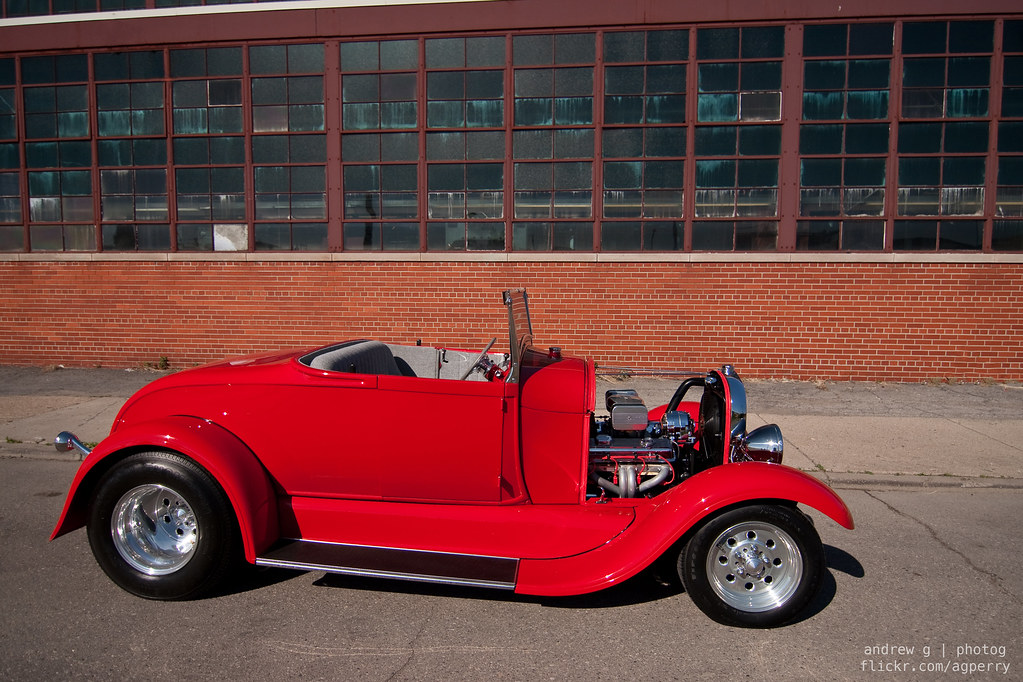
Getting ready to work, the owner pulled it out in the sun so we would have the chance to look everything over once last time prior to getting started.


DSC00928.jpg


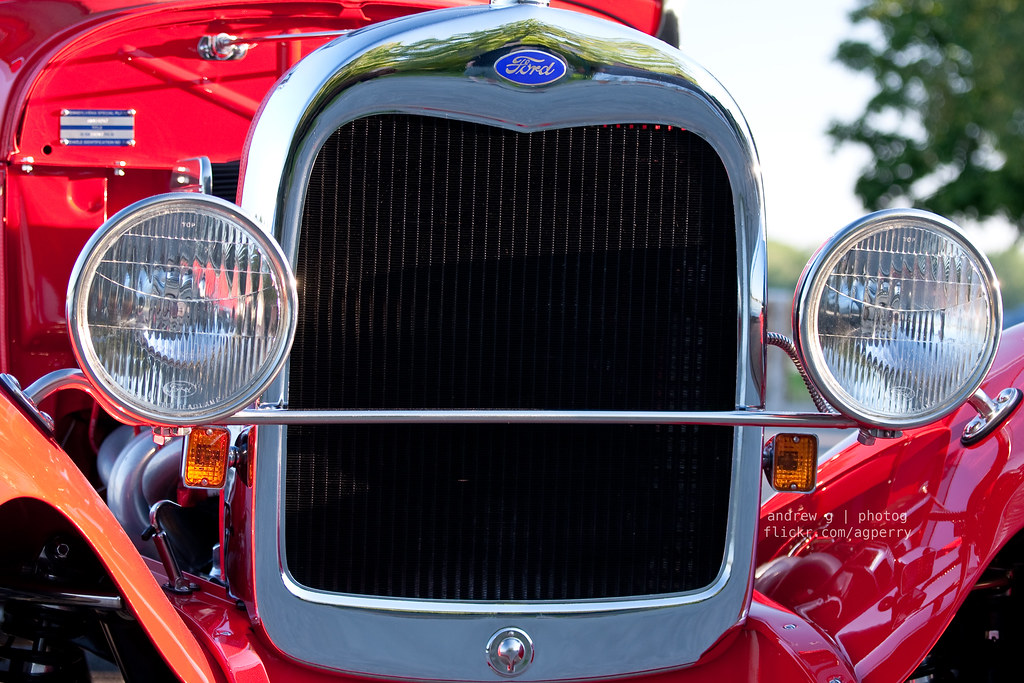
At this time we made subtle changes to our plan of attack to help streamline our process. The engine had some overflow from a hot radiator leak at one point we were to take care of, and while at it we were scheduled to detail the rest of the engine bay. Due to the lay-out, everything would have to be washed by hand using spray bottles, microfiber towels, cotton swabs, brushes, etc.


DSC00938.jpg


DSC00991.jpg


DSC00996.jpg


DSC00997.jpg


DSC01000.jpg


Starting on the cool engine with a light dilution of Meguiar's All Purpose Cleaner Plus, brushes were handy to allow for physical agitation which always goes a long way to break up residue, grime, and dirt. As I got started, Jacob continued to get the E-Z Up into action as the outside temperature was rising very quickly. Once everything was set to go, I helped to place and secure the tent so we could continue working.


DSC01055.jpg


DSC01056.jpg


DSC01057.jpg


DSC01059.jpg


DSC01061.jpg


Spark plugs/boots/wires:


DSC01062.jpg


DSC01066.jpg


DSC01075.jpg


DSC01071.jpg


DSC01076.jpg


DSC01079.jpg


Jacob gently wiped off residue of the Optimum No Rinse solution that was used to flush away the loosened dirt and grime along with the All Purpose Cleaner residue. Everything was then wiped dry with a microfiber towel.


DSC01089.jpg


Sacrificial cotton swabs:


DSC01090.jpg


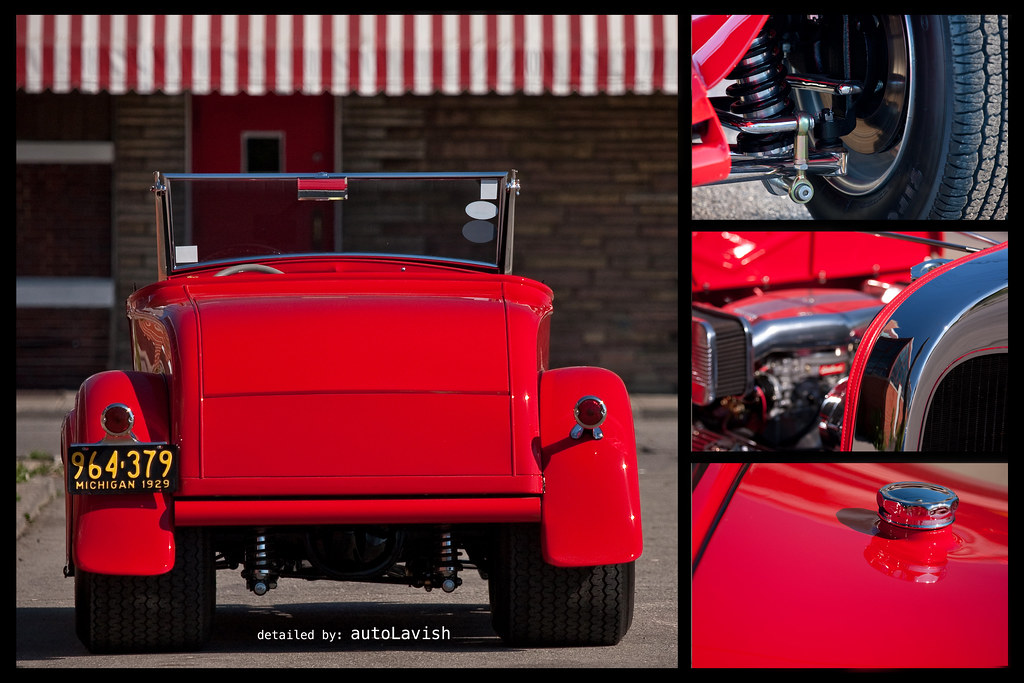
Around 90 minutes later, everything was looking much better:


DSC01167.jpg


DSC01386.jpg


DSC01396.jpg


DSC01397.jpg


DSC01398.jpg


DSC01399.jpg


DSC01400.jpg


DSC02071.jpg


DSC02072.jpg
 
Next, we started working with the paint. The roadster was kept relatively clean, but needed a light washing before clay and polishing could commence. Even without a wash, it was easy to see the reason the owner came to us: to correct some significant Random Isolated Deep Scratches and Swirls that accumulated over the years from car show wipe downs, washes, and a few road trips.


DSC00940.jpg


DSC00941.jpg


DSC00945.jpg


DSC00963.jpg


DSC00964.jpg


DSC01016.jpg


The sun was in full force, and it is always important to avoid working in direct heat. To prove the difference even a few minutes of shade can make, we used an infrared thermometer to take temperature readings.

Jacob taking readings:

DSC01044.jpg


One-hundred fourteen and a half degrees at 10:27AM

DSC01047.jpg


So we pulled shade over it:


DSC01051.jpg


Now we have a max temperature reading of 76 degrees at 10:36AM - 9 minutes after the first set of readings, let alone the time it took to move the pop-up tent.

DSC01054.jpg


Testing the local water for dissolved solids helped us decide it would be OK to use it to wash the car.


DSC01096.jpg


The car was built solid: it is a driver and not a museum piece, so we opted for a garden hose version of the foam gun in addition to a rinse bucket with grit guard method.


Carefully foamed with the foam "gun":


DSC01105.jpg


DSC01107.jpg


DSC01109.jpg


DSC01110.jpg


And careful rinsing:


DSC01112.jpg


Blow dried:


DSC01116.jpg


DSC01118.jpg


Polishing combinations were determined using the trunk: a nice, consistently sloping (but straight) surface to perform inspections on, with adequate surface area to try multiple polishes, pads, backing plates, machines, and techniques.


DSC01131.jpg


DSC01132.jpg


DSC01135.jpg


DSC01136.jpg


DSC01142.jpg


DSC01151.jpg


The lucky winner for the cutting was the 3M UK green pad under 3M grey ultra-soft foam backing plate on the Flex. The soft backing plate allowed less pad marring then the 3M yellow foam backing plate, and also allowed the 3M pad to contour to the shape of the panel easier. The Makita is much smoother and better suited for finer work, but the Flex rotary is easier to maneuver on a vehicle with such extreme curves, and allowed for a better cut during the initial polishing stage. The Green UK pads were imported from England at extraordinary cost, but they worked much better than the typical LLC orange in both cutting and finish. The pads did not survive to do another vehicle, but that's the difference in choosing a detailer that lives by low volume, high attention to detail work from one in which "Cost is King."


DSC01158.jpg


DSC01162.jpg


DSC01164.jpg


Still, it would take multiple passes:


DSC01175.jpg


DSC01178.jpg


DSC01191.jpg
 
Some defects required very careful sanding:


DSC01202.jpg


DSC01204.jpg


DSC01207.jpg


(here the Makita provided enough clearance for the gas cap)


DSC01209.jpg


DSC01210.jpg


DSC01212.jpg


Refining was performed with 3M Ultrafina (UK edition) on the Ultrafina pad using the flexible 3M backing plate which helped to lighten pressure from the pad's edges leaving a perfect finish.


DSC01201.jpg


Got Red? The result of the cutting stage, polishing stage, and final refining stage was red bliss


DSC01213.jpg


DSC01216.jpg


DSC01218.jpg


The next day we arrived and started an ONR wash to get any dust off prior to resuming polishing:


DSC01224.jpg


DSC01236.jpg


DSC01237.jpg


DSC01238.jpg


Places like the trunk and doors were finished, but areas like the fenders still needed further polishing and / or refining to hone the finish.


DSC01246.jpg


DSC01249.jpg


DSC01255.jpg


DSC01255.jpg


DSC01287.jpg


DSC01288.jpg


DSC01298.jpg


DSC01303.jpg


DSC01306.jpg


DSC01312.jpg


DSC01317.jpg


While Jacob continued to work some stubborn sections of the hand-painted finish, the interior was due to be freshened up. I had hit up the steering wheel the day before; the leather was dirty from use and needed some light cleaner and patience so I used the Fermani method of leather cleaning:


DSC01138.jpg


DSC01139.jpg


DSC01140.jpg


DSC01146.jpg


DSC01150.jpg


DSC01152.jpg


DSC01156.jpg


Today we would continue the cleaning and do some polishing. Here is the steering wheel aluminum before which was then treated with Meguiar's 105:


DSC01260.jpg
 
DSC01261.jpg


DSC01262.jpg


DSC01266.jpg


Look carefully at the steering wheel's clear-coated metal finish and you can see a 50/50 line: left side is done, right side is not polished.


DSC01263.jpg


Guages and dash were also polished by hand and then protected with a coat of Blackfire Wet Diamond All Finish Paint Protection sealant:


DSC01281.jpg


DSC01282.jpg


Rubber air-guards around the front windshield weren't in horrible shape, but needed a little love. Klasse All In One paired with a cotton applicator came to the rescue to provide the abrasive action needed to remove oxidation while adding a bit of protection.


DSC01283.jpg


DSC01284.jpg


After the Klasse All In One, 1Z (Einszett) Vinyl + Rubber Care and Protectant "Tiefenpfleger" was added to further even out the finish while adding a dose of UV ray protection against future elemental bombardment.


DSC01286.jpg


With polishing of the paint complete, we needed to get rid of any excess locked in the crevices. A true professional should never leave evidence of their work outside of the gloss and protection left on a vehcile. We resourced P21S Total Auto Wash and a soft Swissvax boar's hair brush to gently remove polish residue:


DSC01319.jpg


DSC01324.jpg


Washed, then blow-dried:


DSC01327.jpg


With the paint much smother now, blow-drying is much more effective:


DSC01336.jpg


DSC01337.jpg


DSC01338.jpg


I began going crazy with the protection at this point. On a car of this caliber or any other vehicle your eyes naturally will come to rest on the most unsightly part of the car: anything you might leave untouched/untreated will stand out like a sore thumb when all other parts look flawless.


The engine compartment had a red piece of vinyl going around it to act as a "buffer" to the hood that was currently removed. For this, 1Z (Einszett) Vinyl + Rubber Care and Protectant "Tiefenpfleger" was used to treat the finish for the same reason it was used on the rubber air-guard strip: adding UV ray protection along with evening out the finish.


DSC01347.jpg


DSC01351.jpg


DSC01355.jpg


DSC01354.jpg


Every little rubber gasket such as those that attachd the headlamp housings to the body of the vehicle and more were carefully treated as to not distrub the perfected clear-coat.


DSC01357.jpg


DSC01360.jpg


DSC01361.jpg


DSC01363.jpg


Rubberized bump stops inside the trunk area treated:


DSC01370.jpg


DSC01376.jpg


The running boards were cleaned thoroughly early on in the detailing process, so all we had left was to gently treat them to even out the finish. Meguiar's Exterior Trim Detailer in action:


DSC01367.jpg


DSC01368.jpg
 
The metal hood struts were treated with Blackfire Wet Diamond All Metal Sealant while the painted firewall was treated with Blackfire Wet Diamond All Finish Paint Protection sealant:


DSC01383.jpg


Painted trunk dampers= Blackfire Wet Diamond All Finish Paint Protection


DSC01388.jpg


DSC01389.jpg


DSC01419.jpg


All jambs... yes, all jambs. This means taking the time to apply Blackfire via cotton-swab to the trunk latch, water channels, and other painted surfaces as well.


DSC01415.jpg


DSC01416.jpg


DSC01420.jpg


Here you can see the same rubber bump-stop that was treated prior with 1Z (Einszett) Vinyl + Rubber Care and Protectant "Tiefenpfleger" has a beautiful even and dark finish, the painted surface around it however was yet to be treated until now.


DSC01421.jpg


DSC01422.jpg


DSC01426.jpg


Gently wiping off the hazed-over sealant revieled a beautiful glossy shine that would also allow for future cleanings of this area to be that much easier through-out the next years of the vehicle's life. Compare the wiped off side to the hazed over side:


DSC01425.jpg


Interior stuff went something like this: if it was metal, it was protected with Blackfire Wet Diamond All Metal Sealant. If it was rubber or plastic, it was treated with 1Z (Einszett) Vinyl + Rubber Care and Protectant "Tiefenpfleger"


DSC01429.jpg


DSC01432.jpg


DSC01410.jpg


DSC01412.jpg


The grill, headlamp housings, turn signals, and windshield bracket were polished by hand and then sealed with Blackfire Metal sealant like other metal had been.


DSC01401.jpg


DSC01403.jpg


DSC01404.jpg


DSC01413.jpg


Semi-Afters:

Still left were a few loose ends including a few more coats of sealant. While we originally were planning on a modest 2 coats, we would end up more than doubling that number as some plans changed shortly after these photos were snapped.


DSC01437.jpg


DSC01439.jpg


DSC01443.jpg


DSC01447.jpg


DSC01449.jpg


DSC01455.jpg


DSC01465.jpg


DSC01466.jpg


DSC01468.jpg


DSC01510.jpg


DSC01512.jpg


DSC01513.jpg


DSC01515.jpg
 
Tight and true reflections that only looked better as you poured more and more light onto the finish (one of those times I wished there were 3 or 4 suns to show off the absolute perfection of this roadster).

It was at this point, the point we knew our contract with this car was up, that the owner mentioned he had never seen the car look this good; even when freshly built. Since it is a show car, and he wanted to show off ALL the car, he asked us what it would take to bring "the rest of the car" up to the level the exterior was now in. With an increased budget, we decided we would go crazy and not only make this something for him to show off, but to make this as thorough of a job as possible . The owner lifted the restraints on the detailing budget and we went to work.


We decided to start going crazy: do everything we could find left and see where it took us. We would go beyond the ceiling. It didn't matter. Nothing else mattered. We would spend another half a week working on this beauty, in very high spirits, loving every second of it. It is very rewarding to be able to go crazy on a car for a customer who really appreciated it!


The next time we were back, the wheels were being dismounted. The owner placed the car in a carpeted area of the building for our comfort. We planned a Michael Angelo style upside-down work day (not only did he paint the famous Sistine Chapel, like Jacob and I; he was left handed). One of the rear wheel lugs had seized, and required some work to remove, so we finished the rear section another day.


DSC01926.jpg


DSC01927.jpg


DSC01928.jpg


We started by wiping off the heavy stuff, then spraying cleaners, brushing, and rinsing via an Optimum No Rinse solution in spray bottles. Once wiped dry, items were gone over once more.


Grease build up:


DSC01935.jpg


DSC01936.jpg


DSC01940.jpg


Brake components were treated with Chemical Guy's Sticky Gel wheel cleaner


DSC01941.jpg


DSC01942.jpg


DSC01943.jpg


DSC01944.jpg


Behind and around the wheel hub:


DSC01947.jpg


Inside the rotors there was quite a bit of build up so each individual fin would thoroughly be gone over to ensure a beautiful clean finish.


DSC01951.jpg
 
Using the Optimum No Rinse solution to flush away the Sticky Gel:


DSC01955.jpg


A toothbrush came in handy to agitate some hard to reach places: nooks and crannies, cotter pins, etc.


DSC01962.jpg


DSC01963.jpg


After being rinsed with our Optimum No Rinse solution, we used compressed air to help dry all the various parts which would help against water marks.


DSC01965.jpg


Finally cleaned and dry, Detailer's Pride spray sealant was used to dress and protect the painted portions in the wheel well.


DSC01967.jpg


DSC01968.jpg


DSC01969.jpg


DSC01970.jpg


Clean! Just look at the inside of those rotors!

DSC01971.jpg


Optimum Opti-Seal was used on the brake calipers, behind the rotors, on the springs, control arms, on the painted black portion of the wheel hub, and the various other pieces of the suspension.


DSC01972.jpg


DSC01976.jpg


Collected water after working on one corner:


DSC01978.jpg


DSC01980.jpg


The hood presented some challenges due to its unusual shape and lack of rigidity. We combated the problem using 1/4th inch painter's tape to protect edges and a soft but supportive roll of packaging material.


DSC04245.jpg


DSC04246.jpg


Getting to work!


DSC04256.jpg


Clarity coming back under various types of lights.


DSC02084.jpg


DSC04257.jpg


Half of the hood done, half to go. Here you can see the difference in gloss and clarity gained from proper polishing techniques.


DSC04260.jpg


Again - the section of the hood that is closest is corrected while the section in the back has yet to be cared for.


DSC04262.jpg
 
Afters for the day.

Many parts were hand cleaned (APC 10:1, Optimum No Rinse, car wash shampoo, etc), hand polished (Meguiar's 105/205), then sealed with the same Detailer's Pride spray sealant as used on the wheel wells. It was time consuming and not always easy, but the results left a smile on our faces for sure.


DSC02005.jpg


DSC02006.jpg


DSC02008.jpg


DSC02009.jpg


DSC02010.jpg


The black drive shaft came out nicely after some polishing by hand - here you can see it looks like a mirror:


DSC02026.jpg


DSC02032.jpg


DSC02040.jpg


DSC02044.jpg


The coat of Blackfire Wet Diamond that was applied earlier in the day was taken off, and we retired from our labor until the next day when we'd continue on the rear wheels, suspension, and other parts that would be lifted off the ground making them accessable.


DSC02046.jpg


DSC02056.jpg


Wiped off to reveal the deepest red I've set my eyes upon:


DSC02058.jpg


The next day we would tackle the rear portion of the underbody and the rear wheels, now removed from vehicle in the same manner we had perviously done on the fronts. Most of the same products were used - there'd be no way around taking the time to simply do things right. The results spoke for themselves...


Rear quarters:


DSC04280.jpg


DSC04281.jpg


DSC04283.jpg


Jacob took care of the rear differential housing using more Meguiar's 105+205 by hand. The results were stunning and unlike any gloss I've ever seen on a differential case.


DSC04285.jpg


DSC04289.jpg


The mag wheels posed an issue to us. We knew we needed to clean them even further to improve the look of the finish, but wanted to know if we could cut down on time using the Mother's Powerball (did OK actually):


DSC01981.jpg


By hand ending up being not only more effective, it was more thorough. While the Powerball cut down on time, it did so at the expense of the finish looking as good as possible. We started cleaning the oxidation off the wheels with P21S Polishing Soap:


DSC01983.jpg


Then used some Meg's Mag & Aluminum Polish:


DSC01984.jpg


DSC01986.jpg


P21S PS versus Polished:


DSC01987.jpg


P21S PS versus uncleaned:


DSC01990.jpg


Polished versus uncleaned:


DSC01991.jpg


Undone:


DSC01997.jpg


Done:


DSC01996.jpg


Done and Undone:


DSC01993.jpg


If you hadn't notice, those pictures were of the back of the wheels. The owner had some points taken off at a judging for dirty back-sides of the wheels (they drove the car there!) at a show not too long ago. We would make sure it never happened again. The Mag & Aluminum polishing was used on the fronts as well, and once done, the wheels looked outstanding.


Here is the front of the front wheel:


DSC02002.jpg


The next day, with the rear wheels finally removed, we would finish. I got to work:


DSC04267.jpg


DSC04269.jpg


DSC04270.jpg


Jacob followed my efforts of initial cleaning with P21S Polishing Soap with the Meguiar's Mag & Aluminum polish.


DSC04276.jpg


Once he finished, I got going with caring for the nasty tires that had build-up of old dressings and grime. They were scrubbed clean with a little help from Meguiar's Super Degreaser.


DSC04274.jpg


DSC04271.jpg
 
DSC04306.jpg


DSC04302.jpg


Front sides of rear wheels:


DSC04293.jpg


DSC04294.jpg


DSC04295.jpg


That was the end of the billable work. We totaled about 25+ hours (50+ man-hours) on the vehicle, talked it over with the owner and he happily wrote us a check with a tip included. The money is nice, but the satisfaction of bringing the full potential out of a beautiful car is something that money can't touch.


A few months later, after the Michigan winter had passed and schedules converged with the photographer's, we paid a visit to go over the vehicle in prep for the photo shoot. Oh yes, of course there would be a photo shoot! We arranged to have this vehicle shot by the same guy that did the press release picture's for some of Roush's Mustangs: Andrew G Photog.


We arrived at the vehicle's quarters and found it unmolested. It had not moved since we finished with it last Fall. I'm not even sure if it had even been started over the last few months. We went over the finish with an Optimum No Rinse wash solution and shag-style microfiber towels to prepped for a very special "Last Step Process" dispite the paint already wearing 6 layers of sealant.


DSC06072.jpg


DSC06077.jpg


DSC06080.jpg


DSC06091.jpg


A vehicle that has recieved so much special attention deserved to out-class any past project of ours. This 1929 Ford Roadster deserved the very best.


DSC06094.jpg


DSC06095.jpg


DSC06096.jpg


DSC06100.jpg


DSC06102.jpg


DSC06106.jpg


DSC06107.jpg


DSC06108.jpg


DSC06109.jpg


DSC06111.jpg


DSC06112.jpg


DSC06115.jpg


Zymol Atlantique is unlike any wax I've previously used or smelled. The aroma was hypnotizing:


DSC06116.jpg


The brand might encourage its users to only apply the "estate glaze" by hand, but we chose the much softer Lake Country Gold Concours applicator pad in order to achieve a thinner and more consistent finish.


DSC06123.jpg


DSC06124.jpg


DSC06125.jpg


DSC06126.jpg


DSC06130.jpg


DSC06131.jpg


The reveal:


DSC06134.jpg


DSC06136.jpg


DSC06137.jpg


DSC06138.jpg
 
DSC06139.jpg


DSC06140.jpg


DSC06141.jpg


DSC06142.jpg


DSC06144.jpg


A few days later, we would meet up with the owner and the photographer at a few locations very early in order to take advantage of the soft light. The weather said 0% chance of precipitation, so we knew this is the day we were waiting on for all these months. There was no way we were going to take this car out to get rained on!


The first location was next to a lake:


DSC06294.jpg


DSC06295.jpg


DSC06311.jpg


After getting a cool 40-60 pictures, the first boaters began to arrive to take advantage of the beautiful weather and perfect time to fish. As they drove uncomfortably close to the Roadster (within 20 feet :) ), we decided to move to the next location:


DSC06355.jpg


DSC06316.jpg


DSC06326.jpg


DSC06382.jpg


Arriving at the next location, another lake, the photographer started setting up his strobes. You do know that Michigan has over 15,300 lakes right? Sorry Minnesota ;)


DSC06398.jpg


DSC06400.jpg


DSC06402.jpg


DSC06405.jpg


DSC06408.jpg


DSC06413.jpg


DSC06417.jpg


DSC06420.jpg


DSC06423.jpg


DSC06433.jpg


Time to button up and hit the next location:


DSC06460.jpg


DSC06462.jpg


The next location was further from the water, some muted colors and angles, textures and contrast. Nice backdrop for the most intense of reds:


DSC06466.jpg


DSC06470.jpg


DSC06473.jpg


DSC06480.jpg


DSC06485.jpg


DSC06496.jpg


DSC06503.jpg
 
DSC06514.jpg


DSC06516.jpg


DSC06528.jpg


... and lets get to the last location:


DSC06529.jpg


The last location for shooting of the day was down the road a little, a proper place for the day (Memorial Day): The Grosse Pointe War Memorial.


DSC06531.jpg


DSC06533.jpg


DSC06537.jpg


DSC06550.jpg


DSC06556.jpg


DSC06566.jpg


DSC06575.jpg


DSC06582.jpg


DSC06590.jpg


DSC06591.jpg


DSC06594.jpg


DSC06610.jpg


DSC06621.jpg


DSC06627.jpg


Andrew G Photog said:
Over 8 months after we initially talked about it, a date had finally been set...the shoot was on! I contacted the owners to discuss any possible ideas they might have for the photos. I've found that some owners have that, "special place" they just HAVE to have, while others want to leave it in the hands of the professional. After a brief conversation with the owners, they let me know this was a case of the latter. Knowing I had complete creative control, I started brainstorming possible locations for the car. After 3 days of driving around scouting, I contacted AutoLavish and the owners with my location ideas. We agreed on a starting location and time (6am), and prepared to meet in the coming days when weather would be ideal.


Andrew G Photog said:
Red can be a tricky color to shoot. I had to make sure final locations had colors that complimented the car. I tried to avoid busy and distracting backgrounds as they tend to take away final product.


Lens selection was another consideration. I like to shoot cars from a distance, which meant my 70-200 f/4 IS was used for a lot of these photos. I really enjoy the natural depth that is achieved when shooting a car @ 200mm. For the wide-angle shots I used my Tokina 11-16 f/2,8. For all of the shots I used a circular polarizer, as it helps to cut through the glare that the sun likes to create on a shiny, freshly polished surface.


Lighting is always the key to getting "the" shot. Not everyone can afford strobes, which is why you're lucky the sun is free. Use that early morning sun and late night light when you can. It is soft, even, and allows for some nice shadows to accentuate the lines of a car. I did bring my strobes to the shoot, and while we set them up once, we didn't end up using them for any of the photos. I'm a huge fan of natural lighting, but having a backup plan never hurts as you never know when you're going to need the extra light.


These were just few of the things that need to be taken into consideration.


4662124244_788ac89044_b.jpg


4662092954_1303c2bc4a_b.jpg


4661494077_d0bae31e4d_b.jpg


4662110020_3889931991_b.jpg


4662073470_3a93a00ce3_b.jpg


4661456109_d639d80e74_b.jpg


4662119652_4bd01b36b3_b.jpg


4661487299_90da6d9a48_b.jpg


4662095922_f3ec9ee8b8_b.jpg


4662081320_7f7336a28b_b.jpg


4662084608_f76ba7d9cd_b.jpg


Andrew G Photog said:
I Hope you enjoy the photos as much as I enjoyed shooting them!


Thank you for taking the time to walk through our journey. It was an incredible experience for us: we're proud and fortunate to have been able to take part of this stunning car's good looks, and to have worked on a car who's nameplate has done more for auto enthusiasts than we could ever imagine doing.


4713113577_59510fcf3d_b.jpg
 
I rated this thread 5 stars! This is down right one of the best threads I have ever read!


:bow:bow:bow:bow:bow:bow:bow:bow


Ill call you soon Mark I finally got around to get some stuff together for ya! Sorry tfor the delay, its hectic now! :xyxthumbs
 
I think those are fallen comrades bracelets. He wears them in honor of fallen soldiers.


I had chills the whole time I read this. That is awesome work. You raised the bar even higher with that one. I totally know what you are talking about with getting the check but the opportunity and pure joy of it make it worth it. I love detailing cars. I've learned so much from your threads.


I finally have a question. When you dressed the front wheels, did you dress the inboard side of the wheels also. Normally you can't see them but with this style of vehicle it was right there.


Tim
 
This is the BEST OF THE BEST of the best....

I got no words, awesomeee!!!

You must buy a ferrari already for the money for this detail. or atleast an m5 lol

best thread on autopia.
 
They say the great ones always have that "One" that stands out and puts them over the edge.. Guys this is your "One" by far. I usually don't even bother with the long write ups. They always tend to be more filler than anything but I couldn't stop reading through this one until it was done. You guys had me hooked from start to finish here. The attention to details and the awesome photo's really put this one away. Absolutely one of the best write ups I've ever had the pleasure of seeing...:bow:bow:bow:bow
 
Back
Top