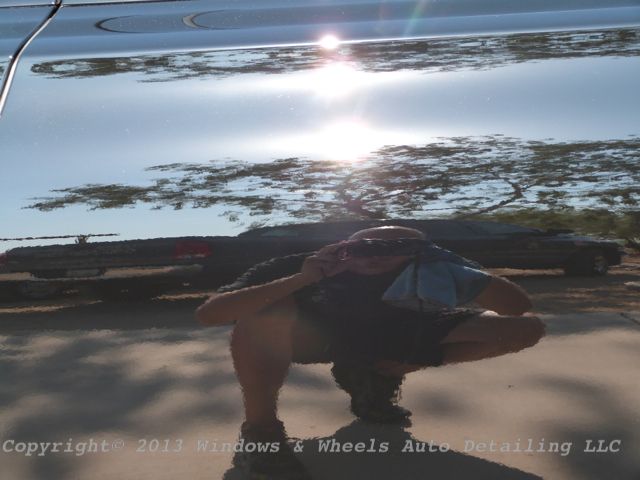
Sometimes you just get lucky...not with what car you do, but with who you're doing work for...this was one of those cases. This couple had a very sweet pair of cars...we took care of the beast first (13' Black ZL1)....and now it was time to do the beauty...the 750LI. Now most owners will make some room in their garage for us...these guys however just gave us the WHOLE 3 bays to work in...on top of that...they told us take anything we need out of their outside fridge (which trust me in this heat - we did take advantage of that offer!)...brought out fans into the garage for us...and then even went as far as to leave the garage door open to the house so that the AC would blow in some...now that is some serious thoughtfulness. So before I get into the story, i just wanted to give props to nice people like these two were...to say they went the extra mile would be an understatement.
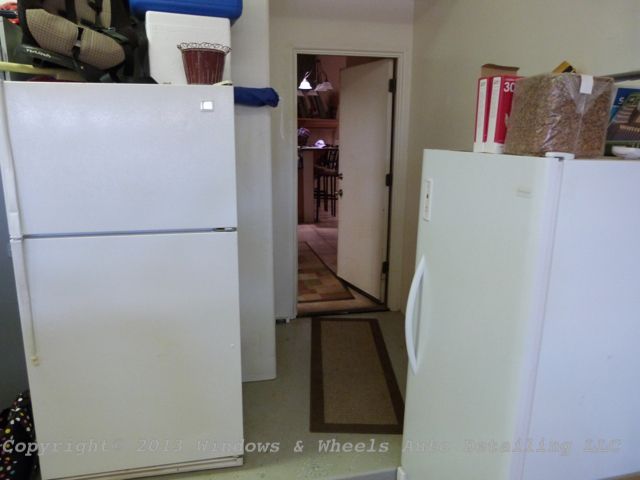
I told you, i wasn't kidding, they left the damn door open!
Now onto the fun stuff...the detail.
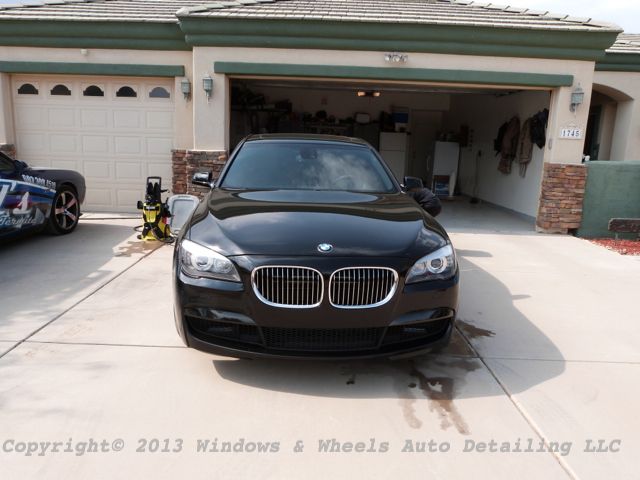
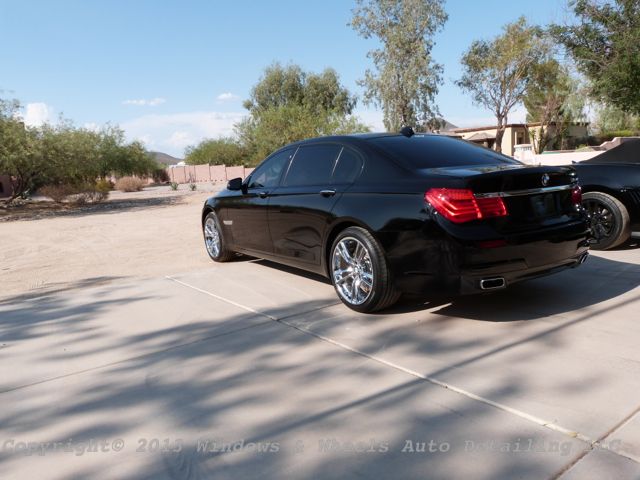
This was Jet Black #2 for the year...except this one was a LOT bigger. You don't realize till you stand next to one of these 7 series BMW's not only how WIDE they are..but how tall.
This one was pretty clean...it was down a dirt road so...had some dust and some mud sling but....not as bad as you'd expect:
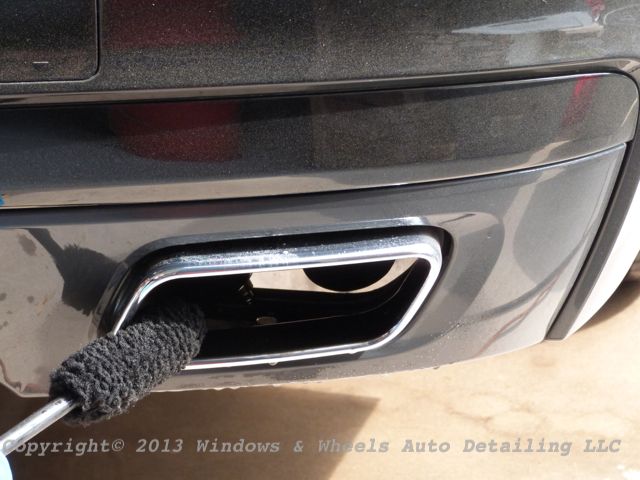
Some clean up was needed on the tires/wheels and tips as usual as well:
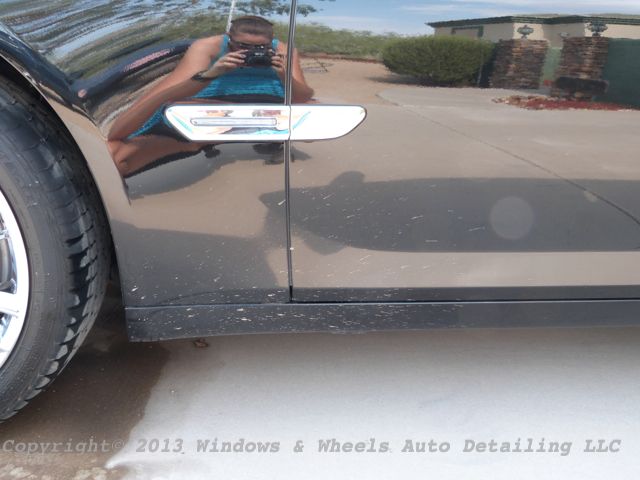
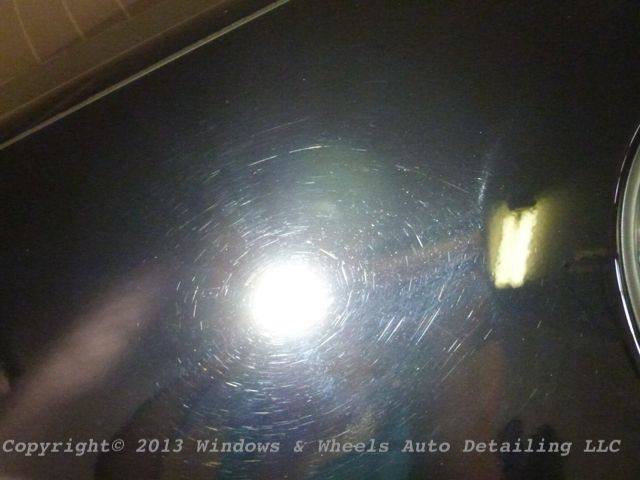
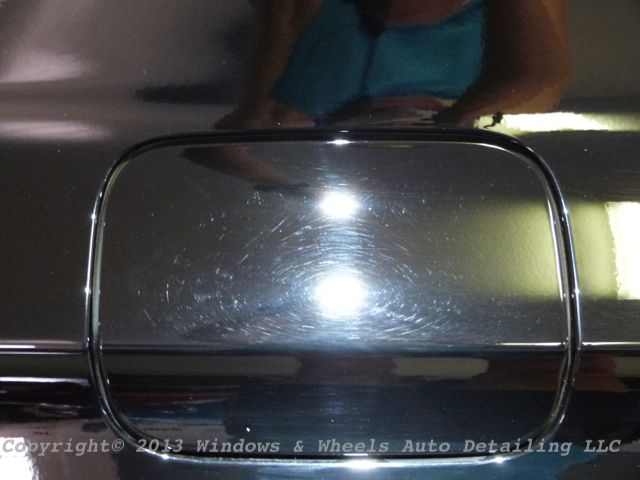
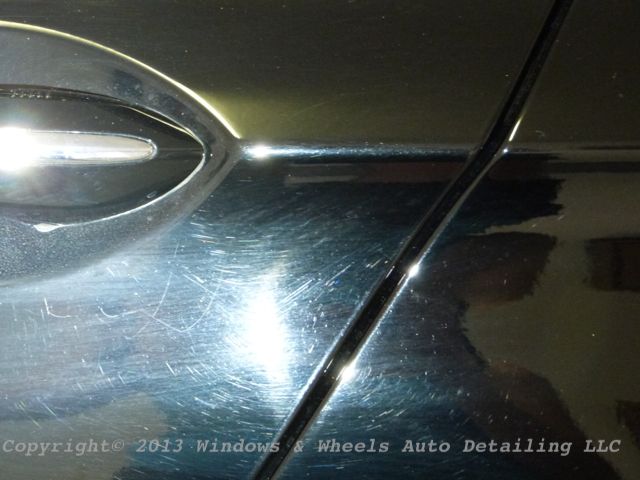
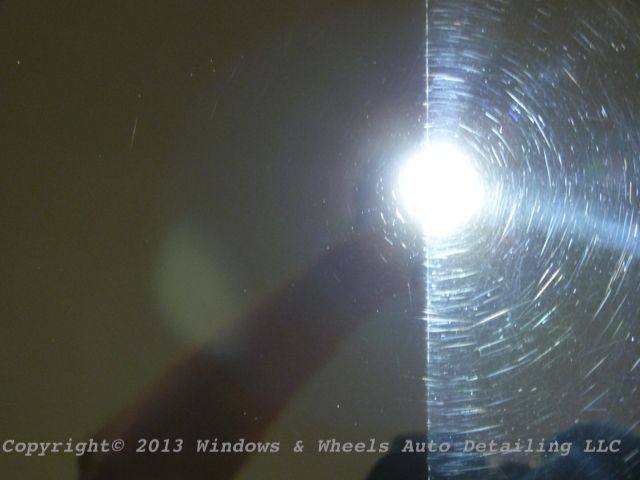
But of course, being not only black...but BMW Jet Black...meant that the real damage was on the paint...swirl city:
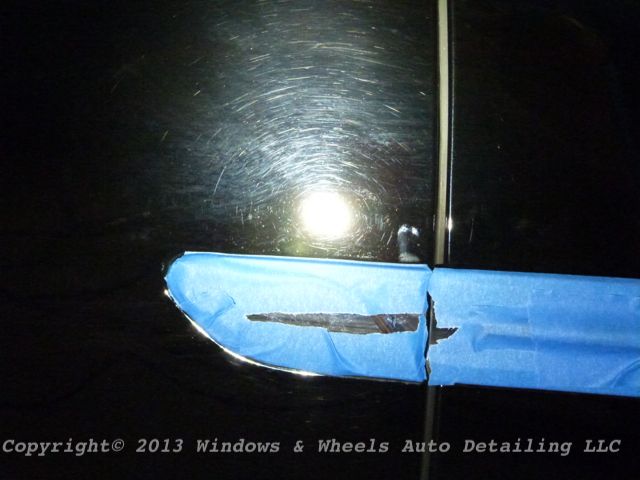
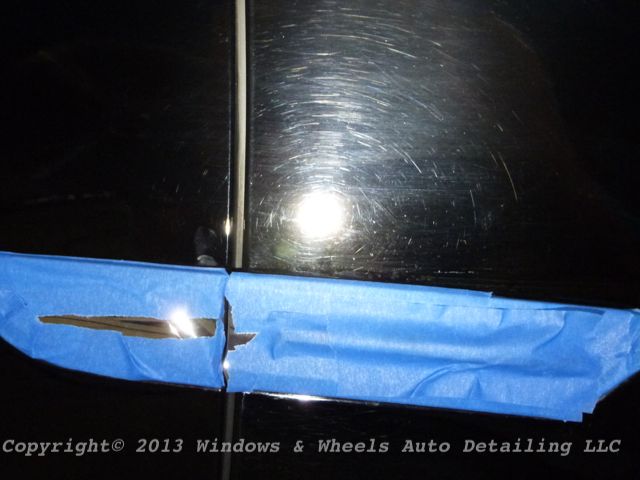
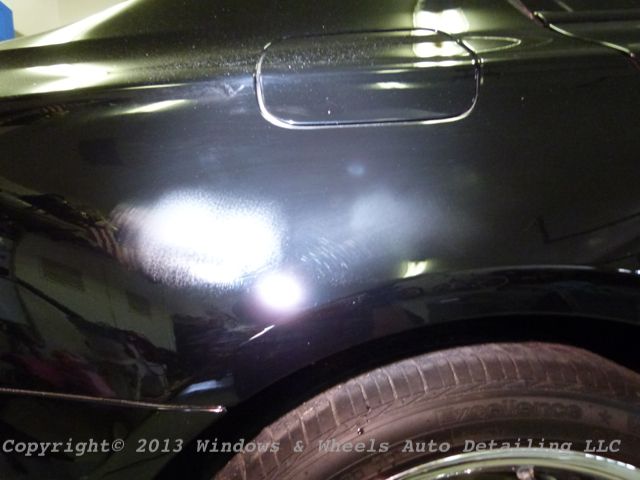
Every inch of this car was covered...even and on the passenger side there was a couple of pretty deep gouges as you can see here under the gas chamber:
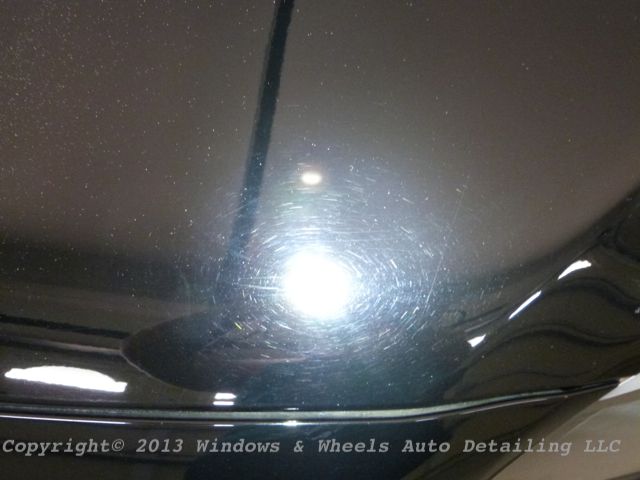
The rest of the car was pretty scary to be honest...lots of work lied ahead:

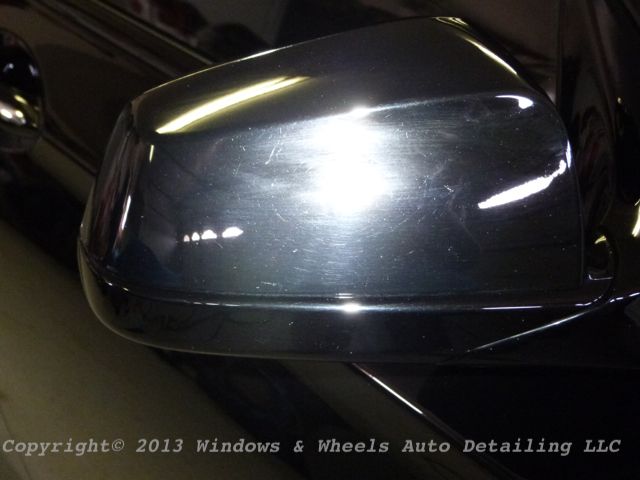
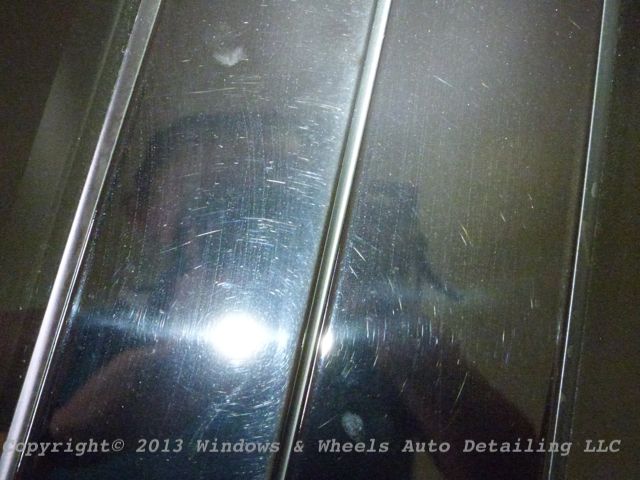
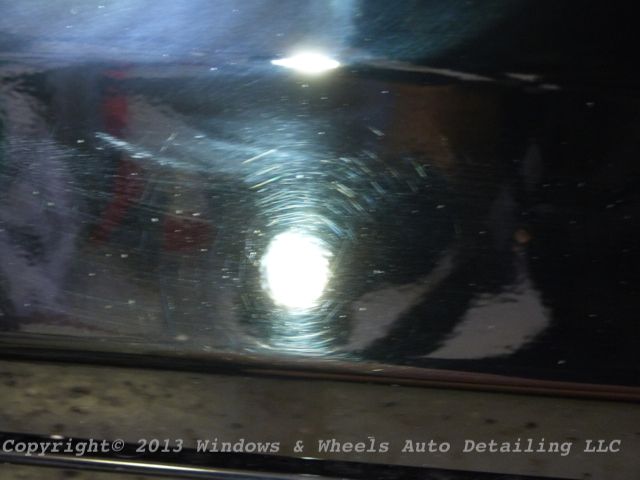
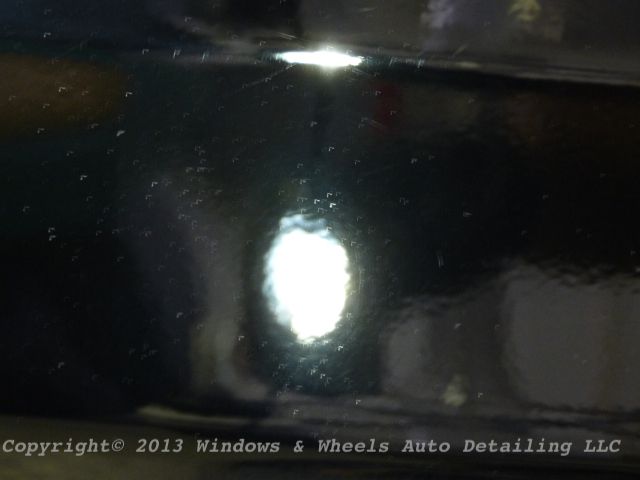
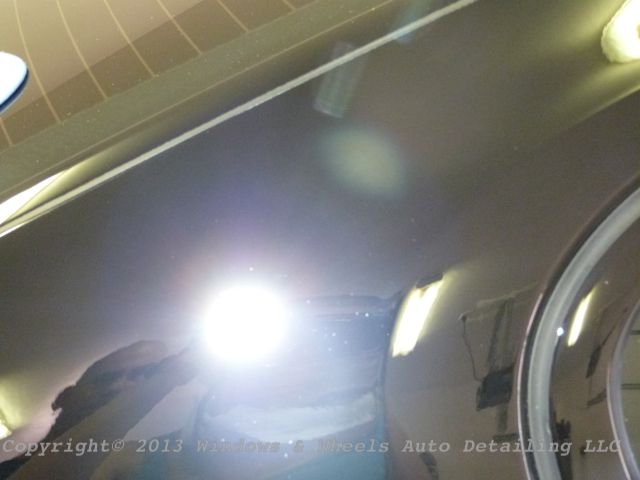
Even indirect light showed some serious swirling:
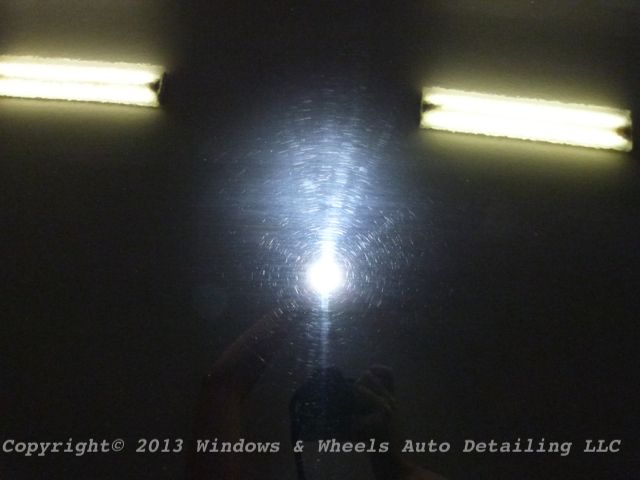
Ouch...

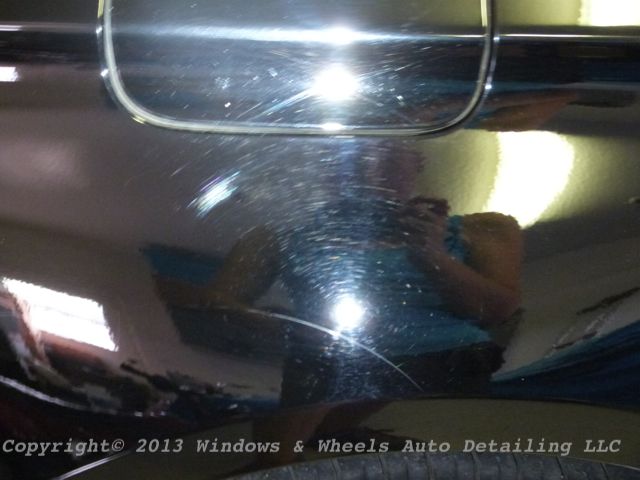
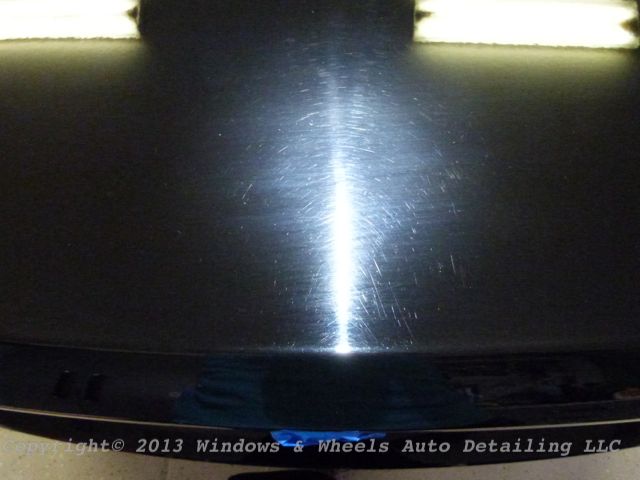
Some pretty wicked ones were on the trunk:

*Sigh*...where to begin! Well, first we had to get a test spot done and see just how much cut these things needed in order to remove them. We tried a Megs 2.0 foam Cutting Pad first with some 205 just to see if the soft paint would correct with a less aggressive approach...no such luck. It did get some great correction, but wayyyy too many RIDS left behind for our liking. So we bumped it up to 105...much better...but on many areas we had to go with M101 to really cut the paint down to our liking.
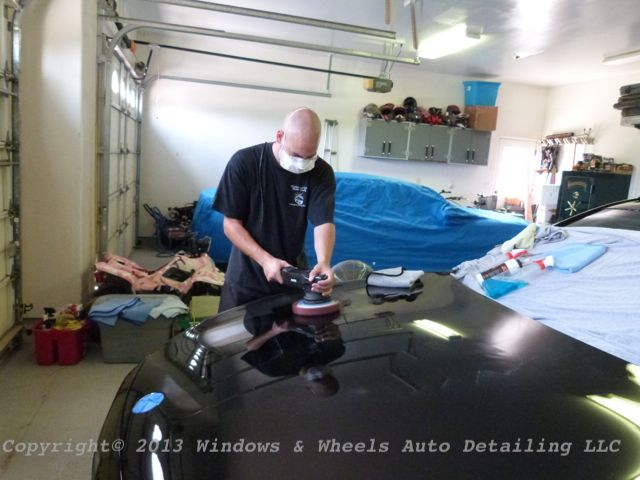
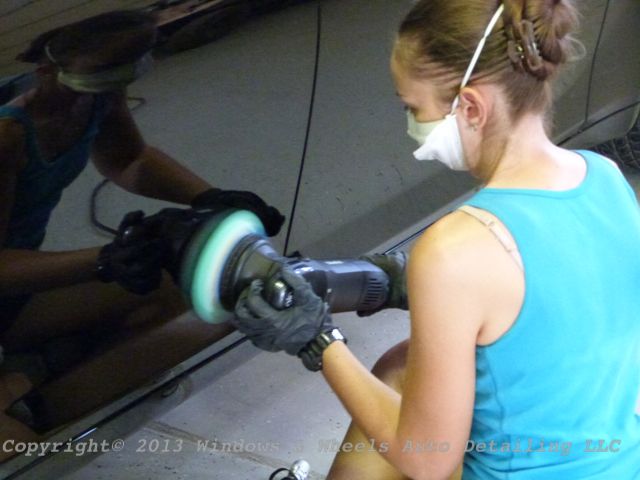
Just for a size comparison...this is me polishing the hood...im using the megs 2.0 pad, which is a 7" pad...much bigger compared to the 5.5" we're usually using...but just look how that big pad gets lost in this monster of a hood!
Obviously we were going to be flinging some serious dust on this one by using M101:

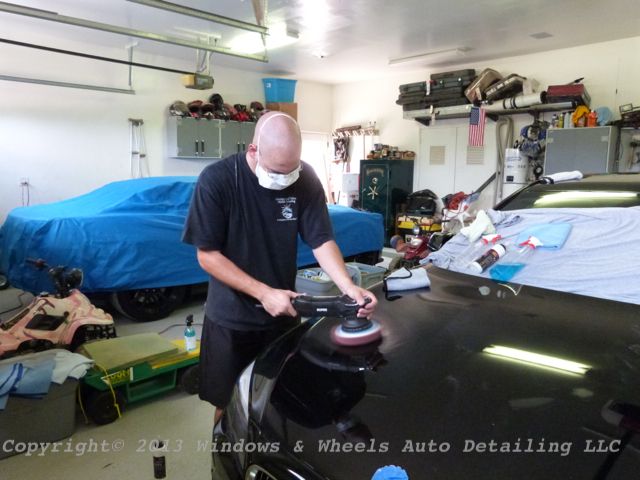
Mask in place...made a big difference but what a task it is even to wear it...it was still nearly 100 degrees in the garage...pretty hot.
The cut however made the dust well worth it....the reason we went with foam on this is because on larger cars where we're doing some seriously extended buffing for hours on end...our microfiber pads have been "bunching" up recently...they still cut like mad...but the bunched up fibers make the cutting process much more hazy than we like...its harder for us to locate rids and its more clean up for us to do when it comes to polishing...so we gave foam a go. On this car at least...it worked.
We were able to take some nasty stuff like this:
And get it to finish down like this with just M101:
Not too bad huh? There was still light marring so we did have some clean up to do with a finishing polish...we decided to split the work up on this one though....i tackled the big stuff with my larger pad..while Dani cut the bumpers, pillars, rockers and other tight areas i couldn't get into...like the trunk/license plate area:
Though her areas were smaller, they were very very tedious and time consuming...i tell you what though...it was nice to double team up on the compounding, this was a LOT of paint...a lot of really really swirled paint lol.
Our results were hitting right on point....here are a couple of nice 50/50 shots:

Lookin' good!
Then of course, we had those super deep scratches on the passenger side...those were not going to buff out...so..it was time to sand them down:
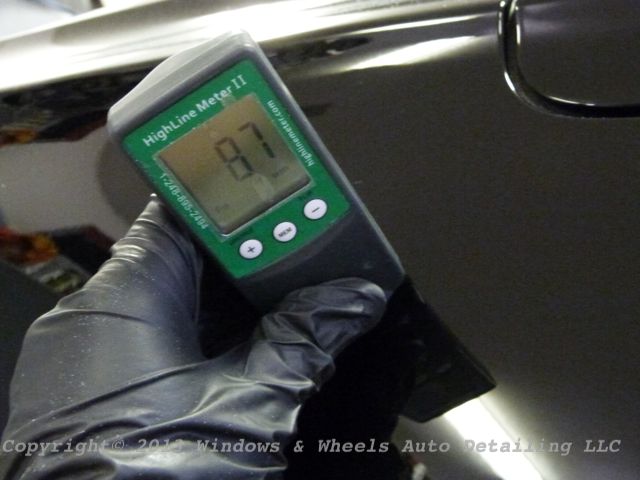
I got them ALMOST removed by sanding....very faint trace was left...but readings were getting a bit low...so i opted to not chase them any further:
After buffing the sanding marks out....it was nearly impossible to tell where they were....most were totally removed...one was SLIGHTLY visible but you had to get perfect light to see it:
Not too bad.
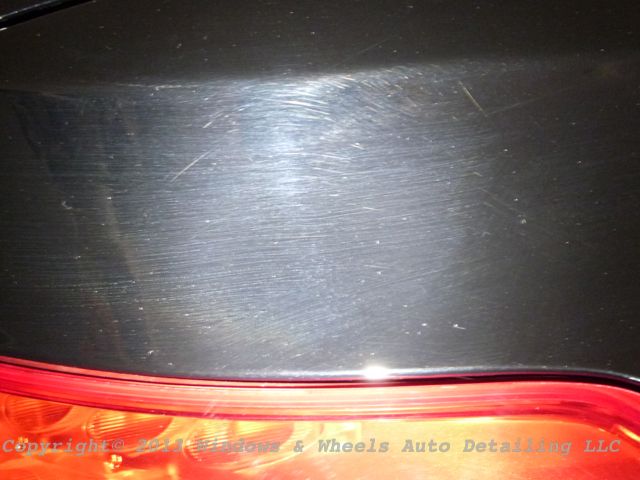
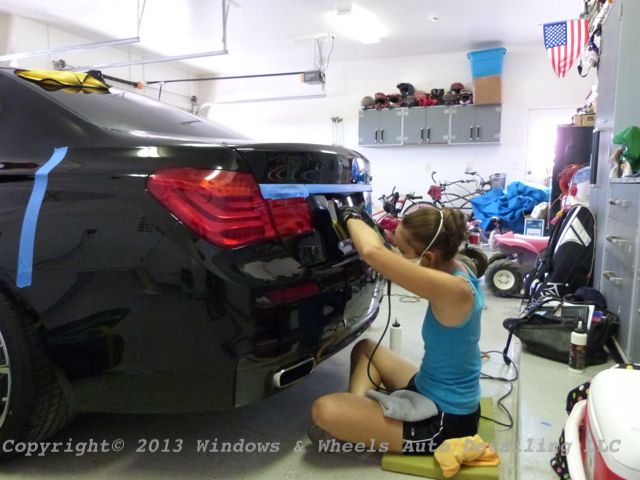
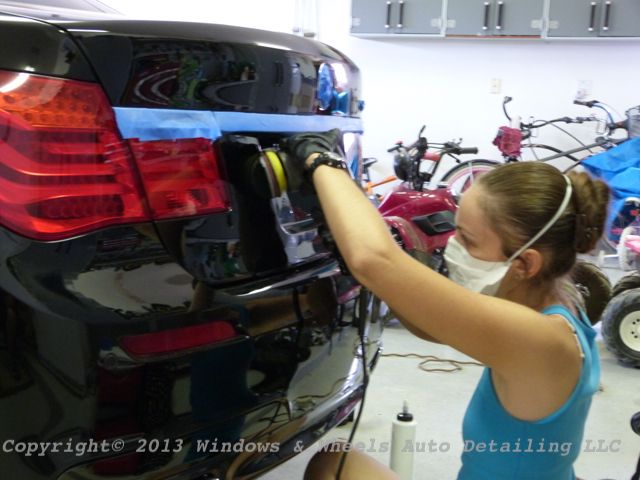
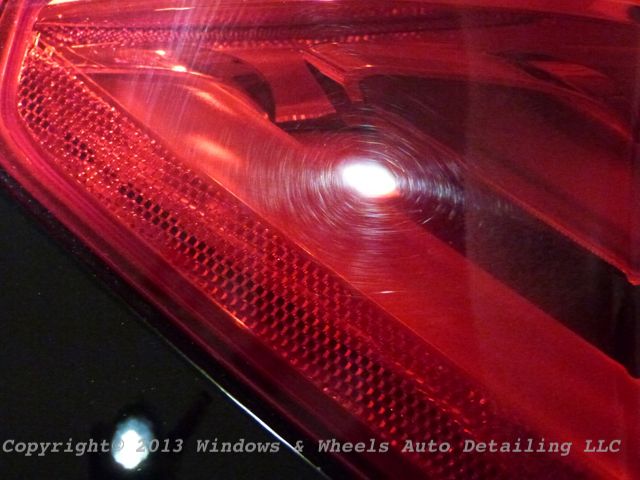
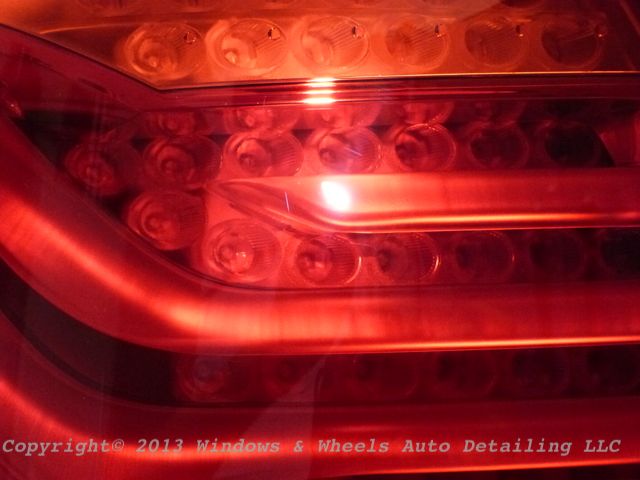
Tail lights needed some loving as well:
By day one we had the car completely cut...day 2 were had to come back up (an hour drive either way) to get the final polishing done. 205 was working beautifully so we stuck with it through the polishing process:
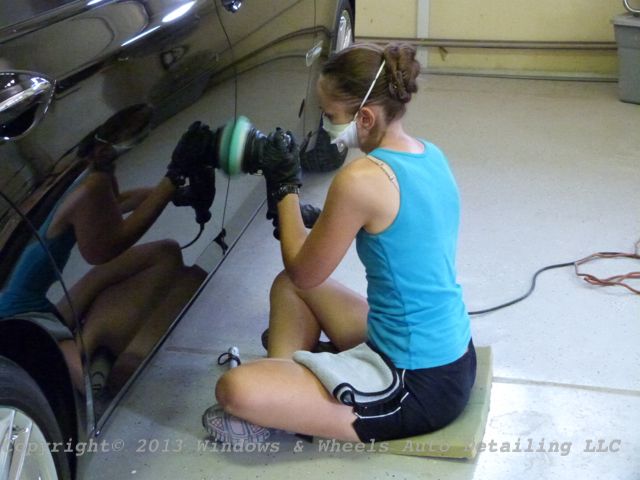
Dani, finessing the paint down to a black pool of "wow!"
She circled using the Rupes 15...while i was working the 21. The 21 is VERY capable of finishing down without any scouring or micro-marring..its just all about working clean. Clean your pad after every section...work a smaller section and TURN DOWN THE SPEED. I was working on 2 1/2 for most of my final polishing...and it was all i needed:
I know sometimes we see speed 6 and think oh yeah...speed 6! But its really not needed especially on the Rupes 21. Even on the soft Jet Black paint i could finish down with relatively zero issue.
After we finished the polishing on day 2...now came the hard part...yeah...the hard part...prepping the paint for CQuartz Finest. This was hard because...even though this paint wasnt GOD AWEFUL soft...it was still very soft and would towel mar very easily. So wiping down with Eraser was a tedious and tactful job. Luckily Dani came up with the idea to wash the car BEFORE we polished...so all the compounding dust was already removed...i just had polishing oils and a little bit of light dust from the final polish to remove:
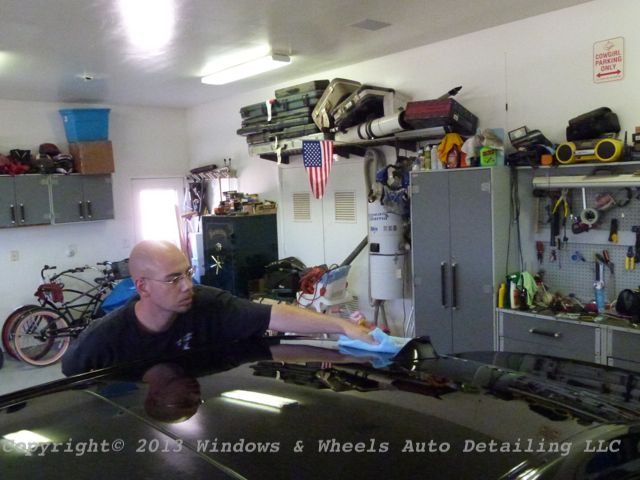
Dani caught me lookin' lol. By this time it was VERY hot in the garage...and extremely humid...cause we killed the fans. We didn't want to chance any dust blowing up onto the surface after we did our Eraser wipe down.
Finally Finest was applied:
Im a bit of a slow coater...i like to make sure its totally even and that my finishing stroke goes the direction i want the water to flow when it gets washed...in this case the side panels you can see the final stork i used was going up/down
The hood (MONSTER!) was left with a final stroke of going length wise with the car:

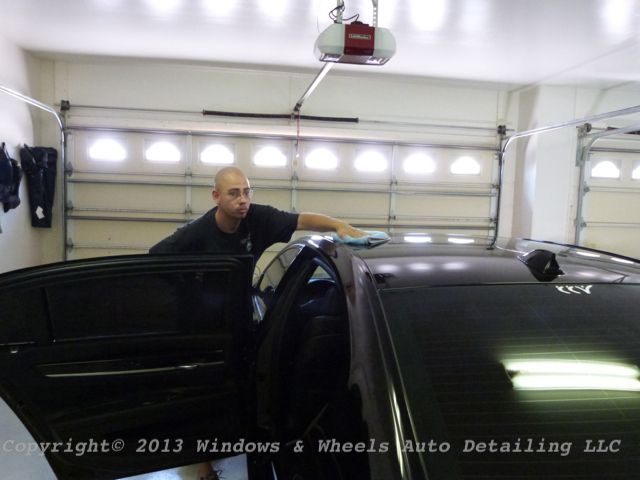
After allowing it to cure...it was time to remove. I found a little trick that others may find useful. Finest comes with a very soft Micro-Suede towel. It removes the coating nicely, but because its so thin ive found that where my fingers are pressing onto the towel...that sometimes i'll live "finger prints" on the paint through the towel. Basically as the little bit of Finest I'm removing builds up onto the surface of the towel...by the time i get to my final wipe of a section...theres enough on the towel to where it leaves little spots on the paint from where my fingers were pressing.
You can see here how thin the towel is:
NOT a big deal, i know...it wipes right off with a second towel. But what i figured out was...if i put a second towel ontop of the micro-suede...it cushioned my hand...so that the pressure was more even and not excessive where my fingers pressed. This allowed for a very clean wipe. I still followed up with a 2nd towel (my super soft Korean towel you see me wiping with below) just to be sure no high spots are left:

Hey look, she caught me in the same spot! lol...tricky.
Dani went around and coated the wheels, lights and hard plastic as well as any tight areas i may have missed. She also double checked after i removed Finest to be sure i left nothing (in between packing everything...serious multi-tasker!)
Finally the fun part....finished pictures.
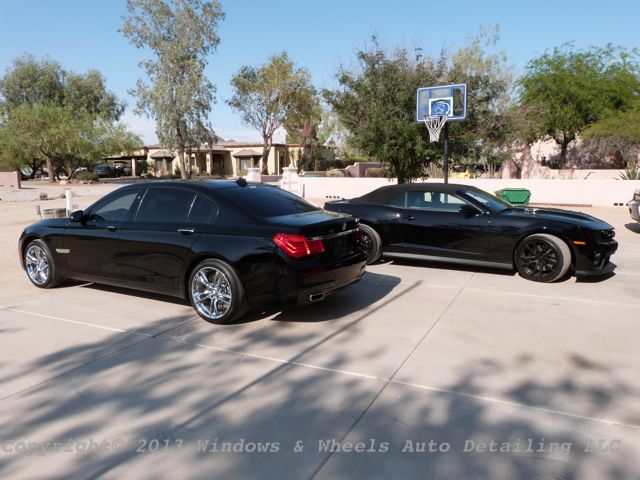
I present to you the Beauty and the Beast:
But this write up is about the beauty")
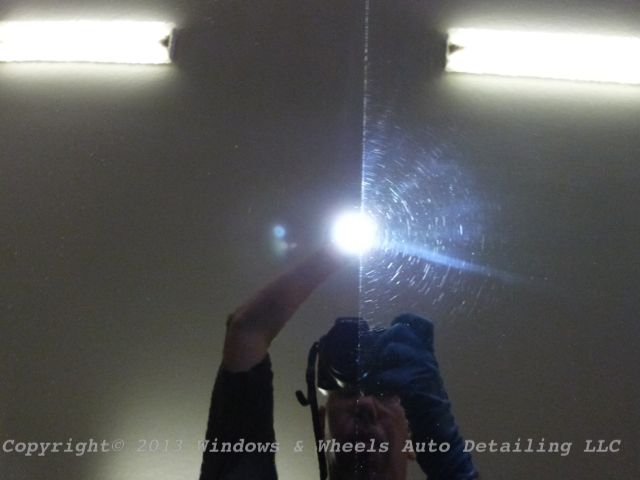
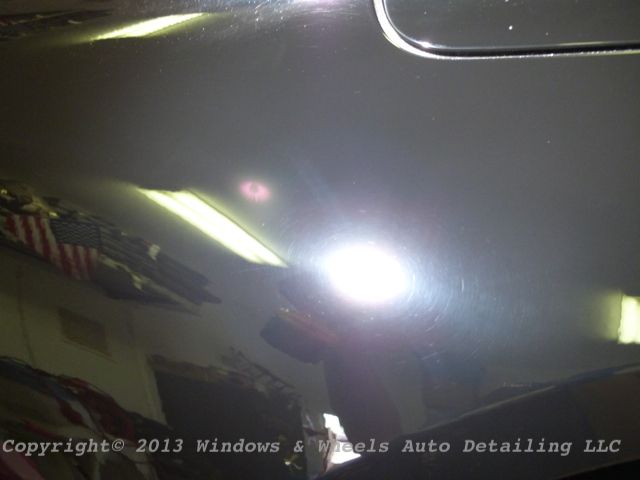
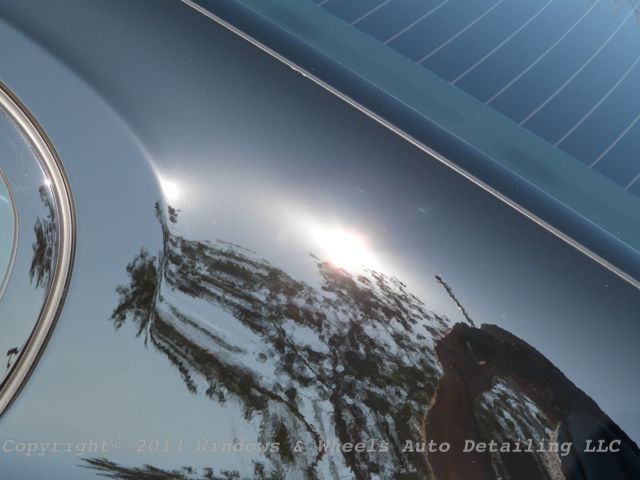
No more swirls on this paint:
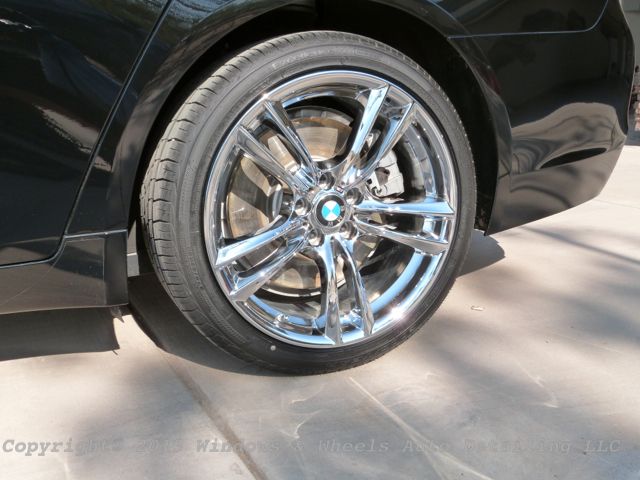
Wheels shining like crazy...tires dressed as well as wheel wells:
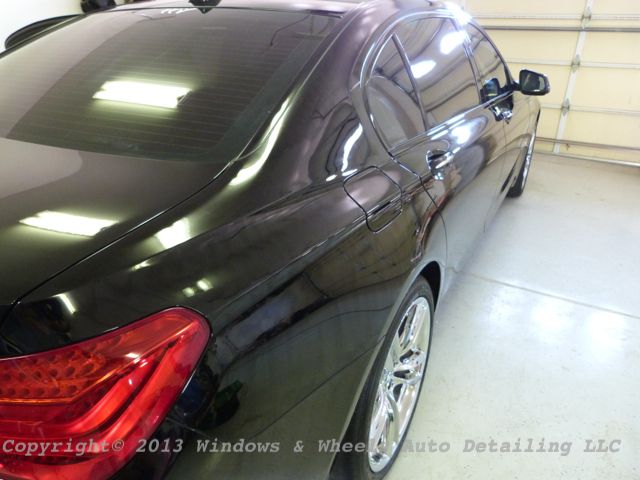
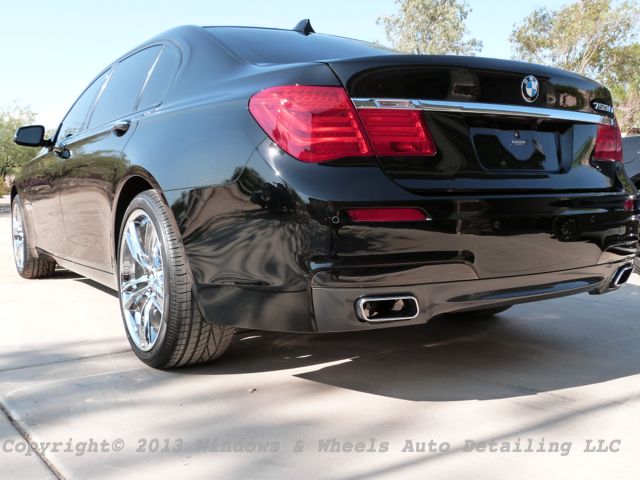
And as for gloss, it had serious serious gloss:
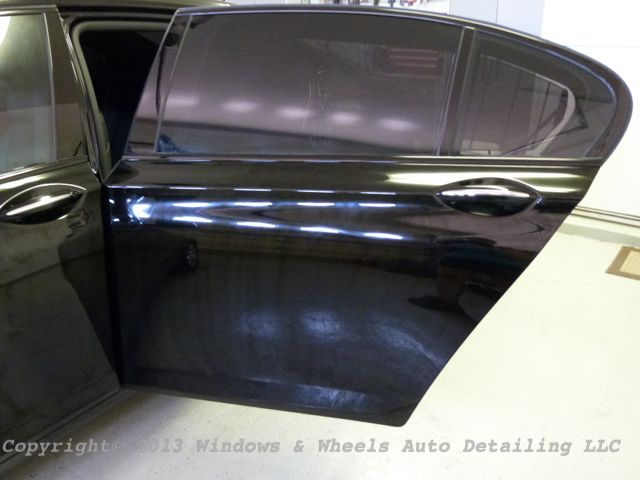
No swirls over here either:
Crystal clear:
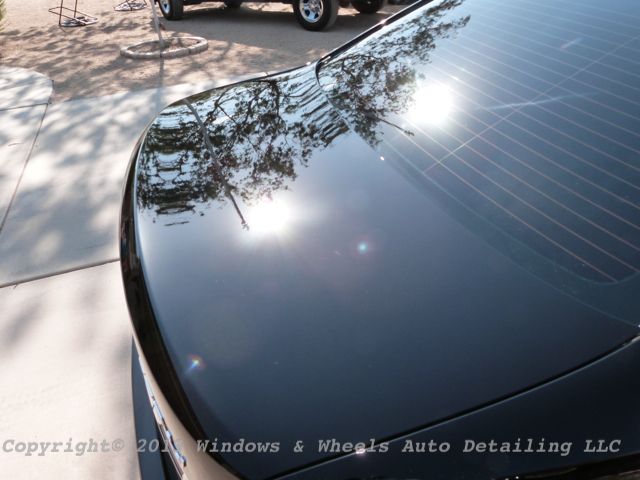
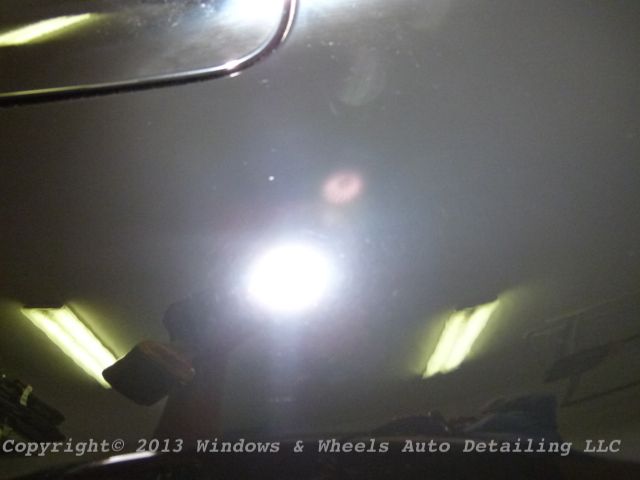
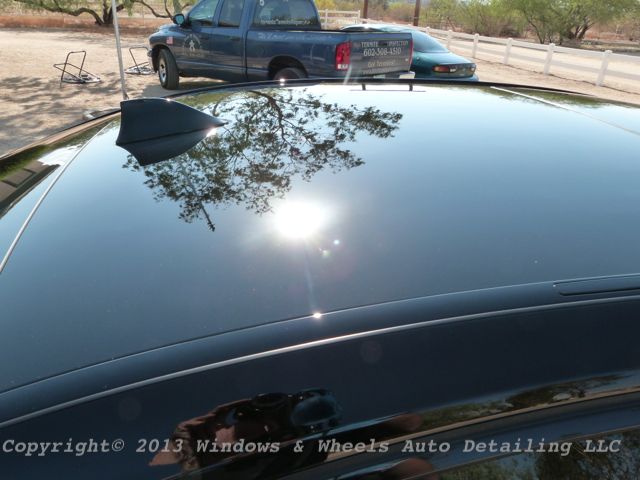
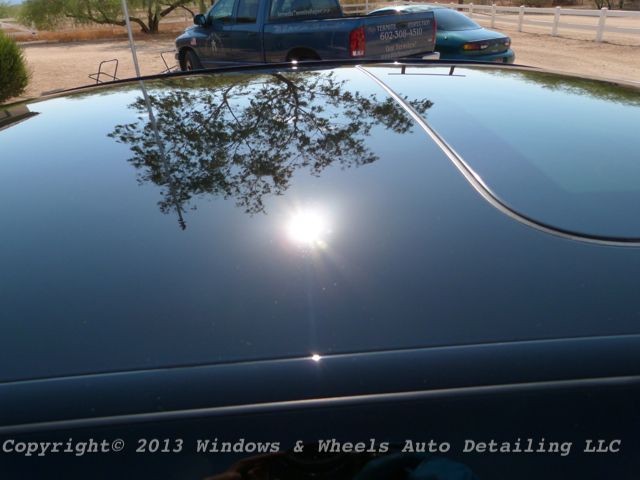
The monster roof was also in tip-top shape:
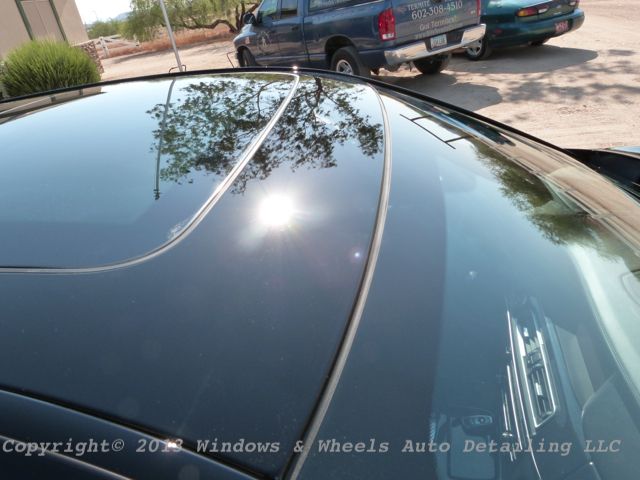
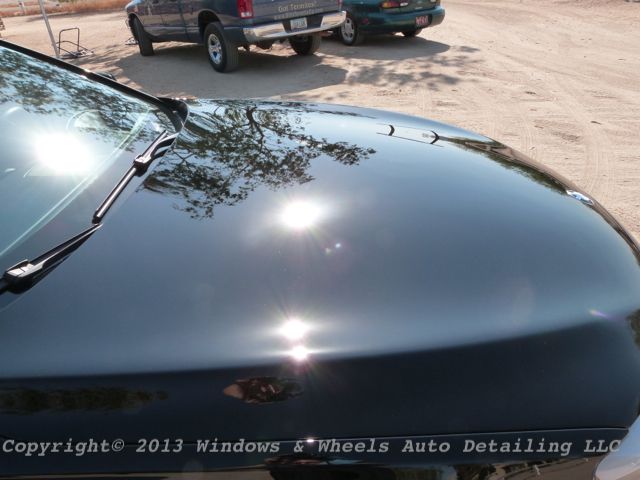
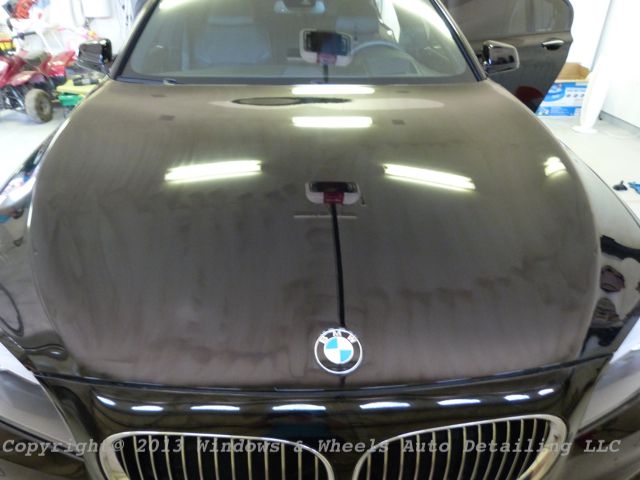
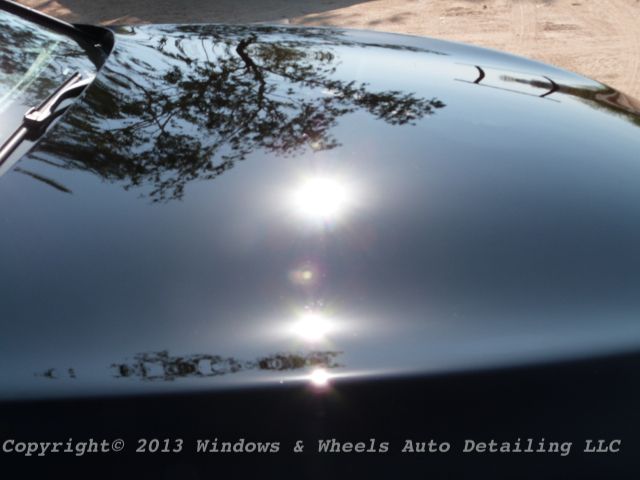
Looking good on the hood as well....

I told you, i wasn't kidding, they left the damn door open!
Now onto the fun stuff...the detail.
This was Jet Black #2 for the year...except this one was a LOT bigger. You don't realize till you stand next to one of these 7 series BMW's not only how WIDE they are..but how tall.

This one was pretty clean...it was down a dirt road so...had some dust and some mud sling but....not as bad as you'd expect:

Some clean up was needed on the tires/wheels and tips as usual as well:

But of course, being not only black...but BMW Jet Black...meant that the real damage was on the paint...swirl city:

Every inch of this car was covered...even and on the passenger side there was a couple of pretty deep gouges as you can see here under the gas chamber:

The rest of the car was pretty scary to be honest...lots of work lied ahead:


Even indirect light showed some serious swirling:


Ouch...


Some pretty wicked ones were on the trunk:


*Sigh*...where to begin! Well, first we had to get a test spot done and see just how much cut these things needed in order to remove them. We tried a Megs 2.0 foam Cutting Pad first with some 205 just to see if the soft paint would correct with a less aggressive approach...no such luck. It did get some great correction, but wayyyy too many RIDS left behind for our liking. So we bumped it up to 105...much better...but on many areas we had to go with M101 to really cut the paint down to our liking.
Just for a size comparison...this is me polishing the hood...im using the megs 2.0 pad, which is a 7" pad...much bigger compared to the 5.5" we're usually using...but just look how that big pad gets lost in this monster of a hood!

Obviously we were going to be flinging some serious dust on this one by using M101:


Mask in place...made a big difference but what a task it is even to wear it...it was still nearly 100 degrees in the garage...pretty hot.
The cut however made the dust well worth it....the reason we went with foam on this is because on larger cars where we're doing some seriously extended buffing for hours on end...our microfiber pads have been "bunching" up recently...they still cut like mad...but the bunched up fibers make the cutting process much more hazy than we like...its harder for us to locate rids and its more clean up for us to do when it comes to polishing...so we gave foam a go. On this car at least...it worked.

We were able to take some nasty stuff like this:

And get it to finish down like this with just M101:

Not too bad huh? There was still light marring so we did have some clean up to do with a finishing polish...we decided to split the work up on this one though....i tackled the big stuff with my larger pad..while Dani cut the bumpers, pillars, rockers and other tight areas i couldn't get into...like the trunk/license plate area:


Though her areas were smaller, they were very very tedious and time consuming...i tell you what though...it was nice to double team up on the compounding, this was a LOT of paint...a lot of really really swirled paint lol.
Our results were hitting right on point....here are a couple of nice 50/50 shots:


Lookin' good!
Then of course, we had those super deep scratches on the passenger side...those were not going to buff out...so..it was time to sand them down:

I got them ALMOST removed by sanding....very faint trace was left...but readings were getting a bit low...so i opted to not chase them any further:

After buffing the sanding marks out....it was nearly impossible to tell where they were....most were totally removed...one was SLIGHTLY visible but you had to get perfect light to see it:


Not too bad.
Tail lights needed some loving as well:


By day one we had the car completely cut...day 2 were had to come back up (an hour drive either way) to get the final polishing done. 205 was working beautifully so we stuck with it through the polishing process:

Dani, finessing the paint down to a black pool of "wow!"

She circled using the Rupes 15...while i was working the 21. The 21 is VERY capable of finishing down without any scouring or micro-marring..its just all about working clean. Clean your pad after every section...work a smaller section and TURN DOWN THE SPEED. I was working on 2 1/2 for most of my final polishing...and it was all i needed:

I know sometimes we see speed 6 and think oh yeah...speed 6! But its really not needed especially on the Rupes 21. Even on the soft Jet Black paint i could finish down with relatively zero issue.
After we finished the polishing on day 2...now came the hard part...yeah...the hard part...prepping the paint for CQuartz Finest. This was hard because...even though this paint wasnt GOD AWEFUL soft...it was still very soft and would towel mar very easily. So wiping down with Eraser was a tedious and tactful job. Luckily Dani came up with the idea to wash the car BEFORE we polished...so all the compounding dust was already removed...i just had polishing oils and a little bit of light dust from the final polish to remove:

Dani caught me lookin' lol. By this time it was VERY hot in the garage...and extremely humid...cause we killed the fans. We didn't want to chance any dust blowing up onto the surface after we did our Eraser wipe down.
Finally Finest was applied:

Im a bit of a slow coater...i like to make sure its totally even and that my finishing stroke goes the direction i want the water to flow when it gets washed...in this case the side panels you can see the final stork i used was going up/down

The hood (MONSTER!) was left with a final stroke of going length wise with the car:


After allowing it to cure...it was time to remove. I found a little trick that others may find useful. Finest comes with a very soft Micro-Suede towel. It removes the coating nicely, but because its so thin ive found that where my fingers are pressing onto the towel...that sometimes i'll live "finger prints" on the paint through the towel. Basically as the little bit of Finest I'm removing builds up onto the surface of the towel...by the time i get to my final wipe of a section...theres enough on the towel to where it leaves little spots on the paint from where my fingers were pressing.
You can see here how thin the towel is:

NOT a big deal, i know...it wipes right off with a second towel. But what i figured out was...if i put a second towel ontop of the micro-suede...it cushioned my hand...so that the pressure was more even and not excessive where my fingers pressed. This allowed for a very clean wipe. I still followed up with a 2nd towel (my super soft Korean towel you see me wiping with below) just to be sure no high spots are left:

Hey look, she caught me in the same spot! lol...tricky.
Dani went around and coated the wheels, lights and hard plastic as well as any tight areas i may have missed. She also double checked after i removed Finest to be sure i left nothing (in between packing everything...serious multi-tasker!)
Finally the fun part....finished pictures.
I present to you the Beauty and the Beast:

But this write up is about the beauty

No more swirls on this paint:

Wheels shining like crazy...tires dressed as well as wheel wells:

And as for gloss, it had serious serious gloss:

No swirls over here either:

Crystal clear:


The monster roof was also in tip-top shape:


Looking good on the hood as well....


")