06 Audi A8-L Brilliant Black over Amaretto Multi-Step Polish by AutoLavish

Bobby G

New member
BlackFire is “wildfire�!


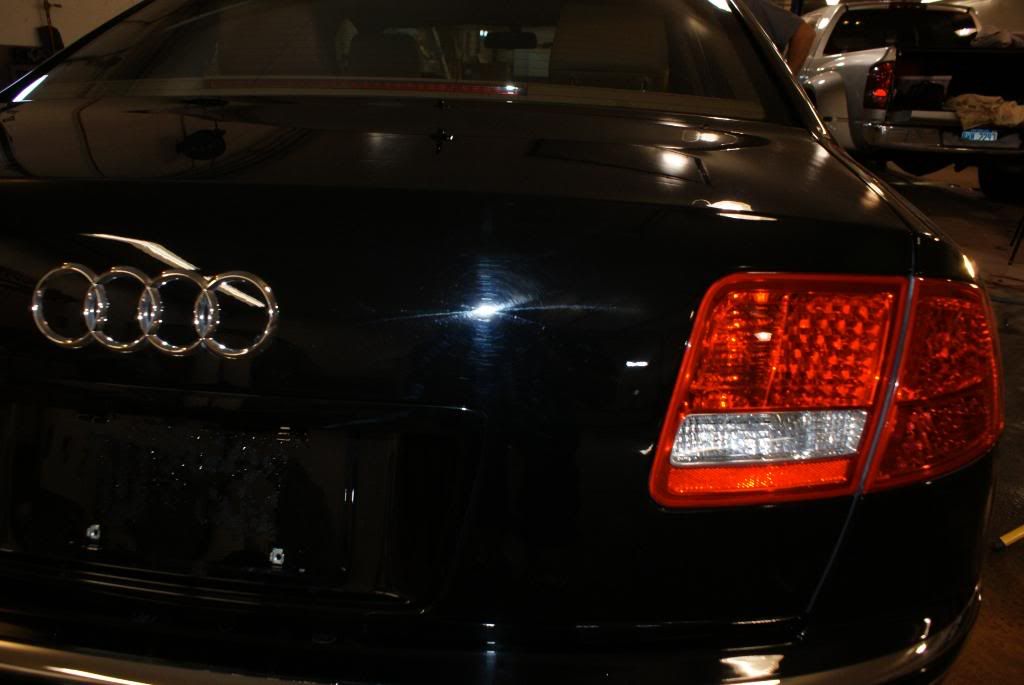
First of all, let me just say that it takes a lot to get me excited. Not since Pinnacle Souveran Wax have I thought that a wax (natural or synthetic) deserved great praise. I have noted many times my personal preference for a wax top coat to bring out depth and warmth. To my eye, most synthetics offer great gloss, but the brilliance is not to my eye’s liking. Remember... just my humble opinion.


BlackFire is the first polish and sealant system I have used that creates the depth and warmth of Souveran. Wax. The High Gloss Polish is easier to use than Pinnacle Paintwork Cleansing Lotion, and it leaves a beautiful finish for the Protectant. The Protectant is very easy to apply and dries/cures in seconds. Much easier to buff off than Klasse SG… maybe as easy as Souveran.


I will add more to this post later. I need to go apply layer number 3.


More to come…


db

:bounce
 
Can't wait David, if it looks as good and buffs off as easy as Souveran, they are going to have TONS of people buying the product. Any word on how long the sealant is supposed to last? Most say Klasse is good for at least 6 months.
 
...please post the details as soon as you know them. Any technical or marketing (like when can I get my grubby hands on it) would be appreciated. How about a photo after layer #3?


Steve
 
I'm interested! Is the product a liquid or paste, and when do you expect it to come out? Will there be any more changes to the product you tested, or is this the final product?


Thanks!
 
Okay, I've had a little more time to work with the BlackFire product. Here's some background information:


1. The BlackFire product line includes a Shampoo, Polish, Protectant, and Quick Detailing Spray. At this time, I have only tested the polish and protectant.


2. The BlackFire Polish and Protectant are an oil-in-water emulsion containing multiple polymers (one is heat resistant, one offers durability, one provides great gloss...). I don't have formula details, so don't bother asking.


3. The polymers used are supposed to withstand temps up to 800 degrees. CMA is claiming 480+ degrees. Trust me... if your hood get this hot, you have other problems to worry about.


4. CMA claims a 20-30 second bond time (I believe it!) with high substrate bonding.


My Observations:


Both the polish and the protectant go on very easily and they flash dry quickly. The protectant cures so fast that I found you must keep your applicator damp with water (not wet, just slightly damp). I used a terry over foam applicator for the polish and a foam applicator for the protectant. I will try a microfiber applicator today.


The BlackFire Polish has good cleaning qualities (slightly less than Pinnacle Paintwork Cleansing Lotion), but not enough to remove stubborn bug or tar specs. Spot cleaning or clay prior to using BlackFire Polish would be necessary for a perfect finish.


I applied BlackFire Polish with the PC and it worked great. I buffed at a speed of 3-3.5 and did a final buff-out at speed 5. Using the white foam pad, there was no residue remaining. I wiped the surface with a Miracle Towel spritzed with Clear Pearl and the surface looked great.


After playing with the polish, I applied two back-to-back coats of BlackFire Protectant. The protectant goes on very fast and easy, but as I said, you need to keep your applicator damp. If you don't the product dries too fast and it takes a lot of elbow grease to get it on the car. Buffing off is suprisingly easy, even after the product sits for a while. I was interested in how well it would work in direct sunlight, so I rolled the car out in the driveway and let it heat up for 30 minutes in the sun. Guess what? It went on and buffed off with the same results. Mind you, my BMW is silver and did not get over 150 degrees or so.


In the past, when I have tried to apply back-to-back coats of a sealant, such as Klasse SG, the surface gums up. You can see that what you're really doing is removing the first coat and applying a fresh coat. This wa not the case with BlackFire Protectant. The second coat applied just like the first. Unfortunately, I was not able to see any difference on the silver paint. I will apply 3-4 more coats to see how well it builds up.


Durabilty? Who knows. I will wash the car with Dawn to see if the protectant remains.


My Opinion:


I have often said that I like the look of a good Carnauba to a polymer sealant. The reason is simple; to my eye, most polymers give paint a "silvery" finish. While the shine of a good polymer cannot be disputed, the depth and richness of dark colors (black, red, dark blue) is overshadowed by the high gloss and silvery-white shimmer.


Many polymers also highlight swirl marks and water spots instead of hide them. This happens if the polymer increases the hard edges of the scratch or water spot (light bounces off the angled surface of the scratch). To avoid this problem, the protectant must fill the scratch or round the edges.


I need to try BlackFire on a black car to be sure, but I believe it approaches the "jetting" quality of a good Carnauba wax. I noticed a deeper, wetter looking shine than I get with several coats of Klasse SG. The surface looked more like what I get after applying Klasse AIO, SG and a coat of Souveran. The few light surface marks I have on the hood are nearly invisible, even under floresent light.


More to come...
 
Sounds real good David. Two questions though. What is the curing time needed before you can apply additional coats? Secondly, do you have a feeling yet as to whether this product will darken the paint color. I would most interested in this as you are working on a silver car. Thanks.
 
Few questions-->


1. Any idea of pricing yet? Will products be sold separately or only in a package?


2. Is the polish something that is only used 1-2 times a year and the sealant the main product that you layer and layer or do you apply the polish before every coat of the sealant?


3. What is the main purpose of the polish? to Clean? Aid in bonding? Polish abrasively? Remove swirls?


4. What was the dust factor like, and did it leave any marks on rubber trim?


Thanks!
 
Blackfire looks like a promising product...too bad I already have two have bottles full of Klasse... :(


Oh well, a new product means another excuse to just buy more car care products! Hehe... :cool:
 
JM19,

Maybe you could use your Klasse AIO, instead of the Blackfire polish, with the Blackfire Protectant and post the results. :)
 
DETAILKING,


I have not seen pricing yet. By looking at the CMA web site, I see that the products will be sold as both a kit and as individual products. That seems natural.


Since my first test on the BMW (silver), I have done more testing and found a problem buffing out. I informed Terry and he went back to the chemist. The problem seems to be solved now... it was the fragrance. Depending on the color, temp and humidity the product could be very easy to buff out or moderately difficult (like KSG). I'm waiting for a new test sample.


The product has very little dust residue. Compared to Klasse AIO, the BF Polish buffs out very clean, and I have not seen any signs of white residue around rubber or emblems. Time will tell.


The BF Polish is not a cleaner, nor is it abrasive. If you need a cleaner, you should pre-treat with PPCL (or other favorite) or clay, then use BFP. Is it abrasive? I'd have to say yes because it contains some amount of clay. However, in trying to use it to remove minor surface scratches, it only seems to hide them and round off the edges. It seems far less abrasive than AIO, PPCL or P21S PCL.


db
 
This product sounds very promising indeed. It will be a while before I strip the Zaino and try the BlackFire though. Can't wait to hear more results from this product. Laters.
 
This gorgeous A8L was purchased recently with only 10k miles on the odometer. Before the sale, the vehicle was cleaned pretty good. The interior was immaculate. The new owner contacted us to perfect it, and make the exterior look as good as the rest of the car. He knew it had some swirls, and wanted it to be perfect. We expected a 2 step polish.

Let me assure you, this is a BIG car. Looks are deceiving. The doors are about 4 feet wide, all 4. The trunk is as big as many hoods. The roof is wide enough to have to struggle to reach the middle. But oh what a feeling working on it. It feels like quality. More than the typical Audi. We have worked on many, and has a B6 A4. But the give (or lack thereof) of the panels as you press against them, the silkiness of the paint, the muted solidity of the car made it a pleasure to work on. Not that we don't enjoy all cars we work on, but this one felt special. Kinda weird. I have always wanted an A8L in black (you know, when I grow up), so this was bliss.

In the cold of winter, we usually ask clients to bring the car to our location to be able to work around the weather. Our work location garage is insured and set up for detailing year around, but the owner lives 2.5 hours away. He mentioned he had a place we could work out of, heated and spacious, well lit and comfortable. We agreed on making the trip out to the west side of the state in Grand Rapids in early January, as soon as we got back from our trip to Puerto Rico (yep, hot and humid one day to extreme cold the next). The morning was about 15 degrees out.

Upon arrival, the new owner had already prepped the vehicle. After a quick inspection, we called it good and went straight to taping and masking.


DSC00332.jpg


We started to unpack our supplies from TDR and set up wires, hoses, and lighting. Luckily, the shop had decent lighting...

Using the single halogen was enough to see these easily:

DSC00336.jpg


DSC00338.jpg


DSC00343.jpg


DSC00345.jpg


using just the camera flash:
DSC00351.jpg


DSC00353.jpg


DSC00356.jpg


We had our work cut out for us! But this is going to look awesome once polished!

DSC00362.jpg


The vehicle had been washed and clayed prior to our arrival, so we proceeded straight to masking.

DSC00364.jpg


DSC00368.jpg


DSC00372.jpg


DSC00373.jpg


DSC00374.jpg


We split up the door into a few sections and started testing various polishing combinations...

DSC00375.jpg


DSC00377.jpg


50/50 with one pass of M205 on a Meg's Black pad via Makita Rotary:

DSC00379.jpg


50/50 with one pass if Menzerna Intensive Polish on a Megs Black pad:

DSC00381.jpg


50/50 with Menzerna IP on Green LC Constant Pressure pad:

DSC00384.jpg


DSC00386.jpg


Could this paint get any blacker?

DSC00387.jpg


The paint was relatively soft, so we needed something that would correct pretty good but not leave much pad trails. The idea was to use a medium polish on a softer pad, then refine with a finishing polish on the PC. Menzerna IP was chosen since it finished down well enough to be able to refine with FF106 and the PC. It would take a few passes of IP/green, but we preferred to take a little extra time here to make things quicker in the end.


Working it:

DSC00390.jpg


After first stage of compounding:

DSC00395.jpg
 
Finished down LSP ready!

DSC00406.jpg


No... just kidding. Some areas were very bad, and required some extra work as evidenced by the severe buffer trails

Looking better after some refining...

DSC00415.jpg


More IP on the other side:

DSC00428.jpg


We were able to correct most of the RIDS and 100% of the swirls for an overall 95% correction. The RIDS the vehicle had were very deep, with the passenger side worse than the drivers side.

After compounding, I finessed the finish with Menzerna Final Finish on a Yellow 3M Germany pad on the Porter Cable 7424 DA, which took care of any buffer trails.

We gave the vehicle a wash to get polish residue and dust off surface prior to sealing. Here we used Chemical Guys Citrus Wash at 4:1 in the foam gun.

DSC00437.jpg


DSC00440.jpg


DSC00443.jpg


Sealant of choice was Blackfire Wet Diamond, applied via PC 7424 with a LC ultra-soft blue pad on speed 3:

DSC00448.jpg


DSC00450.jpg


DSC00452.jpg


As Jacob applied the sealant, I dressed the tires with Optimum Tire Dressing. This helps keep any overspray off the dried finish.

DSC00446.jpg


Afters:

DSC00480.jpg


Beautiful high quality paint does wonders for afters:
DSC00485.jpg


DSC00487.jpg


Dude!
DSC00496.jpg


DSC00490.jpg


L4P reppin'
DSC00493.jpg


DSC00498.jpg


DSC00500.jpg


DSC00501.jpg


DSC00506.jpg


DSC00507.jpg


Thanks for reading!

DSC00508.jpg
 
Back
Top