

Found this nice little thread on another board that I`m on. Really impressive stuff. I had no idea you could even do this to an engine!
Originally Posted by beandip
 Well due to popular demand (and getting too many PMs from people asking how) i will show you how i polish in a step by step writeup that should be fairly easy to follow. this will get the beginners started with decent results, then later to be perfected by technique that you develop. This is a writeup on how I polish, i understand there is other ways with different compounds/wheels but this is what works for me....currently.
DIFFICULTY: rated at 4, very easy to do but with anything, especially polishing, work + attention to detail X time= results. If you half ass it you get half ass results...that simple.
1|2|3|4|5|6|7|8|9|10
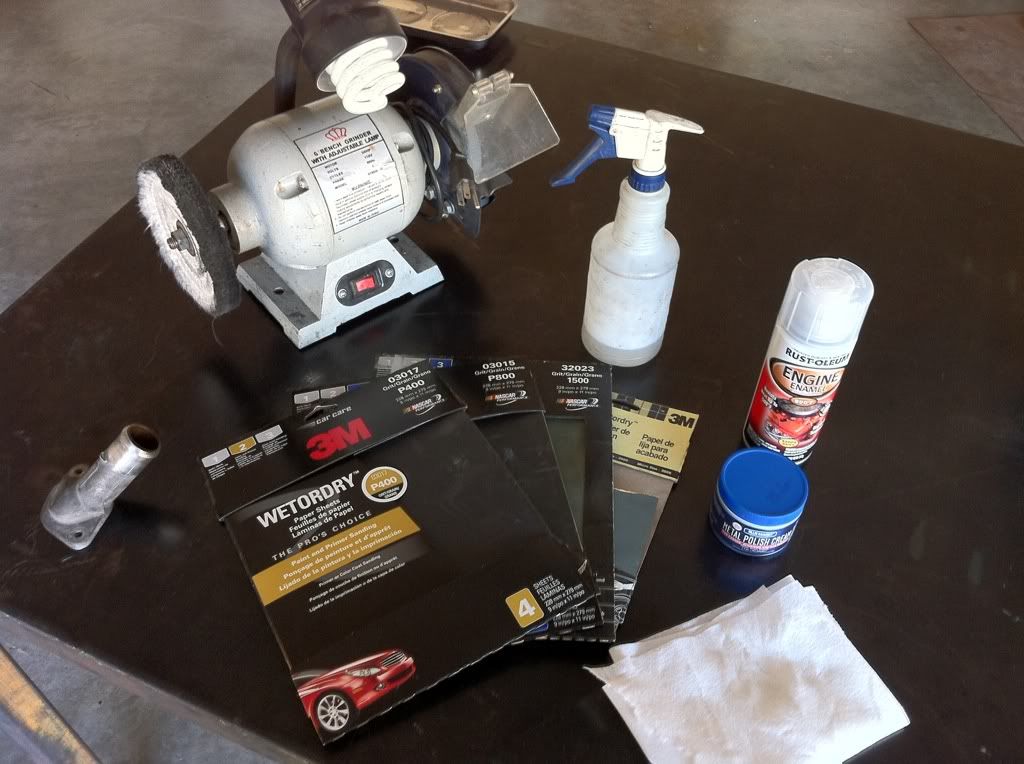
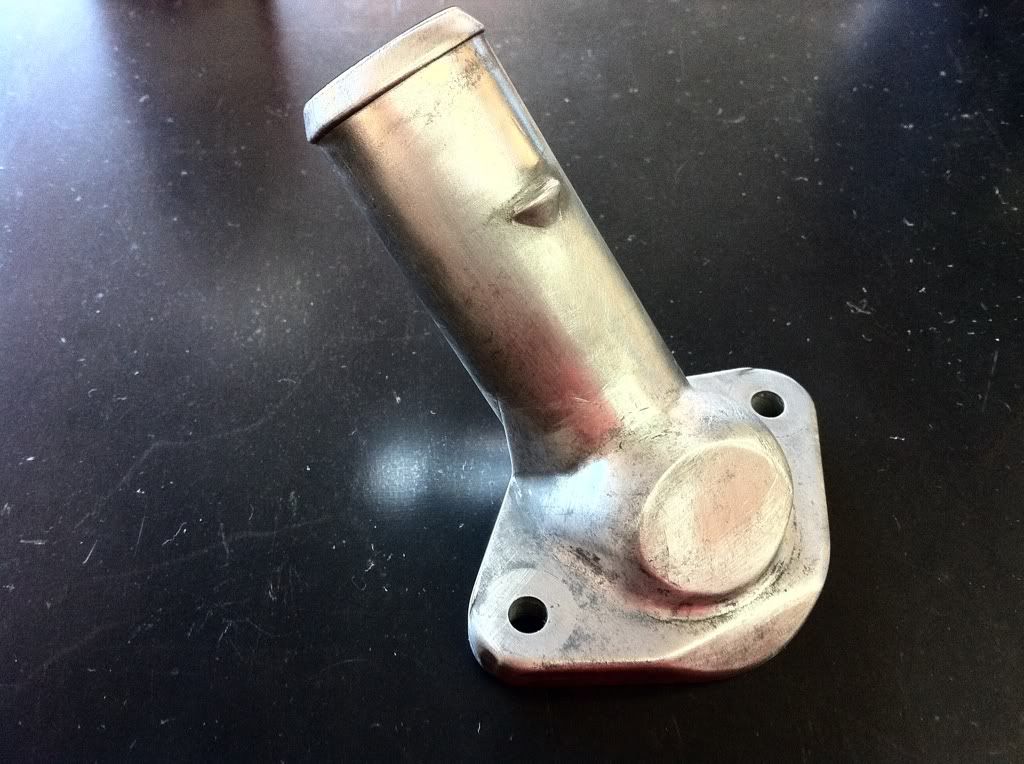
OK today i will start off polishing something very simple...an aluminum thermostat housing. before we get into it lets go over the materials needed to start this project.
- Buffing wheel on a bench grinder (take note of the RPM rating and do not exceed that of the wheel)
- assortment of 400-1500 grit sand paper (2000 can be used if desired)
- Blue Magic Metal Polish (of course my favorite versatile polish)
- Paper towels or microfiber cloths
- Clear coat (optional and will be explained below)
- spray bottle with water
- dremel (optional, can be used to fix surface defects/polish in tight areas.
OK now that we have everything we need lets get started!
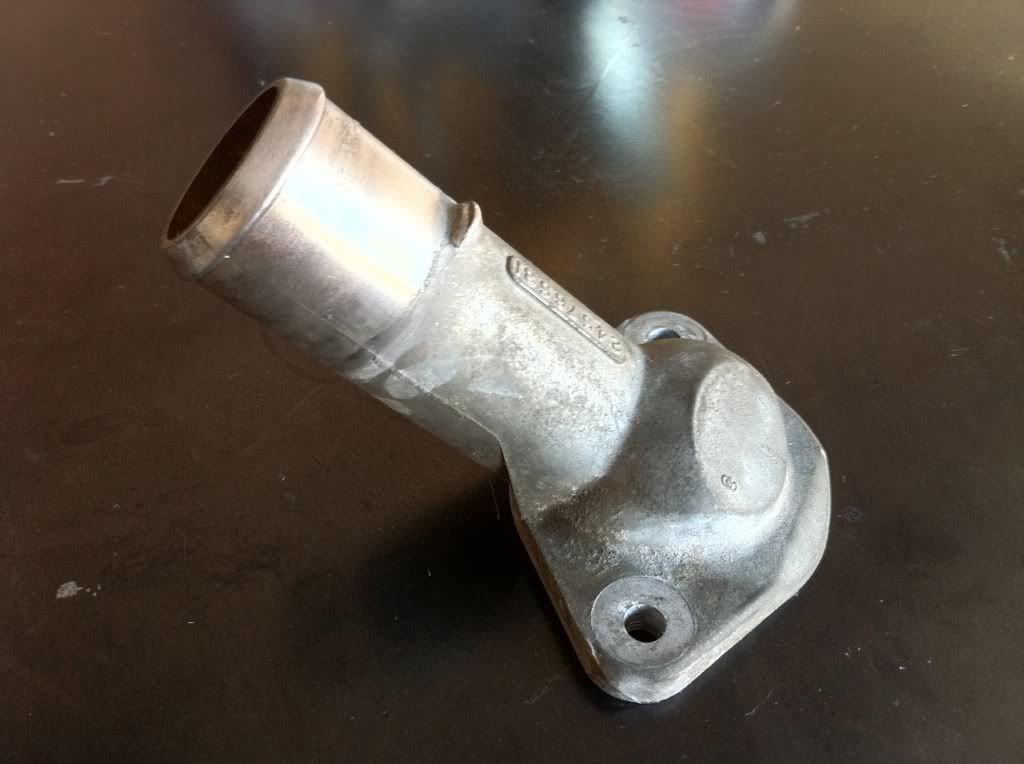
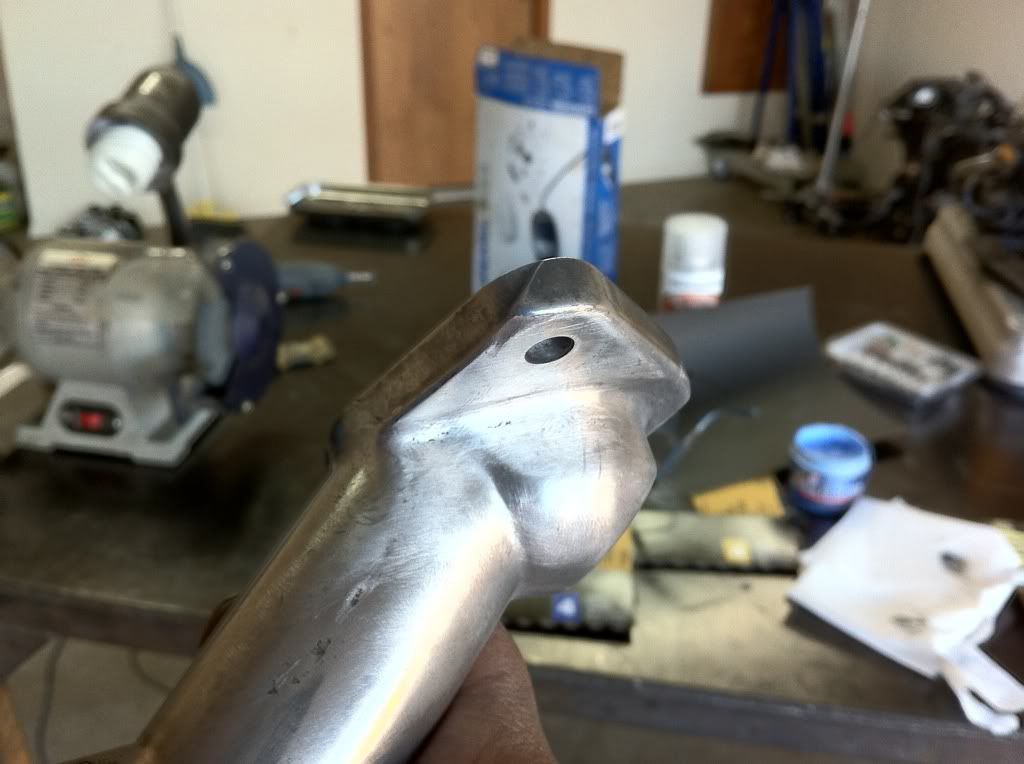
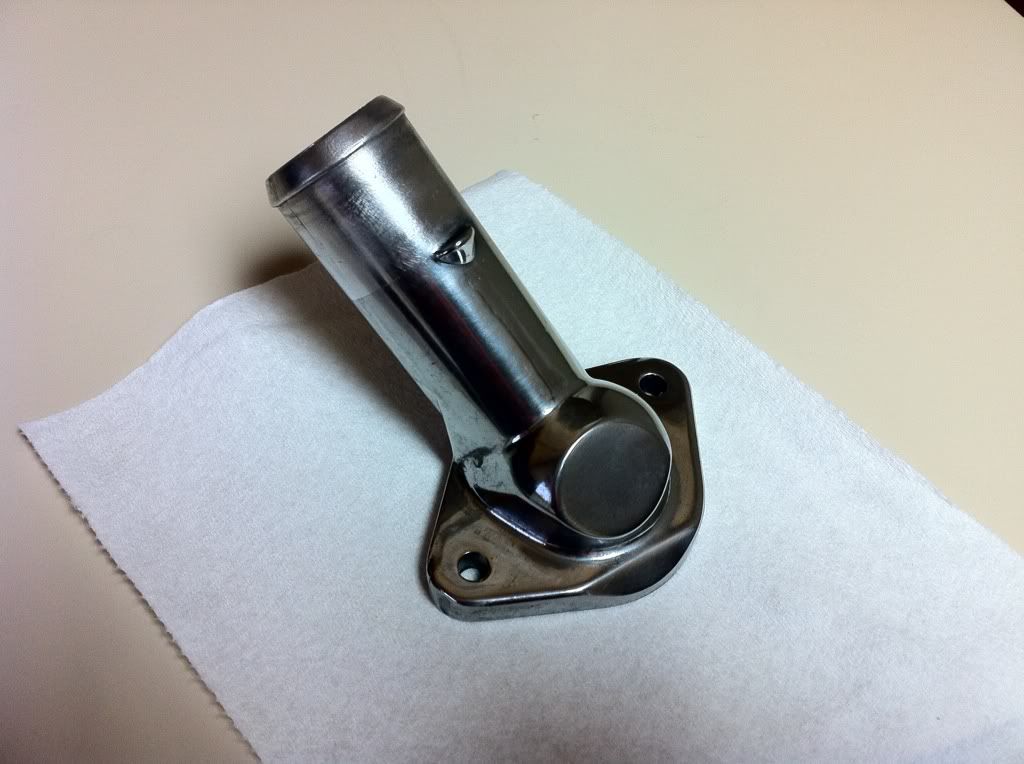
Here is the thermostat, it has raised lettering and a casting mark from when it was mass produced. I want to sand those defects down for a smooth look, now this part is optional depending on what you are wanting to do...
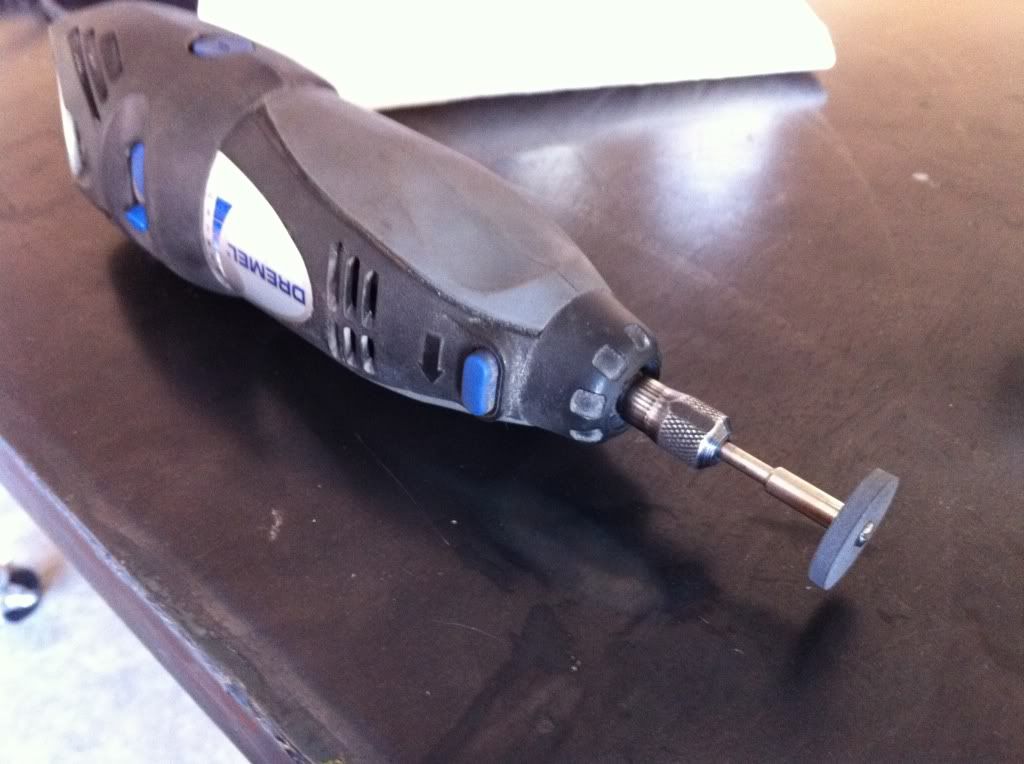
Next i grabbed my dremel with a fine grinding wheel on it. this is perfect to sand off the raised letterings and casting marks.
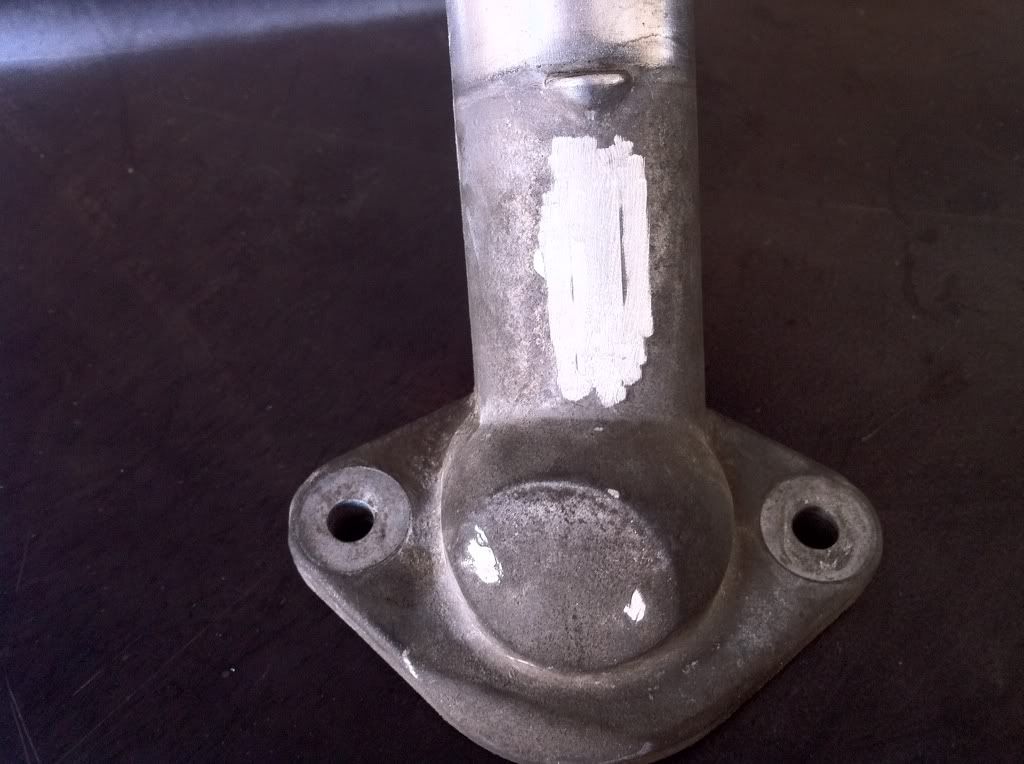
Shown below is how it looks after sanding those down, just use your general judgment if you decide to do this.
Next, i wet sanded the whole thermostat down with 400 grit, man this thing is oxidized! i got it from the salvage yard and i suppose its seen its fair share of salt over the years. Keep sanding until all the black specks and imperfections are gone.
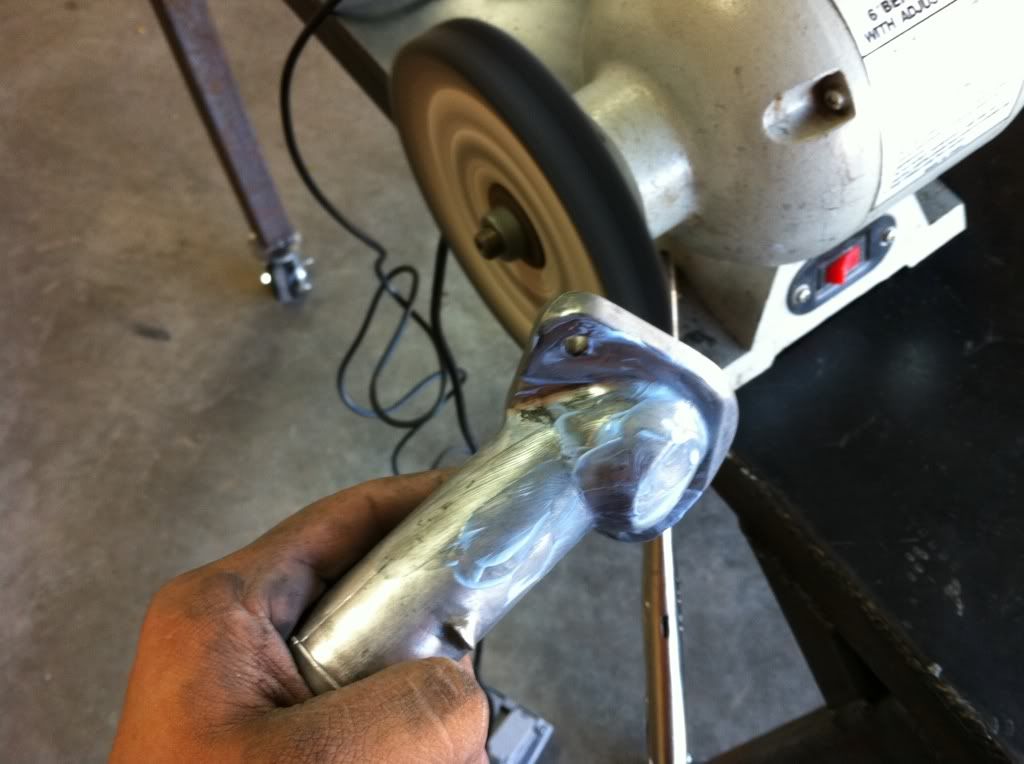
Next i did a test polish to see where i stand on the process. Simply apply a thin layer of the polishing compound onto the part, you cant put too much, but if you do it flies all over the place and makes a mess. remember, this part is dangerous!!! be careful how you orientate the part on the buffing wheel allowing no corners to make contact with the wheel in a way as it cause the part to violently kick out. this will cause you to either hurt yourself, or damage the part from being dropped...or both.
simply apply pressure and slowly work around the part, you can use the side of the wheel, or at least the corner to remove some compound and that generally gives it a "buff" since its usually dry. hard to explain really without writing a book but once you get here you will see for yourself. experiment with different pressures/angles, no matter how much i try to explain its just one thing i cant really teach, and that is hands on experience.
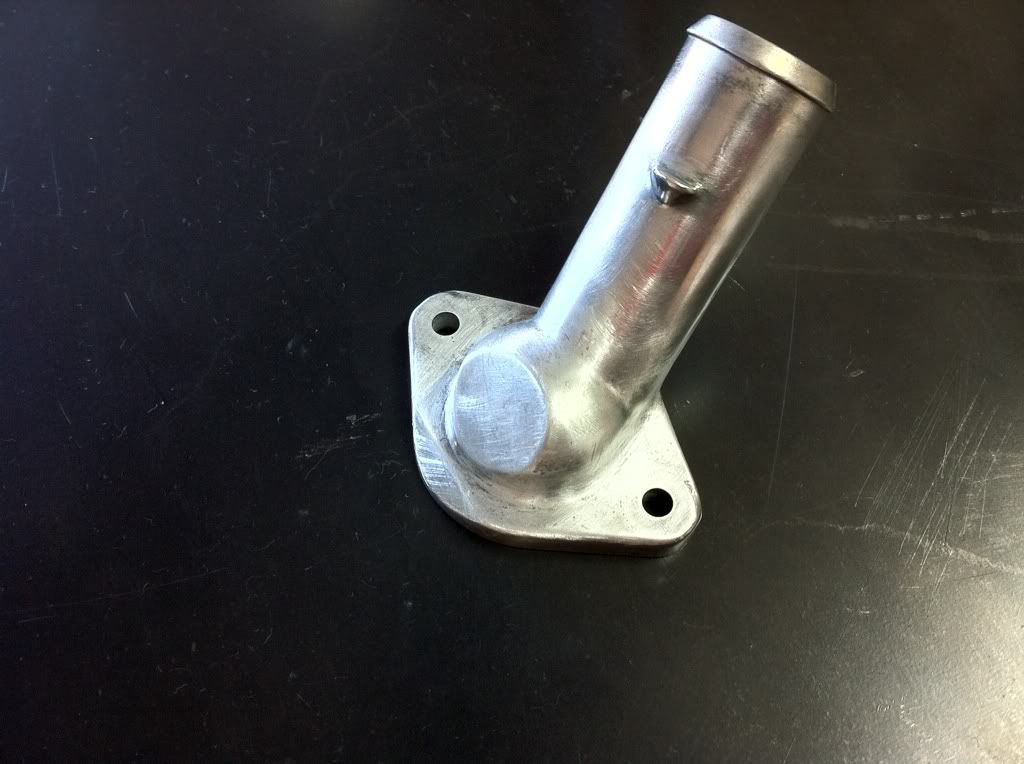
Here it is fresh from a general buffing. looks a lot better, but see the dark spots? those still need to be sanded out. so keep wet sanding at 400 grit one good time and you should be able to get it out.
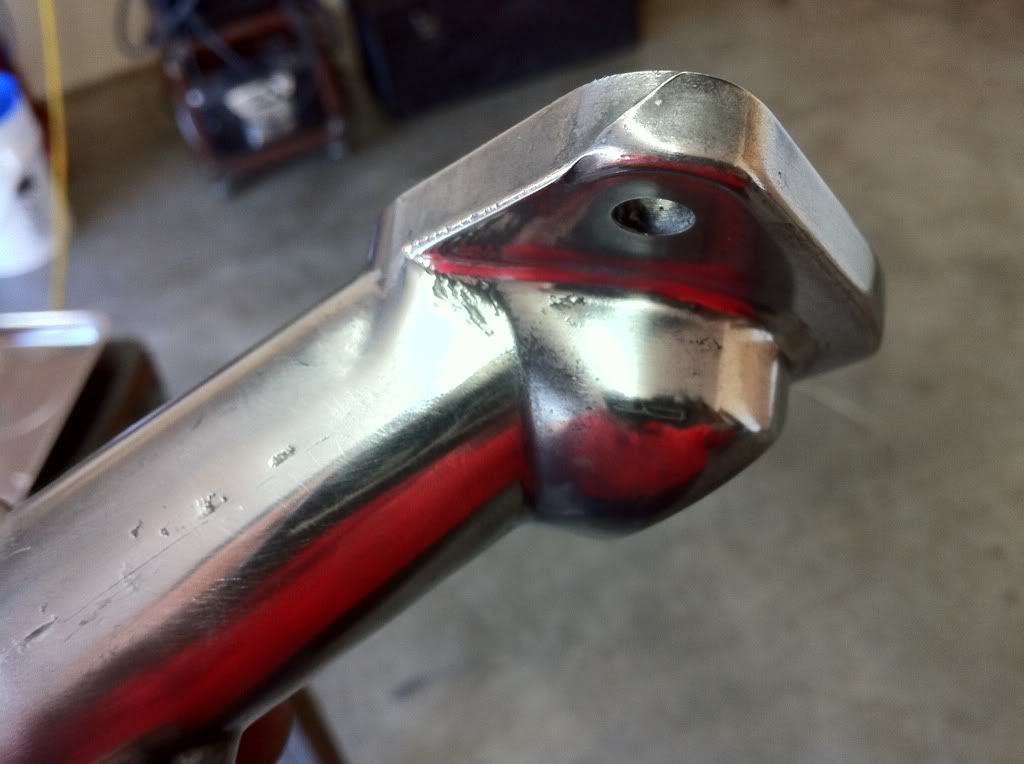
Uh oh, looks like i ran into a problem. apparently this piece has some defects from the manufacturing process. There really isn`t much i can do about it but sand some, but i cant sand too much or else there will be a low spot...when something like this comes up, you just have to deal with it and try to make it less noticeable or try your luck on a different part.
Notice the side there is a hole, and around the flange too. GM never intended these parts to be polished so you may encounter this, or you may not.
So i sanded some more and that is the best i can do...not as bad as before but lets see if we can make this work.
there we go. freshly sanded with 400 grit. looks like i can touch up on a few more areas but other than that its good to go!
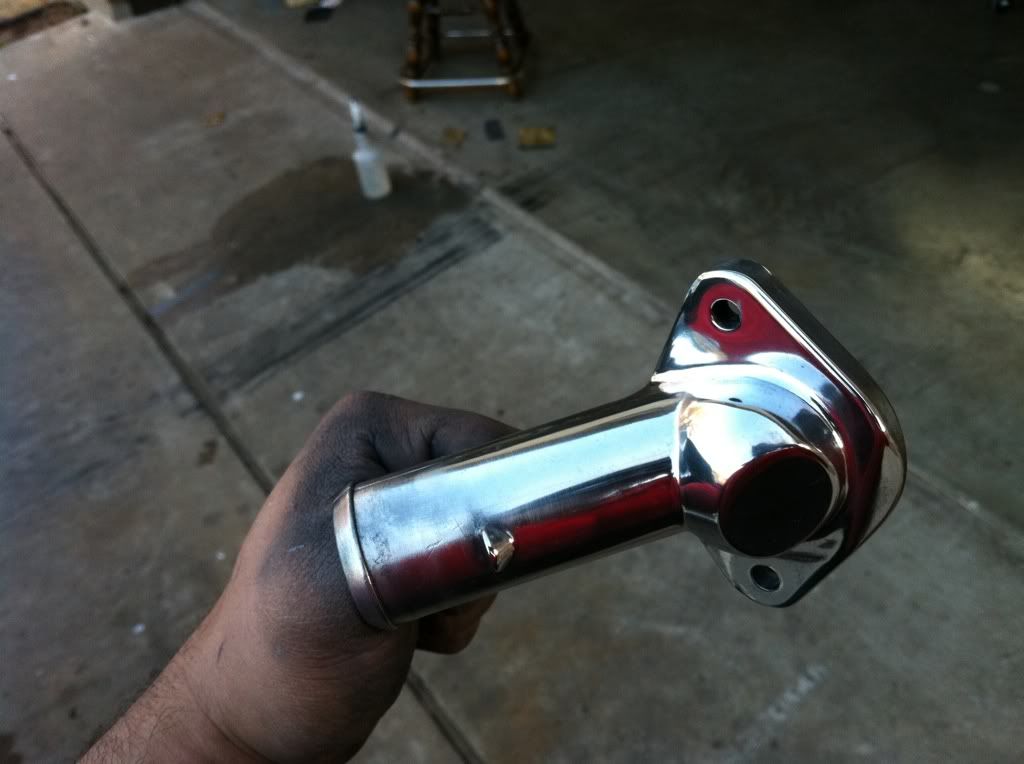
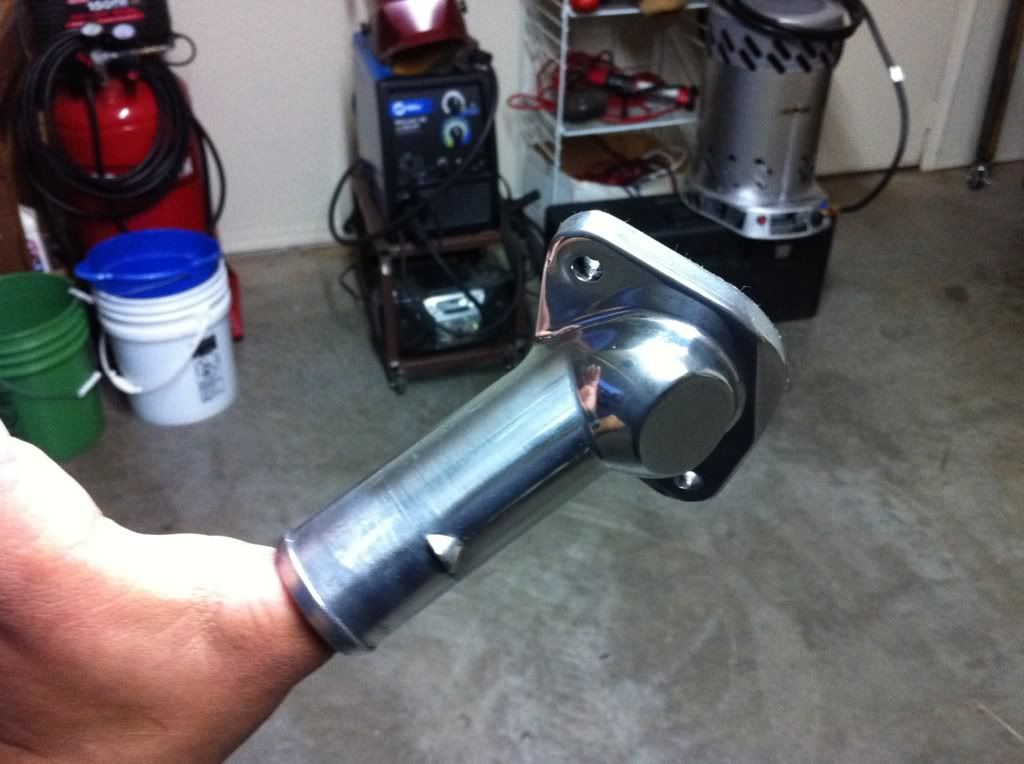
Next just wet sand thoroughly with 800, then 1500 grit. its the same process as before, just sand it fully then move on the next grit, making sure you got the scratches out from the previous grit of course.
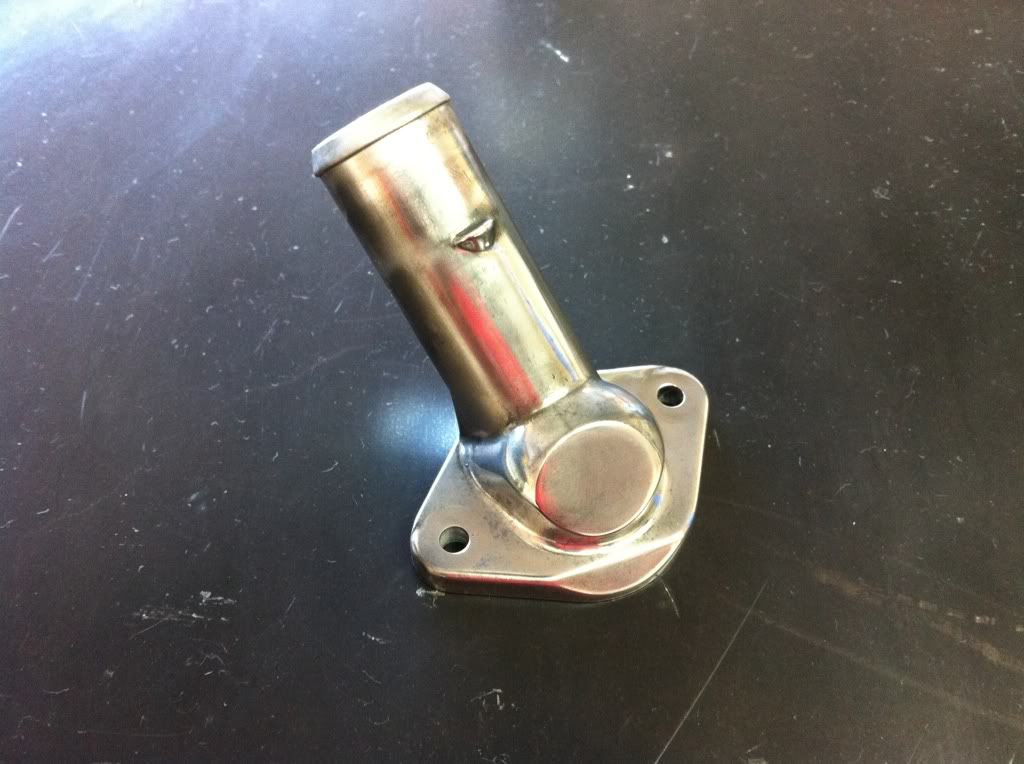
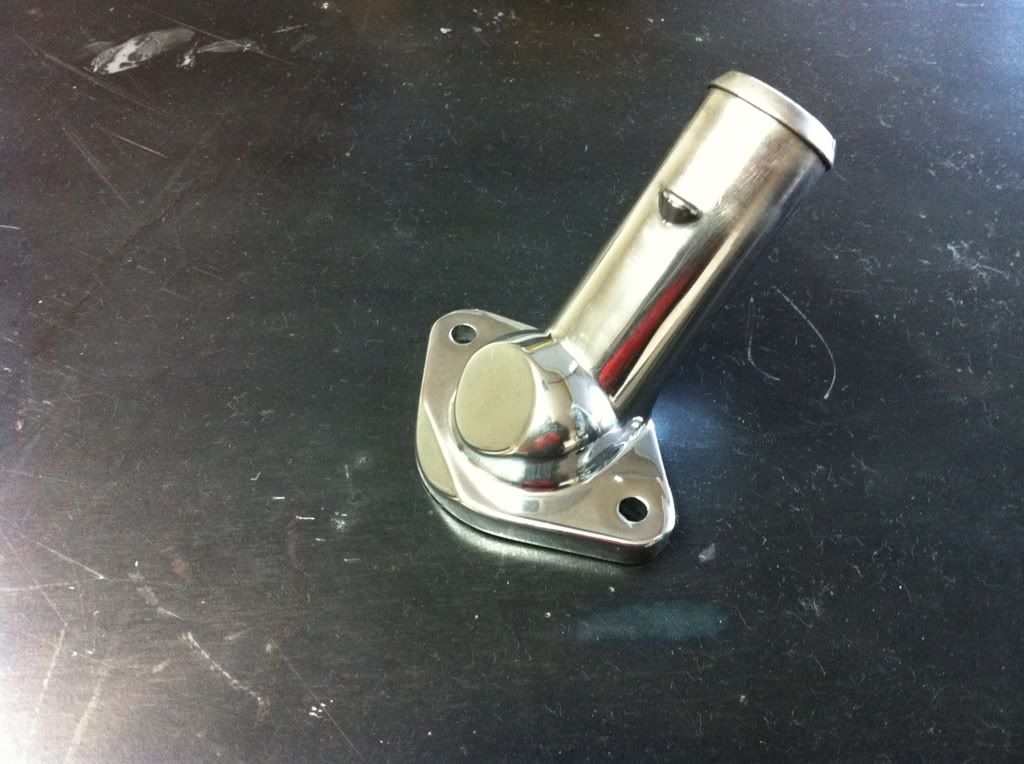
once you do that run it though the buffer and you should get these results.
Now i decided to clear coat this, i used high temp because i thought i would need it being the thermostat sees some heat.
I removed all the grease and cleaned the part very well, then i sprayed on the clear, it did deepen the shine a bit, but its not too bad.
here it is after a few hours, hardly noticeable..
HOWEVER...apparently when high temp clear coat fully cures, it leaves a cloudy finish....so its a BAD idea, not too bad but the only good thing about it is the clear coat does not come off easily, it actually sticks despite how smooth the surface is.
what i do suggest is clear coating with duplicolor clear coat, for regular paint, not high temp. this will NOT dull the shine, but there is a downside, it does peel very easily so this would not be ideal for a part that has anything rubbing against it. and i mean peels easily, a scratch from your nail is enough to make it come off.
I have polished steel before (much more difficult to polish) and used the duplicolor clear coat, it works well despite how delicate it is. so far its held up great. so if clear coating anything due to being lazy to keep it polished, use dupicolor.
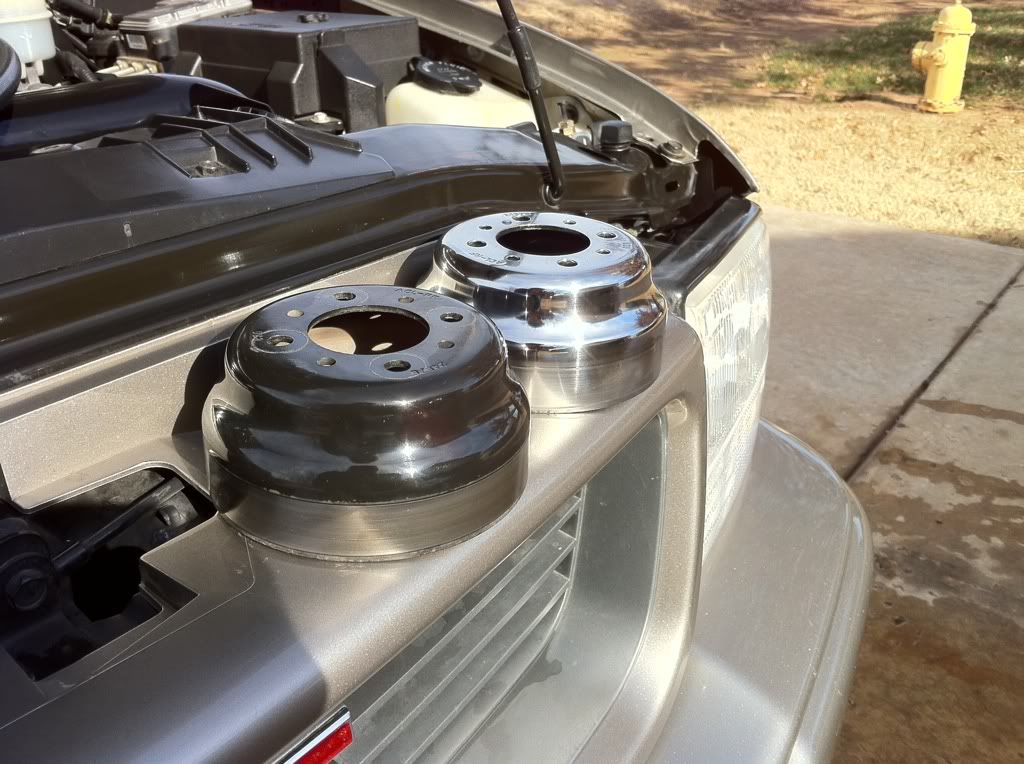
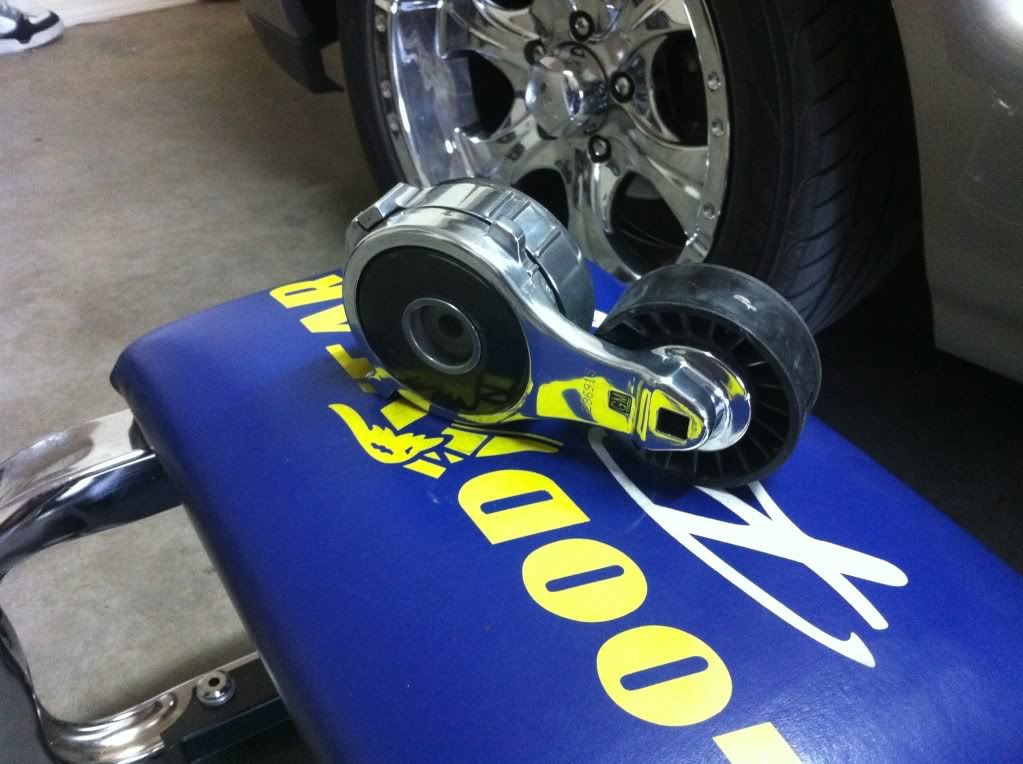
But i love polishing, its simple, easy, but can be time consuming....but its dirt cheap once you have the materials. you will be surprised how much detail it adds when you polish a few things, it really brings everything out.
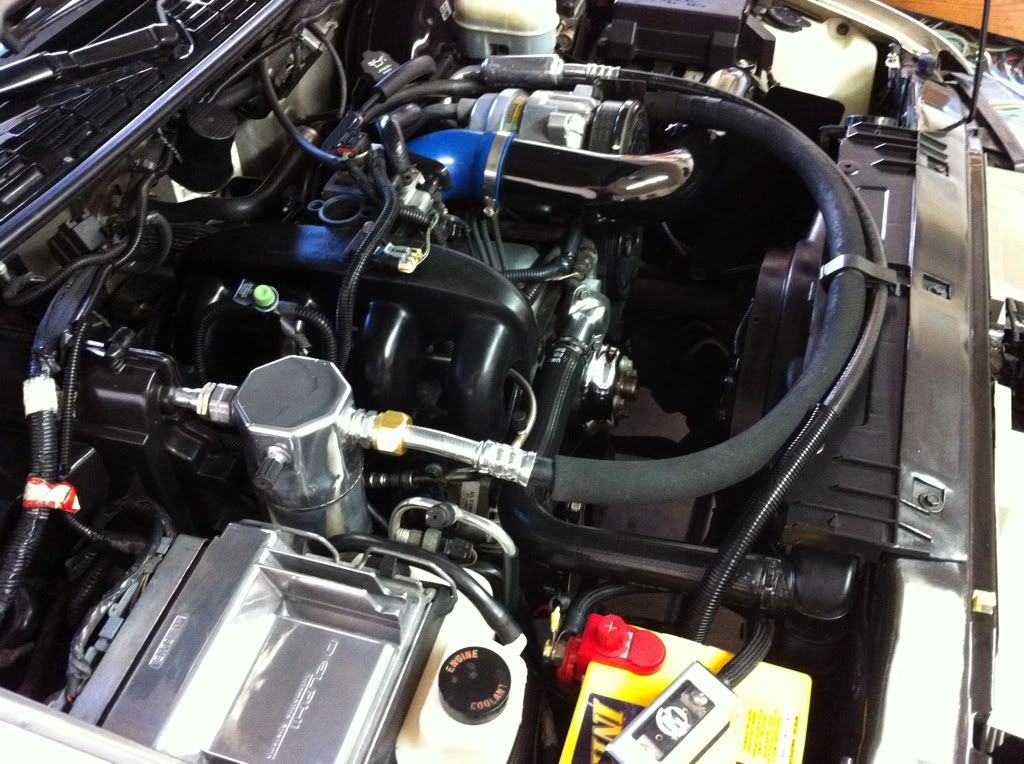
Its all about the details, the little things that you think people wont ever notice, but really people misunderstand how important details are.
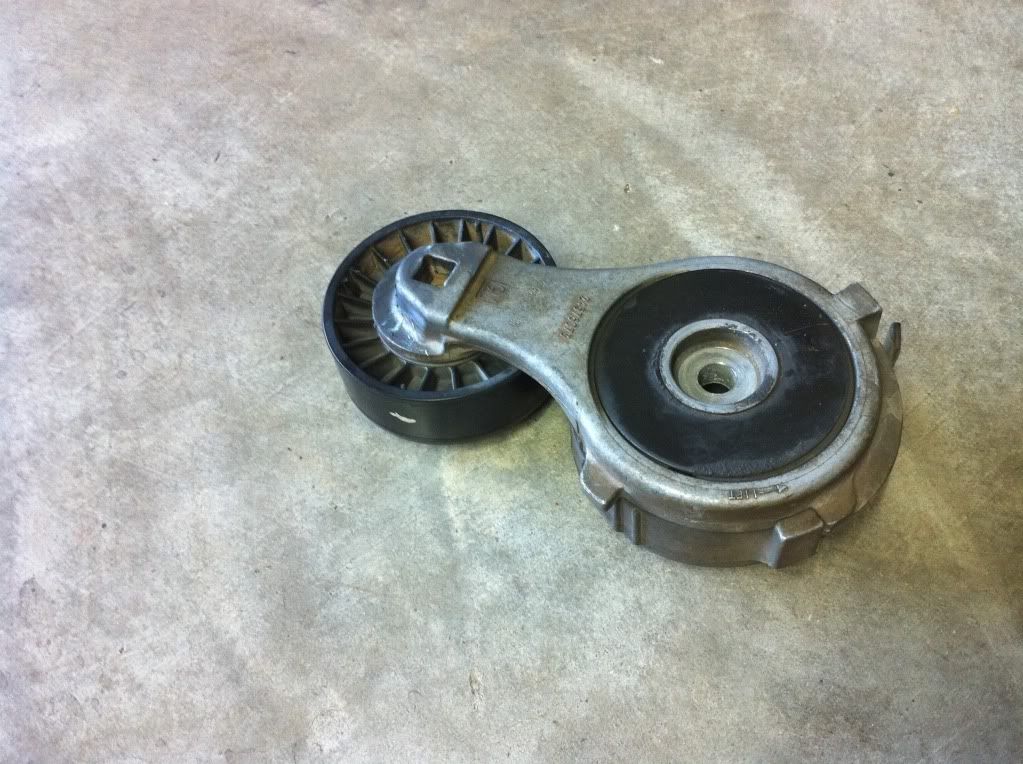
like this belt tensioner, its basically on the bottom of the motor.
even though its not really visible, and you probably have to point it out, its all about the details...
Hope you guys enjoyed this and maybe learned something
Results 1 to 15 of 16
Thread: Polishing Engine Components...
-
10-01-2013, 09:56 AM #1


- Join Date
- Dec 2010
- Posts
- 1,381
- Post Thanks / Like

Polishing Engine Components...
Found this nice little thread on another board that I`m on. Really impressive stuff. I had no idea you could even do this to an engine!
Originally Posted by beandip
Get your shine on!
-
10-01-2013, 10:39 AM #2


- Join Date
- Feb 2010
- Location
- Southern Illinois
- Posts
- 2,907
- Post Thanks / Like
Re: Polishing Engine Components...
I worked for 10 years in a machine shop polishing die cast and plastic injection molds. Basically the same concept as this but with commerical grade tools and equipment. We would often start with 80 grit and end up finishing with industrial diamond equivalent to 5000 grit. When you get up that high, you have to deal with high and low spots, and MANY hours are spent flattening out the surface before any diamond polishing took place. If it wasn`t flat, it would turn out looking like a piece of tin foil.

-
10-01-2013, 10:59 AM #3Wax Waster

- Join Date
- Mar 2008
- Location
- SwFL
- Posts
- 27,090
- Post Thanks / Like
Re: Polishing Engine Components...
wow
Formerly the "Best Detailer", now just Super Wax Waster Man. Not necessarily tactful, but normally right. It`s good to be da King !!!
-
10-01-2013, 11:06 AM #4
- Join Date
- Dec 2010
- Posts
- 1,381
- Post Thanks / Like
Re: Polishing Engine Components...
^^Yeah I bet, I guess you have to develop an eye for that sort of thing. But even if you don`t know how to polish like a pro I would think that anything would look better than oxidized aluminum and steel. This seems like a nice and cheap way to dress up the engine. If you look at that guys` engine bay, it looks as if you could eat off of it!
Get your shine on!
-
10-01-2013, 04:02 PM #5@PoorboysWorld.com

- Join Date
- Oct 2006
- Location
- West Nyack, NY
- Posts
- 2,218
- Post Thanks / Like
Re: Polishing Engine Components...
How long will it last .... now that`s the question
-
10-01-2013, 06:42 PM #6

- Join Date
- Sep 2012
- Location
- NW Minnesota
- Posts
- 1,004
- Post Thanks / Like
Re: Polishing Engine Components...
I did that to a Ruger 10/22 receiver. I had bought a used 10/20 .22 cal rimfire with a target barrel in it used from the local hardware store a few years ago. I had gotten a real good price on it due to the fact that the previous owner that traded it in had put a stainless steel target barrel on it and stripped the paint off the receiver and then must have used a Dremel with a drum sander or grinding wheel and basically ruined the finish on it. One day I decided to go to town on it since it was an aluminum receiver. I start out with about 100 grit paper and worked my way up to 1200 grit wet paper then hand polished it out it with Megs #9 swirl remover. It wasn`t a mirror look but it had the stainless look that I was going for. I think it took me about 4 to 6 hours since it was all done by hand. Would have been nice to have that bench grinder with the polishing wheels though.
Dean. Dean.
Dean.
-
10-01-2013, 08:06 PM #7Long Time Member

- Join Date
- Jul 2003
- Location
- Utah
- Posts
- 10,695
- Post Thanks / Like
Re: Polishing Engine Components...
About as long as an unsealed/uncoated aluminum wheel. Originally Posted by Pockets
 A society willing to trade liberty for temporary security deserves neither and will lose both
ΜΟΛΩΝ ΛΑΒΕ
-
10-01-2013, 08:34 PM #8
- Join Date
- Dec 2010
- Posts
- 1,381
- Post Thanks / Like
Re: Polishing Engine Components...
Pffffttt, and I must be silly for even thinking that the clear coat he put on it will protect it. Oh silly me
Get your shine on!
-
10-01-2013, 08:39 PM #9Long Time Member
- Join Date
- Jul 2003
- Location
- Utah
- Posts
- 10,695
- Post Thanks / Like
Re: Polishing Engine Components...
Nah, we always cleared our polished alternators. It works to some degree. Originally Posted by Addicted2Bling
A society willing to trade liberty for temporary security deserves neither and will lose both
ΜΟΛΩΝ ΛΑΒΕ
-
10-01-2013, 08:41 PM #10
- Join Date
- Dec 2010
- Posts
- 1,381
- Post Thanks / Like
Re: Polishing Engine Components...
Just tie down your rotary buffer and put it on lock setting Originally Posted by skibik

About as long as the clear coat he put on will last Originally Posted by Pockets
 Get your shine on!
-
10-02-2013, 10:19 AM #11Just a regular guy

- Join Date
- Feb 2009
- Location
- Oviedo/Stuart Florida
- Posts
- 15,278
- Post Thanks / Like
Re: Polishing Engine Components...
If you have a rotary you can get the same results using the BLACKFIRE metal polishes: http://www.autopiaforums.com/forums/...-aluminum.html
-
10-02-2013, 11:07 AM #12Just One More Coat

- Join Date
- Apr 2003
- Location
- Sonoma County, CA
- Posts
- 12,320
- Post Thanks / Like
Re: Polishing Engine Components...
I can answer that, if you stay on it, it will look good for months. However it takes polishing on a fairly regular bases. That`s been my experince Originally Posted by Pockets
Old Enough To Know Better, Too Stupid To Care....
Dave`s Detailing
Sonoma County, CA
-
10-02-2013, 11:15 AM #13@PoorboysWorld.com
- Join Date
- Oct 2006
- Location
- West Nyack, NY
- Posts
- 2,218
- Post Thanks / Like
Re: Polishing Engine Components...
He said the stuff flakes and chips off with a fingernail touch .... I`m betting it probably would be better uncoated Originally Posted by Addicted2Bling
That`s why I asked, he said the coating he puts on does not last
-
10-02-2013, 11:19 AM #14
- Join Date
- Feb 2010
- Location
- Southern Illinois
- Posts
- 2,907
- Post Thanks / Like
Re: Polishing Engine Components...
I wonder how well Opti Coat would hold up?
-
10-02-2013, 01:08 PM #15
- Join Date
- Dec 2010
- Posts
- 1,381
- Post Thanks / Like
Re: Polishing Engine Components...
Yes that was the regular clear coat he was talking about, apparently the high temp clear coat sticks better but does not shine as good Originally Posted by Pockets
Get your shine on!


 Reply With Quote
Thread Information
Users Browsing this Thread
There are currently 1 users browsing this thread. (0 members and 1 guests)
Similar Threads
-
Engine detailer spray comparo: CD-2 vs. GUNK Engine Protector Shine
By tom p. in forum Car Detailing Product DiscussionReplies: 12Last Post: 07-31-2013, 10:22 AM -
Cleaning Suspension components
By Parolee in forum Car DetailingReplies: 7Last Post: 08-28-2009, 06:55 PM -
Home Theater Components
By mose in forum Click & Brag -The Detailers ShowcaseReplies: 9Last Post: 12-02-2007, 11:46 AM -
Painting brake components questions and looking for opinions...
By imported_Jon P. Nusbaum in forum Body Shop & Mechanical ModificationsReplies: 2Last Post: 07-15-2003, 02:57 PM
Bookmarks