

If you plan on buying Charismas at the Fieldcrest Cannon outlet site or at one of their outlet stores, consider stopping by at your local Linens `N Things store. The one in Burbank, CA is selling bath sized IRR Royal Velvets for 4.99 each. They aren`t Charismas, but they seem soft and plush.
I think a lot of stores are trying to liquidate all the old RV`s because apparently they are coming out with a new RV towel that is softer and plusher.
Results 1 to 15 of 25
-
01-18-2002, 02:21 PM #1


- Join Date
- Aug 2001
- Location
- Burbank, CA
- Posts
- 2,897
- Post Thanks / Like

-
01-18-2002, 02:30 PM #2

- Join Date
- Mar 2001
- Location
- St. Louis
- Posts
- 4,970
- Post Thanks / Like
Thanks, I will check `em out Saturday!
The Stable
2017 Audi TTS
2014 Porsche Carrera S
2017 Porsche Macan GTS
1996 Porsche Carrera 4S
-
01-18-2002, 04:48 PM #3
- Join Date
- Mar 2009
- Posts
- 163
- Post Thanks / Like
My local ROSS has first quality RV for the same price. They comes in batch. At one point 2 months ago they have like 20+ in one store. THen they are gone for like a week and then some more. Check it out too.
My personal favourite is the Wamsutta 100% Supima Cotton towel I got at Ross. I only managed to get 3 of them. $5.49 at Ross.
Ross also has some Charisma for $5.00 from time to time.
George.
-
10-01-2010, 06:17 PM #4
- Join Date
- Sep 2010
- Posts
- 137
- Post Thanks / Like
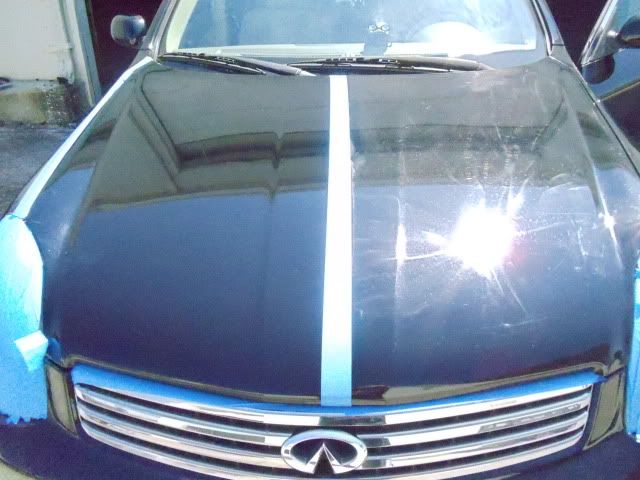
Swirl and oxidation removal on G35 Sedan hood
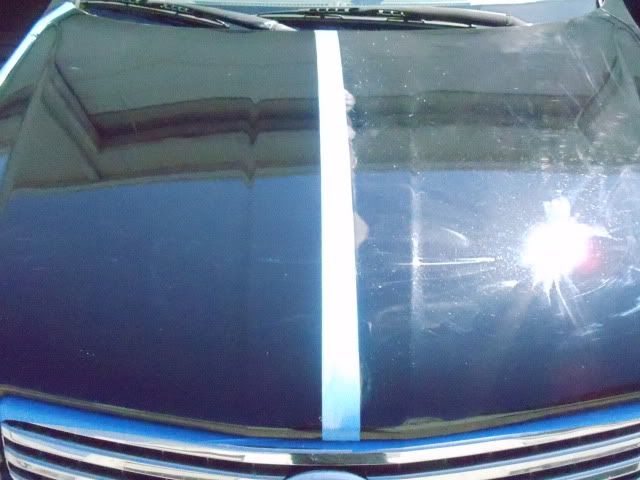
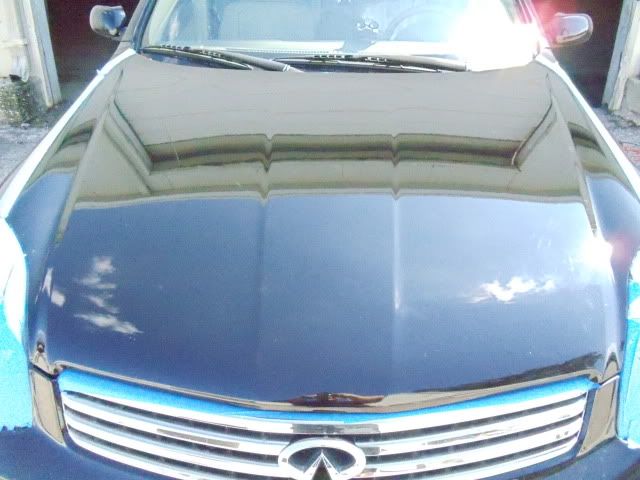
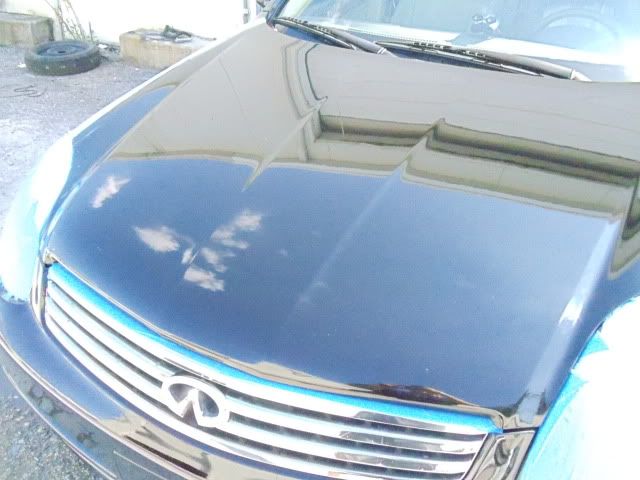
So my buddy comes to me asking if im able to remove whatever is on his hood. So i check it out and there is tons of swirls and oxidation for being in the sun and just treated terribly(From Previous Owner). So i said sure no problem. Let me see what i can do. Swirls were heavy and oxidation wasnt too bad but clearly visible. So i washed the car, used some P21s, and water/alcohol to remove the old wax. Pulled out my Flex, White pads,Orange pads,M105 and finally M205. Didnt come out too bad. Still some light swirls and was wondering if if was doing something wrong or didnt put enough pressure on the flex. Oh also did i mention it was my first time buffing out swirls and such. But wanted to get your guys opinion to see if i can do better. Heres some pictures:
50/50
As you can see, there is still some light swirls on the left side that was worked on.
Final Product(sorry sun was going down so i couldnt get it on the hood)

As i said first time i did something like this so feel free to let me know what i did wrong. Willing to learn and do it the right way.
-
10-01-2010, 06:42 PM #5AMG Classic Car Detailing


- Join Date
- Feb 2008
- Location
- Sunny Florida
- Posts
- 11,199
- Post Thanks / Like
It doesn`t look bad at all, but maybe better pictures would help. I would go over the area again with M105 with a orange pad and put some pressure ( more then you did before ) then use M205 with white pad. When you use the Black pad with M205 then you need to go very slowly during your passes.
AutopiaForums is the place to be.
Remember to Shop Autopia-CarCare.com for your Detailing Needs!
-
10-01-2010, 09:32 PM #6
- Join Date
- Sep 2010
- Posts
- 137
- Post Thanks / Like
Ok will do. Thanks Angelo
-
10-01-2010, 10:41 PM #7

- Join Date
- Sep 2009
- Location
- Flanders, NJ
- Posts
- 3,124
- Post Thanks / Like
You might also want to make sure that you are priming your pad properly. Put on a good amount of M105 and work it into the pad with your fingers. Once the pad is completely covered with polish wipe off excess with a MF. Then add 3 -4 dime sized dots of polish and spread it around a 2 x 2 area with the machine off. Then turn it on to speed 3 to spread it around. Once the polish is spread onto the polishing area, dial up the speed to 5-6 and make slow overlaping passes with a good amount of downward pressure. Work the product until you get the desired results. The biggest problem with using 105 for the first time is there is a learning curve. Work a small area before you move on so you know what works and how to proceed.
BTW, there was a big improvement over what you had before.:thumbup:Barry Schultz
Detailed Elegance
-
10-02-2010, 05:53 PM #8
- Join Date
- Sep 2010
- Posts
- 137
- Post Thanks / Like
Thanks Barry. I will do this next time i see the car. Just afraid that i will go through and burn the clear. I do all of the work in a cool and enclosed area. But thanks a lot for the advice and how to. Will help out a lot with my future jobs.
-
10-02-2010, 06:05 PM #9
- Join Date
- Sep 2009
- Location
- Flanders, NJ
- Posts
- 3,124
- Post Thanks / Like
Don`t worry to much about burning through the clear. A flex is a forced rotation DA, so it is much safer then a true rotary. Just keep the Flex moving in slow overlaping passes. Originally Posted by SIDetailing

You will be fine.Barry Schultz
Detailed Elegance
-
10-02-2010, 08:40 PM #10
- Join Date
- Sep 2010
- Posts
- 137
- Post Thanks / Like
Awesome!! Thanks for the help. Any other advice you could give? Could i add more swirls if im doing it wrong.
-
10-02-2010, 09:07 PM #11
- Join Date
- Sep 2009
- Location
- Flanders, NJ
- Posts
- 3,124
- Post Thanks / Like
Unfortunately, adding swirls is all to easy! Originally Posted by SIDetailing
Make sure that your pads and work surface are both clean. Clean pads often, or change pads. There are just so many things that can cause swirls.Barry Schultz
Detailed Elegance
-
10-02-2010, 09:42 PM #12
- Join Date
- Apr 2010
- Posts
- 196
- Post Thanks / Like
great work buddy. did you ever get back to touching it up as angelo mentioned.
-
10-02-2010, 09:50 PM #13
- Join Date
- Sep 2010
- Posts
- 137
- Post Thanks / Like
Not yet. I will probably see the car again tuesday. lets see. Originally Posted by drdetail
-
11-02-2010, 06:58 AM #14
- Join Date
- Oct 2010
- Posts
- 154
- Post Thanks / Like
I`ve been working on my wifes 2007 Infiniti G35... with black paint. We got it used after a 3 year lease, and I think the previous owner took it to every gas station car-wash he could find. He was probably an inspector for them, and had to hit at least one a day, based on all the swirls and holograms and such.
Anyway, I`m having the same problem of getting rid of all the scratches. After repeated rounds of M105 with orange pads, and finishing with M205 with white and finally black pads I still see some small scratches with my LED light.
Yes it`s a ton better then what was there before, but not the level I`m going for.
I even tried the Menzerna 85R micro polish, by hand, but that didn`t seem to do much for me either.
-
11-02-2010, 07:19 AM #15
- Join Date
- Oct 2009
- Posts
- 358
- Post Thanks / Like
Are you seeing scratches that are still there from before you began buffing or are you seeing micromaring? Originally Posted by shizam1
If it is micromaring then you need to make sure you are working clean and try hitting it again with 205.
If it is still scratches from before you began then more than likely if they arent removed during the compounding step the following steps will not remove it. When compounding you have to make sure you level the paint all the way. The following steps mainly clear up some of the micromarring from the compounding step and enhance the finish. If you are still seeing some from before you buffed then those are obviously the deep defects and you have to determine if it is worth chasing or not.
Jon
"I can do all things through Christ who strengthens me."
Jon Leidgen

 Reply With Quote
Thread Information
Users Browsing this Thread
There are currently 1 users browsing this thread. (0 members and 1 guests)
Similar Threads
-
2001 Blk VW Passat Hood Oxidation Removal?
By RioGrandeValley in forum Paint Correction and Gloss EnhancementReplies: 15Last Post: 07-30-2012, 08:24 AM -
Heavy swirl and oxidation removal?
By DETAILKING in forum Machine Polishing & SandingReplies: 37Last Post: 04-22-2011, 01:53 AM -
How long does it take you to remove heavy swirl marks on a midsize sedan?
By kyazh in forum Machine Polishing & SandingReplies: 7Last Post: 08-25-2007, 05:04 PM -
Oxidation & Swirl Removal
By schmatt in forum Car DetailingReplies: 1Last Post: 03-18-2005, 06:19 PM -
Swirl removal, oxidation removal and other pics!
By Scottwax in forum Click & Brag -The Detailers ShowcaseReplies: 30Last Post: 05-10-2004, 02:30 PM
Posting Permissions
All times are GMT -5. The time now is 03:25 PM.
 Copyright ©, 2002-2015, Autopia Forum - All Rights Reserved
4.2.2
Sponsored by Autopia-CarCare.com
Bookmarks