

Perhaps a more befitting title would have been, "How to rub polish into a pad and mist water onto paint, in 13,000 words or less."
Thanks to David Saunders for sending me a simple e-mail about pad priming.
What started out as a three page response turned into five, then twelve pages.
At that point, I decided to finally write most of what I wanted to about the subject.
What follows is a 5 month compilation of various written tidbits & thoughts.
Ten minutes here, thirty minutes there, and finally a wrap-up day to convert the article from a Word document to a forum-ready file.
If anybody is interested in a .pdf version of this, e-mail me and I`ll fire a copy your way... it is a much easier on the eyes.
And thanks in advance to the 8-10 guys that will fight their way through the entire thing!
iamwaxman@aol.com
Results 1 to 15 of 42
-
05-02-2011, 03:20 AM #1


- Join Date
- Jul 2011
- Posts
- 653
- Post Thanks / Like

-
05-02-2011, 03:21 AM #2
- Join Date
- Jul 2011
- Posts
- 653
- Post Thanks / Like
Mr. David Saunders-
Glad to hear you got the M205 to finish out to perfection.
Your e-mail about your recent polishing experience has inspired me to write more in-depth about the subject than I first anticipated. Perhaps this article can help other paint polishing enthusiasts to better understand the benefits and drawbacks to priming a pad, using the buffing liquid as the primer. I decided to discuss the benefits of supplemental wetting agents, too. When used together, the dynamic duo of pad priming and wetting agents can deliver stunning results. But, as with most things, there are benefits and drawbacks to consider.
When writing this tutorial, had the random orbital in mind, but after reading through the content, I am confident that most of the information can easily apply to any polishing machine. This includes orbital, random orbital, forced rotation orbital, and rotary machines.
If I happen to cover some things you are already aware of through experiences of your own, deductive reasoning during your hundreds of polishing sessions, or via diligent research in your quest for knowledge, my apologies in advance. Much of the written information has been included for the benefit of much less experienced readers. I hope that at least some portion this article will benefit you, too. I appreciate the fact that someone with your talent and level of passion would ask for an opinion on the subject. With that said⦠happy reading!
Let`s address your two specific questions.
1. Is it possible that a foam buffing pad, once saturated with buffing liquid, could deliver less cut, despite technically having more abrasive product in the foam to begin with?
In my opinion, the answer to this question is a resounding yes.
It is definitely possible and probable that pad saturation can diminish the cutting power of a pad. Saturation is akin to using too much oil in an engine. Although the engine has ample lubrication, the splash and drag on the crankshaft counterbalances and other moving parts diminishes overall performance. Down the line a bit, this article delves into the nuances of pad saturation directly.
2. Is it fair to say that in some cases, a properly primed pad cannot equal the cut of a non-primed pad?
In my opinion, the answer to question two is I suppose, albeit rarely.
Unless I am completely missing something, or cannot recall the instance when I saw this to be true⦠I feel pretty confident stating that for the task of cutting, a non-saturated, properly primed pad will typically and easily outperform a non-primed pad of the same type.
That being said, I am certain that there will be instances when a primed pad will outperform a non-primed pad for certain tasks, and vice versa. In fact, I recently saw Mike Stoops of Meguiarâs clear up some rather nasty hazing using a non-primed Meguiarâs W9207 7â Foam Finishing Pad. The foam pad easily outperformed the primed Meguiarâs DMF5 5.5â DA Microfiber Finishing Disc I was using. It wasnât even close: I was a beaten man! Truthfully, this was the only time Iâve ever seen a foam pad rival the Microfiber Disc so easily.
Instead of priming the pad, Mike used only three or four dots of Meguiarâs DA Microfiber Finishing Wax to remove the hazing. After seeing the results, I was able to mimic his results by dialing back the amount of product used on the Finishing Disc. I still used a primed pad, but I minimized the amount of liquid on the pad big time- more than I usually do. We had compressed air handy, which is by far the best way to clean the pad and control the amount of buffing liquid attached to it.
Throughout the polishing session, we had seen an inordinate amount of scouring, or hazing. In this case, neither the disc nor the liquid was responsible for the damage; the abraded paint residue was! The first time I encountered this phenomenon, it was a real eye opener, and taught me the value of keeping the pad clean. It also taught me to be on the lookout for this occurrence at the onset of all future polishing sessions (a rather tough thing to judge when polishing clear-coated paints).
Luckily, we realized early on that the paint residue was responsible for the hazing. After all, soft paint is one thing, but soft and crunchy is pretty rare, especially with paint jobs that arenât all that old. This paint was relatively new and our microfiber discs were fresh and fluffy, so the deduction was not all that hard to come by.
So, why did the two pads deliver such different results?
Some background:
The paint we were working on was a soft, single stage, black. The brand was unknown to us. Truthfully, when dealing with any aftermarket paint job, the brand isnât all that important because the hardness of the finish will vary depending upon how accurately the painter adhered to the manufacturers mixing and drying recommendations. The amount of paint sprayed onto the car can vary from painter to painter, too, which can also affect the overall characteristics of a cured paint job.
Even if the model of car is familiar to you, the paint system can vary widely. Claude Sevigny of Meguiarâs Canada, a man that I enjoy talking with and respect immensely, recently told me of a major European automobile manufacturing plant that was using three completely different paint systems (traditional, water based, and powdercoat)! So, unless you can decipher a vehicleâs paint code and know the characteristics of each paint type beforehand, you might notice that a seemingly familiar paint type is reacting to polishing differently than before, but you wonât know why. Consequently, you might chalk up the differences to changes in your technique, pad saturation, temperature and humidity, or a number of other things.
-
05-02-2011, 03:23 AM #3
- Join Date
- Jul 2011
- Posts
- 653
- Post Thanks / Like
Back to the question: why did the pads perform so differently?
Pad comparison:
Both pads are designed for final polishing, and neither pad is known to cause marring when used on delicate paint surfaces. The 7â foam pad is taller and larger in diameter than the 5.5â microfiber disc, which could potentially absorb some of the machineâs orbital motion via increased cushioning action.
The diameter discrepancy between the pads was pretty substantial. In general, a larger diameter pad offers improved stability as it glides across a surface. In other words, if the machine is inadvertently tilted one way or another during polishing, the pressure shift is more gradual. Subsequently, it is easier to regain control of the pad when its diameter is larger.
In addition, during that time, the pivot point (or fulcrum) does not receive as abrupt a concentration of pressure as it would on a smaller pad, so there would potentially be less scouring of the surface at the pivot point. These observations are perhaps hypothetical, yet sensible nonetheless.
Finally, larger diameter pads feature more surface area. But then, this is where our comparison gets complicated, at least when comparing these two pads. Before we compare these two pads, let`s run some numbers.
The 7â diameter foam pad features 38.48 square inches of total surface area, while the 5.5â diameter microfiber pad features only 23.76 square inches of total surface area. Thatâs a difference of 61.9%, in favor of the larger pad. This means that if the same pressure is applied to the same machine, the smaller pad will have a larger concentration of weight and pressure placed upon it. This can change all sorts of things, including overall backing plate rotation when using a random orbital machine.
Additionally, a larger pad of the same type can be used longer before it accumulates the same percentage of potentially damaging residue and debris. Looking at things another way, you can use a large-diameter pad longer before cleaning is needed.
So far, it seems as though a larger the pad is the best choice for final polishing duties. Yet, we havenât taken into account how the buffing liquids we use are built and designed to interact with the pad, nor have we accounted for the fact that the DA Microfiber Disc features thousands upon thousands of fibers that are capable of holding loads of buffing compound and abraded paint residue.
In fact, if we were able to measure the surface area in contact with the paint at any given time, I believe that once its fibers had packed together due to compression, the smaller DA Microfiber Finishing Disc would offer up a huge surface area advantage. Perhaps, the difference would be a startling amount.
To be fair, we must also consider how the disc was prepared for polishing, and how well its cleanliness and fluffiness was maintained. Do you see where this is going? Thatâs right- we have way too many unknown variables to form a tenable conclusion. So, where does this leave us?
The short answer:
In this case, itâs quite likely that initially, the flat-faced foam pad offered up more immediately usable surface area, thus keeping the pad-to-residue ratio lower than that of the microfiber disc. Perhaps itâs also true that the pore structure of the pad was able to store the damage-inducing paint remnants away. Maybe the abrasive grains were able to attach themselves to the pad only briefly? If so, abrading action would have been short lived- much shorter than we realized.
Finally, we should at least consider the possibility that machine movements and applied pressures were more evenly dispersed across the panel, and pad face.
But then, this is all conjecture, hypothesizing, and theorizing. In short, itâs a guess. We didnât end up having the time to discuss things, nor do any structured testing. Conceivably, it could have been Mikeâs polishing abilities!
After all, as of late, the glorious Mike Stoops has become quite the paint-polishing guru.
"Perhaps itâs not that at all. Maybe heâs not that good, but instead failed to realize that the foam pad shouldnât have worked better?"
Oh, how that Professor Von Stoops loves a good joke. Isnât that right, Mr. Mike?
The long answer:
Somewhere amongst the following 12,000 or so words is the long answer. Iâve tried my best to be brief, but obviously it didnât quite work out as Iâd planned. Regardless, I hope youâll stick with it and read my best attempt at writing what I know to be true.
At least itâs what I think I know.
PAD PRIMING, AND HOW IT AFFECTS POLISHING PERFORMANCE
My theory as to why pad priming works so well is based mostly in deductive reasoning and comparative analysis of polishing results. Comparisons were made using primed pads and non-primed pads, and by employing various application methods on all sorts of paint types.
It has been my experience that most times a better result is achieved by priming the pad with the buffing liquid as opposed to using a non-primed pad. Certainly this may have to do with the way I handle my polishing machines, manipulate their speed controls, time my polishing cycles, and apply pressures and angles to the machine. There are lots of other procedural issues to consider, too.
One thing is for sure- I am definitely able to see the effects that priming has on a pad by magnifying the pad using my Radio Shack Handheld Lighted Microscope (Carson Optical makes the microscopes for Radio Shack):
Illuminated Microscope - RadioShack.com
MicroMax⢠| MM-100 | MM100 | Microscopes | Pocket
While I typically prime the pad and use additional product for the defect removal process, I use a different approach for final polishing. Although I still prime the pad thoroughly at the onset of the polishing session, I minimize the amount of compound applied to the pad by blowing the pad clean using compressed air prior to polishing. If I don`t have air handy, I place the pad face into a microfiber towel and run the machine for 3-7 seconds, or until the pad is still moist but there`s no obvious polish stuck in the pores of the pad. Then, I add small amounts of buffing liquid as needed. For delicate or hard to refine finishes, sometimes no added product is needed. Letâs discuss final polishing and prepping of the pad for final polishing after we cover some benefits and drawbacks associated with pad priming, using the buffing liquid as the primer.
-
05-02-2011, 03:24 AM #4
- Join Date
- Jul 2011
- Posts
- 653
- Post Thanks / Like
WHY PRIME A FOAM PAD IN THE FIRST PLACE?
Many polishing enthusiasts believe that pad priming will eventually happen on its own through the reapplication of product after several polishing passes, and I suppose it might. But then, the word prime denotes the word preparation in this case, so it should not be left to happen consequently or by chance. Besides, I much prefer to prepare the pad using fresh, non-contaminated buffing liquid.
Pads that feature strands of material such as wool, microfiber, or micro fingers require manual priming in order to ensure a thorough coating of the individual fibers. Since there is no way to know which way the strands are going to bend, twist, or lay in relation to the surface (or each other), it is best to manually prime them prior to use.
That being said and unless otherwise noted, this discussion relates to foam pads. Donât misunderstand- there are large sections of this article pertaining to the Meguiarâs DA Microfiber Discs as well as the Surbuf Microfingers Pad, but your questions were in reference to foam pads, so the primary focus is on them. Some close-up shots of the various pads discussed in this article:

A Pentel P205 pencil with a 0.5mm lead was used as a pointer in the following photos.

Close-up shot of a Meguiarâs W8207 Soft Buff Yellow Foam Polishing Pad

Close-up shot of the Meguiarâs DMF5 DA Microfiber Finishing Disc

Close-up shot of the Surbuf R Series 00055R Microfingers Pad

Close-up shot of the Meguiarâs W4003 Easy Buff Knitted Wool Pad
There are all sorts of foam pads available to choose from, and selecting one can be a hit-and-miss proposition. For this discussion, let`s focus on the structure of a foam pad.
The pad face is the flat portion of the pad that is set upon the paint (no surprise there). Foam pads feature thousands of air pockets or pores. Between each pore resides the actual foam material. For the remainder of this discussion, we shall refer to the areas of foam as the walls of the pad. Finally, the portion of each wall that touches the paint surface when the pad is placed upon it is referred to as the wall-top. If we could somehow measure the surface area of each wall-top and add it together to determine the total area, we would know exactly the net surface area of foam along the face of the pad.
Manufacturers could possibly use this number to give us an indication of the abilities of their pad. But then, this figure would only be a starting point, because once the pad is put to use, everything changes. As the pad is shuttled across the paint, its walls shift and bend, constantly changing shape along the way. As an example, if the pad is compressed, the walls are going to either:
1. Lay over on their sides.
2. Scrunch and fill the void area of the pores.
3. Move vertically into the pad, keeping the void area of the foam somewhat intact.
What likely occurs most of the time is a combination of all three.
Depending upon what happens affects the net surface area of foam in contact with the paint. No big news there.
The amount of foam in contact with the paint at any given time is dynamic, and when we add a shot of buffing liquid into the equation, itâs virtually impossible to know whether the foam is contacting the paint surface, or simply moving polishing liquid across it. It gets more complicated as we continue!
In relation to the overall size of the pores, the walls can be thick or thin. Keep in mind that although pad manufacturers typically list a pores per inch rating (or PPI) of the foam used to make the pad, this rating by itself is not an accurate indicator of what should be expected in terms of cutting power from the pad.
Theoretically, two seemingly identical pads can feature the same PPI rating yet deliver much different performance. Even if the foam type and physical characteristics are identical by comparison, one pad might feature large pores and thin walls, while the other can feature small pores and thick walls. The following diagram illustrates this point:
Cross section of two foam pads featuring 100 pores per inch (100 PPI)

The pores dispersed throughout the blue pad are half the size of those dispersed throughout
the yellow pad. Consequently, each pad`s wall thickness varies proportionately.
I hope you donât mind if I stray even further from the pad priming for final polishing topic. It won`t be much longer- I just think its important to preface that discussion with some facts that you probably already know, but may have not pondered.
-
05-02-2011, 03:25 AM #5
- Join Date
- Jul 2011
- Posts
- 653
- Post Thanks / Like
PRIMING CAN DETER SATURATION OF A FOAM PAD
Pad priming, using an abrasive buffing polish to treat the pad, slows the absorption of the liquid components of the buffing polish into the membrane-like structure of the pad (as it is repetitively added during the polishing process).
As you know, buffing compounds and polishes use all sorts of hard materials to abrade paint (aluminum oxide is just one example). By stuffing the pores of the pad full of buffing polish, we`ve created a hard barrier. This is akin to damming a river using rocks and debris to slow or stop the movement of water. In our case, however, the hard barrier keeps the liquid portion of the buffing compound or polish from traveling throughout the foam pad with little resistance. What is the net result? Pad saturation is kept to a minimum! Why is this desirable?
To put it simply, pad saturation is a performance killer. While keeping the face of the pad moist, supple, and coated with buffing liquid can be beneficial, saturating other areas of the pad with buffing liquid almost always diminishes its performance. After all, if the majority of the pad is loaded with liquid and debris instead of air, the foam cannot respond or rebound quickly because these products do not easily compress, and are much heavier than air. The avoidance of pad saturation also keeps mass out of the center of the pad, so the pad can respond in an agile manner.
What are some other benefits to avoiding pad saturation?
The pad will operate at a lower temperature if air can travel through it. With liquid and hard material stuck in the membrane-like structure of the pad, airflow decreases, so heat cannot readily escape, causing the pad to run hotter. Higher operating temperatures can alter a pad`s performance and dramatically shorten its life.
The pad can be used longer during the polishing session before it needs replacing. If we can avoid all of the aforementioned negative situations from occurring, there is no need to change the pad as frequently.
Pad longevity may be increased because there is not as much solvent, oil, paint residue, or abrasive material stuck inside the pad. All of this foreign matter can degrade the structure of a pad over the long haul, either by mechanical agitation or through the absorption of volatile liquids.
If the goal is defect removal, pad priming offers many benefits.
Pad priming increases the useable surface area of a pad. Filling the pad pores with hard particles and liquid allows additional polishing liquid to set upon those areas, effectively increasing the surface area of the pad.
Pad priming mass-loads the face of a pad. By keeping the polishing liquid located on or around the face of the pad, the only additional weight added to the pad is focused where it should be, not throughout the pad. Keeping the pad free of saturation allows it to compress and rebound as it was intended. In most instances, the additional weight along the face of the pad would be considered a plus. There`s not a lot of weight difference, but there is a difference.
Pad priming stiffens the face of a pad. For defect removal, this can be a huge asset because it accomplishes so much. Consequently, this is a big section to read.
Imagine that we are able to visually magnify a single point of a paint surface, and at this point, there are several crisscrossing, sharp-edged canyons. They appear to be formed by rivers, but in actuality, they`re simply scratches in the paint! Some of canyon-like scratches aren`t too deep, and grinding the protruding paint residing between those scratches will be rather easy to accomplish. Removal of the paint protrusions leaves a smooth paint surface.
The remaining canyon-like scratches are very deep. Rather than eliminate the paint residing between these scratches, you decide to smooth away the uppermost edges of the scratches via repetitive polishing. The smoothing effect will improve the reflectivity of the surface, and the scratch will be less noticeable. Besides, the abrasive action of the polishing compound and pad will remove some of the finer scratching that is present along the canyon-like walls, if the polish or pad comes into contact with them.
As the foam walls of the pad shuttle polishing liquid across the paint surface using a squeegee-like action, some of the scratch-edge is scrubbed away. Inevitably, there will be loose abrasive particles rolling across the paint surface as the walls of the pad sweep them along. In addition, there`s undoubtedly going to be an abundance of abrasive particles physically attached to the foam walls (and the top edge of the walls), and those particles will be moving at the same rate of speed as the foam. A-ha! This is likely where we will realize maximum cutting power. However, if the wall flexes and bends as it contacts the scratch, what happens to our cutting power?
Recall that we previously discussed the membrane-like structure of a foam pad, and how it might deform its shape under pressure. A recap of the statement:
If the pad is compressed, the walls are going to either:
1. Lay over on their sides.
2. Scrunch and fill the void area of the pores.
3. Move vertically into the pad, keeping the void area of the foam somewhat
intact.
What likely occurs most of the time is a combination of all three.
Depending upon what happens affects the net surface area of foam in contact with the paint.
If the pores and walls are coated with abrasive polishing grains, then polishing performance should be pretty good. However, if there is an absence of abrasive grains, then the abrasive action of the foam must be relied upon to scrub paint away. The probability that any foam buffing pad would feature the same amount of cutting power of any cutting compound is pretty small. Therefore, we could reasonably conclude that there would be a decrease in defect removal capability. This statement could also apply to polishing pads and liquids, and finishing pads and liquids.
What happens if we fill the pores with buffing liquid? Instead of the pad walls readily deflecting their shape (consequentially changing the shape of each affected pore in the process), wall shape should remain mostly intact, especially if the pad is moving at a high rate of speed. There`s a lot to discuss in regards to that statement, but in my opinion, the laws of physics would support the premise.
With buffing liquid now supporting the pad walls, would they still deflect or change shape as they contacted the edge of the canyon-like scratch? It`s highly likely that the answer is yes, but not nearly as much as they would without the added support. Essentially, by priming the face of the pad, we`ve made the pad face stiffer to some degree.
This may or may not be a desirable effect, but it comes in handy if you find yourself working on a complex-shaped panel. Whereas we would normally reach for a typically dense or firm foam cutting pad to remove harsh defects, pad priming and its stiffening effects could allow you to use a rather pliable polishing pad in place of a firm or hard-to-compress cutting pad.
As long as the pad you choose can squeegee the paint surface clean during polishing, the pad will perform impressively. However, if the abrasive particles stick to the paint surface and the mechanical action of the pad cannot budge the abrasive residue, the surface may become coated with abrasive particles or gummy residue (a mixture of spent polishing liquid and abraded paint).
-
05-02-2011, 03:26 AM #6
- Join Date
- Jul 2011
- Posts
- 653
- Post Thanks / Like
PAD PRIMING, AND HOW IT RELATES TO DEFECT REMOVAL
When the goal is defect removal, pad priming can do wonders. Some of the benefits are seemingly small, but as their benefits accumulate, the difference is quite substantial. In a way, itâs a lot like the tuning of an engine or the balancing of a rotating device; infinitesimal adjustments, when combined, make all the difference! This diagram shows how pad priming and added downward pressure might cause the abrasive grains in the buffing liquid to interact with the pad:

Non-primed pad, lightly applied polish

Non-primed pad, moderately applied polish

Primed pad

Compressed and primed pad

Compressed and primed pad, abrasive minimized
A quick recap of the benefits of pad priming:
When we pack the pores tight with compound, to a large degree weâve filled in the void areas across the face of the pad. This effectively creates more surface area on which to place a layer of buffing compound. As a result, we realize faster cutting of the surface. Since the pad pores have been packed with hard particles, the fluid portion of the buffing compound cannot easily travel upward through the pad, so saturation has been hindered. This âdamming effectâ also helps to keep the fluid-to-particle ratio of the buffing liquid close to optimal, or at least close to what the manufacturer intended it to be. Weâve also stiffened the face of the pad (so machine motion transfers much better), and mass-loaded it too, so momentum and force increase compared to a non-primed pad. So far, so good!
To better visualize these benefits, imagine that we`ve built a structure to resemble a BIG foam pad. The walls are not made of foam, but are instead made of heavy yet flexible cardboard tubes. Instead of buffing liquid, we`re using uncured fresh cement.
To simulate pad priming, we fill the tubes with the uncured cement, and seal the ends with massive flat saltshaker tops. Next, we strap the tubes together using a sturdy circular band around the perimeter of the grouped tubes (think hula hoop, only a lot bigger). The tightly grouped cardboard tubes now resemble a giant honeycomb-like structure. Finally, we employ a giant machine to clasp onto and shake and spin the entire circular structure, moving it in a manner similar to the motion a random orbital creates.
As the machine moves the structure, the cardboard tubes may move and flex, but they wonât collapse because the circular band binds them together. Since the tubes are filled with hard-to-compress material (water, rocks, sand, and cement), the honeycomb shaped cardboard walls flex, but remain intact. The saltshaker tops allow some cement to escape as the unit is moved. Some splashes out the top, and even more falls out the bottom, sprinkling material on the ground as it moves.
We`ve just created a situation that is similar to what happens when we prime a buffing pad, and use it to polish paint. The cardboard walls and outer hoop mimic the action of a foam pad, storing polish and moving it about. The saltshaker tops allow liquid and abrasive grains to travel out of the tubes, much like what occurs as the buffing pad oscillates and rotates. Some of the polish travels upward and sideways through the pad, while most of the polish falls out of the pad as it wiggles and shakes across the paint surface.
Once again I am getting off track. You asked about pad priming in regards to final polishing.
-
05-02-2011, 03:27 AM #7
- Join Date
- Jul 2011
- Posts
- 653
- Post Thanks / Like
PAD PRIMING, AND HOW IT RELATES TO FINAL POLISHING
Some of the benefits attributed to pad priming become liabilities during the final polishing process. Although a thorough priming of the pad is still helpful, excessive amounts of polish should be removed prior to buffing. Before we explore the reasons why it is important to minimize the amount of polish covering the pad, it might be a good idea to review the priming procedure as described at the very beginning of this article. If itâs all still fresh in your mind, then read on!
WHY PRIME THE PAD AND THEN IMMEDIATELY REMOVE THE POLISH?
It certainly seems wasteful to prime the pad using a generous amount of polishing liquid, only to immediately remove the majority of it. As previously mentioned, the word prime denotes the word preparation in this case, so it should not be left to happen consequently, or by chance. Priming the pad increases the likelihood that if any portion of the pad contacts the paint surface, there will be abrasive particles attached to that area of the pad.
Although priming is important, it is imperative that coverage of the pad be consistent. After all, we wouldnât want some areas of the pad face to have little or no particle coverage, with other areas featuring clumps of abrasives. Besides- as grippy and tiny as some of these abrasive grains are nowadays, there is a high probability that they would fail to disperse in an even and timely manner.
To better understand how inconsistent pad priming can lead to poor polishing results, imagine that we are creating a sheet of ultra-fine finishing sandpaper to sand a freshly painted panel. To guarantee a consistent sanding result, the paper must have consistently-sized particles that are placed equidistant from each other.
As luck would have it, we`ve located some pyramid-shaped abrasive grains that are non-wearing (very durable), and their dimensions are exactly the same. We decide that we shall place each grain right next to each other, bases touching, and glue them to the paper. By positioning our grains in this manner, the sandpaper will cut its way through the paint surface, leaving evenly spaced and consistently shaped v-grooves atop our paint surface. Once the paper building process has been completed, we sand the surface using perfect sanding etiquette. Time to break out the polishing machines!
As we buff, we realize that something has gone terribly wrong during our sanding session. Unfortunately for us, somebody double-stacked and even triple-stacked abrasive grains on top of other grains! Due to this incompetence, our paper created some rather deep gouges in the paint. It gets worse! Our gluing efforts were less than extraordinary, so an uncountable number of grains broke loose during sanding. Would you care to guess the damaging effects of this blunder? Right- even more gouges, and an inconsistently leveled surface because the loose grains acted as casters or rollers that did not allow the paper to glide atop the paint surface.
This is not a perfect analogy for several reasons, but it does paint a picture of what can happen if our abrasives are inconsistently positioned across the pad face. Although our paint surface would not be affected to the same degree if we had clumping of our compound or an inconsistently coated pad, we would likely see at least some scouring or swirling effects across the paint surface. A soft and pliable foam pad may also eliminate the some of the negative effects of clumping by allowing the abrasive grains to move upward into the soft pad material, as opposed to being forced into the much harder paint surface.
Letâs get back on track again.
-
05-02-2011, 03:28 AM #8
- Join Date
- Jul 2011
- Posts
- 653
- Post Thanks / Like
Once a pad has been primed, minimizing the amount of polishing liquid present on the pad gives us more control over how the pad is going to work with the polishing abrasives. In other words, when we use polishing liquids featuring abrasive grains (or particles), and we move those particles across a paint surface using any particular foam pad, there are a few possibilities as to how they might work together.
Realistically, it is likely that any one of these possibilities occur independently for only brief moments because the interaction between the pad and polishing liquid is very dynamic, meaning that change is never-ending as the buffing cycle advances.
At some point, most of the abrasive grains will either become trapped in the pore structure of the pad, attach to the pad or paint surface, float or be flung away from the polishing area, or be pulverized to the point of becoming useless in terms of their ability to further refine the surface in a positive manner.
In the case of polishes featuring diminishing abrasives, the abrasive structures crumble apart as they are worked, and eventually reach the limit of disintegration. It is likely that not all of the structures fully diminish as we polish (for one reason or another), which is why we often see a lower degree of refinement compared to a non-diminishing abrasive of the same quality. Even if the structures do fully diminish (or disintegrate), we cannot be certain how quickly this occurs. Imagine a finishing polish that initially cuts relatively aggressively into the paint, and then diminishes very rapidly. In this case, we might not be able to refine the finish to the highest degree.
Lately, compounds and polishes featuring non-diminishing abrasives have been very successful. One of the most popular, Meguiarâs M105 Ultra-Cut Compound, uses very hard and durable abrasive grains. Still, many polishing enthusiasts believe that the compound âbreaks down too quicklyâ. This is an understandable yet incorrect assumption. Since the particles are so small and aggressive (or sharp), they attach rather easily to the buffing pad. Although the cutting ability of the abrasive particles remains high, most of them are positioned in the pore structure of the pad, and therefore cannot easily contact the paint surface. This brings us to the possible ways that the pad interacts with an abrasive buffing polish:
- The pad will move the polishing liquid across the paint by encapsulating it within the pore structure. In this scenario, if we assume that no abrasive grains are attached to the wall-tops, we can surmise that the pad will affect the paint in a manner independent of the encapsulated polish. In other words, the pad and polish will not create a combined polishing effect. Instead, the pad would act as a squeegee of sorts, scuttling the polish across the paint surface as it moves.
Of course, the pad would also have some effect upon the paint. The extent of its effect would depend upon the abrasiveness of the pad, and the level of lubrication between it and the paint surface. If the surface were already in very good condition, the imperfections would be small in size, so very little friction would be needed to show an improvement upon the surface. Given the right circumstances, the potential for a high level refinement via burnishing might exist.
- The pad will move the polishing liquid across the paint by constantly shifting and tumbling the abrasive particles trapped between the pad and paint surface. Imagine the particles to be very small barbed ball bearings, and youâll better envision their movements across the paint surface. As the pad moves, the wall-tops roll the particles over imperfections in the paint. If the particles happen to be small enough to enter a surface defect (such as a scratch), minute amounts of paint would be removed in the process. This would effectively alter the shape of the scratch by replacing large imperfections with smaller ones. In addition, a smoothing or burnishing of the scratch edges would make the imperfection less noticeable.
It is likely that maximum polishing or refining ability would occur during tumbling, as the individual particles could feasibly enter any scratch they could physically fit into. Some particles might roll across the paint surface, as would a tire across the pavement. In this case, the abrasives would create little more than a micro pockmark trail (if that). It seems reasonable to assume that most of the particles would roll, then drag (as they attached to the pad or were pushed), then repeat the process over and over again.
Thinking things through, it seems to me that free-rolling particles would be able to follow the nuances of a surface better than attached particles, so they would therefore refine the finish best.
- The pad will move the abrasive grains across the paint as they attach to the wall-tops. When this happens, leveling ability increases because the particles are moving in tandem with the pad, so speed of movement is at its peak. However, if there are no free-rolling abrasive grains present between the pad and paint surface (as discussed in the section immediately above), polishing results will suffer.
Therefore, when using foam pads in the manner outlined (the abrasives grains are attached to the pad face), thorough polishing of the surface requires that multiple passes be made. Oftentimes, the abrasive particles must be forced into scratches and defects via user applied downward pressure. This is especially true if the abrasive grains are of a smaller size than the overall depth of a defect.
Even the softest foam pads available to us cannot readily contour to every surface detail. Think of a tire rolling across a pebbly road for a visual of what I mean: although the tire would have an ability to contour to the overall shape of the road, (the degree would be dependent upon the tread design and characteristics of the rubber), it is very unlikely that it could precisely match every topography detail.
Note: Meguiarâs® DA Microfiber Discs and Surbuf® Microfingers Pads feature vertically placed fibers across the pad face. The fibers used on both styles of pad are very pliable, and rather unique.
The structural design of Meguiarâs Microfiber material is flexible yet crushable; each strand can bend, yet collapse in diameter and length (similar to the pile of fuzzy shag carpeting, while theyâre being stepped on).
While the Surbufâs Microfingers are also flexible, they retain their cylindrical shape and length, even under pressure (bending in a manner similar to the bristles of a toothbrush).
Both types of pad enable attached abrasive particles to enter very small nuances of the paint surface. In the case of the Meguiarâs discs, the microfiber material can accommodate a massive amount of buffing liquid, and since the fibers are so fine, its polishing ability is unmatched when used with ultrafine abrasive compounds.
-
05-02-2011, 03:30 AM #9
- Join Date
- Jul 2011
- Posts
- 653
- Post Thanks / Like
âHEY, IâM JUST GETTING STARTED HERE!â
Since weâre on the subject of attached abrasives, letâs discuss the misconceptions that arise when this happens across the entire face of the pad. When all of the abrasive grains have attached to the face of the pad, polishing enthusiasts tend to think that the polish has run a very short work cycle. To explain this phenomenon, phrases often bantered about include:
- âThe polish broke down too quickly.â
The user thinks that the abrasives became unusable due to mechanical destruction or disintegration.
- âThe lubrication evaporated too fast. It flashed off⦠it soaked in.â
The user thinks that the lubricating agents or liquid ingredients used in the compound have evaporated, or soaked into the pad.
Essentially, the impression is that the compound has either worn out or dried very quickly. Most times, this is not the case⦠so spread the word!
There are plusses and minuses to âlooseâ grains, âattachedâ grains, and a combination of the two. Hopefully, this information helps to point these out.
âTHE REASON I PULLED YOU OVER TODAY, SONâ¦â
At this stage of the polishing session, the liquids we use typically feature very fine abrasives, while the pads we outfit our machines with are chosen to gently apply the liquids in an oh-so delicate manner. It makes sense that in order to further refine the surface, paint must be removed using a gentle approach. Besides using slow and deliberate motions to control the machine, one of the best ways to achieve stellar results is to lower the machine speed.
We already know that, for the most part, higher machine speeds will remove paint more rapidly than slower machine speeds. The primary reason is obvious: an increase in repetitive scrubbing of a section of paint for a given amount of time. In addition, the faster the pad is moving, the more likely leveling ability is going to increase.
It is important to mention that leveling refers to a minimizing of height variations across the paint surface. Leveling makes a surface appear smooth, and reflections upon that surface will appear more accurate to the object being reflected. Examples? The reflection cast off of a still body of liquid, or a high quality glass mirror.
All that being said⦠once weâve sufficiently removed defects or leveled the surface, thereâs no real benefit to using high speed for final polishing. In fact, there are a lot of negatives associated with moving the buffing pad at a rapid clip.
-
05-02-2011, 03:31 AM #10
- Join Date
- Jul 2011
- Posts
- 653
- Post Thanks / Like
SLOW AND LOW IS MELLOW
There are many benefits to using a slow speed setting for the task of final polishing. Some of the most important ones are listed below:
- Slower operating speeds lessen the need to control the machine using a heavy hand, so edge digging and uneven compression of the pad is kept to a minimum.
- Pads maintain a higher level of pliability when used at lower speeds. This allows them to more accurately contour to complex shapes and the small nuances of a surface (such as orange peel). A pad that has become effectively stiffer due to an increase in speed is beneficial for the task of defect removal or surface leveling, but for final polishing it can leave scour marks, or light hazing.
- When using very soft and pliable foam pads, too much speed can cause the pad to ride atop the buffing polish rather than move it across the surface.
- Slower operating speeds curtail the generation of friction induced heat. This has all sorts of benefits. Lower operating temperatures keep paint characteristics stable, so the potential for paint swelling may be minimized. Fluids evaporate at a slower pace, so polishing liquids last longer and perform as intended. Fluids efficiently transfer heat, so polishes and pads can help to keep paint surfaces cooler during the buffing process.
- Buffing pads and backing plates can wear quickly as the adhesives warm to the point of failure.
- Foams, fibers, and attachment materials weaken or can be damaged by overly aggressive machine movements.
- Rapid evaporation of lubricants and liquids can even cause buffing cycles to be dramatically shortened.
- The smooth and curved motions made by the random orbital change to motions that are aggressive and pointed when operating speeds are increased. This can lead to less than perfect polishing results. The following pictures illustrate this point:

A Meguiarâs G110 Dual Action Polisher was outfitted with a backing plate using four modified ballpoint pens in place of
a typical buffing pad. The circle created by the rotating pens measures 4-3/8â (or 111.125mm) in diameter.

This pattern was created using the machine on speed setting 1, which equates to approximately 2,560 orbits per minute (OPM).
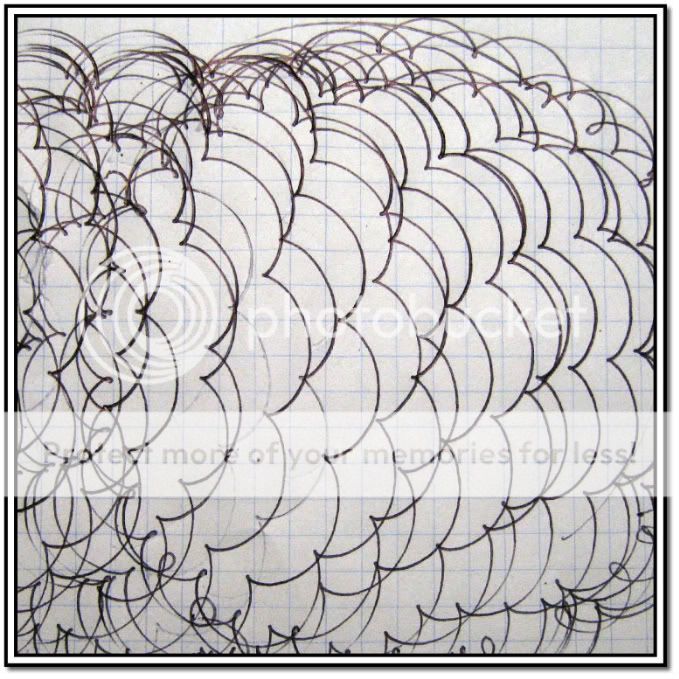 This pattern was created using the machine on speed setting 6, which equates to approximately 6,700 orbits per minute (OPM).
The list of reasons why using slower machine speeds can improve final polishing results goes on and on. Bottom line? If thereâs no need to finish a job in a hurry to meet a deadline⦠and youâre not attempting to level a surface⦠and youâre not trying to maintain a specific amount of random pad rotation (or increase it)⦠then lower the machine speed setting for final polishing.
Side note: Another simple yet highly successful way to improve final polishing results is to use large diameter pads as opposed to equivalent small diameter pads. Large diameter pads provide a much more stable platform, which helps to minimize machine wobble and user-applied pressure variances across the face of the pad. In addition, larger pads feature more surface area, so they can be used longer before cleaning is needed.
-
05-02-2011, 03:32 AM #11
- Join Date
- Jul 2011
- Posts
- 653
- Post Thanks / Like
A CLEAN SWEEP.
Since todayâs polishing technology does not allow us to eliminate abraded paint residue from the buffing liquid after each cycle, it is important to keep our pads clean. Sometimes the residueâs effects are negligible, but other times it can wreak havoc on a paint surface. In fact, this type of contamination can cause scouring so fine that it seems no pad & polish combination will deliver stellar polishing results. When this occurs, it can really shake your confidence!
This sort of thing happens any time we use one item to remove material from another. A rake that becomes clogged with leaves can no longer gather them efficiently⦠a file clogged with shavings can no longer remove material in an even manner (if at all). In most cases, the tool is still usable, but contamination slows or halts progress altogether. Stuck-on debris can even ruin a surface. Can you imagine the damage caused by a file that has become loaded with aluminum shavings? How about a piece of sandpaper packed with pills of freshly sanded paint?
In the case of buffing pads, once they have become clogged with abraded residue and spent abrasives, we tend to see a less than perfect finish. When using rotary machines, we see swirls in the paint surface: these are scratches that are long and curved. When using dual-action or orbital machines, we see scouring or hazing of the paint surface: this is simply caused by an accumulation of scratches that are short and curved, and layered upon each other.
Wouldnât it be nice to know whether the residue featured sharp, hard points and edges similar to the type found on shards of glass? What if instead it was pulverized into a soft, powder-like substance? If we had this sort of information, perhaps it would help us to make choices as to the type of pad we should use and how often it should be cleaned. We might even get some insight as to which buffing liquid would work best for the situation.
On that note, Iâll leave you to ponder whether or not the solvents and other liquids designed into a buffing liquid help to dissolve the abraded paint remnants. At the minimum, they likely coat the residue and other contaminants, perhaps curtailing some of their negative effects. For now, weâll have to rely upon common sense cleaning of our pads.
USE A RAKE TO COMB YOUR HAIR? I DONâT THINK SO!
Imagine having to remove some sort of gritty, oily, caked on goop from your hair using nothing more than a common leaf rake. For guys like me, imagining a full head of hair is merely a harsh reminder of what once was, but I digress. For the hairy-headed among us, think about how futile such an attempt might be.
Unless the rakeâs teeth were able to force their way between the hairs and strip the goop away, all that would likely occur is perhaps a haphazard redo of your `do! I think itâs pretty safe to say that most of the hair on your head would stay packed tightly together. The probability of cleaning and separating thousands of hair strands using the comparatively thick and flimsy raking teeth is undoubtedly very low.
Yet, in the midst of a polishing session, many of us attempt to clean our buffing pads using nothing more than a run of the mill, nylon bristled brush. Unless the pad is coated in dry or crusty residue, agitating the fibers or pores of a pad wonât do a whole lot of good. In fact, other than seeing some foam or fibrous pad remnants and a few crusty residue bits, I donât recall seeing any oil or grease droppings oozing from the brush. Isnât there a better way to clean foam, microfiber, or microfinger pads on the fly?
Back to the hair: I suppose that if we didnât have shampoo and water handy, most of use would reach for a towel in an attempt to wipe the goop away. Perhaps we would first wipe our hair with the towel, then agitate it with a brush, and repeat both steps until we were satisfied that we had removed all we could. In fact, lots of us use this exact method for cleaning our pads when we are polishing paint using random orbital machines. First, we agitate the pad with a brush. Then, we place the face of the pad against a towel and run the machine until the pad looks pretty clean. Some guys will go one step further and mist the pad with water, then repeat the towel step (I do this while cutting, but never for finishing). Three steps later, the pad usually looks pretty darned good! Sounds like a lot of work, and it is. Luckily, there is a much better way.
The best way to clean a buffing pad in the midst of a polishing session is to blow it clean using compressed air. A high-pressure blast of air aimed directly at the padâs face loosens stuck-on contaminants, and will have no problem separating fibers or cleaning pores with ease. Compressed air works incredibly well on wool pads, so the need to spur a pad is virtually eliminated. With air, thereâs no way Iâm transferring trace amounts of plastic or metal onto my pads as I clean them. One less big deal to worry about.
Most detailers and paint polishing enthusiasts donât keep a portable air compressor in their polishing kits, so perhaps itâs not a reasonable option for most folks right now. But rest assured, as our pads become more fibrous and our compounds feature finer and more capable abrasives, youâre going to need an air compressor.
So the next time the desire hits to buy that âmust haveâ polishing machine, consider purchasing a small air compressor instead. Once you make the switch, you may just realize that you didnât need that new machine after all.
-
05-02-2011, 03:34 AM #12
- Join Date
- Jul 2011
- Posts
- 653
- Post Thanks / Like
âIâVE GOTTA HAND IT TO YOUâ¦â
A good way to test the effects of paint residue is to polish a section of paint by hand. A few rubs of the paint using a high quality foam or microfiber applicator and some polish will give you an idea of what to expect from the polish itself. It`s best to compare the resultant finish using different applicators to determine whether or not a particular type is affecting the paint surface. It might even be a good idea to rub the paint surface using only a clean applicator to determine its effects beforehand. If you can get a similar result using various applicators, thereâs a pretty good chance that the residue will not create a lot of problems.
Once youâve got your base, try another similarly sized section using the same polish, applicator, and pressure, but double the rub time. Obviously, youâve got to be reasonable because as paint is removed and the polish dries out, the residue can build to the point that it engulfs the surface of the applicator. In terms of the detrimental effects caused by dried polish and abraded paint residue rubbing against the paint, expect to see a magnification of the results you`ve achieved by hand when using a machine.
Paints that are seemingly impossible to dial-in often respond well to soft and pliable non-marring pads, and a minimum amount of polish. Sometimes priming as specified for final polishing works well, but other times a non-primed pad and a minimal amount of polish delivers the desired result. More times than not, when using high grade, non-diminishing abrasive compounds and polishes, additional downward pressure can work surprisingly well.
Patience and methodical analysis is often the only way to form the optimum finishing method. In the end, the best advice is the obvious advice: to avoid contamination-induced swirls, scouring, and hazing⦠keep the pad clean!
âIF YOU CANâT STAND THE HEATNIKSâ¦â
When the discussion turns to heat and its positive or negative effects on paint polishing, things can become heated rather quickly! The pro-heat crowd (the Heatniks) insists that the heat generated by pad friction as it rubs against the paint is the ultimate polishing medium, never accounting for how the friction was created in the first place.
Heatniks often mention that high operating temperatures help to break down the abrasives in our compounds and polishes. This to me is interesting, considering the hard and durable composition of the abrasive grains used in buffing liquids these days. Commonly used materials include varieties of aluminum oxide, silicon carbide, diatomaceous earth, clay, and silica. While these materials vary in hardness, none of them would be terribly affected by the temperatures generated by the typical buffer, pad, and compound.
Heatniks have even been known to boast that a specific amount of heat further hardens a paint surface, effectively making the paint more durable and less susceptible to scratching. I suppose the effect is akin to the shot peening of metal parts to improve stress crack resistance. With no actual scientific data to back this up, nor any other convincing evidence that a fully cured or catalyzed paint system will further harden with the introduction of heat after the fact (or any paint type, for that matter), I have nothing positive to say about this unproven premise.
-
05-02-2011, 03:35 AM #13
- Join Date
- Jul 2011
- Posts
- 653
- Post Thanks / Like
WATER SPRITZING⦠THE NITROUS OF PAINT POLISHING?
A large portion of this article touts the benefits of pad priming. However, once a pad has become excessively packed with abrasive particles and abraded paint residue, cutting power can decrease rapidly. Not only is cutting power affected, so too are all other positive aspects associated with having a clean buffing pad. Rather than having to constantly clean the pad or exchange it for a fresh one, what is a buffing guru to do?
What if I told you that by spritzing a bit of water onto the paint, you could:
- Thoroughly clean the pad
- Use less compound
- Extend the buffing cycle by 200-300%
- Increase cutting & leveling ability by 30-50%
- Increase pad rotation when using a random orbital machine
It sounds too good to be true, but it is true, and it works with all types of pads!
Supplemental wetting agents, or wetting agents, are liquids that are sprayed onto the paint surface during polishing to moisten the pad and paint surface. They are used in addition to buffing compounds or polishes, and can be used when polishing using any type of buffing machine.
When used correctly, a wetting agent can dramatically increase cutting power and extend the amount of time an application of buffing liquid can be used before additional liquid is needed. A wetting agent can also help to keep buffing pads clean. In fact, it can clean a pad much better than agitating it using a nylon bristled brush, or rubbing a towel against it.
Wetting agents can be used with all types of pads including foam, wool, wool blends, Surbuf® Microfinger Pads, and Meguiarâs® DA Microfiber Pads.
Although a wetting agent could be categorized as a lubricant, in this case its intended purpose is to control the bond between the abrasive grains and the buffing pad, not to increase slipperiness between the pad and paint surface. Regardless the intent, a wetting agent will serve double duty, working as an âabrasive grain bond-controllerâ, and as a surface lubricant.
Purified water is probably the most popular wetting agent, but a paint maintenance spray can also be used. Although a paint maintenance spray may seem to be the natural choice for this task, it may not always be the best choice. Some maintenance sprays are designed to evaporate more rapidly than plain water, while others contain ingredients that can help to clean, beautify, or protect a paint surface. Oftentimes, these additives can form a barrier, making it more difficult for abrasives to scrub paint away. For these reasons, purified water is an ideal supplemental wetting agent because it can evaporate from the surface completely, leaving nothing behind that could affect polishing performance.
Note: Occasionally, an added bit of slipperiness can be a benefit. I have used Meguiarâs Last Touch Detail Spray (1:1 dilution) in conjunction with Surbuf pads and various Meguiarâs compounds to pick up a bit more backing plate rotation, thus improving leveling ability when using my random orbital.
Compared to lubricants that are typically used in buffing compounds and polishes, most wetting agents tend to evaporate rather quickly. Plus, since they are usually very thin in viscosity, wetting agents can fling or splatter, especially if there happens to be a lot of pad rotation. For these reasons, the lubrication supplied by a wetting agent can be very short lived.
Perhaps it is best to think of a wetting agent as being similar to a lubricant that has been designed for use during the drilling or sawing of metals. These types of lubricants are commonly used to minimize the damaging effects of friction-induced heat. They are also used to keep metal shavings from packing into the drill shank or saw teeth by flushing them away.
Although we are not necessarily trying to control the level of heat generated by polishing, we are concerned with maximizing the pad and compoundâs cutting power. In order to keep cutting power at the highest level, sometimes the pad must be purged of the abrasive grains and paint residue that have become tightly packed onto the pad. If the compound is fresh and has some obvious cutting ability left, there is no need to waste it by blowing, scrubbing, or rubbing it away. A wetting agent will help to loosen and then redistribute the compound.
Note: If the pad has become laden with debris, you should consider cleaning the pad before using a wetting agent. Do not use a wetting agent at the onset of the buffing cycle because it will dilute the buffing liquid and cause it to splatter. It can also rinse away precious lubricating agents⦠in a hurry!
Itâs pretty easy to tell when itâs time to use a wetting agent. Usually, the polish seems to âflashâ or disappear from the paint surface, and cutting ability diminishes almost completely. After cutting stops, scouring of the surface sometimes begins. When this occurs, our natural inclination is to add more polish or increase downward pressure on the machine. Adding more product can help initially, but the excess polish inevitably clumps onto the pad and then rolls off, forming spheres of compound and paint residue that can become trapped between the pad and paint surface. This can really make a mess of a freshly polished surface, especially if youâve increased downward pressure.
A pad face that is completely covered in tightly packed compound loses its ability to squeegee away compound and abraded residue from the paint surface. Instead, the pad rides atop it. Known as gumming, this phenomenon can be very frustrating to deal with because it continue occur until the pad is cleaned or replaced, or the gumming is manually wiped away.
Fortunately, a wetting agent can also help to eliminate gumming issues. As the wetting agent loosens excess buffing compound and residue from the pad, the pad face becomes exposed once again, thus allowing its pore or fibrous structure to whisk the gummy stuff away.
After the face of the pad has been purged of excess buffing liquid, there will very likely be a lot of polish sitting atop the paint surface. It is therefore important to carefully inspect and regularly clean the edge of the pad to make sure it doesnât become laden with an excessive amount of debris. This happens as the pad moves across the paint and its edge works as a squeegee, gathering up whatever happens to be in its way. The accumulation of spent abrasives, buffing liquid, and paint residue can clump along the padâs edge, potentially scouring an otherwise pristinely polished surface.
When using buffing pads featuring strings or fibers, a wetting agent can help to loosen stuck-on buffing compound and paint residue. It can also find its way into and between each fiber, effectively making the fibers more pliable by breaking the friction lock they have on each other. With the newfound wiggle room created by the liquid, the fibers are able readjust positioning in relation to each other.
As the wetting agent becomes displaced via pressure, evaporation, or by absorption into the pad, the fibers are able to pack tightly against each other. This phenomenon effectively creates a pad featuring a higher density of fibrous material, if only for brief periods of time. As the pad once again scrubs material from the paint surface and becomes coated with buffing compound and paint residue, it must be cleaned again.
Although the benefits of a wetting agent can be short lived when used with these types of pads, what a difference it can make! The increase in cutting power and leveling ability can be jaw dropping; this is especially true when a rotary machine is paired with a wool buffing pad, or when a random orbital machine is outfitted with either a Meguiarâs DA Microfiber Cutting Disc, or a Surbuf Microfingers Pad.
Another huge benefit: wetting agents can help to keep pads clean. This is especially true when the pad is rotating at a high rate of speed. As the pad rotates, attached compounds, liquids, loose fibers, and debris are essentially flung from the pad. Although this can create a messy environment at times, pad debris, compound splatter, and dust can be minimized through diligent pad cleaning, and adjustments to the amount of compound being added between cleanings.
-
05-02-2011, 03:36 AM #14
- Join Date
- Jul 2011
- Posts
- 653
- Post Thanks / Like
âWOULD YOU PREFER THIN OR THICK NOODLES WITH YOUR SAUCE?â
Lets discuss the benefits and drawbacks to using thin or thick fibers. Itâs a bit of a long read, so fair warning!
To begin, imagine that we are using a pad featuring long, rectangular fibers. Regardless the length, each fiber features four long sides and an end tip (the other end is attached to the pad). Since the surface area of a tip is tiny in comparison to the combined surface area of all four sides of the fiber, letâs not figure the surface area of the tips into our equation. Besides, wool pads, Surbuf Microfingers Pads, and the Meguiarâs DA Microfiber Discs all feature fibers that are positioned vertically in relation to the face of the pad, but tend to bend horizontally when in use.
If we apply buffing compound to a pad featuring just one fiber, each side of the fiber would have the potential to abrade the paint surface as the pad, twists, bends, and spins the fiber across the panel.
If we add another fiber, we would have eight sides in play. Three fibers give us twelve sides, four fibers give us sixteen sides, and so on. For this equation, weâll hold at four fibers. Now, what would happen if all four fibers stuck together, forming one larger four-sided, single-tipped fiber?
With two sides of each four-sided fiber stuck to another fiber, only 50% of the surface area of all four fibers would be available to scrub paint away. Not only that, but the combined size of the fiber would measure double in thickness and width.
Consequently, the thicker 4-ply fiber would not be able to contour as well as a single fiber, so although we might see an increase in leveling ability, there might also be a decrease in the ability of the fibers to follow the finer nuances of a surface. In other words, if the fibers cannot physically scrub the entire paint surface because they are either too stiff or too large, and the fibers cannot force the buffing compound into or across the deeper defects in the paint (this is what buffing pads truly are designed to do), then polishing results could be disappointing.
Undoubtedly, with enough scrubbing time or applied pressure, we could eliminate the fine scratches, or polish the deeper defects without completely eliminating them, but then we run the risk of removing an unnecessary amount of paint. Why try to force a large diameter fiber to do the work of a small diameter fiber, unless we have no other option?
Of course, the buffing pads we use feature fibers that are closer to cylindrical in shape as opposed to rectangular, but the same principle applies. If the fibers stick together, they will undoubtedly offer less surface area, less pliability, and be misshapen to boot. I say misshapen because there is no way to control the shape or the quantity of fibers that stick together. A pad featuring inconsistently sized fibers is bound to wreak havoc upon an otherwise pristinely polished paint surface.
A great example showing how single or grouped fibers can affect the abilities of a buffing pad compares a knitted wool pad to a twisted wool pad. For this comparison, letâs assume all parameters of the pad are the same, with the exception of how the wool is configured before being attached to the pad.

Close-up shot of a knitted wool pad.

Close-up shot of a twisted wool pad
Both types of pads feature groups (or bundles) of wool, commonly referred to as tufts. To make a tuft, imagine laying out a dozen strands of wool, side by side. If you were to grab the strands mid-length and fold them in half, you would have a tuft featuring two-dozen strands of wool. One end of the tuft would be bunched together, while the other would not.
If you then attached the bunched end of the tuft onto a fiberboard disc by stitching it into place (and repeating the procedure over and over until the disc was full), we would have the makings of a wool pad.
A knitted wool pad typically features tufts of thin wool strands that have been knitted or stitched onto a simultaneously stitched backing. If youâve ever seen an embroidery machine work its magic, or a yarn-knitting guru turn a continuous string of yarn into a blanket or sweater, youâll have a good idea of how knitted wool pads are created.
Each individual tuft can be placed tightly or loosely together, helping to control the characteristics of the pad. Knitted wool pads are known to have good cutting ability compared to foam pads. They tend to cut well initially, but because the individual fibers are thin and lack rigidity, they tend to pack full of compound and debris rather easily. Because of this, knitted wool pads must be cleaned often to achieve satisfactory results.
When used correctly, knitted wool pads cut well and leave a pretty nice finish. They are generally very comfortable to use, as there can be a lot of air residing between each fiber. This allows the fibers to remain flexible (or pliable) during use. In most cases, knitted wool pads do not offer the leveling ability of a twisted wool pad. The exceptional case might be one that requires leveling of a surface featuring a dramatic curve or bow. In this instance, the fibers could unintentionally be forced to contour to the panel, creating a pliable yet dense grouping of dynamically shifting wool fibers. Loads of surface area, fantastic contourability, and non-rigid fibers⦠the best of all worlds!
A twisted wool pad features tufts of wool that are pressed through and stitched onto a backing disc. However, before the tufts are mounted onto the backing, they are twisted or weaved together, forming a thicker strand of wool. By combining multiple tufts or by using more strands of wool per tuft, the fibers can be made as thick as desired. Thick, stiff fibers offer less total usable surface area compared to knitted wool pads, but there are some big benefits to this design.
First, it is important to mention that twisted wool pads tend to be less susceptible to having its fibers stick to each other. After all, itâs not that easy to bind large fibers together using nothing more than a concoction of abrasive particles, goopy buffing liquid, and paint residue. In this regard, a pad featuring twisted wool fibers beats a knitted wool pad, hands down. Less time spent cleaning the pad means you can spend more time buffing with the pad.
Since the fibers are thicker in girth, less individual strands can fit onto the same size pad. This means that although there is potentially less wool contacting the paint at any given time, the pressure placed upon the pad and force generated by its movement is more focused onto each twisted wool fiber than it would be on the multitude of strands used on a comparably sized knitted wool pad. Thick fibers, and lots of pressure applied to those fibers means that leveling ability is going to very high when compared to a knitted wool pad.
A lot of this discussion comparing knitted and twisted pad designs is theoretical. In the real world, overall pad performance depends so much upon the type and amount of wool being used, the length and stiffness of the fibers, and how tightly the fibers are packed onto the pad. Keep this in mind when choosing a new pad, or when analyzing the performance of a pad during use.
How about a comparison of two very distinct pads that use fibers to do their work, but are very different by design? Letâs once again compare the Meguiarâs DA Microfiber Cutting Disc to the Surbuf Microfingers Pad.

Close-up shot of the Meguiarâs DA Microfiber Cutting Disc
The Meguiarâs DA Microfiber Cutting Disc features tufts of microfiber strands. The face of the pad is similar in design to a knitted wool pad. The microfiber strands are not stiff like the type used on the Surbuf pad. Instead, they kink, crush, and bend very easily when pressure or force is applied to them, and respond in a manner similar to the pile of shag carpeting as it is stepped on.

Close-up shot of the Surbuf R Series Microfingers Pad
The Surbuf Microfingers Pad touts a very unique design. It uses non-tufted, individually placed fibers that are mounted vertical to the pad face. The microfingers maintain a constant length, and donât kink or crush easily when pressure or force is applied to them. Comparatively, microfingers react to pressure in a manner similar to the bristles of a toothbrush.
Using typical machine operating speeds, and with all other parameters being equal (pad priming, machine type, buffing compound, applied pressure, backing plate rotation, paint type, panel shape, etc.), a Surbuf Microfingers pad will generally level a surface to a truer degree, while the Meguiarâs DA Microfiber Pad will typically deliver a glossier finish.
Before we confidently claim that one pad is more capable or versatile than the other, remember that by changing machine speed, altering our technique, or swapping the backing plate for a different one, we can dramatically change the performance characteristics of any pad.
-
05-02-2011, 03:38 AM #15
- Join Date
- Jul 2011
- Posts
- 653
- Post Thanks / Like
âYAWN⦠IS THERE ANYTHING ELSE I SHOULD CONSIDER, KEVIN?â
Yes! Just a little more.
There are advantages and disadvantages that go along with using supplemental wetting agents. Although they can be used with any type of machine or pad, wetting agents work best for the task of defect removal, not final polishing. Since there is almost always an increase in scouring of the paint surface when using a wetting agent (the reasons have been discussed), it is wise to anticipate having to re-polish the area with a fresh buffing pad and the same (or a finer grade) of polishing liquid.
- The first thing you may notice is that the wetting agent releases the buffing polish from the pores or fibers of the pad. With so much polish present, there is a potential for a lot of cutting power, assuming the pad can cut through the build-up (as opposed to riding atop it). If youâve recently primed the pad, expect to see an incredible amount of polish upon the paint surface (probably too much). If there is too much buffing liquid present, simply wipe the excess from the surface, and continue polishing.
- As the buffing pad glides across the paint surface, it gathers up and moves the polish and abrasives that are lying upon the paint surface. Since the polish has by this time lost some of its lubricating ingredients or buffering agents* via evaporation, through absorption into the pad, or by friction, expect to see an increase in cutting power (sometimes, a whole lot more!)
* Buffering agents, as they are known in the abrasives industry, are ingredients that are sometimes used to keep debris from attaching to the abrasive grains, and to keep the abrasive grains from attaching to each other. Buffering agents can also curtail the formation of oxidation, and provide lubrication while acting as a sacrificial barrier. Buffering agents are sometimes used on sanding sheets and discs to minimize abraded materials from attaching to the abrasive grains.
Hereâs a non-industry example: bakers use sifted flour to act as a buffering agent when kneading dough. The flour keeps the dough from sticking to rollers, boards, pans, and hands.
- Donât be surprised to see an increase in scour marks or fine scratches to go along with all the extra cutting power. The potential lack of lubrication means that the abrasives may cut deeper and stick to the paint momentarily before becoming dislodged and continuing on their way. They may also more easily clump together.
IN CLOSINGâ¦
Advances in pads, compounds, and techniques have delivered high-end paint polishing to the masses. The beginner of today, armed with a random orbital and the latest compounds and pads, can literally rival the results achieved by the rotary wielding, paint-polishing guru of only a few years ago. I never thought I would claim such a thing, but its true. Sure, itâs not a slam-dunk, and thereâs still a learning curve, but the curve is much shorter. Heck- itâs not even a curve anymore⦠itâs a direct line!
For polishing enthusiasts that donât know how to use a rotary buffer or prefer to use any variation of an orbital machine, supplemental wetting agents and pad priming can make all the difference. When paired with a Meguiarâs DA Microfiber Cutting Disc or a Surbuf Microfingers Pad, a random orbital can rival the cutting and leveling results delivered by a rotary buffer and a wool pad. This is not always the case, and the process is not necessarily faster, but the potential certainly exists.
For the rotary users among us, pad priming and supplemental wetting agents can increase cutting power and leveling ability by a substantial amount. Although the orbital has closed the gap on the rotary, there are still a lot of fans of the rotary, and definite benefits that go along with using a rotary polisher.
So choose your polishing weapon, and get to polishing!
Written by Kevin Brown, Spring, 2011
e-mail: iamwaxman@aol.com

 Reply With Quote
Thread Information
Users Browsing this Thread
There are currently 1 users browsing this thread. (0 members and 1 guests)
Similar Threads
-
Bonding Agents
By rzatch in forum Waxes, Sealants, and LSP'sReplies: 38Last Post: 04-16-2012, 10:22 PM -
KBM- Pad Priming and Supplemental Wetting Agents
By wizardofahs in forum Auto Detailing 101Replies: 32Last Post: 06-04-2011, 05:57 PM -
wetting pads
By toyota2 in forum Car DetailingReplies: 16Last Post: 11-13-2004, 04:10 AM -
wetting pad before use
By schneider325 in forum Car DetailingReplies: 4Last Post: 07-03-2004, 06:41 PM -
Any insurance agents in the house??
By ExplorerXLT95 in forum Car & DriverReplies: 4Last Post: 08-08-2003, 06:59 AM
Bookmarks