

I`ve recently purchased a brand-new 2008 Mitsubishi Eclipse and want to start on the right foot this time. So far I`ve I purchased the following:
Microfiber Wash Mitt
Meg`s Gold Class Wash
NXT 2.0 Tech Wax Liquid
Lot`s of big blue MF towels
Two wash buckets (for two wash method)
I want to clay the vehicle, just make sure the finish is properly prepared prior to waxing/sealing. Can you explain what the exact process is? Would it go something like this:
Wash
Dry with MF
QD spray
Clay
Dry
Wax?
Just wanted to be sure as I plan on purchasing the smooth surface clay kit this Friday. Anything else I need beside what is listed above?
Many, many thanks in advance!

Results 1 to 15 of 22
Thread: Can someone explain to me step by step the process of properly preparing a finish (claying)?
-
05-29-2008, 03:13 AM #1


- Join Date
- May 2008
- Posts
- 8
- Post Thanks / Like

 Can someone explain to me step by step the process of properly preparing a finish (claying)?
-
05-29-2008, 03:43 AM #2Mr Detailer


- Join Date
- Mar 2006
- Location
- Portland, Connecticut
- Posts
- 2,813
- Post Thanks / Like
Re: Can someone explain to me step by step the process of properly preparing a finish (claying)?
In the steps you mentioned are you using the QD as the lubricant for the clay? Or is that just a step added?
If you are using it as a lubricant then thats fine. The only thing you may want to do is since the car is new and may only have light swirling if any is add a glaze to the process. This will fill in any minor swirling and give the finish that extra pop.I like beer. On occasion I will even drink a beer to celebrate a major event such as the fall of communism or the fact that our refrigerator is still working.
Stephan`s Detailing
Portland CT.
XBox Live - mr detailer
-
05-29-2008, 04:25 AM #3
- Join Date
- May 2008
- Posts
- 8
- Post Thanks / Like
Re: Can someone explain to me step by step the process of properly preparing a finish (claying)?
Hello,
Thanks for the fast reply!
Yes, the QD would be used as a lubricant for the clay. My question was, would these steps be correct?
Wash
Dry with MF
QD spray
Clay
Dry
Wax
Would that be a correct order to go by? Or should I wash after clay, then dry then wax?
-
05-29-2008, 04:55 AM #4Mr Detailer
- Join Date
- Mar 2006
- Location
- Portland, Connecticut
- Posts
- 2,813
- Post Thanks / Like
Re: Can someone explain to me step by step the process of properly preparing a finish (claying)?
 Originally Posted by danondorf

Yes the steps are correct, you should not need to rewash the car if you are keeping the clay well lubricated and dying the section you did right after you finished it.I like beer. On occasion I will even drink a beer to celebrate a major event such as the fall of communism or the fact that our refrigerator is still working.
Stephan`s Detailing
Portland CT.
XBox Live - mr detailer
-
05-29-2008, 06:36 AM #5Obsessive Compulsive Detailer

- Join Date
- Mar 2004
- Location
- ...a state of confusion
- Posts
- 9,789
- Post Thanks / Like
Re: Can someone explain to me step by step the process of properly preparing a finish (claying)?
The last time someone asked me that question it turned into the following article from my site:
This article is written to answer the following question...
"What are those orange dots and how to I remove them from my car?"
Perhaps the condition of the paint on this vehicle will look familiar to you...
 Can you see what I see? Lets take a closer look...
 That is the back of a 1998 Chevy van. Those little dots arent spray from a splattered catsup pack. They arent bug guts. Those are little dots from particles of metal that have embedded themselves in the paint and rusted. That is the way that many vehicles end up looking if they arent careful. In fact, if you look at the back of your own car along the bumper or across the trunk you may see similar dots. This article is going to explain what those dots are and how to get rid of them.
The orange or brown dots that most white car owners see and many other car colors simply hide is called Industrial Fallout (IFO) and is also known as Rail Dust. IFO occurs when particles from the atmosphere land on an unprotected car surface and then embed themselves in the paint. Typically this kind of thing is caused by brake dust if you do a lot of freeway driving. Hot brake dust coming off your brakes and the brakes of other drivers will land on your paint and melt right into the car much quicker than other forms. Rail dust is similar. Rail dust is named such because it is commonly found on cars that are transported by rail. Metal shavings from the rails fly up and melt into the car the same way brake dust does. It is protection from these kinds of IFO that cars are shipped with those protective plastic sheets on the hood and side mirrors and other parts of the car.
IFO literally falls out of the sky. If you live in an industrial area then you are going to see more of this problem than if you lived in the country. Living near refinerys like I do puts me at greater risk of IFO than the average Joe. Compound the fact that I have to do some freeway driving and I live a stone throw away from the freeway makes me even more at risk. Pollution from these areas will collect in the atmosphere and just land where it falls. Usually that is going to be on cars parked and not doing anything.
The only way to 100% protect yourself from IFO is to never drive your car and keep a car cover on it. That not being an option for most of us, the other alternative is to protect the car in other ways. Keeping it washed is the first good way to prevent it. In the winter IFO is even worse than in the summer. All that brake dust and pollution that doesn`t land on your car right away is quickly deposited there in the form of slush and road spray. Ever notice how bad your car looks in the winter as compared to the summer? People go longer between washes because it just gets dirty again. That is not a good excuse. The same argument could me made for washing your dishes or cleaning anything else. What`s the point in brushing your teeth? They are just going to get dirty again. You need to keep your car washed weekly if possible. In the winter when it is hard to get out there and do it then you need to at least take it to a drive through car wash or something. The paint on your car is the most expensive part of the vehicle. Even more expensive than the engine or anything else. It is also the most visible part of your car. If you ever plan on selling the car someday then you need to take care of the paint. That will be its best selling point when the time comes. Don`t let your lack of washing it cost you hundreds or thousands of dollars on the resale value.
Another good way to protect your car from IFO is to use a high quality sealant on the surface. Waxes are great and everything, but they are merely for looks. Waxes won`t protect you from IFO for very long. Imagine dipping your finger in a candle that has just been blown out. I remember playing with wax when I was a kid and I would do this all the time. The wax coats your finger and creates sort of a shell around it. If you bend your finger and then straighten it back out again, then you might notice that it isn`t a skin tight shell anymore. The more you wiggle your finger the shell gets looser and looser. That is how wax works on your car. It creates a `shell` around the paint that is temporary protection. In the heat your car will shrink a bit. When it gets cold it will expand. This shrinking and expanding will create space between the paint and the wax. Heat builds up in that space and will speed up the process of the breakdown of the wax. Even the best wax will only last around 6 weeks on your car before there are large areas of wax that have basically `melted` away. Harsh weather like heavy rain or snow will wear down the wax as well. Using really strong soaps to wash the car will wear it down too. Wax is very oily, so using an oil cutting wash will pretty much remove all the wax. Dish soap is a very good example of this.
A car sealant is more like dipping your finger in super glue rather than wax. Super glue bonds to your skin right away. It will shrink and expand with your finger instead of pulling away. In fact, to remove the super glue you may need to use an abrasive pad or some other strong chemical. Sealants bond to your car in the same way. They bond on the molecular level. First the molecules bond to each other and then they bond to the paint. This creates a very strong barrier of protection that can last for many months. Some can last for 6 months or longer. Sealants are very good protection for your paint. There are many different kinds of sealants that provide a variety of appearances. Most are very glossy and shiny. The latest technology of sealants adds a depth and a `wet look` that has always been the best quality of waxes and glazes. Now you can get the appearance of a wax and the durability of a sealant.
The best part about a sealant is that it will protect your car from UV rays that will fade the car and oxidize it. It will also create a much slicker surface that IFO finds much harder to penetrate. If you have a good sealant on the car then IFO may land on the car, but it won`t be able to work its way into the paint quite as easily. It will wash off instead of needing other treatments. If you live in a higher risk area for IFO damage then it is important for you to wash your car frequently and use a good sealant.
Now comes the part where we deal with removing the little brown dots. The reason they are brown is because most IFO is actually metal shavings and they rust when they get stuck in there. The brown stain is the rust that spreads from the little piece of metal. The rust stain can be cleaned off easily enough with a paint cleaner or a polish. That won`t remove the metal shaving though. It will still be there. With enough of those metal shavings in your paint you could cause serious and irreversible damage to your paint that will eventually result in total clear coat failure. You have seen it before I`m sure. Cars that look like the hood needs to be repainted are cars that were badly taken care of to begin with. I`ve seen 15 year old cars looking better than 5 year old cars and it is all a result of proper car care on a regular basis.
The most common way to remove the IFO is to use a product called `clay`. I`m not talking about molding clay or earthy clay. This is a specifically designed for automobiles kind of clay. Clay Magic is the brand that I would suggest. You will find other brands on the shelf from companies like Mother`s or Meguiar`s, but Clay Magic is the brand that I like the best. I like it best for a number of reasons. Number one is the way that it sticks to your fingers while working with it. Some clay is just too hard and slips out of your hand too much. If you drop a clay bar on the floor then it is going to pick up little pieces of grit that are going to do damage to your car. A dropped piece of clay is a lost cause and should be thrown away for safety. Clay Magic is sticky and I very very rarely have one slip out of my hand while working with it.
 The way you use clay is very simple. You wash the car and rinse it like normal. Dry it as you usually would, but leave a little water here and there to help in lubricating the clay. Clay Magic usually comes in a kit that includes a bottle of spray lubricant. Using that with the extra water on the surface will make the job much easier.
Clay usually comes in a 100g sized bar. You can break that into three or four pieces very easily. Break off a chunk and begin with that. If you drop it then at least you didn`t just throw away an entire bar of clay. One clay bar is good to clay probably half a dozen cars or more. You shouldn`t need to worry about replacing this bar often. You won`t really have to use it that often.
Using the spray lube provided with the kit, spray some lube on the surface of the car. I like to start with the front of the car on the hood or the fenders. Don`t go too heavy with the lube. Just a spritz is really all you need. Then going in back and forth motions in the direction that the air blows over the car while driving, go about 10 or 12 inches at a time. Just rub it back and forth along the surface until you have covered the whole car. Do not use clay in circular motions. Go in straight lines from front to back. Don`t go up and down or in circles. There is no need to wipe down the area after you are done either. Usually I just pull the car back out of the garage and wash it again when I`m done. That is actually the easiest way to do it.
Claying your whole car should take about an hour. Once you get good at it then it is possible to cut that down to 20 or 30 minutes. Its not a very hard job to do and the difference after claying is amazing. You will notice that the surface is noticeably smoother and has more shine. As you are claying you will feel that the surface grabs at the clay at first and then allows the clay to glide after a couple of passes. That is how you know the clay is working. It isn`t rocket science at all. I am amazed everytime I explain the principle of clay to someone that they have never heard of it before. This is the easiest way to work by hand and actually repair damage and prevent future damage on your car.
After claying your car you can follow it up with whatever paint cleaner or polish you normally use. While clay will remove many of the black and brown dots that are caused by IFO, it may not remove them all. Using a good paint cleaner or polish will clean off the rest of the stains. The metal shavings are gone and all that remains is the stain. That should be easy to clean up as preparation for a sealant or a wax.
The only risk involved with clay is that you may pick up some grit in the clay and it could act as an abrasive on the car causing scratches. To avoid that, you should fold the clay often and inspect your work and the clay frequently. If you feel rough particles in the clay then you should try to either get them out of the clay or get a new piece. Folding only helps so much. If you have lots of gritty particles in the clay then its time for a new piece. Its not worth the scratches you could cause in the car if you choose to ignore the particles. Clay is cheap at a price of only about 10 bucks. Your paint is worth buying a new bar if you have run out instead of using a piece that is gritty and could cause damage.
To store your clay you should either choose a zip loc bag or some other kind of container that will protect it from dirt. 200 gram sized bars of clay usually come in their own box. I store my clay in an empty wax jar. Choose whatever works best for you. Protect the clay from dirt and it will be there to protect your car from IFO for a long time.
You should only really need to clay twice a year. I clay in the spring to clean up from the winter and then I do it again in the fall as I prepare the car for the winter. Unless you notice the orange dots coming back then you shouldn`t need to clay more than that. The most common place for IFO to appear is the back bumper and trunk. That is where your own exhaust deposits pollution and the wind blows your own brake dust behind you. Those areas may need to be clayed more often. Follow clay with the sealant or wax you normally use.
Well, that may seem like a lot of work, but it really isn`t. This article is mostly informative rather than actual instructions. To summarize what is written, these are the steps you should follow:
-Wash the entire car with the car wash of your choice. You may leave a bit of water on the surface when drying to assist in the lubrication of the clay. To clay you just lubricate the surface with either a soap and water mixture in a spray bottle or with the lube included with the clay kit and glide the clay along the surface. Do not use circular motions. Rub the clay on the paint in straight lines from back to front in the direction the wind blows over the car while driving. The clay will grab at first and then glide with ease when the surface is clean. Do not drop the clay. Inspect it often for grit or other particles that could scratch. Clay the whole vehicle and then rewash the car. Apply a paint cleaner or polish to remove the remaining brown dots and then seal or wax.-
That is as much as I think I can say about how to handle those annoying dots that appear on your car. Don`t just polish the car and be satisfied that the brown dots are gone. Protect the car properly with a sealant and remove the IFO with clay. That way the dots won`t come back unless more IFO penetrates the sealant. Keep an eye on your car and care for it well and your paint should please you for many years.~ ~ www.OCDetails.com ~ ~
Faster isn`t better. BETTER is better no matter how long it takes.
-
05-29-2008, 08:51 PM #6

- Join Date
- Feb 2008
- Posts
- 21
- Post Thanks / Like
Re: Can someone explain to me step by step the process of properly preparing a finish (claying)?
Nice write up. I`m saving this for emailing to my son... Originally Posted by Jngrbrdman
 2008 Z4 M Coupe (my baby!)
2005 530i (wife`s DD)
2003 Z4 (weekend convertible toy)
1961 Ford Ranchero
1973 Norton Commando
Sugar Land, TX
-
05-29-2008, 09:03 PM #7Just One More Coat

- Join Date
- Apr 2003
- Location
- Sonoma County, CA
- Posts
- 12,320
- Post Thanks / Like
Re: Can someone explain to me step by step the process of properly preparing a finish (claying)?
J
Excellent write up ThanksOld Enough To Know Better, Too Stupid To Care....
Dave`s Detailing
Sonoma County, CA
-
05-30-2008, 01:19 PM #8
- Join Date
- Dec 2004
- Posts
- 69
- Post Thanks / Like
Re: Can someone explain to me step by step the process of properly preparing a finish (claying)?
Sorry to have to nitpick, but...
100 grams of clay is less than 4oz. I might break that into two pieces tops, but I can`t imagine using a piece of clay that`s less than one ounce. That`s a piece about the size of your thumb.
-
05-30-2008, 01:44 PM #9Weekend Detailer!

- Join Date
- Jan 2006
- Location
- Gatineau, QC
- Posts
- 318
- Post Thanks / Like
Re: Can someone explain to me step by step the process of properly preparing a finish (claying)?
He has a big thumb!
 2008 Chevy Aveo LS Sedan - Fire Red
-
05-30-2008, 01:57 PM #10Just One More Coat
- Join Date
- Apr 2003
- Location
- Sonoma County, CA
- Posts
- 12,320
- Post Thanks / Like
Re: Can someone explain to me step by step the process of properly preparing a finish (claying)?
Originally Posted by TiredNGrouchy
I just break my clay in two piece...I don`t use that much so it lasts pretty goodOld Enough To Know Better, Too Stupid To Care....
Dave`s Detailing
Sonoma County, CA
-
05-31-2008, 10:20 AM #11Obsessive Compulsive Detailer
- Join Date
- Mar 2004
- Location
- ...a state of confusion
- Posts
- 9,789
- Post Thanks / Like
Re: Can someone explain to me step by step the process of properly preparing a finish (claying)?
Originally Posted by TiredNGrouchy
Have you seen a 100 gram bar? It is the size that you get at AutoZone in the kit with the clay lube. . All I know is that when I buy that kit I find that it is plenty big enough to break into at least three or four pieces without dealing with pieces the size of your thumb. The next time I get a new bar I`ll have to show the size that I`m talking about.
And never underestimate the power of an ounce. You can seal an entire car with an ounce of some products. Sometimes size matters not.
~ ~ www.OCDetails.com ~ ~
Faster isn`t better. BETTER is better no matter how long it takes.
-
06-01-2008, 07:42 AM #12

- Join Date
- May 2008
- Location
- PA
- Posts
- 25
- Post Thanks / Like
Re: Can someone explain to me step by step the process of properly preparing a finish (claying)?
Oh sweet... I`ll have to try this

-
06-01-2008, 11:46 AM #13Mr Detailer
- Join Date
- Mar 2006
- Location
- Portland, Connecticut
- Posts
- 2,813
- Post Thanks / Like
Re: Can someone explain to me step by step the process of properly preparing a finish (claying)?
Agreed, I just bring that same size bar in the house ad cut it into thirds. Originally Posted by Jngrbrdman
I like beer. On occasion I will even drink a beer to celebrate a major event such as the fall of communism or the fact that our refrigerator is still working.
Stephan`s Detailing
Portland CT.
XBox Live - mr detailer
-
06-11-2008, 08:01 PM #14Obsessive Compulsive Detailer
- Join Date
- Mar 2004
- Location
- ...a state of confusion
- Posts
- 9,789
- Post Thanks / Like
Re: Can someone explain to me step by step the process of properly preparing a finish (claying)?
No big thumb here.
Here is a 100g clay bar that came with the lube. You can see that it isn`t hard to get more than a few pieces out of it without detailing with microscopic pieces.
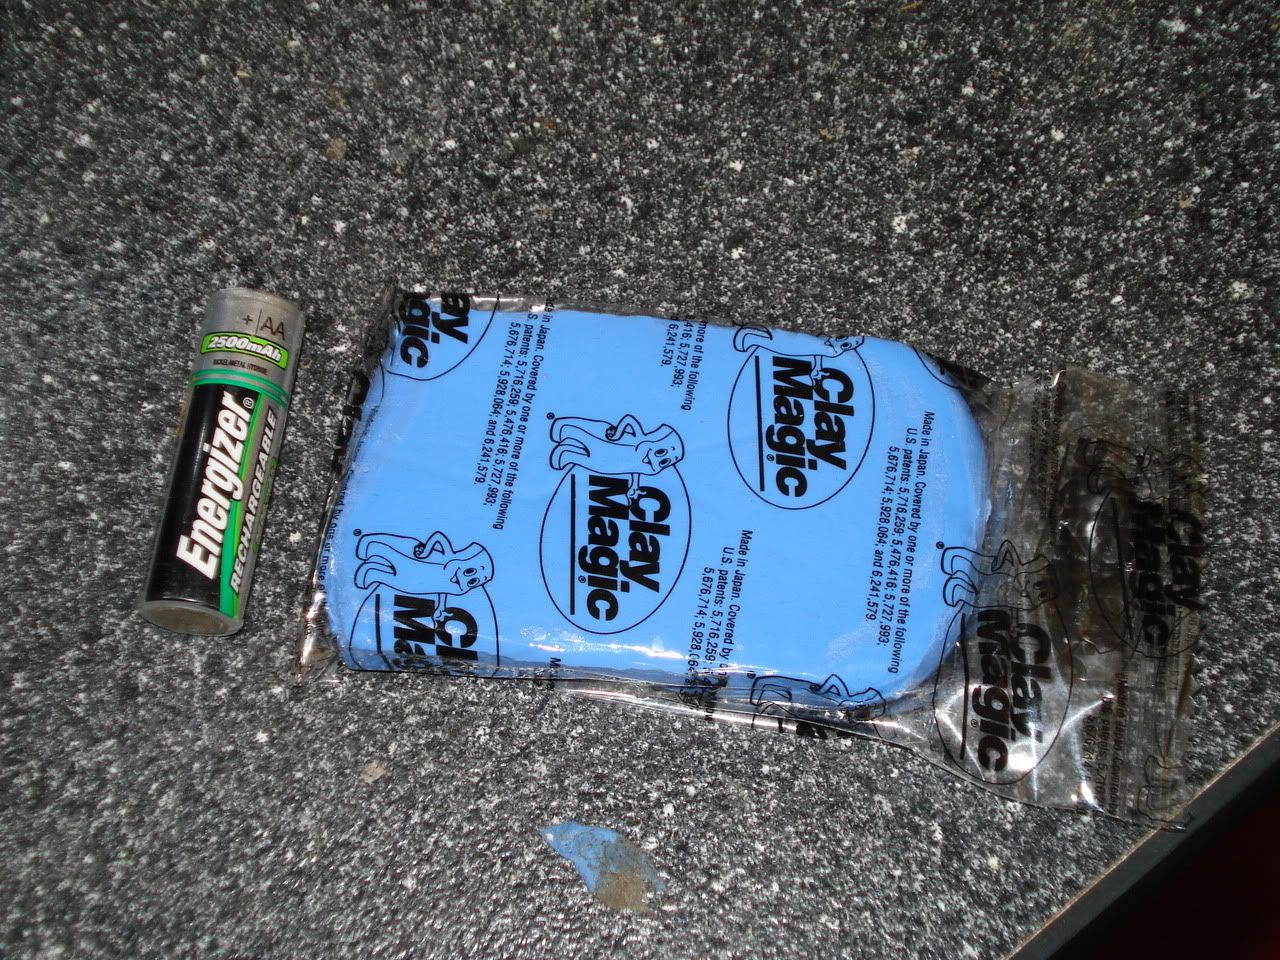

This is typically the size I deal with. I clayed an Accord sedan with this and could probably clay another one too. It was a perfect size for that job and I`d wager I have at least four or five more pieces that size in the bar.
 ~ ~ www.OCDetails.com ~ ~
Faster isn`t better. BETTER is better no matter how long it takes.
-
06-11-2008, 10:05 PM #15Just One More Coat
- Join Date
- Apr 2003
- Location
- Sonoma County, CA
- Posts
- 12,320
- Post Thanks / Like
Re: Can someone explain to me step by step the process of properly preparing a finish (claying)?
Jngrbrdman
You have very nicely trimmed nails Old Enough To Know Better, Too Stupid To Care....
Dave`s Detailing
Sonoma County, CA

 Reply With Quote
Thread Information
Users Browsing this Thread
There are currently 1 users browsing this thread. (0 members and 1 guests)
Similar Threads
-
Meguire`s Three Step Process
By pechols1967 in forum Motorcycle, Marine & RV DetailingReplies: 3Last Post: 06-06-2010, 03:01 PM -
Struggling with a step in the process
By Smokin' Mark in forum Detailing Product ReviewsReplies: 16Last Post: 10-08-2008, 10:04 PM -
Best one step process
By Redwings97 in forum Poorboy's World ForumReplies: 8Last Post: 10-03-2008, 08:17 AM -
Need some help with an optimal step by step process
By flash_e_gt in forum Car Detailing Product DiscussionReplies: 4Last Post: 06-13-2007, 05:22 PM -
3 step process question
By III in forum Car DetailingReplies: 2Last Post: 03-07-2004, 08:36 AM
Bookmarks