

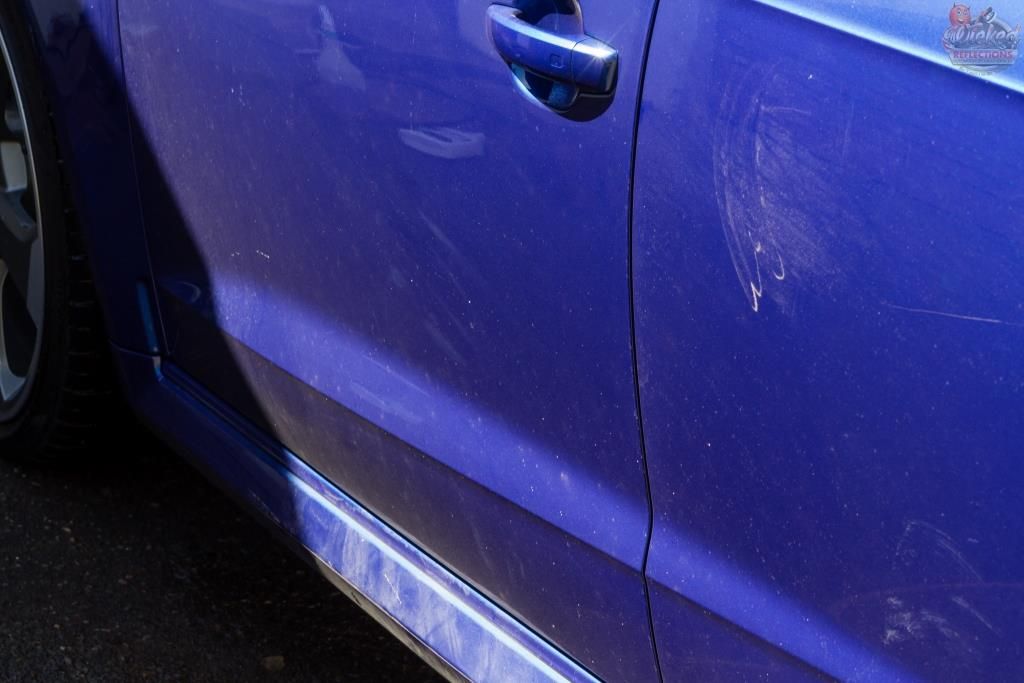
I was contacted by the owner of this vehicle who`s brother had his RS3 detailed by a friend and fellow detailer in Cape Town, and she was looking for the same thing for hers. Up until this point, the car had been getting washed at a fairly well known local car wash, and so there were obviously a lot of washing/drying induced scratches in the paint which needed to be sorted out, despite the car being still quite new.
I explained that unless something changed in this regard, I didn`t believe it would be worth detailing the car, let alone adding a ceramic coating which she had asked for and so I helped get her set up with all the necessary tools and products she needs to maintain the car herself, and did some one on one training with her to give her the confidence to look after her baby herself from now on - this included doing the first wash of the car (2 weeks post detail) with her.
The detail was completed over 9 days whilst I was on leave in April, with a total of 52 hours of actual work on the car.
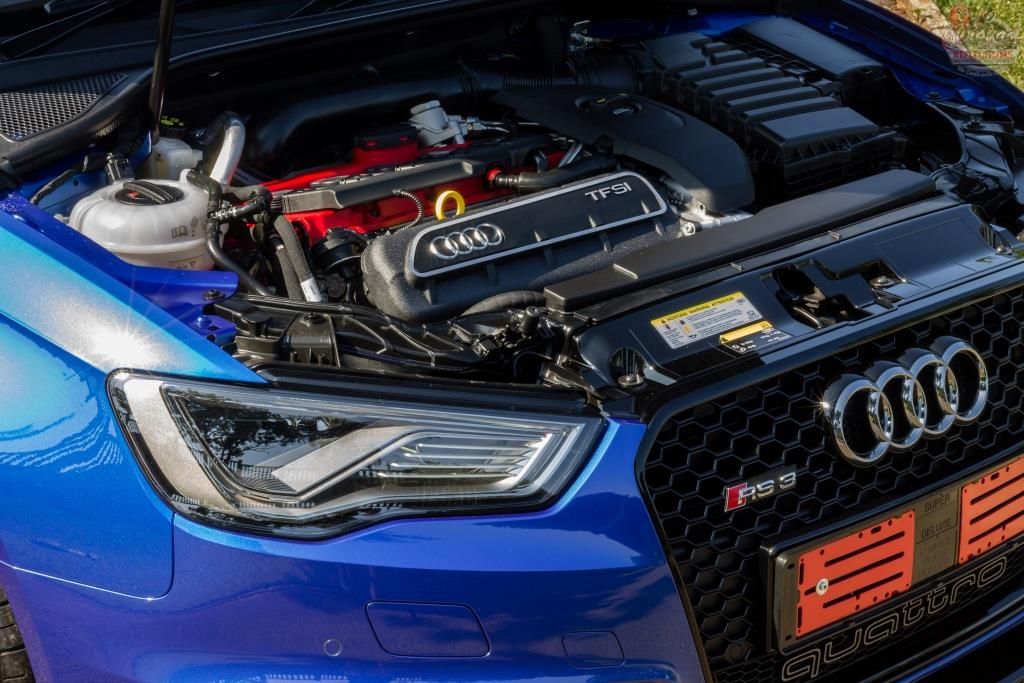
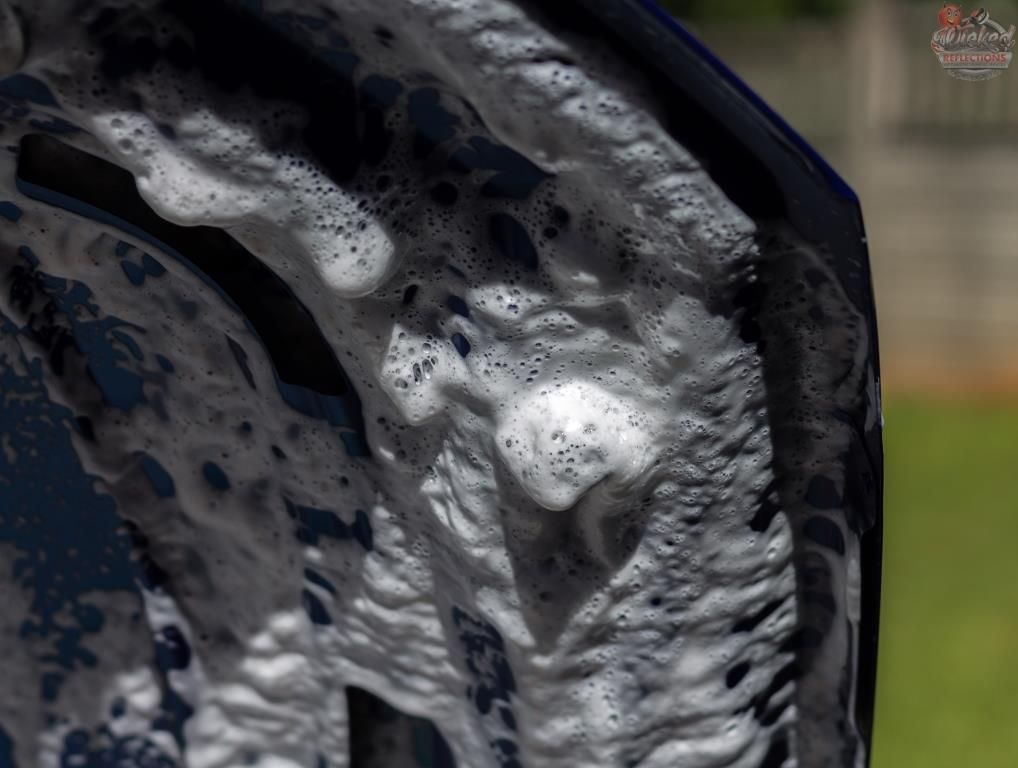
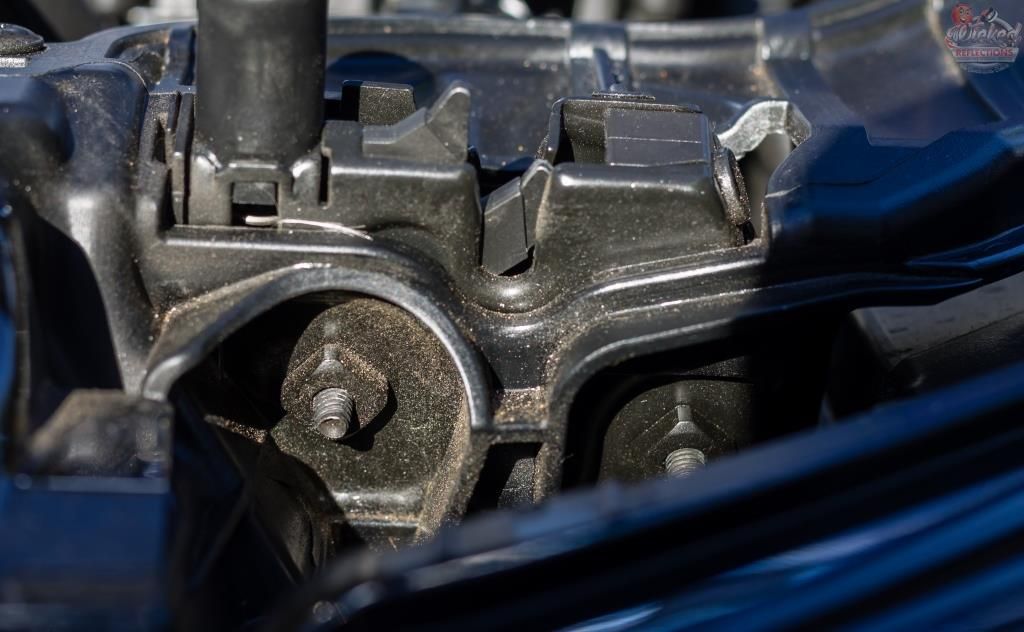
First up as always was the engine bay. It gets done first so that any dirty water that happens to splash out on the vehicle will be cleaned off during the wash, meaning you only have to wash the car once, thereby reducing the potential for swirls.
The first thing was to blow out any loose dirt and then seal up any sensitive areas using a combination of tape and plastic bags. The underside of the bonnet was tackled first, so that any dirt or water that fell during the process, would land on a dirty engine bay and not a clean one.
Here are the tools that would be used
Carchem APC @ 1:5 was diluted into the foam master and sprayed onto the surface, left to dwell a bit, then agitated before being pressure rinsed off. The underside of the hood was then hit with Gyeon Wetcoat to provide some protection and making future cleaning easier, and hopefully prevent some of these water spots from re-occuring
Before
during
After
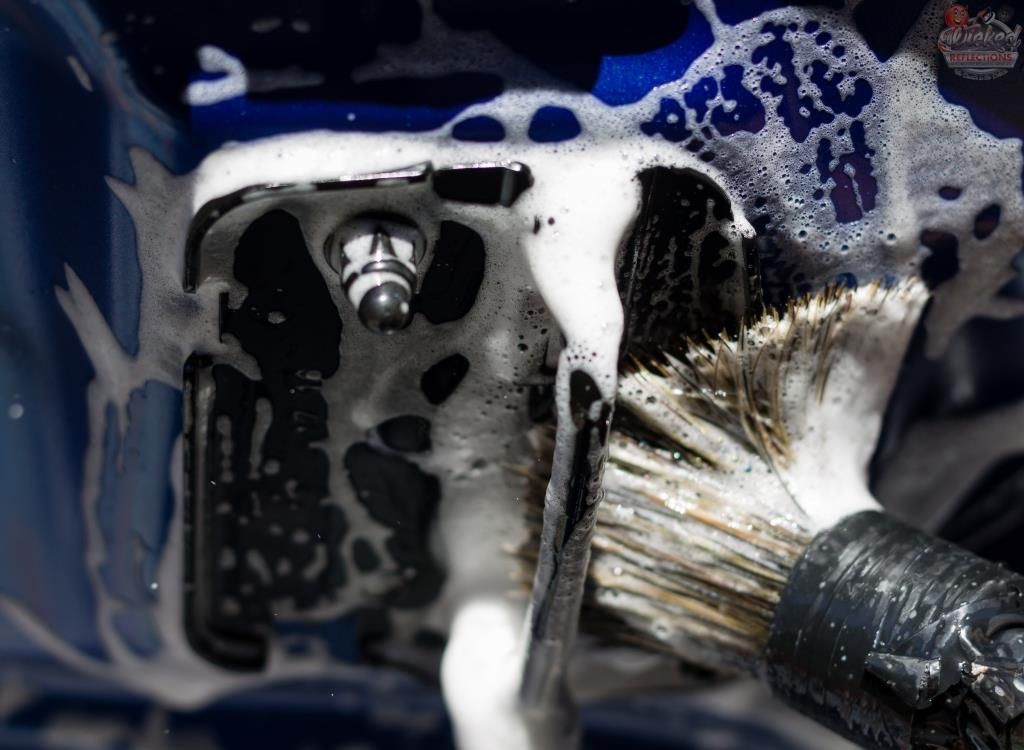
The bay itself was then tackled using the same process, and as you can see there was a fair amount of dirt inside.
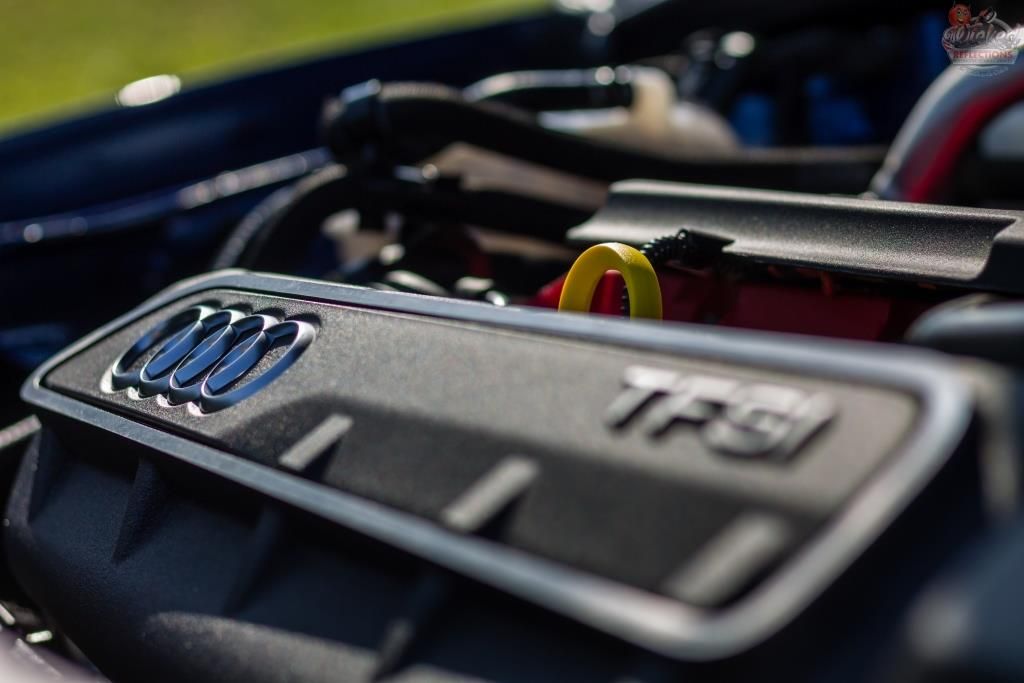
Once cleaned and rinsed it was hit with a blower to remove any standing water, before being sprayed down with Carpro PERL diluted at 1:3. This was left to sit overnight and any excess wiped off the following day. There are some `after` pics of the engine bay included at the end of this write up.
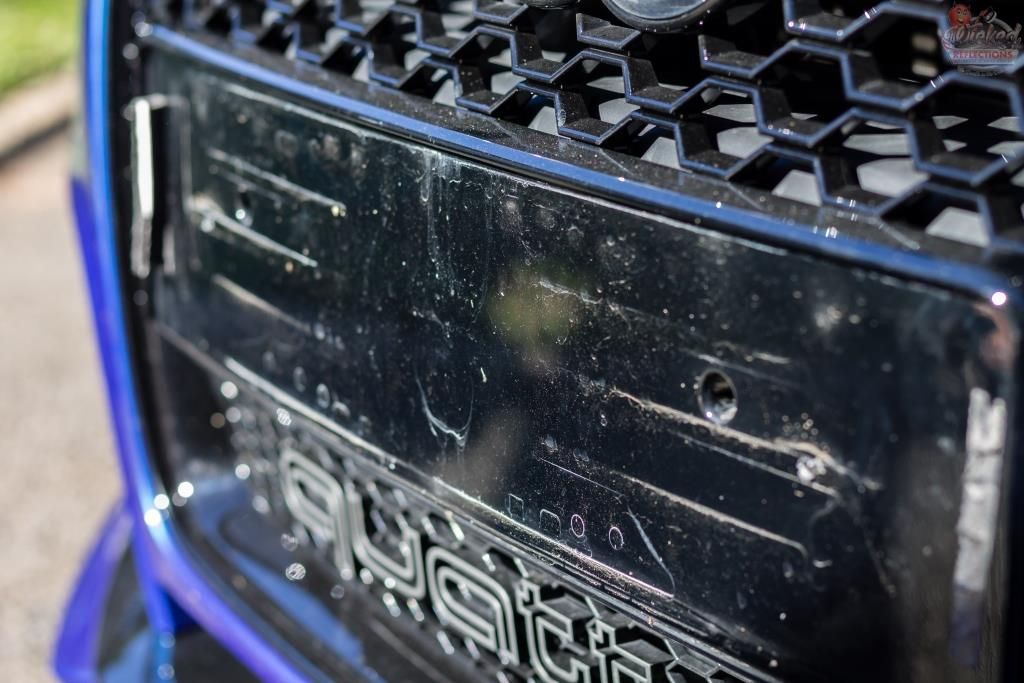
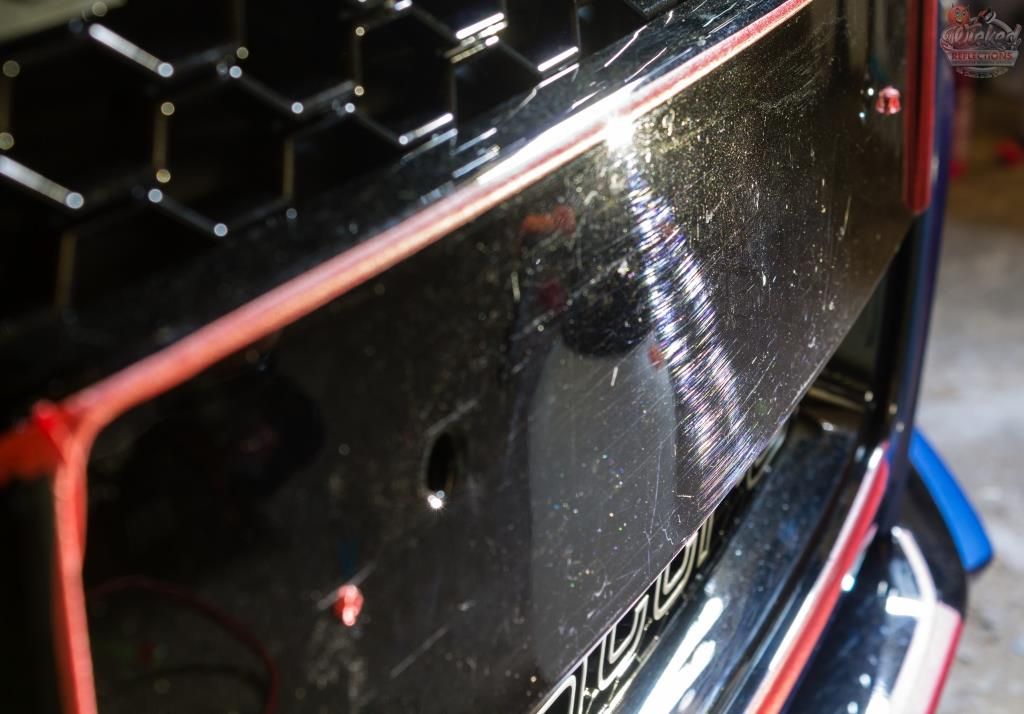
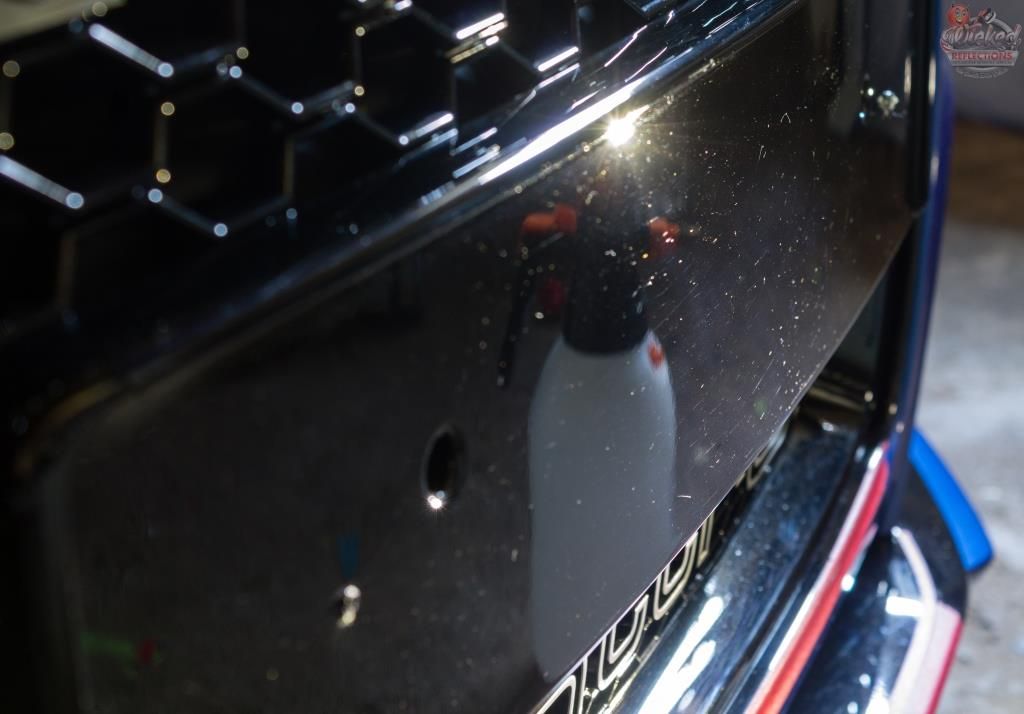
The number plates were then removed to allow them to be cleaned properly, and for the holders to get a light polish, and to allow better access to the underlying and surrounding paint for correction
Later in the detail these were given a quick polish as they really were in a bad state
The fender liners were pressure rinsed, sprayed with some Carchem APC @1:5 which was left to dwell before being agitated with various brushes and pressure rinsed again.
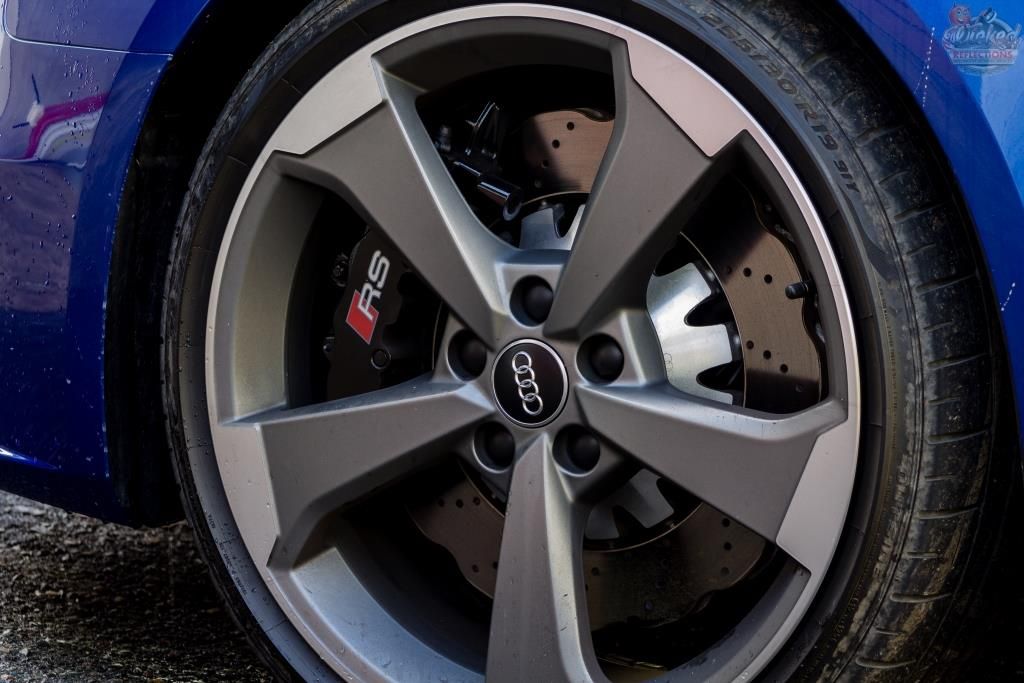
Then the tyres were tackled
Before
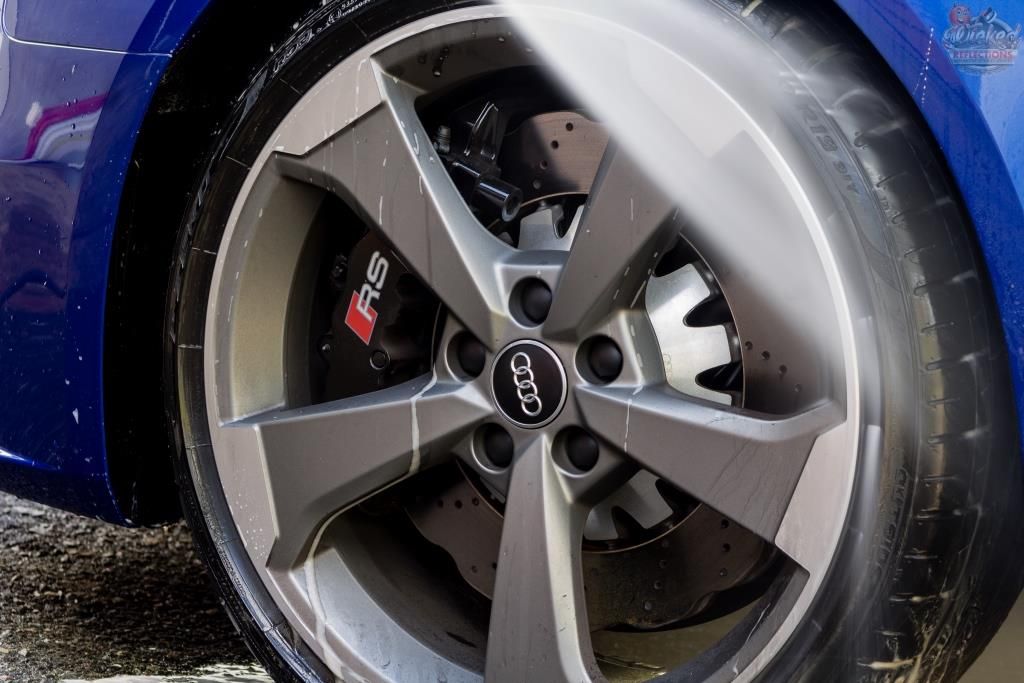
Carchem APC @1:5 sprayed on
[/url]
Left to dwell a bit
[/url]
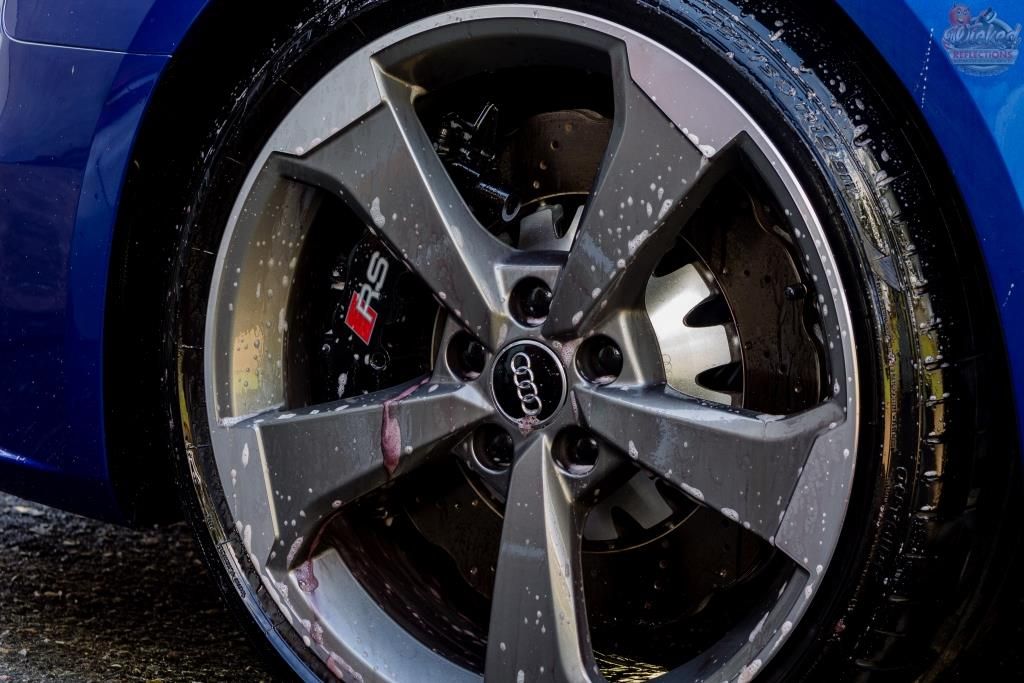
Scrubbed and busy rinsing
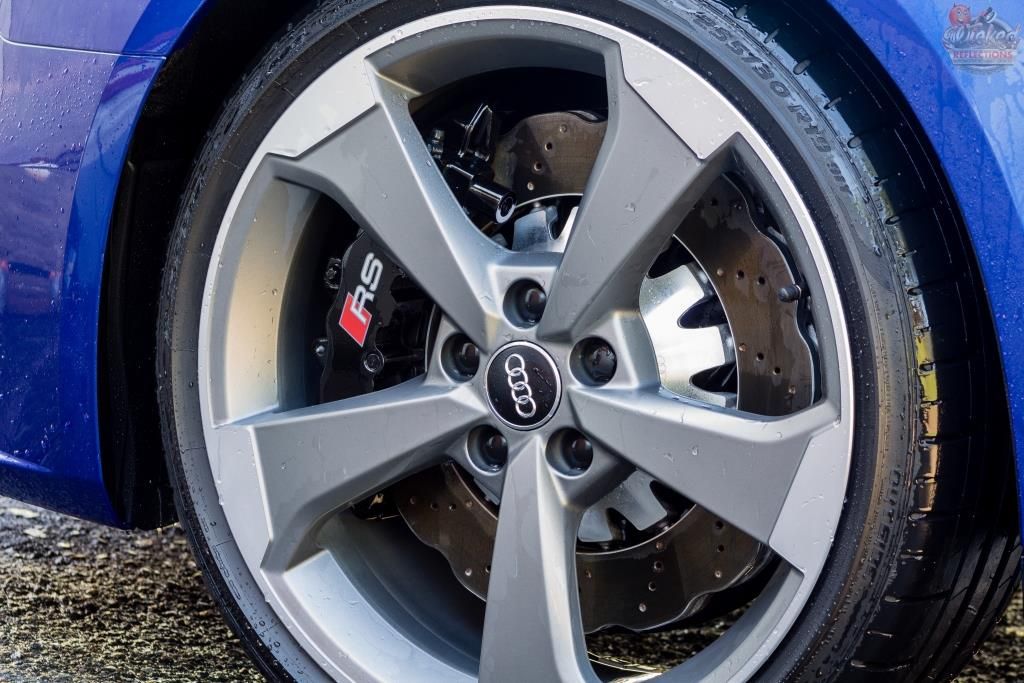
Wheels were then cleaned with Carlack Shampoo to remove any topical dirt and then hit with Carchem Revolt.
Then some Carpro Tar-x
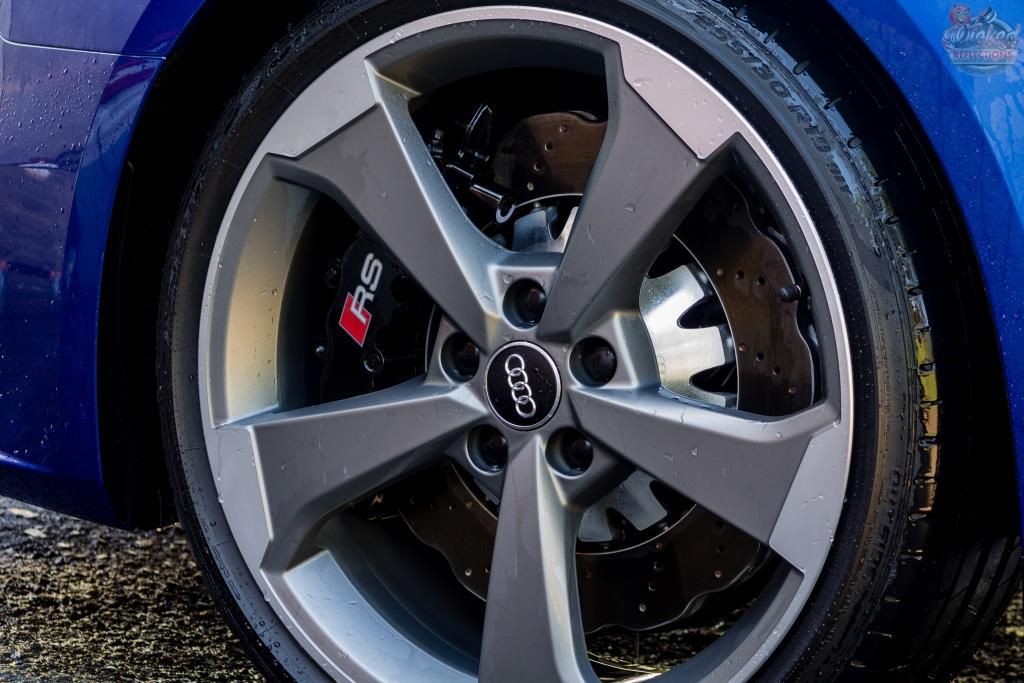
And finally they were clean
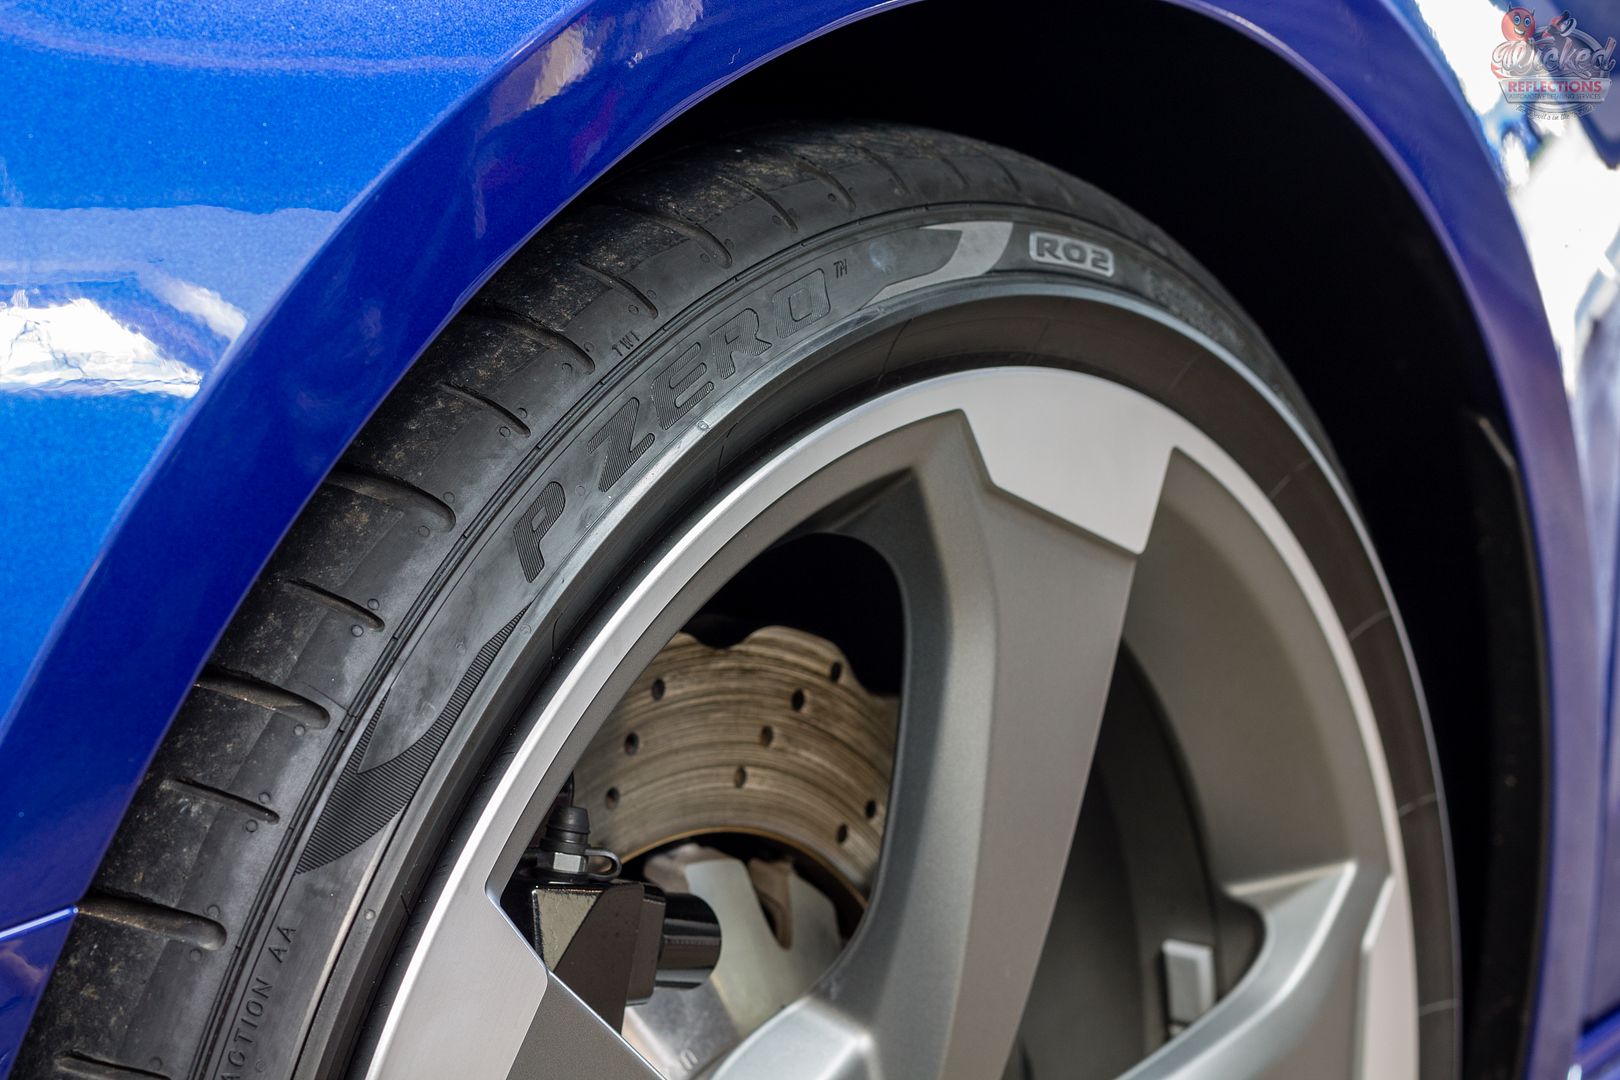
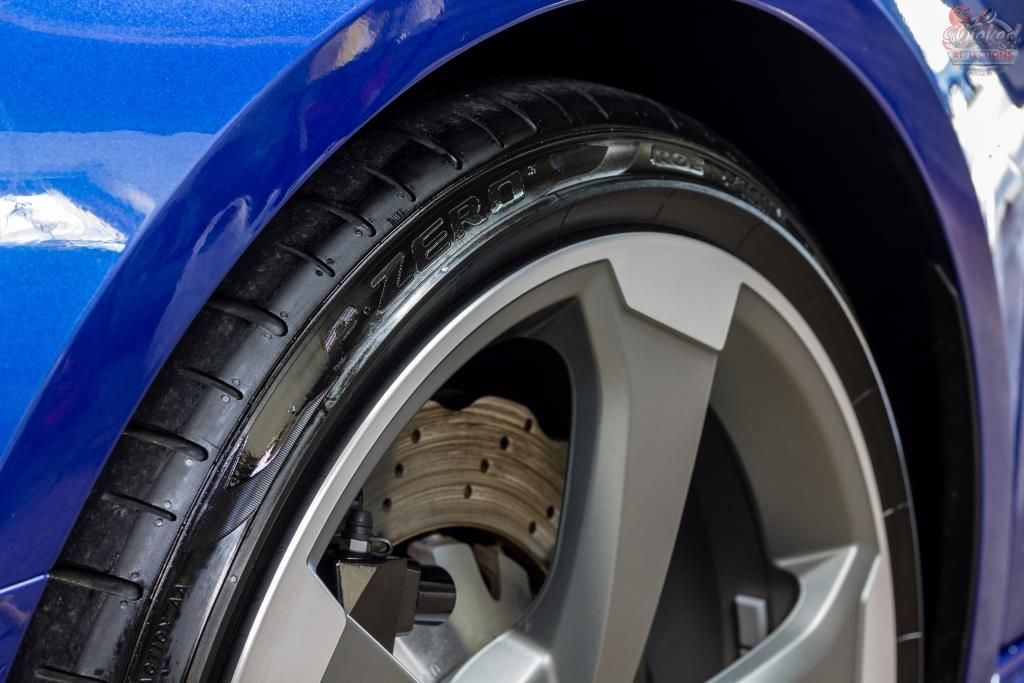
The wheels and tyres would later be wiped down twice with Gyeon Prep before being coated with 2 coats of Gyeon Rim and Gyeon Tyre respectively, each applied 1 hour apart.
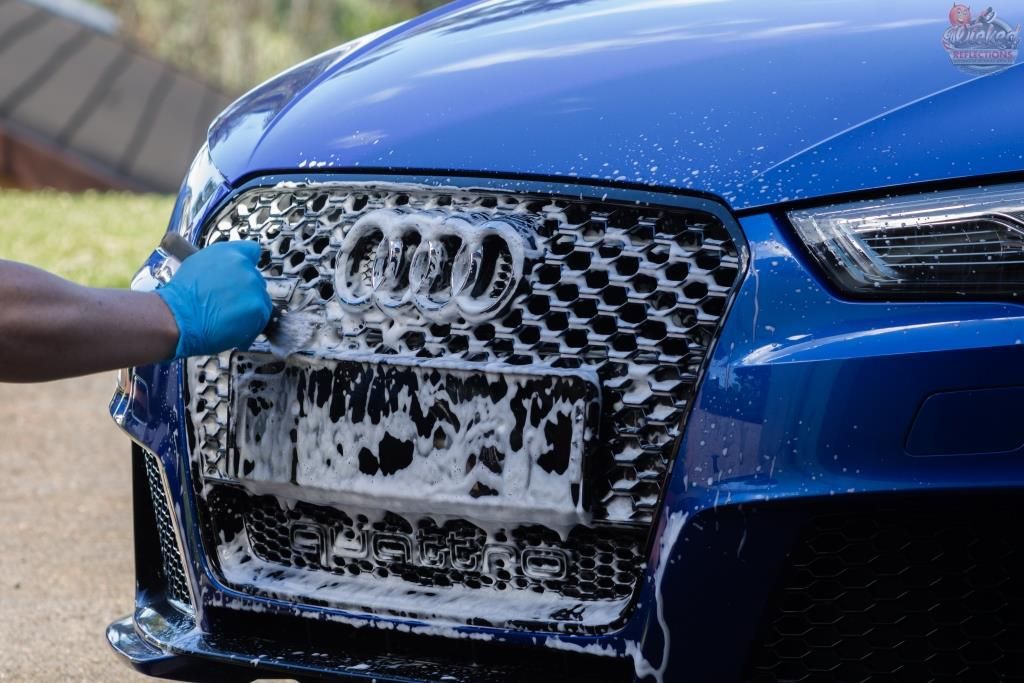
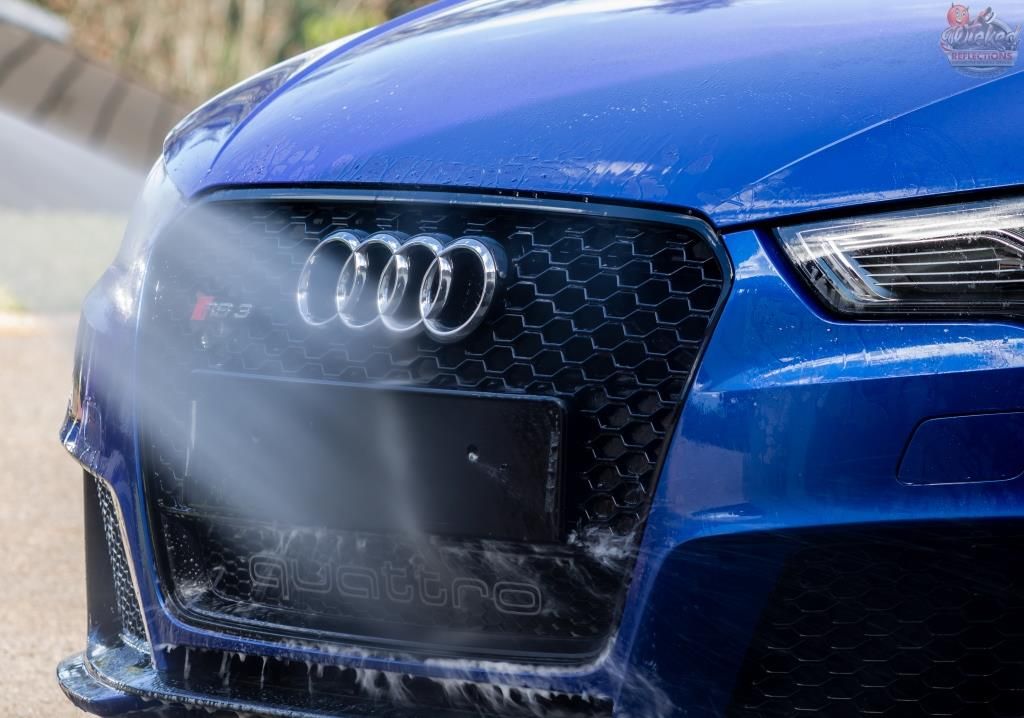
Then it was time to get the car washed and decontaminated and as you can see there was a fair amount of dirt on the paint
Carchem APC @1:5 via the Gloria Foam Master and various brushes were used to tackle those areas which tend to be over-looked by commercial type car washes allowing dirt to build up in these harder to reach areas over time. Places like the honeycomb, inside the fuel flap, inside the door and boot shuts, in and around badges/emblems and the mirror housings (with the mirrors folded in) are but a few more common areas I come across
Then the entire car was pressure rinsed and a layer of Angelwax Fast Foam applied
This was left to dwell before being pressure rinsed off. Then the car was washed using Carchem Luxury Shampoo along with a few lambswool wash mitts
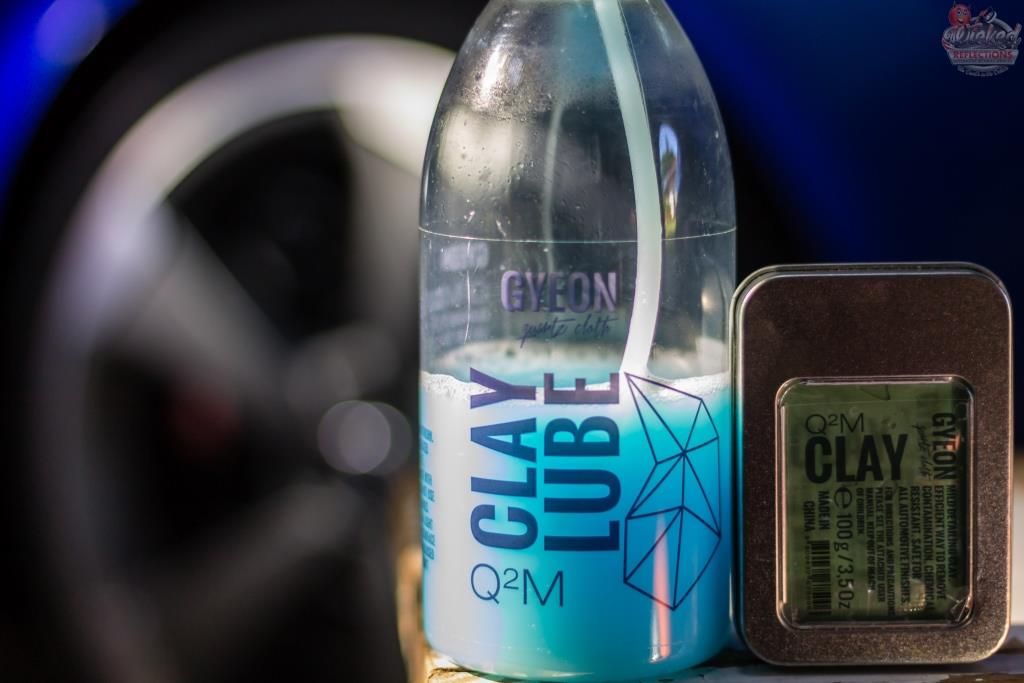
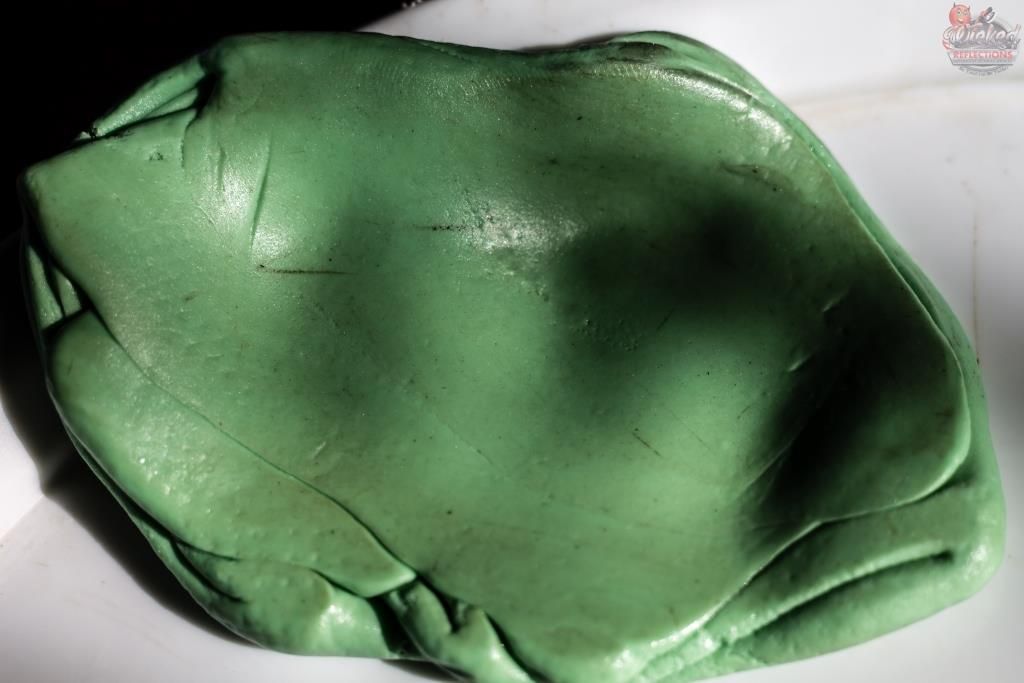
Decontamination consisted of Carchem Revolt to tackle the embedded iron deposits, Carpro Tar-X to tackle the tar and Gyeon Clay and Gyeon Clay Lube to take care of any of the remaining contaminants
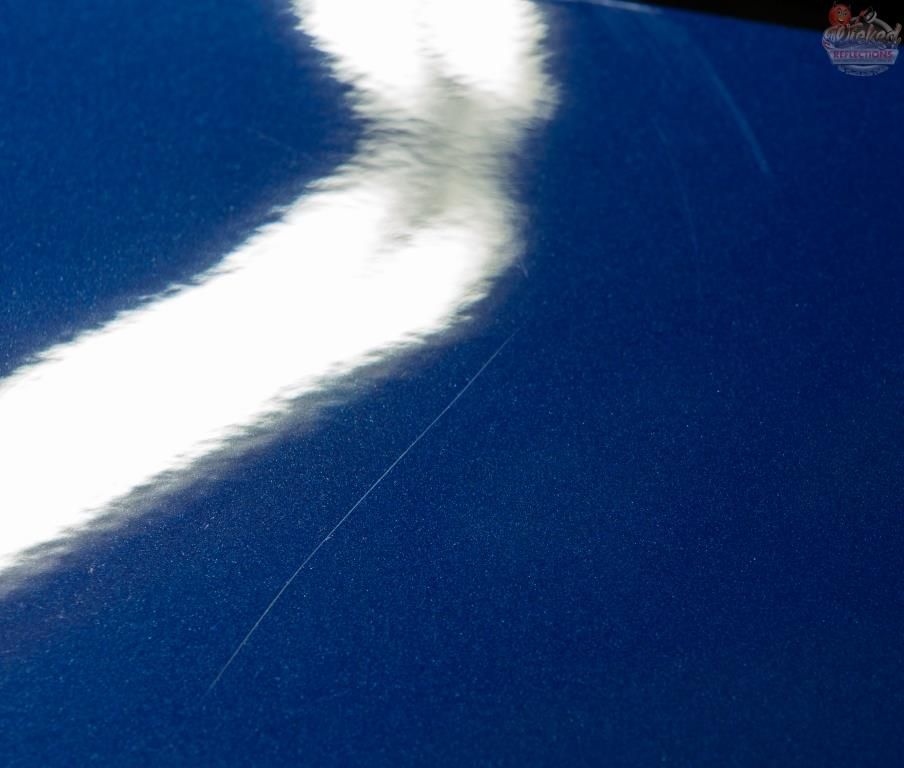
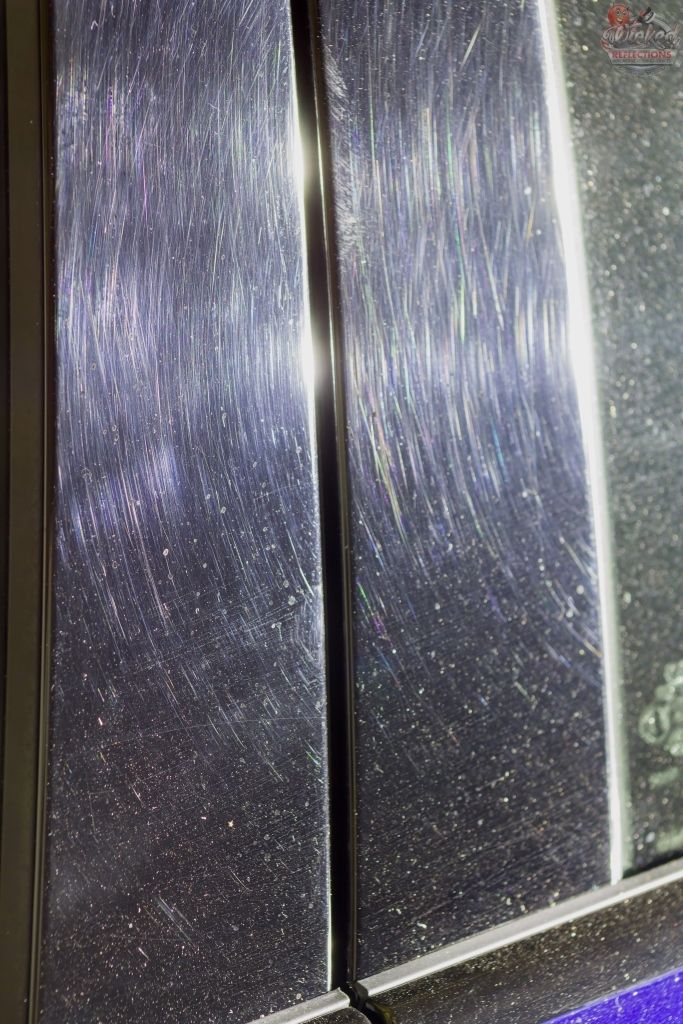
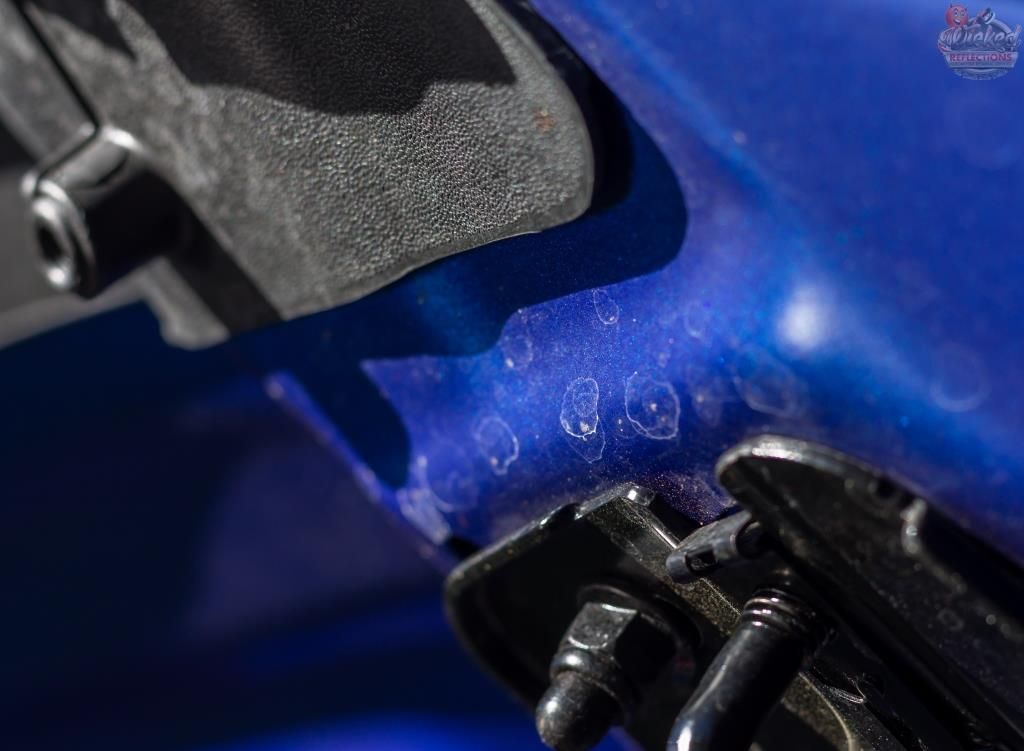
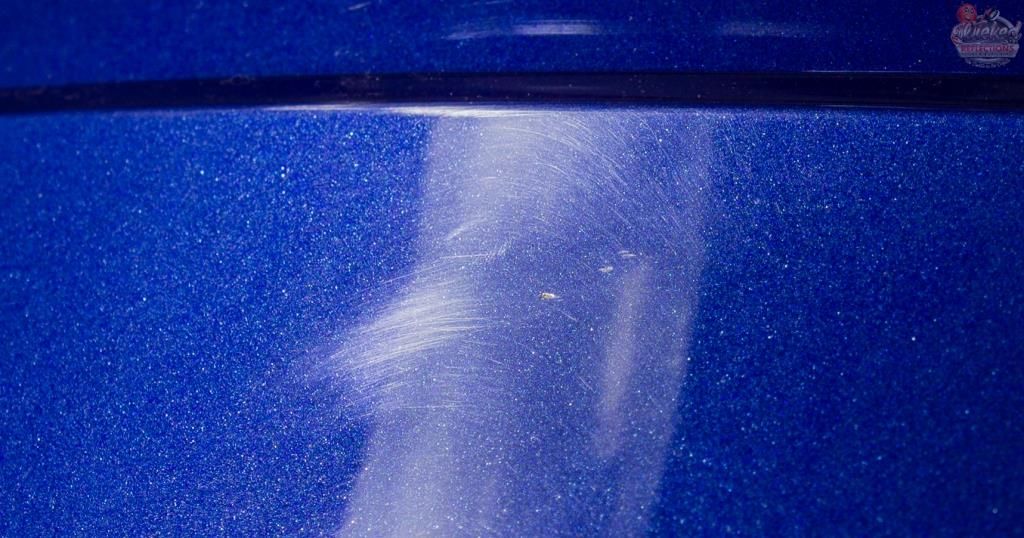
With the paint now `bare` it was time to assess its actual condition, which as you can see, was not pretty.
Approximately 300 readings were taking of the paint at various places across the vehicle which indicated an average of 130µ with a couple of small areas measuring as low as 83µ to 90µ. After trying out a few different combinations I found the paint to be relatively soft on this car, which is not inline with the previous 5 RS3`s I have detailed and just proves how important it is not to make assumptions or generalizations about paint hardness, and to conduct test spots on every car in order to dial in the least aggressive method to get the job done.
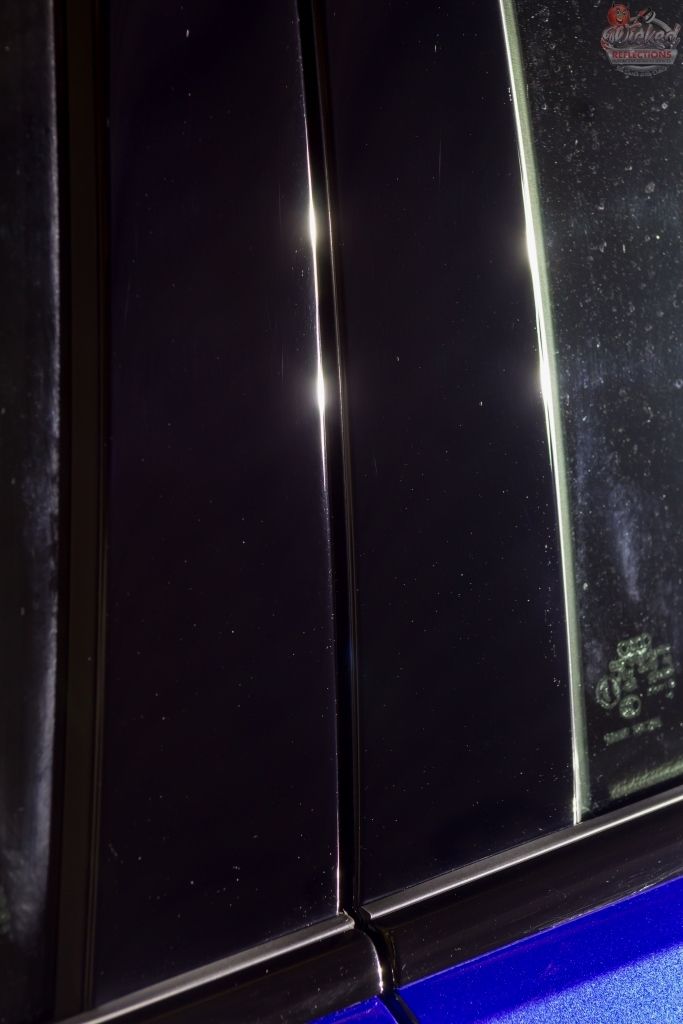
My approach was an initial cut with Menzerna PF2300 on Orange Lake Country Hybrid pads, followed by Capro Essence on White Lake Country Hybrid Pads. There were some isolated areas (like the deeper scratches on the bonnet) which were spot compounded using Menzerna SHC300 on a Lake Country Blue Foamed Wool pad before the aforementioned cut and polish took place.
Results 1 to 13 of 13
-
05-24-2017, 03:22 AM #1


- Join Date
- Dec 2013
- Location
- Durban, South Africa
- Posts
- 277
- Post Thanks / Like

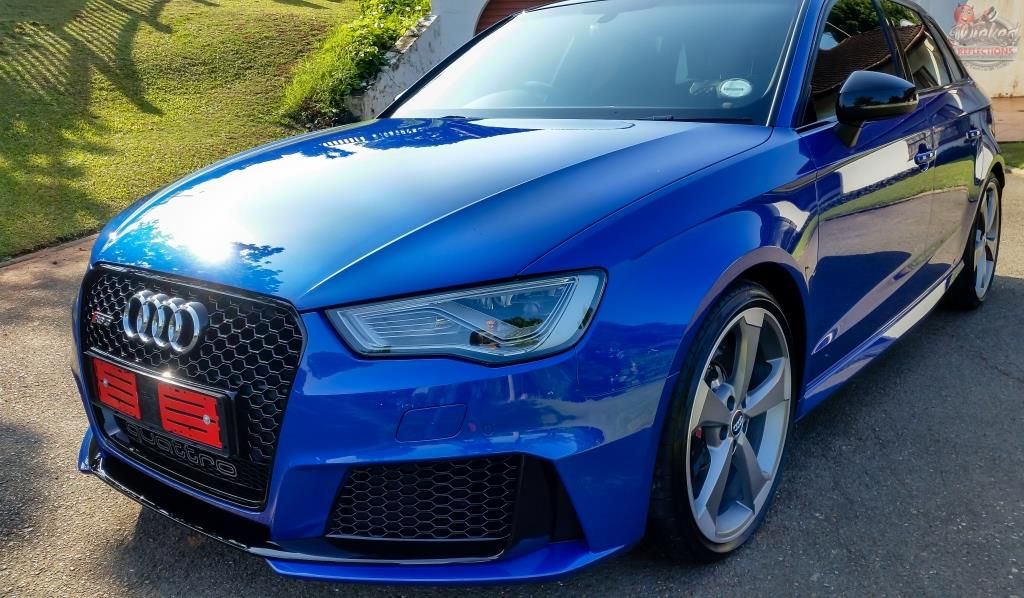
Sepang Blue Audi RS3 - Detailed by Lawrence
Post Thanks / Like - 2 Likes, 0 Thanks, 0 Dislikes
-
05-24-2017, 03:23 AM #2
- Join Date
- Dec 2013
- Location
- Durban, South Africa
- Posts
- 277
- Post Thanks / Like
Re: Sepang Blue Audi RS3 - Detailed by Lawrence
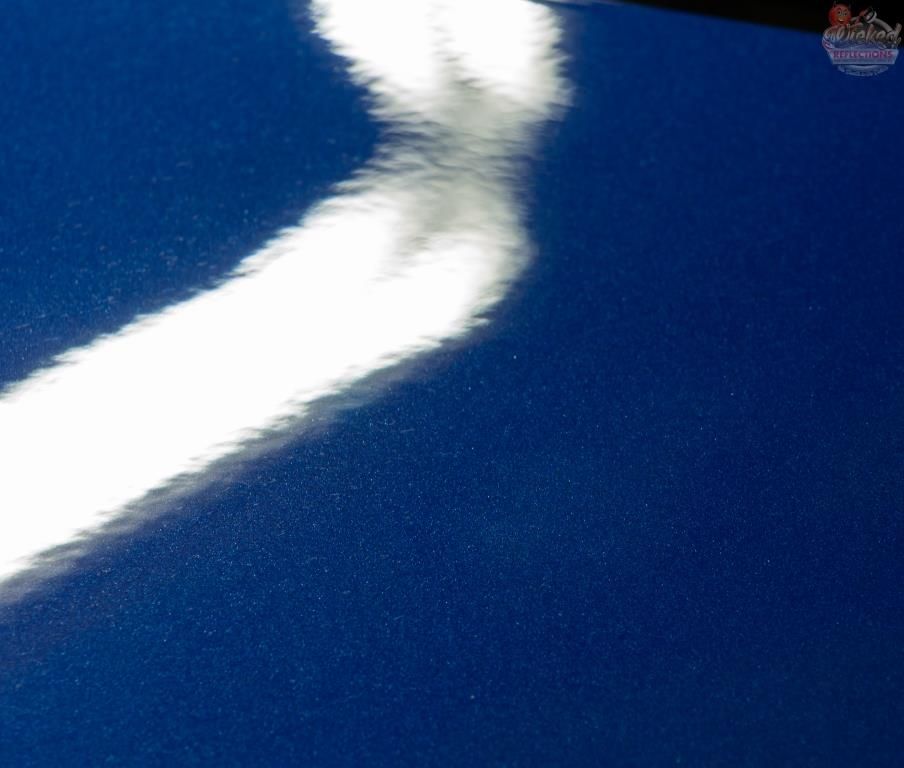
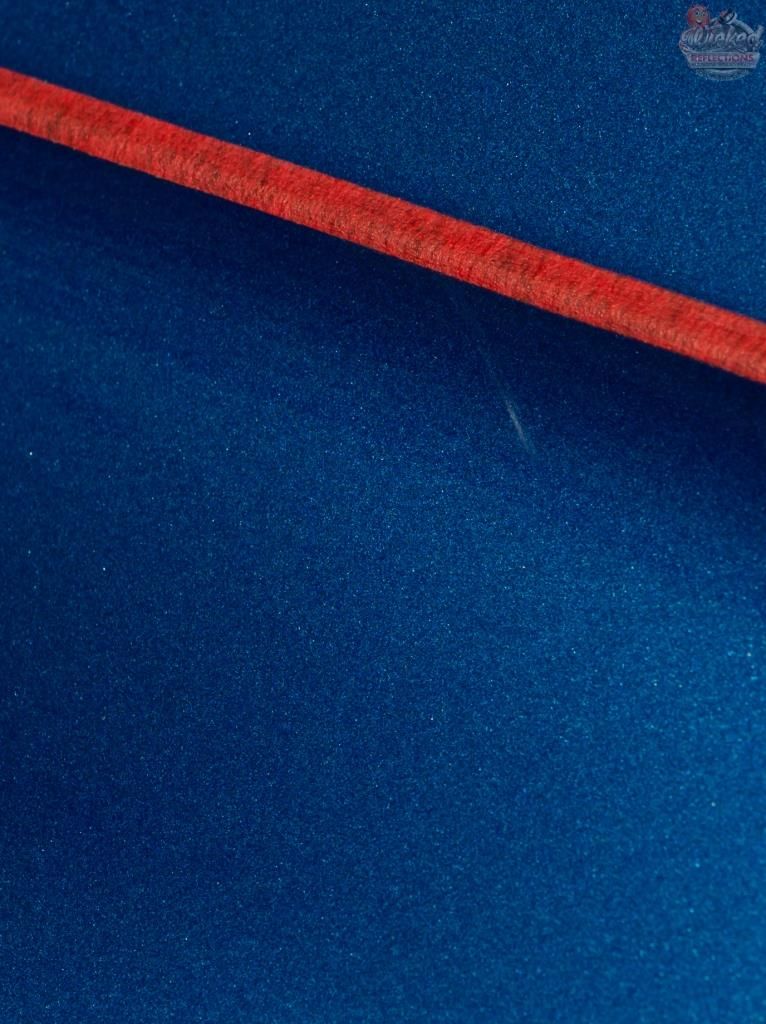
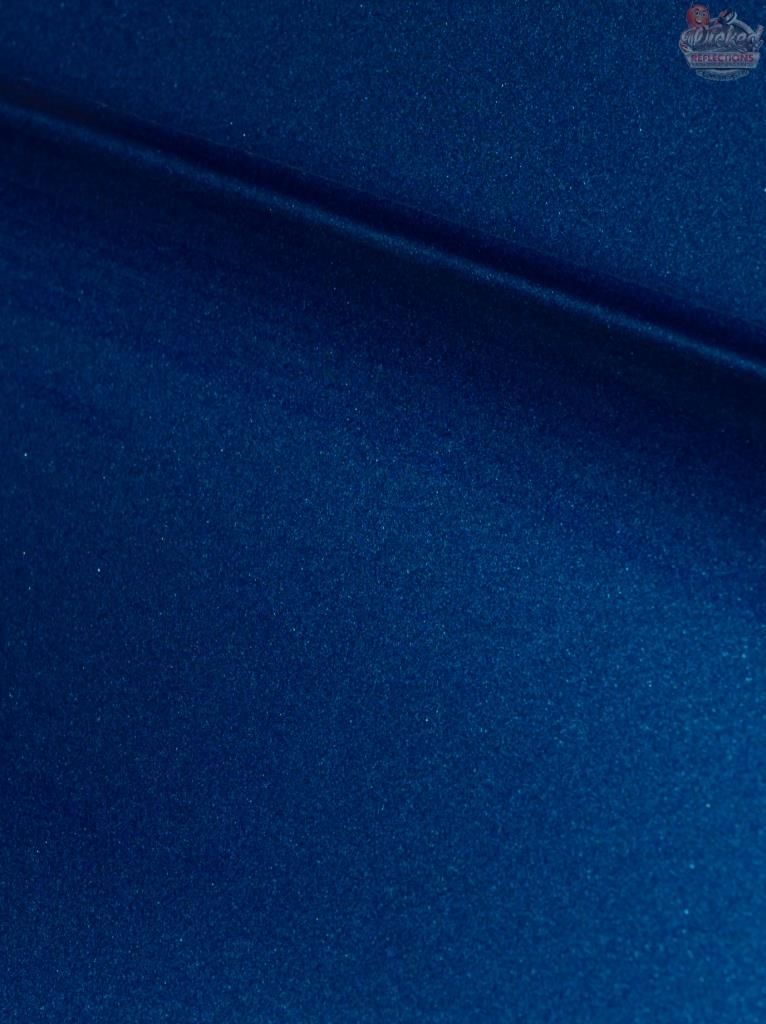
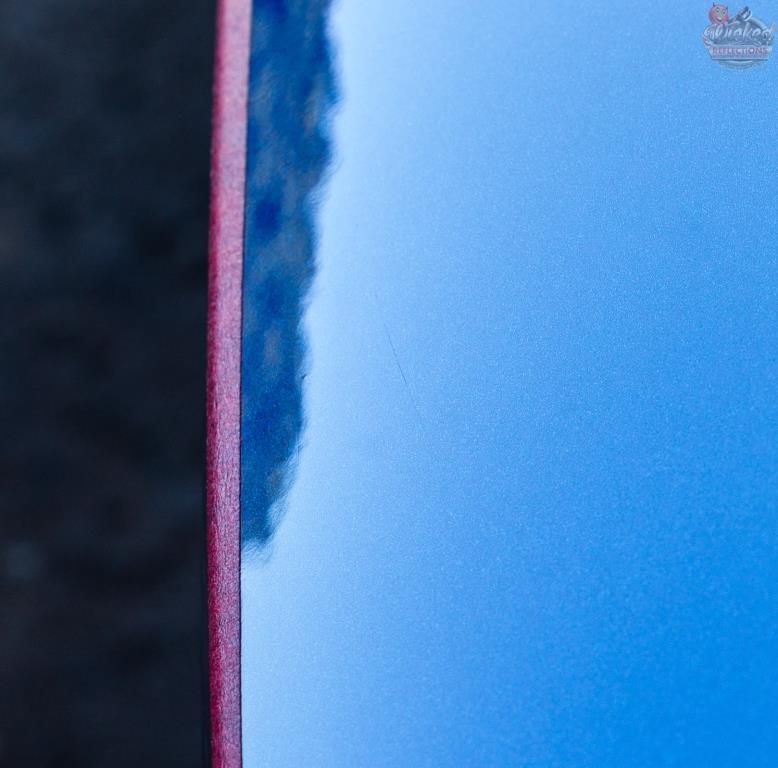
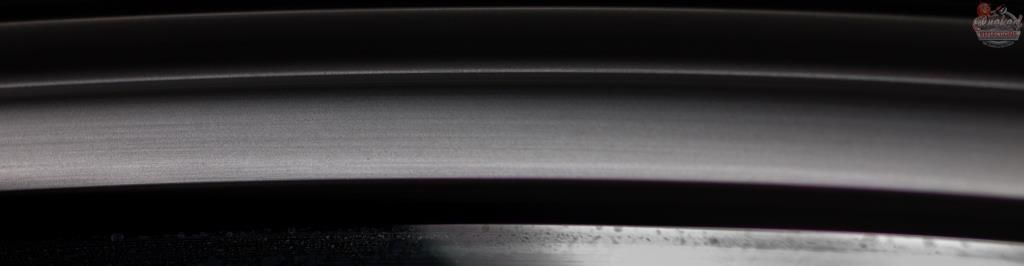
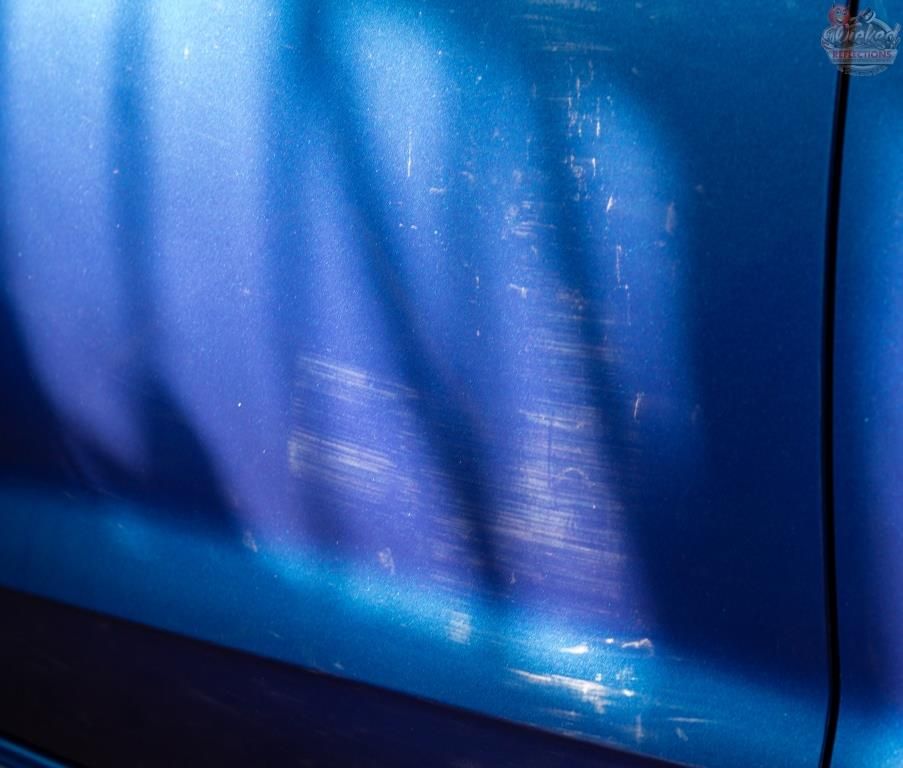
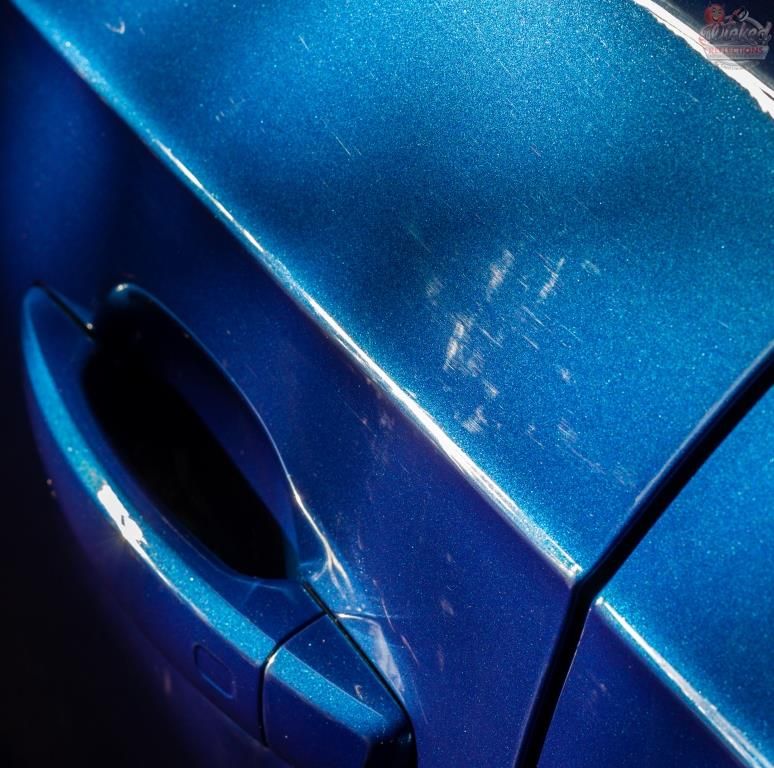
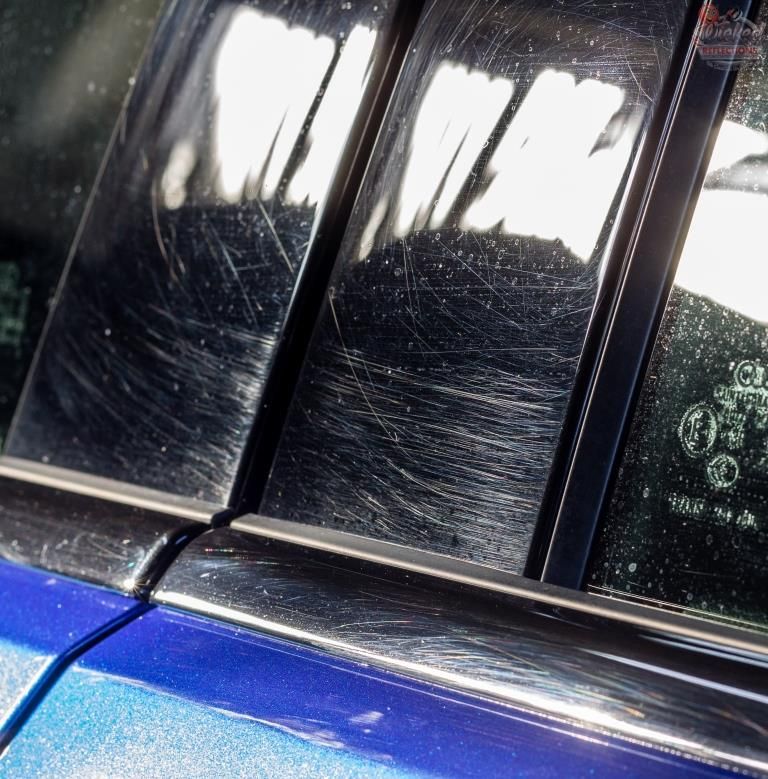
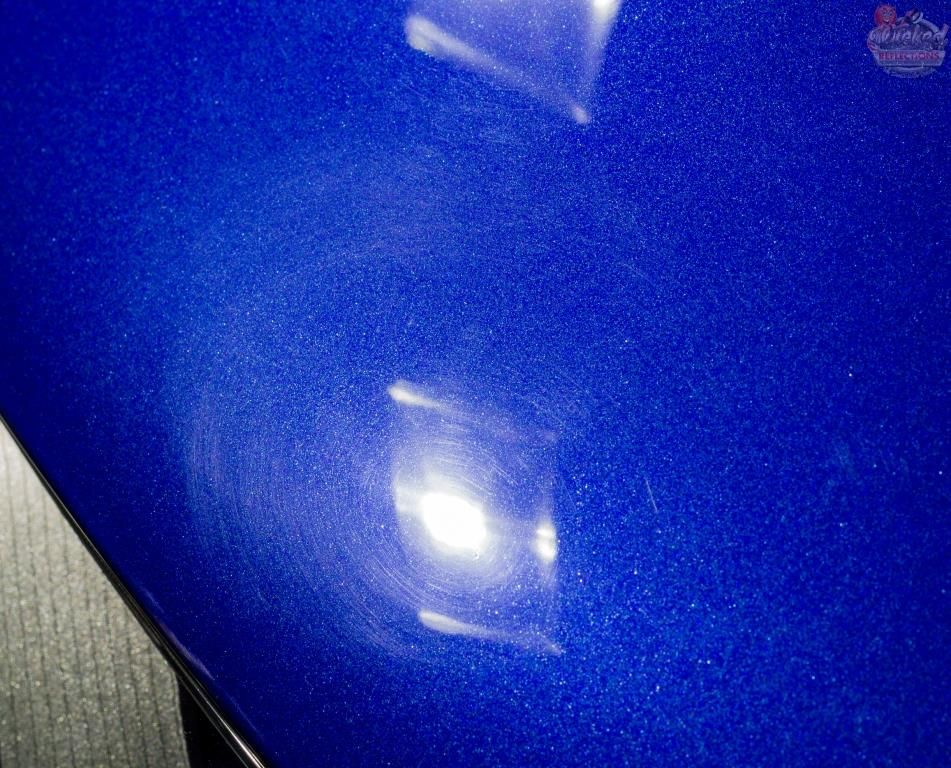
Here are a few `during` pictures of the correction process.
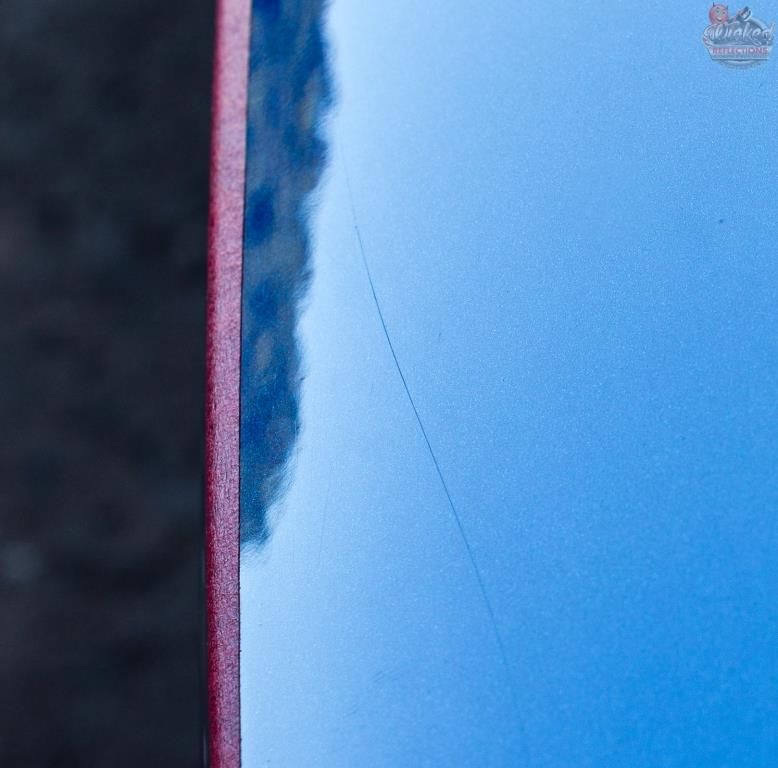
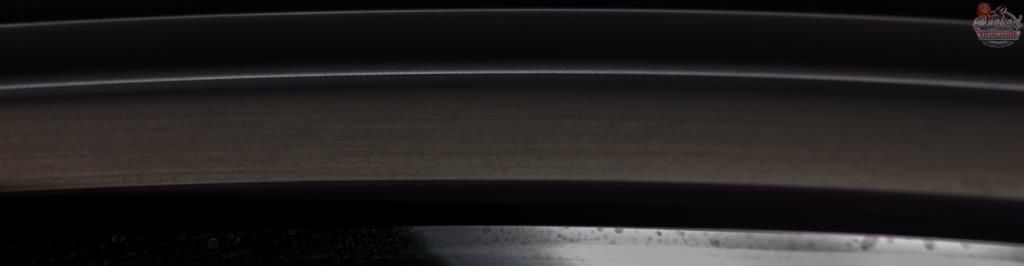
Some deep scratches on the bonnet
Another on the passenger side front fender in a rather awkward spot
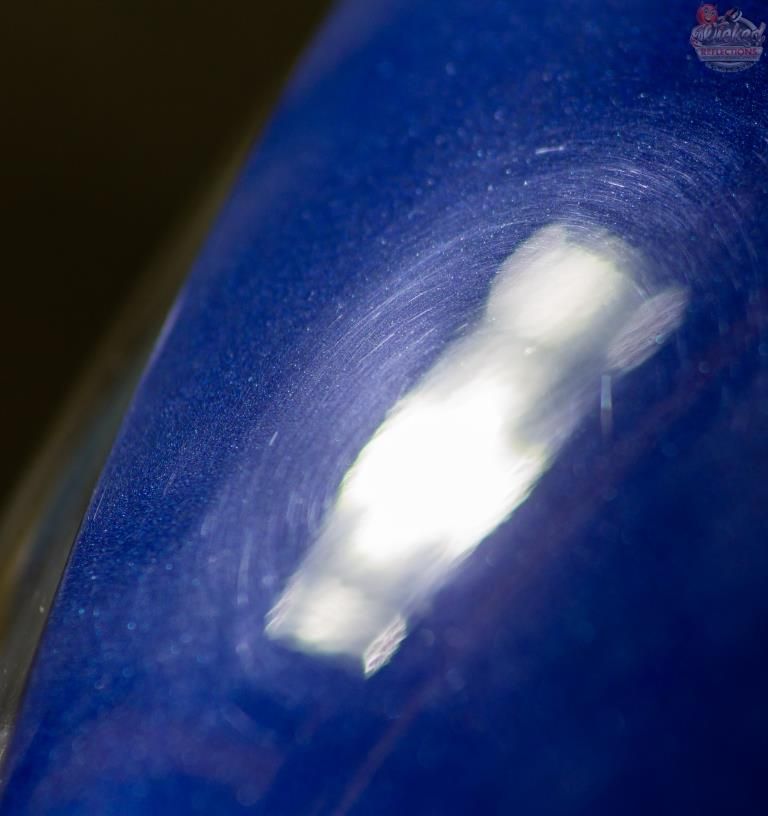
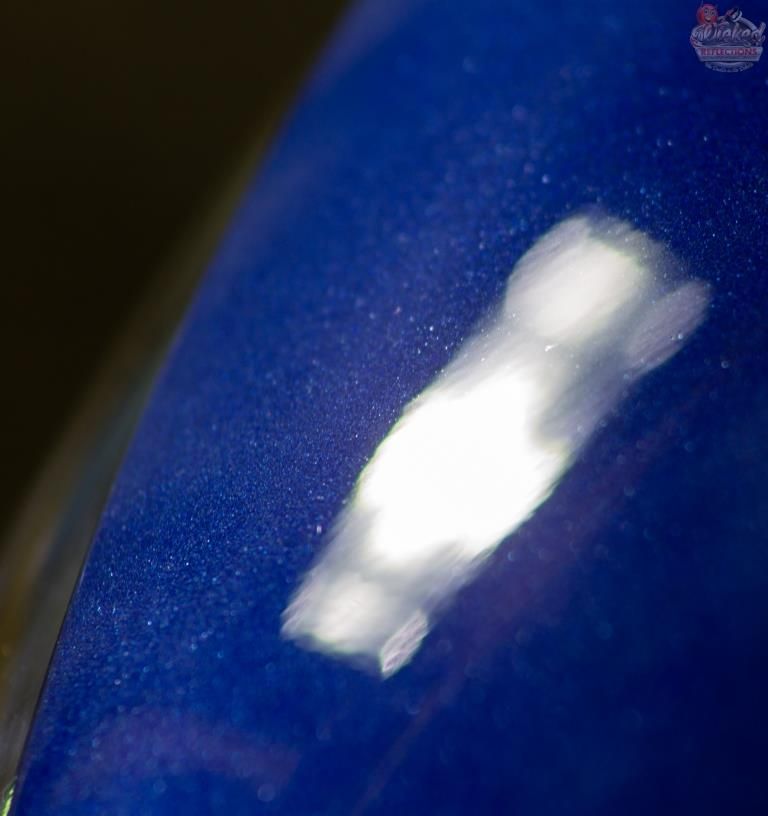


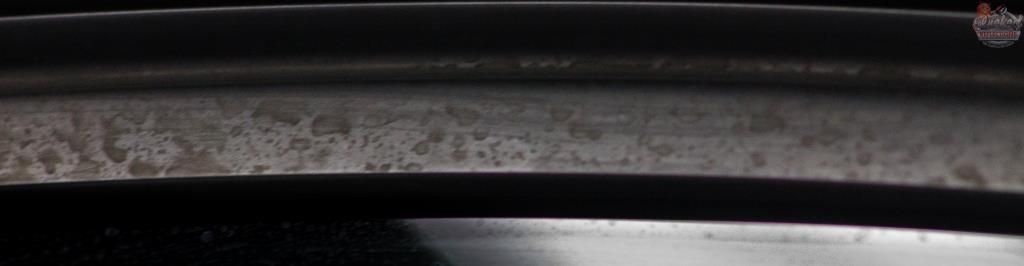
A nasty scratch on the rear bumper which was improved, but not removed completely
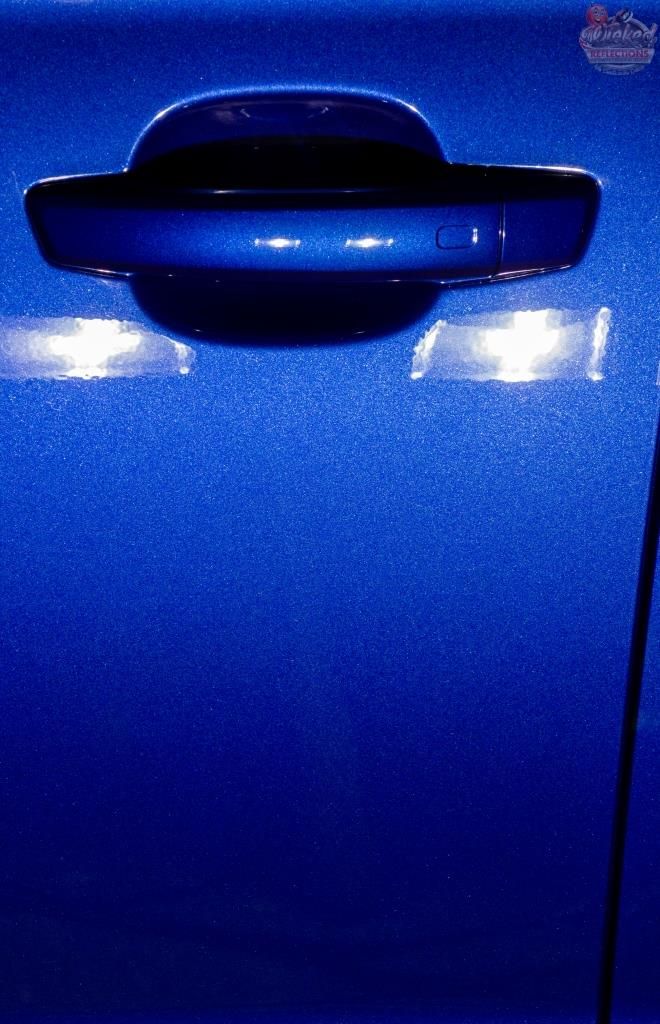
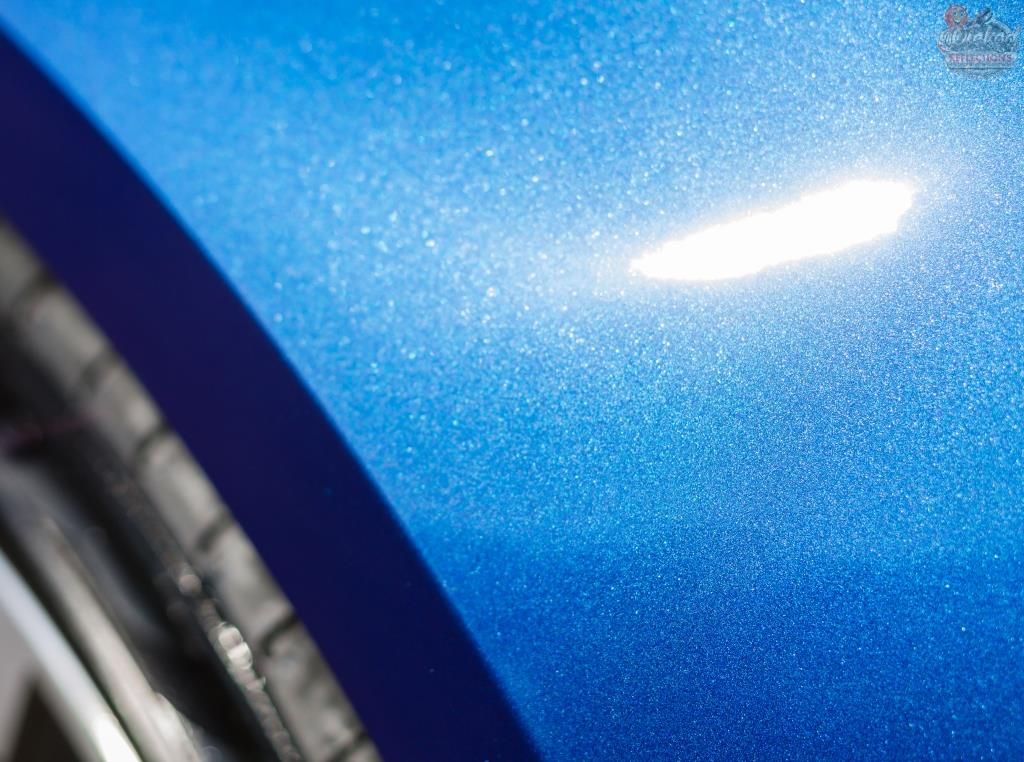
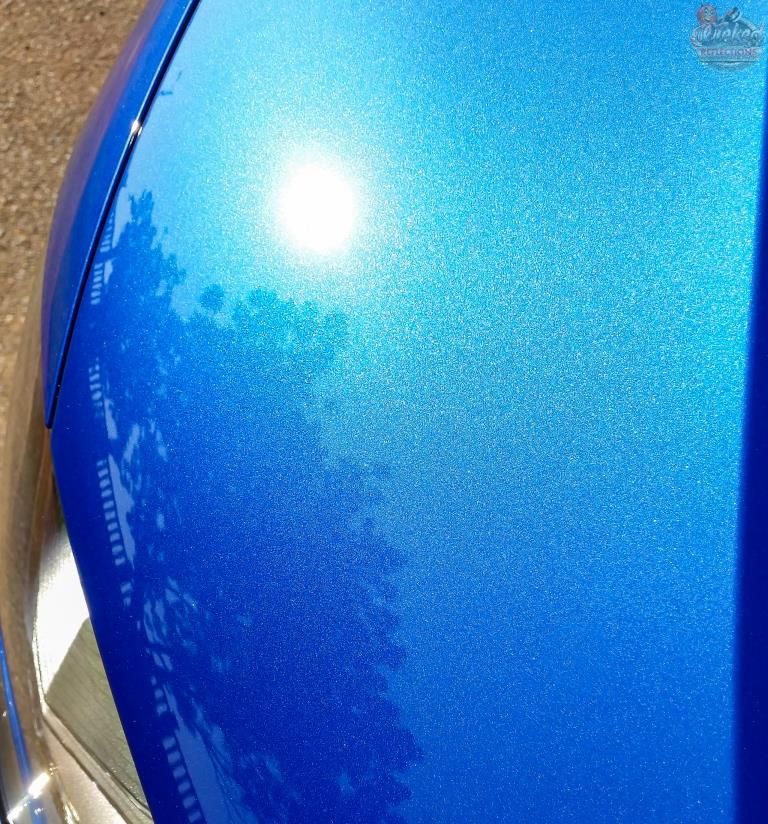
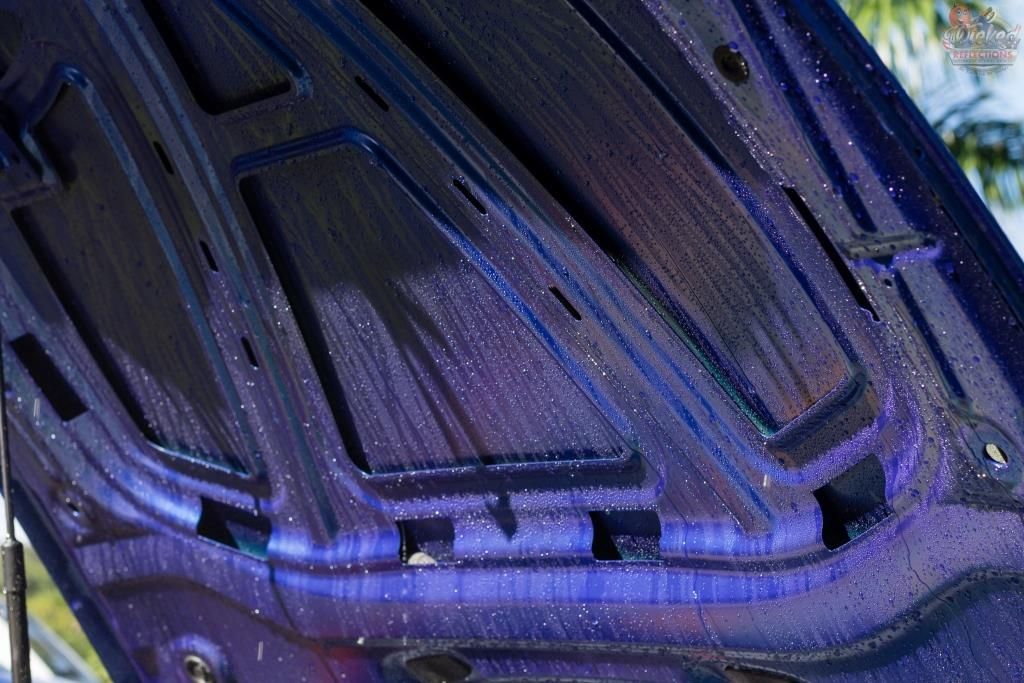
Once the paint was corrected it was wiped down using Gyeon Prep and coated with 2 coats of Gyeon Mohs, 1 hour apart. This was then followed with a layer of Gyeon Cure which is designed to protect the coating from waterspots whilst it cures. The door shuts and boot shut were also protected with Cure.
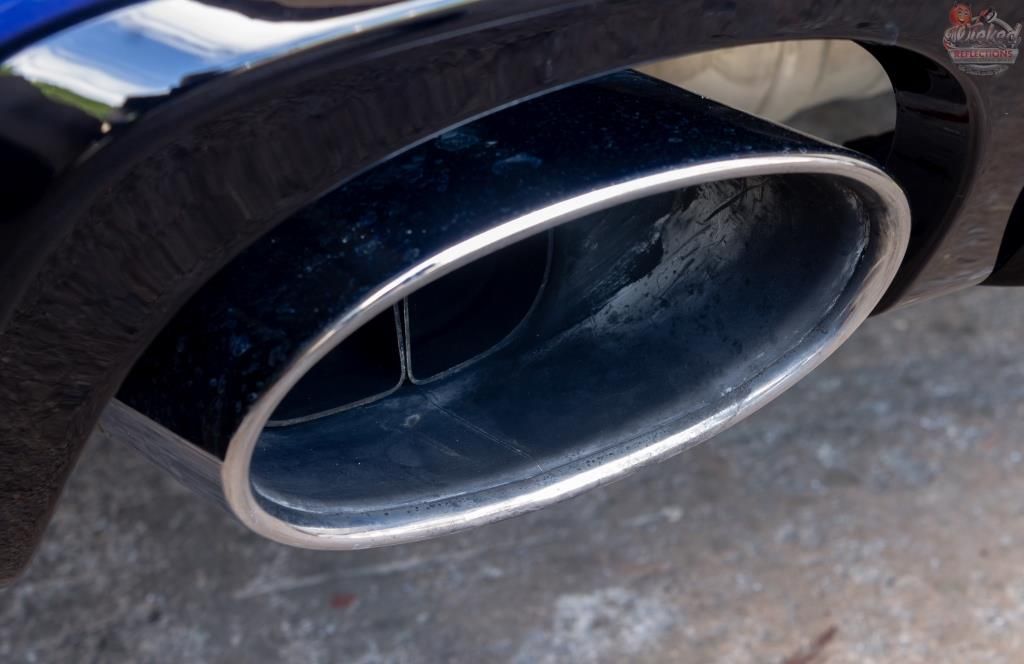
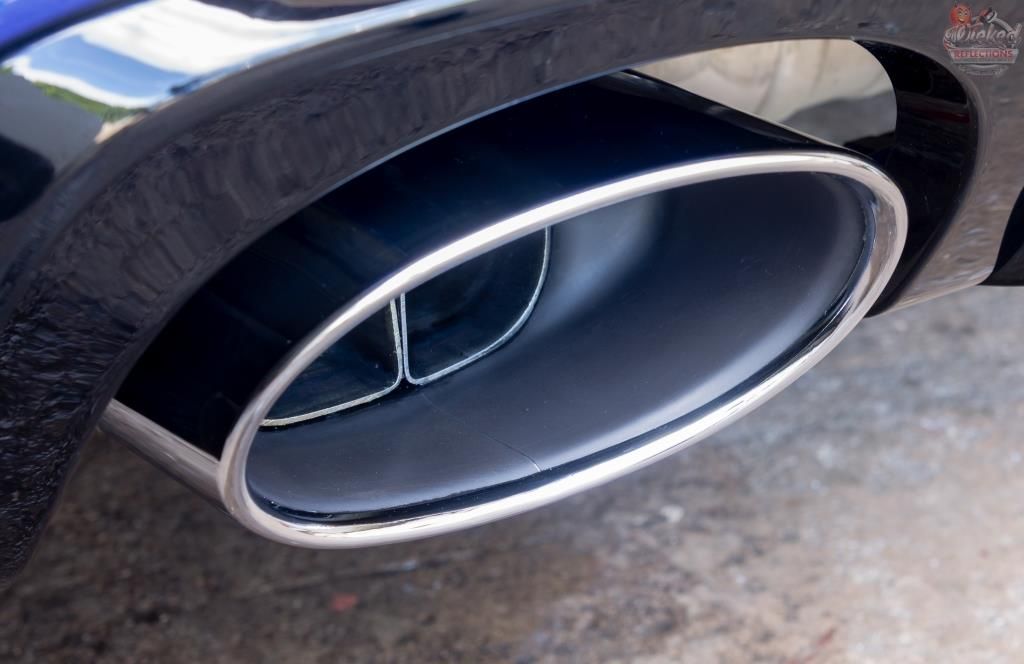
The exhaust tips were then given a polish using Mothers Mag and Aluminium Polish.
Before
After
The rubber trim was the cleaned initially using Shield Heavy Duty Rubber cleaner, followed by 2 wipe downs using Gyeon Prep and then coated using Gyeon Trim
Before
After cleaning
After coating
All of the remaining black exterior trim was then coated with Gyeon Trim - this included the honeycomb, gloss black pillars, diffuser, wiper cowel, wiper arms, head lights and tail lights and side mirrors.
All exterior glass was then cleaned using Autoglym Fast Glass then prepped and coated with 2 coats of Gyeon View
Lastly the interior was sorted out.
Interior plastics : Carchem APC @1:20 / Various brushes and towels / Optimum Optiseal
Interior carpet : Vacuum / Brush / Vacuum
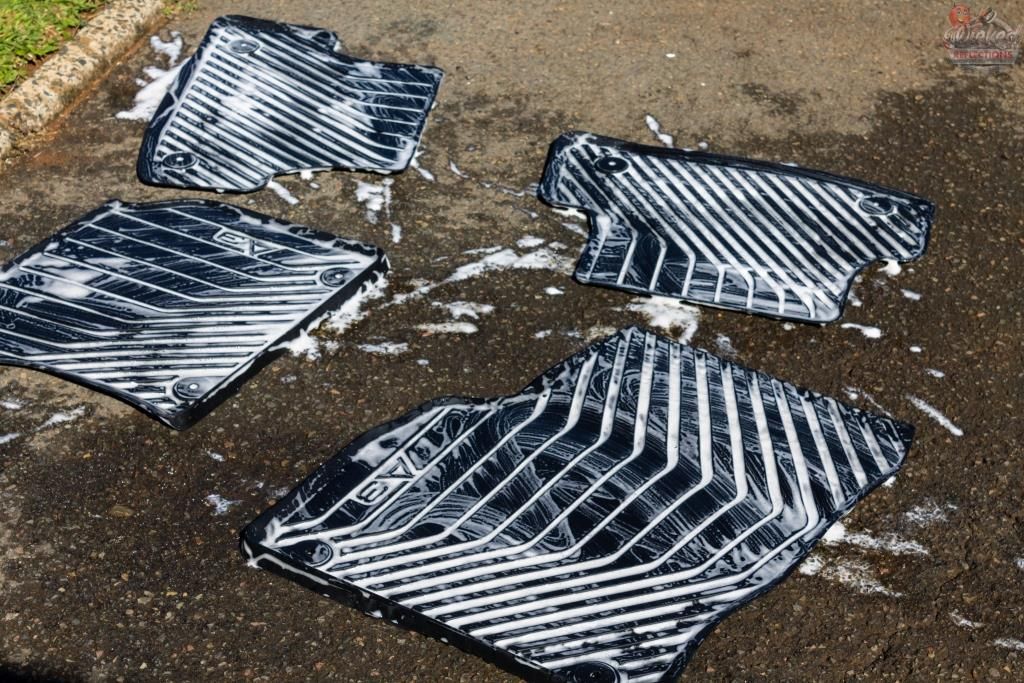
Interior Mats : Carchem APC @1:20 / Various brushes and towels
Interior leather : Carchem APC @1:20 / Gyeon Leather Coat
Pedals : Carchem APC @1:20 / Various brushes and towels
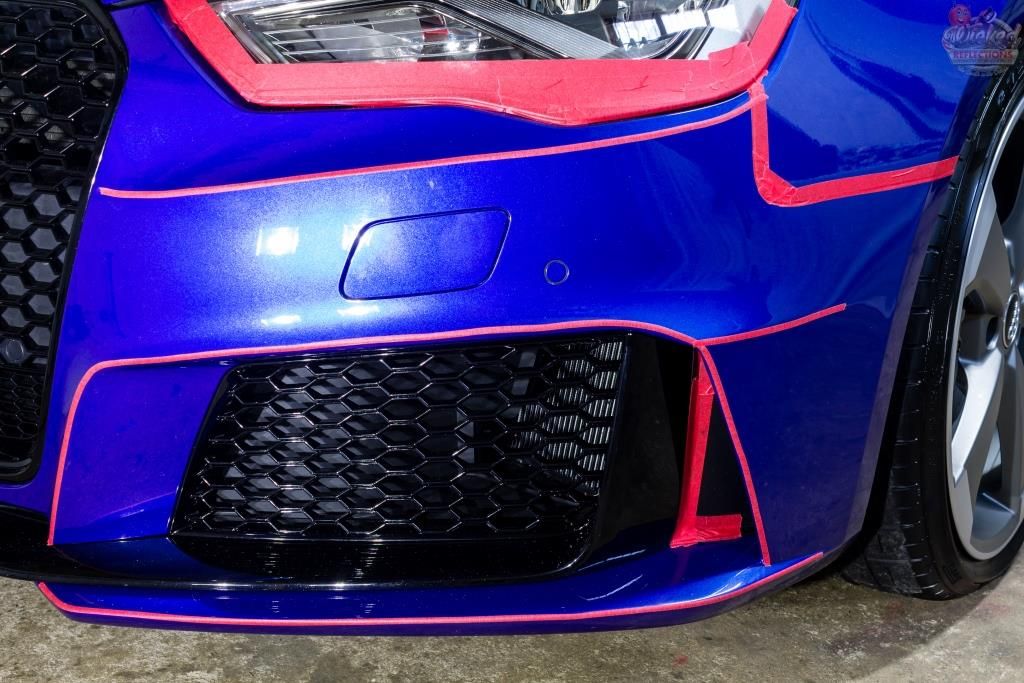
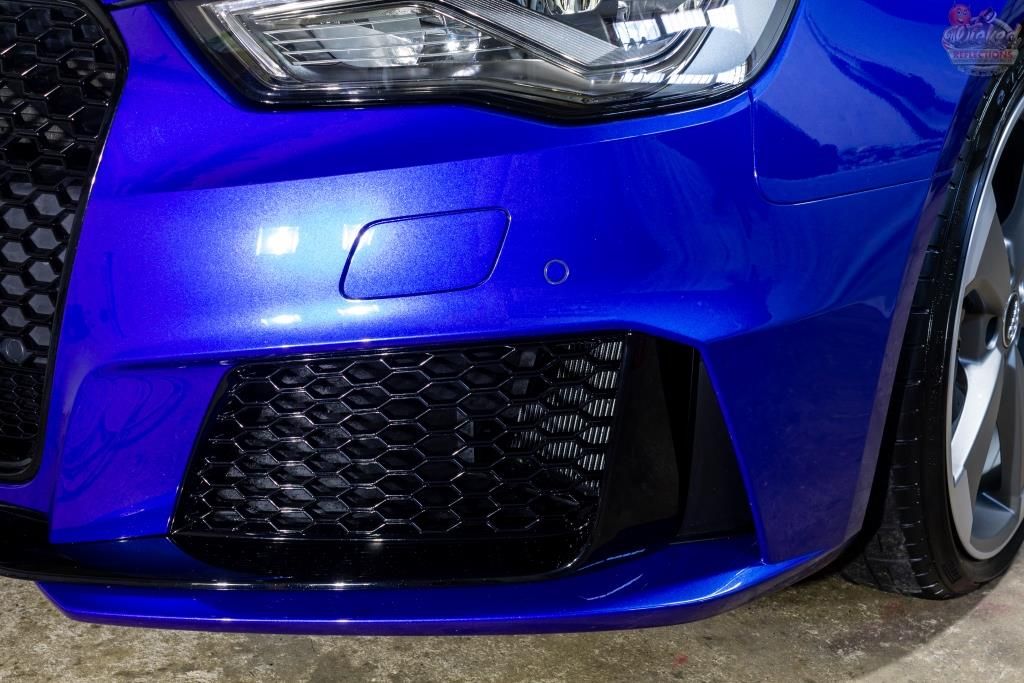
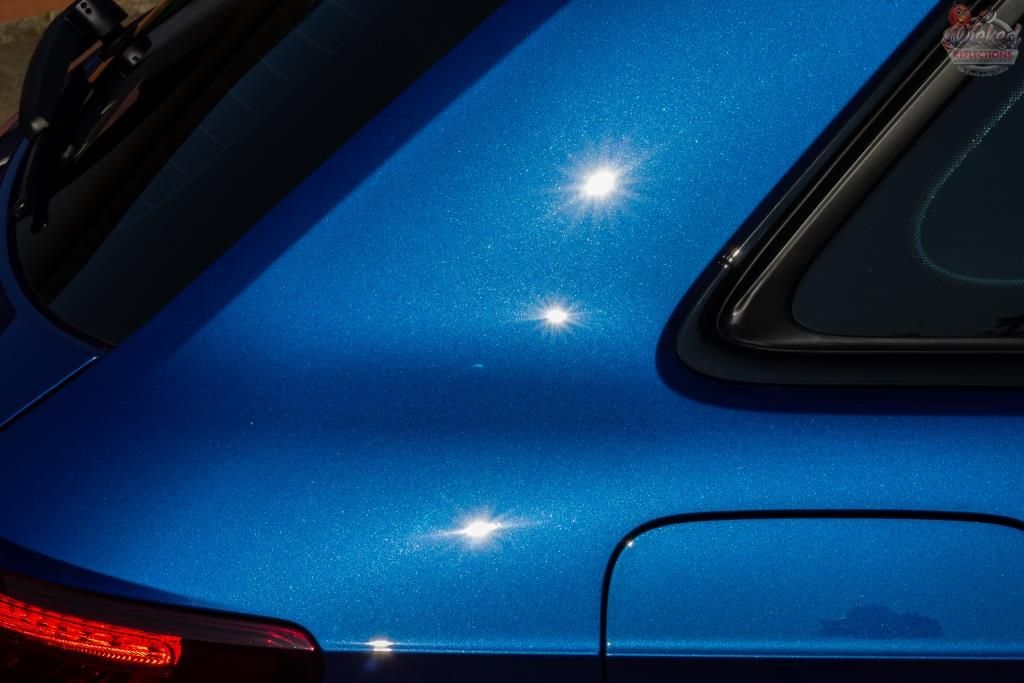
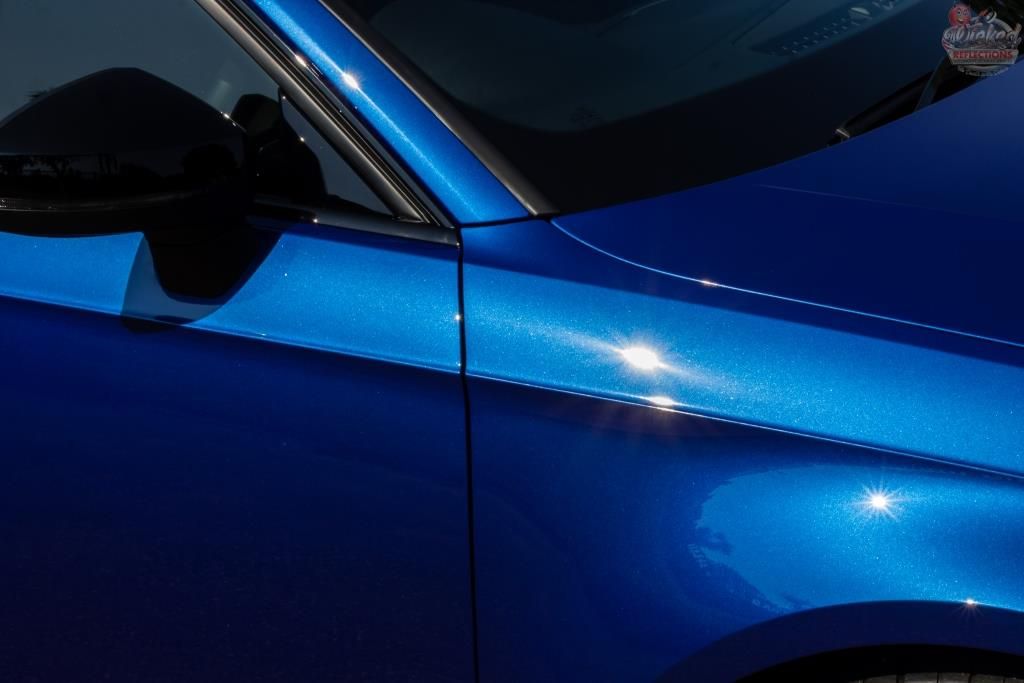
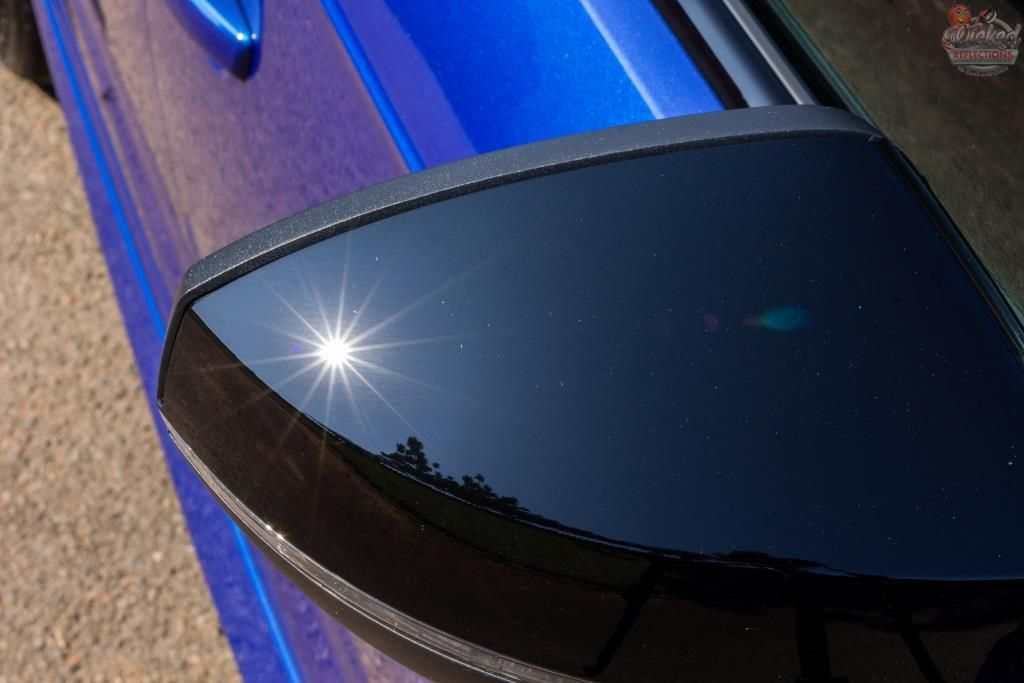
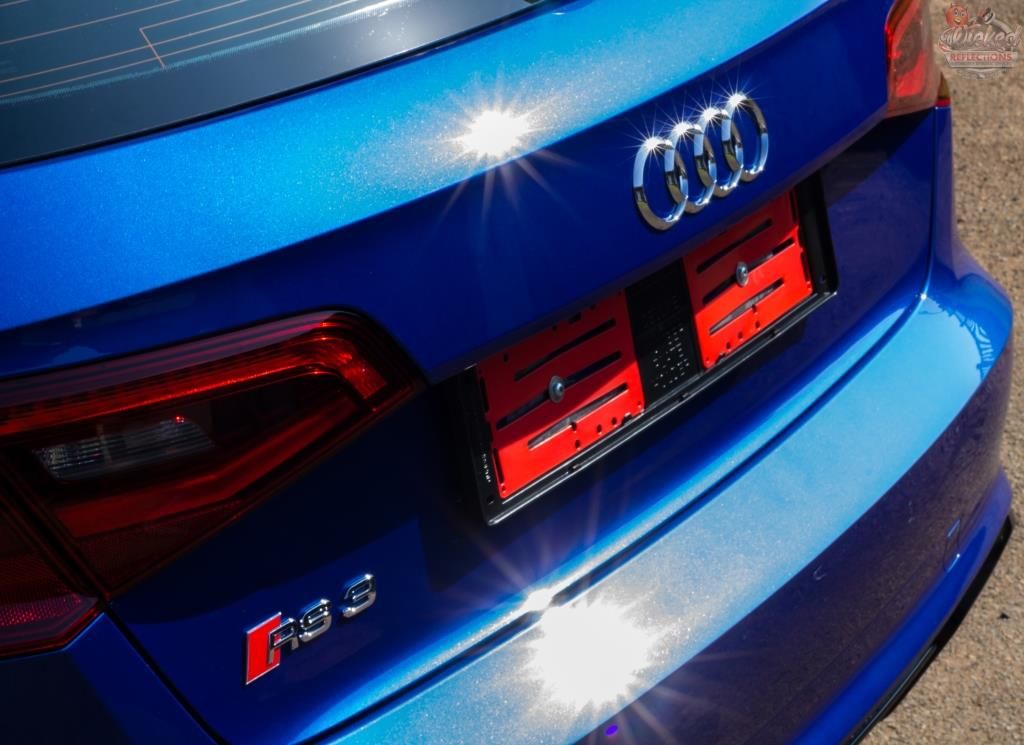
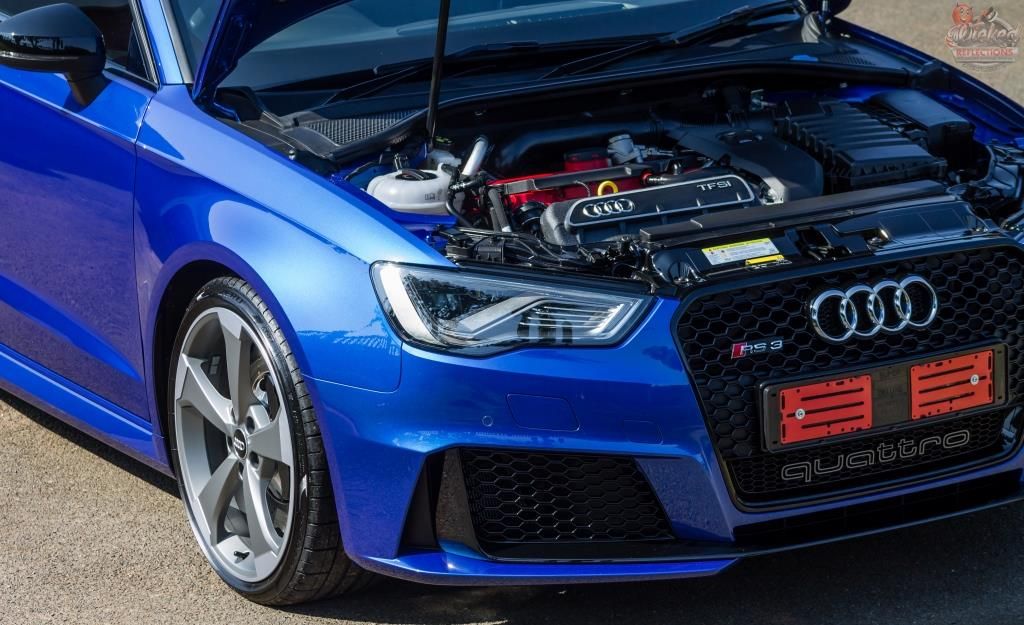
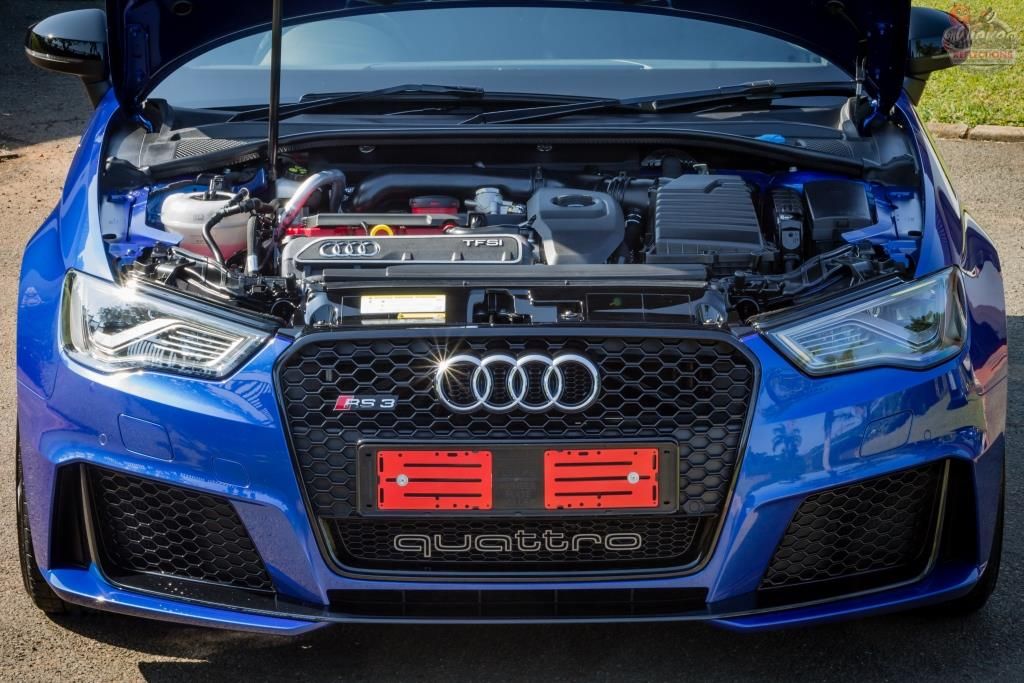
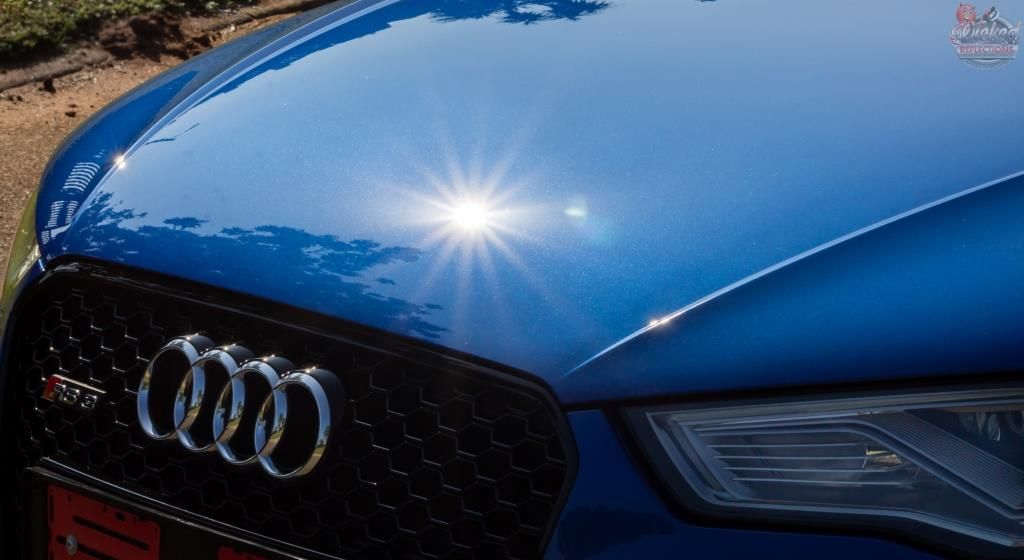
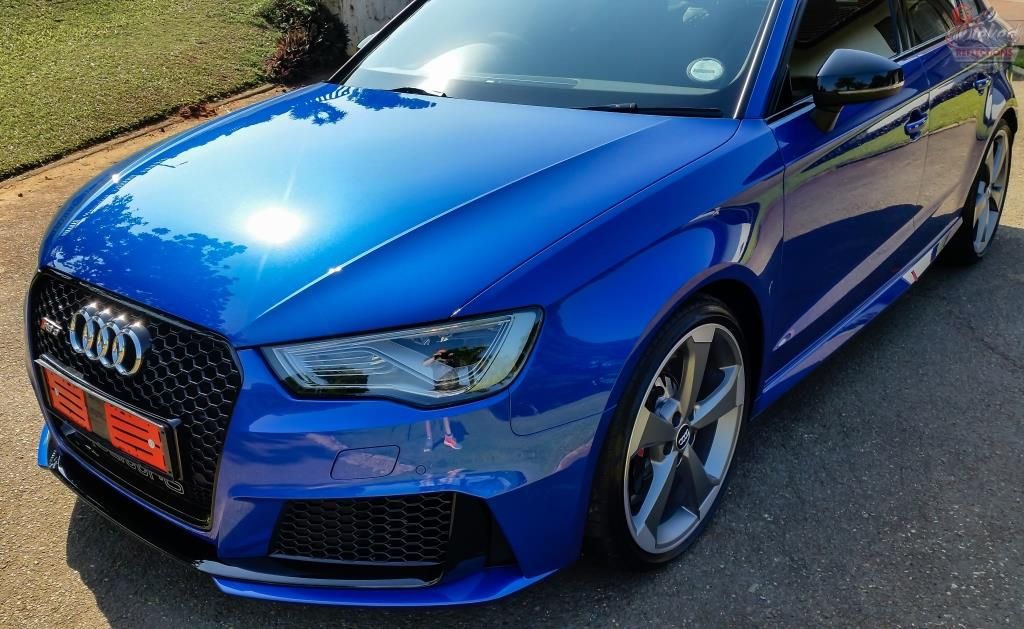
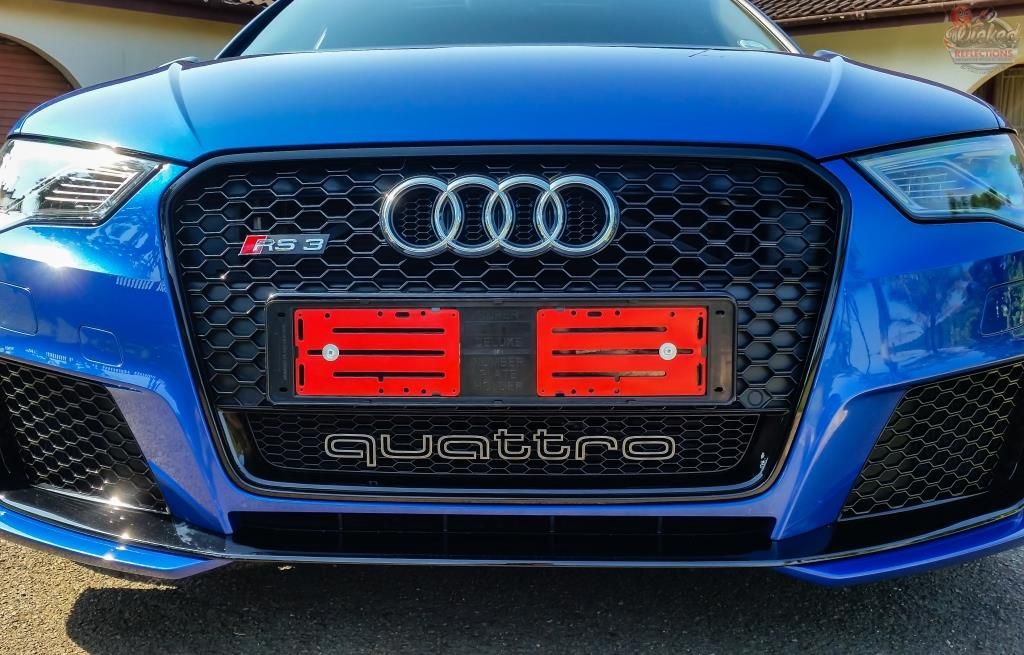
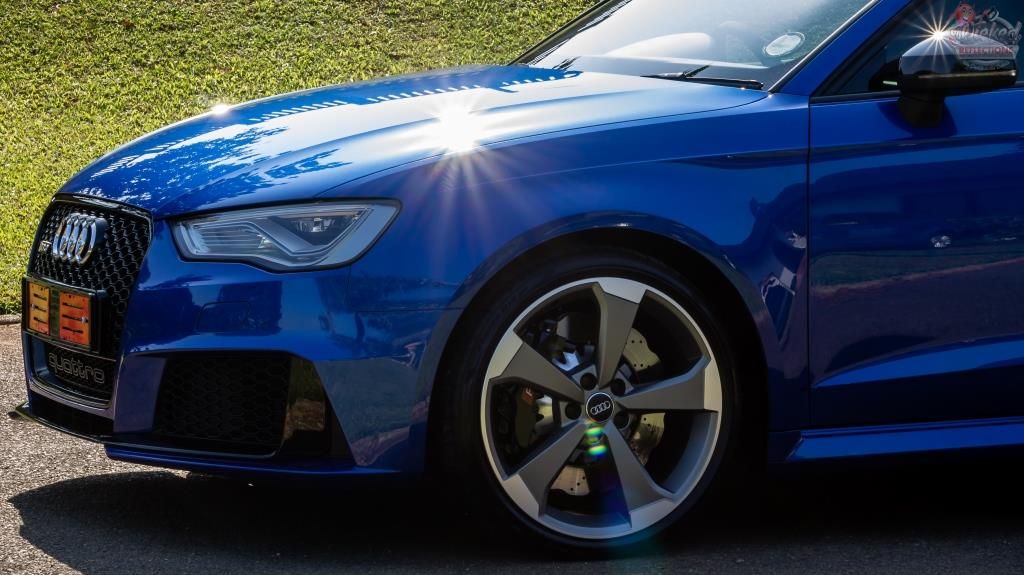
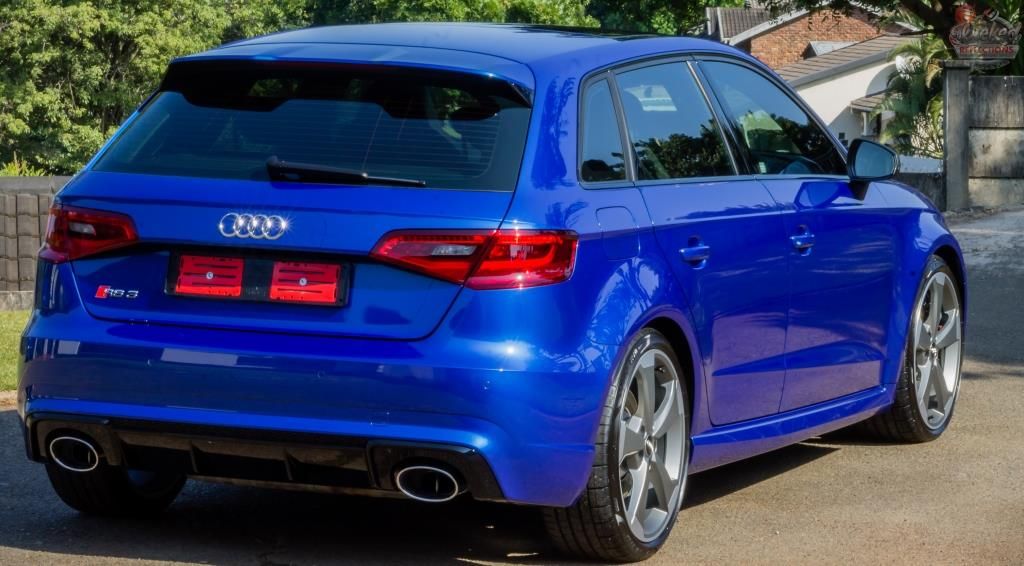
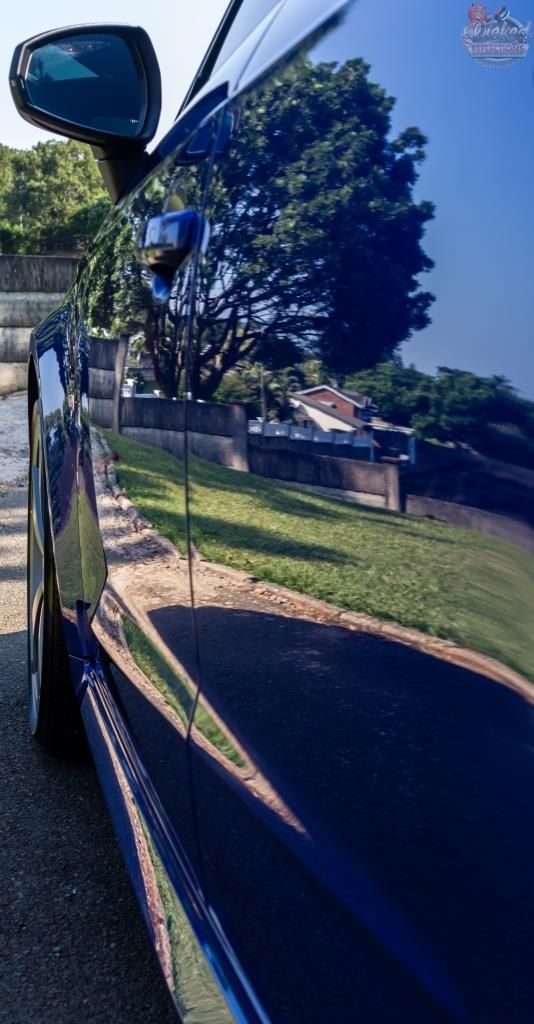
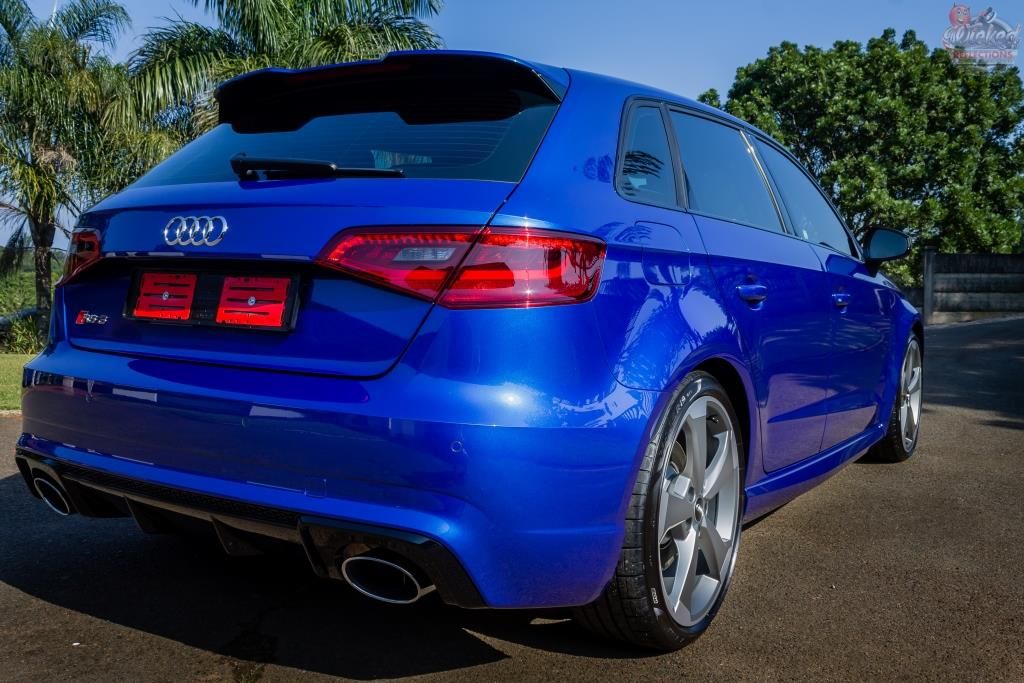
Here are some pictures of the completed car.


 Post Thanks / Like - 6 Likes, 0 Thanks, 0 Dislikes
-
05-24-2017, 03:23 AM #3
- Join Date
- Dec 2013
- Location
- Durban, South Africa
- Posts
- 277
- Post Thanks / Like
Re: Sepang Blue Audi RS3 - Detailed by Lawrence
And lastly my favorite shot
As always thanks for looking and any questions or comments are welcome.
:hi:Post Thanks / Like - 6 Likes, 0 Thanks, 0 Dislikes
-
05-24-2017, 04:19 AM #4


- Join Date
- May 2014
- Location
- Plymouth,Ma
- Posts
- 2,045
- Post Thanks / Like
Re: Sepang Blue Audi RS3 - Detailed by Lawrence
Amazing work, what a great color when properly polished.
-
05-24-2017, 04:51 AM #5Wax Waster

- Join Date
- Mar 2008
- Location
- SwFL
- Posts
- 27,090
- Post Thanks / Like
Re: Sepang Blue Audi RS3 - Detailed by Lawrence
Beautiful work!
Formerly the "Best Detailer", now just Super Wax Waster Man. Not necessarily tactful, but normally right. It`s good to be da King !!!
-
05-24-2017, 06:36 AM #6

- Join Date
- May 2009
- Posts
- 329
- Post Thanks / Like
Re: Sepang Blue Audi RS3 - Detailed by Lawrence
Very nice work
Tampa, Fl
-
05-24-2017, 07:17 AM #7
- Join Date
- Nov 2009
- Location
- Central TX
- Posts
- 1,081
- Post Thanks / Like
Re: Sepang Blue Audi RS3 - Detailed by Lawrence
Very nice indeed! Hopefully she can keep it like that with proper washing as you gave it better than new.
Learning tips and tricks from fellow board members since 2009
-
05-24-2017, 08:47 AM #8

- Join Date
- Jan 2006
- Location
- South TX
- Posts
- 258
- Post Thanks / Like
Re: Sepang Blue Audi RS3 - Detailed by Lawrence
Great job! Love that color, really stands out after the detail.
-
05-24-2017, 11:53 AM #9
- Join Date
- Aug 2015
- Location
- College Station, TX
- Posts
- 795
- Post Thanks / Like
Re: Sepang Blue Audi RS3 - Detailed by Lawrence
Always appreciate your thorough posts with plenty of pictures. Car looks awesome!
-
05-24-2017, 11:53 AM #10

- Join Date
- Mar 2016
- Location
- Wisconsin
- Posts
- 1,020
- Post Thanks / Like
Re: Sepang Blue Audi RS3 - Detailed by Lawrence
Incredible looking Audi and excellent work/write-up as usual. Hopefully the owner can keep her S3 looking good under your tutelage.
Great photos, my favorite is the engine photo with the Audi rings.
-
05-24-2017, 09:27 PM #11


- Join Date
- Apr 2012
- Location
- SW Florida
- Posts
- 3,194
- Post Thanks / Like
Re: Sepang Blue Audi RS3 - Detailed by Lawrence
WOW! Very nice. Love the car and color. Outstanding work! That is all!
Scott Harle
www.autodermatology.com
Autodermatology
Serving Naples and SW Florida
Instagram: www.instagram.com/autodermatology
Facebook: www.facebook.com/autodermatology
-
05-25-2017, 02:19 AM #12
- Join Date
- Dec 2013
- Location
- Durban, South Africa
- Posts
- 277
- Post Thanks / Like
Re: Sepang Blue Audi RS3 - Detailed by Lawrence
Thank you all very much - greatly appreciated!!!
-
06-05-2017, 09:04 PM #13
- Join Date
- Jan 2013
- Location
- Rochester NY
- Posts
- 90
- Post Thanks / Like
Re: Sepang Blue Audi RS3 - Detailed by Lawrence
Beautiful!


 Reply With Quote
Thread Information
Users Browsing this Thread
There are currently 1 users browsing this thread. (0 members and 1 guests)
Similar Threads
-
Monsoon Grey Audi SQ5 - Detailed by Lawrence
By LawrenceSA in forum Click & Brag -The Detailers ShowcaseReplies: 7Last Post: 07-21-2016, 03:42 AM -
Audi SQ5 in Sepang Blue (DISO included!)
By MFT in forum Car DetailingReplies: 5Last Post: 01-28-2015, 12:57 PM -
Sprint Blue Audi S3 - Detailed by Lawrence
By LawrenceSA in forum Click & Brag -The Detailers ShowcaseReplies: 8Last Post: 01-28-2015, 01:34 AM -
2014 Audi RS5 Detail (Sepang Blue)
By autoconcierge in forum Click & Brag -The Detailers ShowcaseReplies: 4Last Post: 12-26-2013, 09:18 AM -
2011 Audi R8 V10 Coupe Sepang Blue Correction by Richie`s Custom Detailing Central FL
By Richie's Custom Detailing in forum Click & Brag -The Detailers ShowcaseReplies: 32Last Post: 02-26-2012, 08:21 PM
Bookmarks