

Not long ago, my neighbor brought home a beautiful, black, 2017 Porsche Cayenne S. While admiring this beautiful vehicle and hearing the story of how it ended up in his driveway, the conversation turned to how he could keep it looking good. A few minutes later we agreed on a full exterior detail. I was really excited about the opportunity.
With everything arranged, I then contacted the good folks at Autogeek and pitched the idea of using this vehicle as a canvas to demo new products. Ive been a regular participant and reviewer on their forums, not to mention a steady customer for many years and felt this was a great opportunity. They agreed, and in a few days a box full of products arrived. Everything was set!
Starting Condition
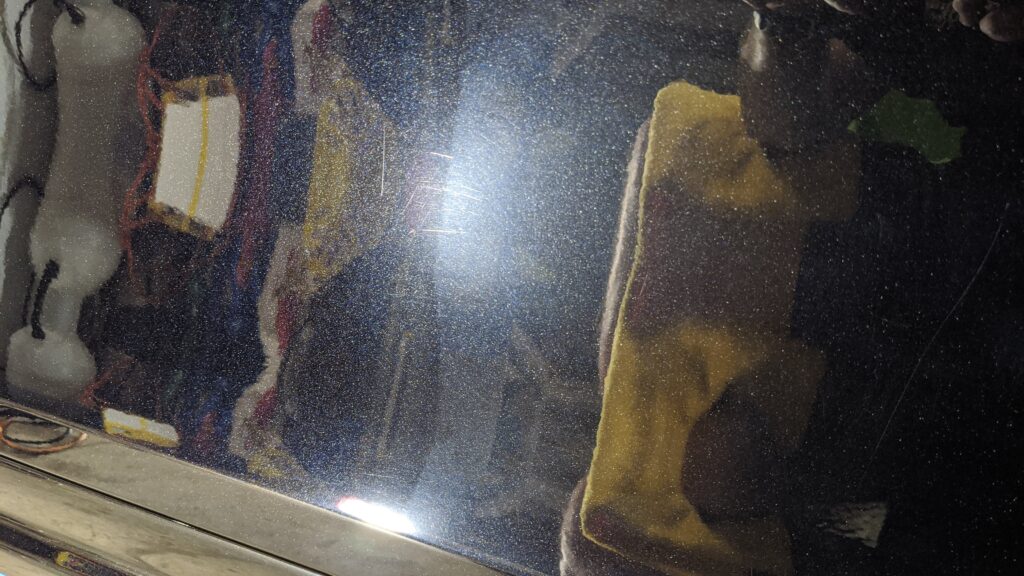
When the Cayenne first came home, it was late evening under hazy skies. Not the best lighting conditions to evaluate the paint, but overall it looked pretty clean and well maintained. A few days later while setting up the exact day to do the work, we both noticed the black paint actually had metallic flake! This brought back memories of detailing another car I initially assumed to be a boring gray color, but turned out to be a very attractive silver metallic once fully polished out. We also noticed a few swirl marks, but I was now really intrigued and couldnt wait to see how this beautiful Porsche would turn out.
Step 1: Washing
This Cayenne is a daily driver and several days of wet, rainy weather left it pretty dirty, but nothing a good wash and clay bar treatment wouldnt fix.
For the washing stage I start with Optimums Car Wash. This car wash continues to be my favorite. It cleans really well, rinses off easily, and leaves no glossing agents or waxes behind. After a good bath the Cayenne already looks better and is now ready for the next step: clay bar.
For those not familiar with detailing clay, it is very similar to the modeling clay you may have used in art class, only stickier. This step removes grime and particles of dirt embedded in the clear coat which leaves the surface feeling rough. Using a clay bar will leave the surface feeling much smoother and will actually brighten lighter colors. Unfortunately for the purpose of this article, the Porsche was maintained well enough nothing was visible on the clay to photograph, but I did notice the surface become much smoother.
Once clean, the Cayenne is looking pretty good, but the water behavior shows a lack of any protection.
Step 2: Polishing
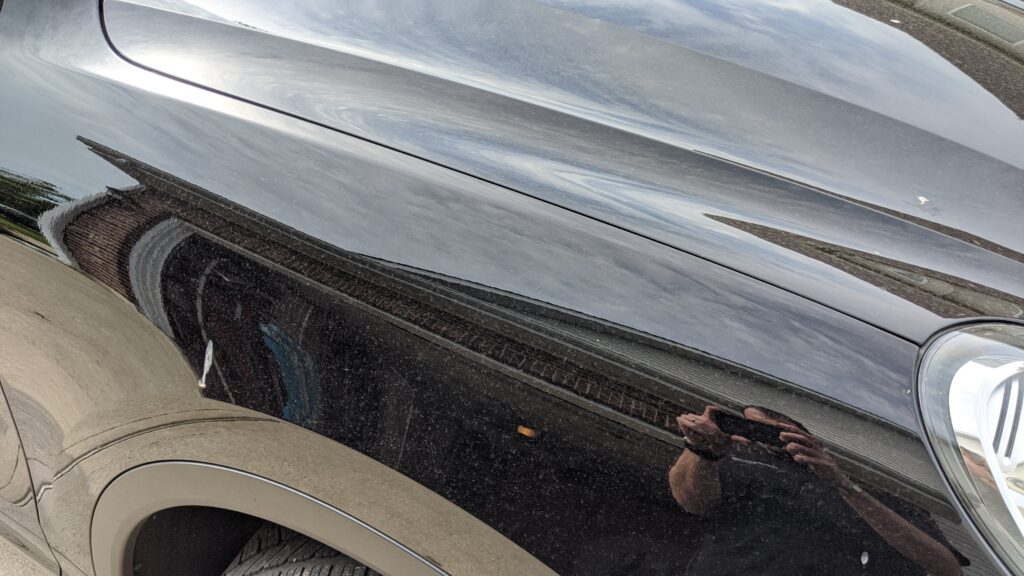
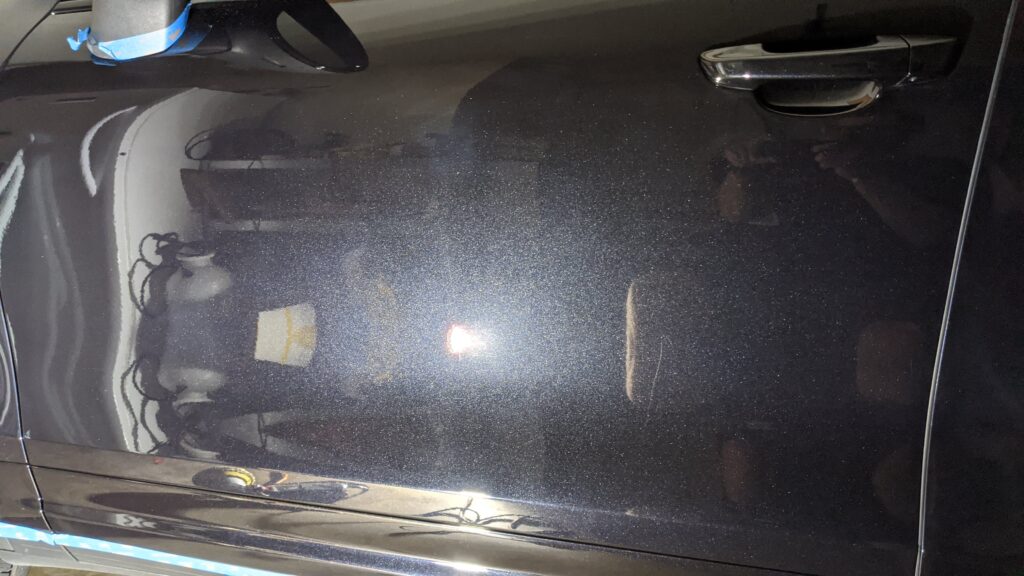
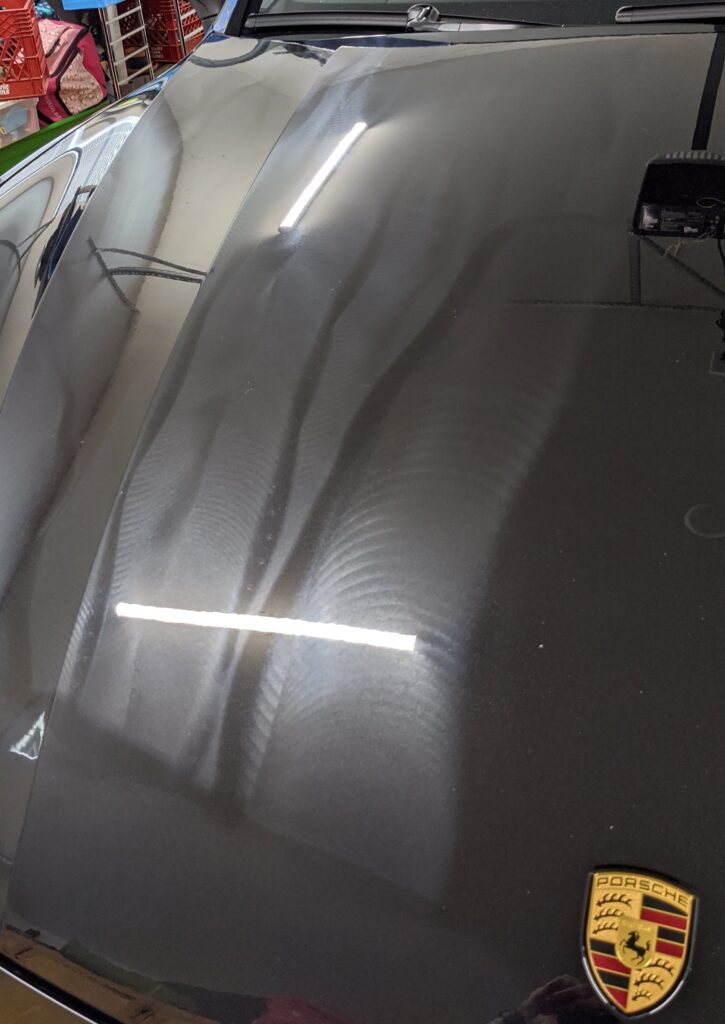
Before pulling the Porsche into my garage, I took a close look at the surface. Work lights are great for seeing swirls and scratches in specific areas, but nothing beats bright sunlight for assessing larger areas and seeing the true condition of the paint. In bright sunlight I was able to see more swirls than previously realized. This area of the tailgate is a good example.
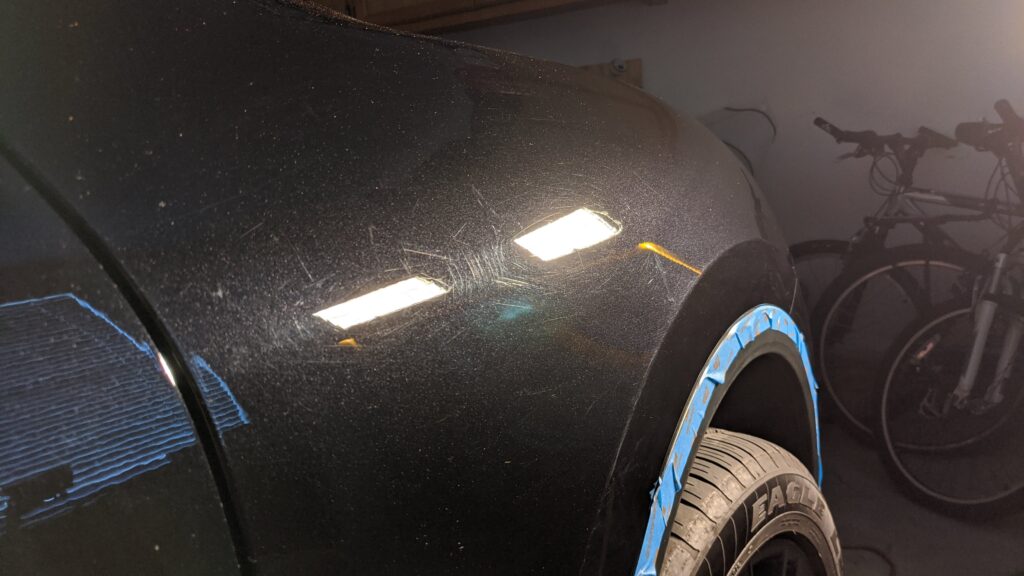
Removing Swirls
Work lights provide a different perspective of the swirls and scratches needing removal.
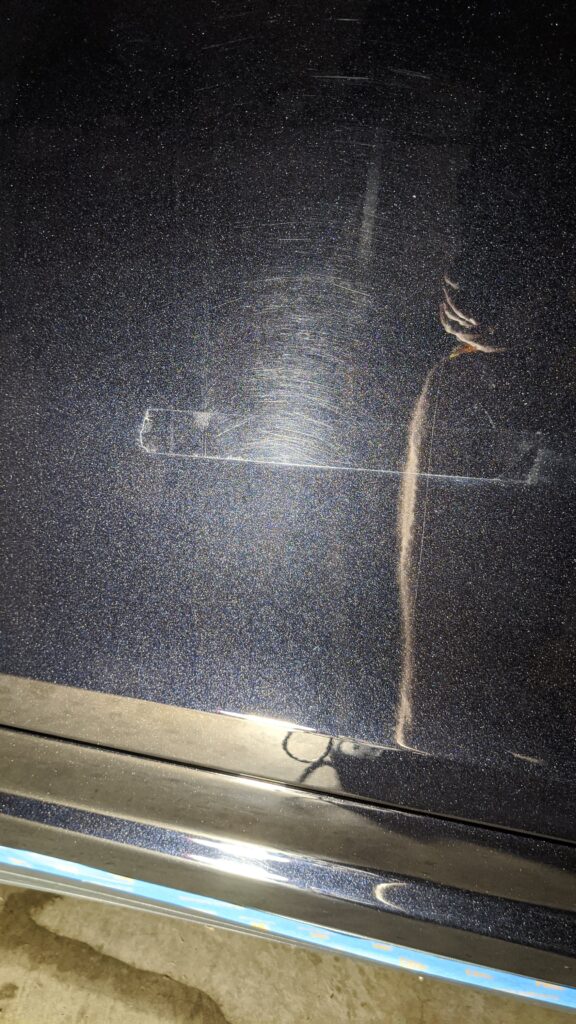
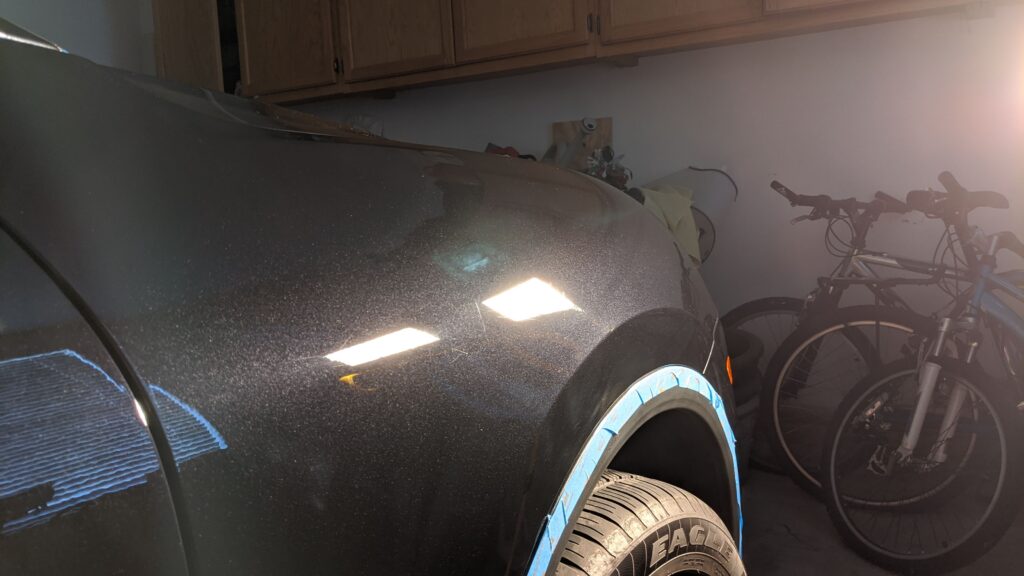
Since Ive never worked on this vehicle, I started with a polish and Lake Countrys white Thin Pro pad. This didnt correct much, so I moved on to a compound and the white pad; my go-to combination for polishing out most vehicles with hard paint. Again, I was not happy with the lack of correction. I then attacked the area with the most aggressive combination in my arsenal: an orange Thin Pro pad and a compound. The good news is this combination provided good correction. The bad news is this approach forces me to take two polishing steps and twice the amount of work. Below is what the 50/50 picture to show what will be possible.
With a process and a product plan in place it was time to attack this vehicle and make it shine. With a process and a product plan in place it was time to attack this vehicle and make it shine. Before now I`ve never personally seen things work out to show such a great example.
Below are a few more before and after pictures.
I used the new DP polishes for this project and you can find my detailed review HERE
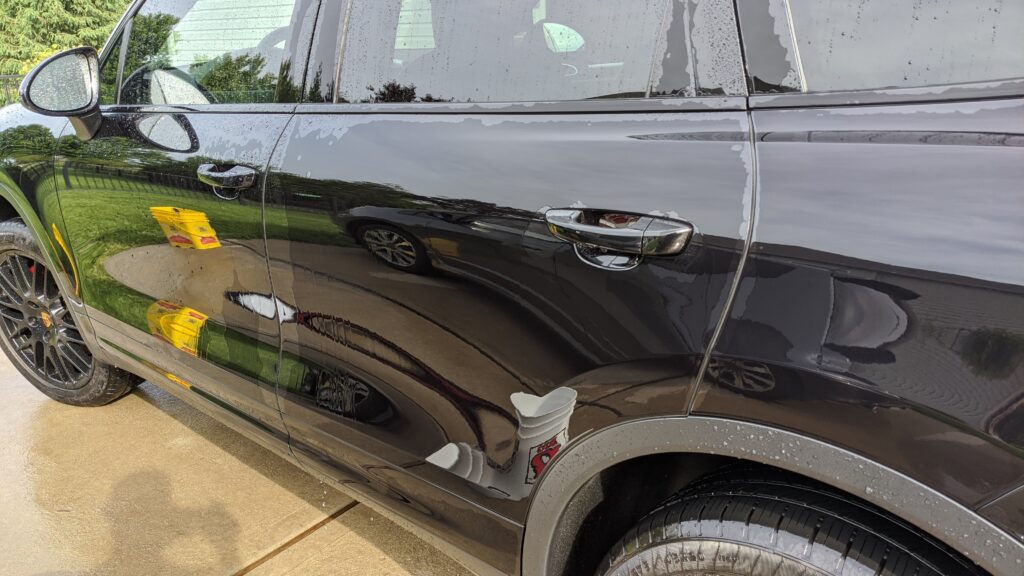
Step 3: Protection
Unlike the polishing steps, there really isnt much to talk about when it comes to applying a sealant. The key to getting the best results from any modern sealant or wax is to apply it even and thin. Most products shouldnt be applied really think and will go much further than you realize. Applying it too think only makes it harder to remove. I actually use a very soft, black, Lake Country Flat Pad on my polisher to quickly apply a nice thin coat of sealant evenly across an entire vehicle. I was able to cover the entire Cayenne in only about 20 minutes. Here is a view of a portion of the hood after application.
A review of the sealant used for this project can be found HERE
Results
Well what can I say. Im really happy with how everything turned out.
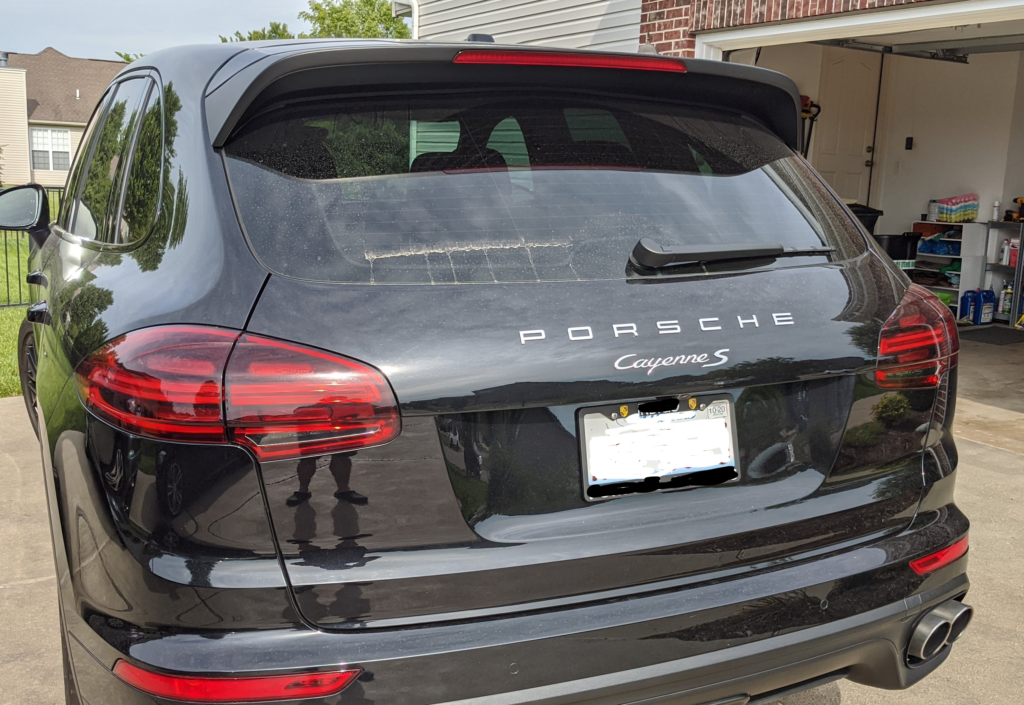
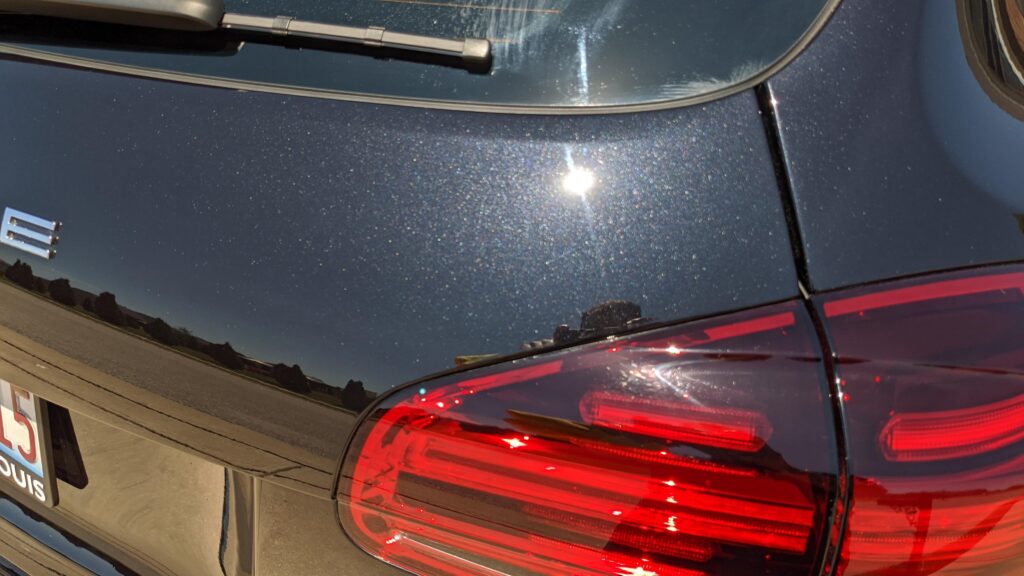
Remember that picture of the tailgate with all of the swirls and the metallic flake looking a little dull? I can safely say it looks much better now. Look at how the metal flake pops!
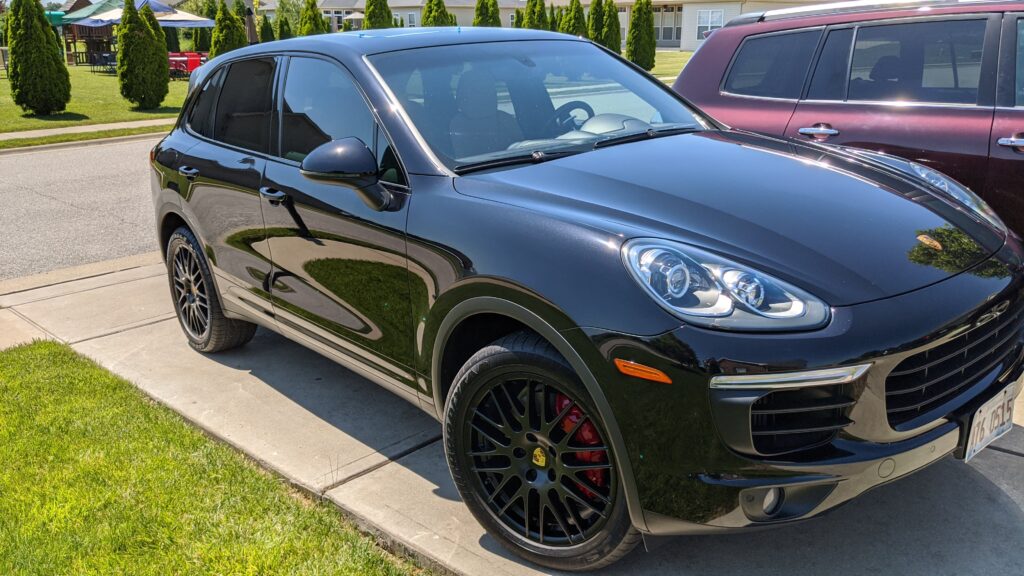
My neighbor was really pleased with the end result and I am too. This Cayenne S is a beautiful vehicle and now the paint is in great shape it really turns heads! Mission accomplished.
One last picture of this great looking Porsche.

Results 1 to 6 of 6
Threaded View
-
07-06-2020, 05:39 PM #1


- Join Date
- Oct 2017
- Location
- St. Louis Metro Area (Illinois)
- Posts
- 1,019
- Post Thanks / Like

2017 Porsche Cayenne S Exterior Detail


 Reply With Quote
Thread Information
Users Browsing this Thread
There are currently 1 users browsing this thread. (0 members and 1 guests)
Similar Threads
-
DetailedByPrecision 2017 Porsche Macan 2017 Dodge Daytona 392 2017 Lexus CT 200h 2018 Honda fit 2009 Subaru Impreza Auto Detailing San Francisco
By CG6Lemon in forum Click & Brag -The Detailers ShowcaseReplies: 1Last Post: 01-29-2019, 08:03 PM -
2017 Porsche Cayenne S
By Sizzle Chest in forum Click & Brag -The Detailers ShowcaseReplies: 9Last Post: 08-21-2017, 07:50 PM -
AJ Auto Detail: Porsche Cayenne S
By ajnavo61490 in forum Click & Brag -The Detailers ShowcaseReplies: 0Last Post: 08-23-2008, 01:35 PM -
Porsche Cayenne Mini Detail
By Thomas Dekany in forum Click & Brag -The Detailers ShowcaseReplies: 6Last Post: 03-29-2008, 11:47 PM -
Black Porsche Cayenne (Exterior + Interior)
By awahl63 in forum Click & Brag -The Detailers ShowcaseReplies: 9Last Post: 07-29-2006, 11:06 PM
Bookmarks