

Grab a snack and your favorite beverage... this is going to be a long one. `Thanks for your patience!
`
`
This was a special detail for me, not only because the car is mine but for quite a few reasons I will mention as this C-n-B moves along.
`
(I apologize for the pictures... this solid red was really hard to photograph. `Sometimes I had to washout the picture to capture defects... so the red paint is going to take on many different shades.)
`
`
<span style="font-family:georgia, serif;">The Chevelle`s condition after sitting unused for almost 4 years...
IMG_7272 by GabeDellinger, on Flickr
`
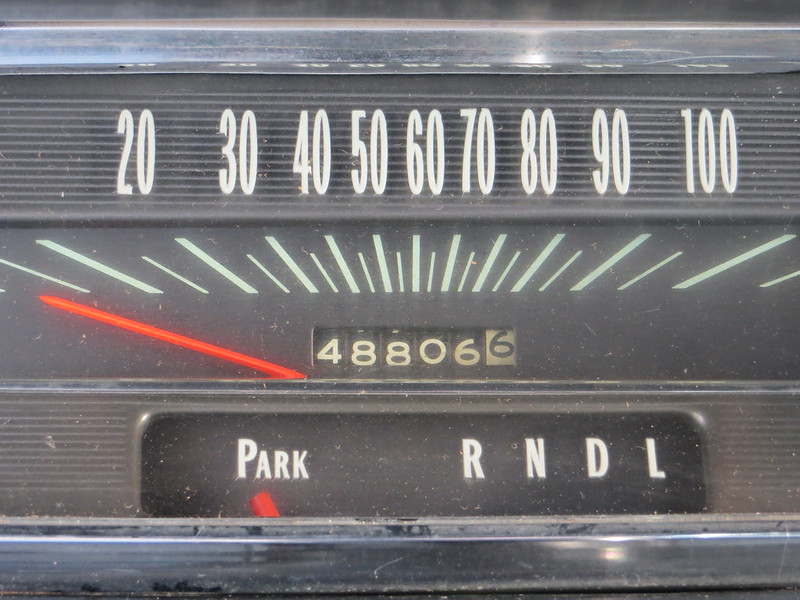
My dad purchased the car back in 1994 for $2,500 out of California. `Quite a bit to give, then, for a Malibu. `However, the car was low milage with 37,000 on the odometer. `It does have some interesting options... factory A/C, factory tinted glass, factory smog pump (removed but still have the unit and special headers) and some nasty, nasty, undercoating. `The odometer now reads...
`
IMG_7306 by GabeDellinger, on Flickr
`
<span style="font-family:georgia, serif;">Original T-3 headlight...(3 of them are still OEM to the car.)
IMG_7520 by GabeDellinger, on Flickr
`
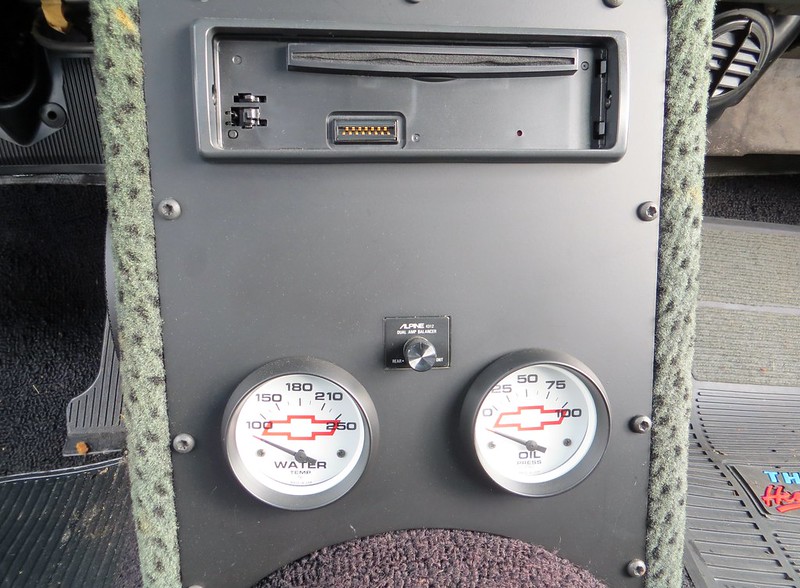
<span style="font-family:georgia, serif;">Here is a center console my dad made... the carpet surrounding the sides appears a feint green... it`s faded over time and used to be a dark grey.
IMG_7311 by GabeDellinger, on Flickr
`
The original color was `Granada Gold`. `I was a freshman in high school when my family took possession of it. `Boy, was I underwhelmed when I first saw the car.... especially when I was wanting a `69 Camaro SS/ 4-speed. `It had hubcaps, ugly gold paint, and a 283, 2 barrel 195hp version and a 2-speed Powerglide auto. `(We ended up putting new rings, bearings, aluminum intake, Carter AFB, and a very mild camshaft to spruce up the 283.)
`
My dad and I spent a solid 4 years on the car. `Every weekend we worked on it. `I can`t say it was fun then... but now I`m a car nut. `The paint and bodywork took 18 months. `There was one quarter that had been hit but there were no rust problems or need for patch panels anywhere. `The floor pans were solid so there wasn`t anything too crazy regarding body work. `As you have probably already noted, we exchanged the Malibu trim for SS stuff. `We even located NOS OEM `67 Chevelle SS trim from a local Chevy parts dealer on Swan Island in Portland, OR. `The SS hood was an OEM piece but it looked like a heard of elephants walked on it. `There`s lots of body filler.
`
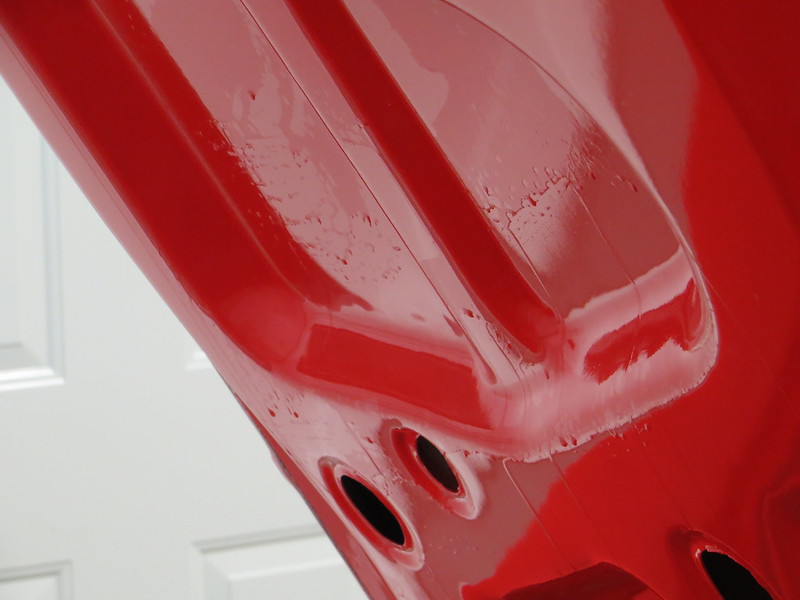
<span style="font-family:georgia, serif;">Hood... texture of paint showing shrinking/ sinking of body filler. `These appeared about 2 years after painting.
IMG_7336 by GabeDellinger, on Flickr
`
We built a makeshift down-draft paint booth in our attached garage with filters, fans, lights, etc... `My dad chose to spray Porsche Guard`s Red using the DuPont Chromabase paint system. `
`
By now, you are beginning to understand why the detail was special. `The car I`m presenting today was where I learned some fundamentals on bodywork, block sanding, wet sanding, and high-speed buffing. `It`s kind of neat to look back and see just `how horrible` some of my work was. `But that`s ok. `I love the car, love the time I spent working on it, and love the lessons it taught me. `Moreover, I`m highly impressed my father let me make some of my own mistakes... and you`ll see them I move forward through this project.
`
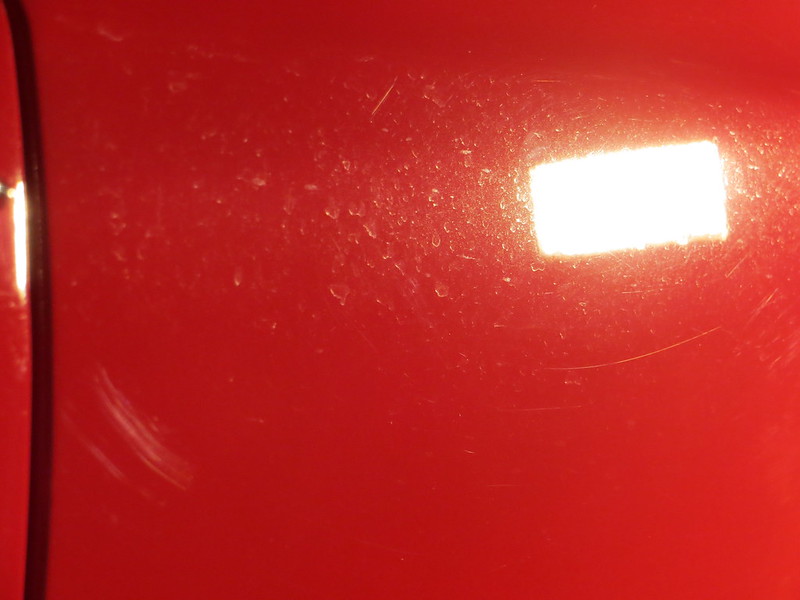
<span style="font-family:georgia, serif;">Here`s my first ever strike through circa 1998. `I laughed pretty hard when I was getting ready to correct the rear decklid and found it... what was I thinking buffing that edge! `
IMG_7630 by GabeDellinger, on Flickr
`
`
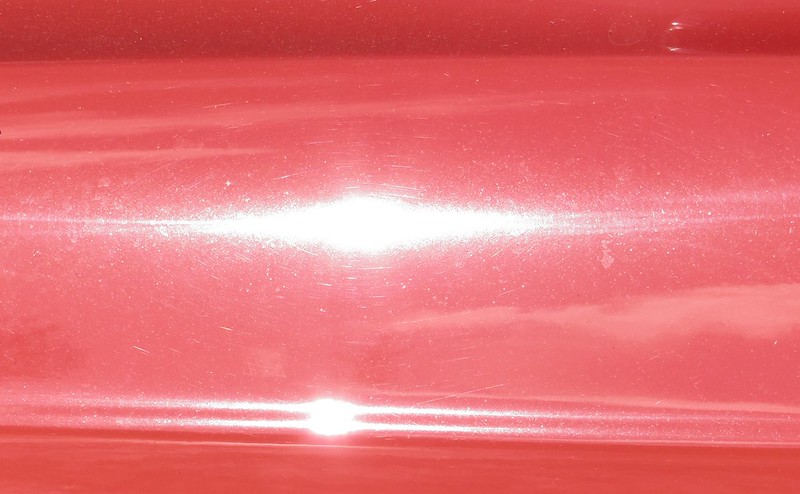
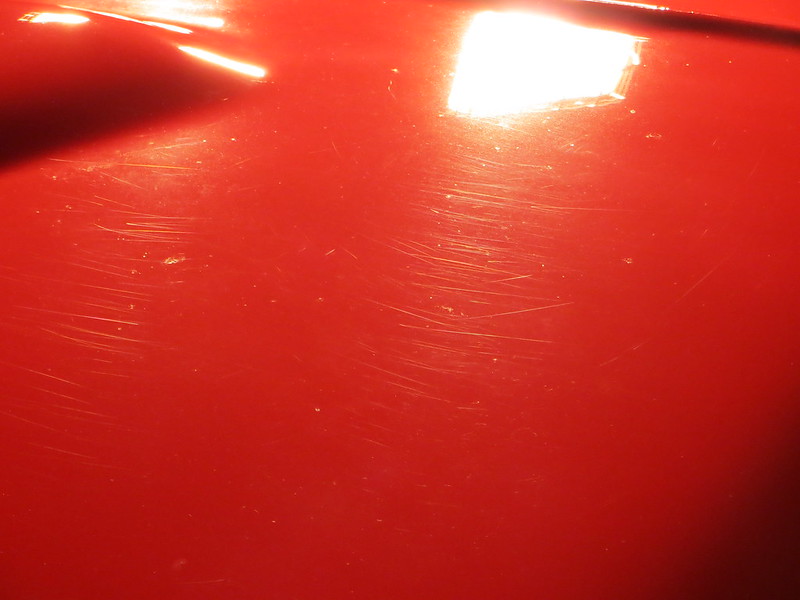
<span style="font-family:georgia, serif;">Sun inspection, prior to wash/ decon...
IMG_7265 by GabeDellinger, on Flickr
`
IMG_7271 by GabeDellinger, on Flickr
`
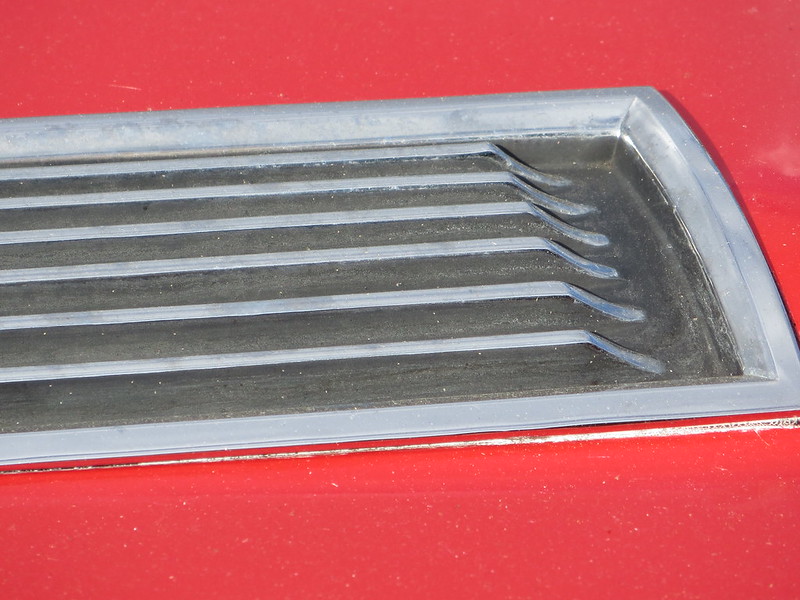
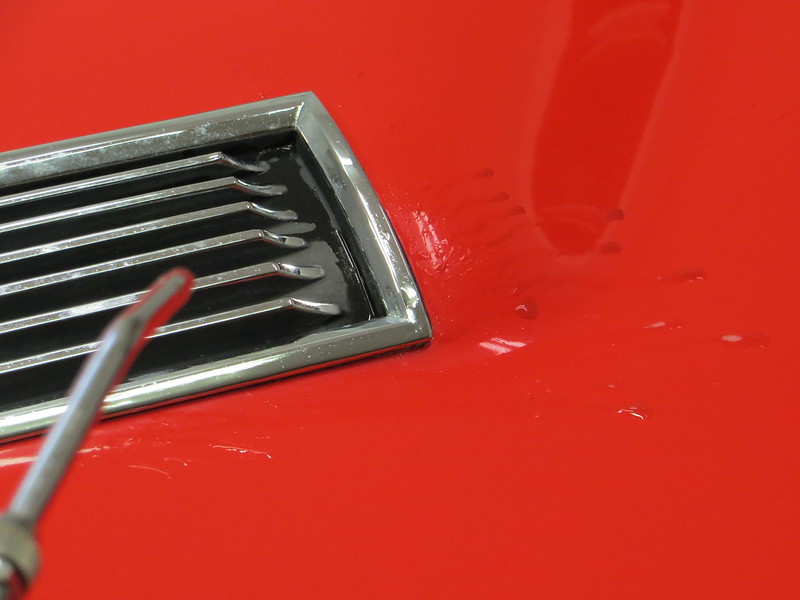
<span style="font-family:georgia, serif;">Hood louver inserts looking weathered... with some old wax residue
IMG_7301 by GabeDellinger, on Flickr
`
IMG_7302 by GabeDellinger, on Flickr
`
`
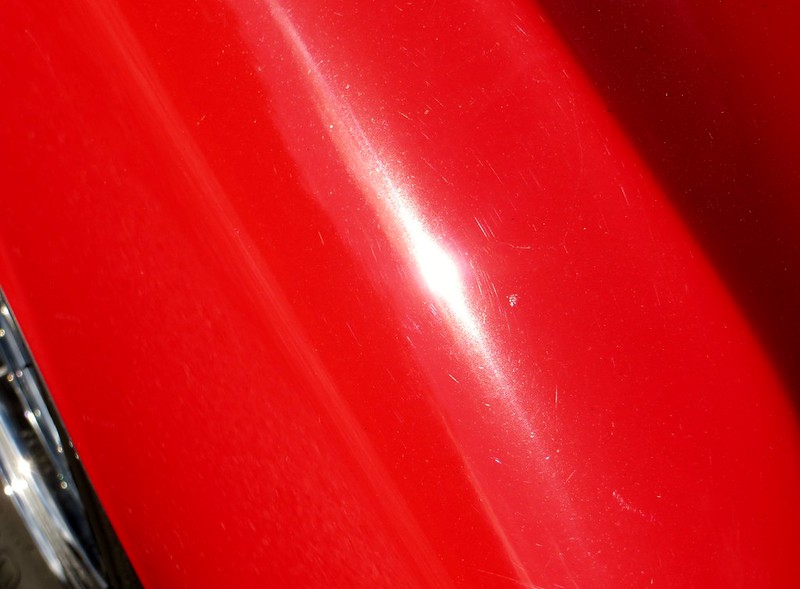
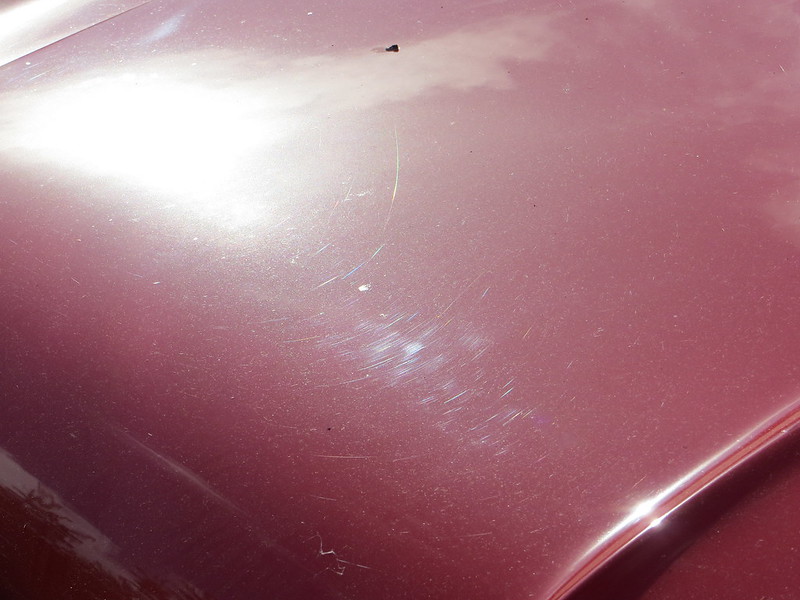
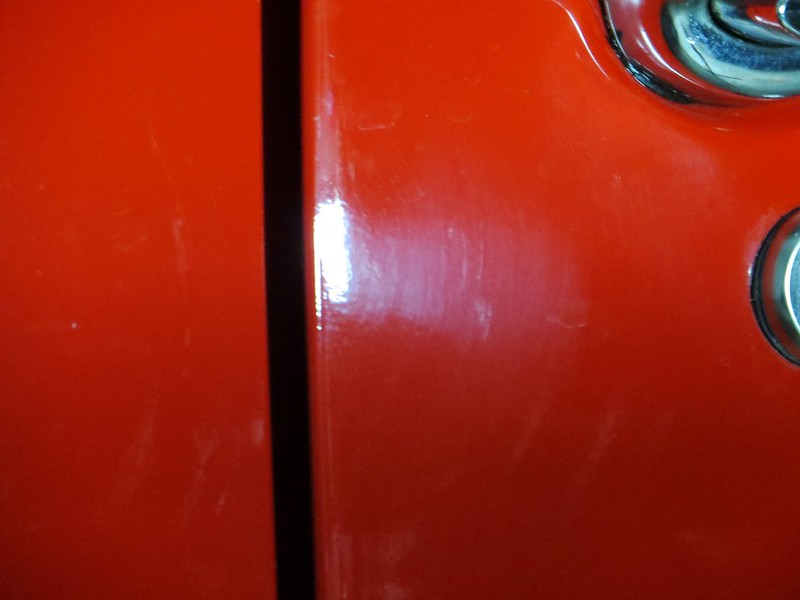
<span style="font-family:georgia, serif;">Driver`s side rear quarter showing sanding marks which were never removed in 1998
IMG_7276 by GabeDellinger, on Flickr
`
`
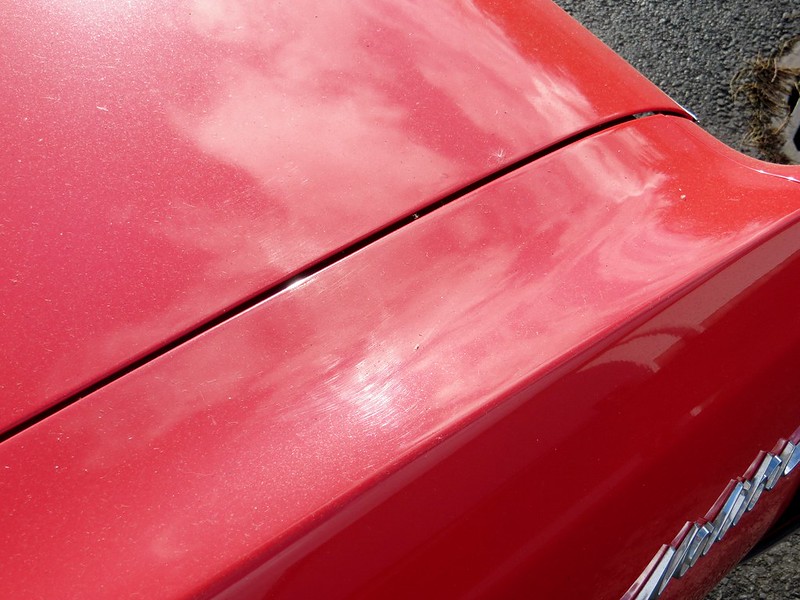
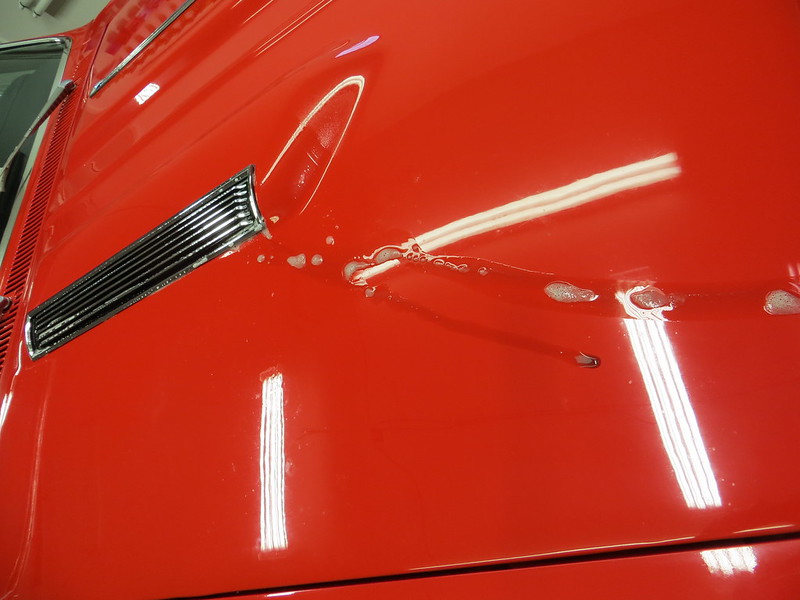
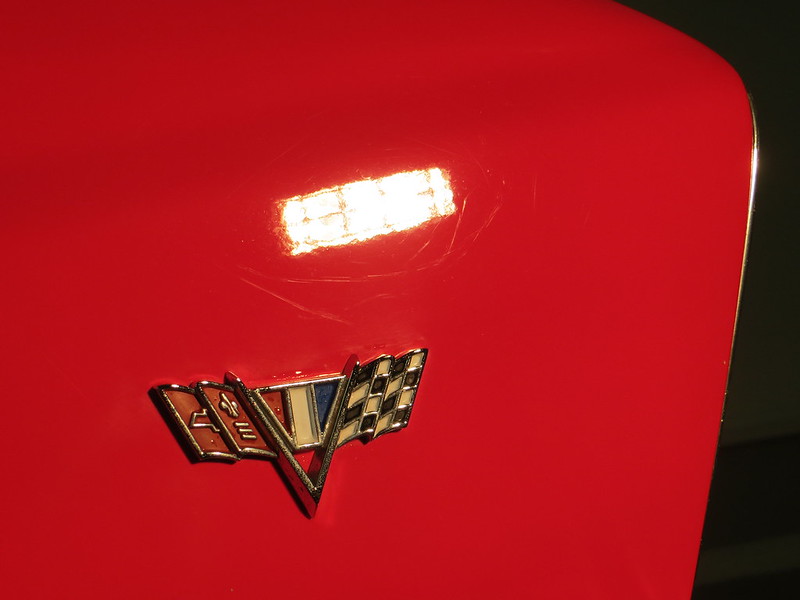
<span style="font-family:georgia, serif;">Hood showing damage from car cover`
IMG_7275 by GabeDellinger, on Flickr
`
âA`cobweb`here... a cobweb there
IMG_7270 by GabeDellinger, on Flickr
`
IMG_7326 by GabeDellinger, on Flickr
`
<span style="font-family:georgia, serif;">Condition of original vinyl top...
IMG_7286 by GabeDellinger, on Flickr
`
IMG_7287 by GabeDellinger, on Flickr
`
Wash/Decon-
`
Meg`s Rinse Free Express Wash (GDM)
Meg`s APC 10:1 & 5:1
Various brushes
Goof off
Meg`s Mirror Glaze Clay, medium
Meg`s Last Touch 1:1
`
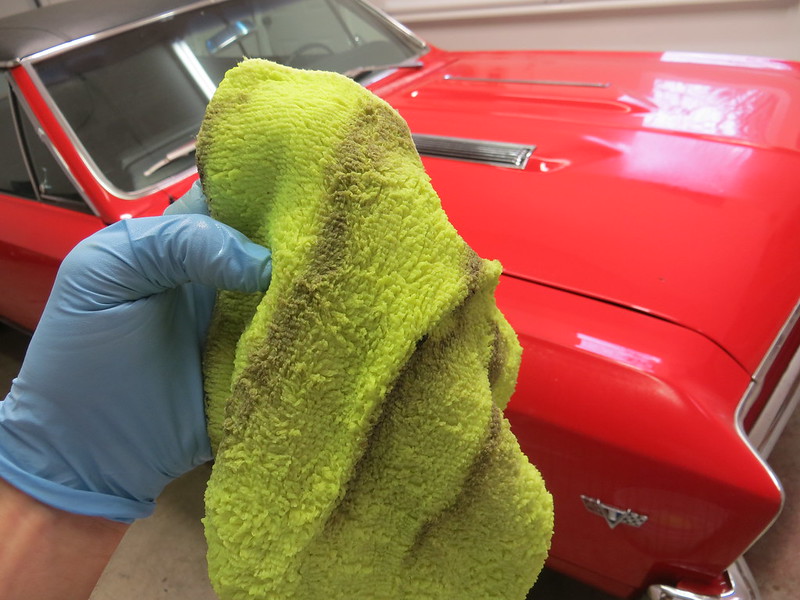
<span style="font-family:georgia, serif;">I usually pre-spray the panel and then wipe...
IMG_7381 by GabeDellinger, on Flickr
`
IMG_7371 by GabeDellinger, on Flickr
`
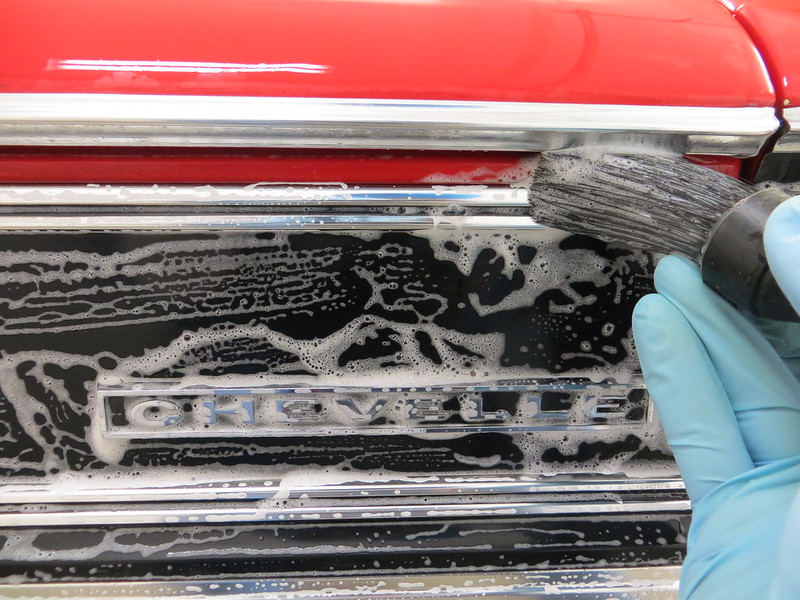
<span style="font-family:georgia, serif;">Quite a bit of brush work...
IMG_7375 by GabeDellinger, on Flickr
`
<span style="font-family:georgia, serif;">Dirty!
IMG_7380 by GabeDellinger, on Flickr
`
IMG_7392 by GabeDellinger, on Flickr
`
IMG_7399 by GabeDellinger, on Flickr
`
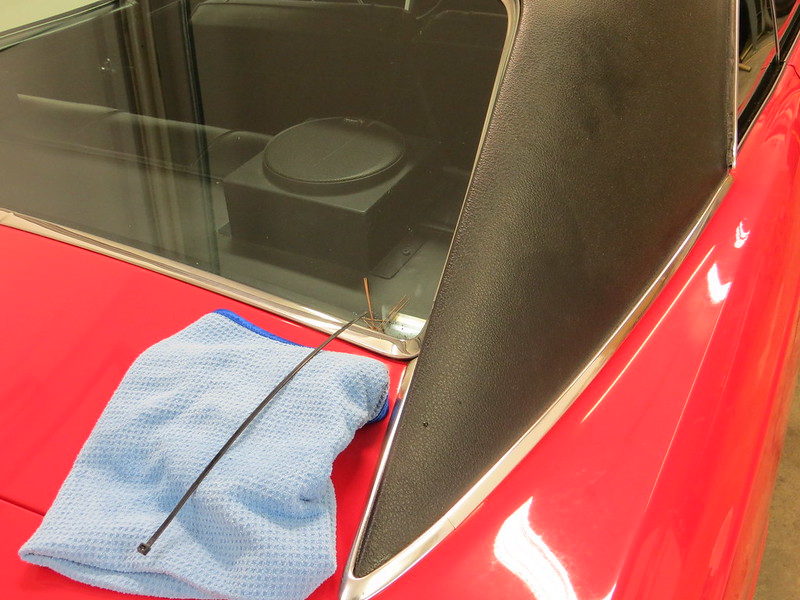
<span style="font-family:georgia, serif;">Quite a bit of `air` work... (I find it imperative to use compressed air to get all the water and soap out of trim/ crevices/ etc... all pictures showing places after being dried... amazing what`s left behind in trim areas on older classics. `Another reason I do rinseless washes exclusively on these types.)
IMG_7390 by GabeDellinger, on Flickr
`
IMG_7385 by GabeDellinger, on Flickr
`
IMG_7400 by GabeDellinger, on Flickr
`
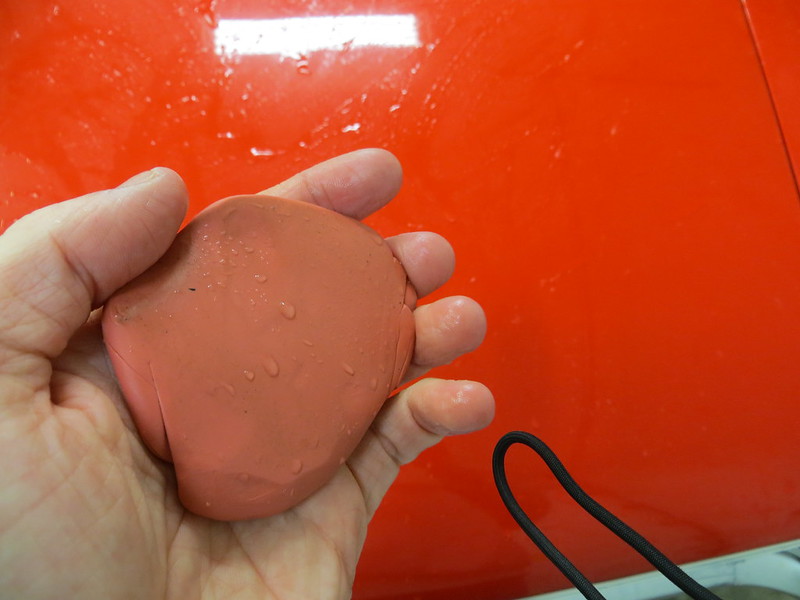
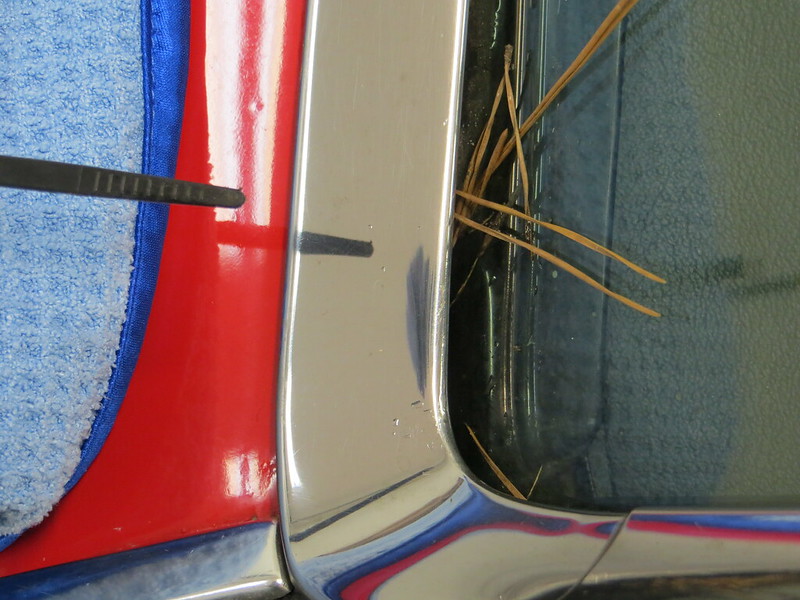
<span style="font-family:georgia, serif;">Clay didn`t pick up much... but then again, the car hasn`t been driven extensively
IMG_7433 by GabeDellinger, on Flickr
`
<span style="font-family:georgia, serif;">More goodies as I worked around the car, working wash, bush, air, and clay a panel at a time...
IMG_7424 by GabeDellinger, on Flickr
`
IMG_7423 by GabeDellinger, on Flickr
`
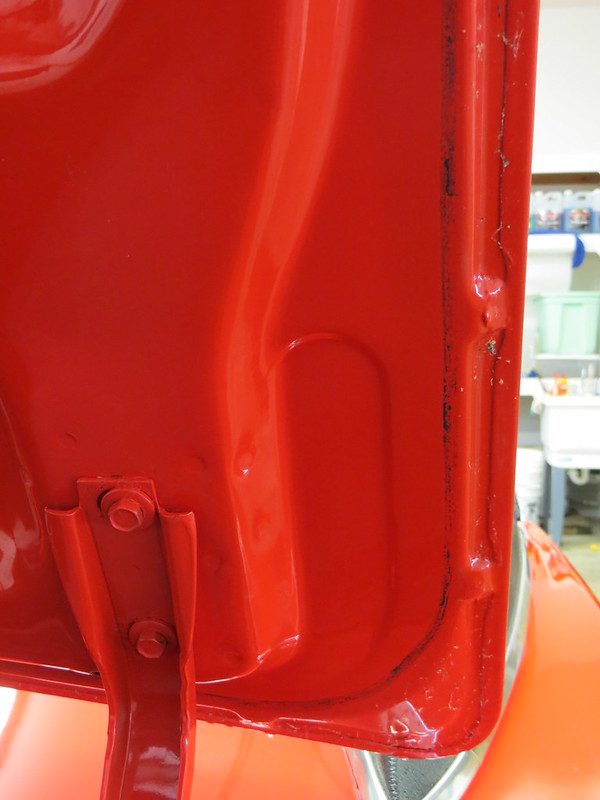
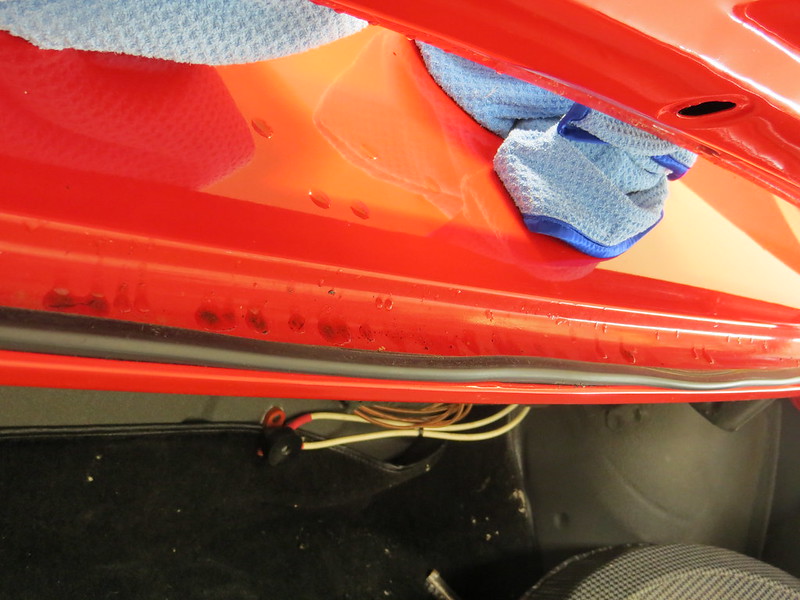
<span style="font-family:georgia, serif;">And bottom of the decklid and jambs received some attention... (black `ring` is weather stripping trasnfer)
IMG_7404 by GabeDellinger, on Flickr
`
IMG_7406 by GabeDellinger, on Flickr
`
<span style="font-family:georgia, serif;">Meg`s Rinse Free Wash... doing it`s thang
IMG_7409 by GabeDellinger, on Flickr
`
<span style="font-family:georgia, serif;">Called in some Goof Off and a foam pad...
IMG_7415 by GabeDellinger, on Flickr
`
<span style="font-family:georgia, serif;">All better
IMG_7421 by GabeDellinger, on Flickr
`
`
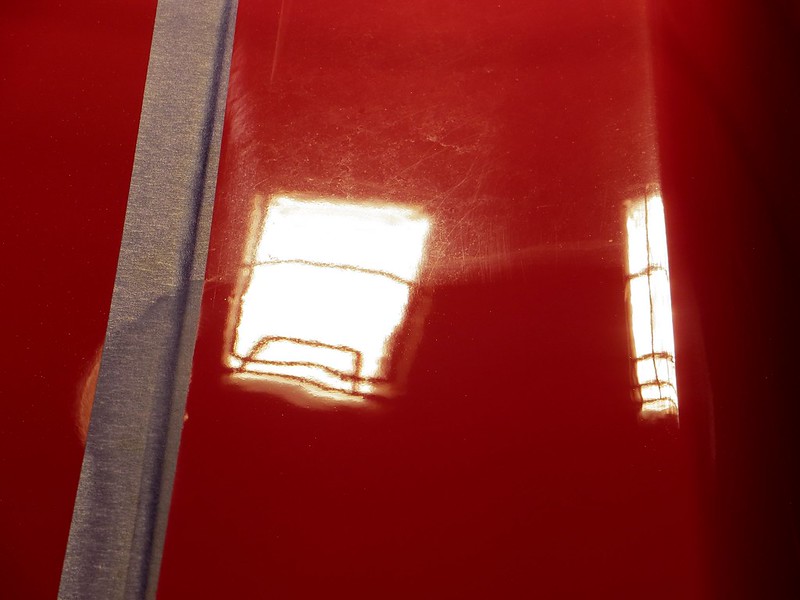
<span style="font-family:georgia, serif;">Inspection After Decon, under the lights
IMG_7437 by GabeDellinger, on Flickr
`
IMG_7461 by GabeDellinger, on Flickr
`
IMG_7500 by GabeDellinger, on Flickr
`
IMG_7496 by GabeDellinger, on Flickr
`
IMG_7503 by GabeDellinger, on Flickr
`
IMG_7509 by GabeDellinger, on Flickr
`
IMG_7511 by GabeDellinger, on Flickr
`
The correction process was pretty clumsy on my part... it took a while to find what the paint wanted. `I started with Rupes 21, D300, and Megs MF cutting pad. `It left a good finish but it was taking too long to cut. `The DuPont Chromabase was proving to be the hardest paint I`ve come across yet... but at the same time being a little finicky to finish down haze/mar free.
`
I ended up doing the following...
Makita Rotary/ 5/1" HD lambswool pad/ M100 @ 1500 (lowest speed my old Makita will go)
Rupes/Orange B&S 5.5"/ HD Uno
Rupes/White B&S 5.5"/ M205
Rupes/Black B&S 5.5"/ HD Polish
`
Smaller areas...
HF D/A / 3" Meg`s Burgundy/ M101
.........../ 3" White B&S/ M205
.........../ 3" Black B&S/ HD Polish
`
<span style="font-family:georgia, serif;">I like to be organized when starting off...
IMG_7560 by GabeDellinger, on Flickr
`
<span style="font-family:georgia, serif;">Good amount of build on the car...
IMG_7363 by GabeDellinger, on Flickr
`
<span style="font-family:georgia, serif;">Some 50/50s
IMG_7543 by GabeDellinger, on Flickr
`
IMG_7556 by GabeDellinger, on Flickr
`
<span style="font-family:georgia, serif;">Note to self... don`t use `cheap` tape
IMG_7563 by GabeDellinger, on Flickr
`
<span style="font-family:georgia, serif;">Extra care was taken with the DP-90... black 3" pad and DG501 for a very light clean up of area below deck lid. `The light sheen is how it should look.
IMG_7627 by GabeDellinger, on Flickr
`
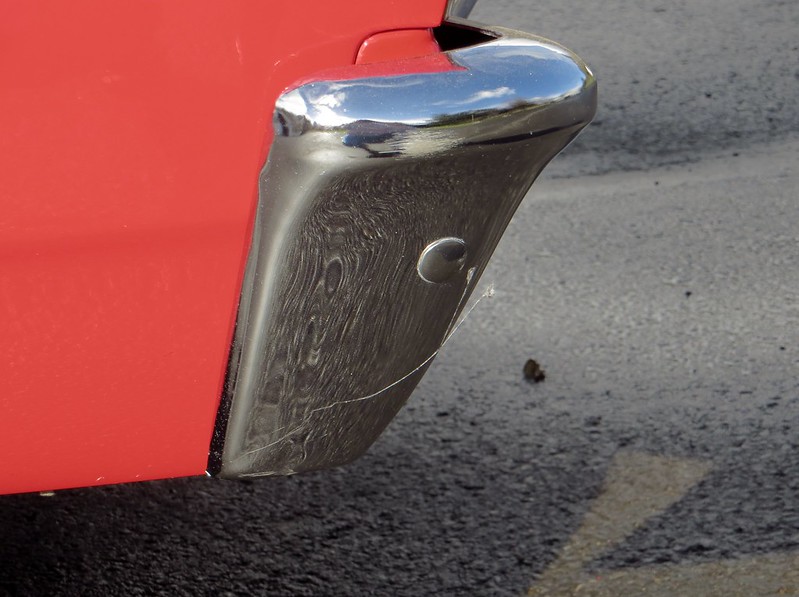
<span style="font-family:georgia, serif;">A little chrome work... but truth be told, all the stainless and chrome needs to be removed and polished. `Happy with a green pad and DG 501 for now.
IMG_7638 by GabeDellinger, on Flickr
`
IMG_7516 by GabeDellinger, on Flickr
`
IMG_7518 by GabeDellinger, on Flickr
`
`
`
<u>To be continued... give me an hour or so...</u>
`
`
`
`
`
`
`
`
`
Results 1 to 15 of 30
Threaded View
-
03-24-2014, 06:46 PM #1


- Join Date
- Feb 2013
- Location
- WA
- Posts
- 410
- Post Thanks / Like

Former Pro, Now Enthusiast


 Reply With Quote
Thread Information
Users Browsing this Thread
There are currently 1 users browsing this thread. (0 members and 1 guests)
Similar Threads
-
`67 Chevelle SS Convertible, extensive exterior detail - Rasky`s Auto Detailing
By RaskyR1 in forum Click & Brag -The Detailers ShowcaseReplies: 28Last Post: 07-15-2012, 03:49 PM -
Resto-mod 572 1967 Chevelle ala Picus.
By imported_Picus in forum Click & Brag -The Detailers ShowcaseReplies: 34Last Post: 02-24-2009, 10:28 AM -
1967 Corvette Stingray Convertible Exterior Detail (43 PICS)
By Autogeek in forum Click & Brag -The Detailers ShowcaseReplies: 18Last Post: 11-20-2008, 08:34 AM -
1967 Corvette Stingray Convertible Exterior Detail (43 PICS)
By Autogeek in forum The Detailers ShowcaseReplies: 13Last Post: 11-18-2008, 11:32 AM -
1967 Chevelle*Lots of pics*
By LandonZ in forum Click & Brag -The Detailers ShowcaseReplies: 18Last Post: 10-06-2007, 12:38 AM
Bookmarks