

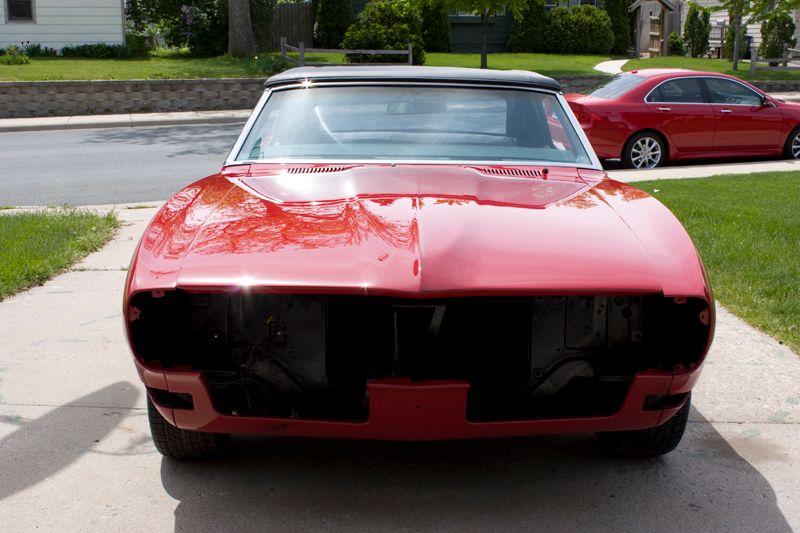
1968 Pontiac Firebird, Full Wet Sand and Buff.
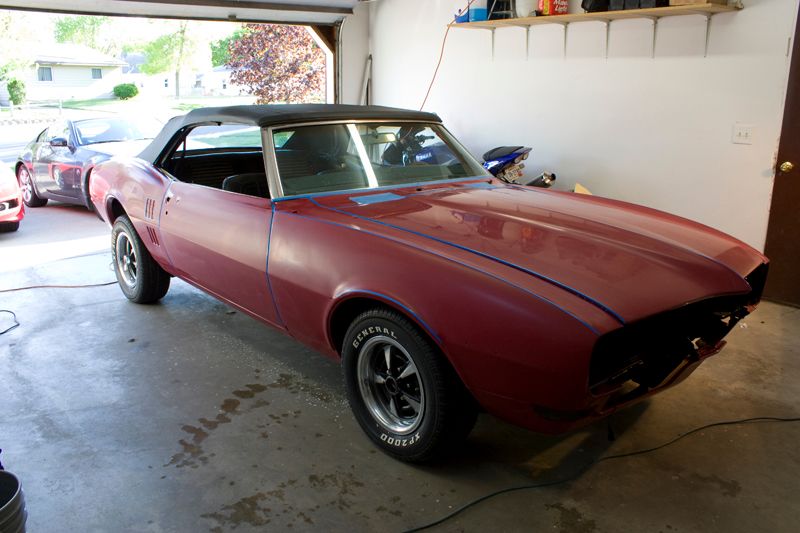
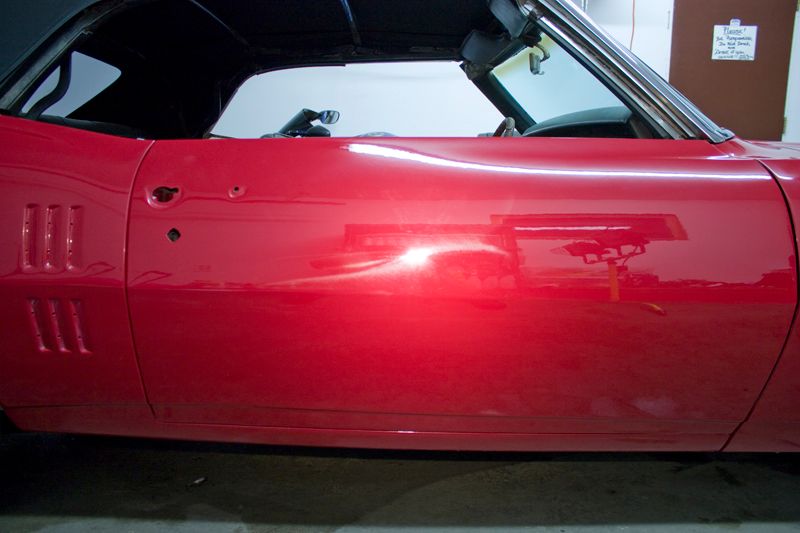
This fine example of classic muscle actually belongs to one of my dealer accounts from back in the day when I worked for a high volume shop. The owner had purchased the vehicle as a personal collector/project car, and like most restorations, it has been a long tedious process over several years and it apparently lost some steam along the way. For those of you whoâve restored a car of this magnitude before you more than likely know exactly what Iâm talking about.In fact, this car had actually been painted about ten years ago and was then tucked away for what turned out to be a very long hibernation. As she awoke from her long slumber this spring she was treated to a new convertible top, exhaust, tune, and finally an extreme make over by yours truly.
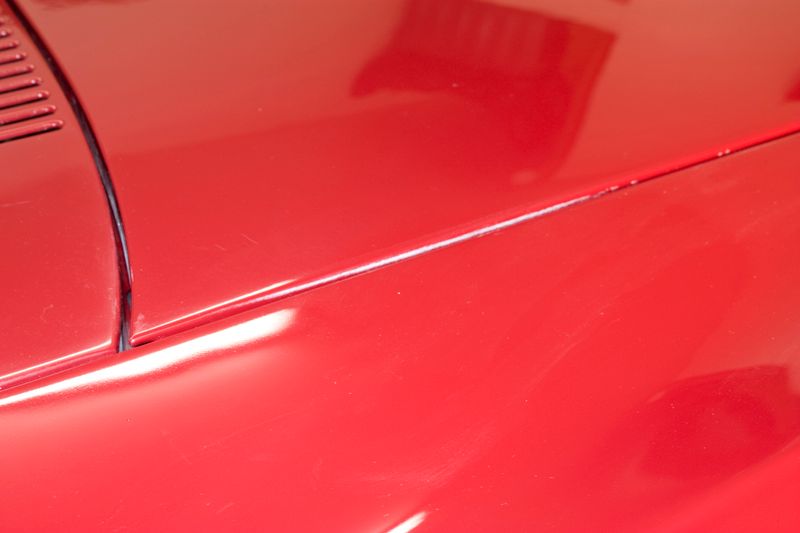
Prior to delivery I was under the impression that the car had not been cut and buffed yet, but it was blatantly obvious upon seeing the car that it had already been done by the painter. Unfortunately, that was also the era where the ârocks in the bottleâ 3M compound was widely used by body shops which left very deep marring throughout the finish. While the finish was pretty smooth as far as orange peel, the paint had shrunk down considerably over the last 10 years which required some additional leveling.
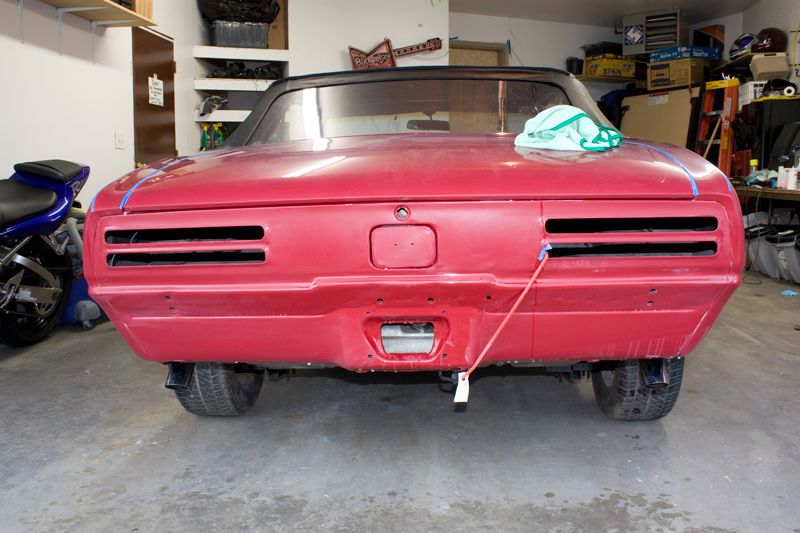
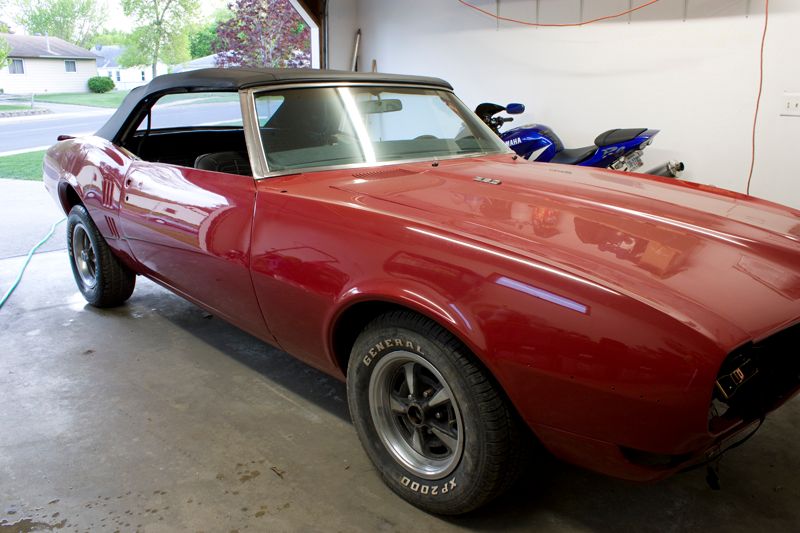
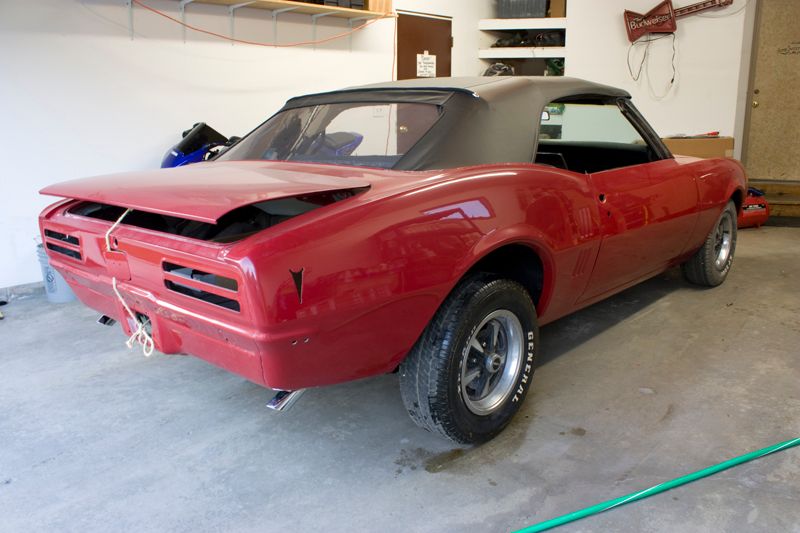
The car actually arrived with 99% of the trim and chrome off the car, which is definitely a plus when youâre wet sanding. Here is how she looked upon arrival.
As you can see the painter was nice enough to leave me some 10 year old compound (concrete) left behind in cracks and throughout the vehicle.
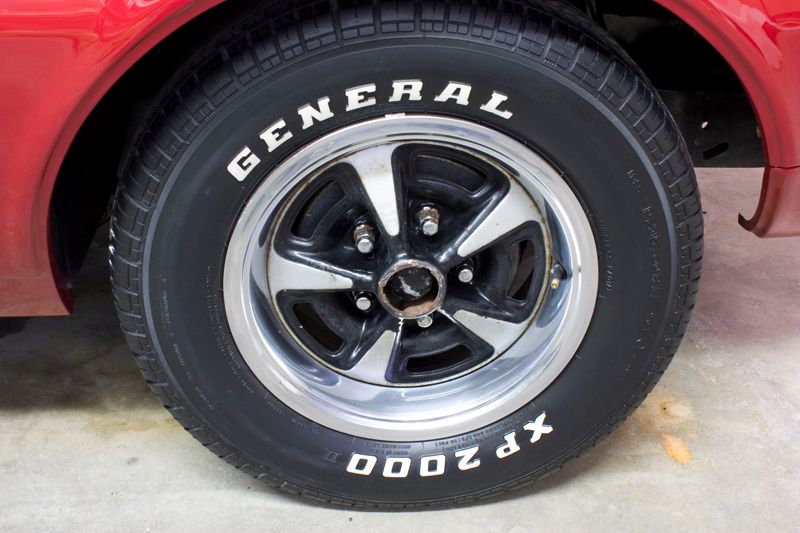
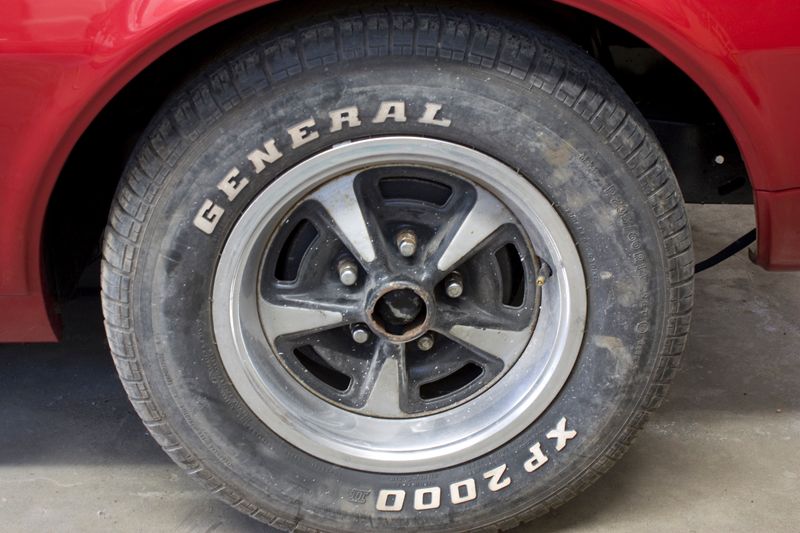
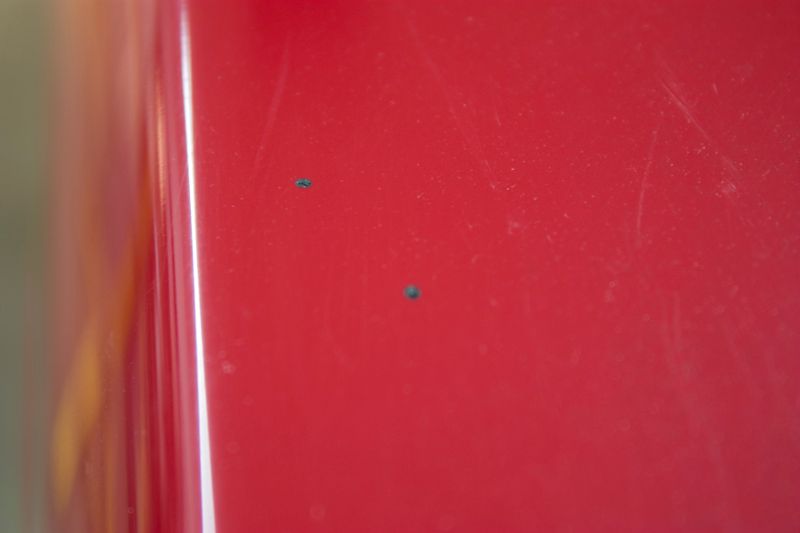
Compound splatter on the wheels
âLike removes likeâ, a good friend once told me. M105 on a MF towel worked great for removing the left over compound in the jambs.
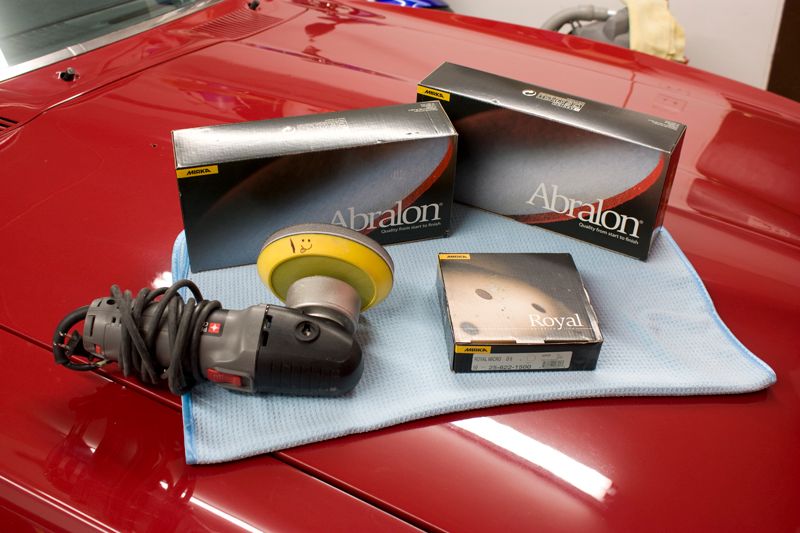
Having had plenty of prior notice on this car I had decided to order up some Mirka sanding disks that Iâd been wanting to try for some time now. Normally 3M is my go to abrasive for sanding but several people I look up to had spoken highly of the Mirka abrasives and this car made for a great test subject. Below you can see the 1500 grit Mirka Royal Micro disks, and the 2000/4000 grit Mirka Abralon disks. However, since the car had already been leveled a good amount the 1500 disk were not used/required.
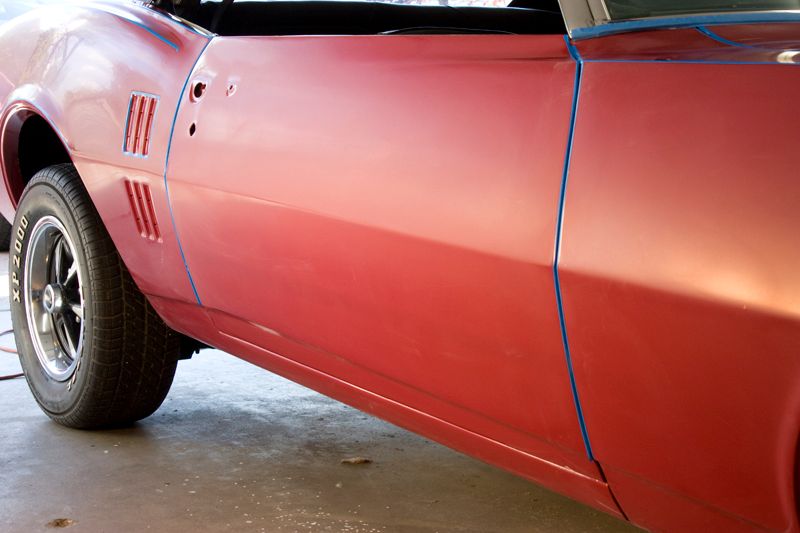
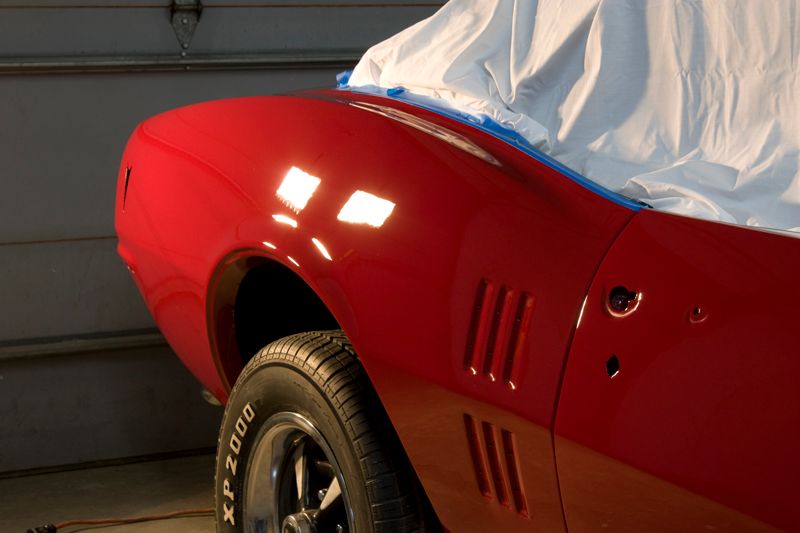
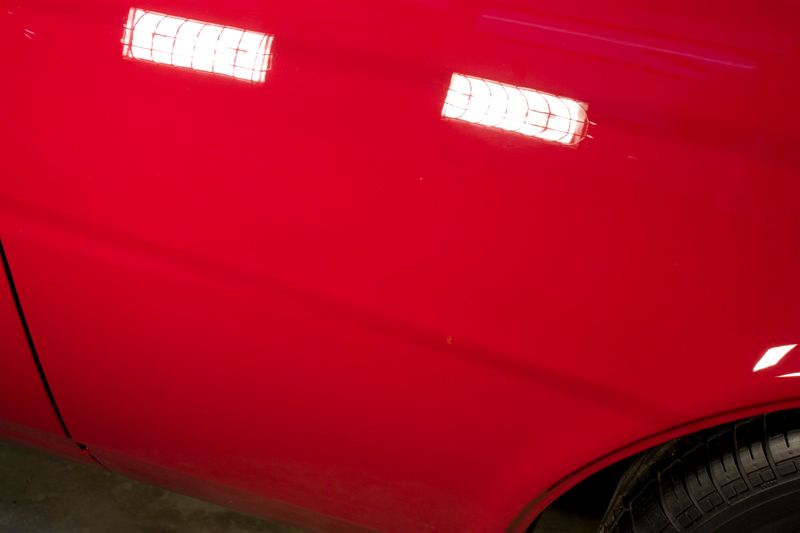
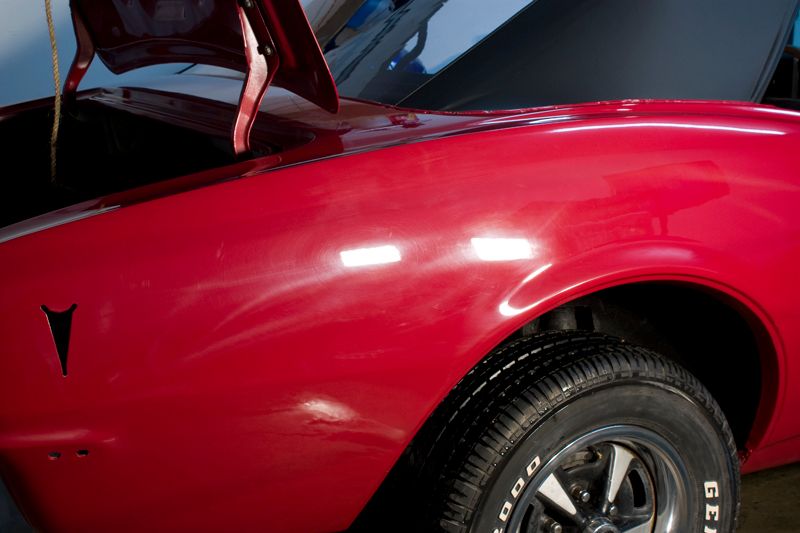
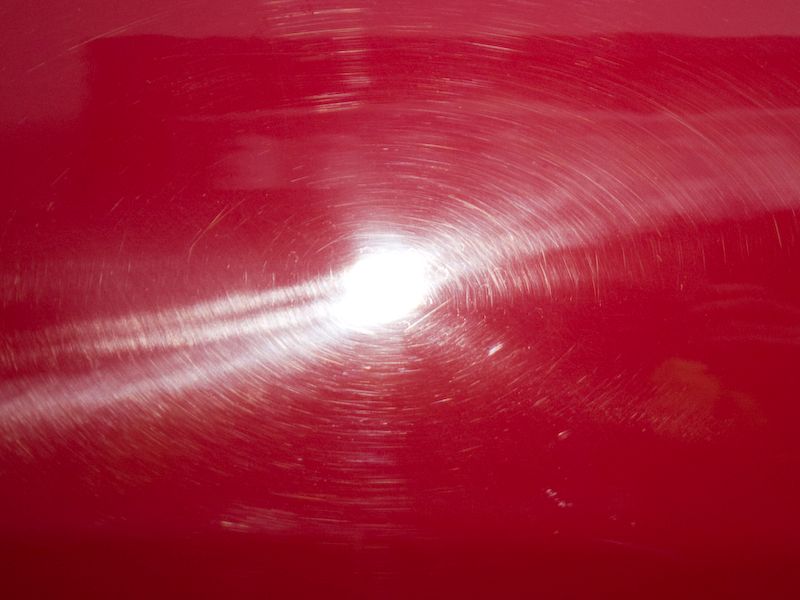
After a thorough wash with Chemical Guys Citrus wash nâ Clear mixed at a paint prep ratio, I pulled out my halogen and dual xenon lights to better inspect the finish. As you can see from the pics, the painter had left a LOT of deep marring and holograms in the paint.
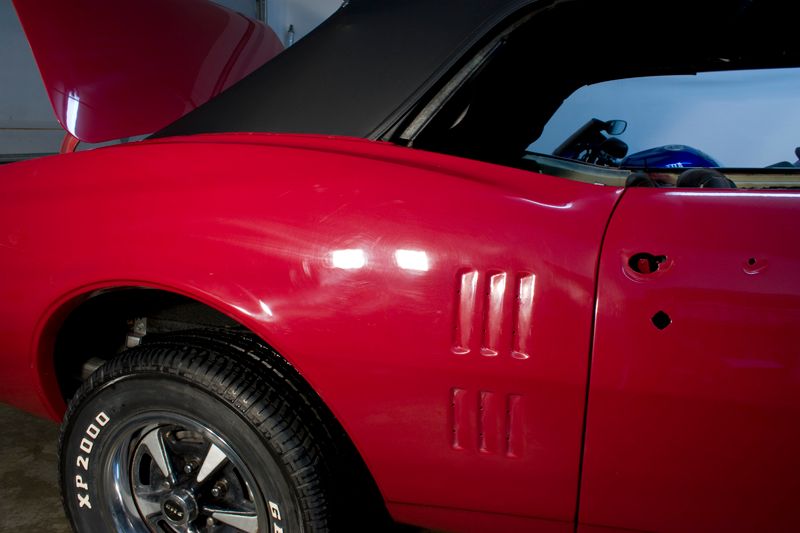
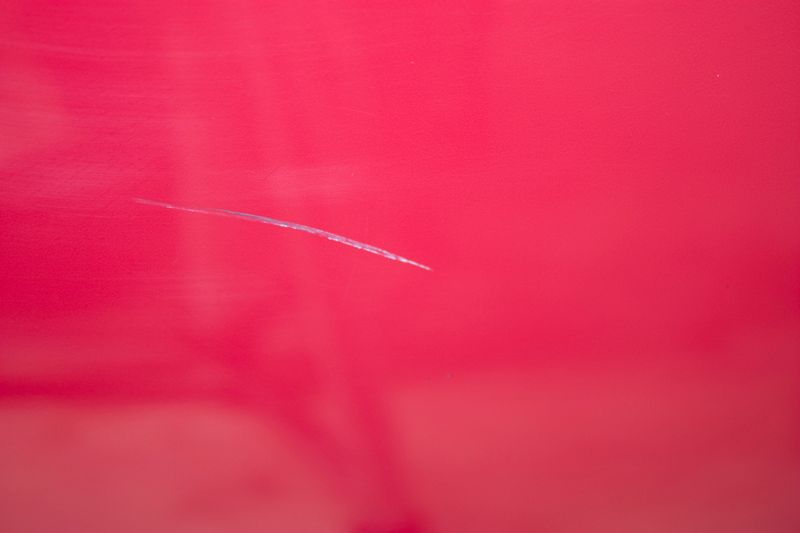
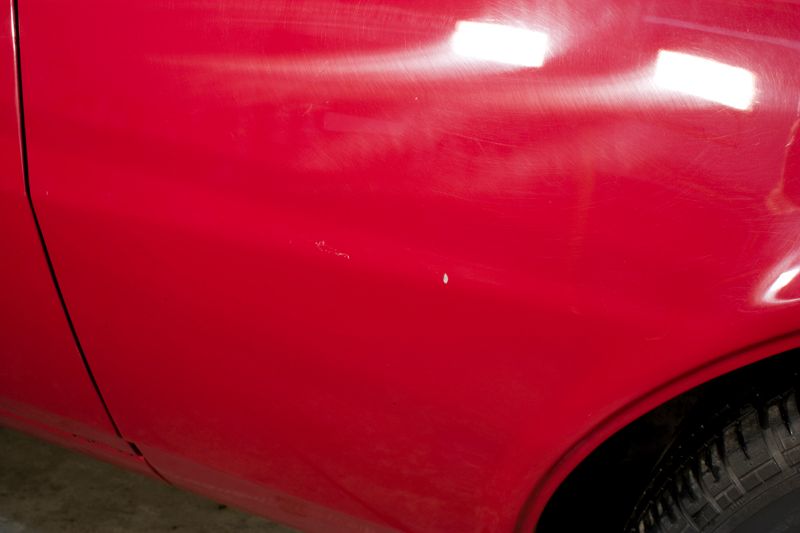
A few RIDS and chips had been inflicted over the years. Most the scratches were fully removed and chips were touched up.
Marring shown with the Brinkmann Dual Xenon light
There was also undercoating over spray on several areas of the car which was removed with Tarminator
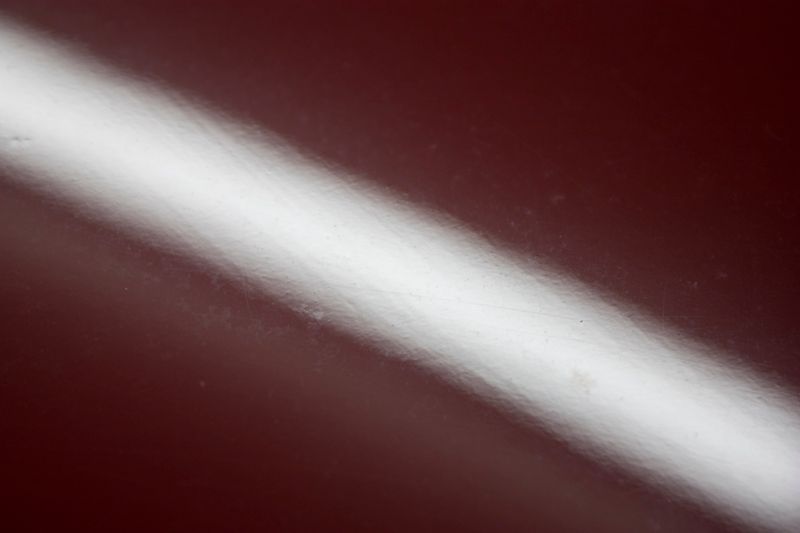
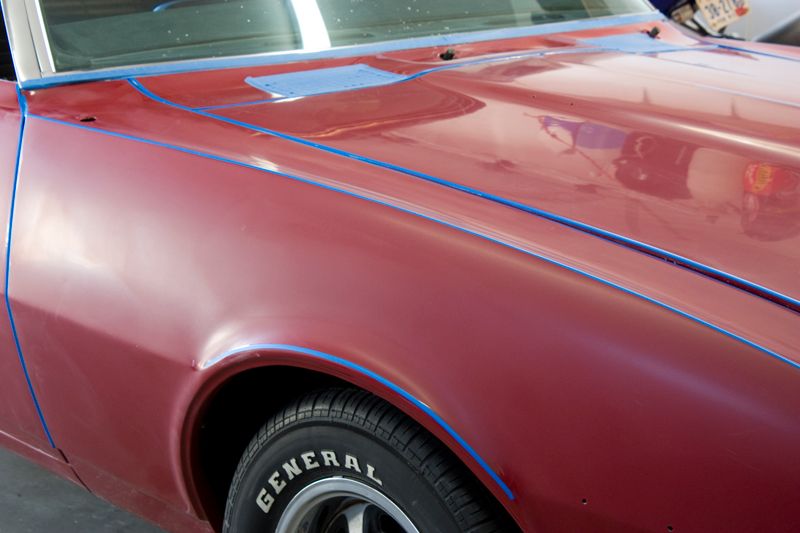
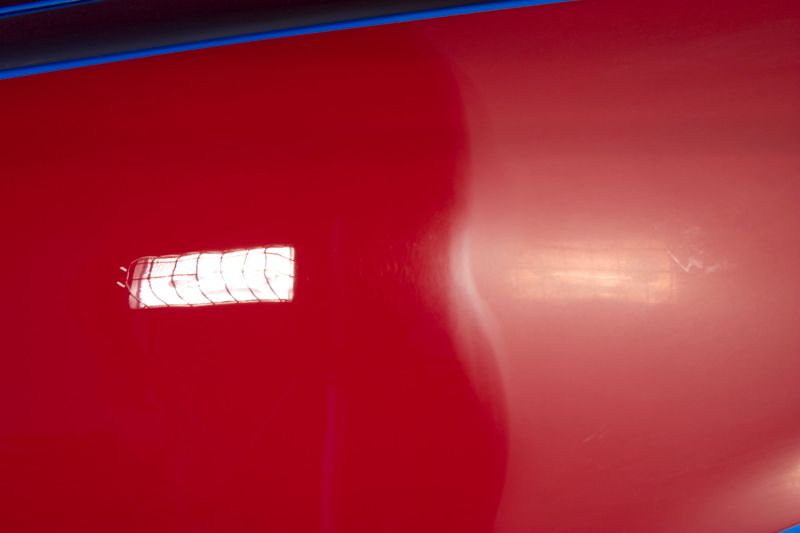
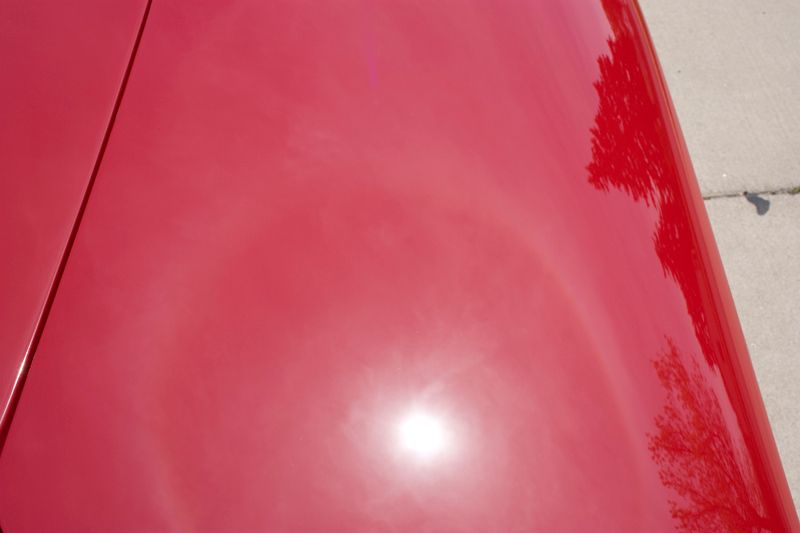
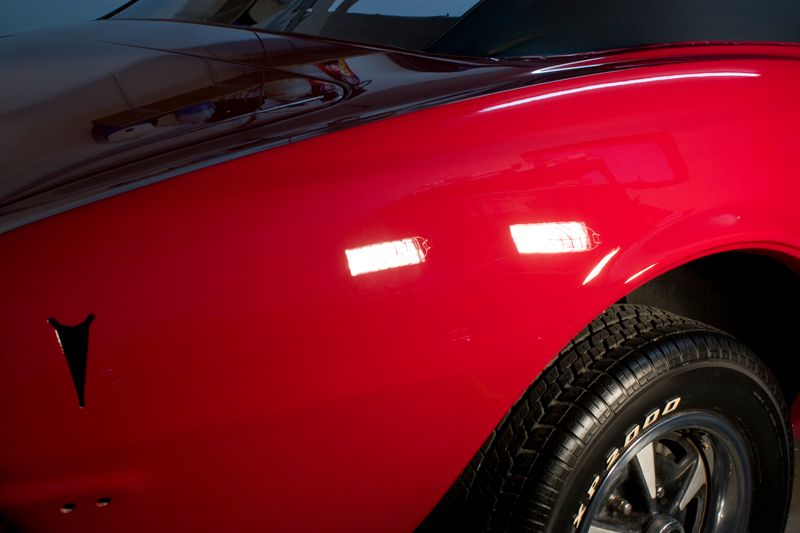
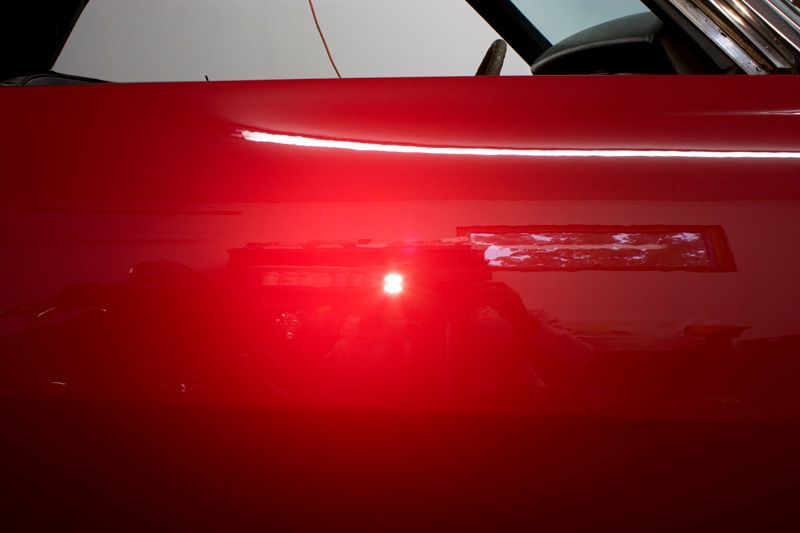
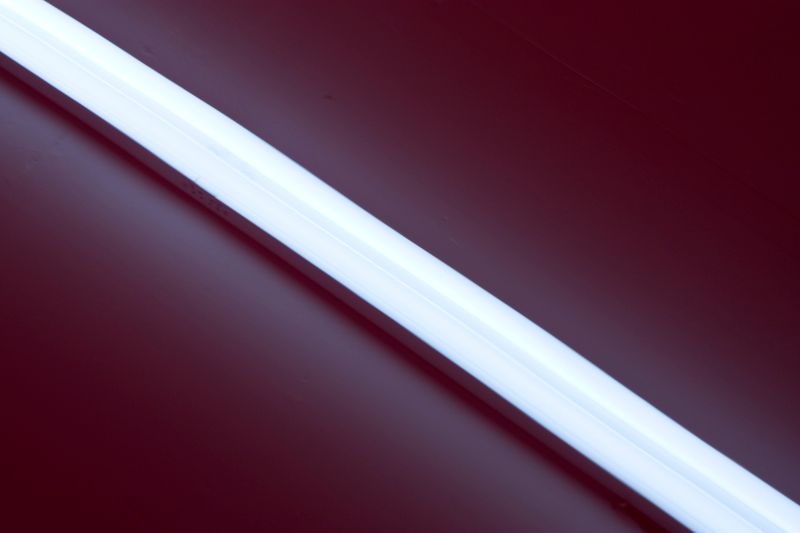
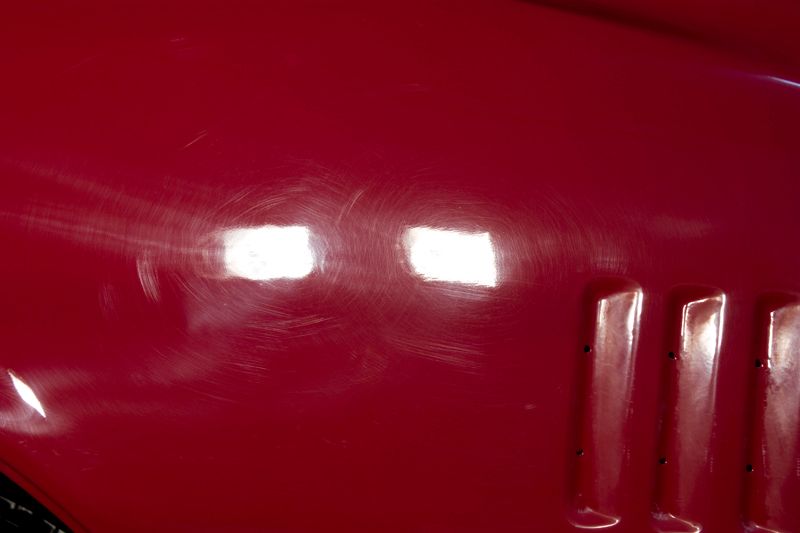
I zoomed in on the hood and took a pic to better show the amount of shrink which had occurred over the last ten years. As you can see this resulted in a dull distorted looking refectionâ¦.wait until you see the after pic of this one!
Results 1 to 15 of 65
-
05-13-2010, 10:54 AM #1Rasky's Auto Detailing


- Join Date
- Mar 2009
- Location
- Eden Prairie, MN
- Posts
- 5,011
- Post Thanks / Like

-
05-13-2010, 10:55 AM #2Rasky's Auto Detailing
- Join Date
- Mar 2009
- Location
- Eden Prairie, MN
- Posts
- 5,011
- Post Thanks / Like
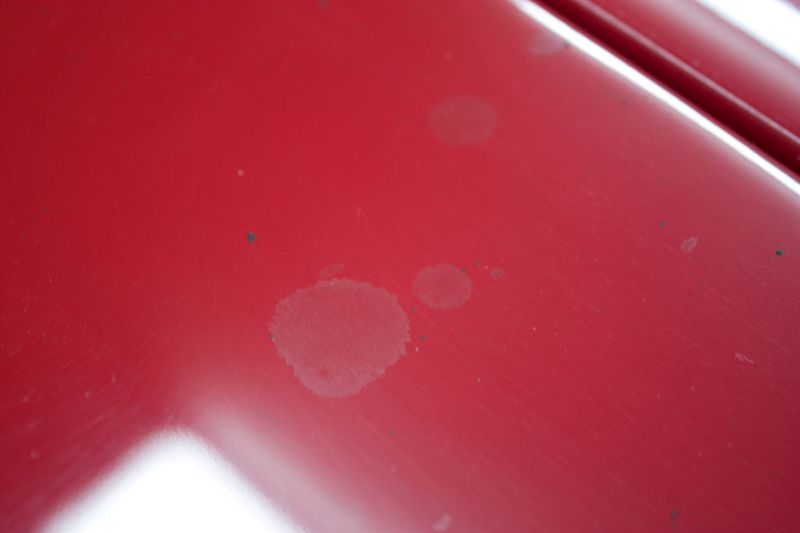
After the inspection was done and the majority of the undercoating was removed I clayed the paint using a mild clay and Meguiars Final Inspection as clay lube.
After claying 1/4 of the hood you can see the amount of surface defects that were still bonded to the paint.

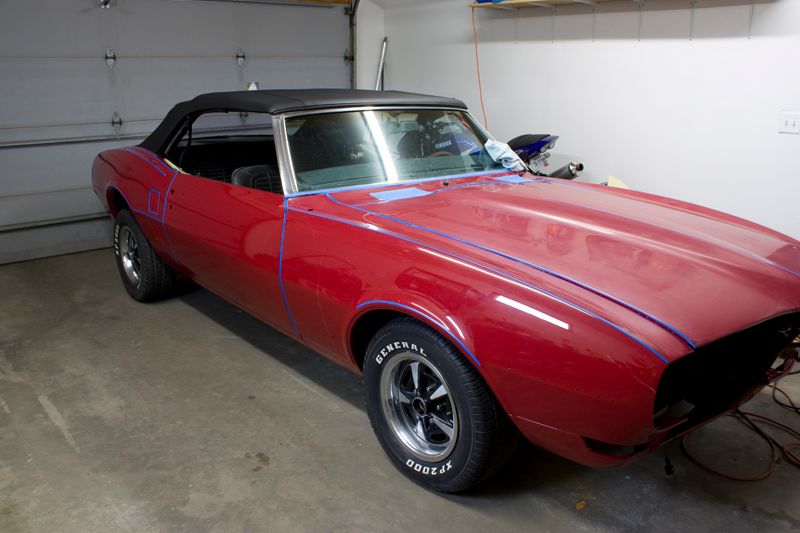
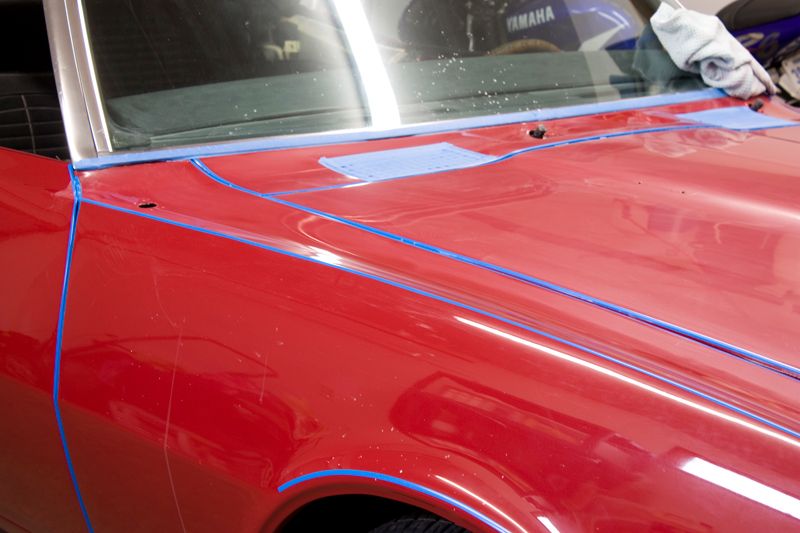
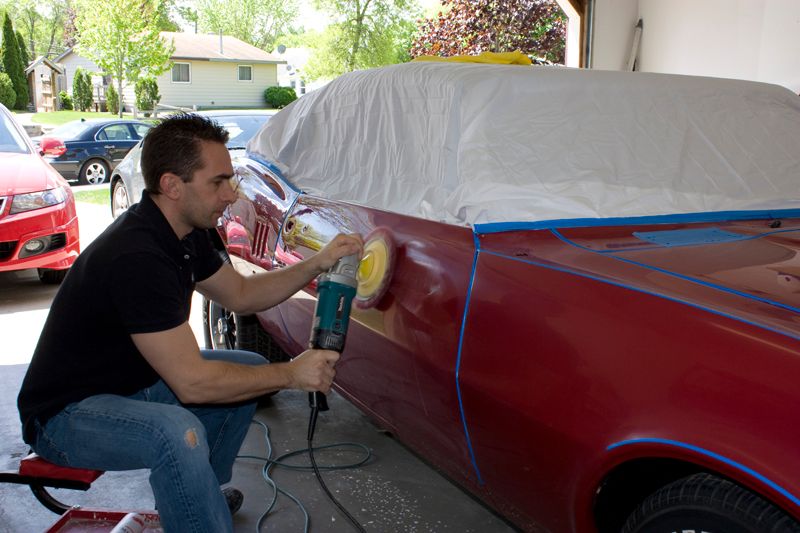
Once I had the surface prepped I then tapped off all my sharp edges using 1/4 3M fine line masking tape. Since the car was initially leveled by someone else, I wanted to avoid any possibility of a strike through on all sharp edges. 3M fine line tape is expensive, but its benefits are well worth the cost on an application such as this. If youâve never worked with this tape before I suggest picking up a roll and trying it out.

Car all taped up
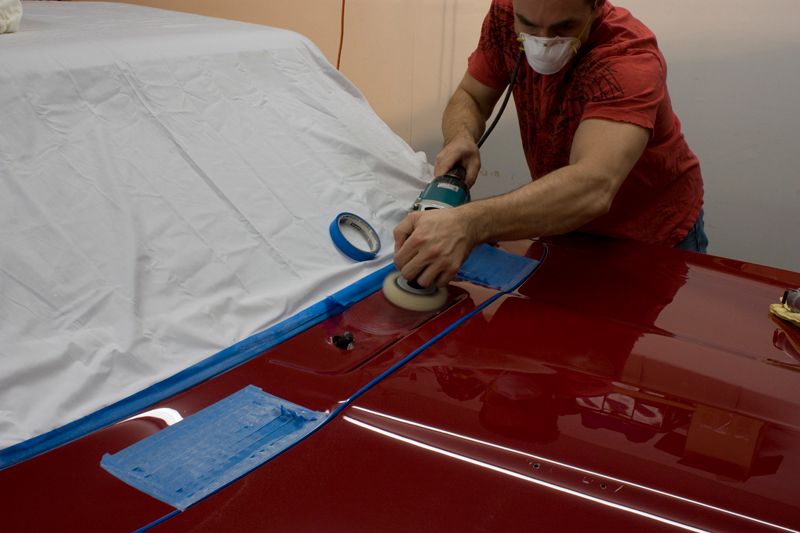
For the actual wet sanding I chose to go with the Abralon 2000 grit disks followed by the 4000 grit disks. All sanding was done via PCXP with a Mirka foam interface pad. I did notice that the Mirka interface pad was significantly stiffer than the 3M ones I have. Not sure if itâs because my 3Mâs pads are old and used or not but itâs just something that was noticed.
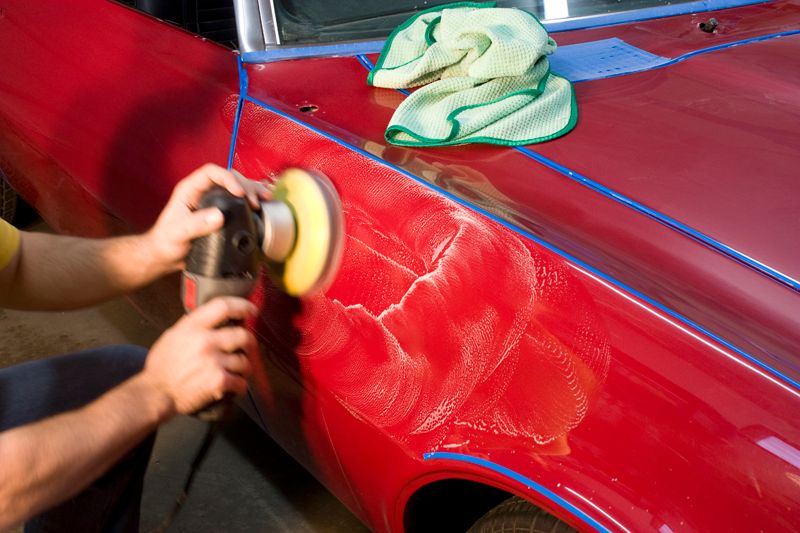
Some pics of the car all sanded waiting to be buffed.
This back section was the only area on the car where some hand sanding was needed and it had never actually been sanded before.
Normally I would finish sanding a car out with 3M Trizact 3000 grit disks, which makes the compounding step a breeze in itself, but these 4000 grit Abralon disks made it even easier!
My process for the sanding scratch removal and the refinement steps went as follows:
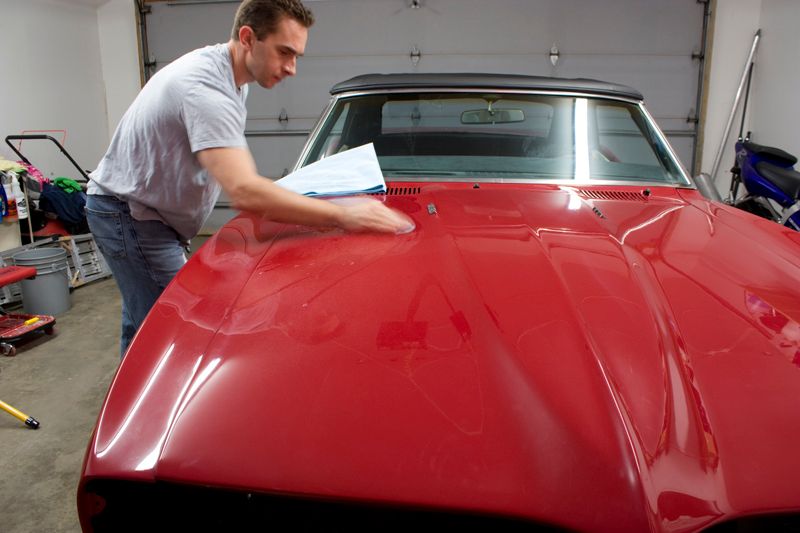
- M105 on the rotary equipped with a Meguiars Maroon Solo wool pad .
- M105 on the rotary equipped with a orange LC foam pad.
- M205 on the PCXP equipped with a black LC pad.
- 3M Ultrafina on the rotary equipped with a blue LC pad.
- (Some areas were done with 3â and 4â pads or by hand)
Initial buffing step
Hitting some tight areas with the 3â wool pad
Lowers got sanded too!

50/50 shots (Steps 1-3 only)
Deck lid turned out amazing!
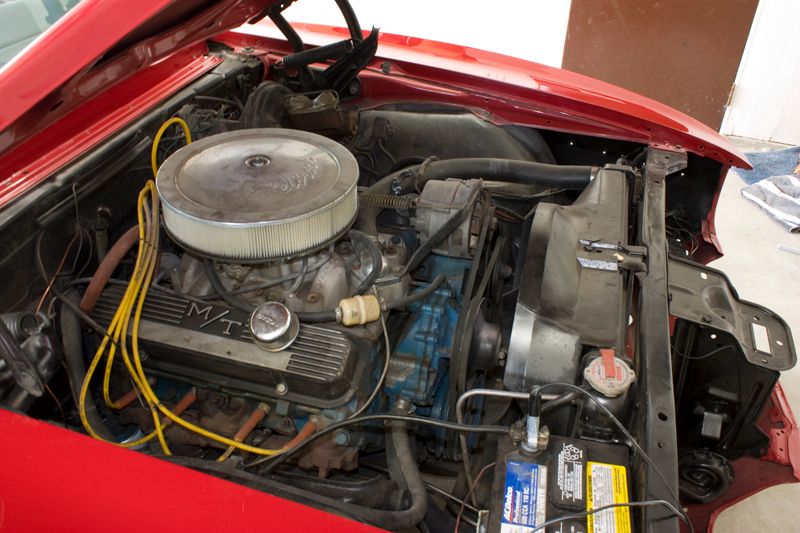
The engine bay was also to receive a quick cleanup to remove the 10 years of dustâ¦nothing crazy though.
-
05-13-2010, 10:56 AM #3Rasky's Auto Detailing
- Join Date
- Mar 2009
- Location
- Eden Prairie, MN
- Posts
- 5,011
- Post Thanks / Like
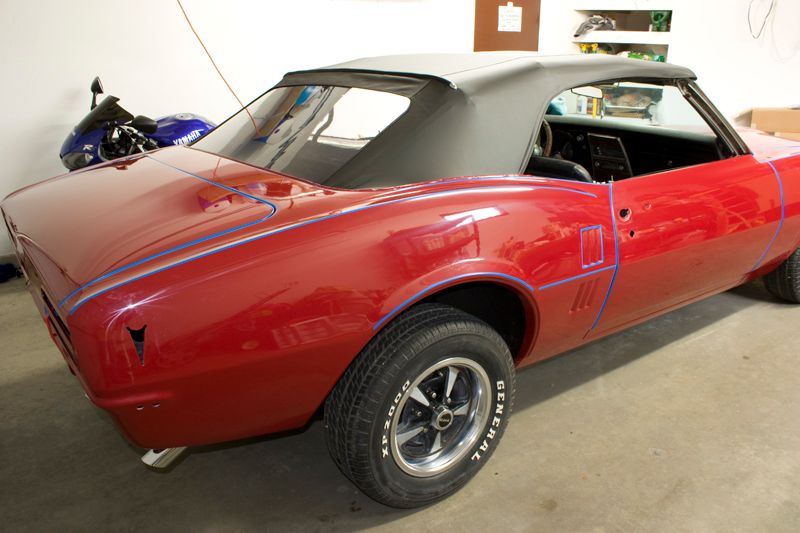
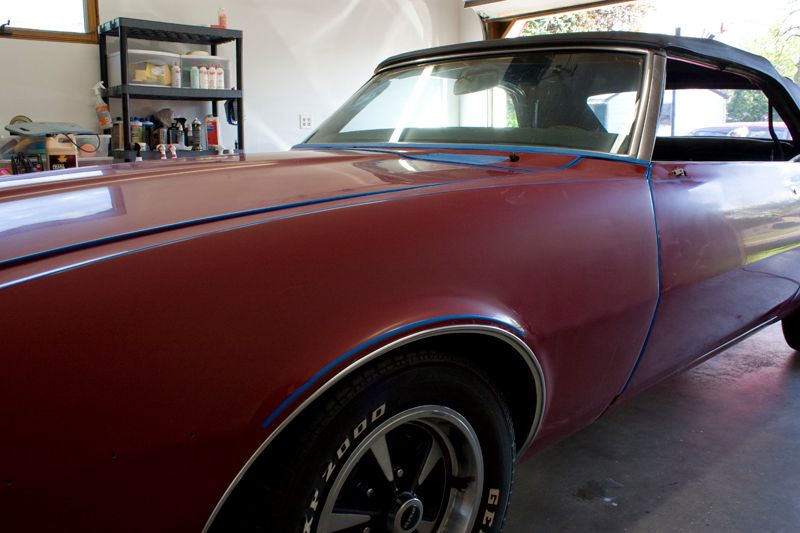
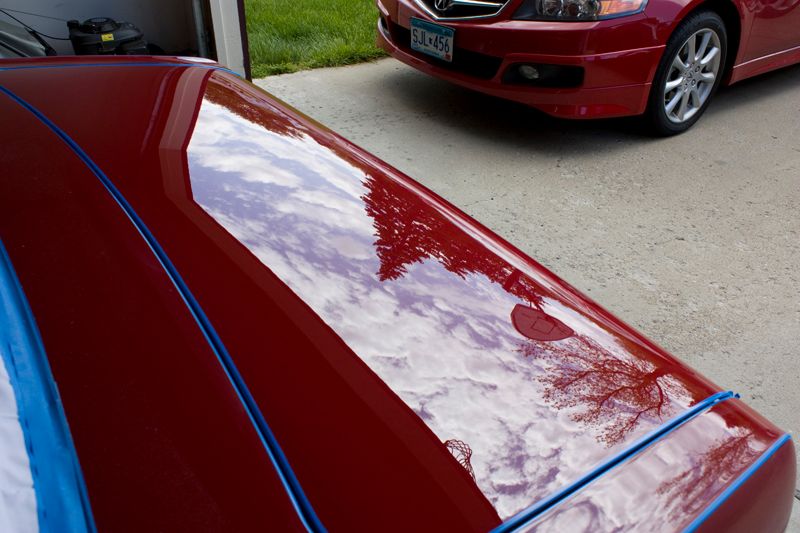
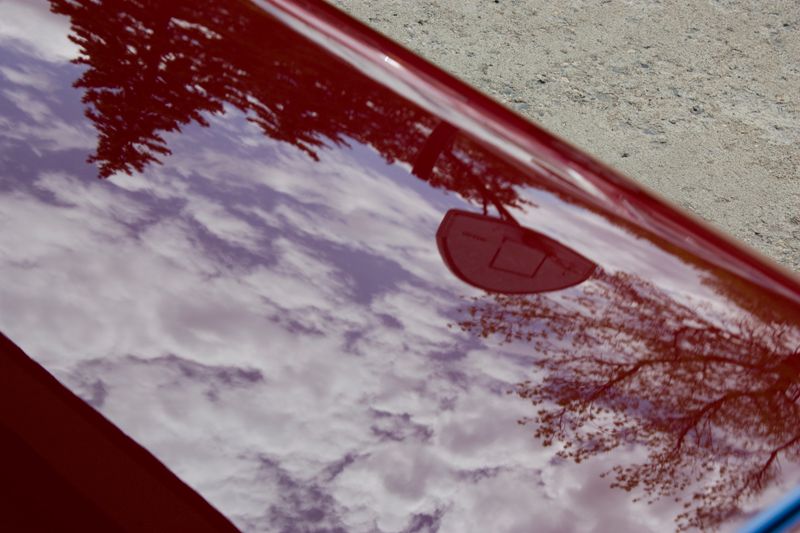
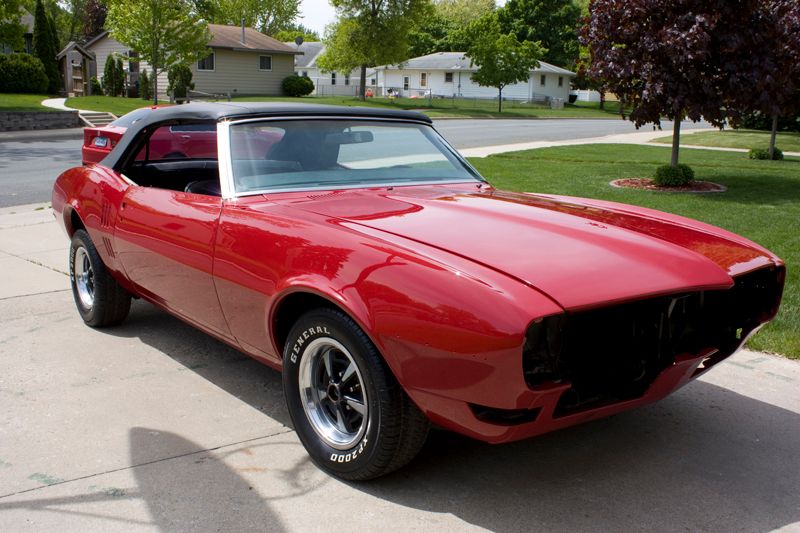
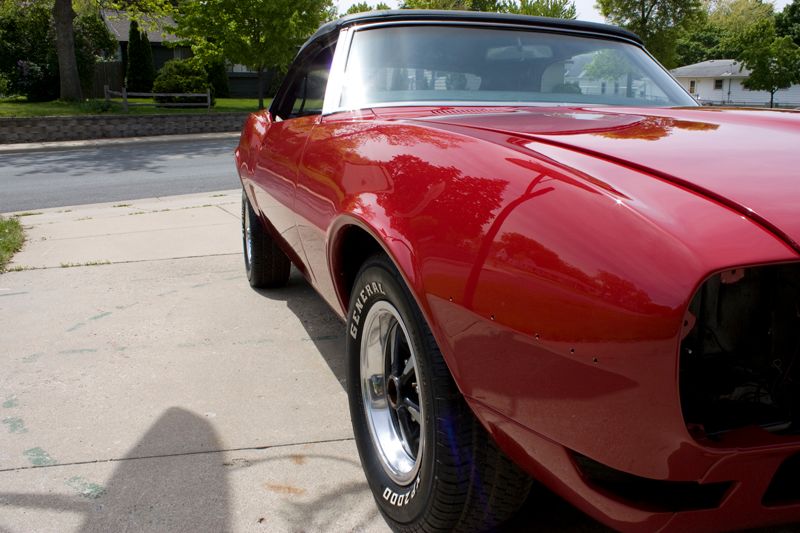
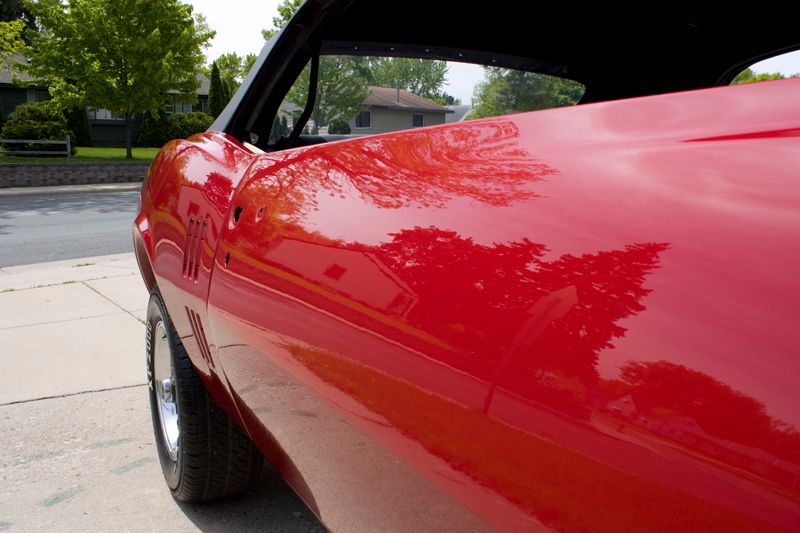
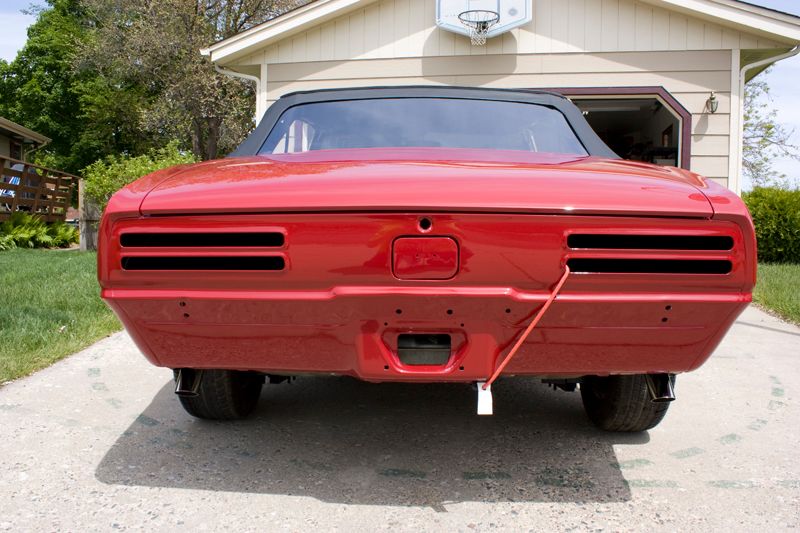
Now for some finished pics!
After the 3M Ultrafina
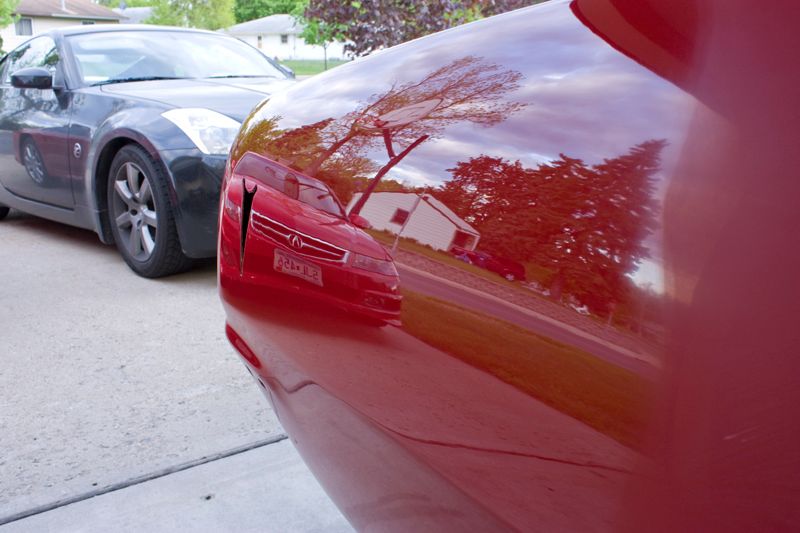
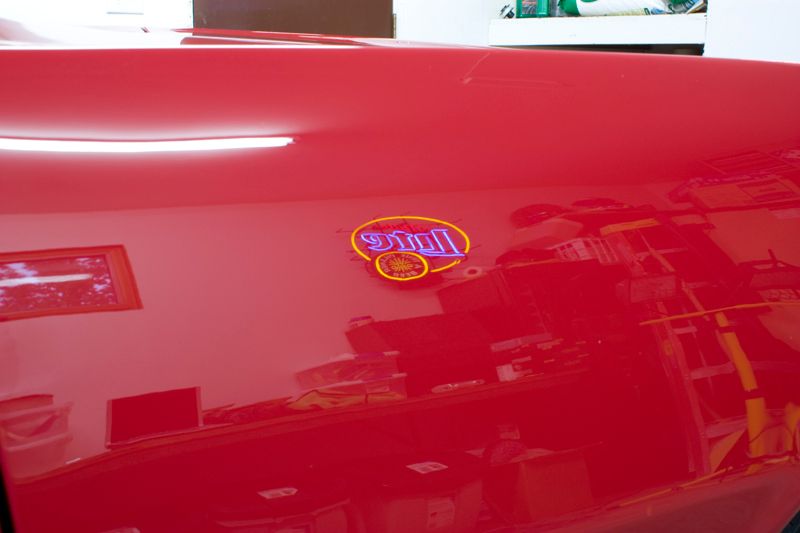
I pulled the car out for some sun pics...the sun had been a rare site the last few weeks and I lucked out on Mothers Day! LSP was 2x Blackfire Wet-Diamond
(I did later remove the black over spray on the front splash pan )
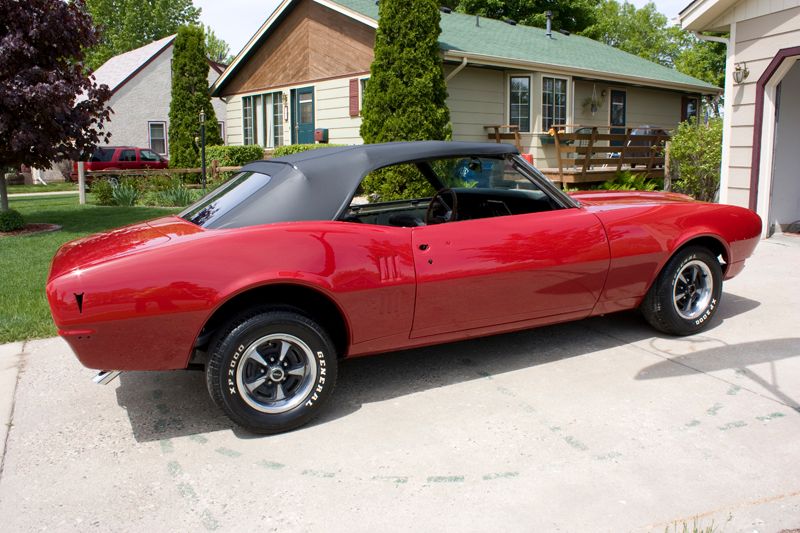
Rear deck lid

Love the hood pics
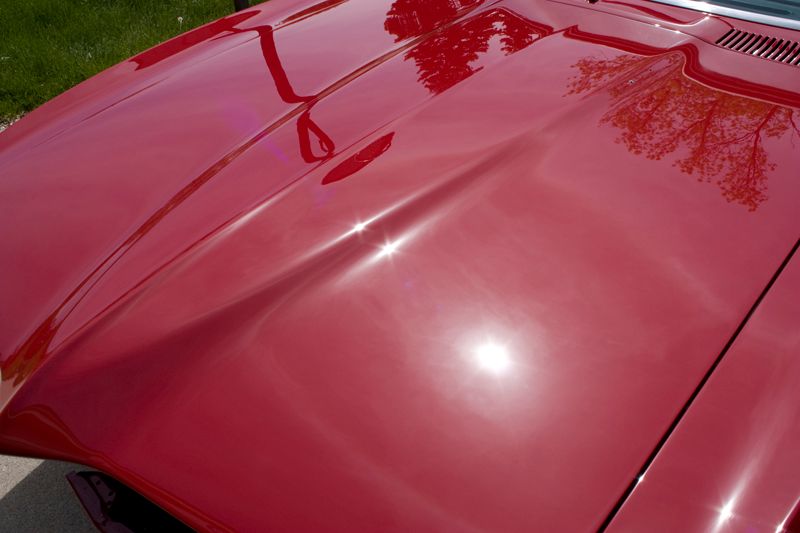
Smooth as glass!

Halogen shots
Brinkman Dual Xenon shots

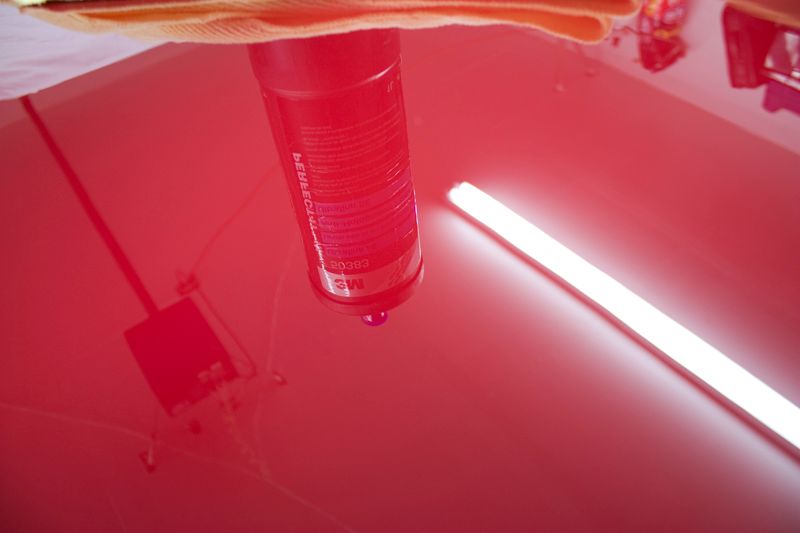
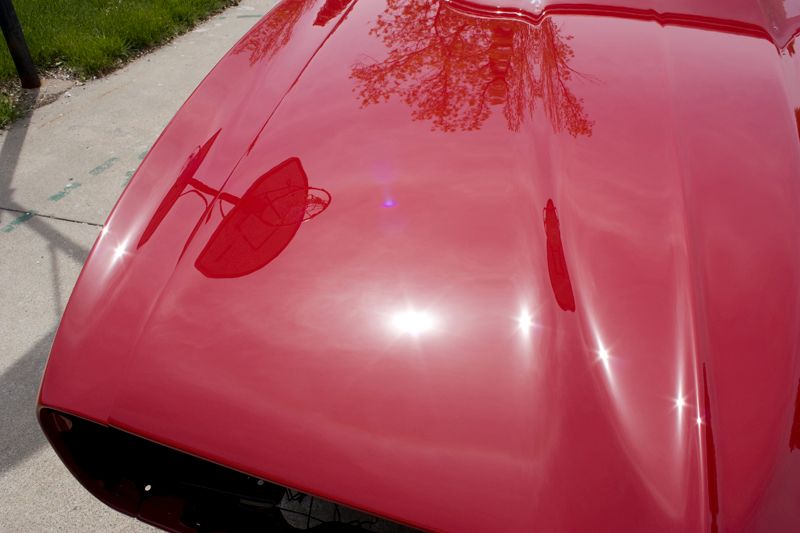
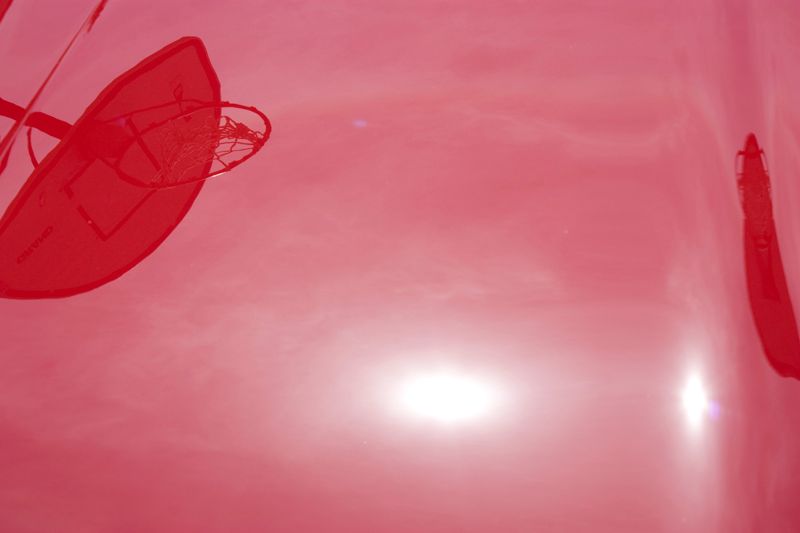
Some cool reflection shots

Removed as much of the other guys compound as I could
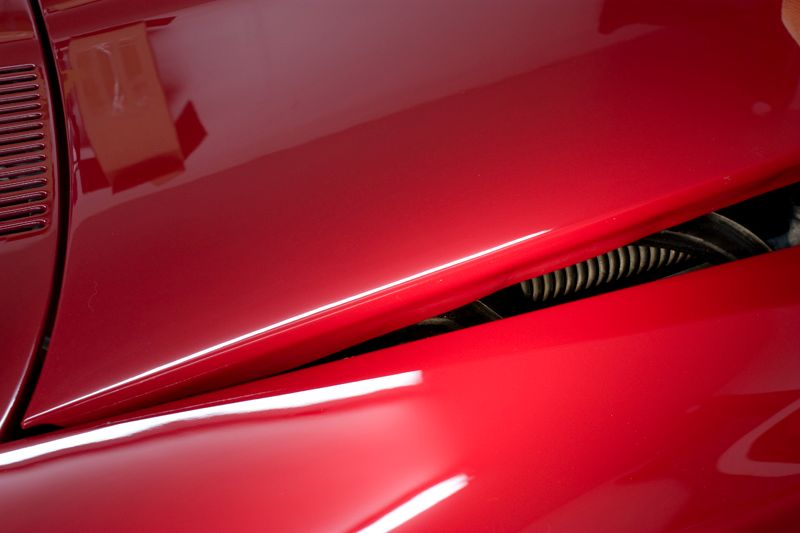
Engine

Wheels/tires
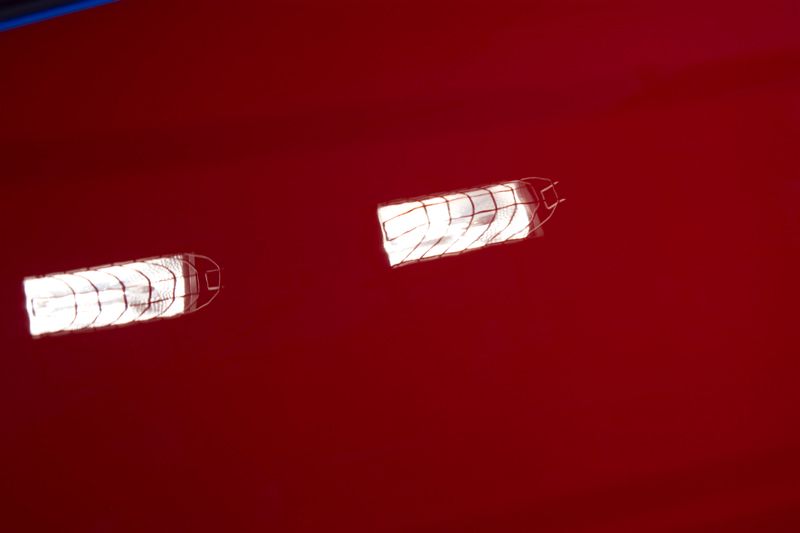
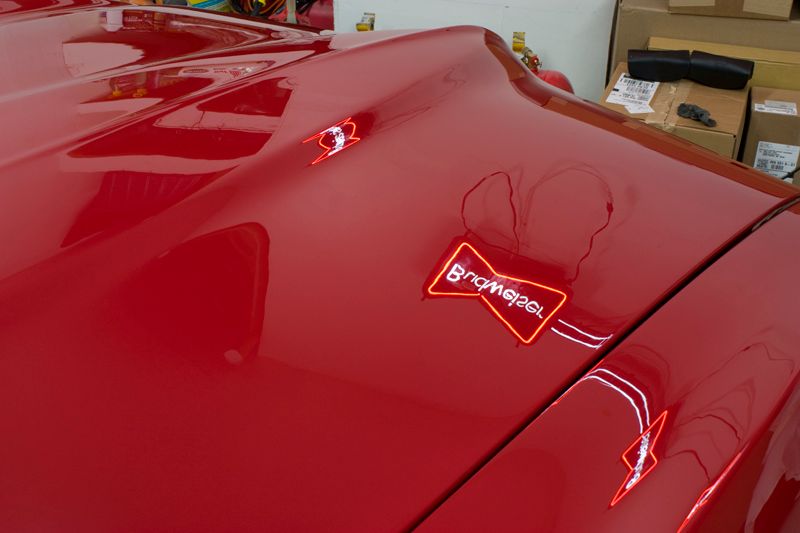
Remember this close up pic on the hood?
Howâs it look now?
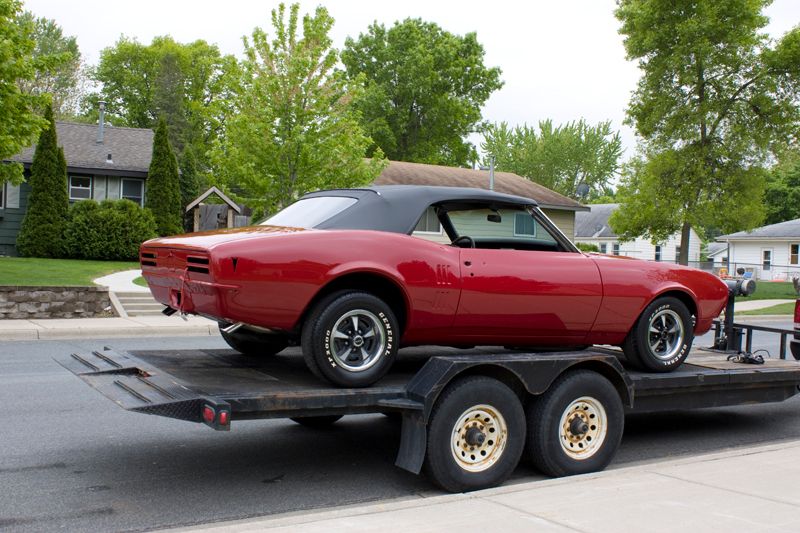
Last but not leastâ¦.car being loaded back up to head home and get assembled.
As always, thank you for taking the time to view my work,
Rasky
-
05-13-2010, 11:09 AM #4
- Join Date
- Jul 2007
- Location
- Macomb Michigan
- Posts
- 2,088
- Post Thanks / Like
SICK SICK SICK work Chad
You really brought that car to where it should be... Bravo!www.deep-gloss.com
Deep Gloss Auto Salon / Fine Automobile Detailing - Metro Detroit`s Paint Correction Specialist
For Discriminating Automobile Enthusiasts Who Demand The Best
-
05-13-2010, 11:20 AM #5
- Join Date
- Sep 2009
- Location
- Hawaii
- Posts
- 1,422
- Post Thanks / Like
hey chad nice work. If it`s one thing that i really would like to learn to do it`s wet sand. Any tips you might be able to offer on that one?
Some use discs like yourself and some go by hand . . . . . your method appears to be much more uniformed and looks to be a tad bit easier.
Excellent work though!
-
05-13-2010, 11:20 AM #6

- Join Date
- Mar 2009
- Location
- Great State of Utah
- Posts
- 1,935
- Post Thanks / Like
Pure beauty!
About how long on the sanding part? Where did you order the backing/interface plate?
Cheers,
GREGReflections Detailing of Utah
"Detailing for the Discerning owner"
State of Utahs most experienced detailing detailer
Meguiars/Ford Detailing team SEMA 2010, 2011
duPont Registry Endorsed Detailer
-
05-13-2010, 11:22 AM #7
- Join Date
- Mar 2009
- Posts
- 1,624
- Post Thanks / Like
BRAVO!!!!!
That is outstanding work, Chad!
-
05-13-2010, 11:33 AM #8
- Join Date
- Apr 2009
- Posts
- 707
- Post Thanks / Like
Great Job Chad. That`s what it`s all about! :2thumbs:
-
05-13-2010, 12:23 PM #9
- Join Date
- Nov 2006
- Location
- Dallas, TX
- Posts
- 2,857
- Post Thanks / Like
I`m impressed.
You did something very good to that car.
How long did it take you start to finish?
and where did you get those sanding pads for the PC, does it need a different backing plate as well? I`d love to get some for mine.
thanks
JoshPerfection Is In The Details
Rated one of the Top Nine Auto Detailers in the US by AutoWeek Magazine! :buffing:
-
05-13-2010, 12:51 PM #10
- Join Date
- Oct 2006
- Location
- Sacramento, California
- Posts
- 1,166
- Post Thanks / Like
Awesome work!! Been my dream car for a long time now!
Could we get some more info on the sanding discs? Where you got them and how they stack up agasint the Trizact ones?
I have been wanting to experiment with sanding and am looking for just the right discs to do it with.
THanks......
-
05-13-2010, 12:55 PM #11
- Join Date
- Feb 2010
- Location
- Cypress, Texas
- Posts
- 321
- Post Thanks / Like
WOW the hood shot is a nice B&A
Question, would a Random Orbital on some strong compound and aggresive pads be able to remove the wetsanding?
or is that only a job for a rotary ?REFLECTIONS
Auto Detailing
"Not Just A Carwash"
Serving The Greater Houston Area
-
05-13-2010, 12:56 PM #12
- Join Date
- Sep 2005
- Location
- Lancaster, PA
- Posts
- 1,022
- Post Thanks / Like
Superbio Chad! Now go grab one of those brewskies that keep advertising themselves in the reflections! Is that Budwesier Red?
What speed did you work the sanding discs on?David Bibiloni
Tailored Automotive Detailing
Drive with Distinction
-
05-13-2010, 01:05 PM #13
- Join Date
- Apr 2010
- Location
- Sunny San Diego
- Posts
- 42
- Post Thanks / Like
very cool!
So the parallel lines in the one photo is the paint actually shrinking and making peeks under the clearcoat? Meaning it actually bunches up over time?
On the hood did you use a machine to get the ridges? Or do you use your hand?
I am amazed that detailers can scratch paint, then make it glass smooth and create mirror reflections still. It is a cool industry!
-
05-13-2010, 01:08 PM #14

- Join Date
- Jun 2004
- Location
- Macedonia, OH
- Posts
- 1,267
- Post Thanks / Like
Amazing work Chad!
-
05-13-2010, 01:08 PM #15Rasky's Auto Detailing
- Join Date
- Mar 2009
- Location
- Eden Prairie, MN
- Posts
- 5,011
- Post Thanks / Like
 Originally Posted by Deep Gloss Auto Salon
Thanks Jason!
Originally Posted by vtec92civic
Thank You!
Sanding by DA is definitely easier and faster but I don`t mind doing it by hand either. I usually let the lines of the car decide which method I use but I use a DA whenever possible.
Mike Phillips actually has some great wet sanding articles over on AG, but if you have any specific questions feel free to PM me. The most important thing IMO is to know the history of the paint. You always want to know what you have to work with before you start sanding. Take your time and watch the edges. I would rather play it safe than risk striking through an edge. I actually knew the painter that did this car...knew his daughter pretty well too!
Originally Posted by Greg Nichols
Thanks Greg!
I`d say I spent around 4-6 hours doing all the sanding. I was playing around with the disks for a while getting a feel for them so its hard to say the exactly amount of time I spent.
I got the Mirka Abrasives and the interface pad here.
Originally Posted by EisenHulk
Thank you!
Originally Posted by michakaveli
Thanks buddy!
Originally Posted by JoshVette
Thanks Josh!
I`m guessing I had around 30-35 hours invested. It was spread out over two weeks as I had the time...getting married in about 4 weeks so I`ve been pretty busy... :faint:
I got everything from Pro Source Center and the interface pad does work with the LC backing plates.


 Reply With Quote
Thread Information
Users Browsing this Thread
There are currently 1 users browsing this thread. (0 members and 1 guests)
Similar Threads
-
`60 Impala, Full Wet Sand and Buff: Rasky`s Auto Detailing
By RaskyR1 in forum Click & Brag -The Detailers ShowcaseReplies: 34Last Post: 06-28-2011, 06:10 PM -
`60 Imala, Full Wet Sand and Buff: Rasky`s Auto Detailing
By Bobby G in forum The Detailers ShowcaseReplies: 19Last Post: 06-16-2011, 02:21 PM -
1968 Firebird, Full wet sand and buff: Rasky`s Auto Detailing
By charger69 in forum The Detailers ShowcaseReplies: 26Last Post: 05-17-2010, 09:53 AM -
Full wet sand n` buff on `05 NBP Acura RL, by Rasky`s Auto Detailing
By RaskyR1 in forum The Detailers ShowcaseReplies: 17Last Post: 10-26-2009, 02:04 PM -
Full wet sand n` buff on `05 NBP Acura RL, by Rasky`s Auto Detailing
By RaskyR1 in forum Click & Brag -The Detailers ShowcaseReplies: 29Last Post: 10-16-2009, 11:14 AM
Bookmarks