

I have been detailing cars for 16 years now and have seen some pretty trashed cars roll through the shop. For some reason, the cars seem to be getting worse and worse as time goes on. Just when you think youâve seen it all, another one appears. Itâs almost as if people are trashing their cars beyond belief, just to see if us at Unique Car Care can work miracles and whip their car back into shape! Iâm really hoping that someone invents a buffer with magical powers someday to make my job a little easier!
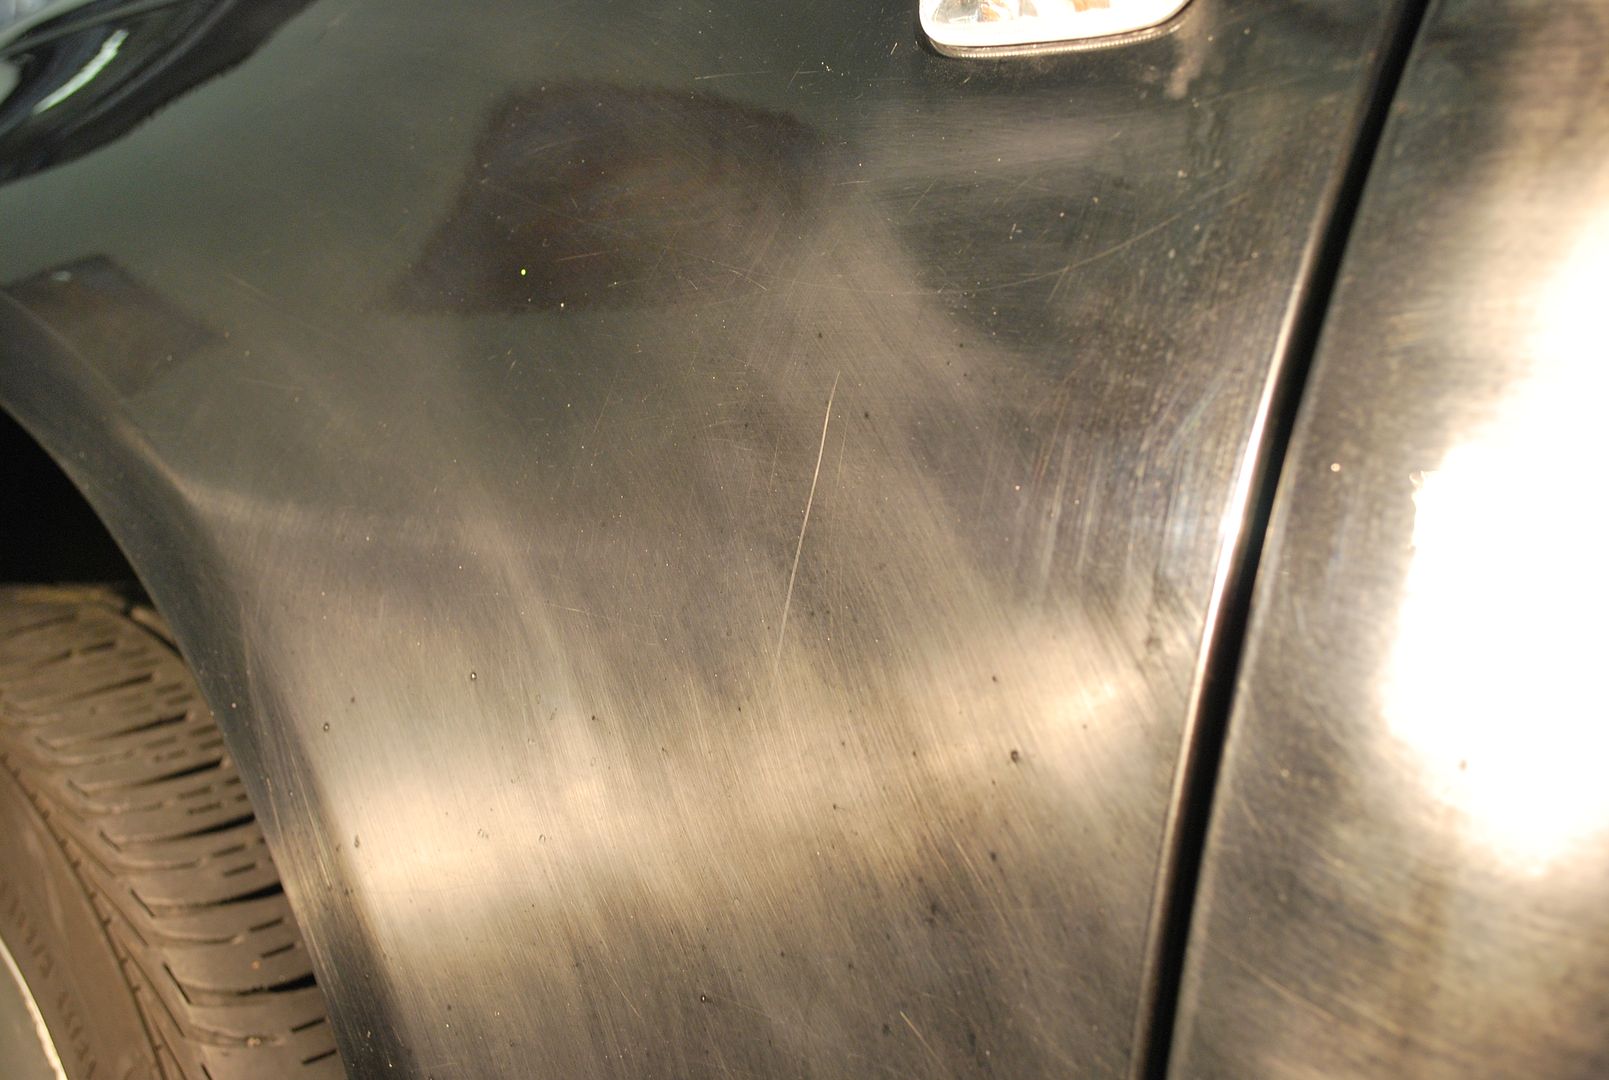
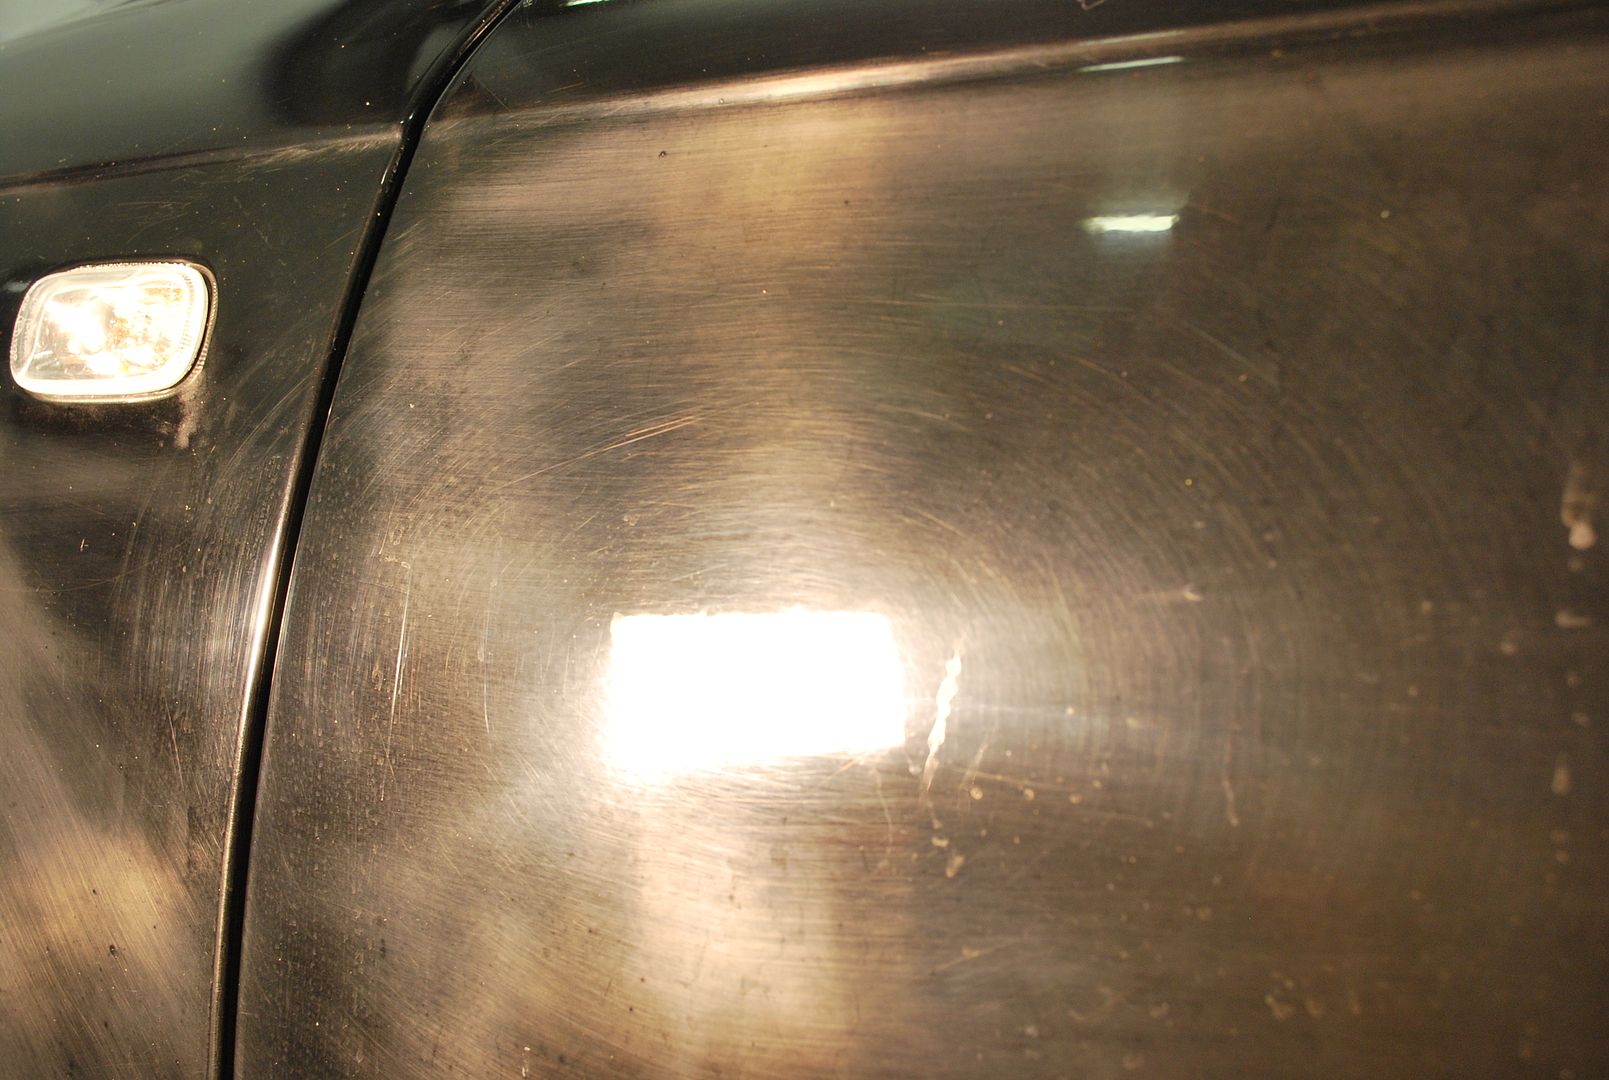
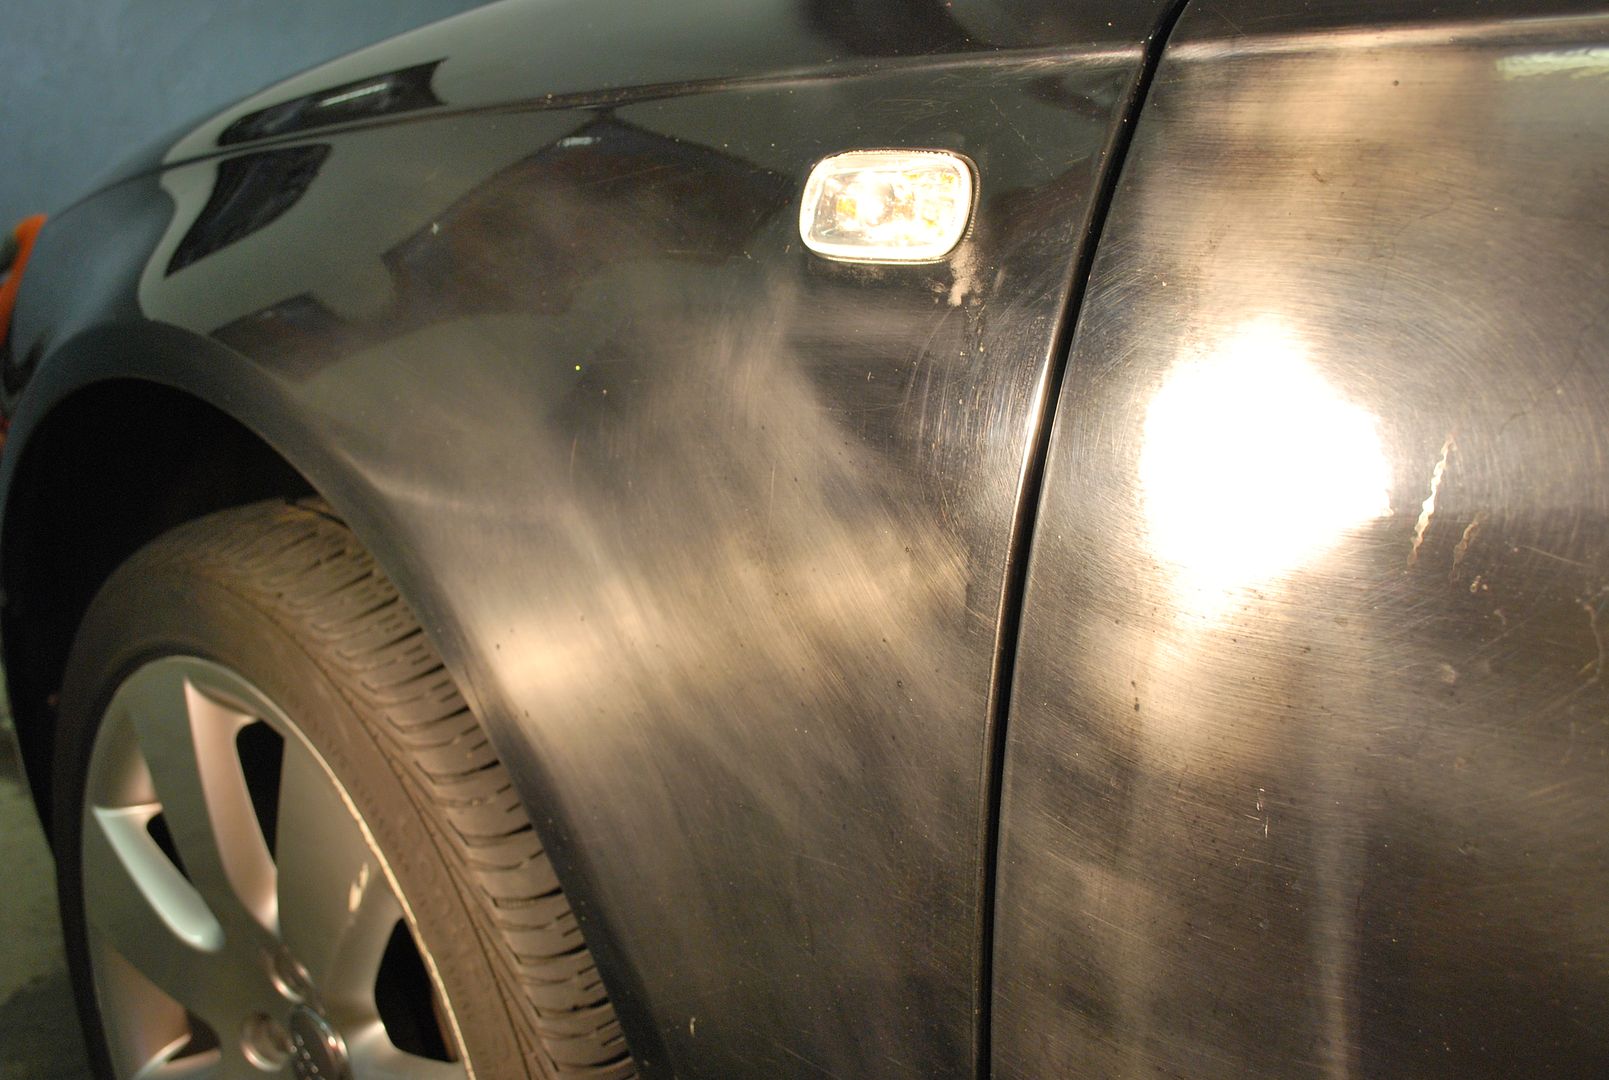
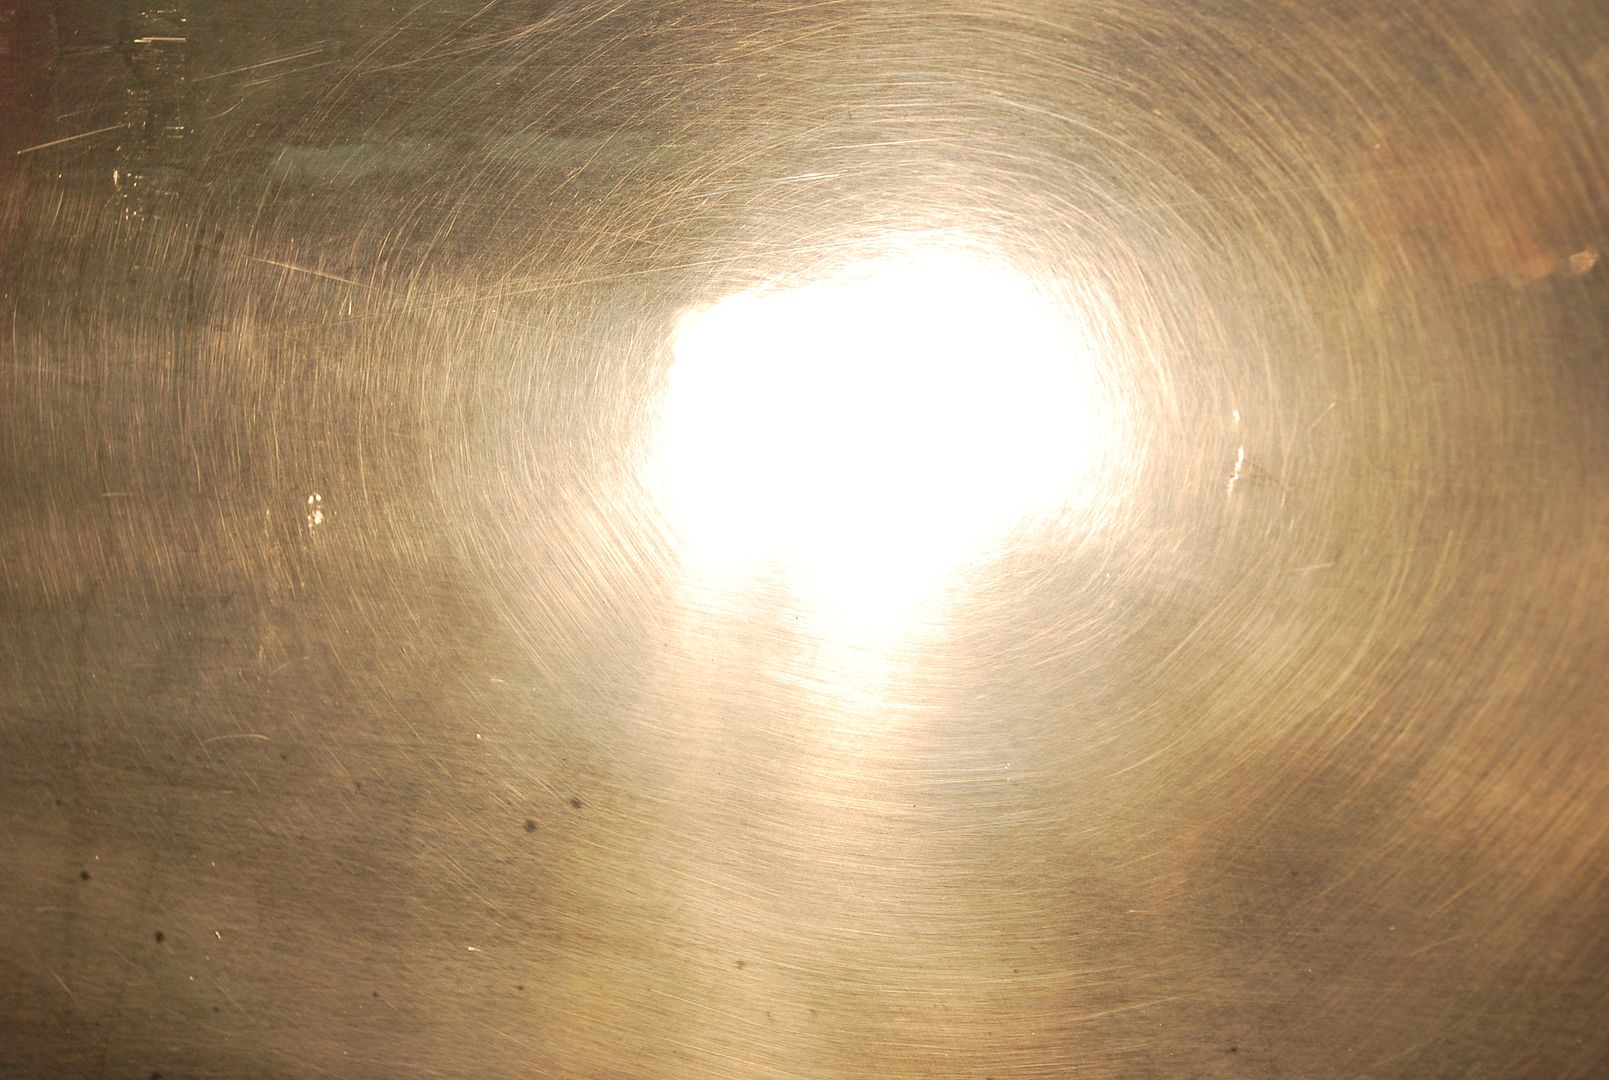
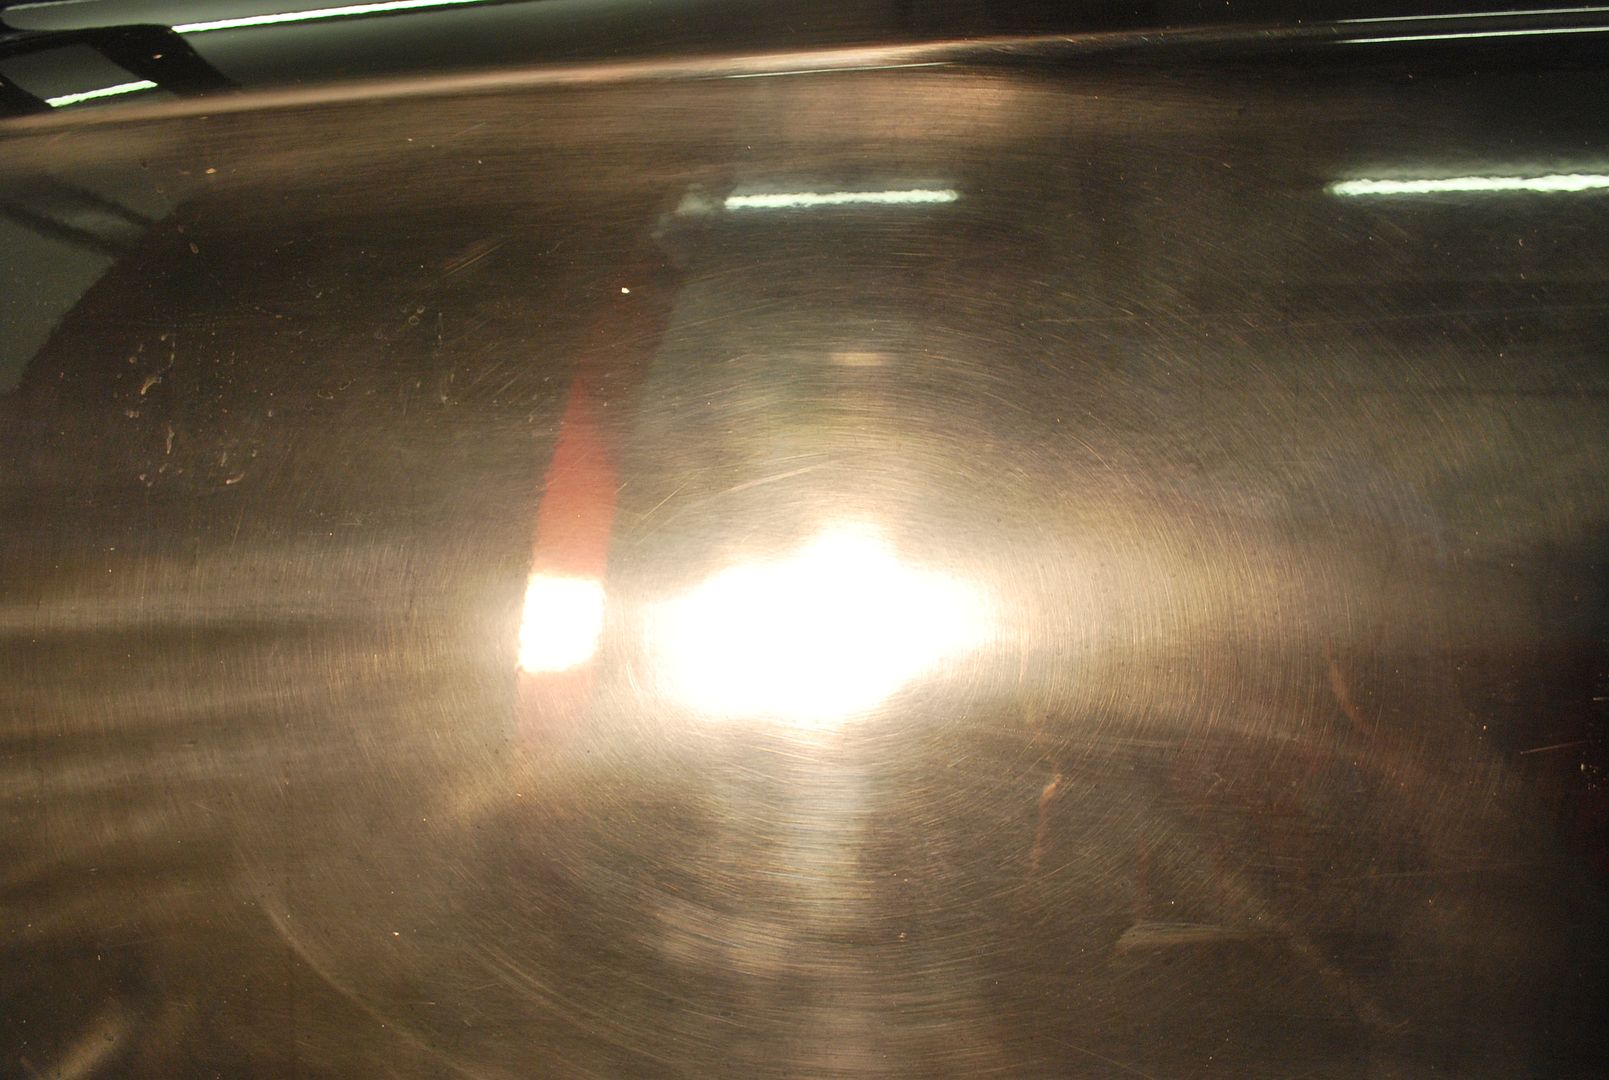
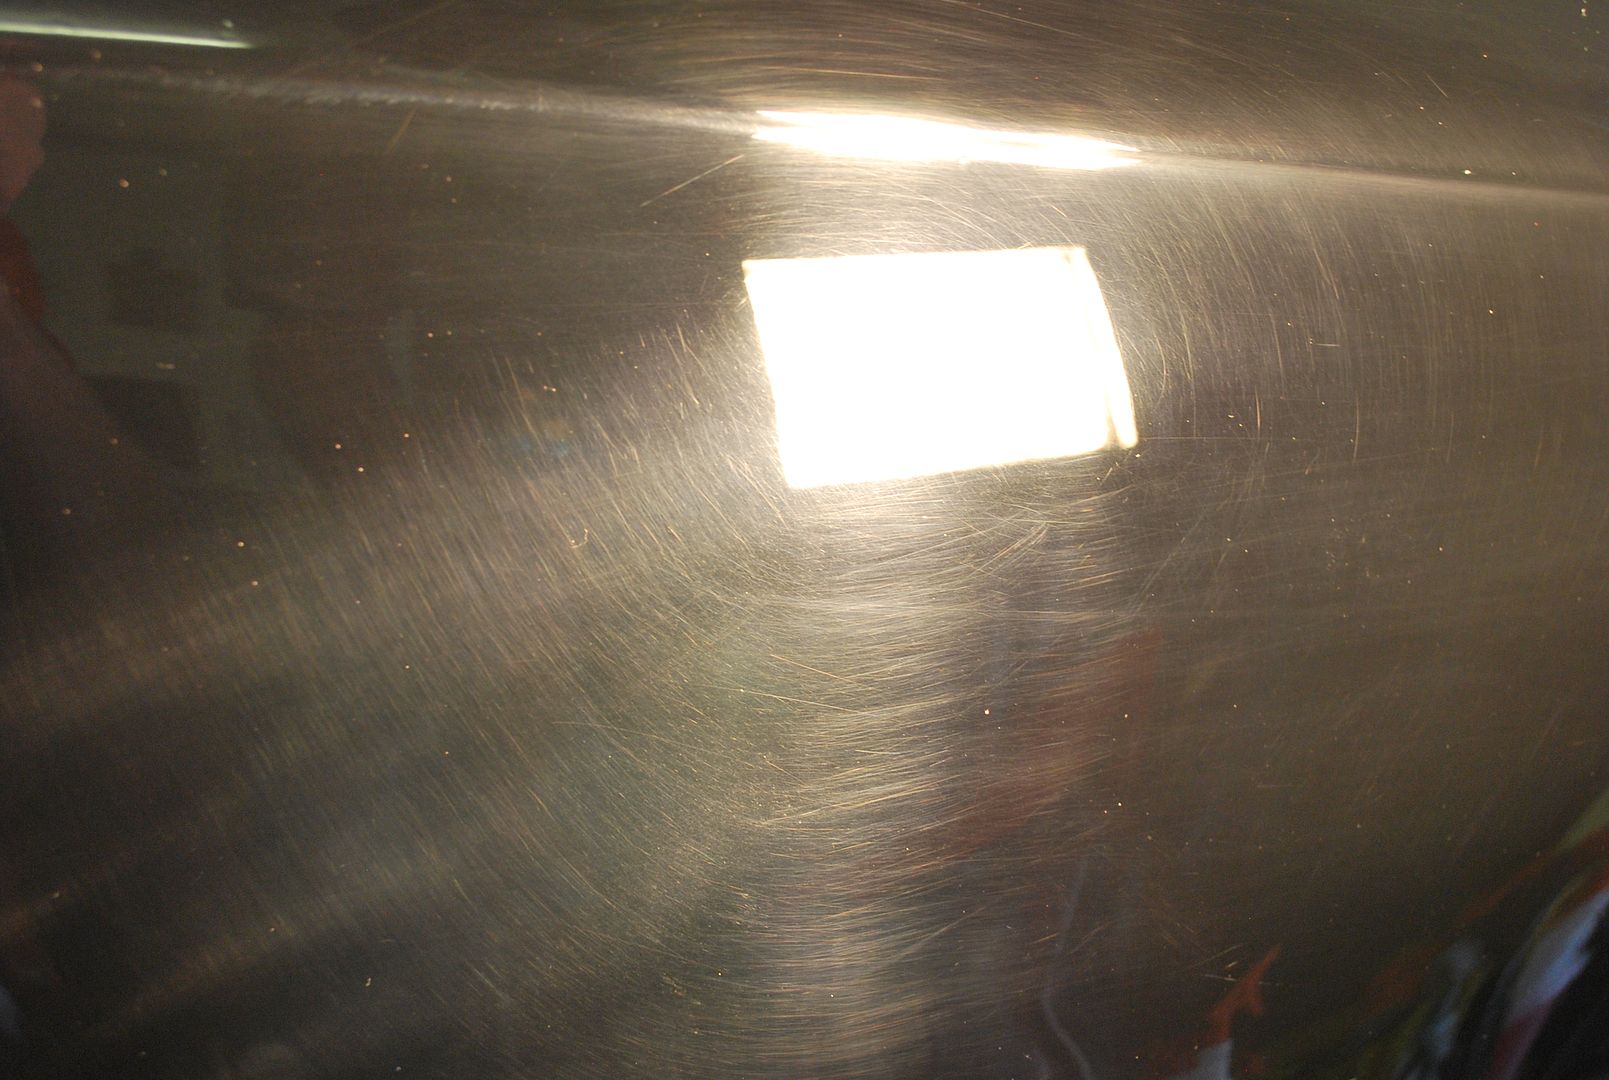
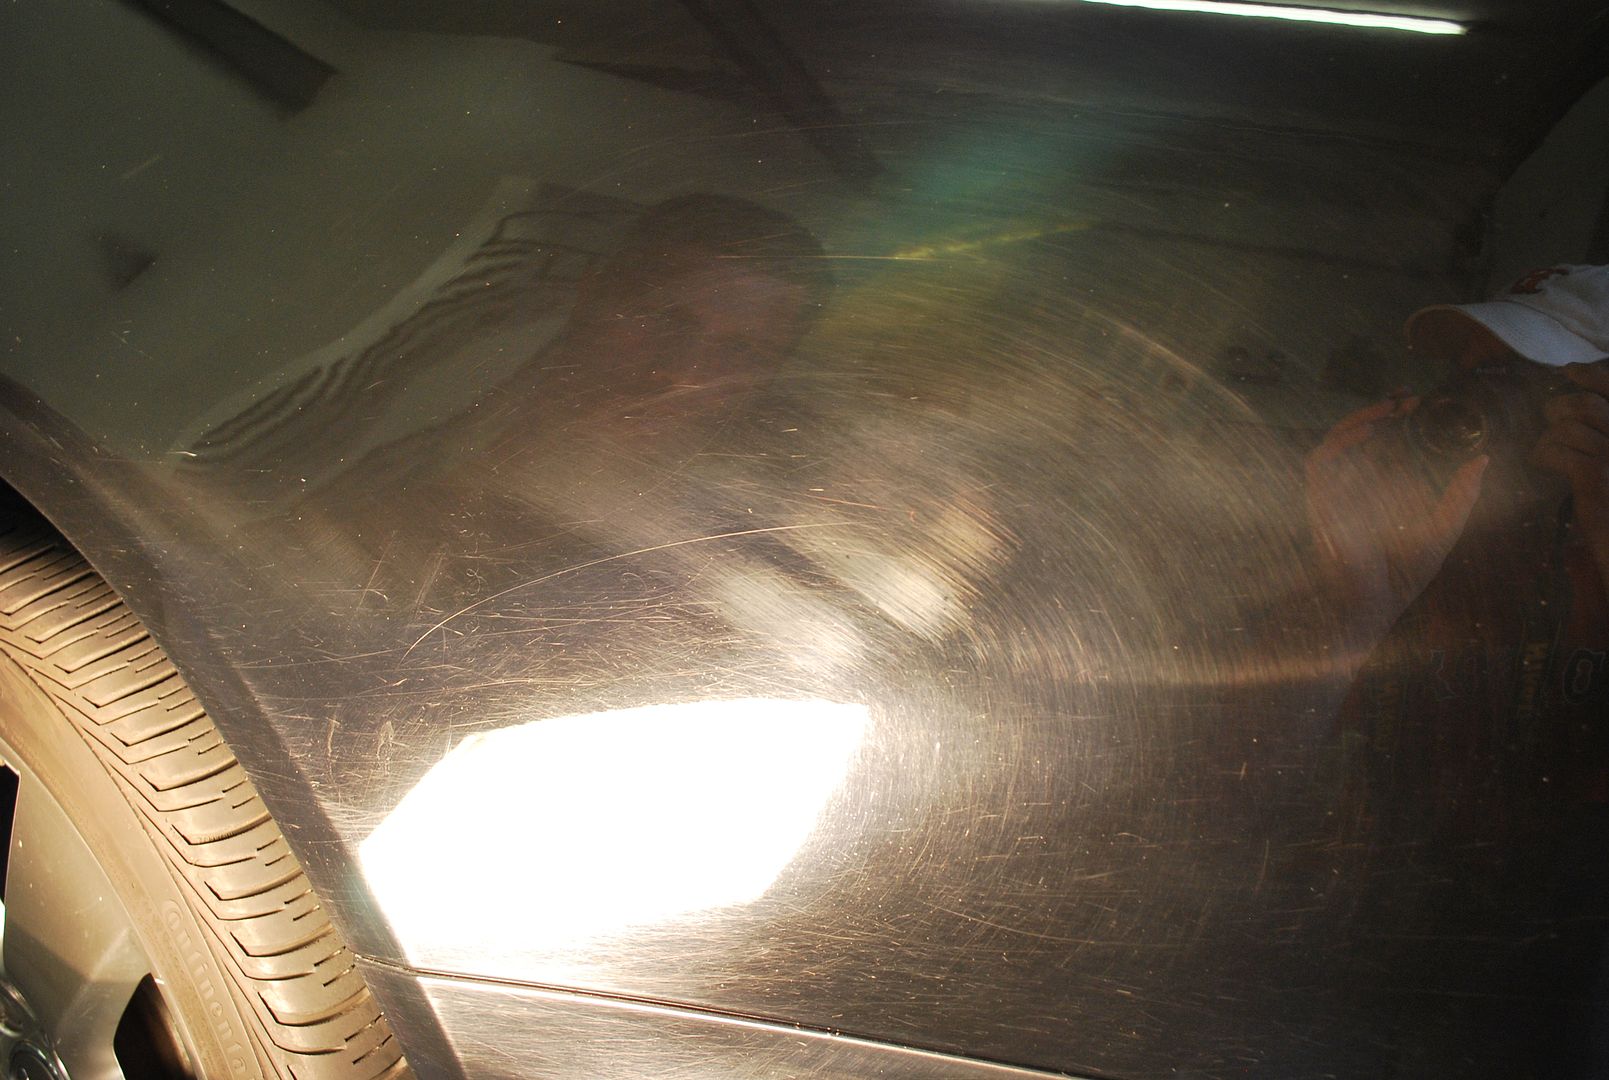
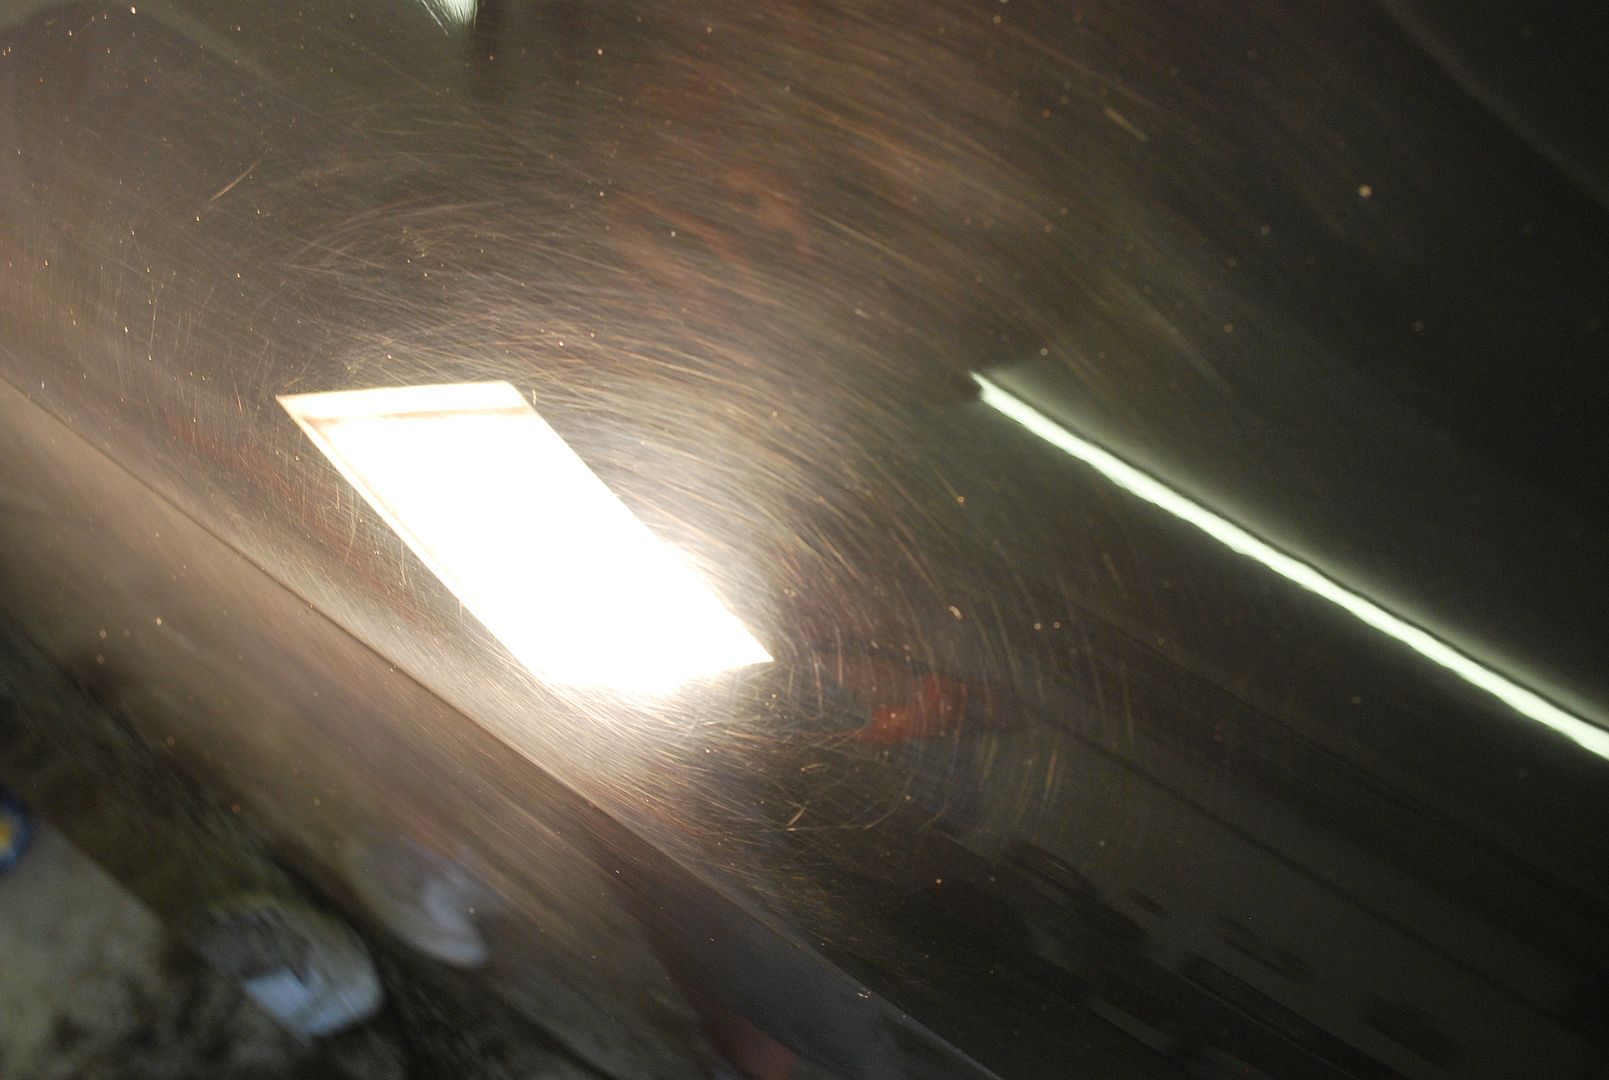
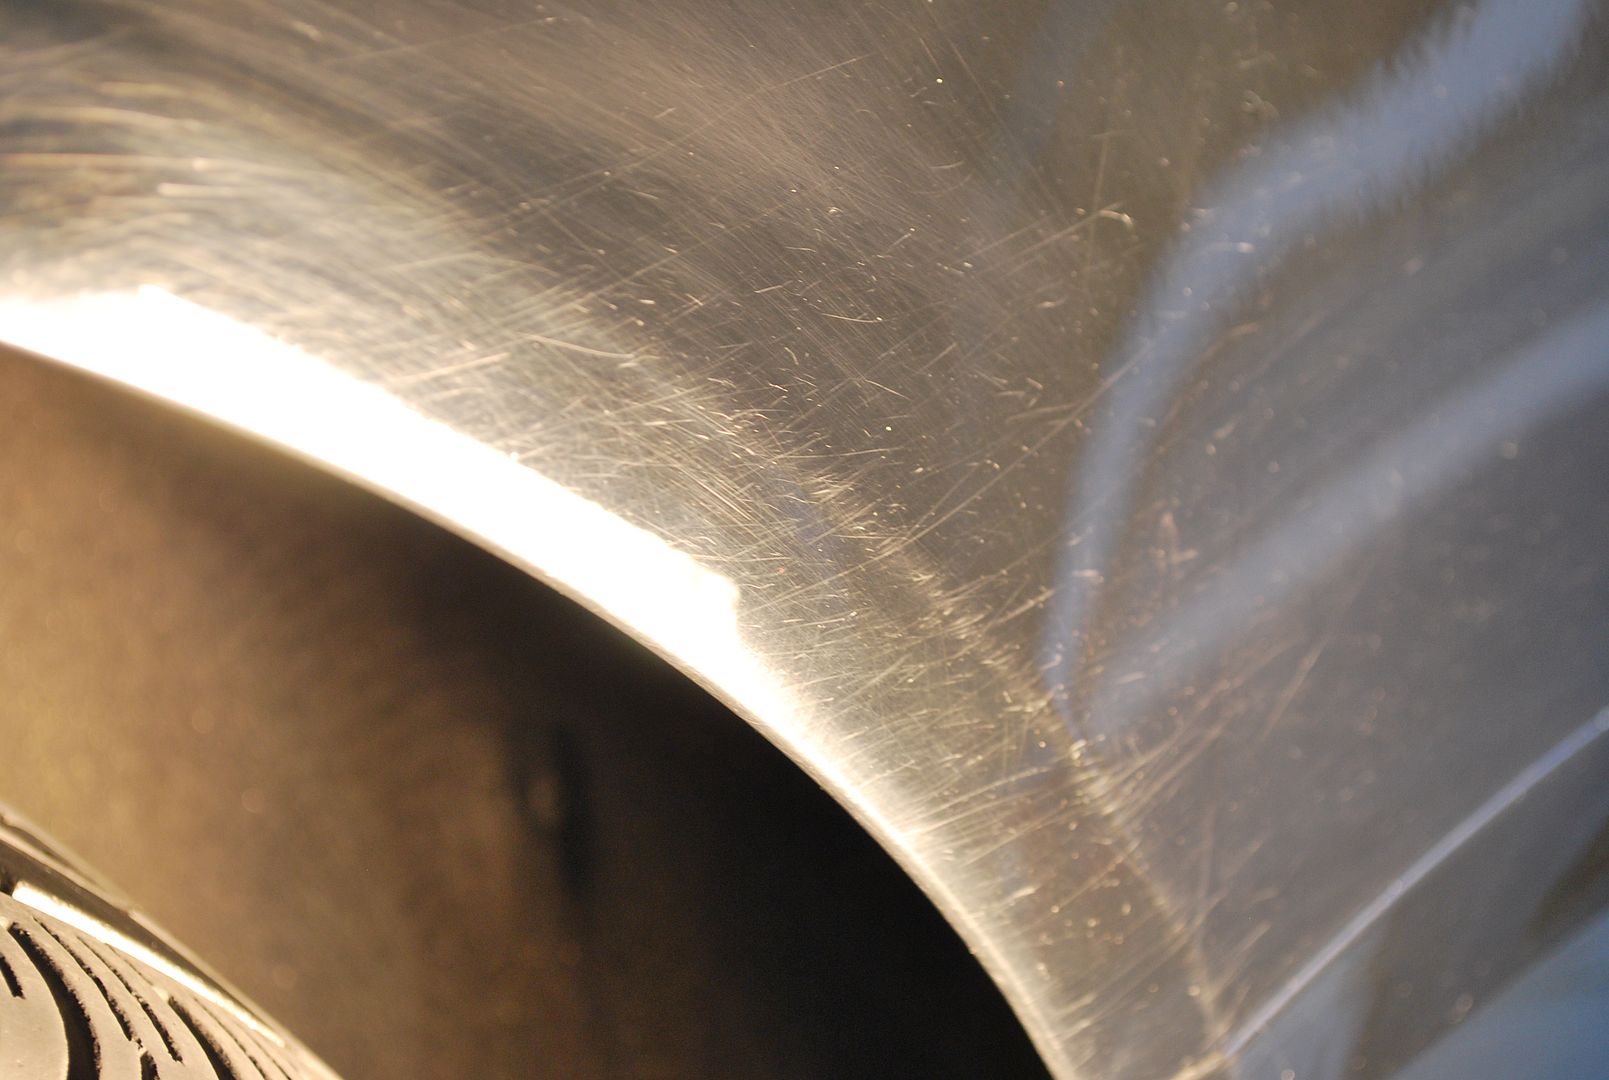
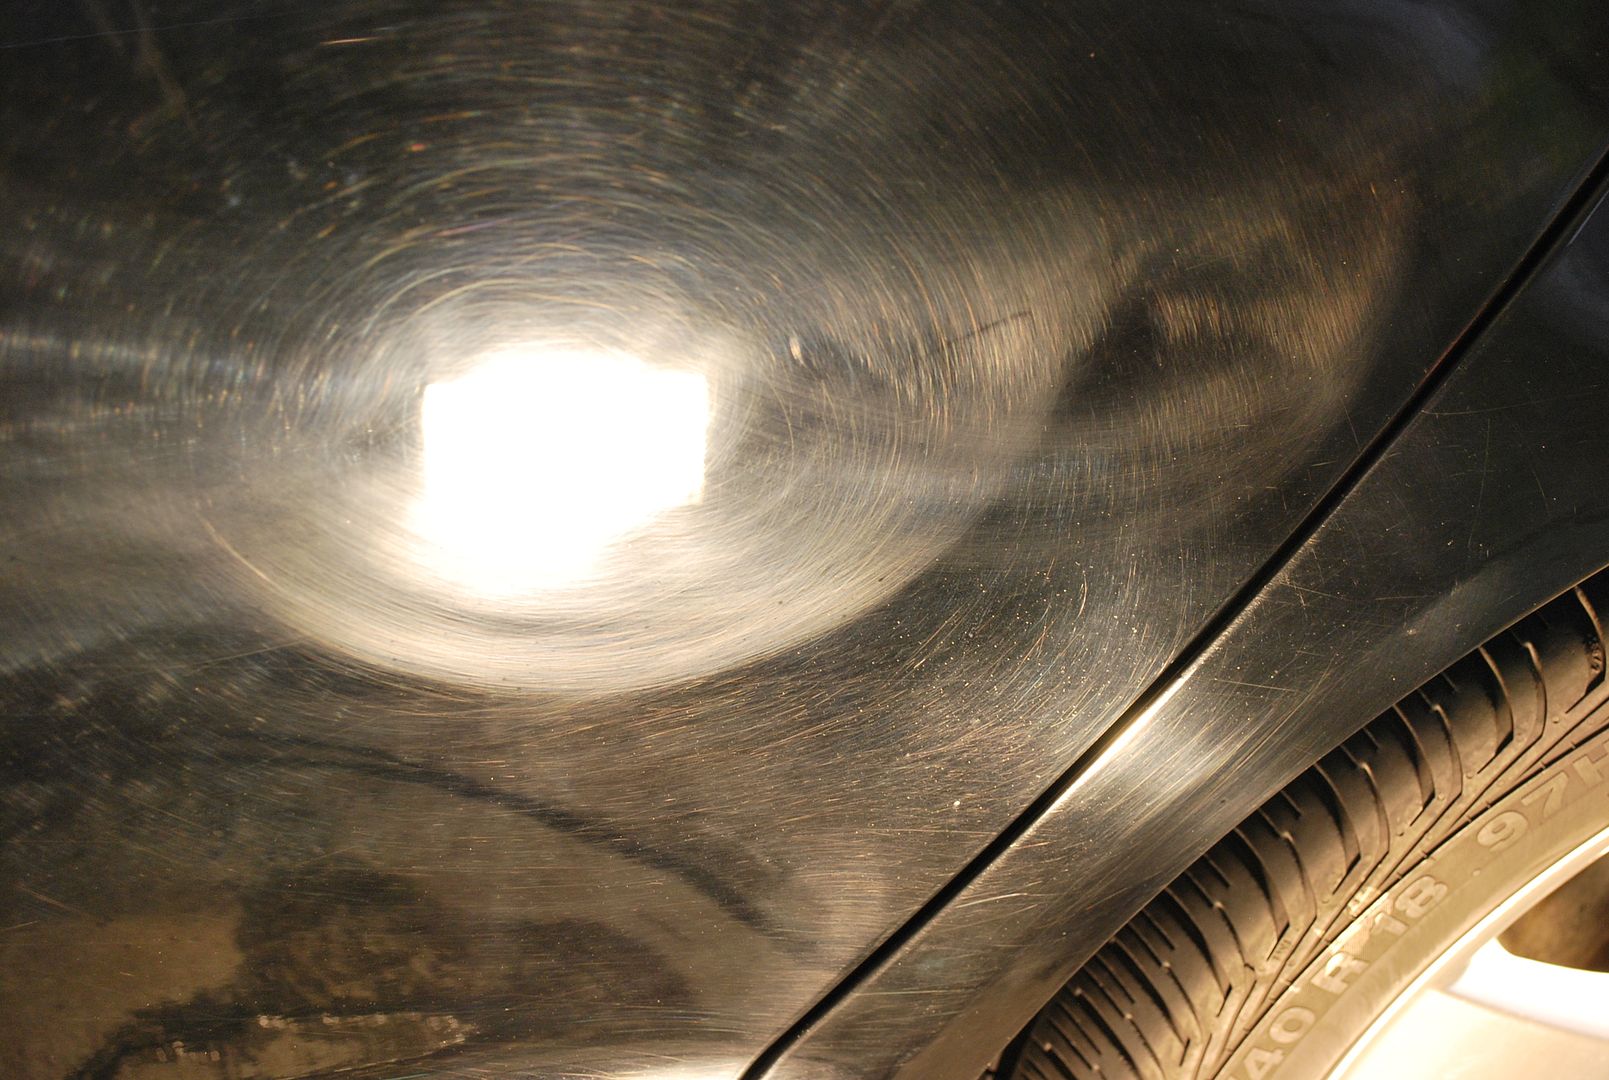
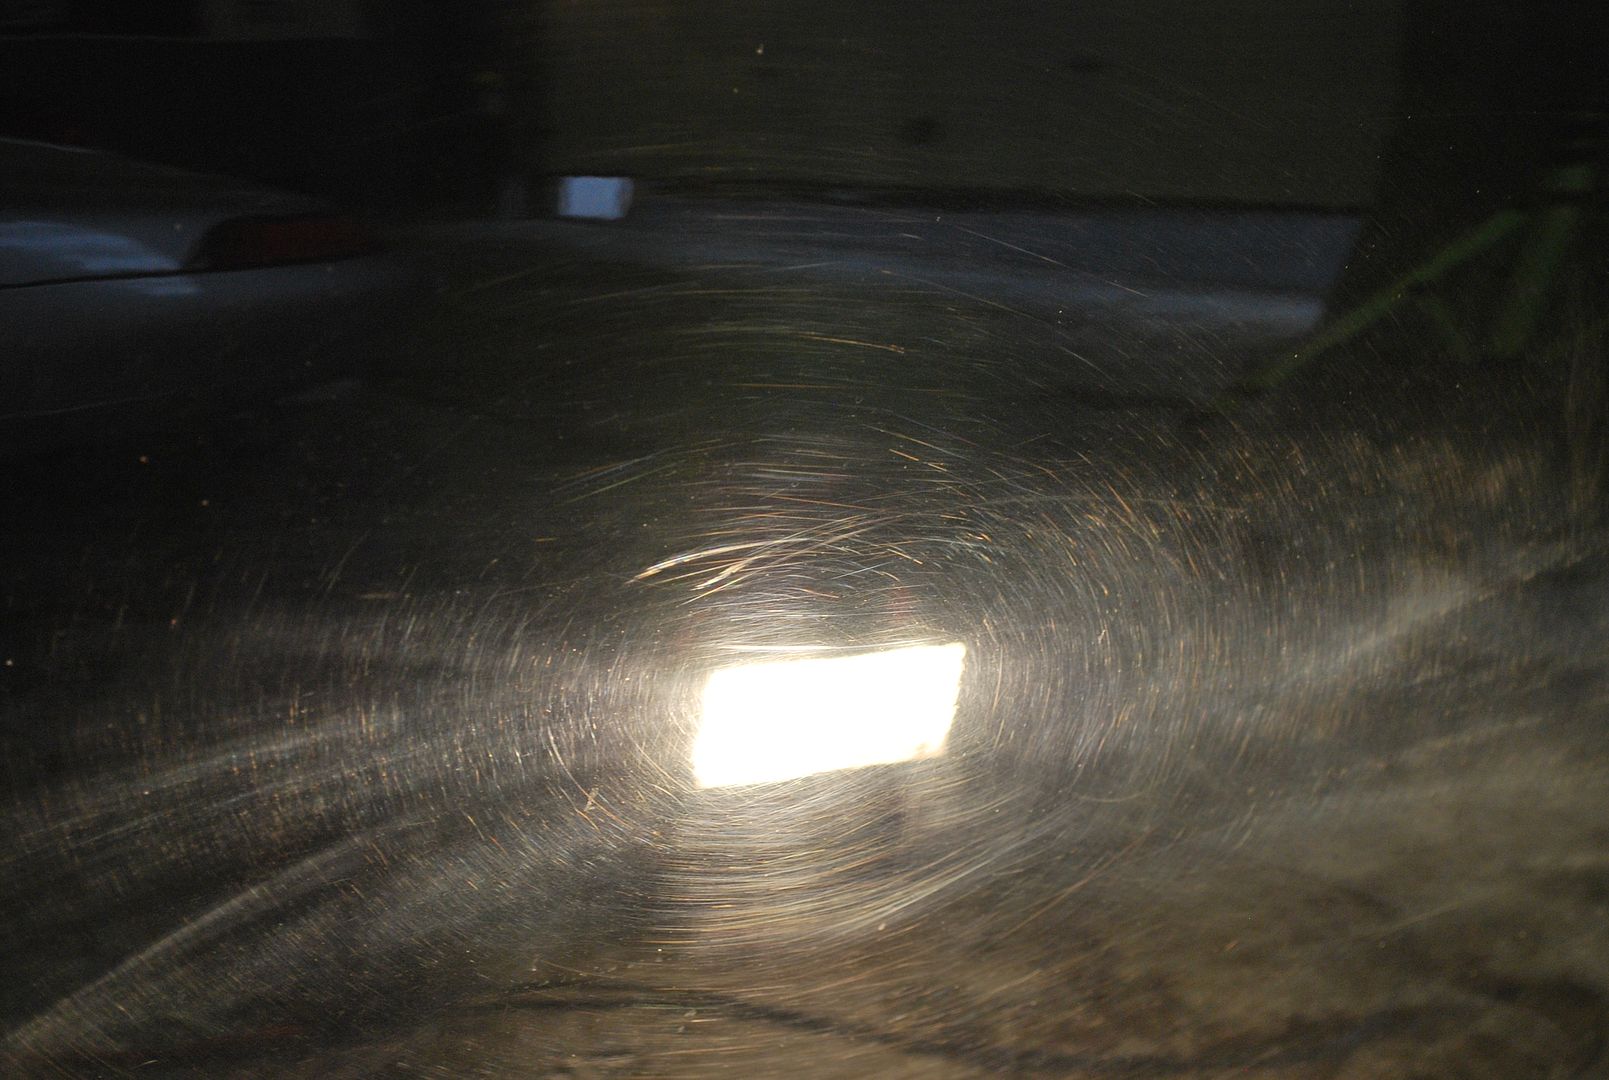
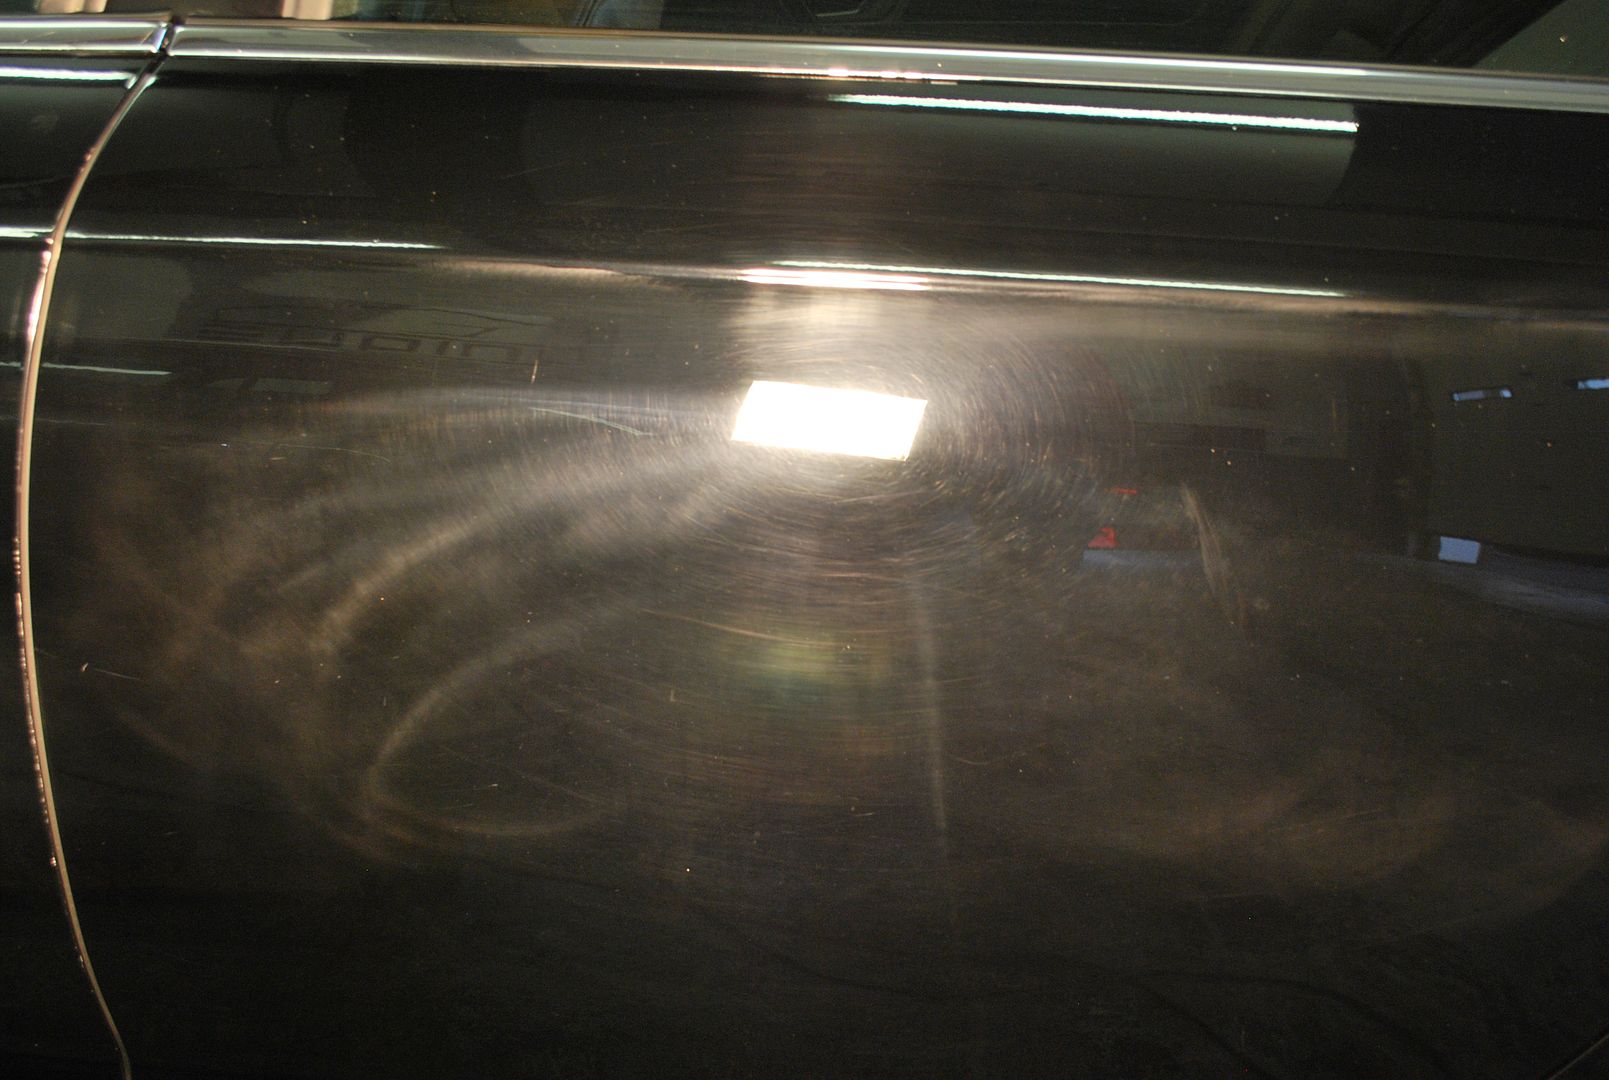
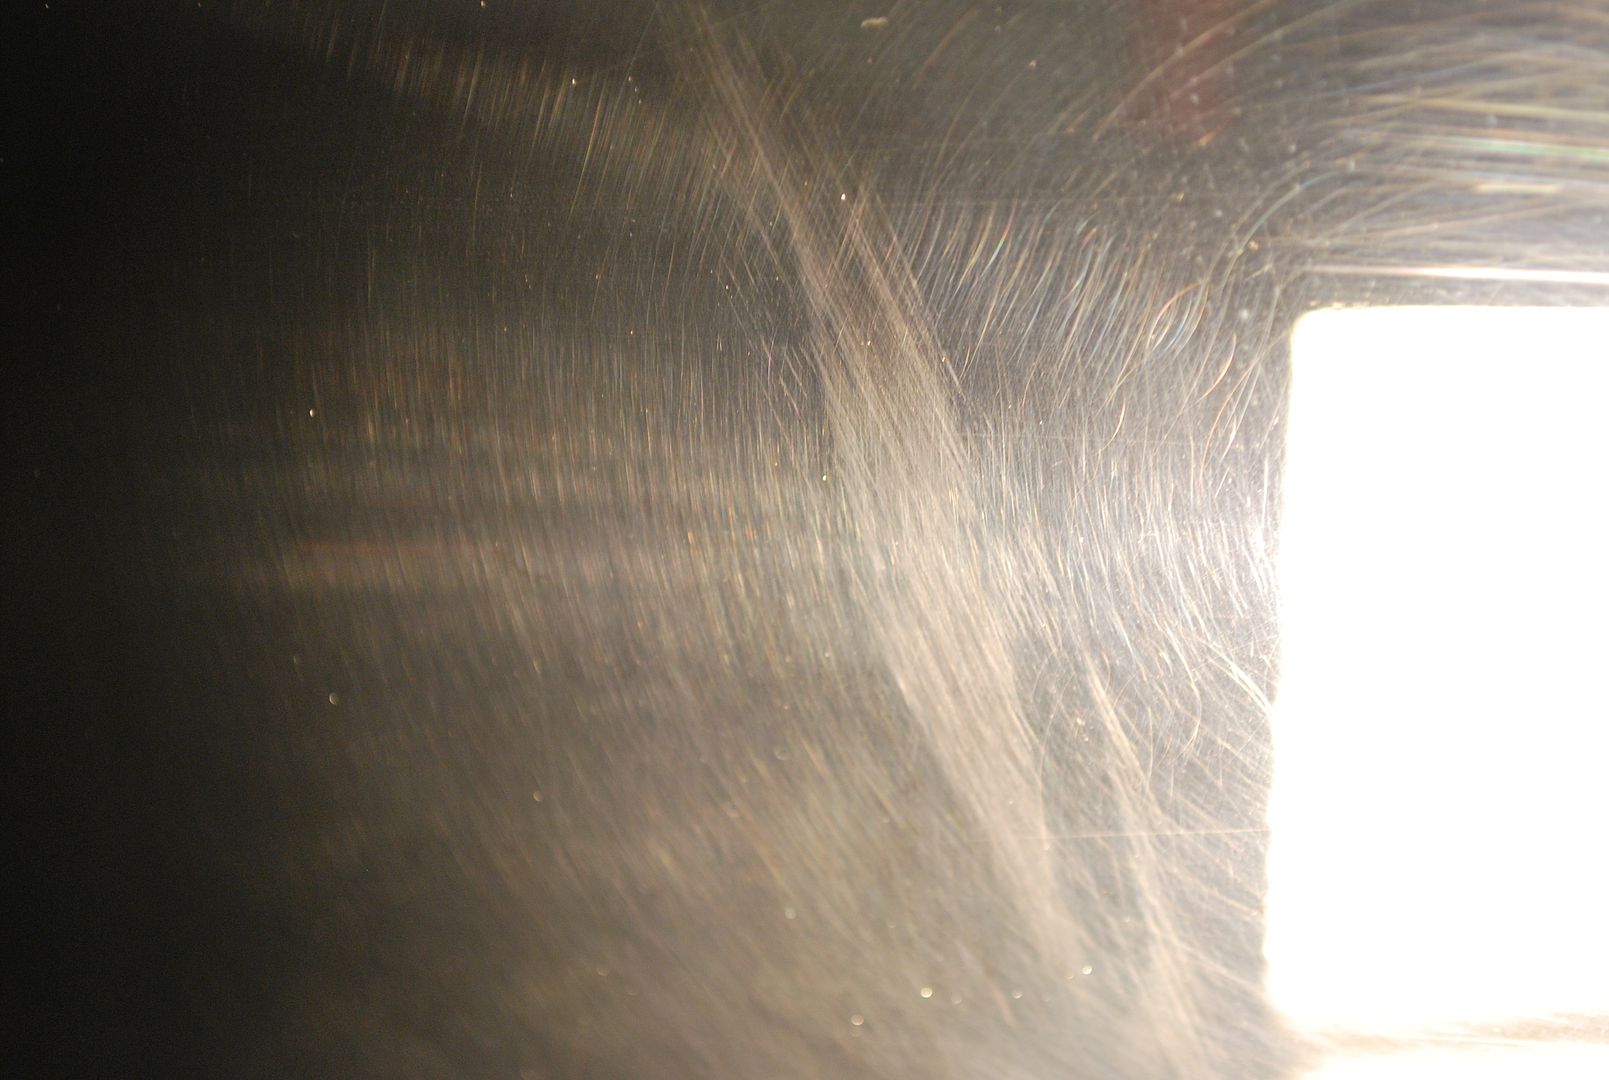
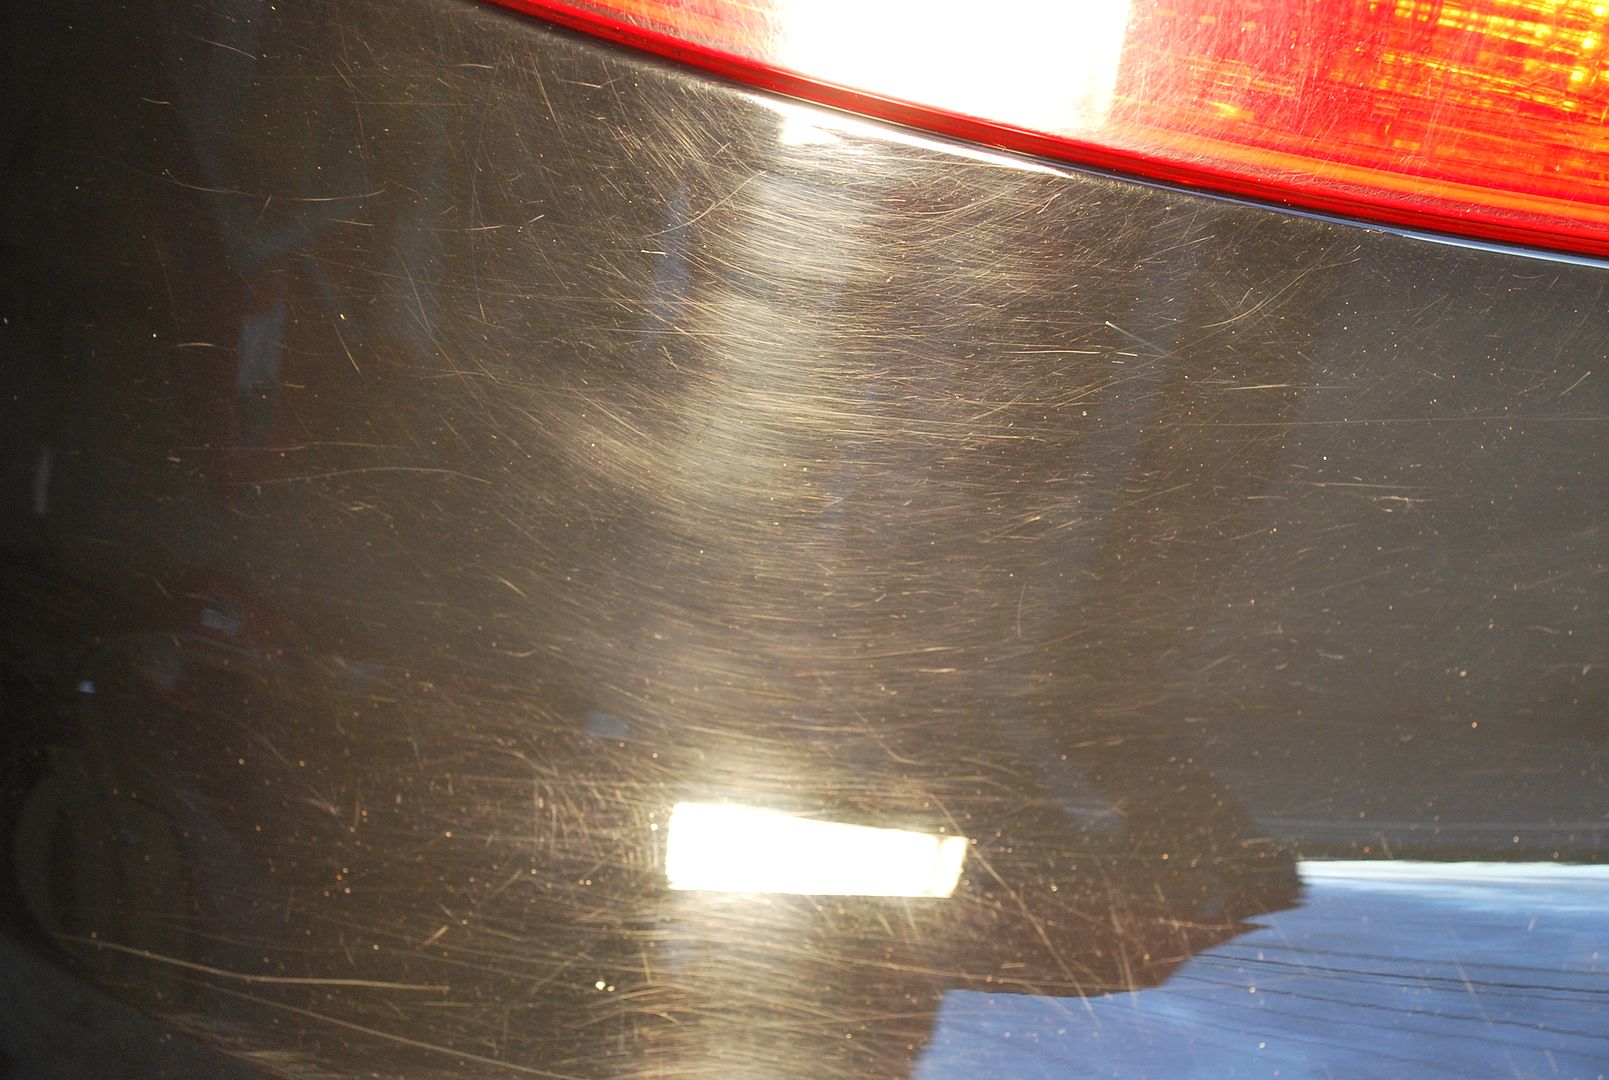
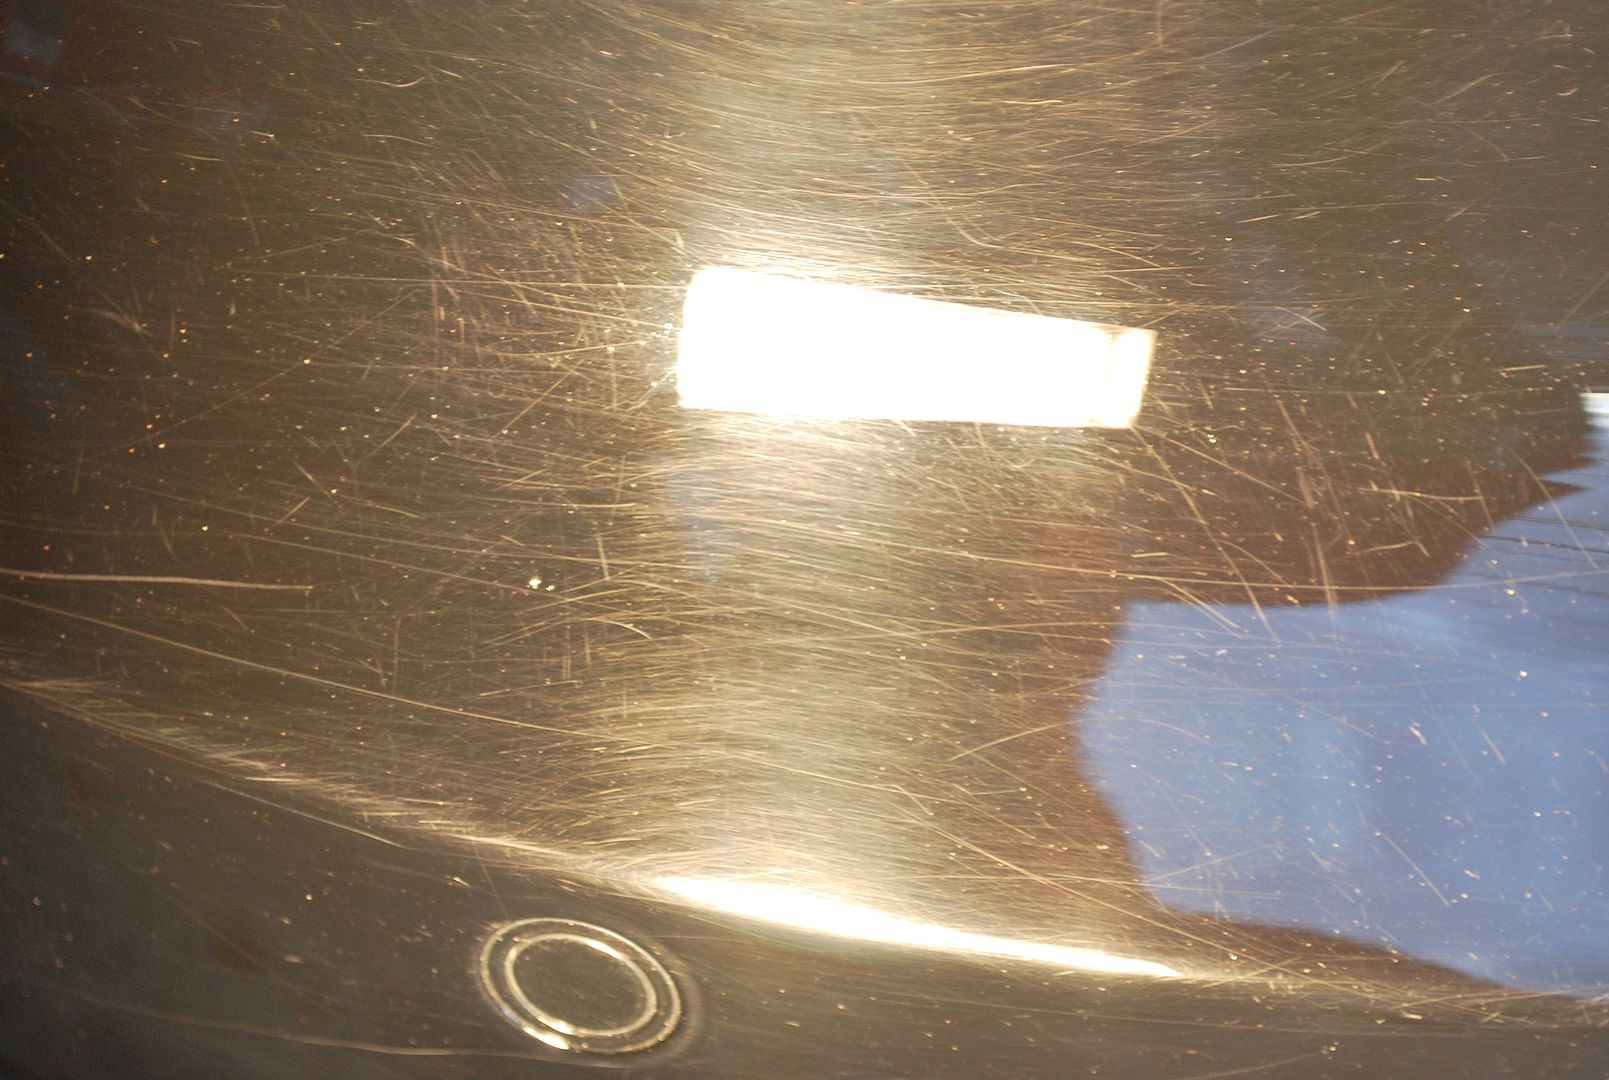
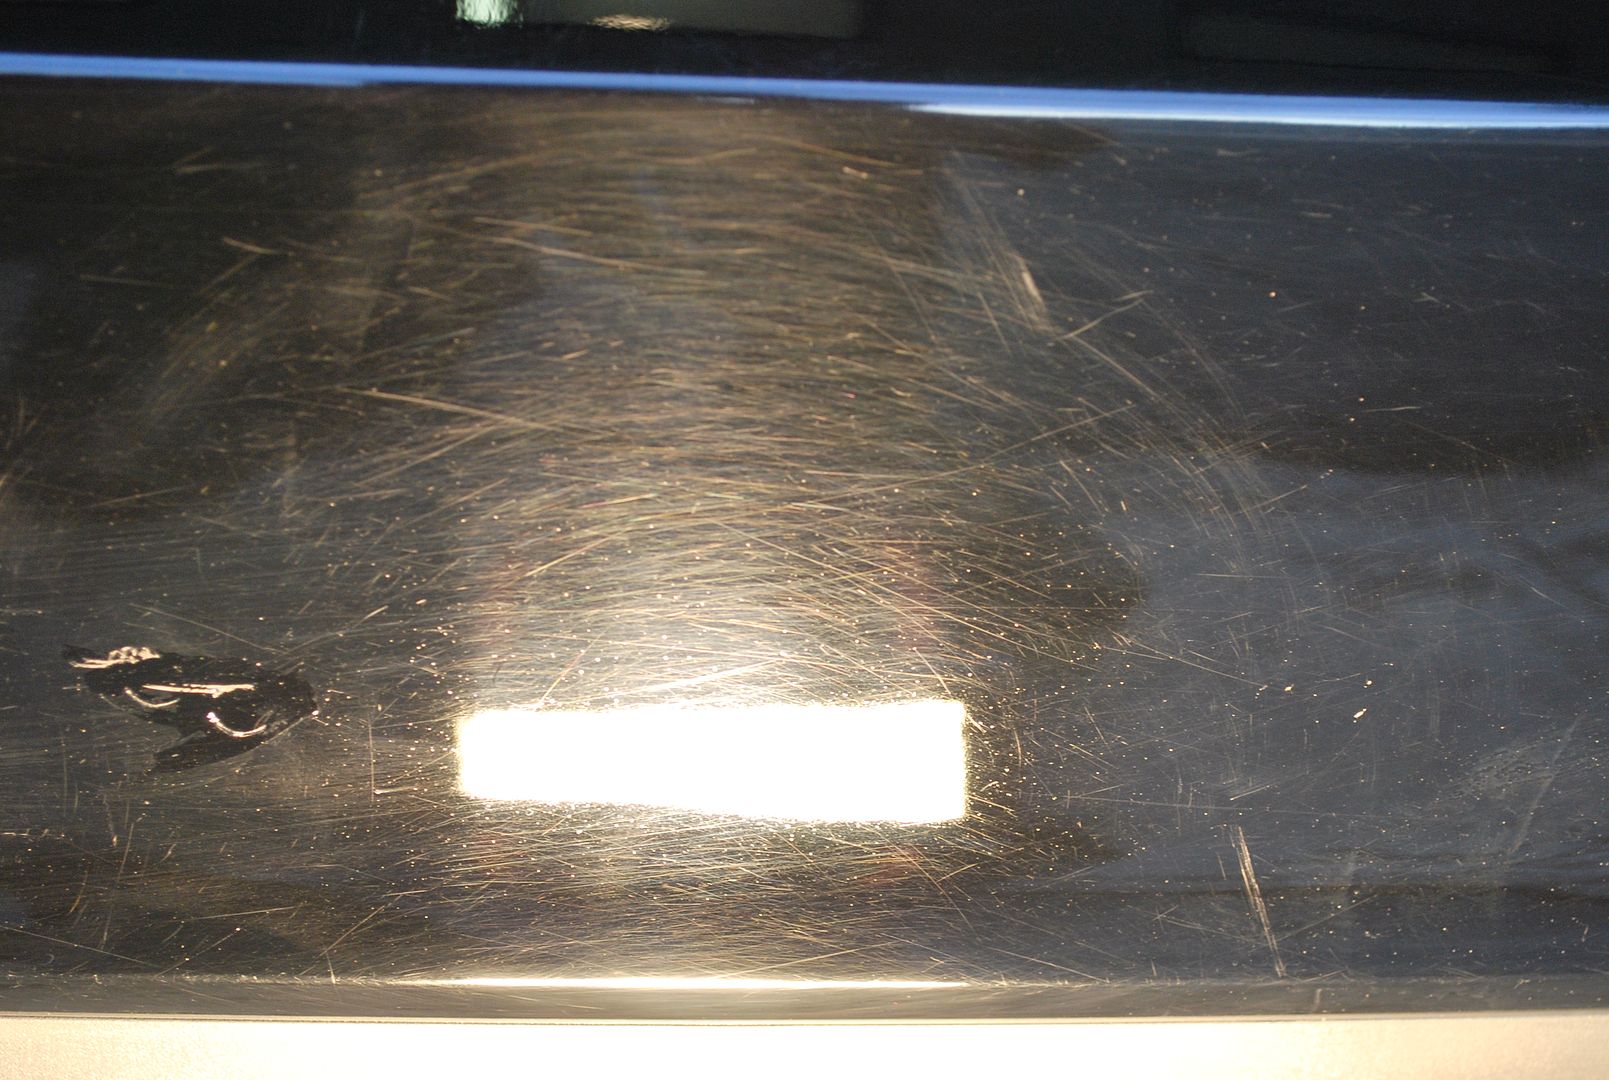
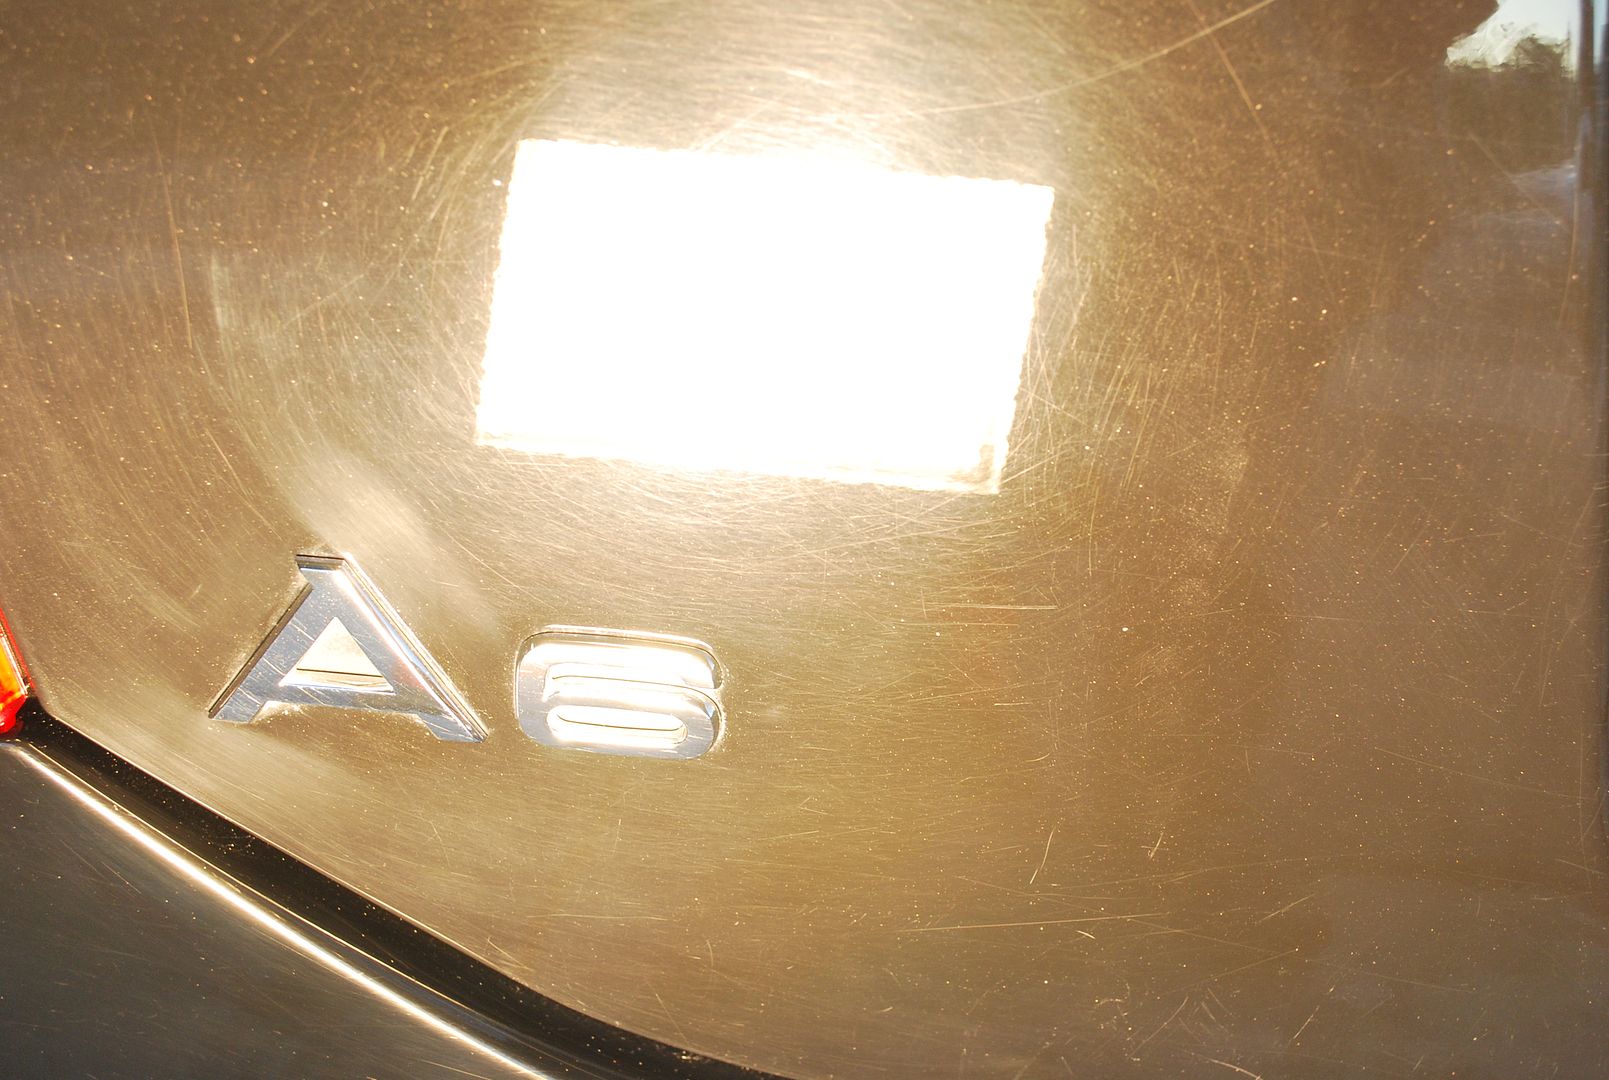
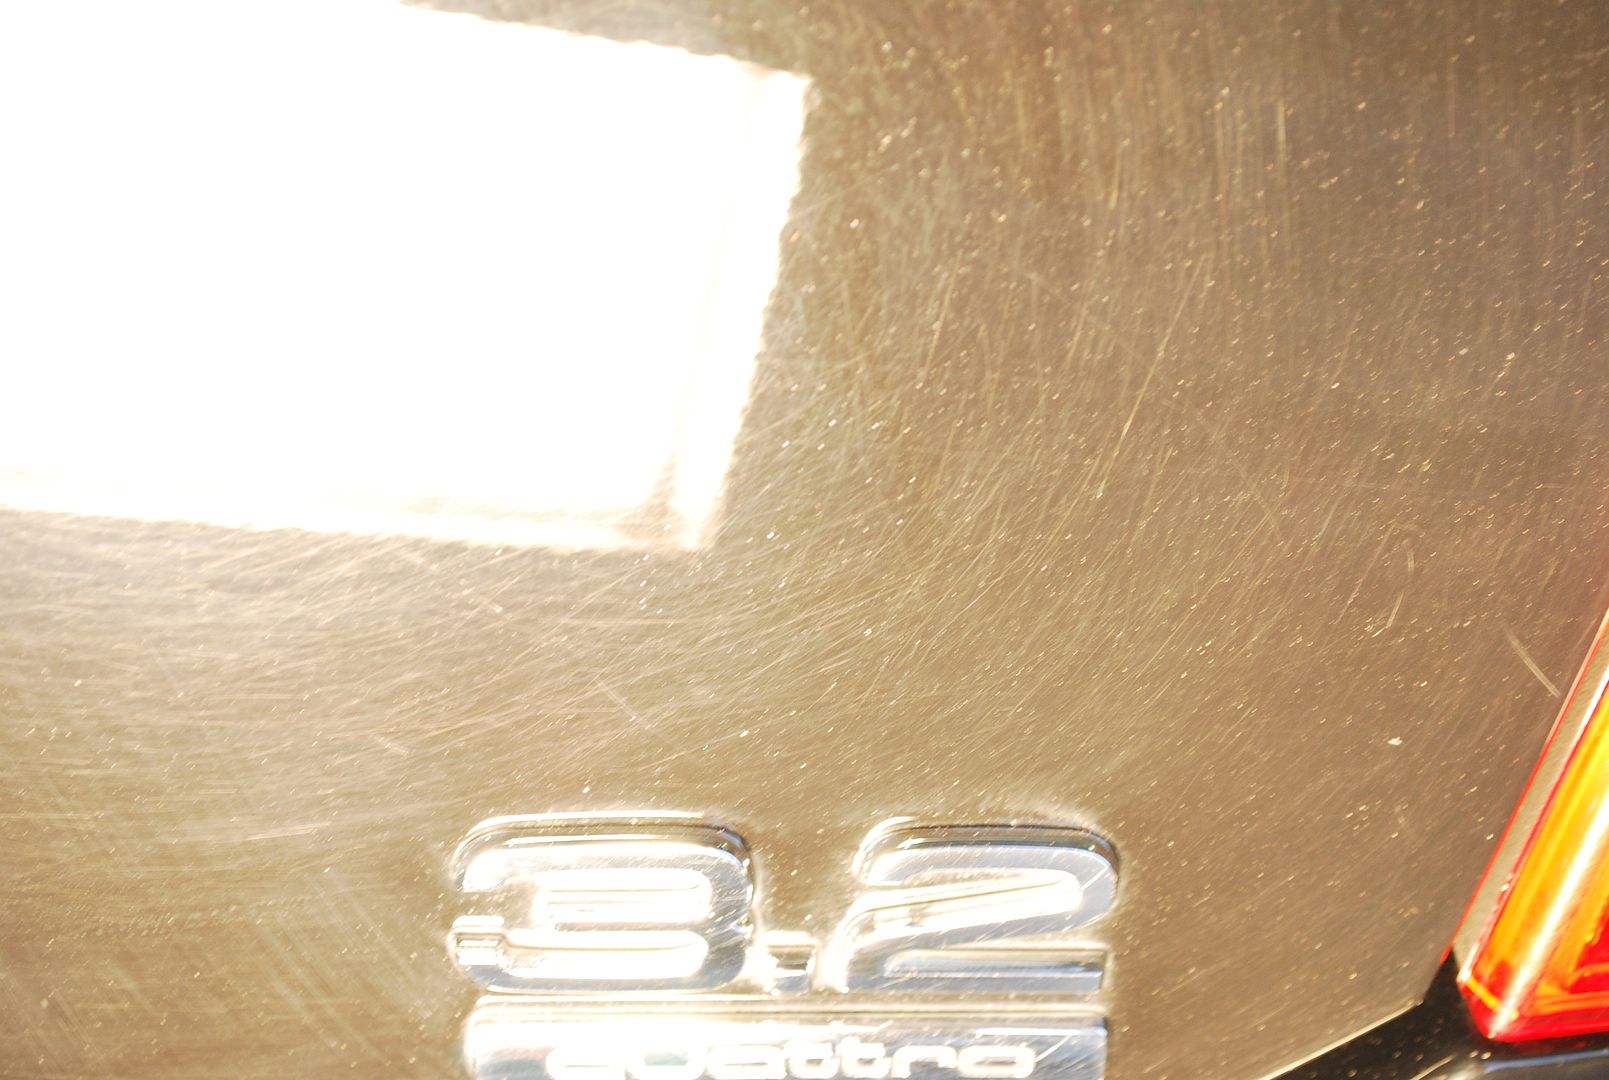
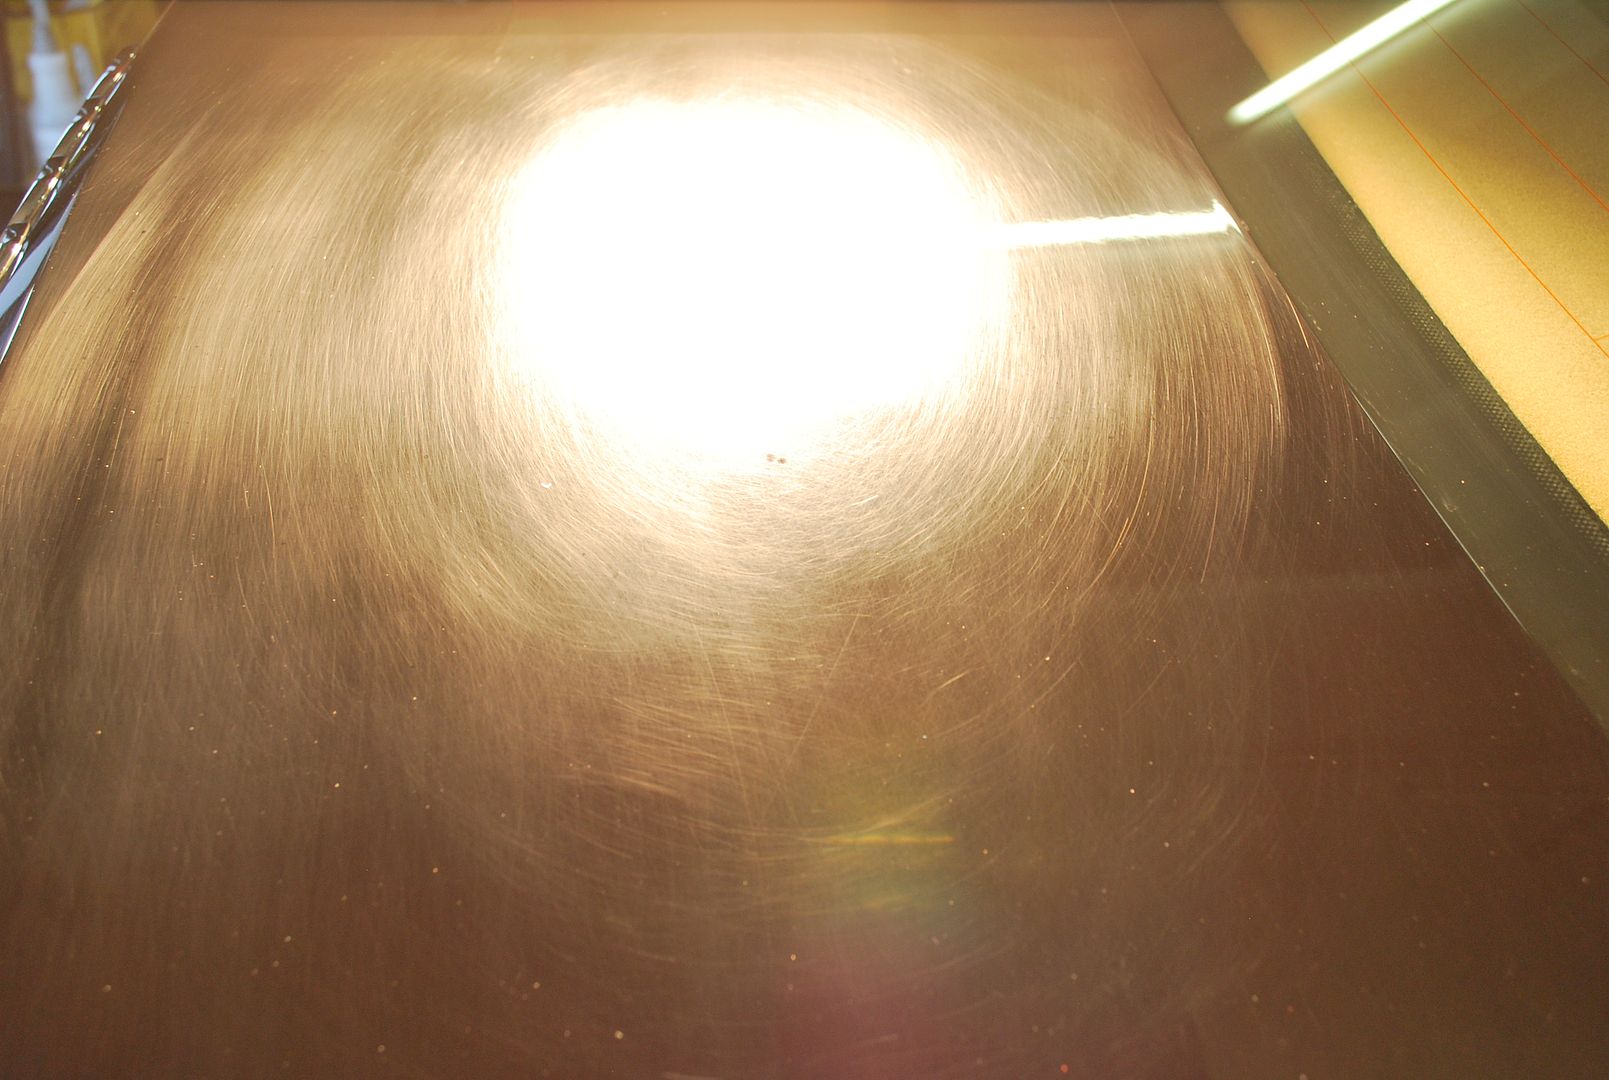
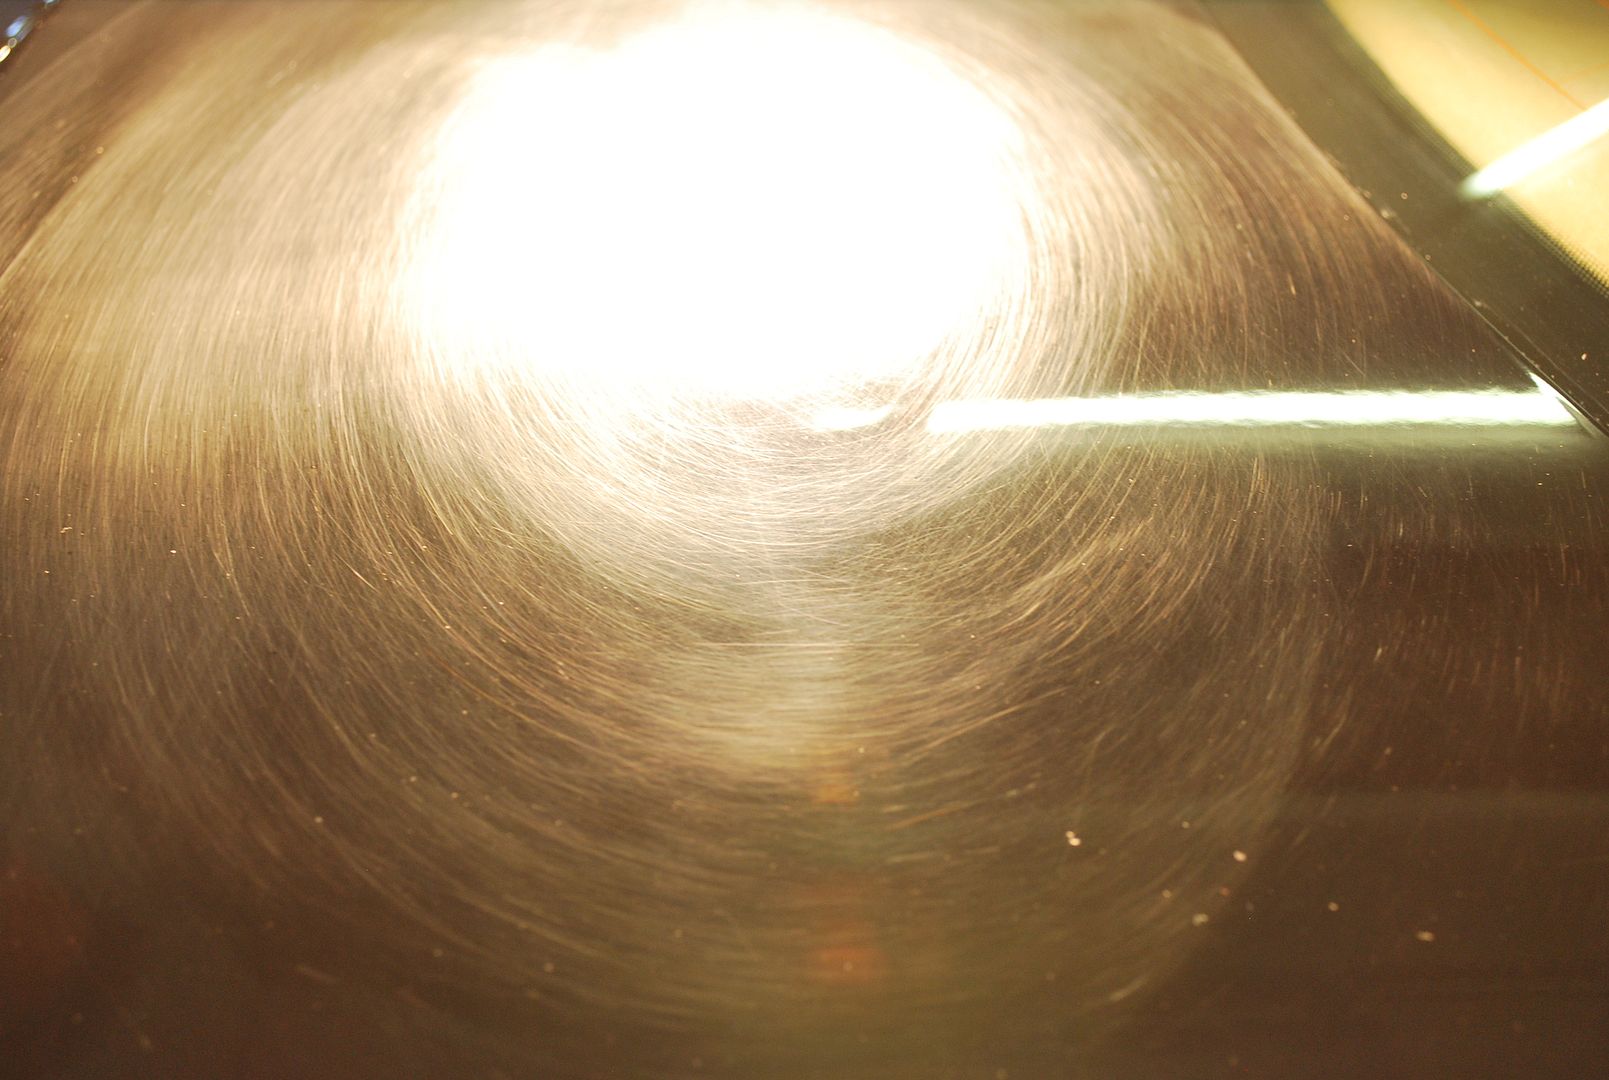
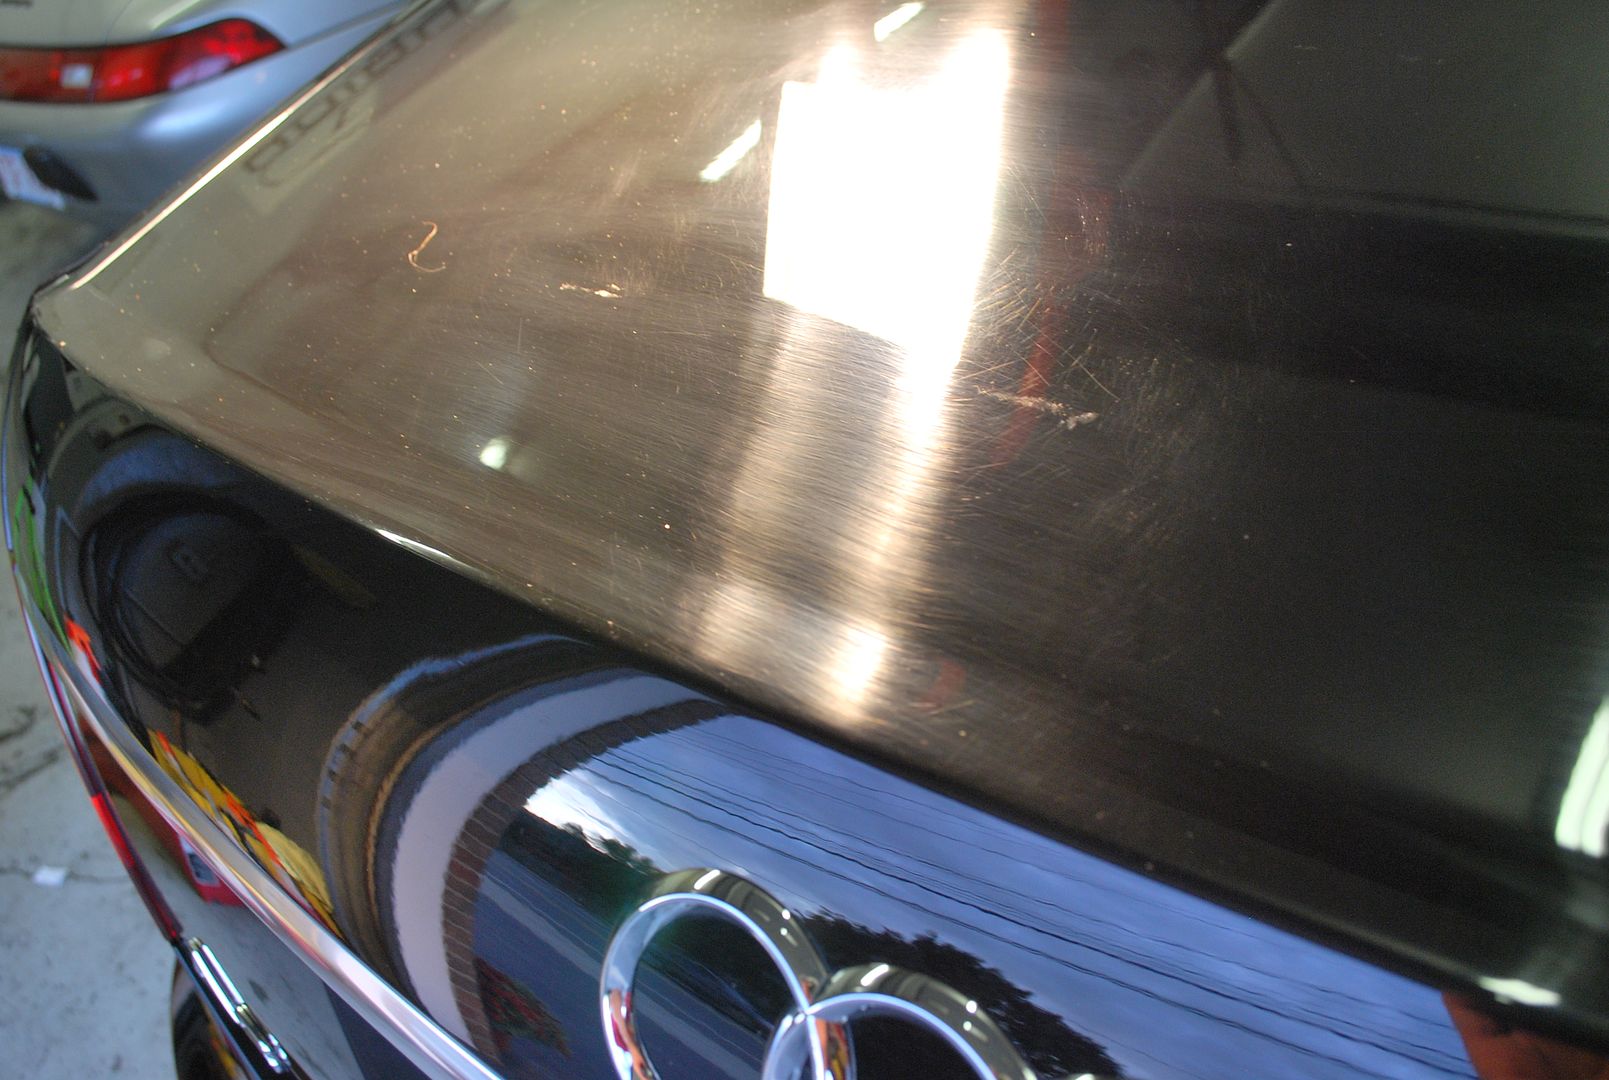
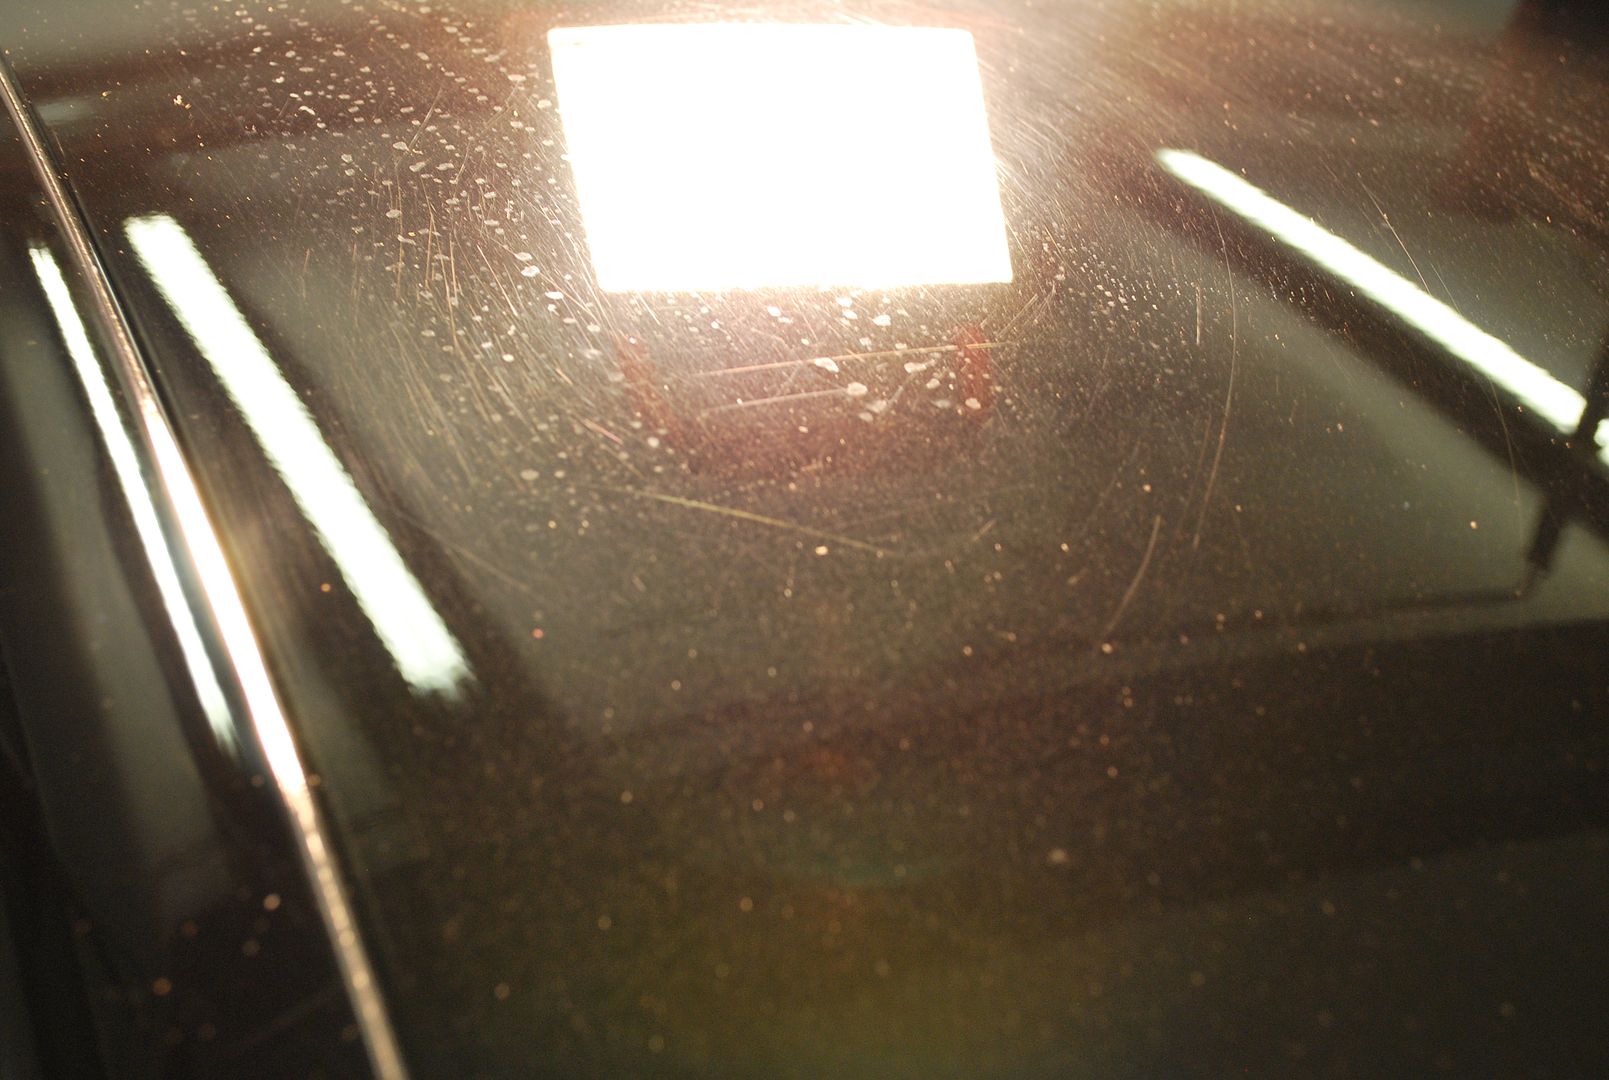
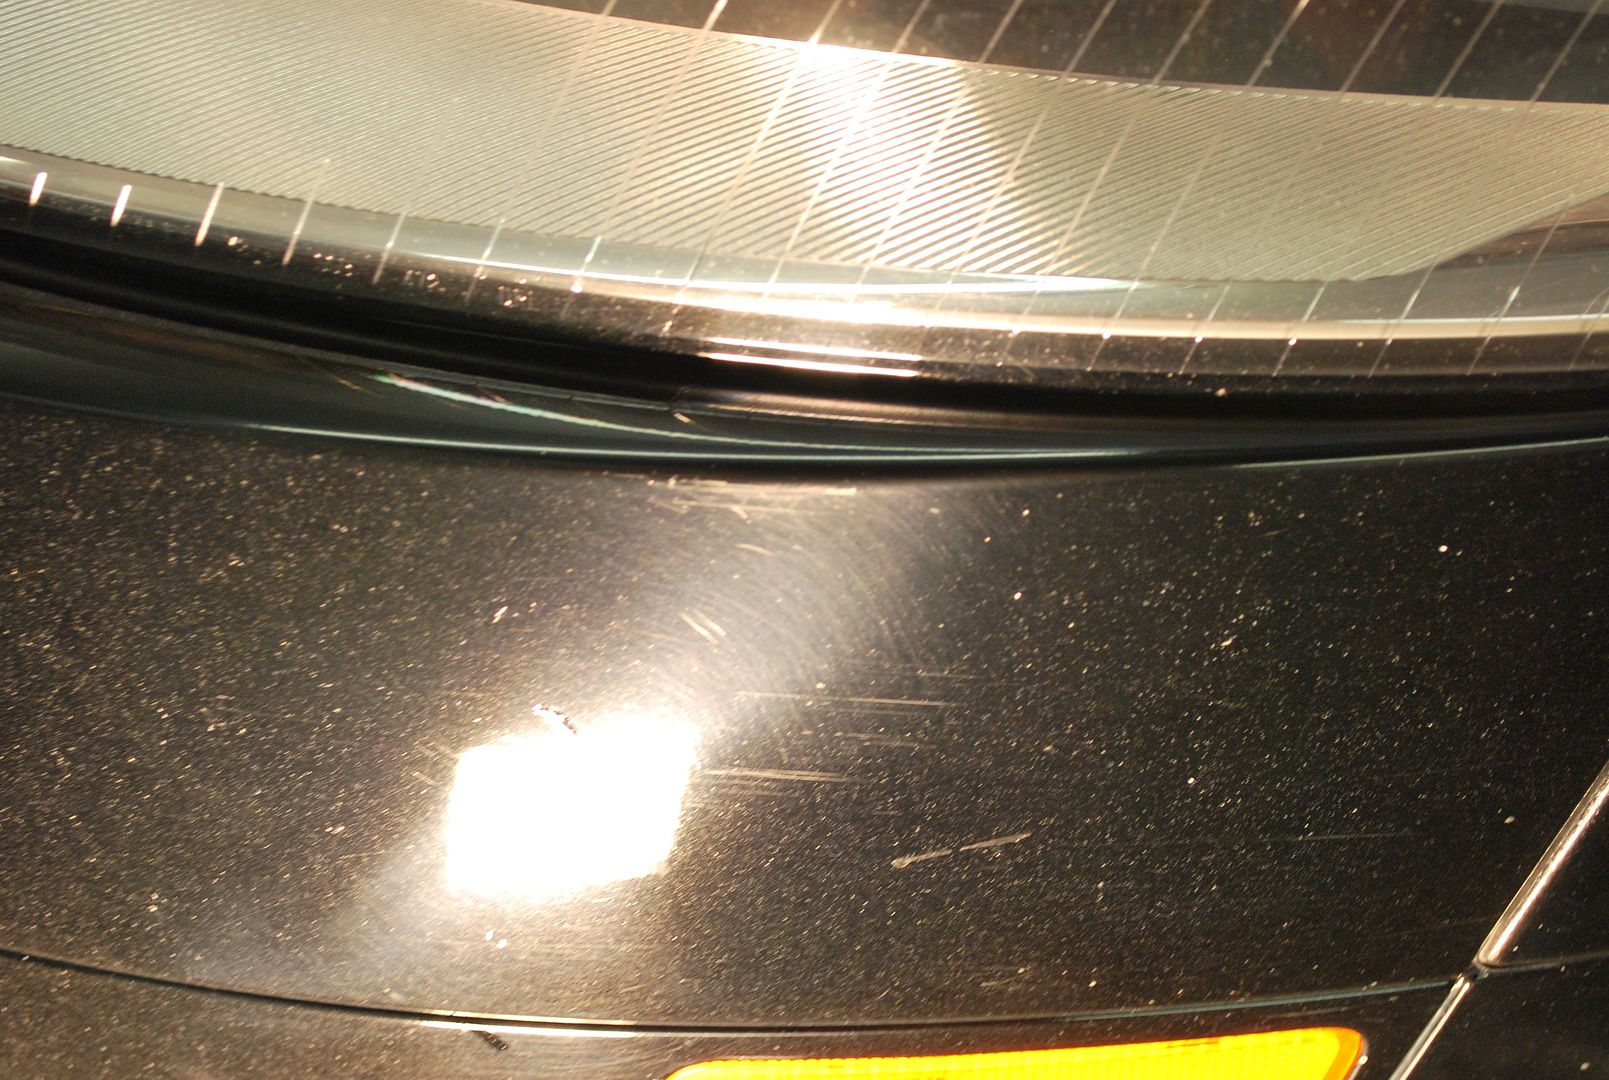
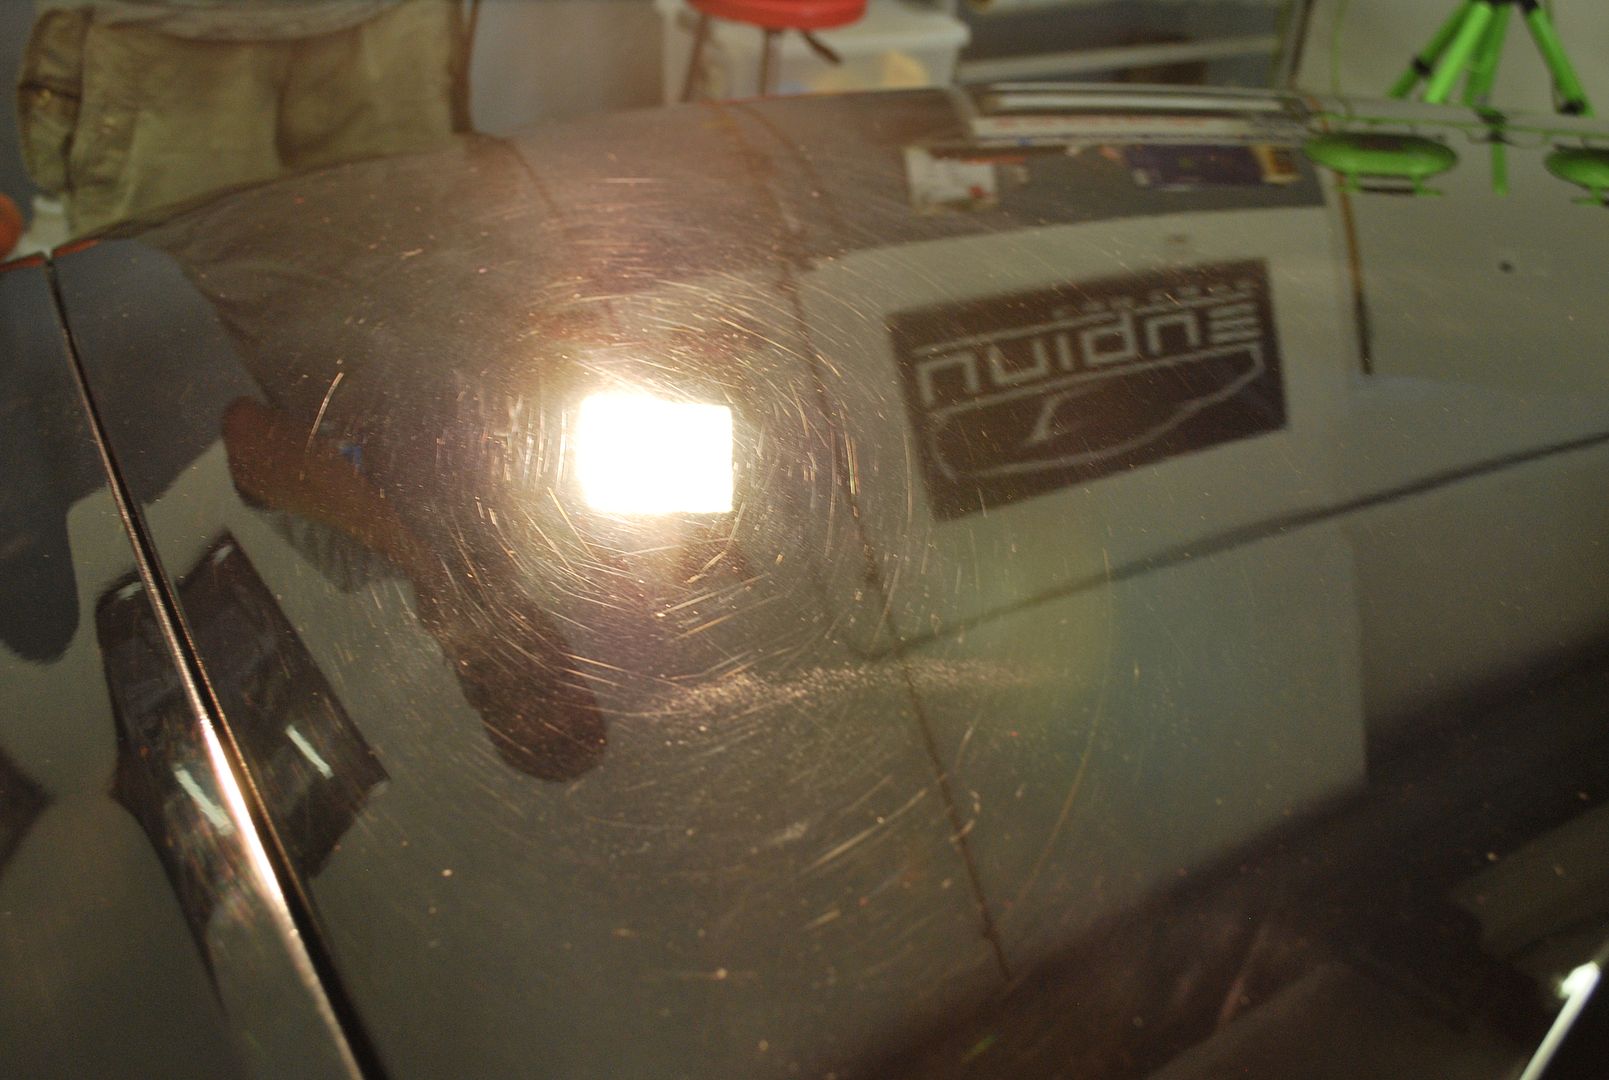
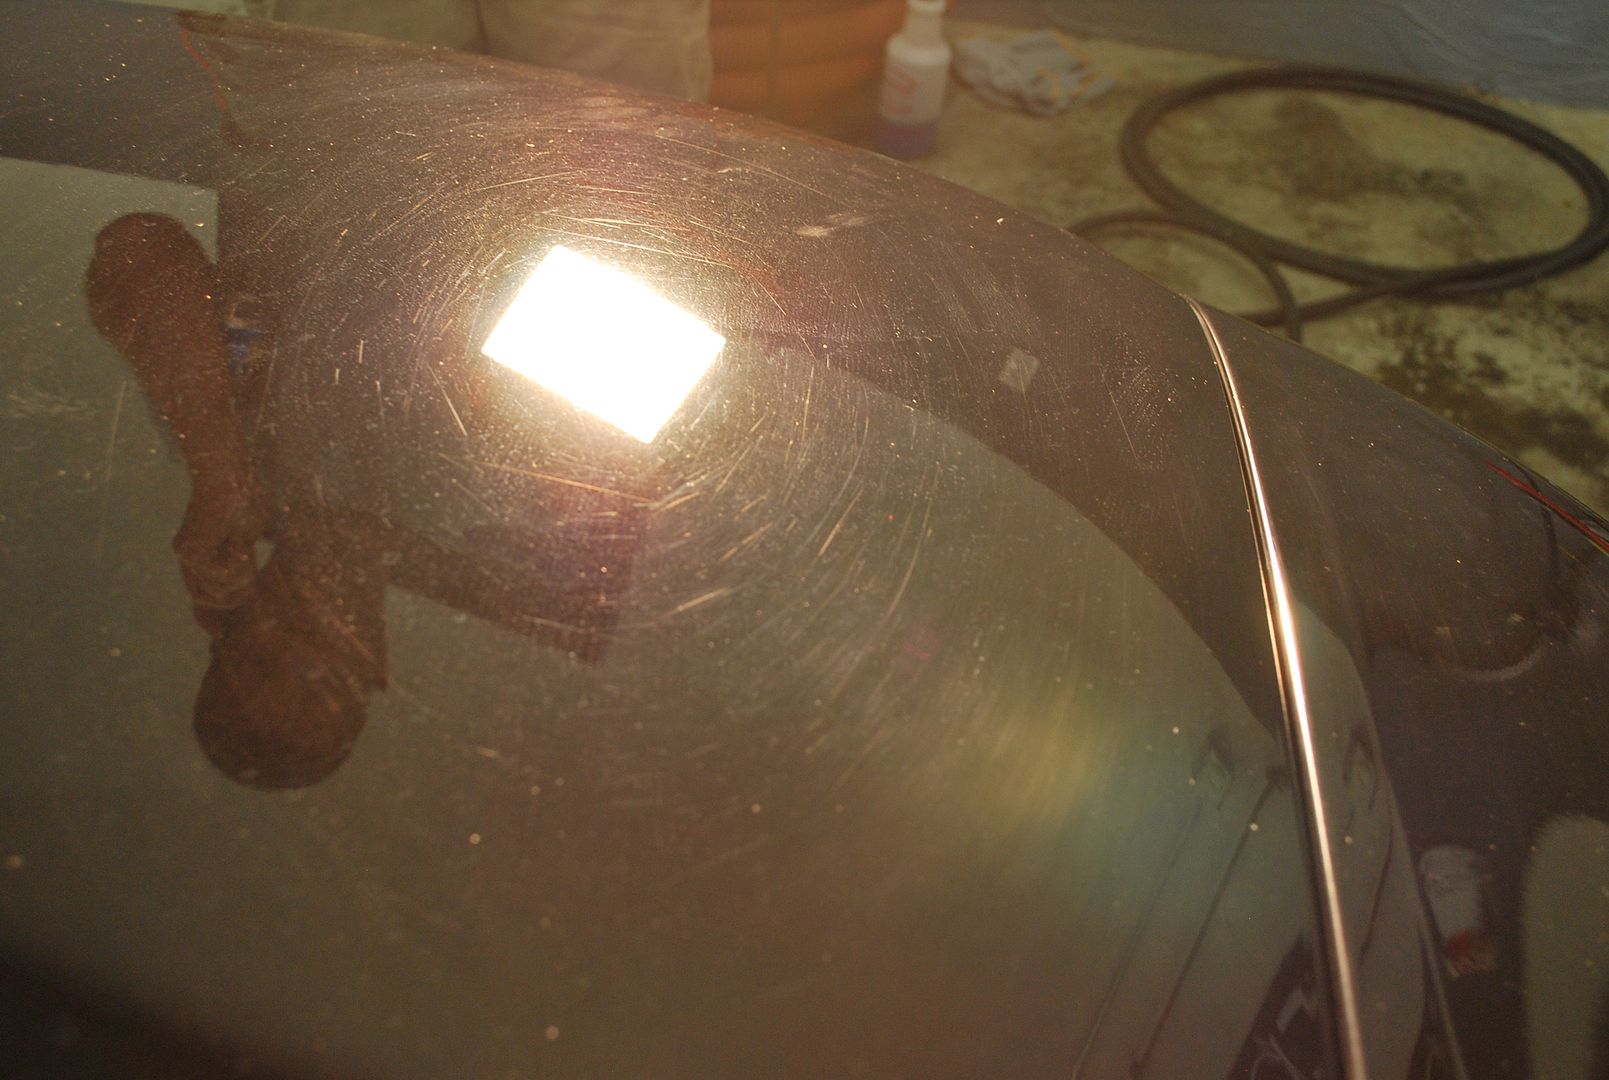
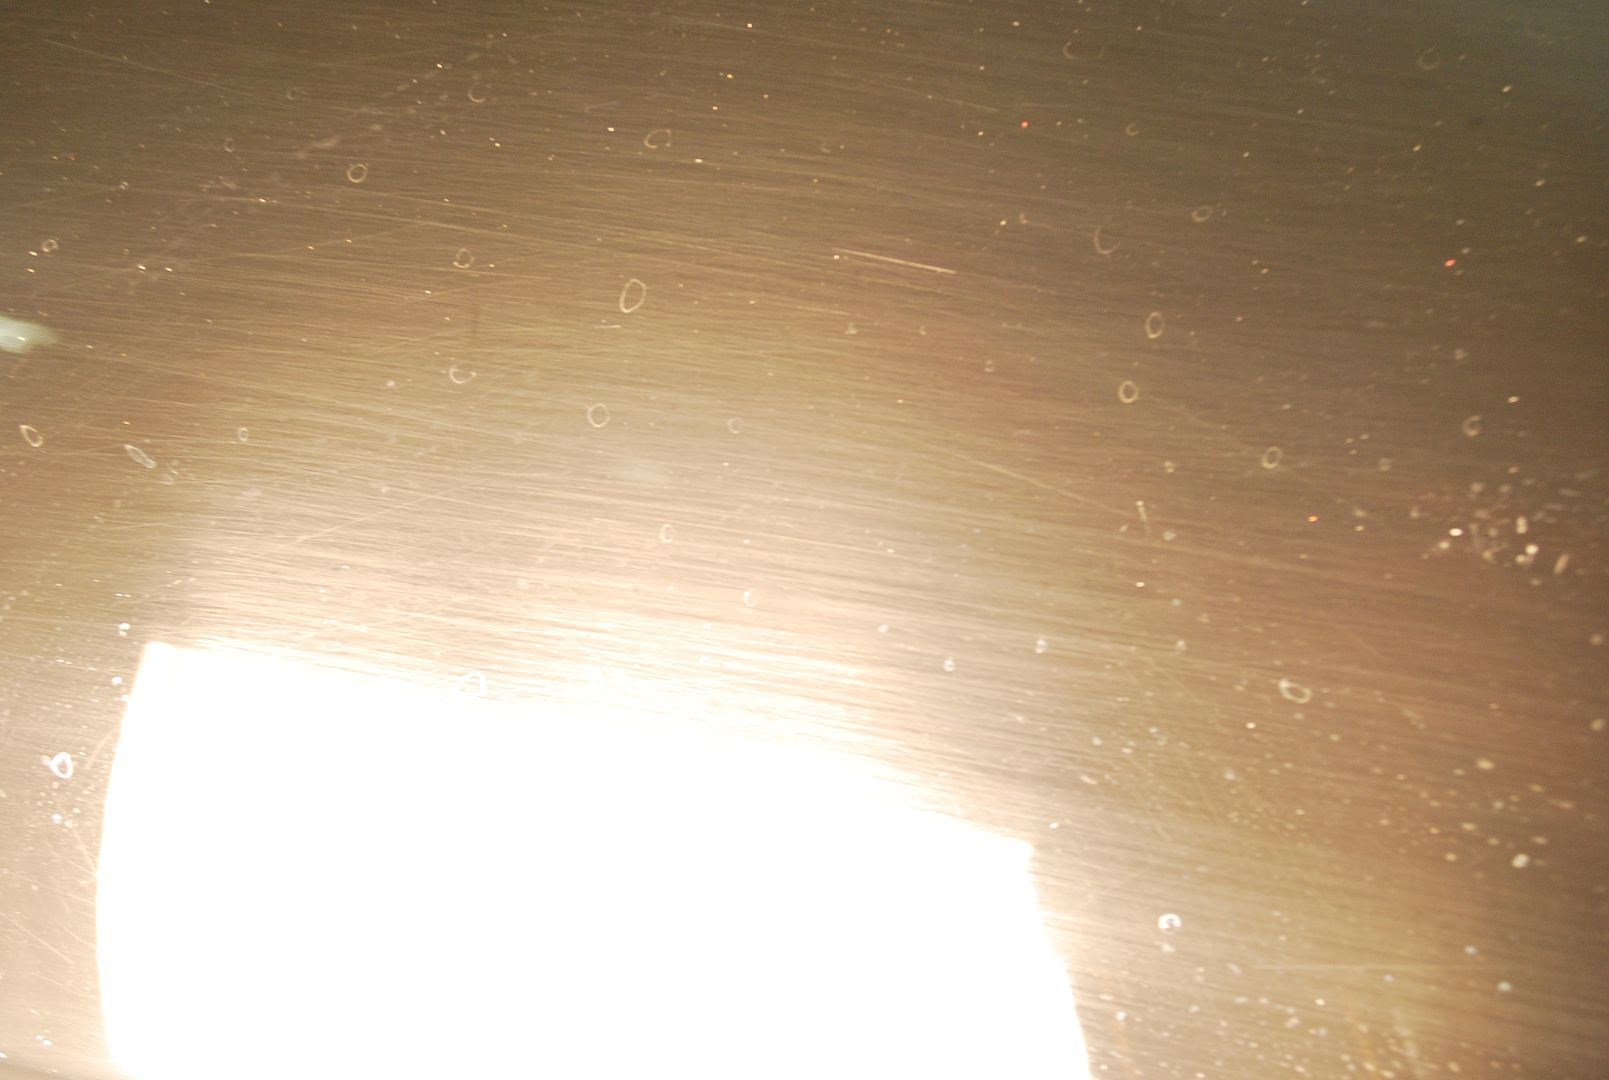
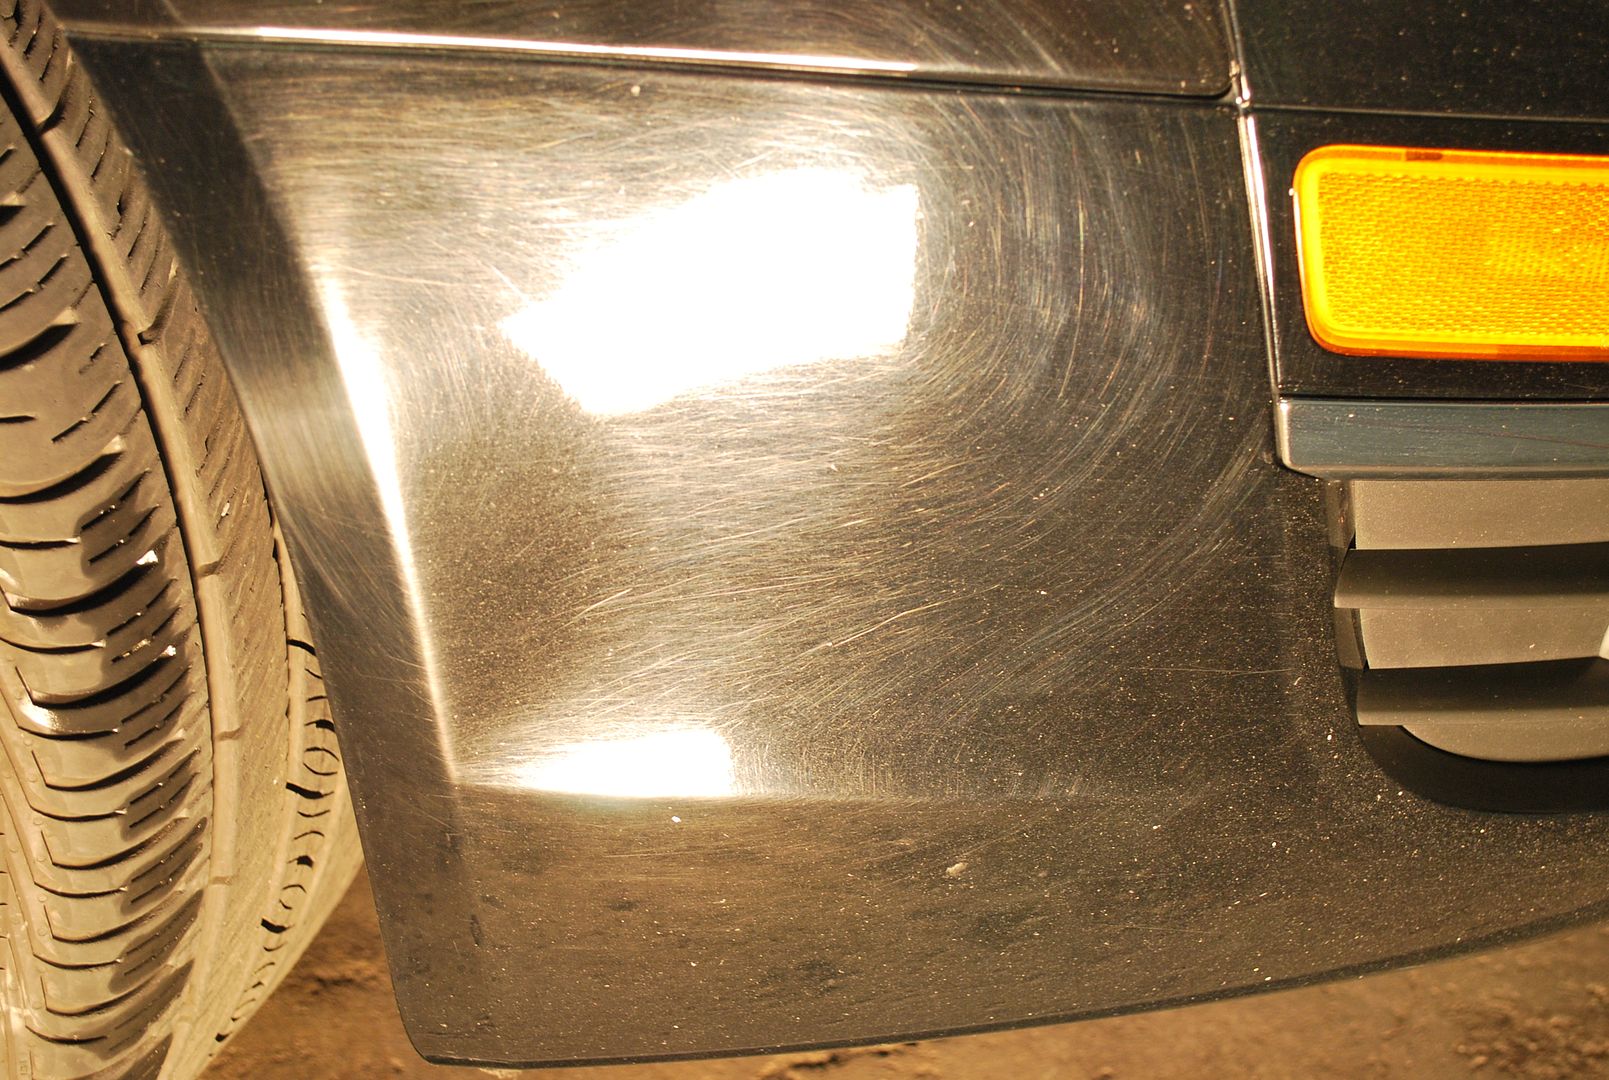
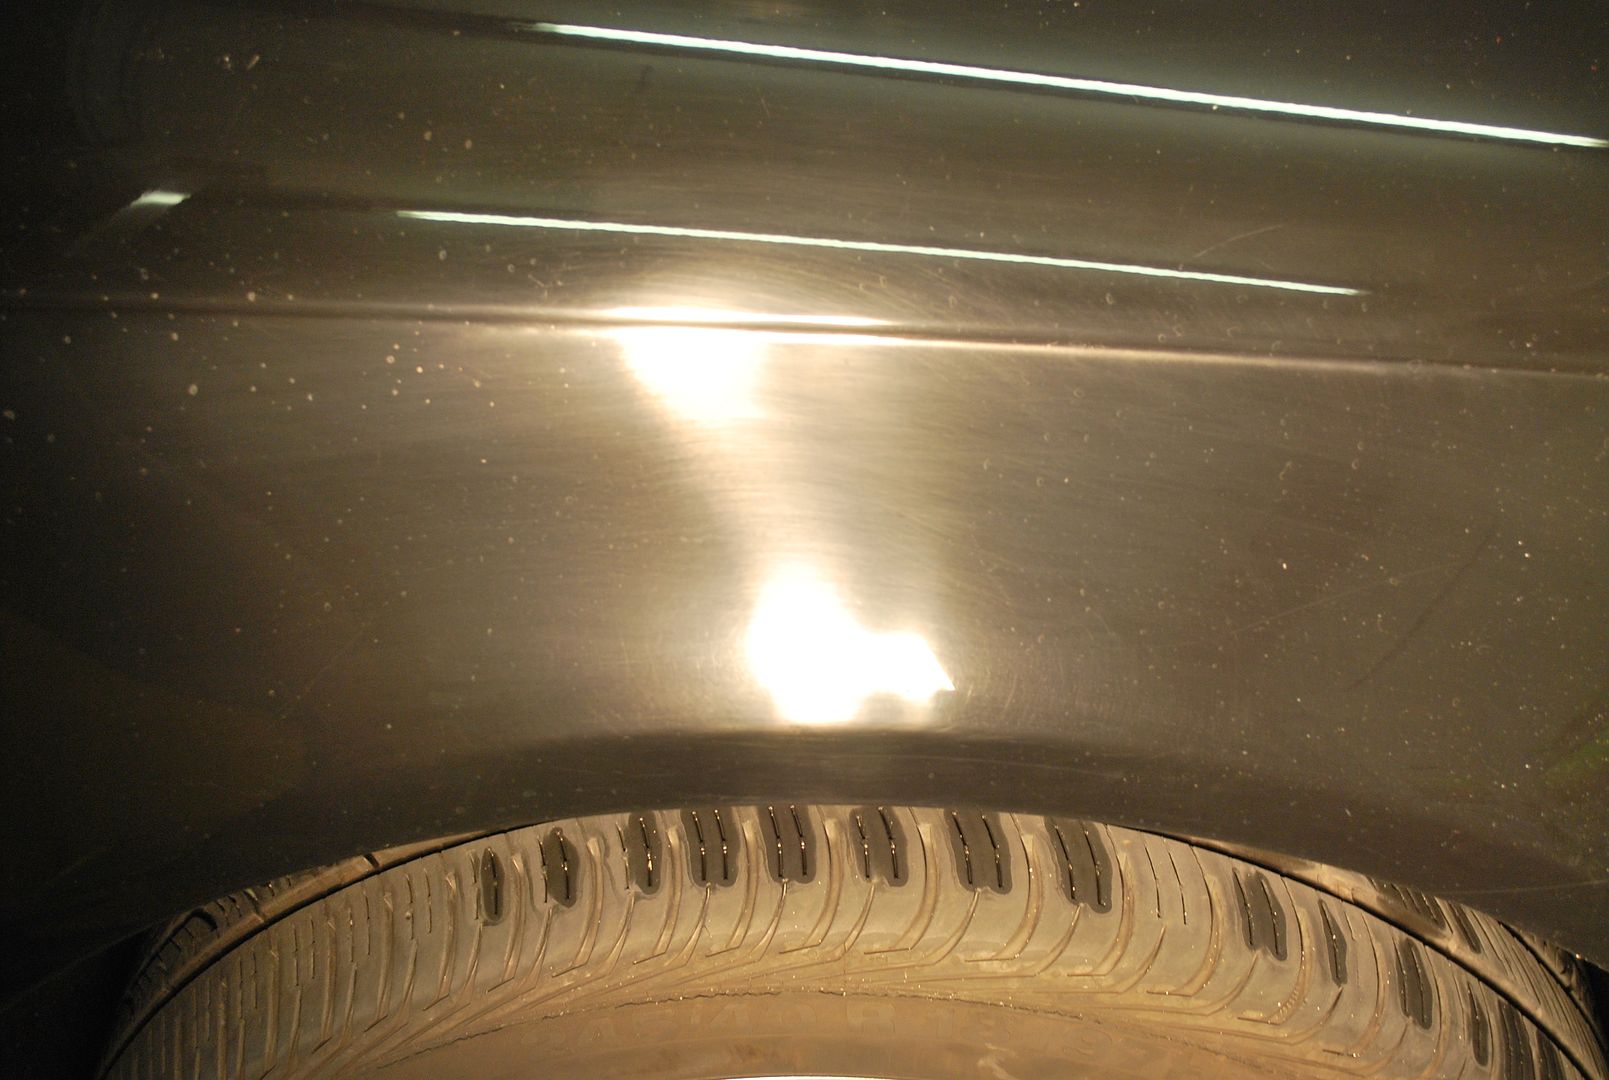
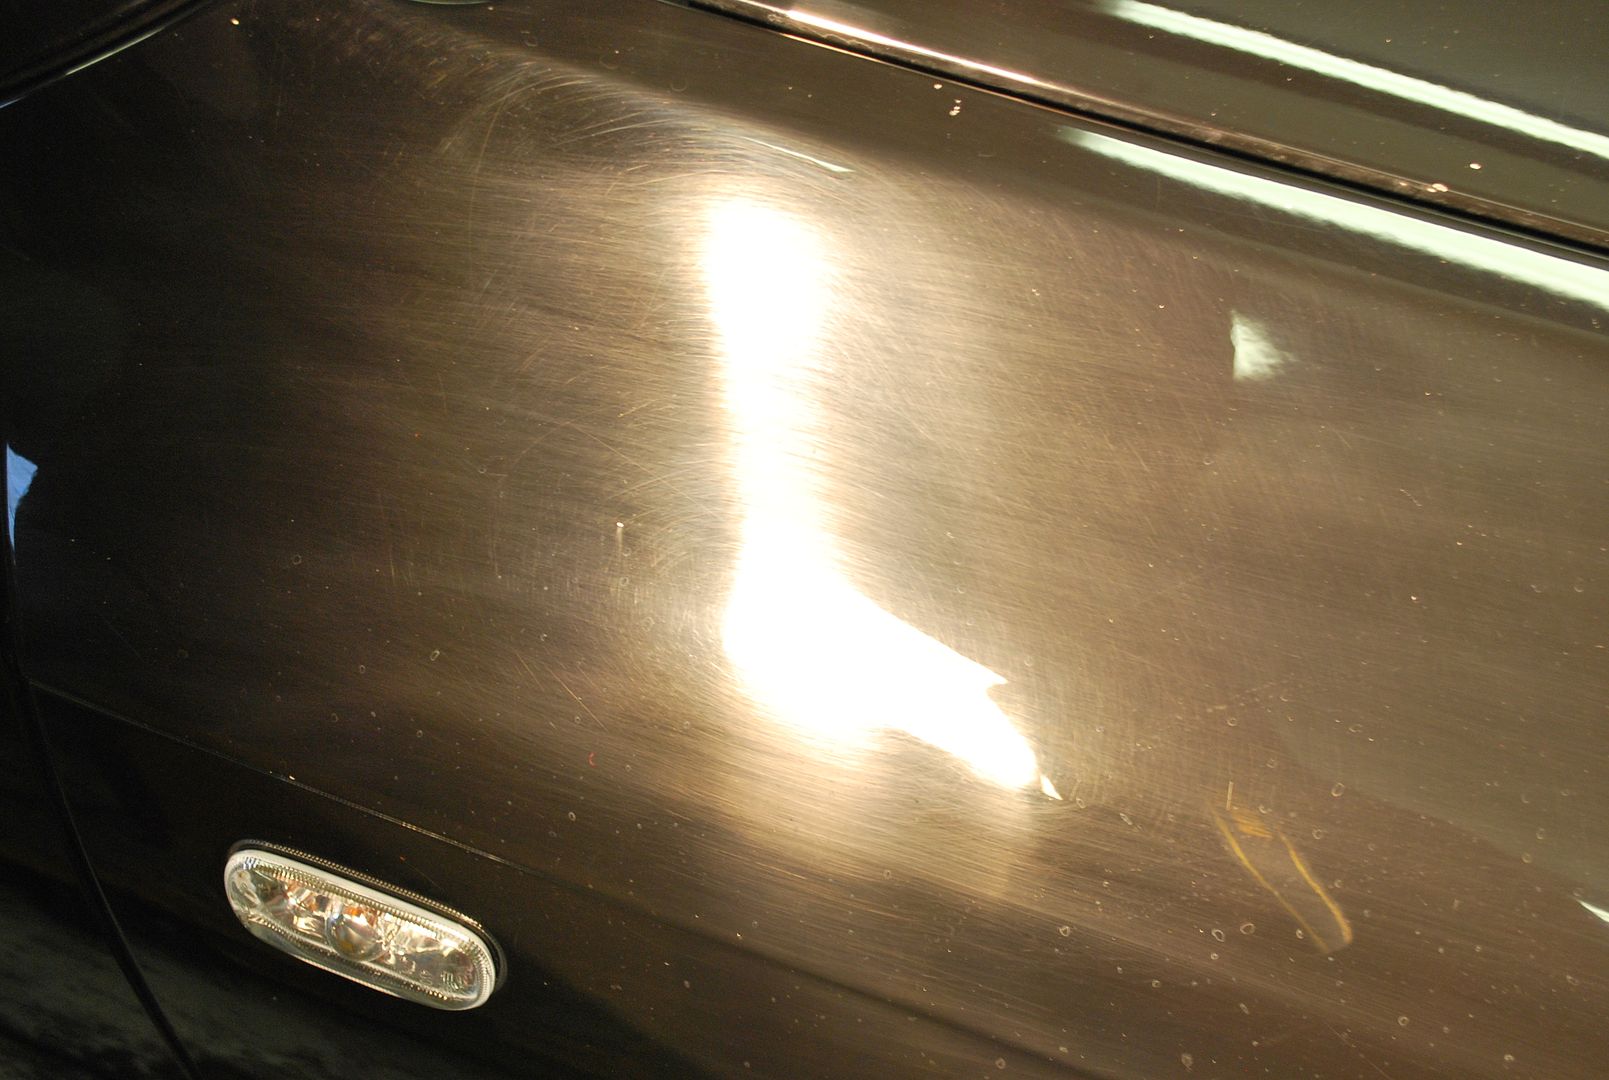
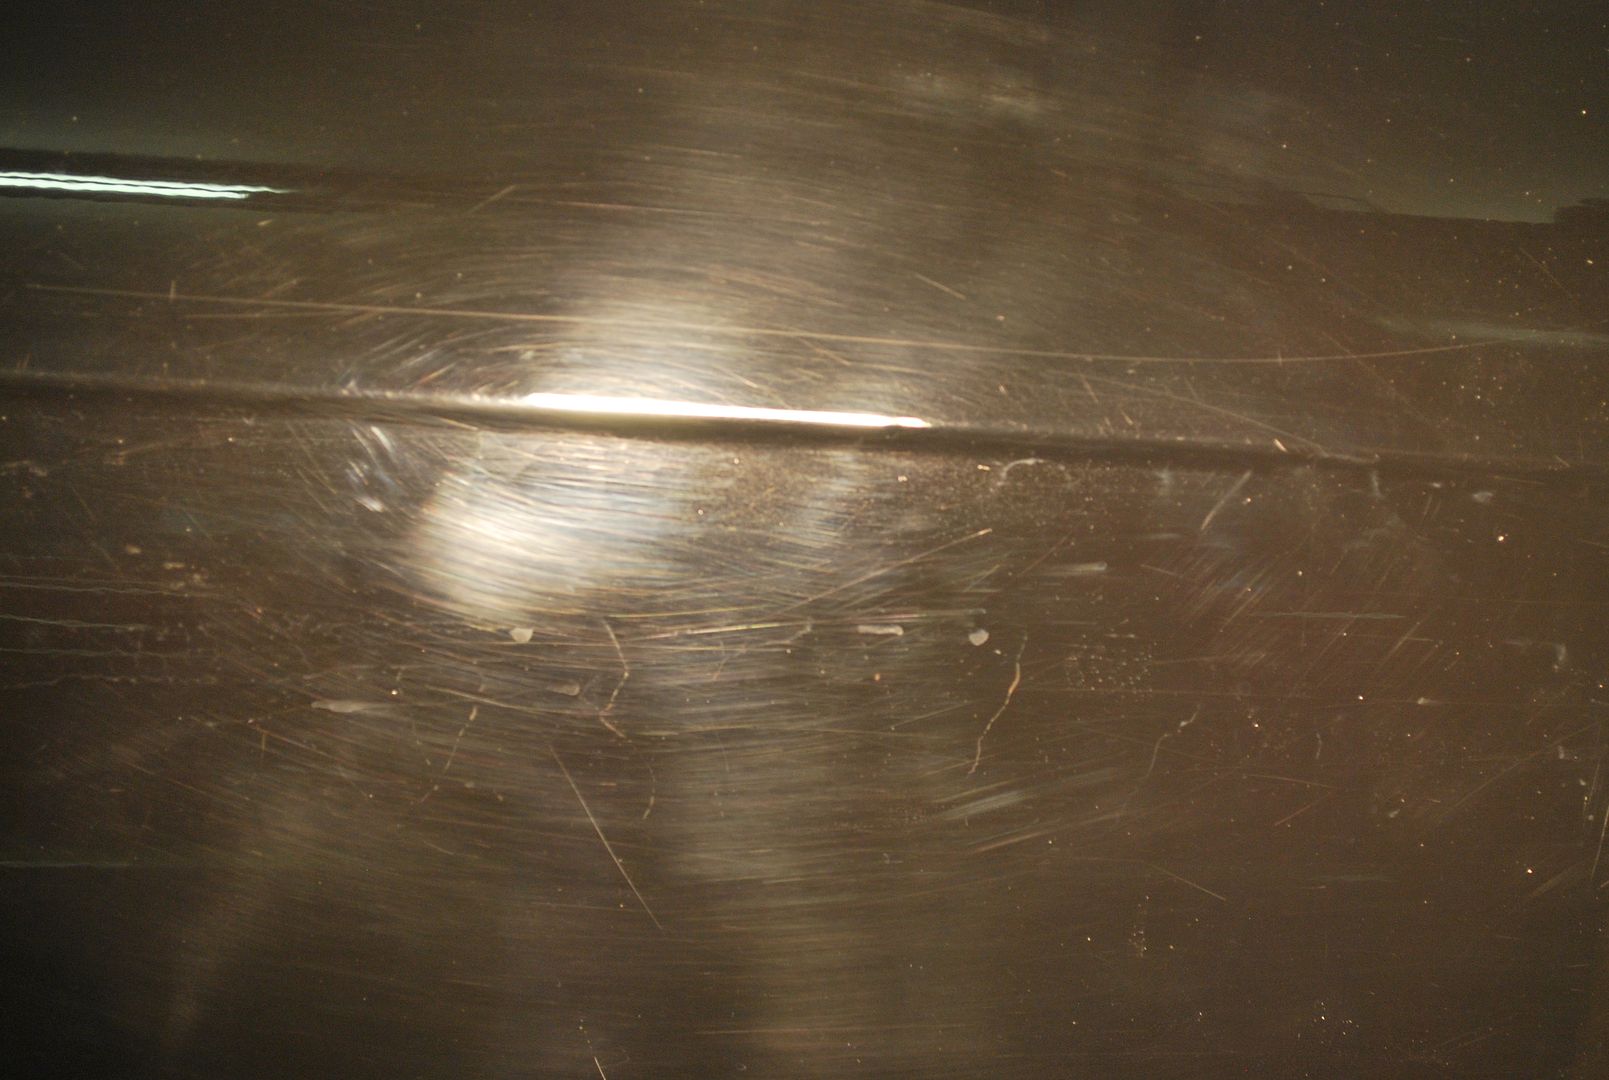
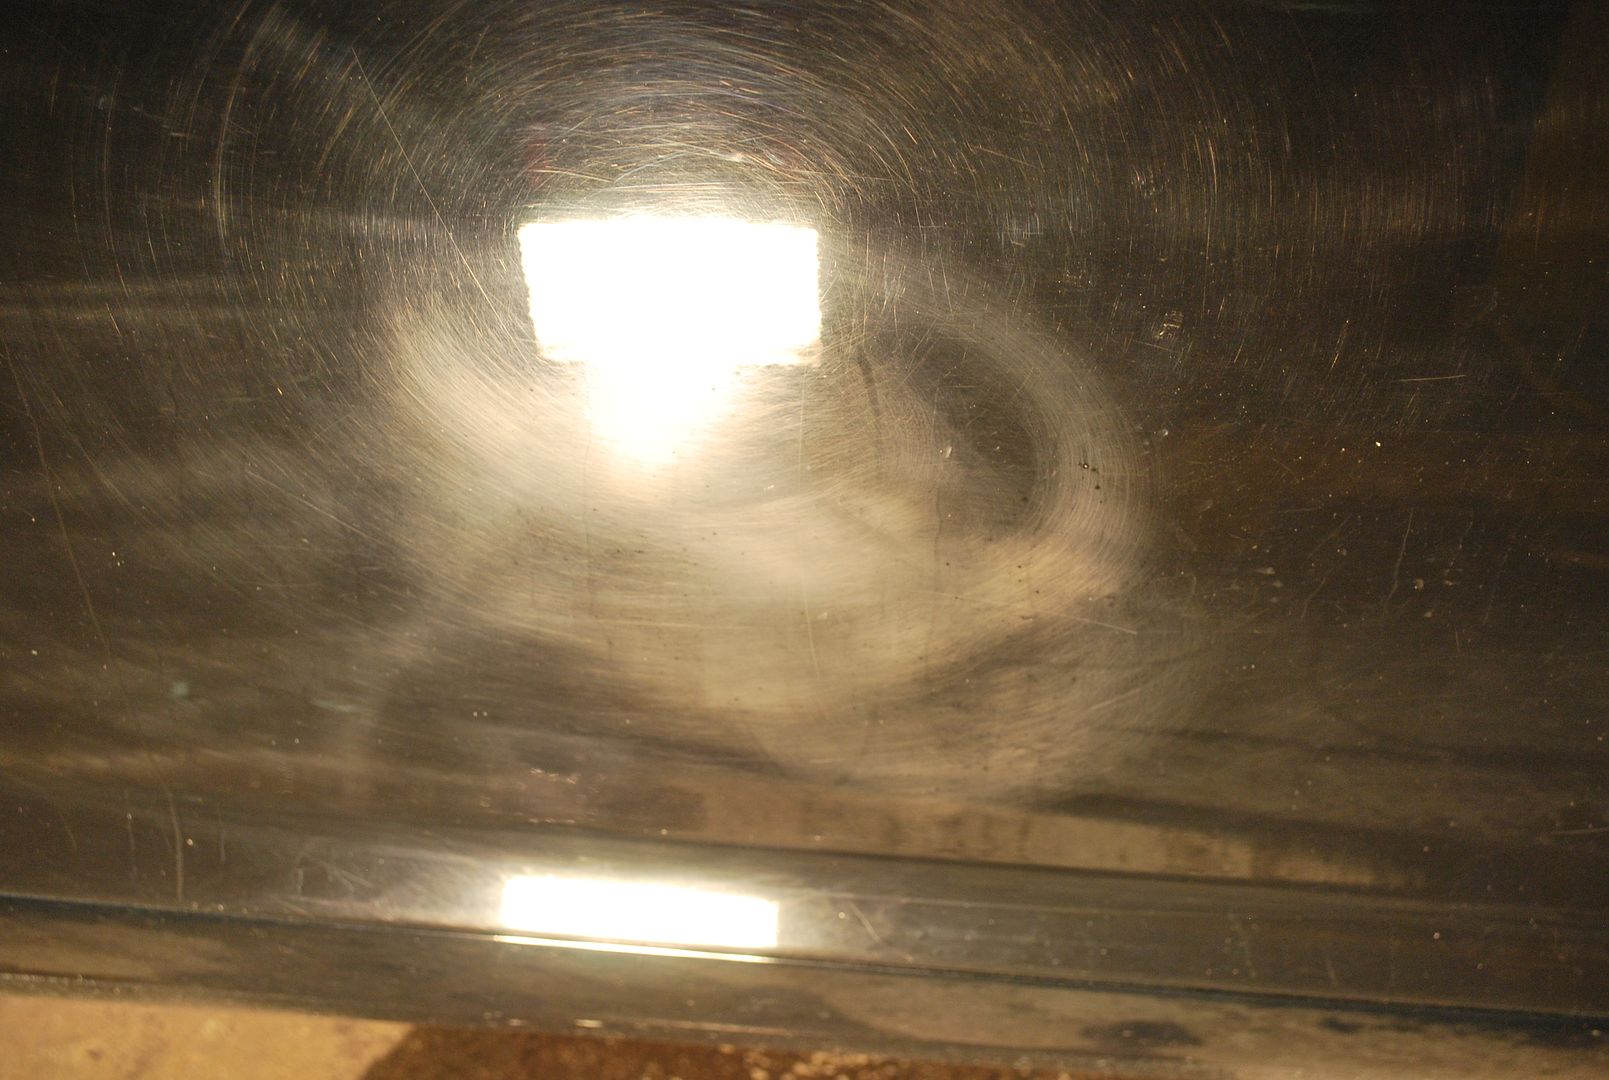
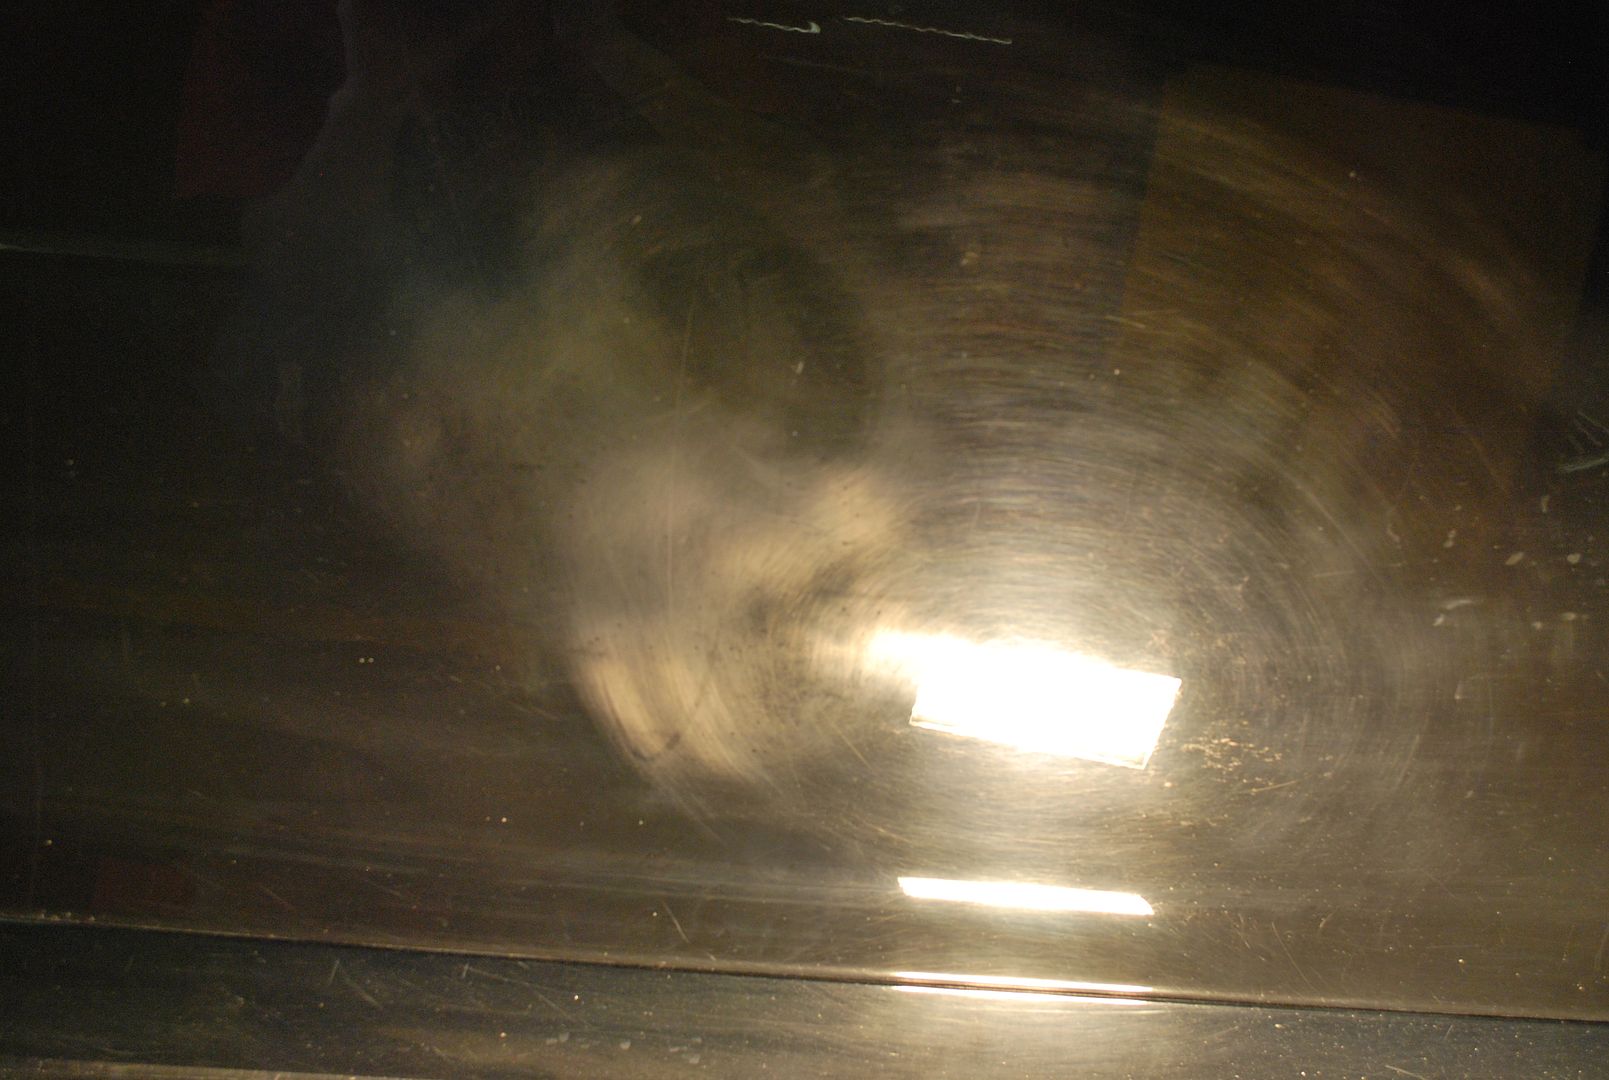
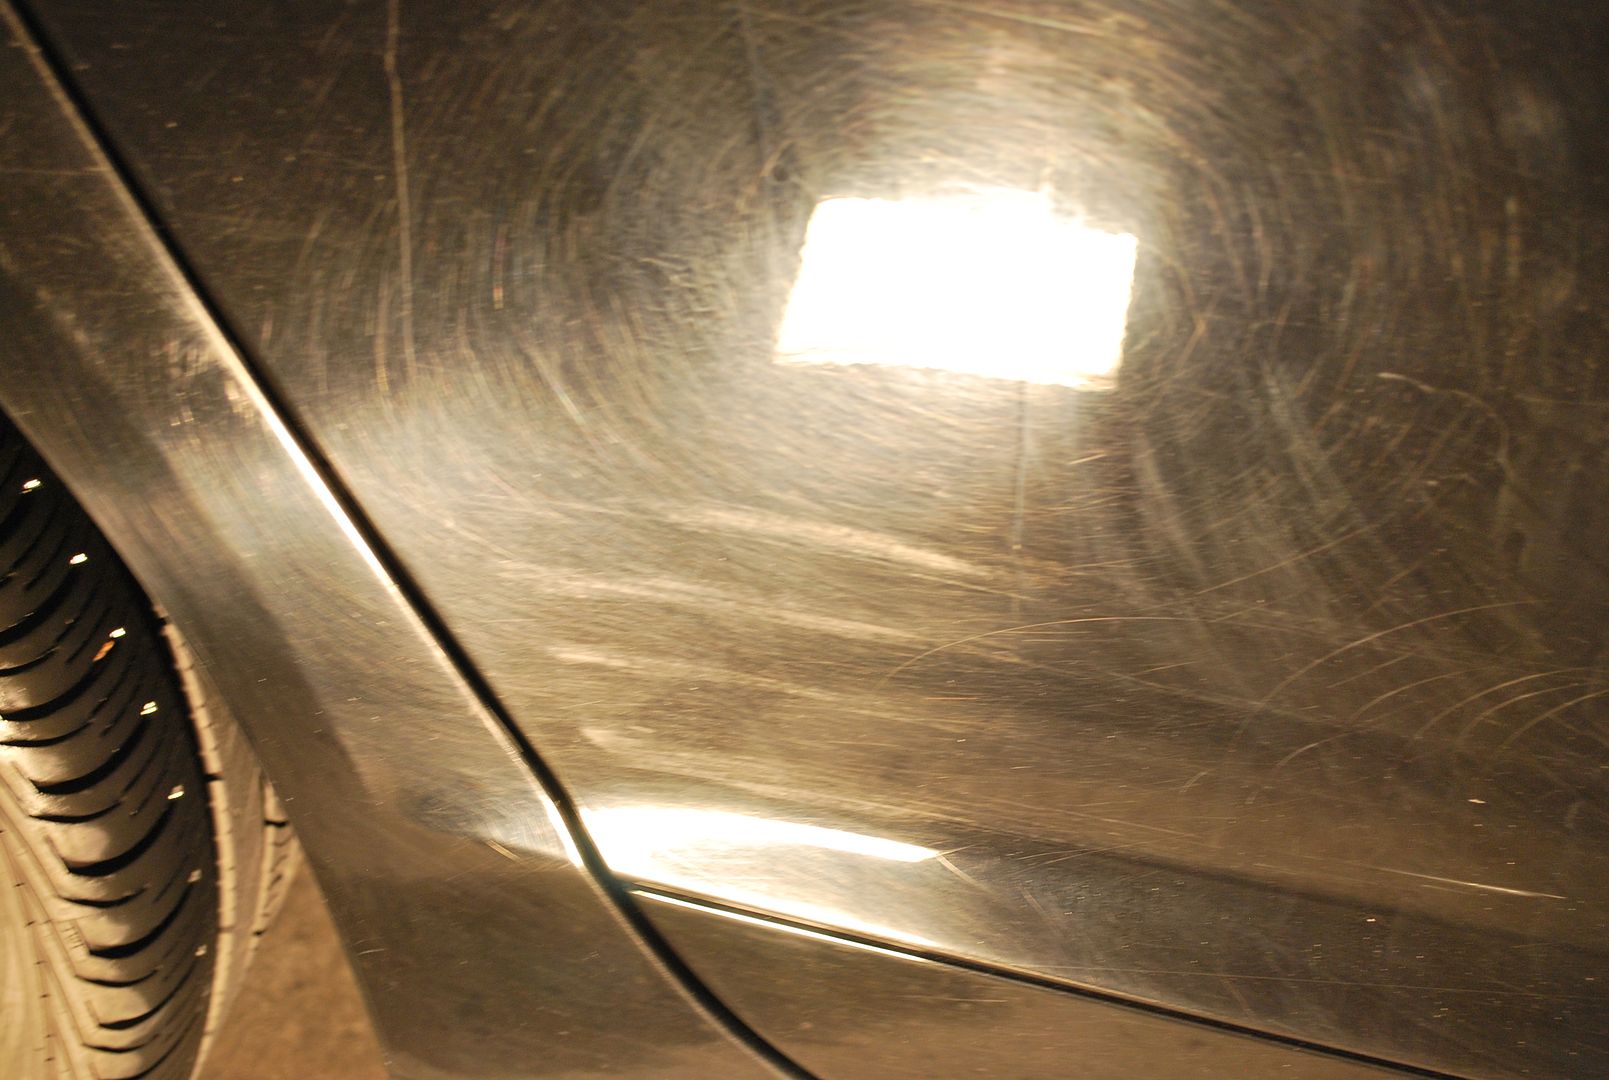
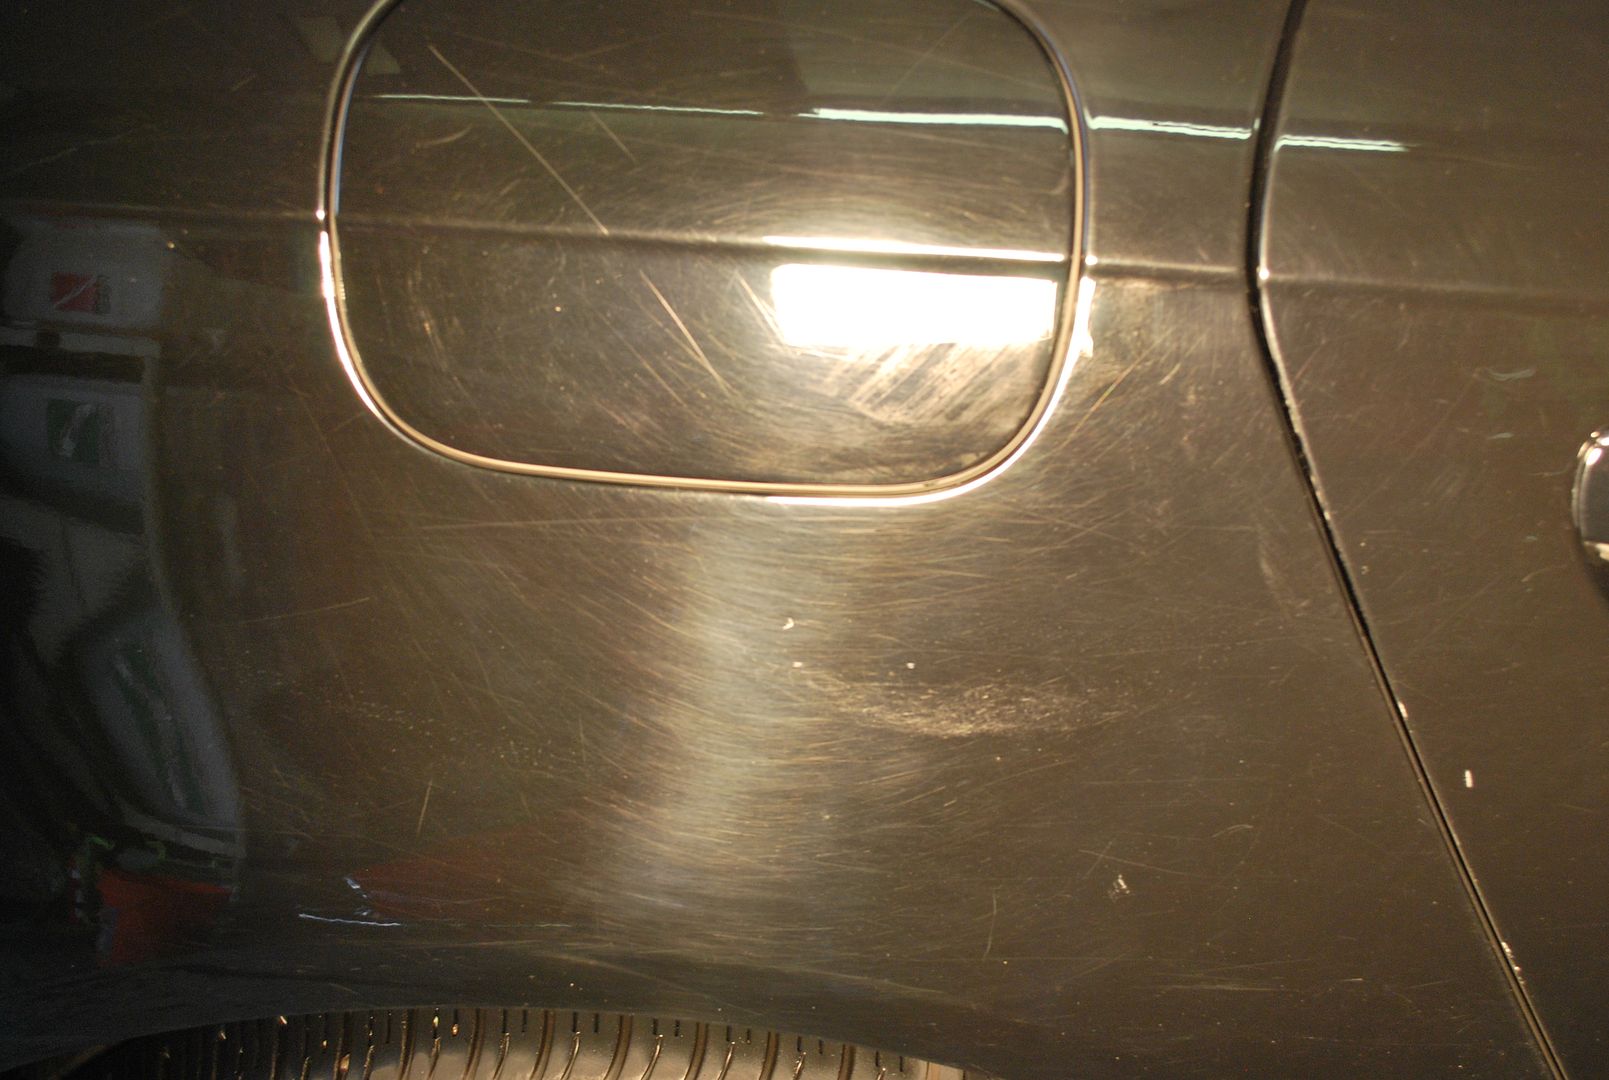
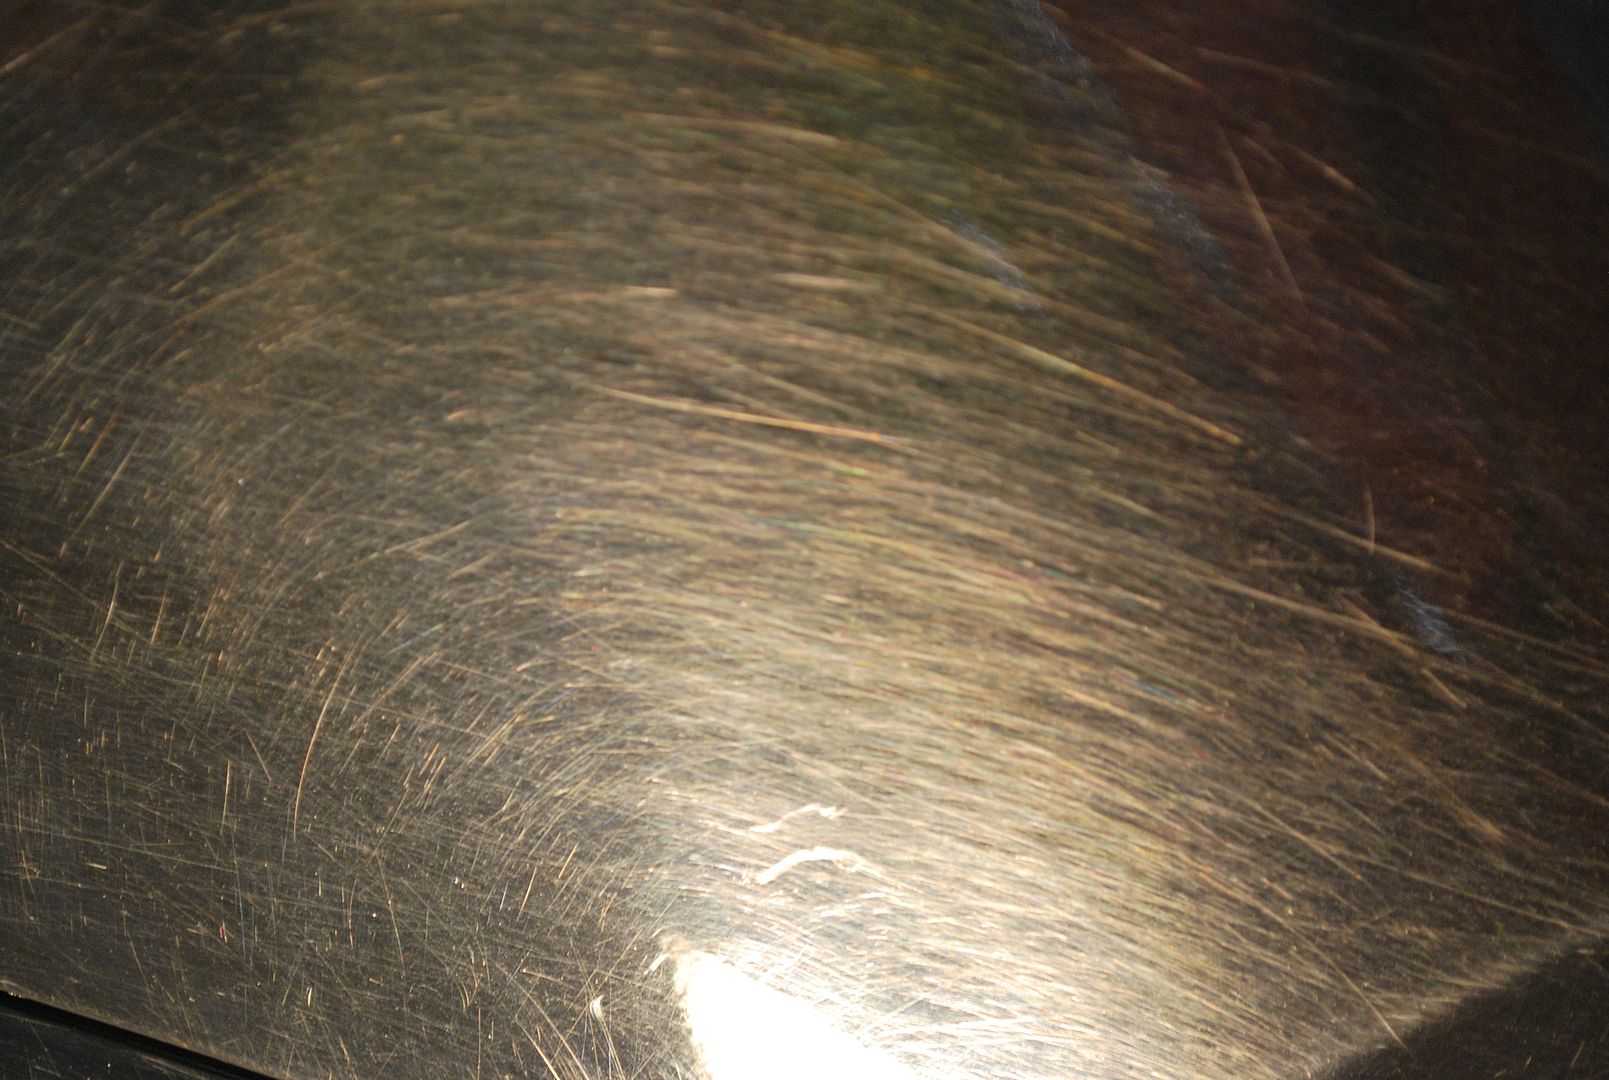
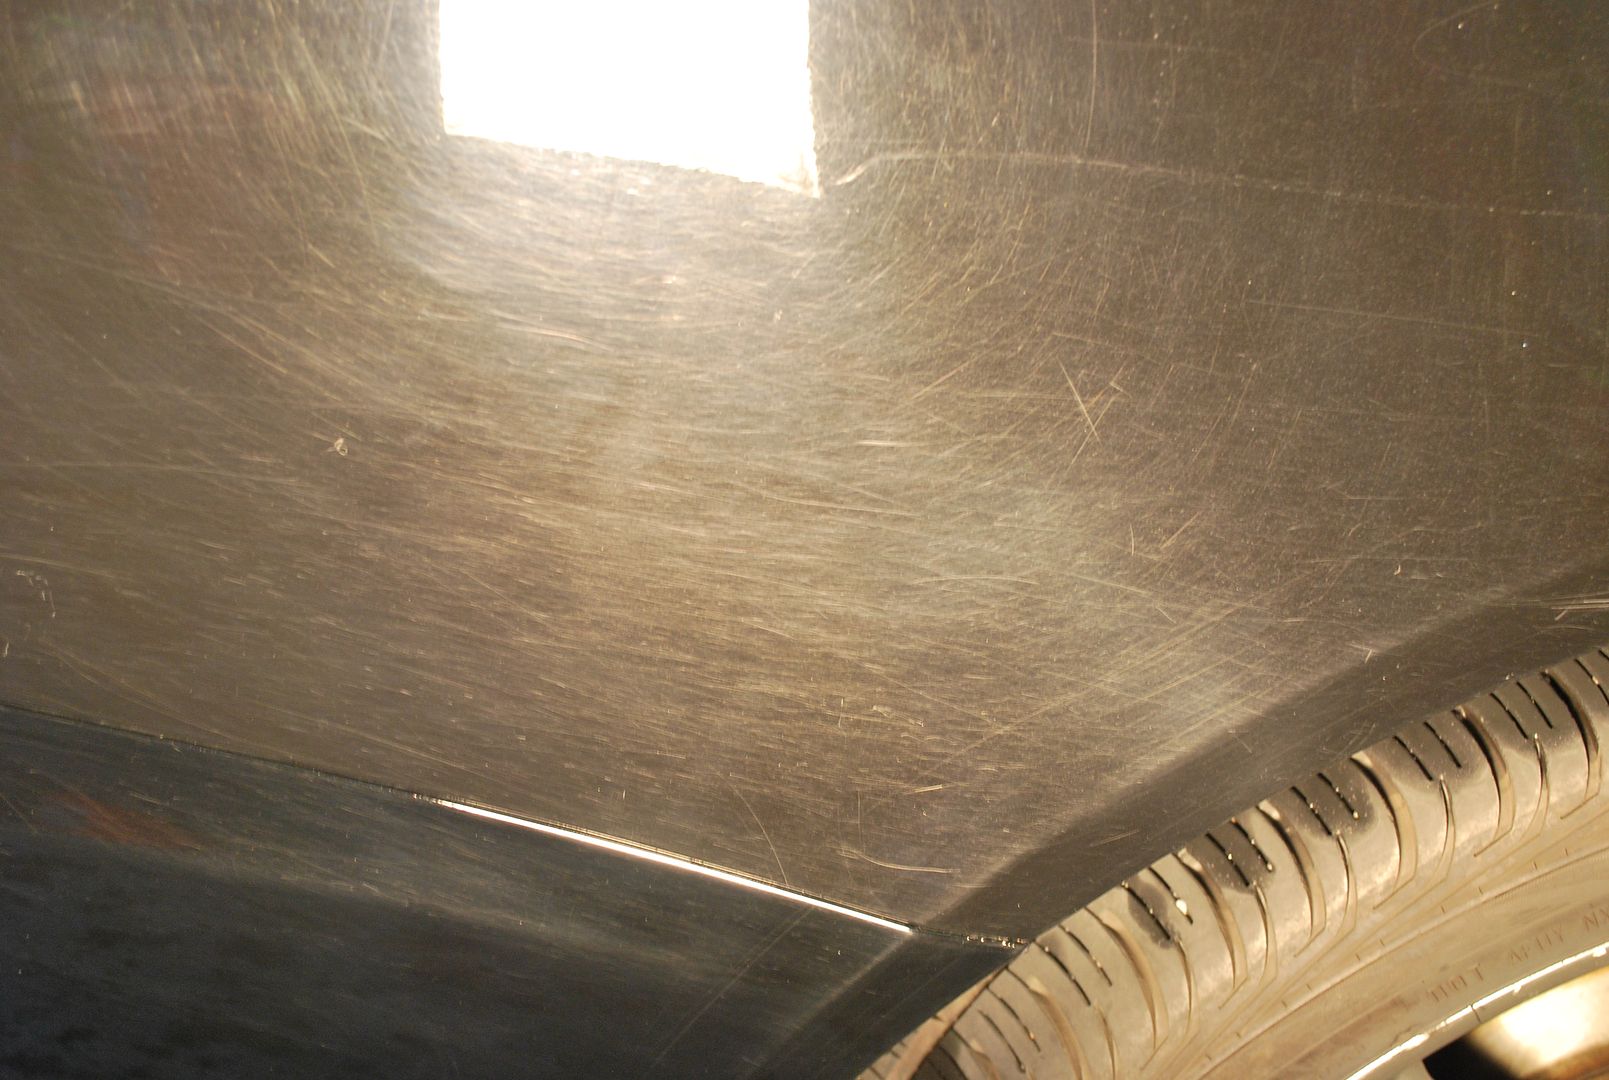
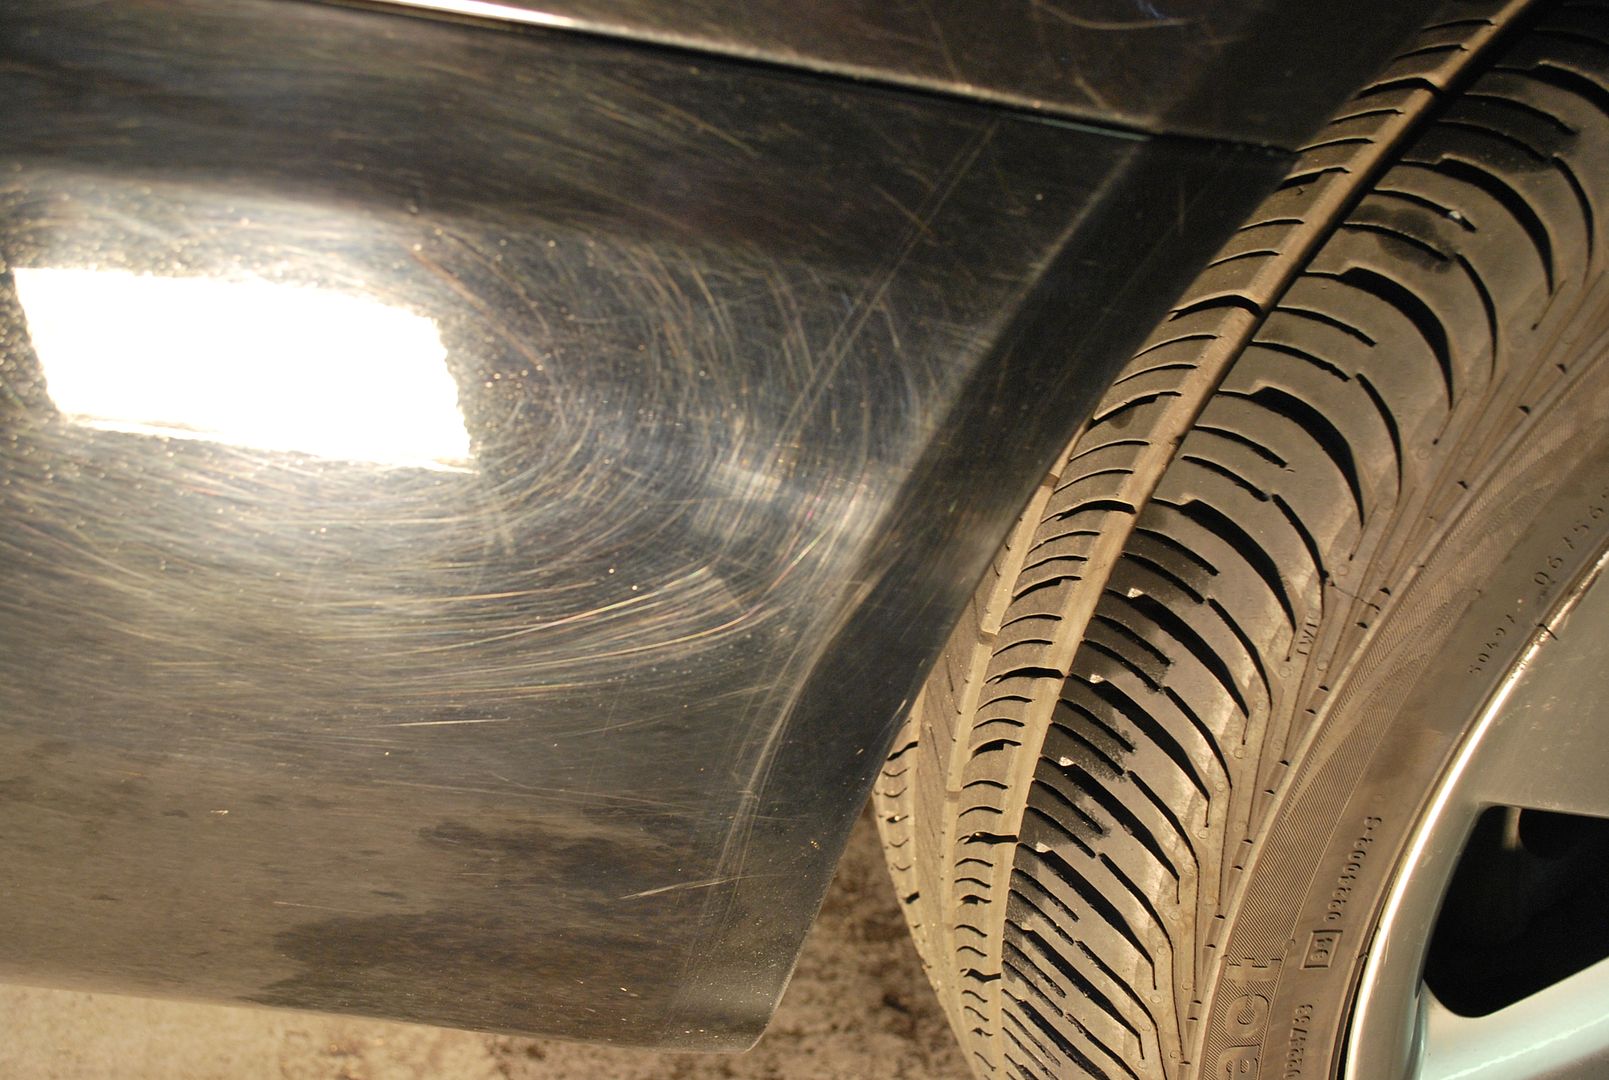
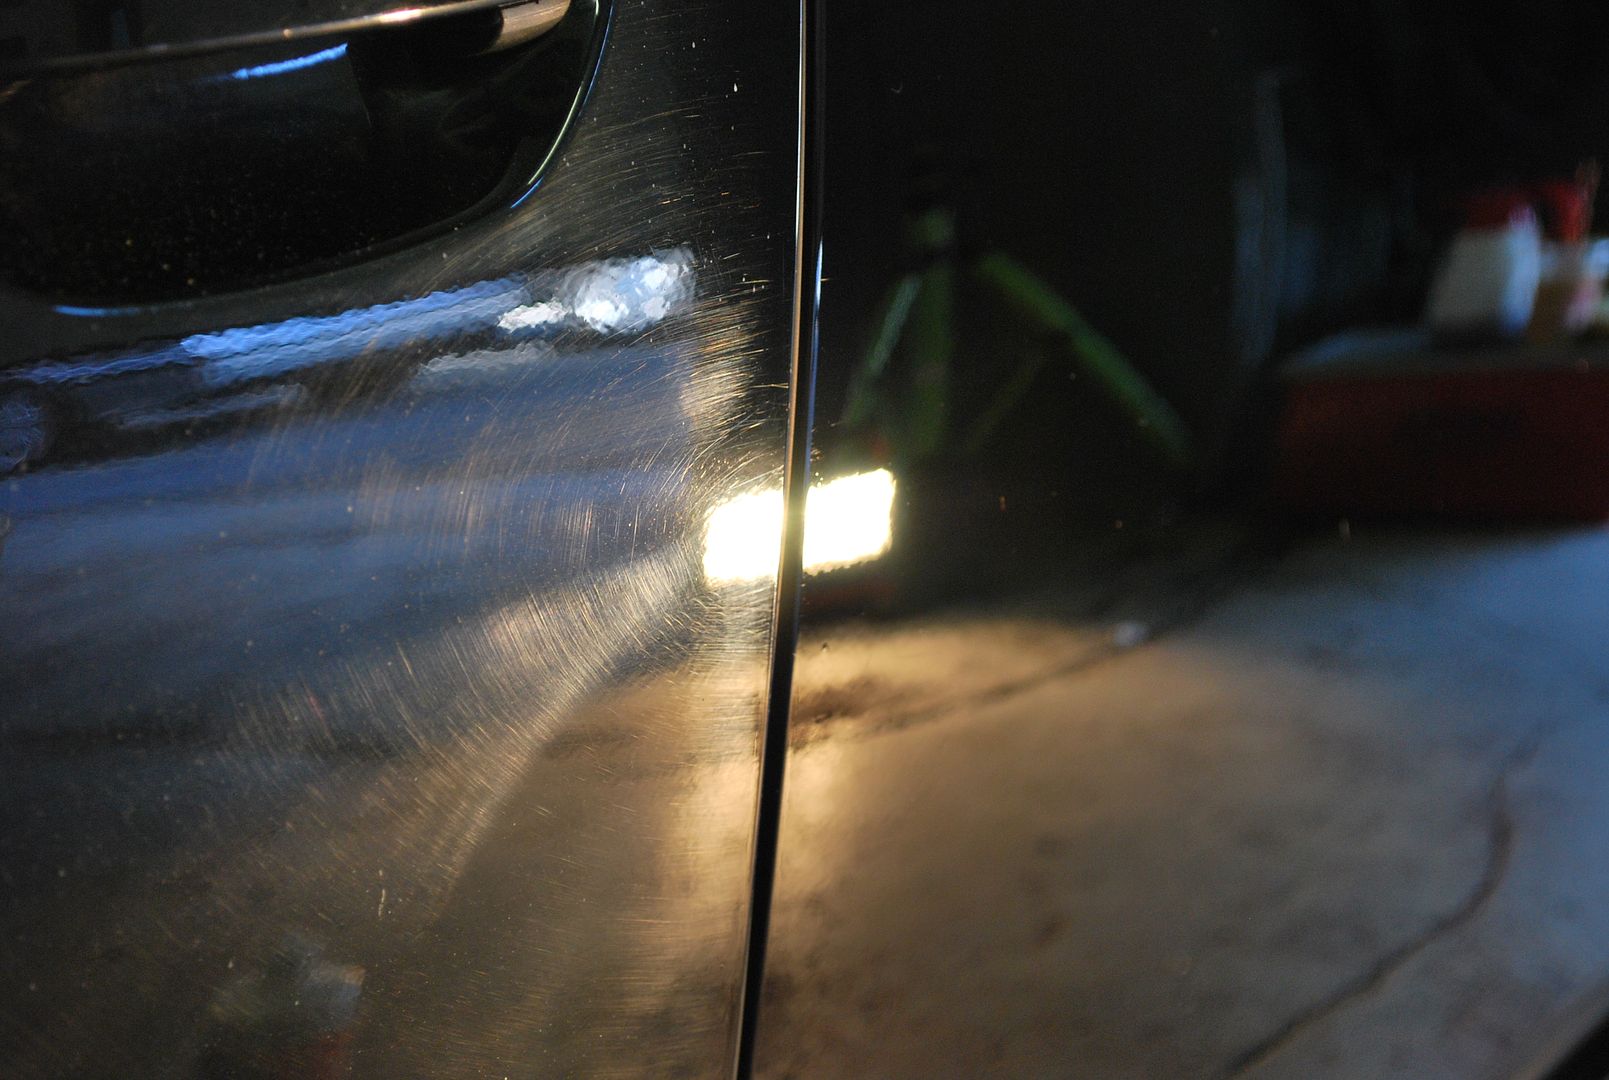
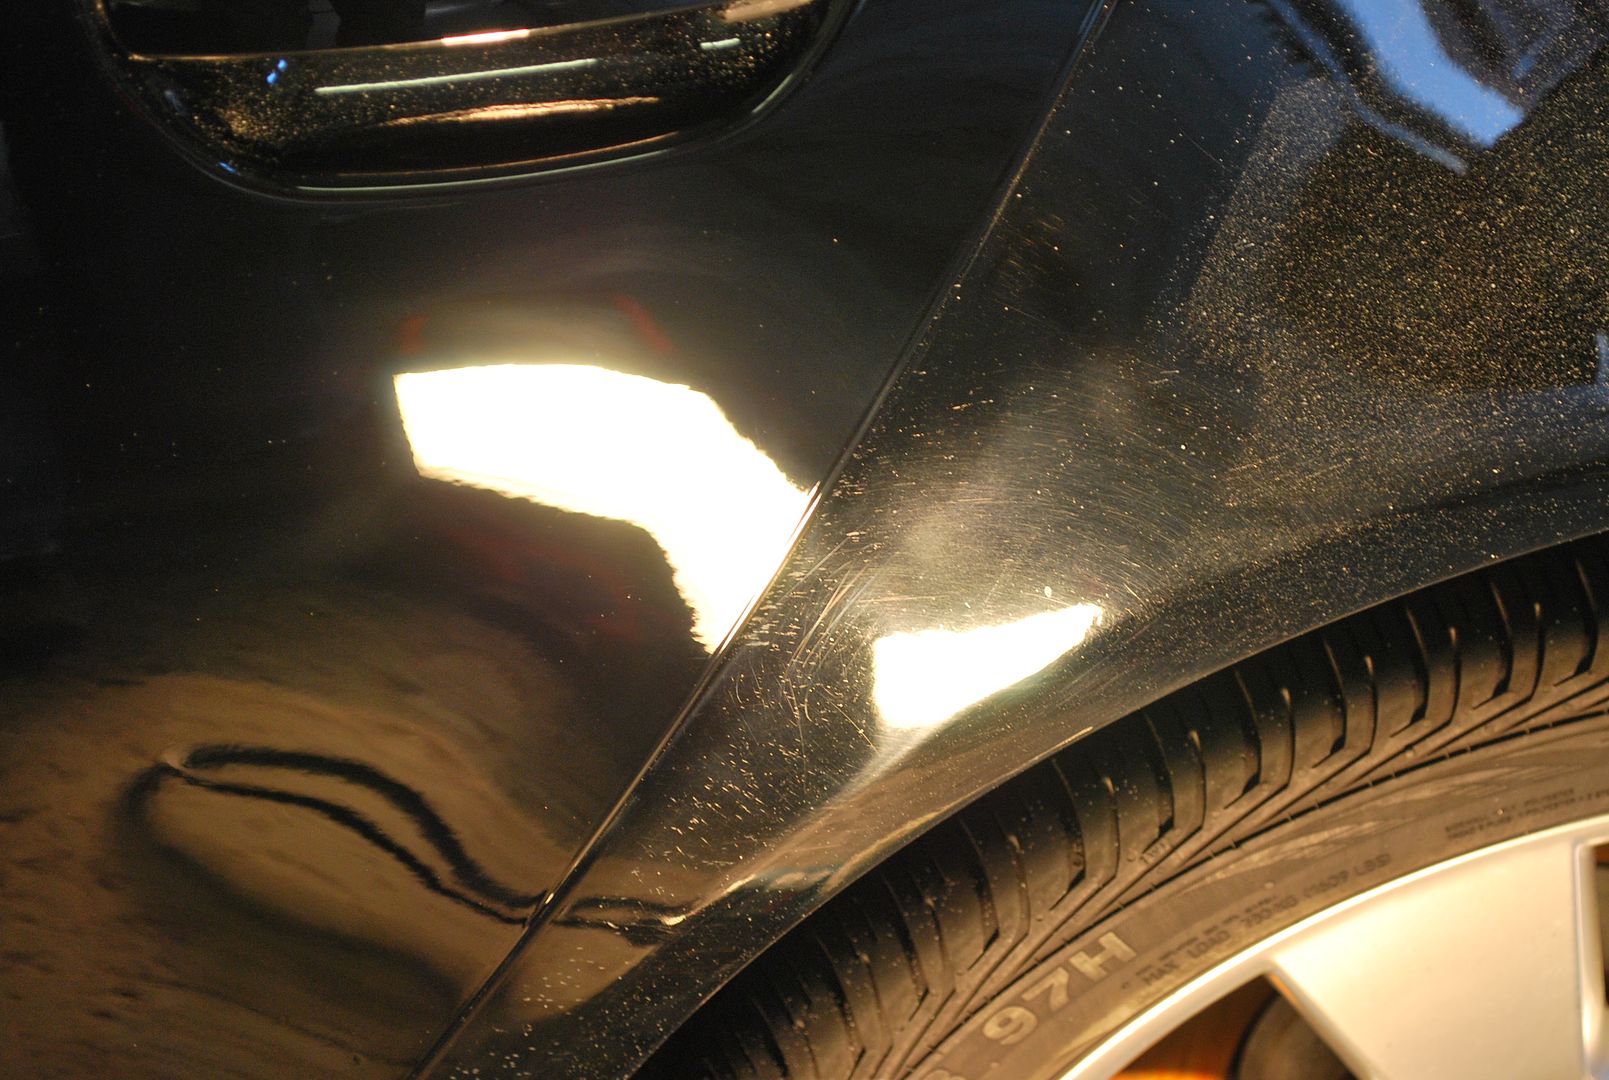
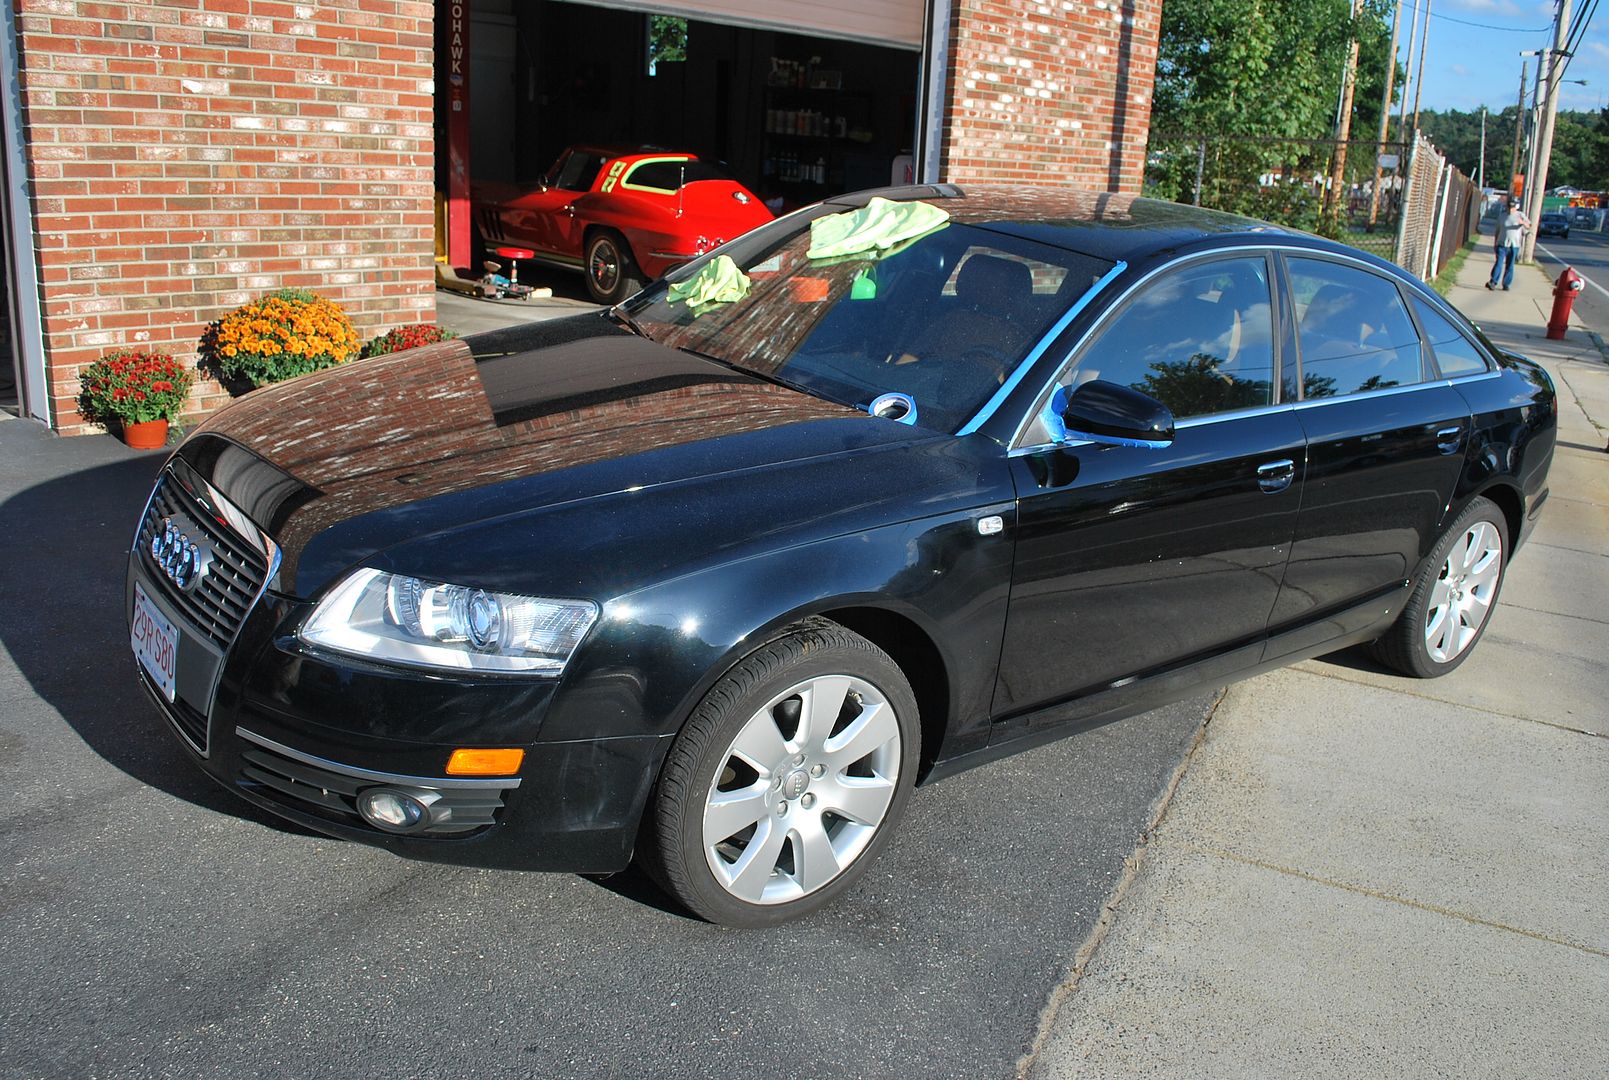
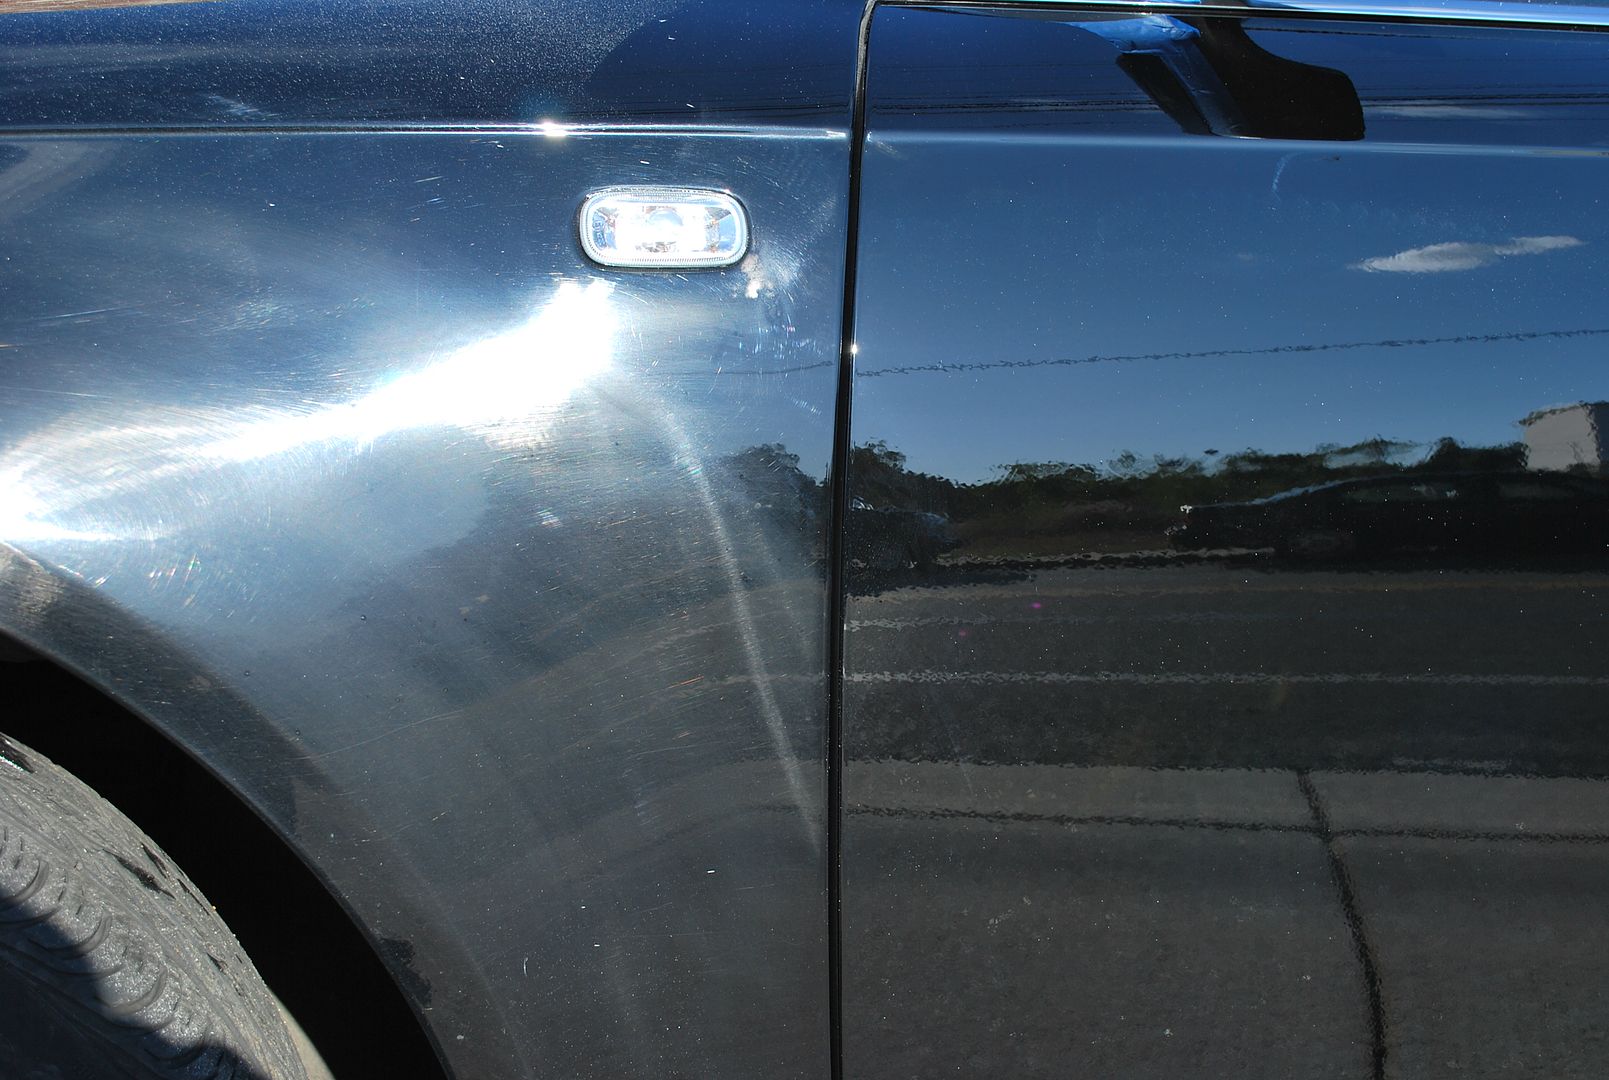
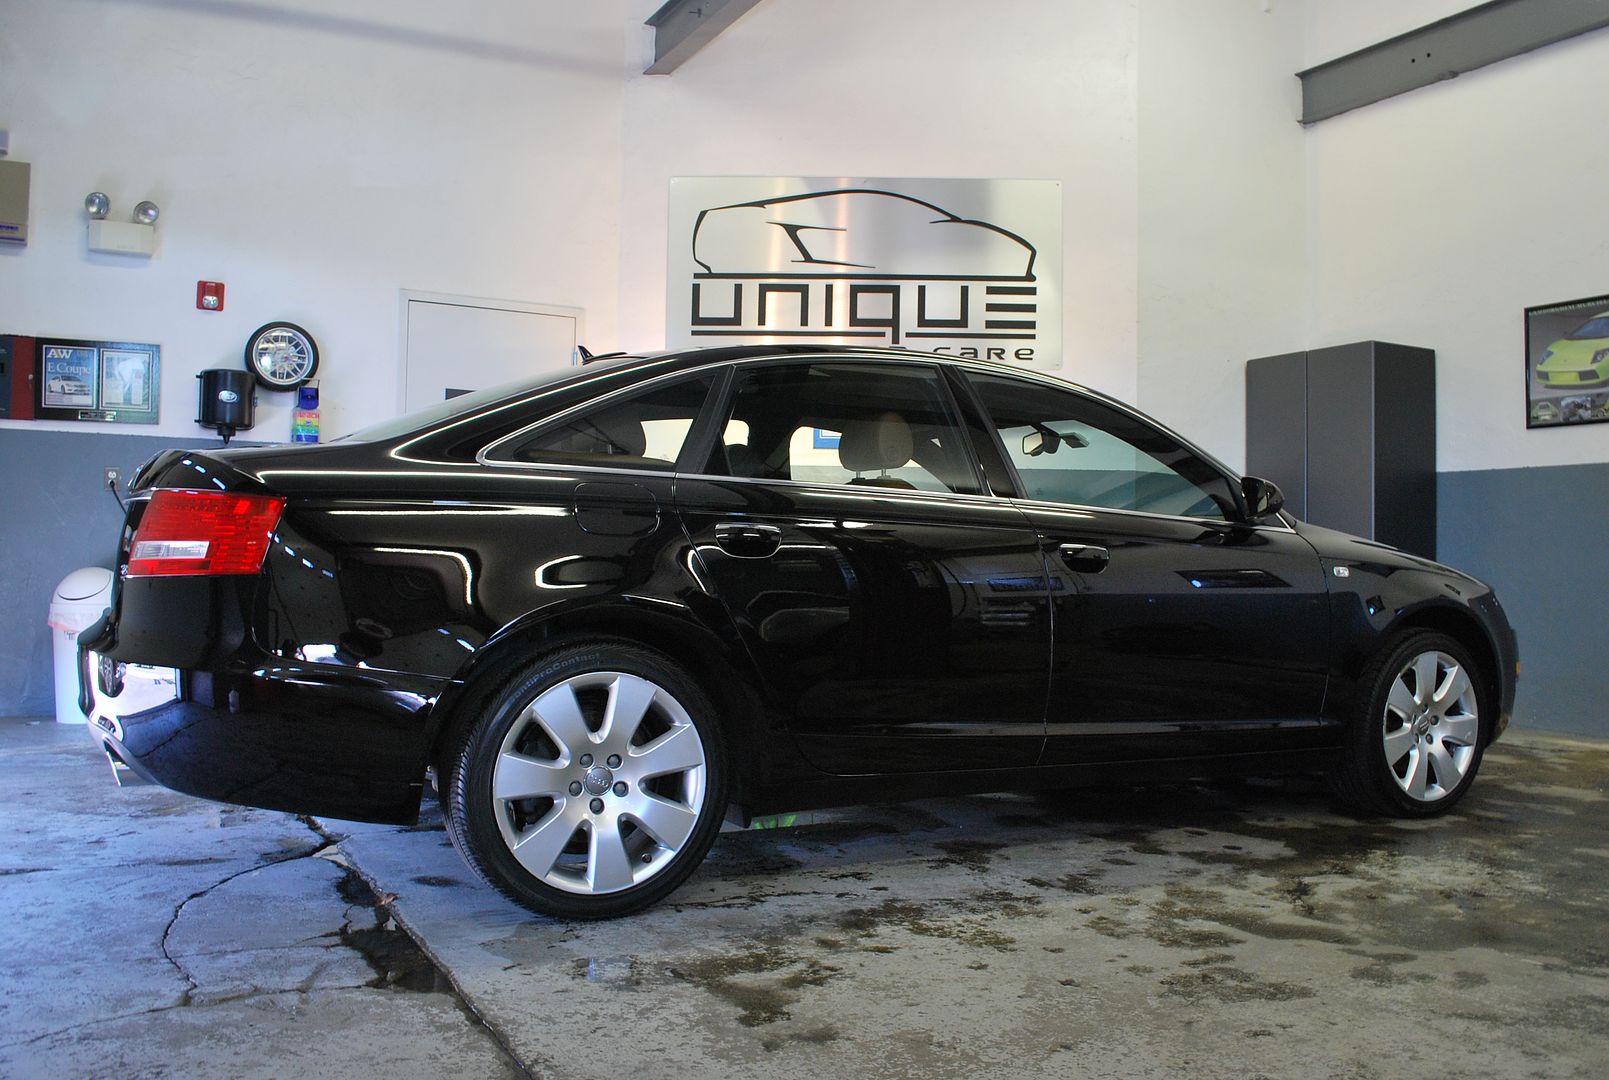
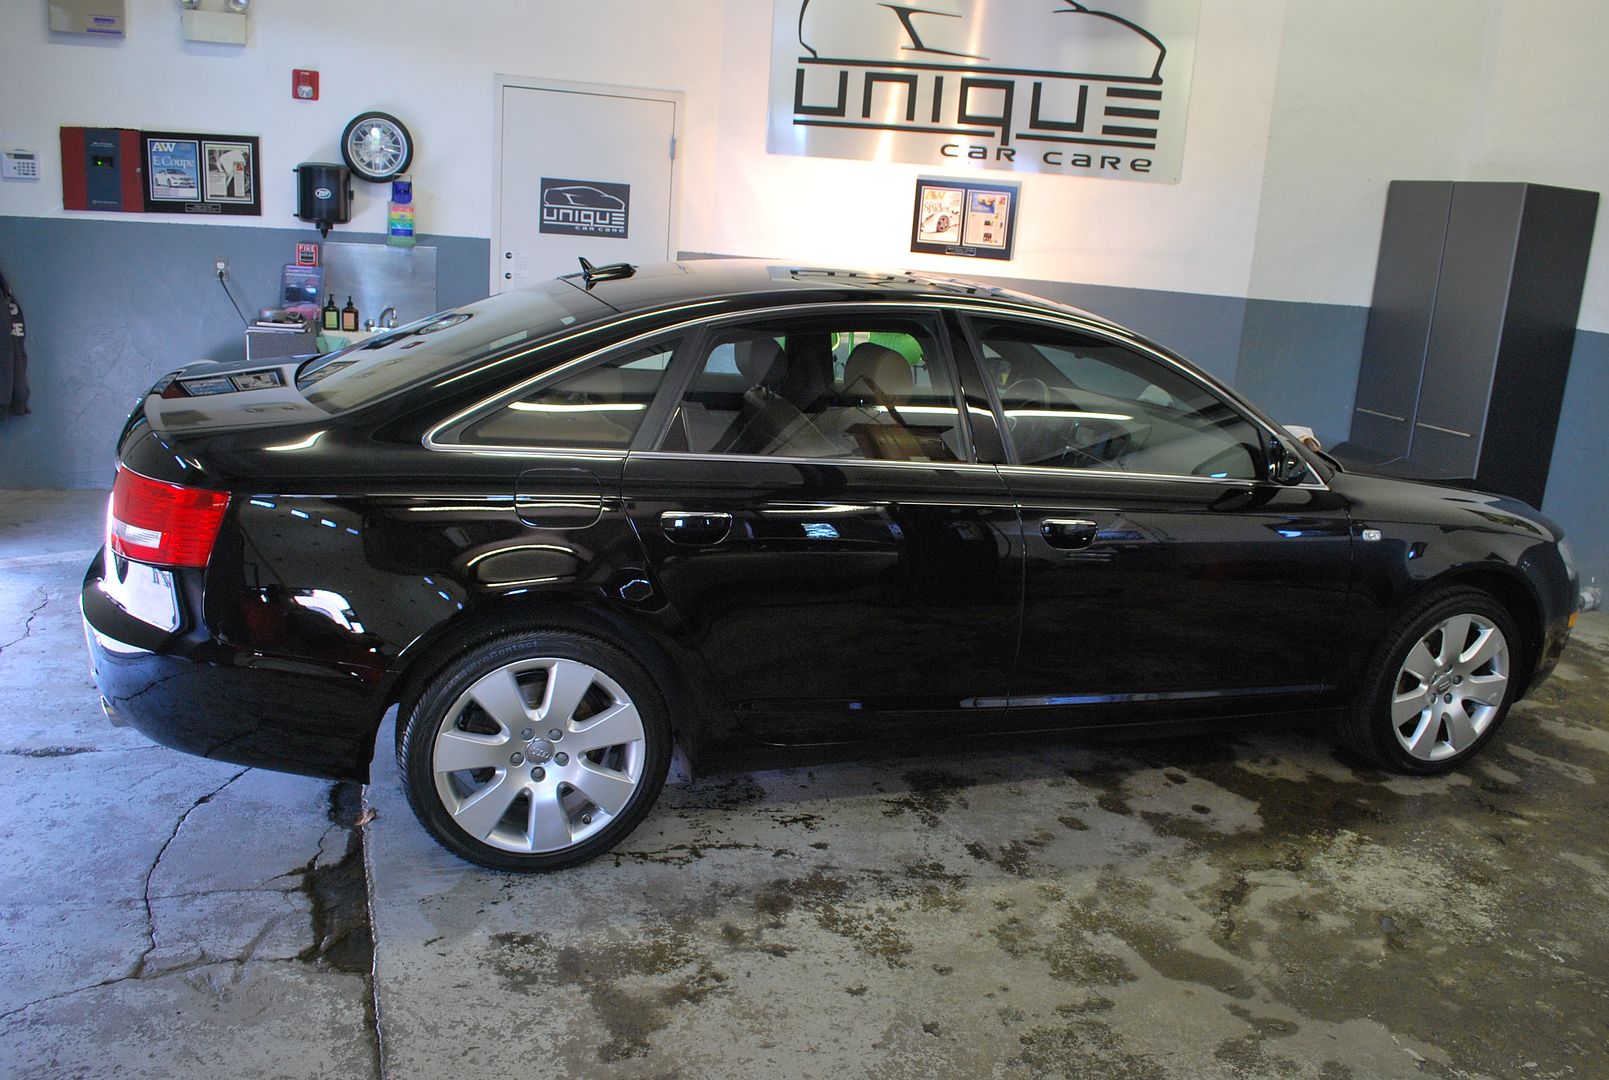
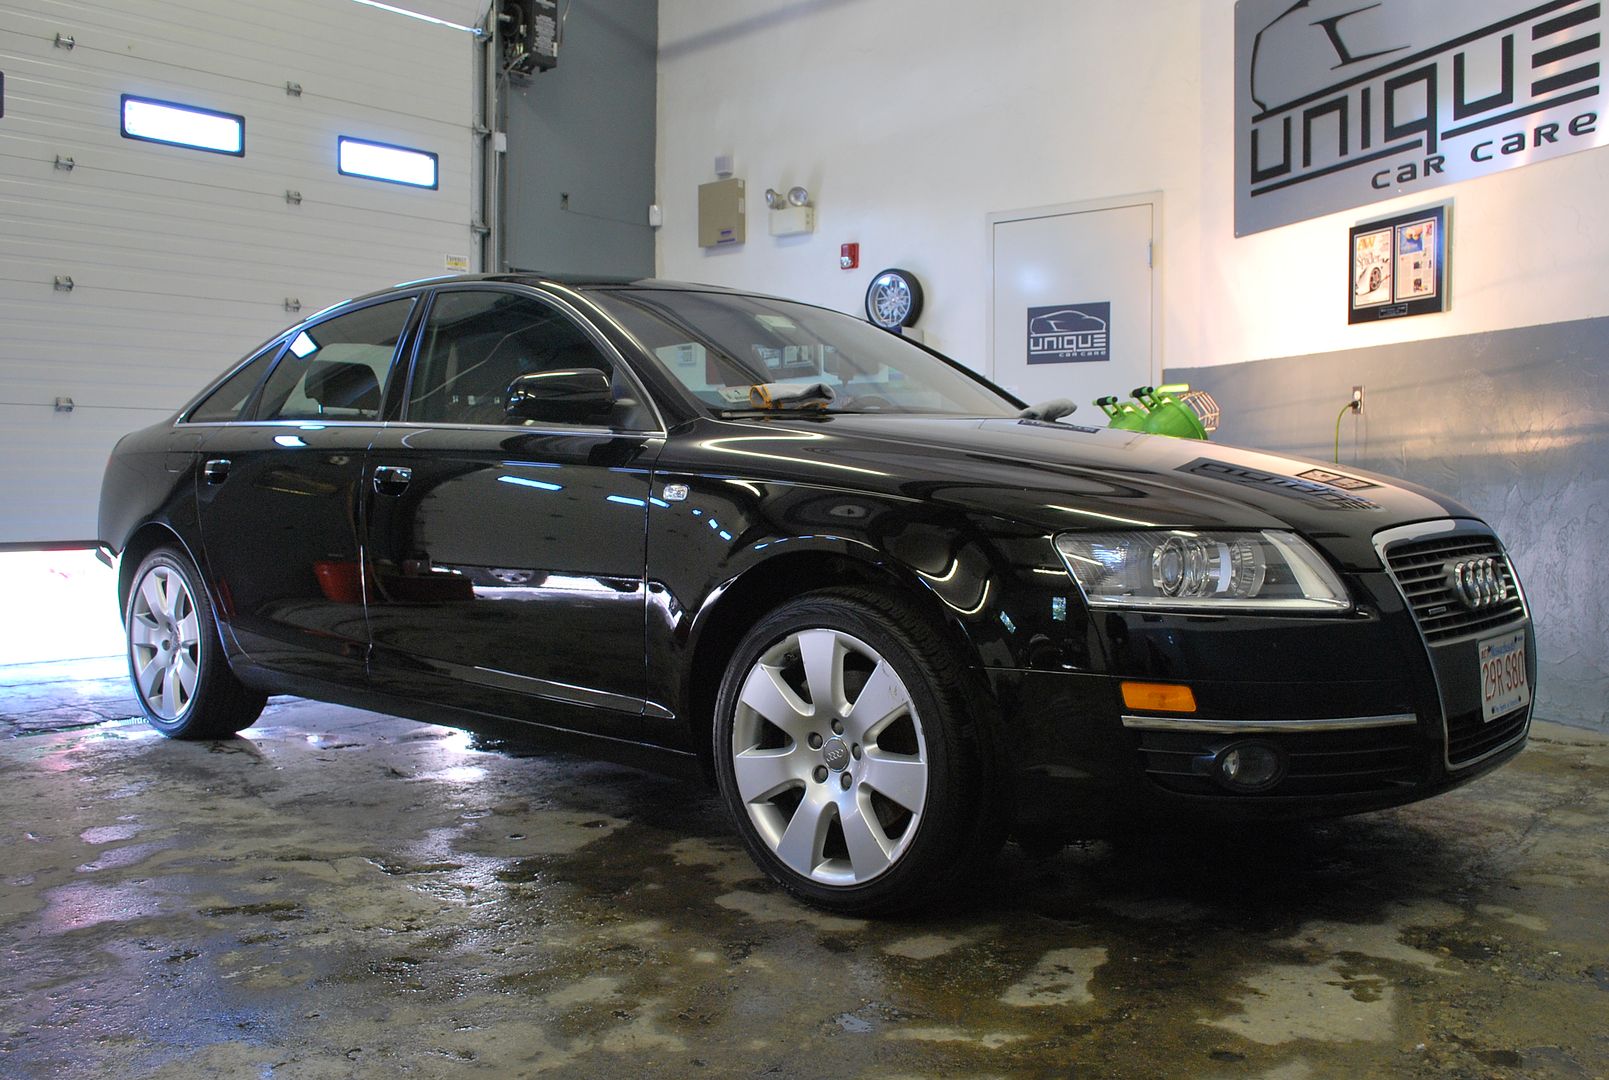
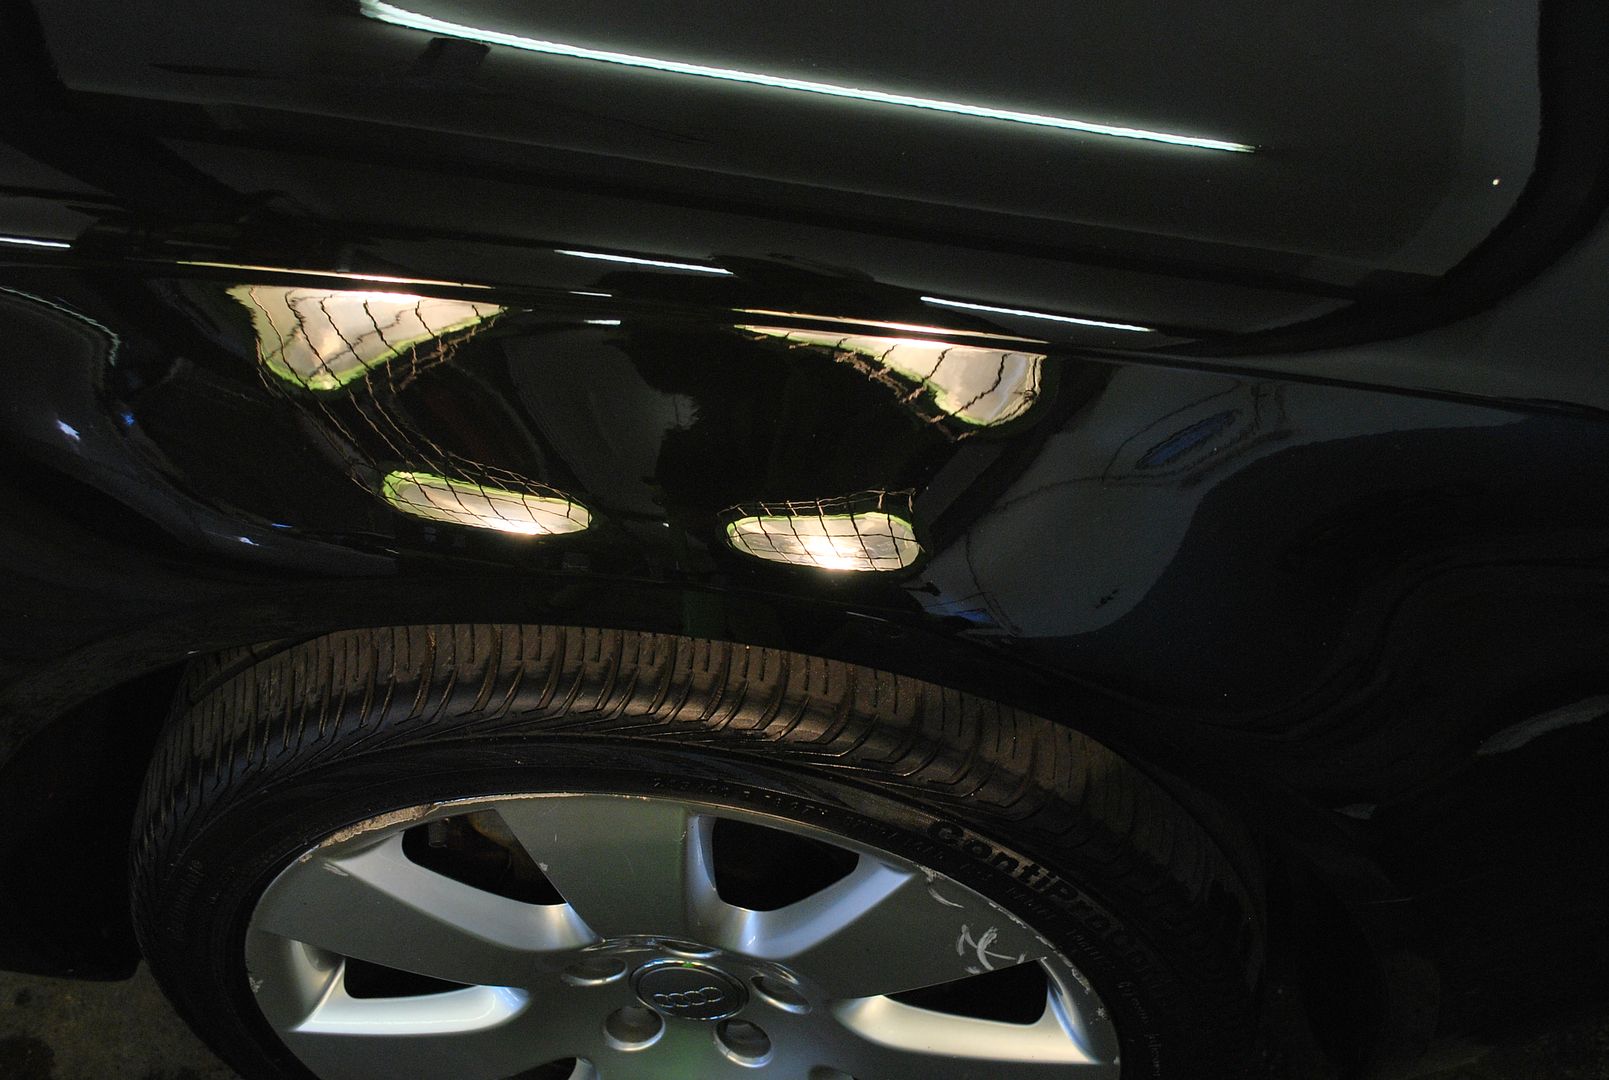
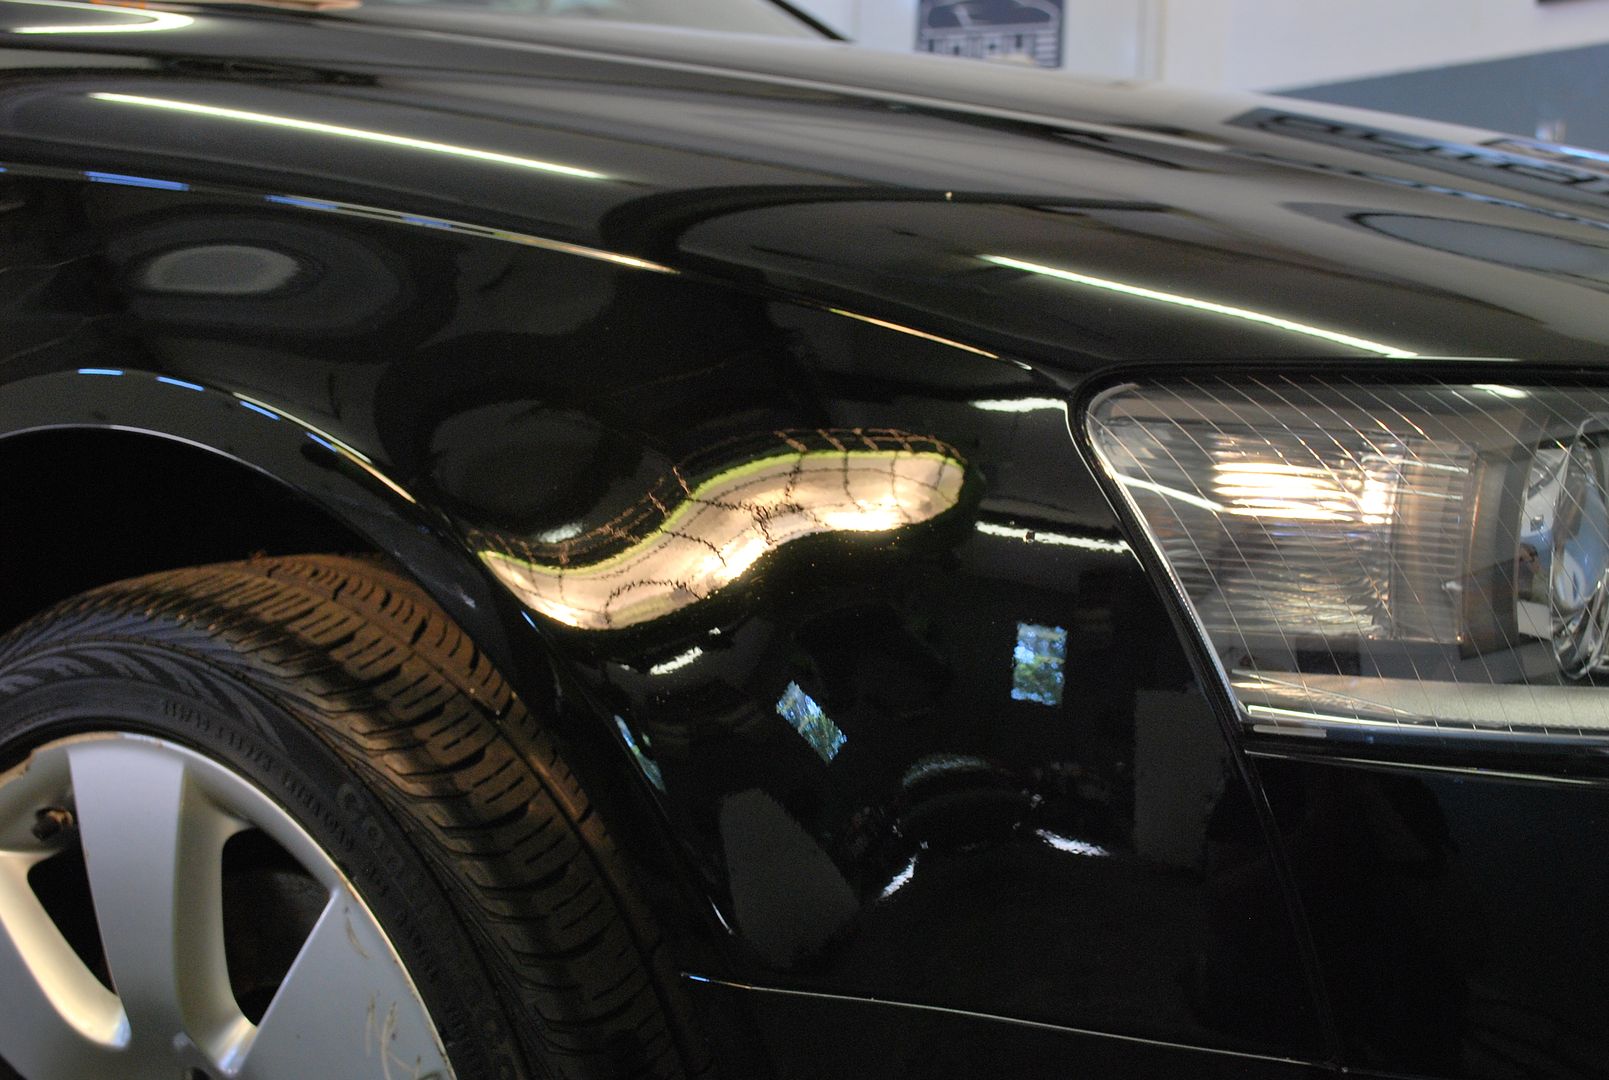
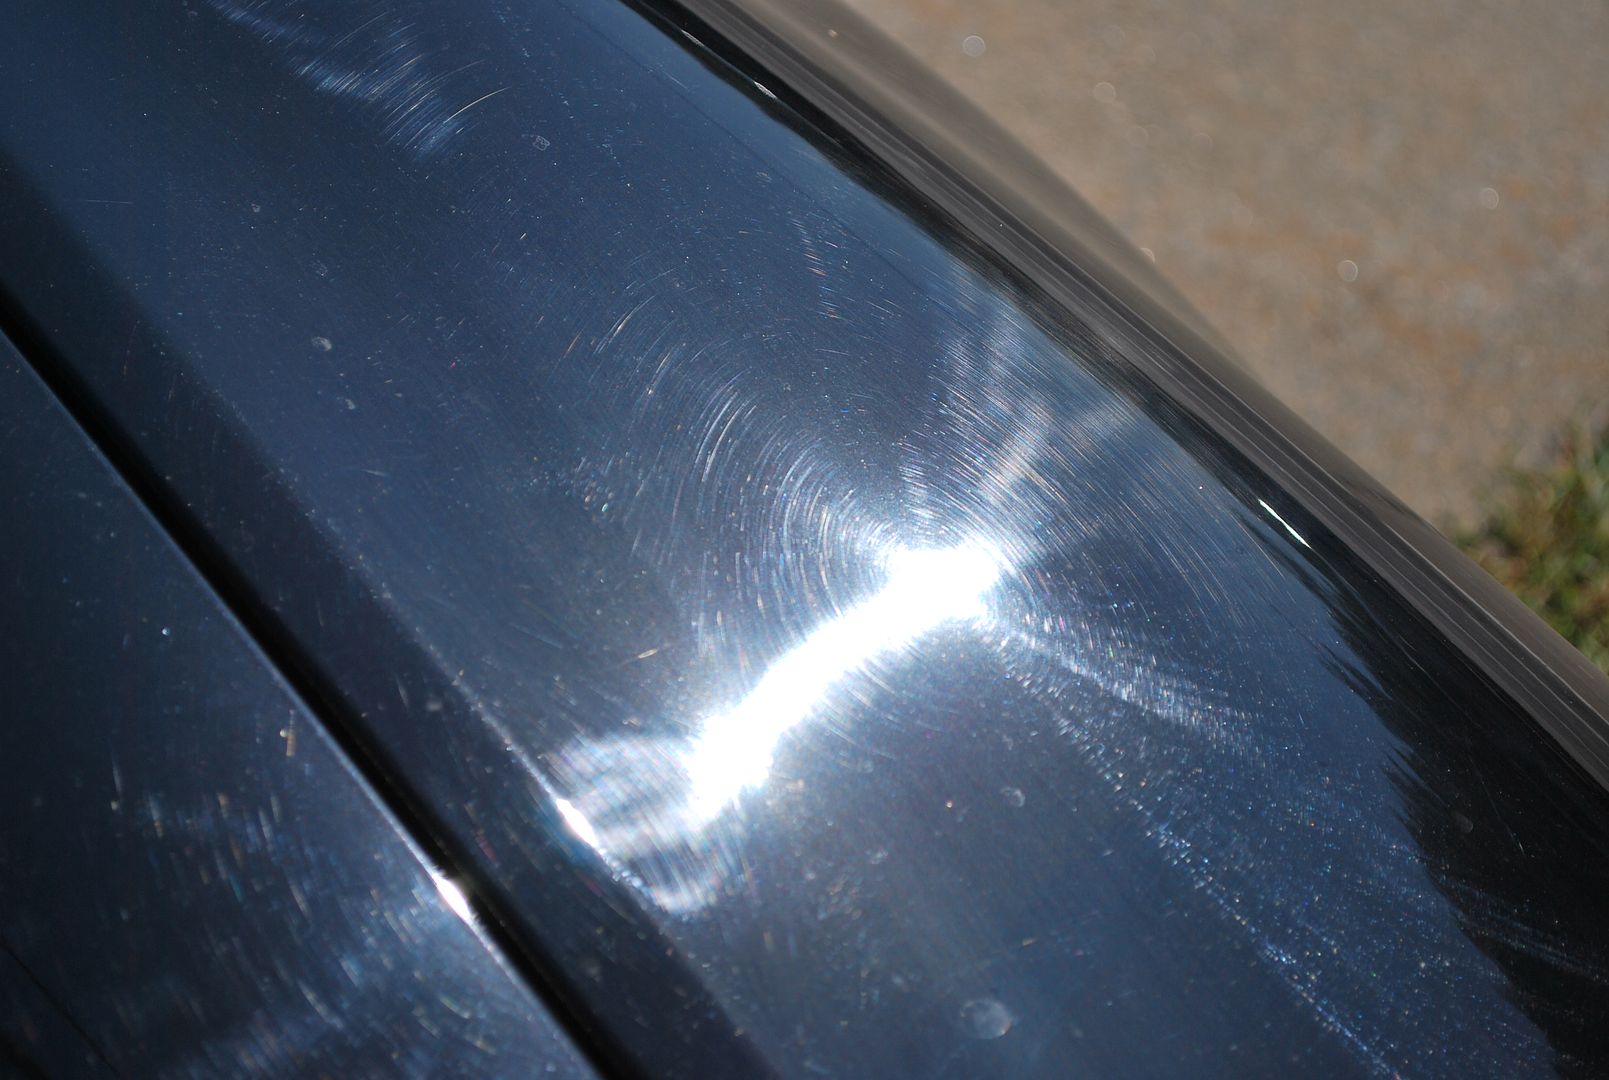
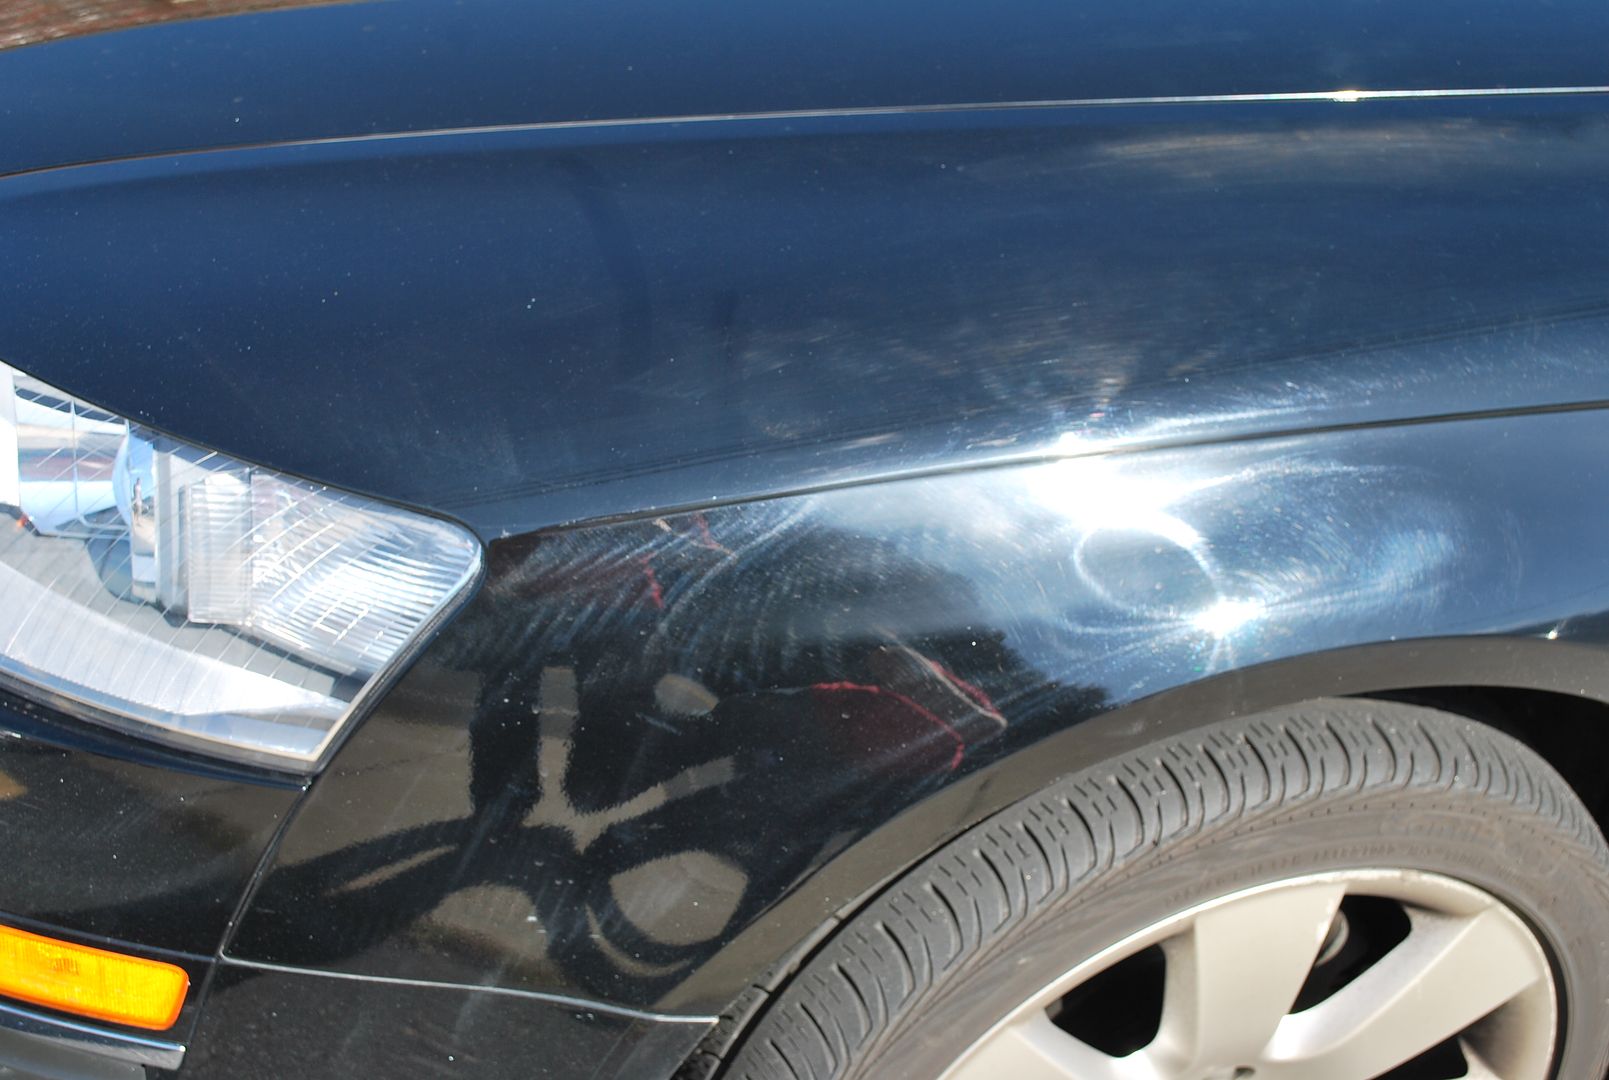
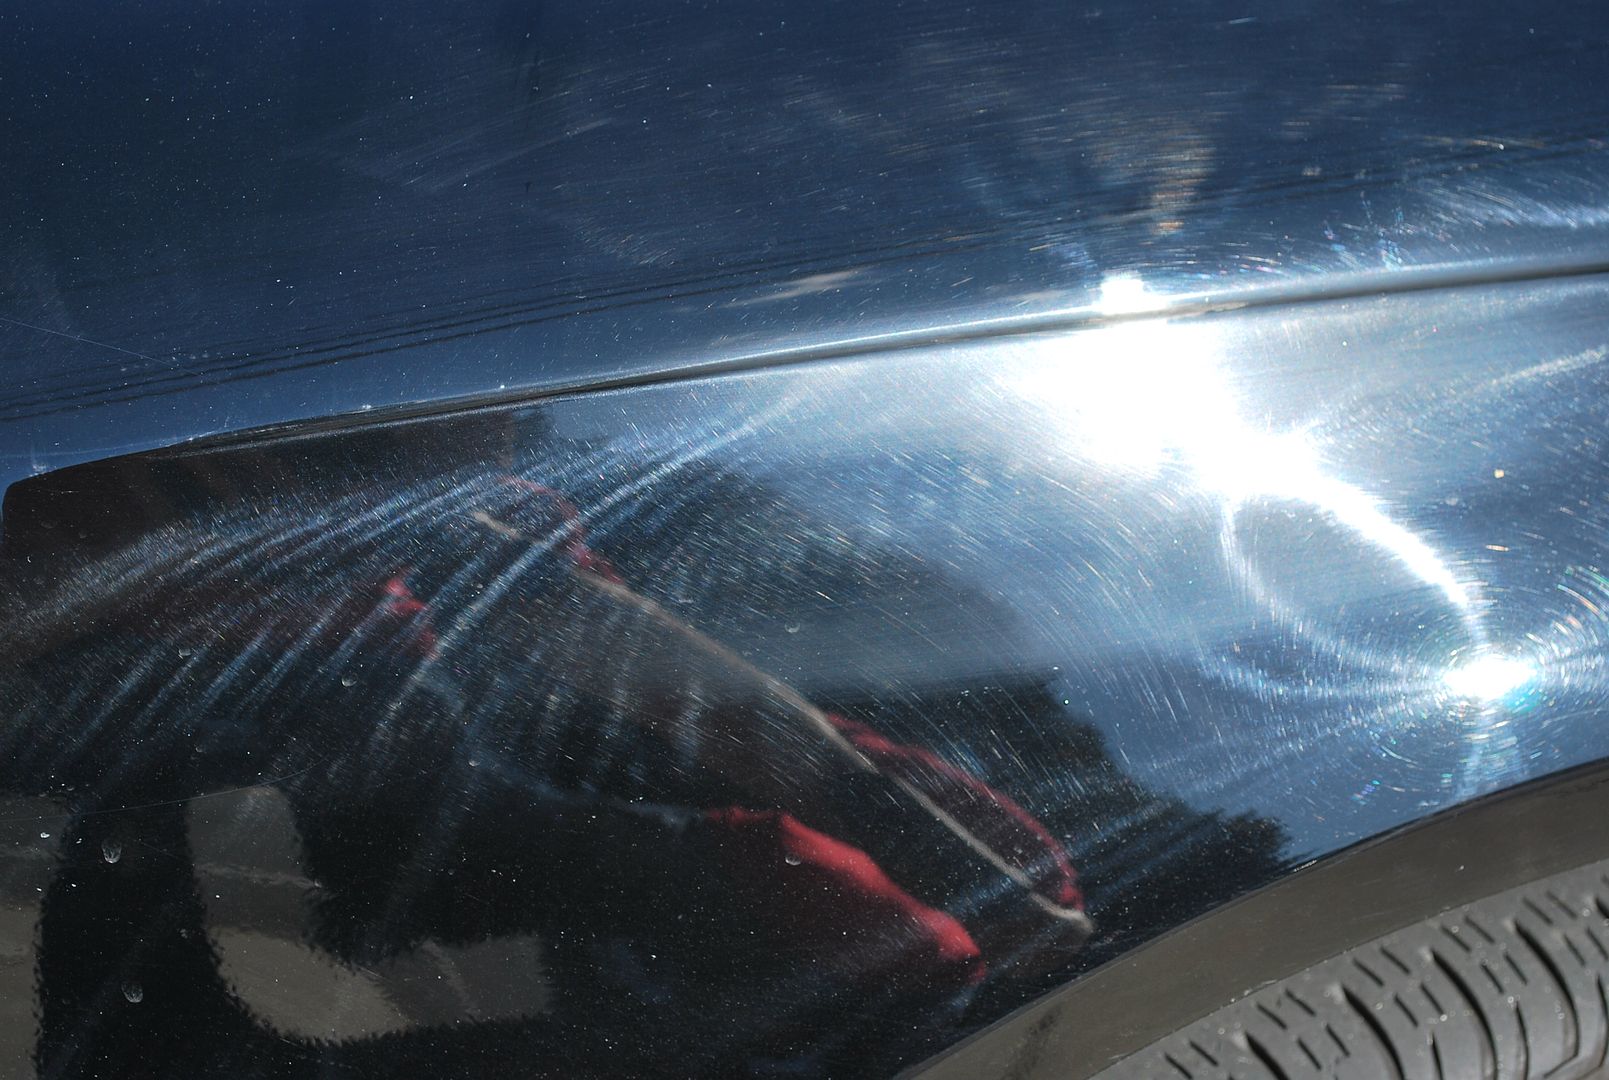
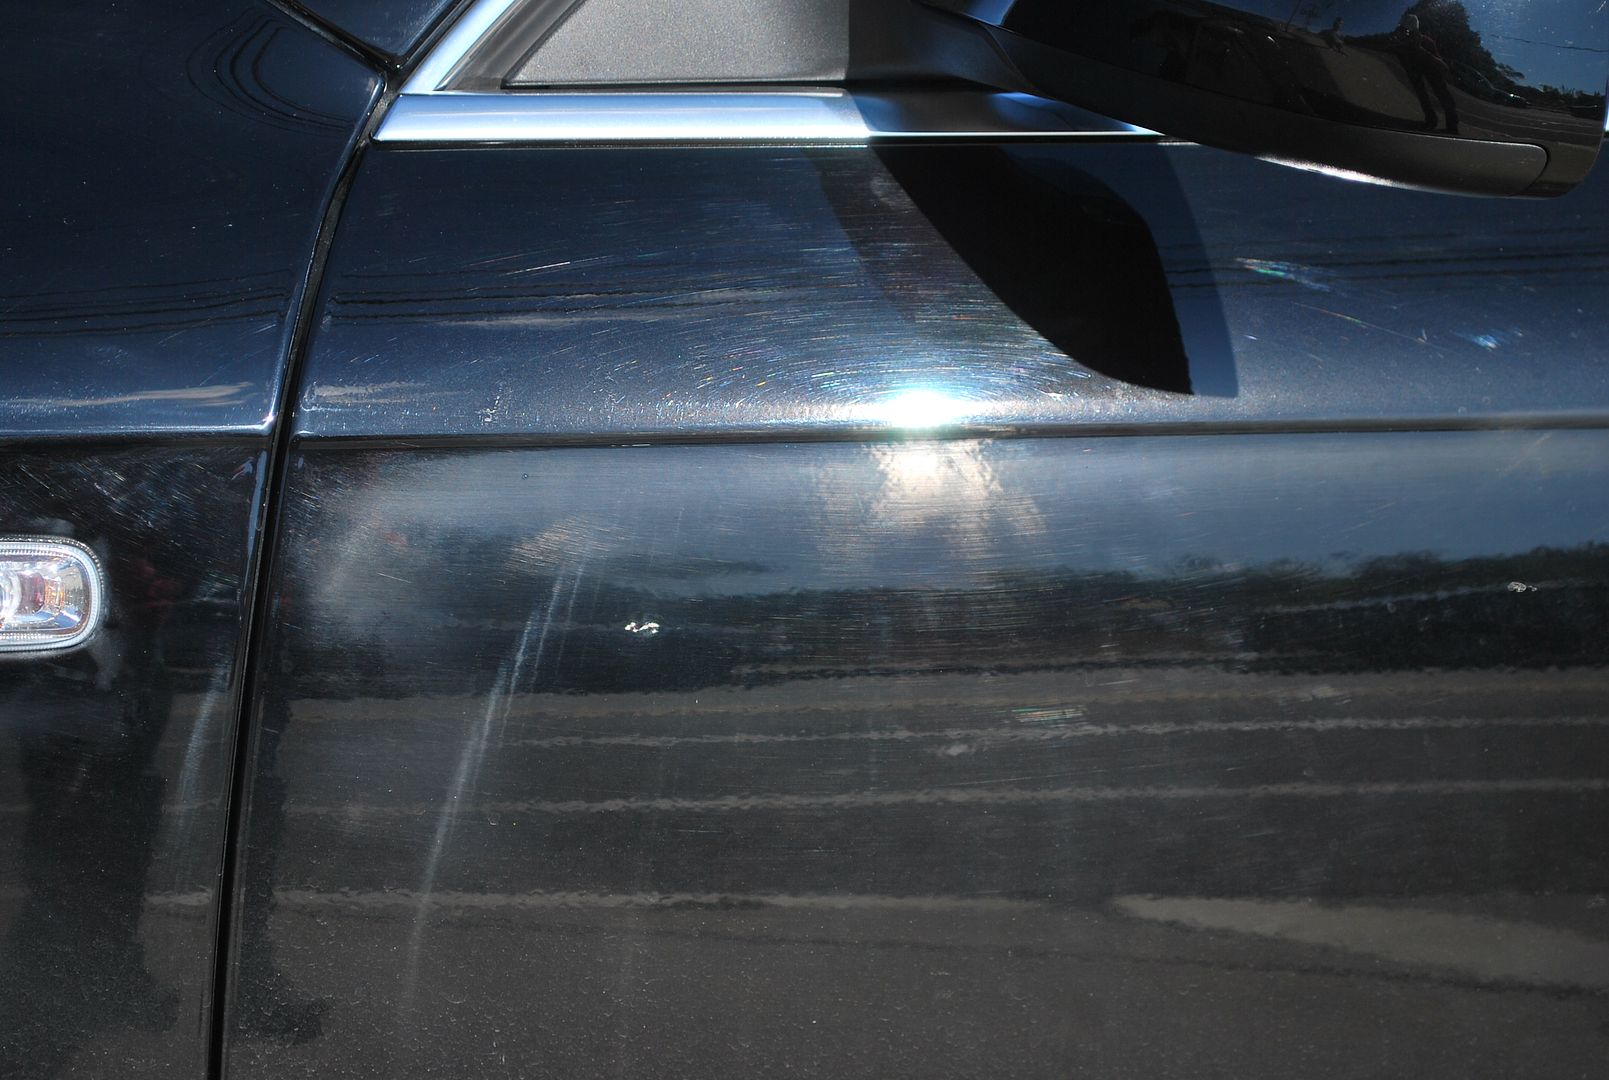
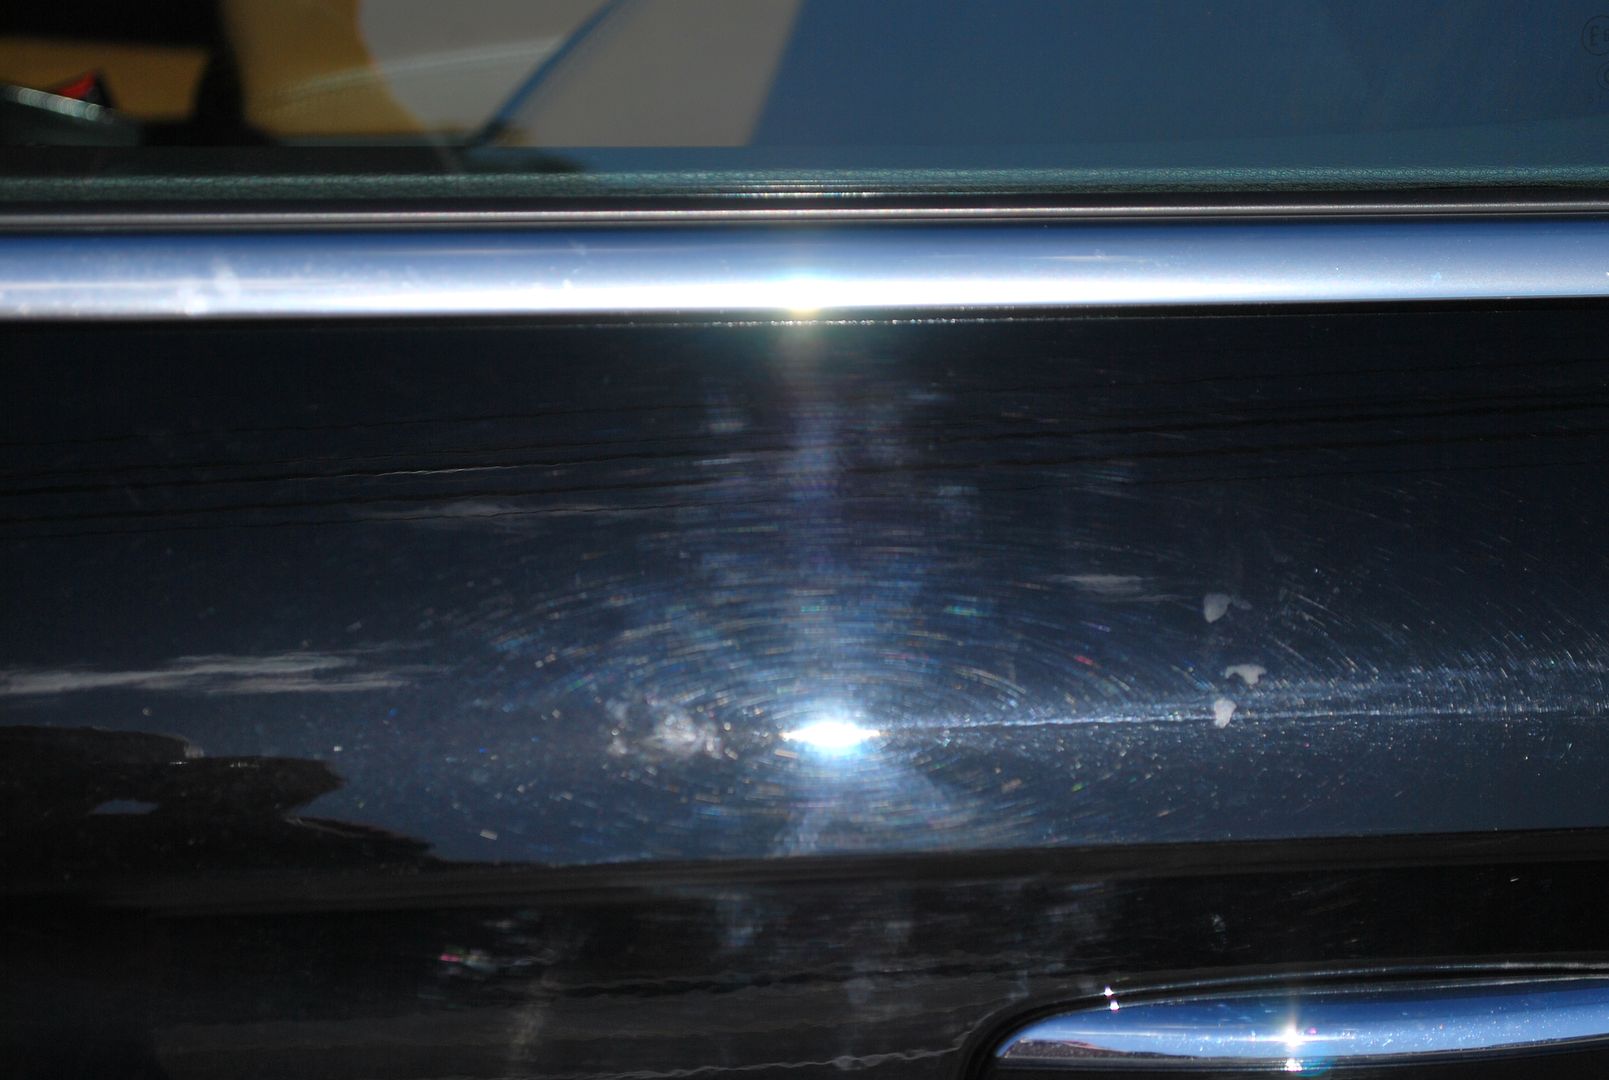
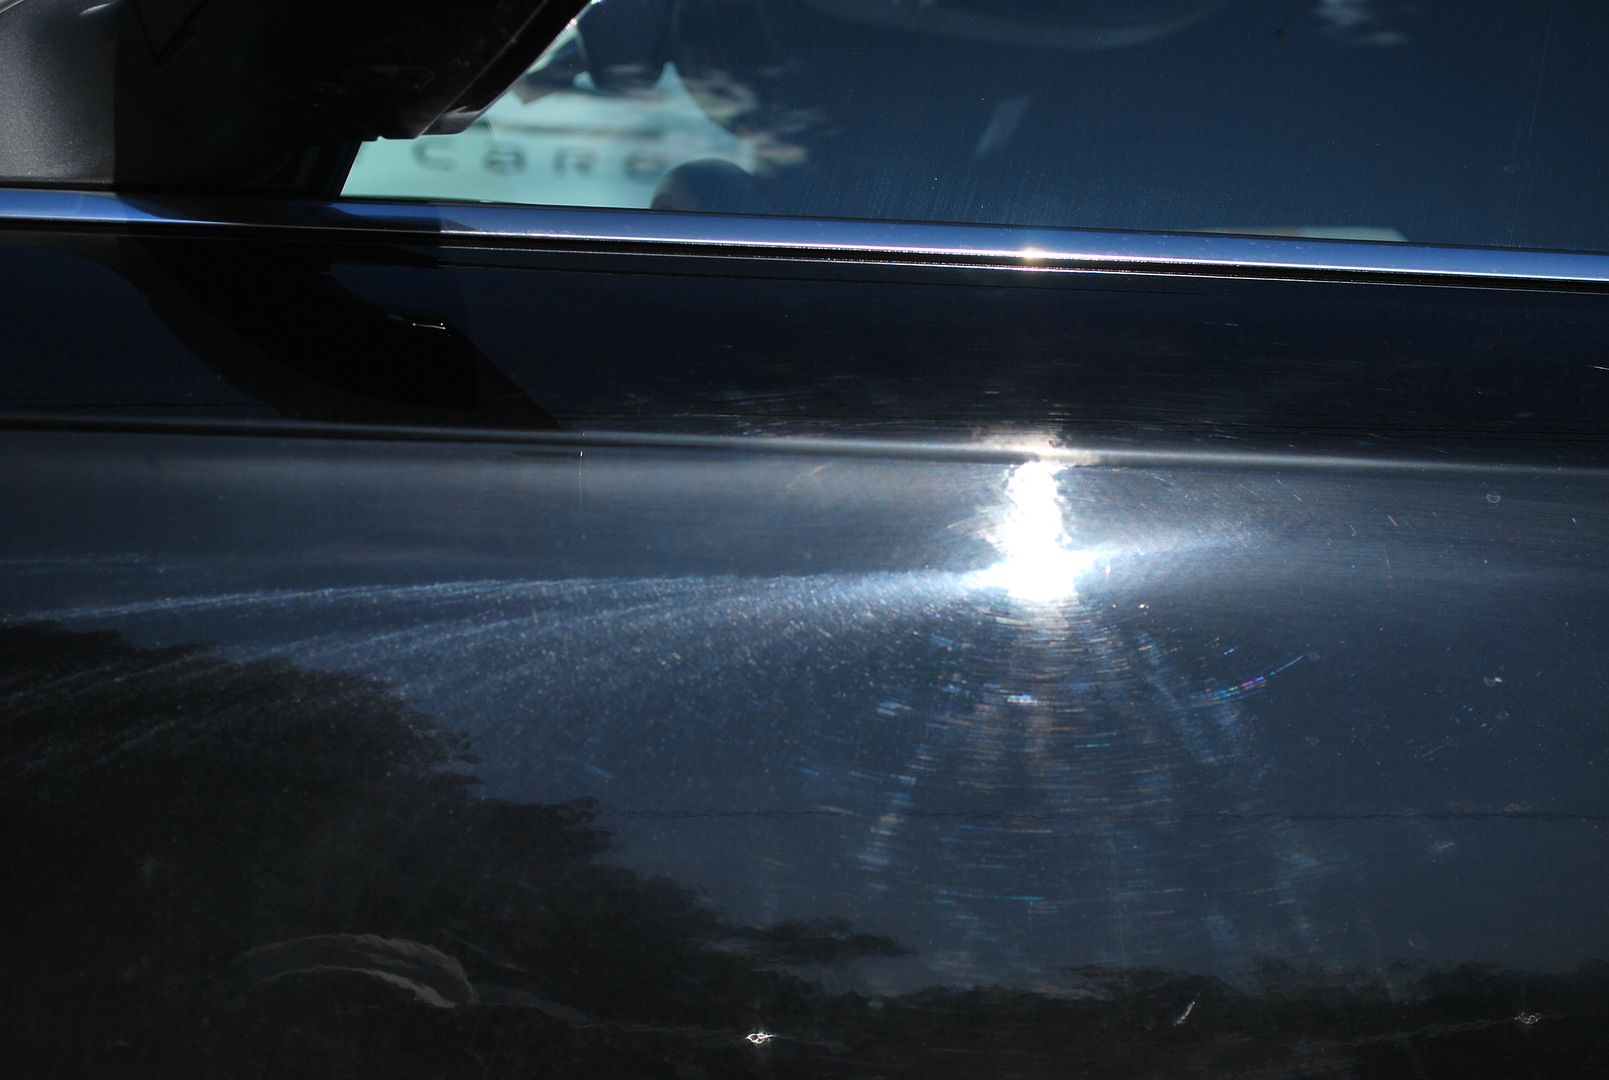
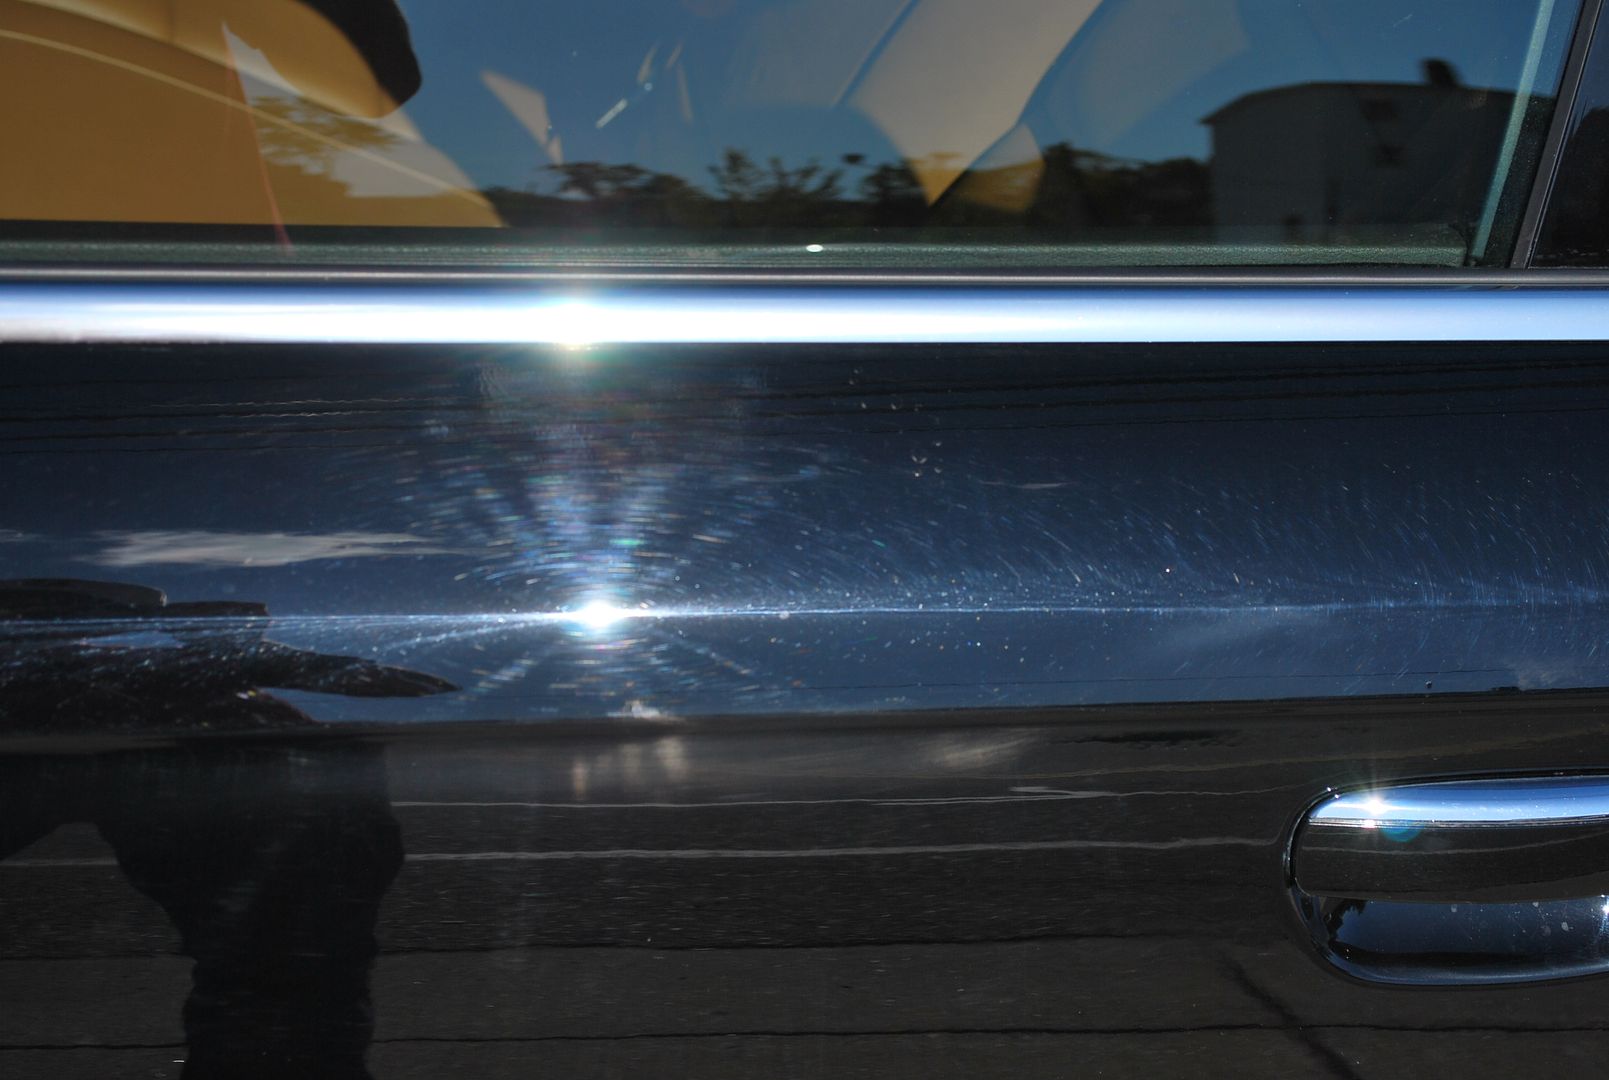
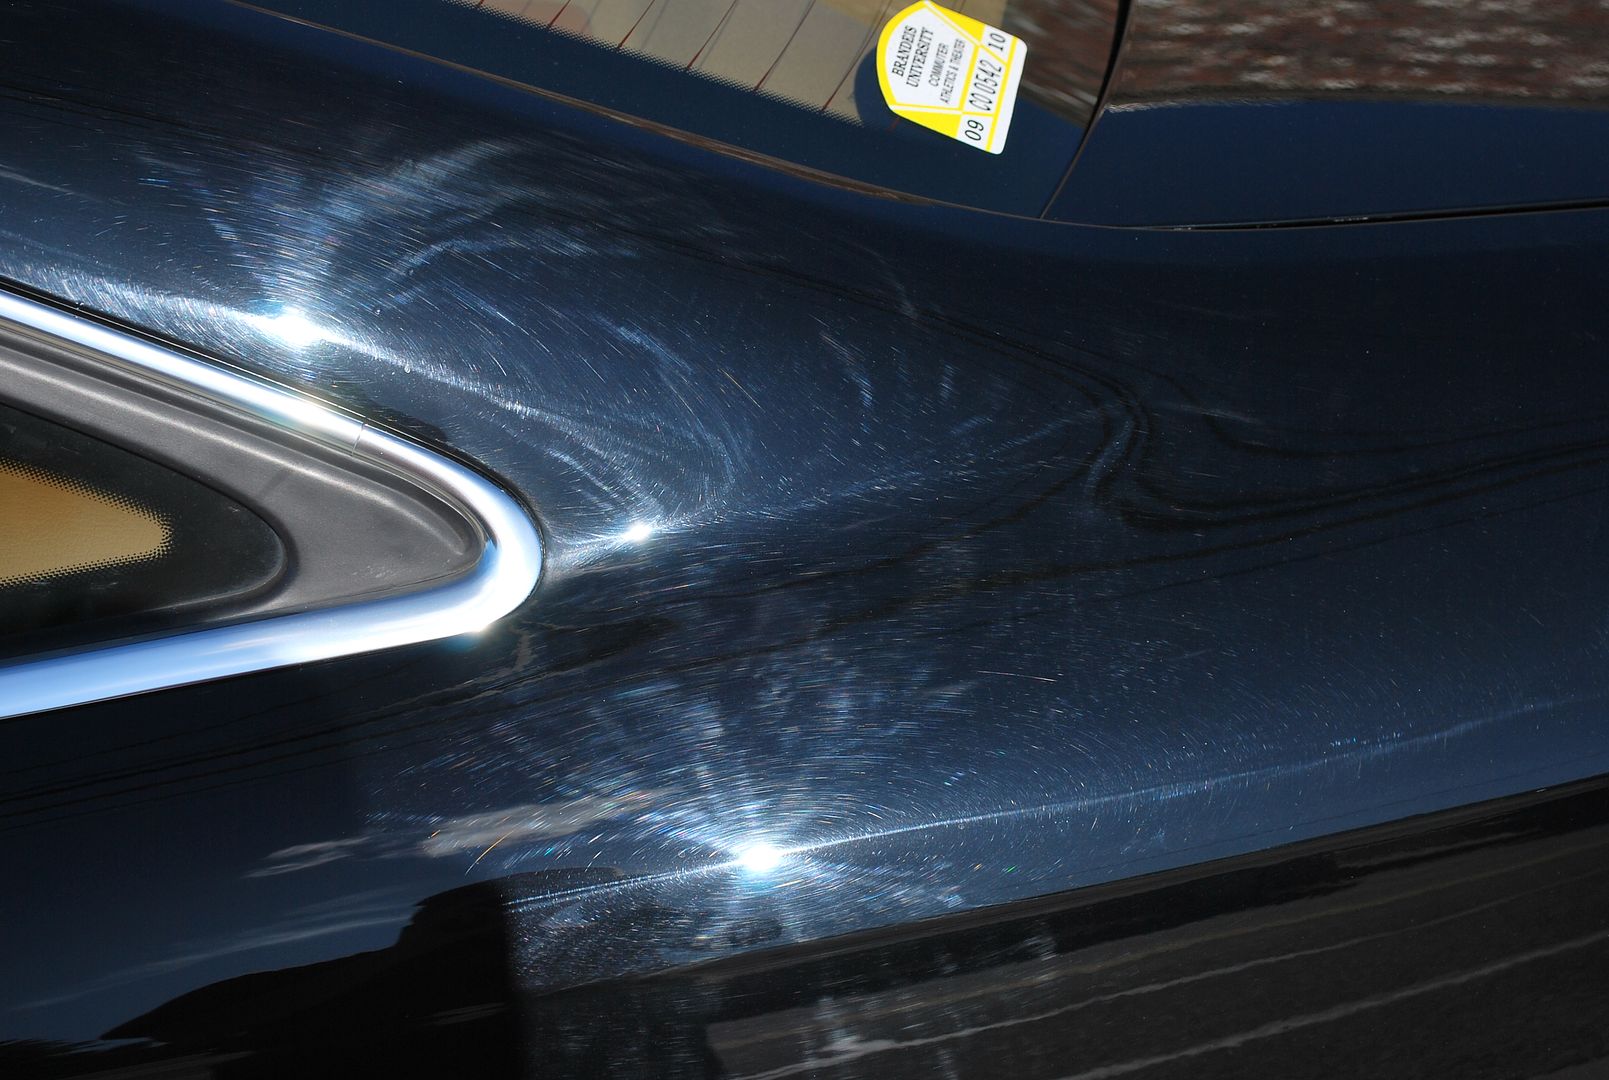
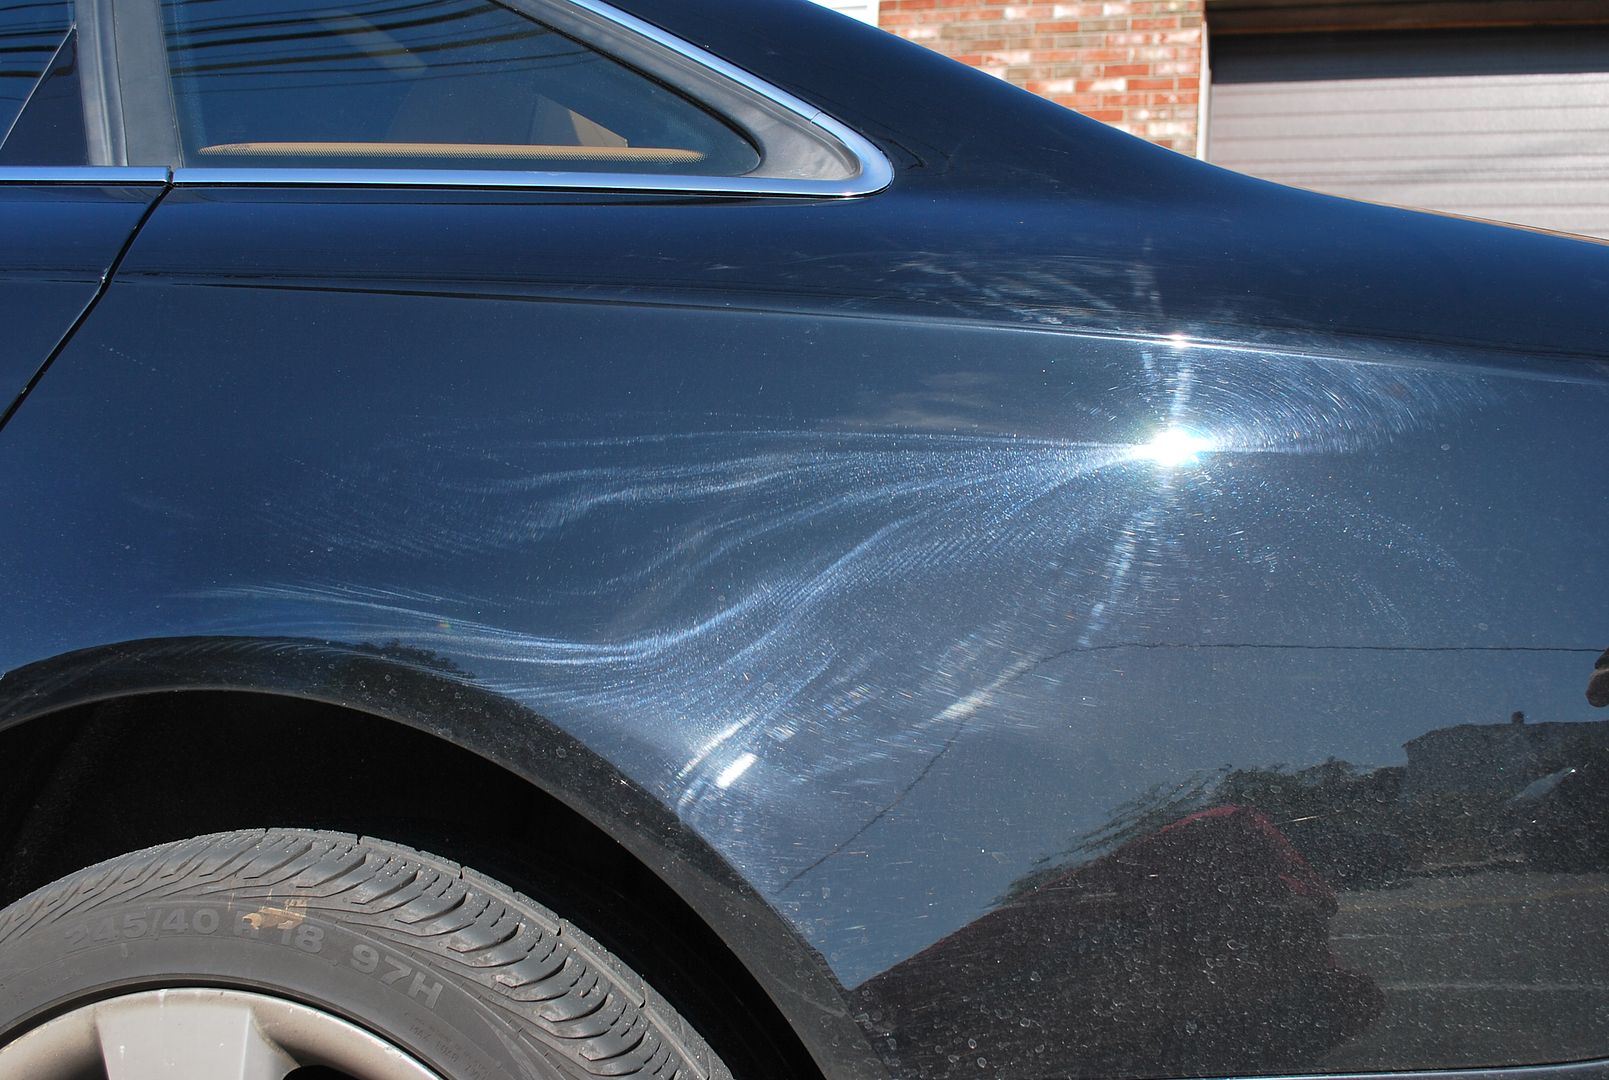
The Audi A6 you are about to see is one of the worst cars weâve had in the shop this year. Not only due to the horrible condition of the paint, but the job overall. The car had recently been to the body shop for some paintwork and was just a swirly, dull, scratched, neglected mess! The paint did not want to cooperate at all and was just a nightmare of a job.
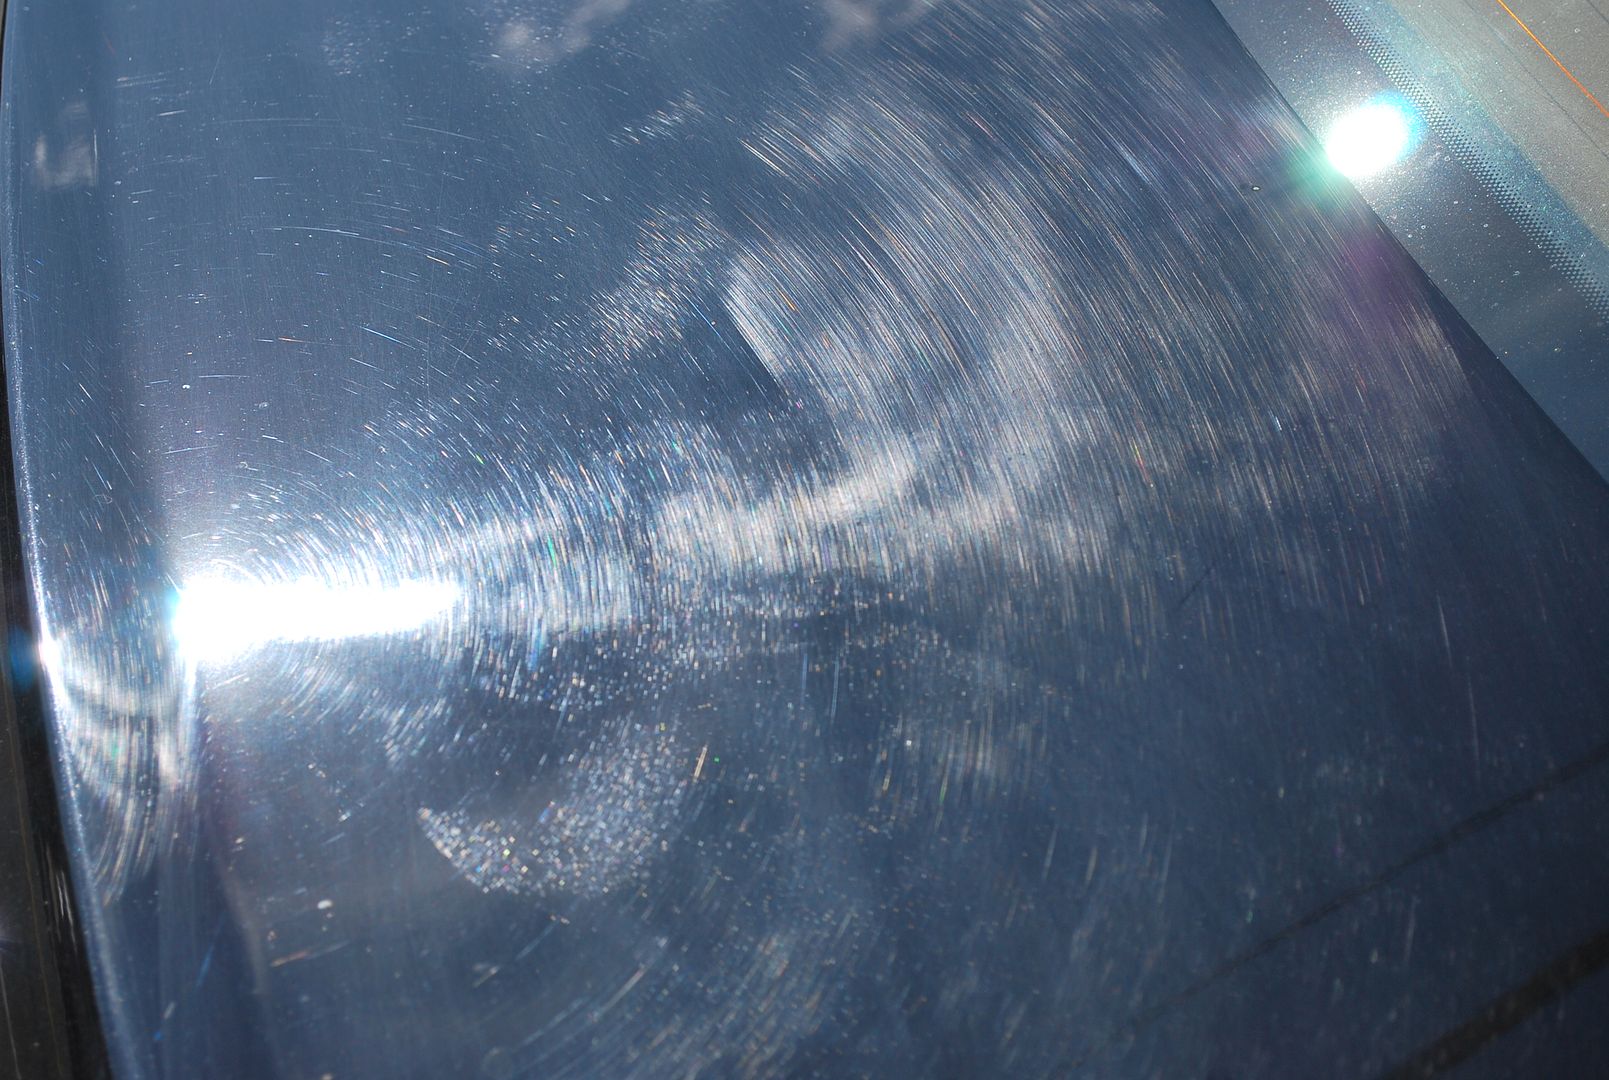
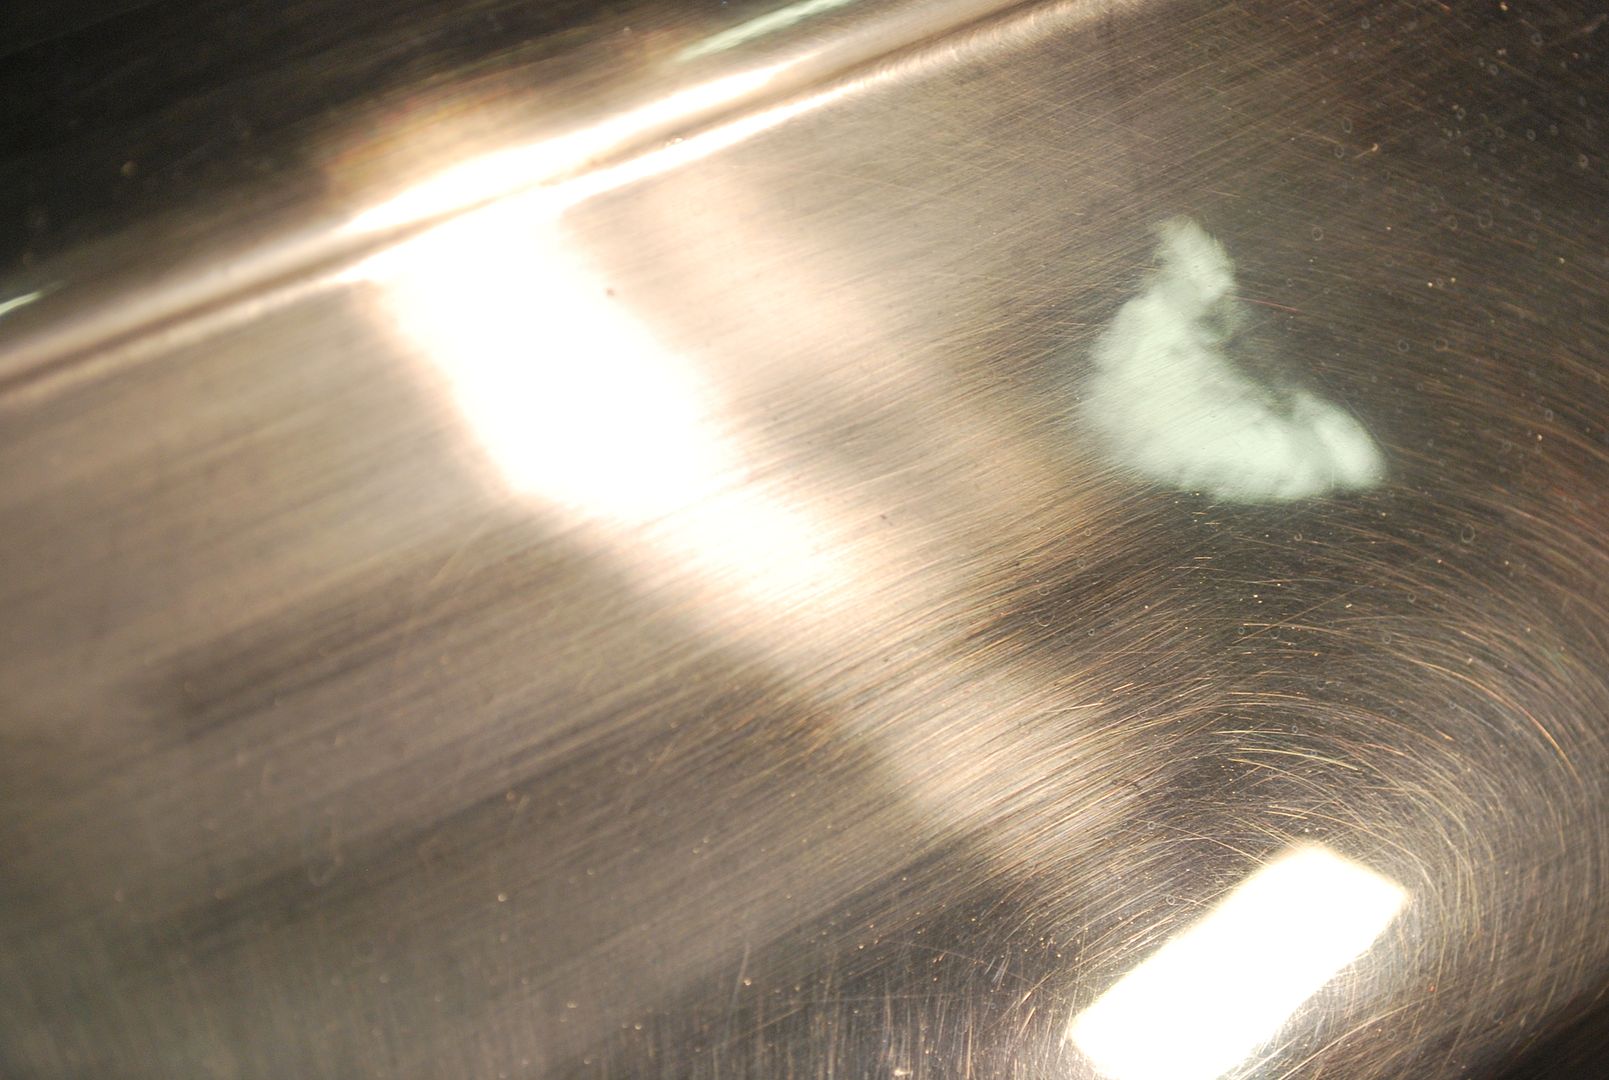
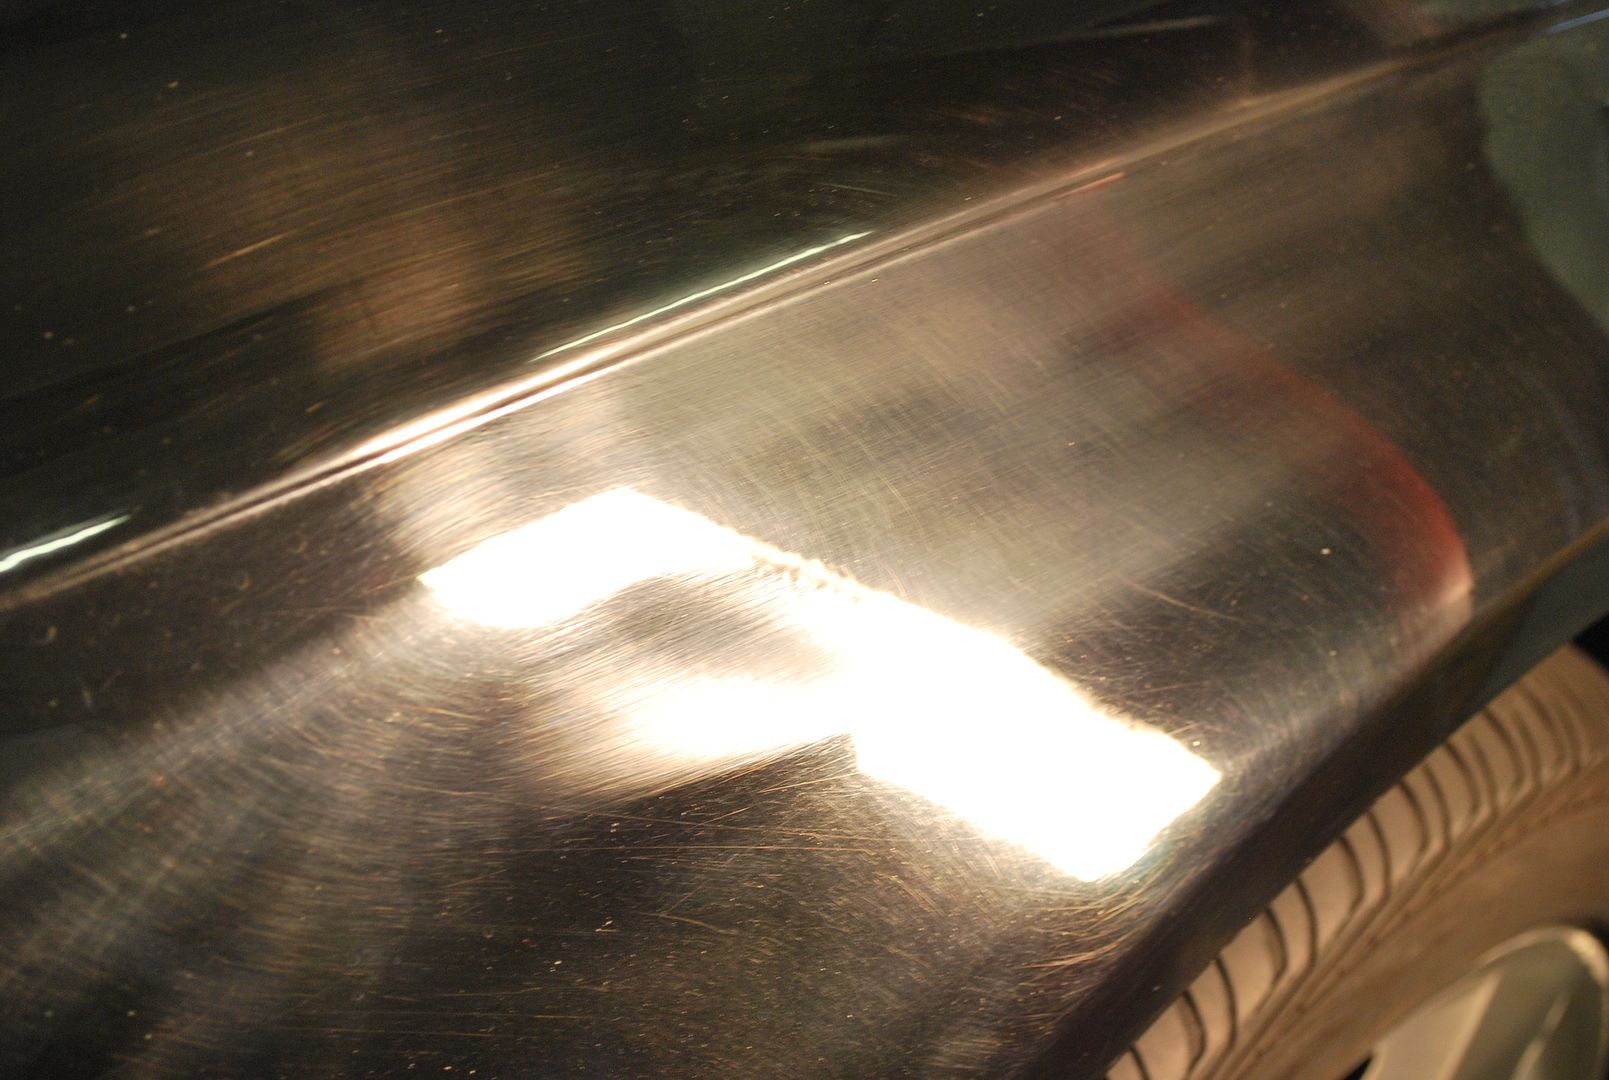
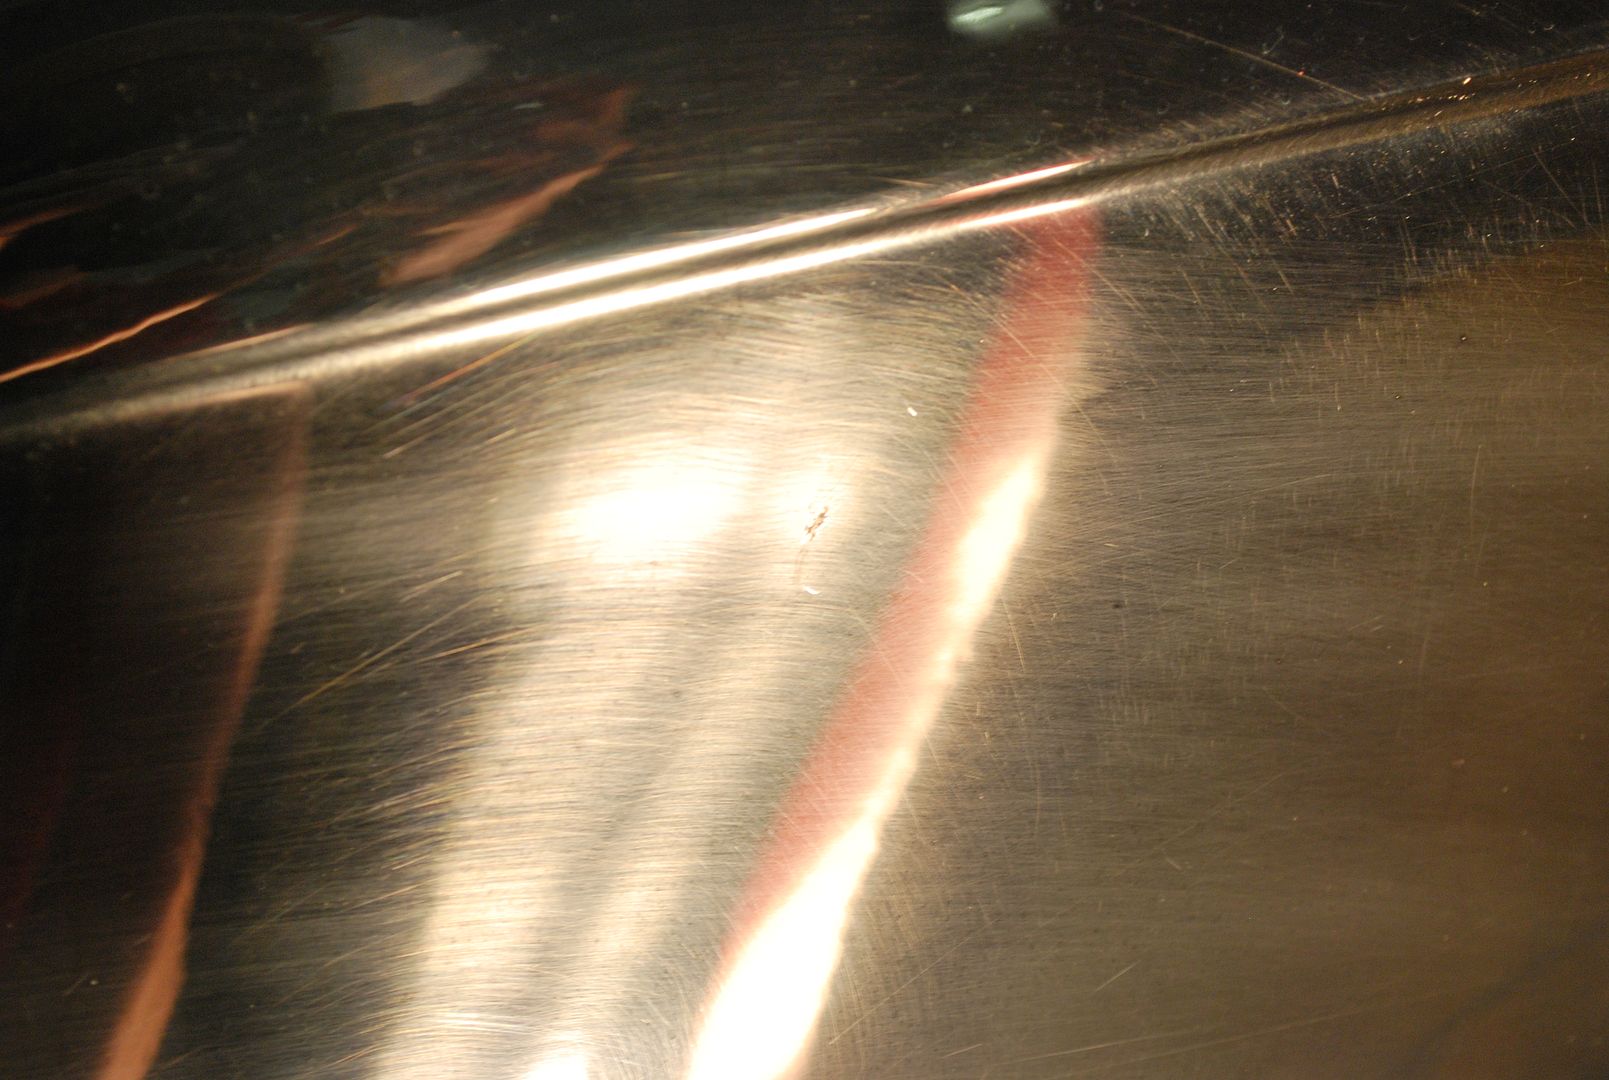
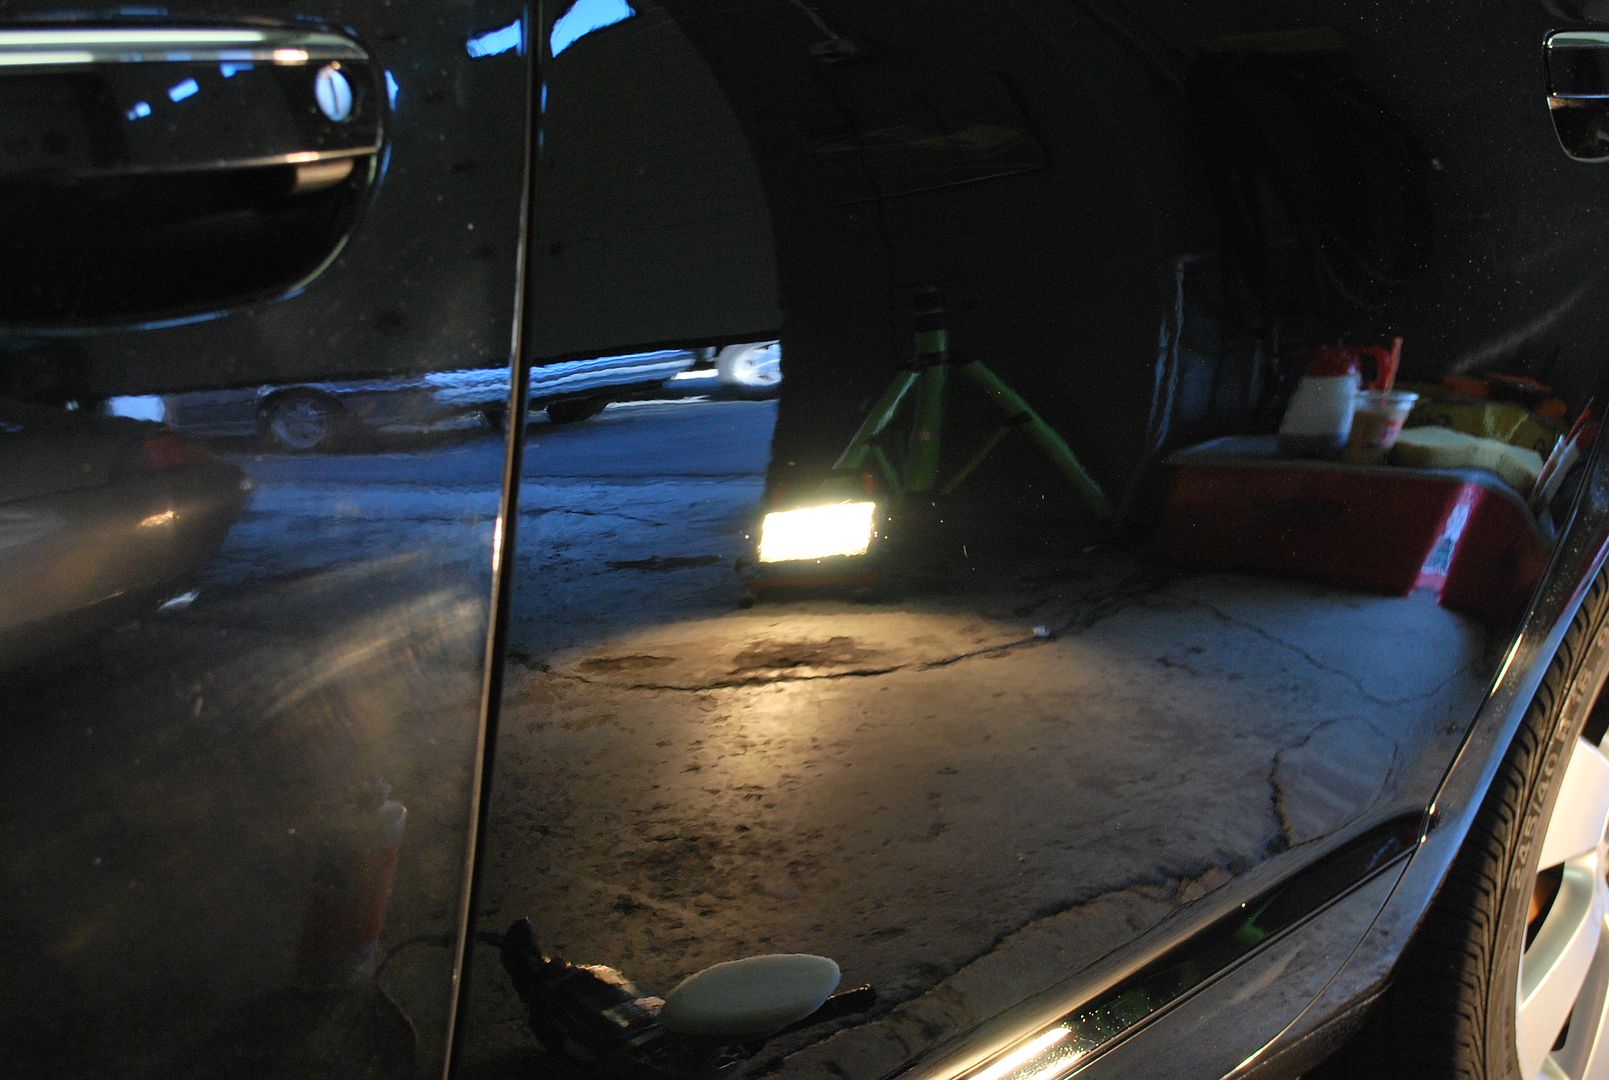
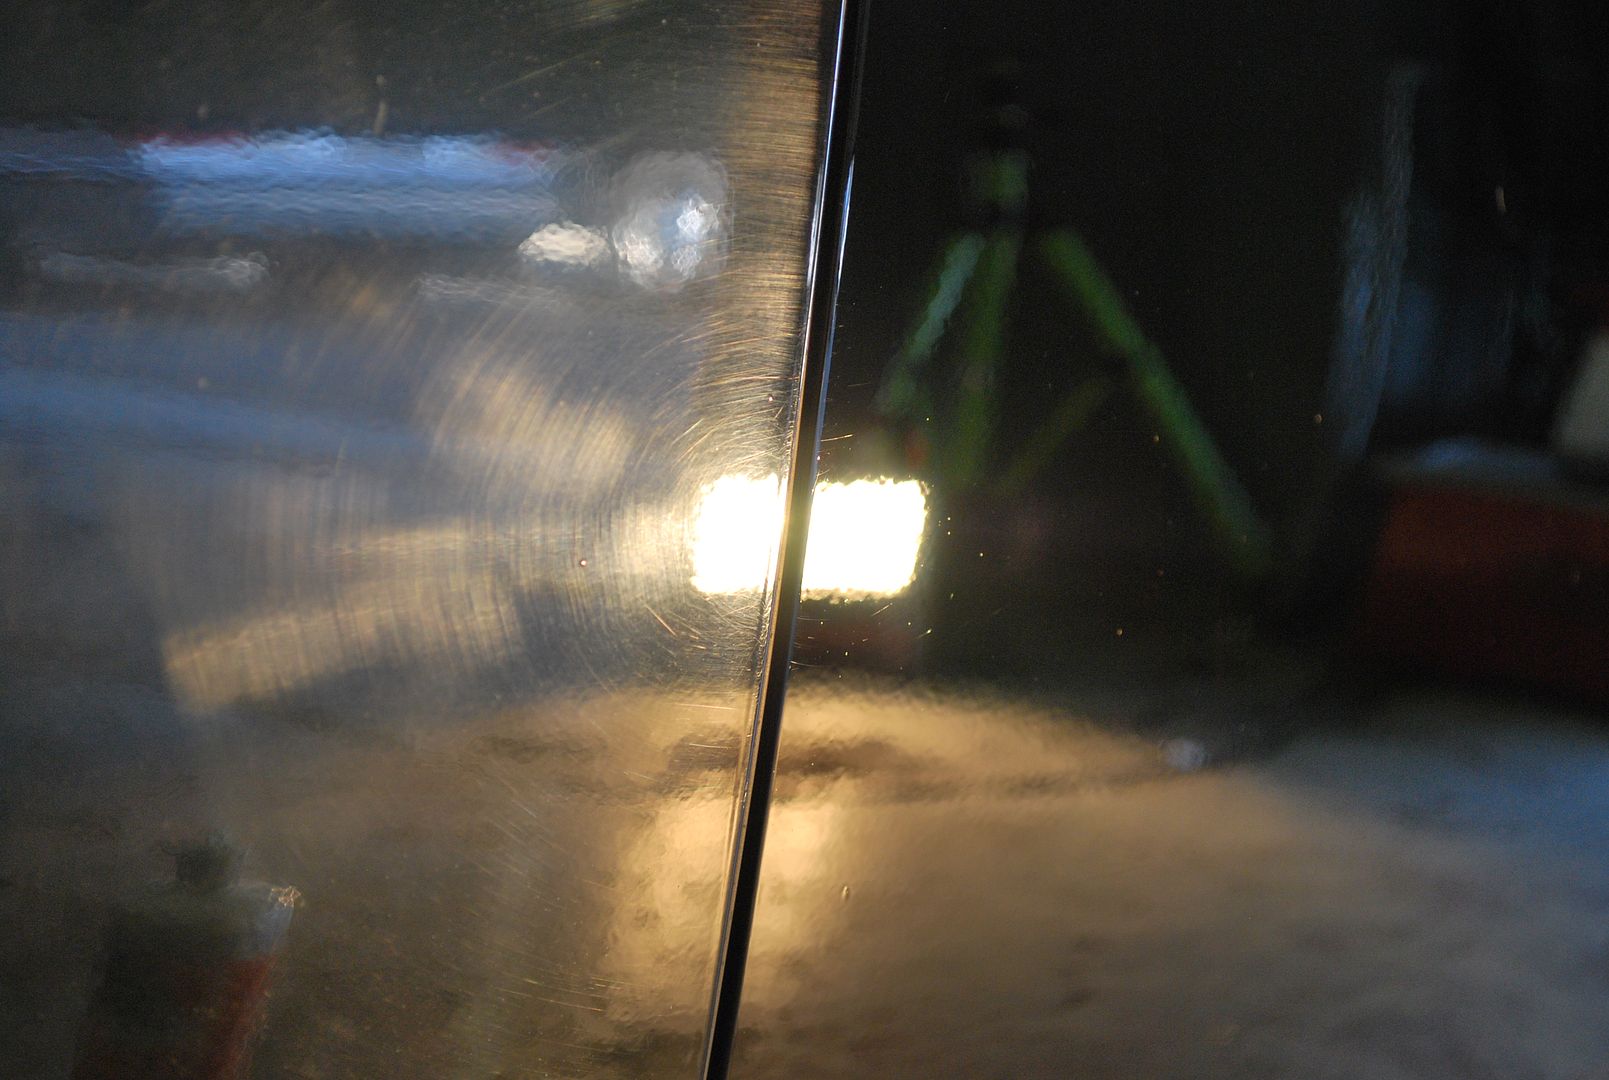
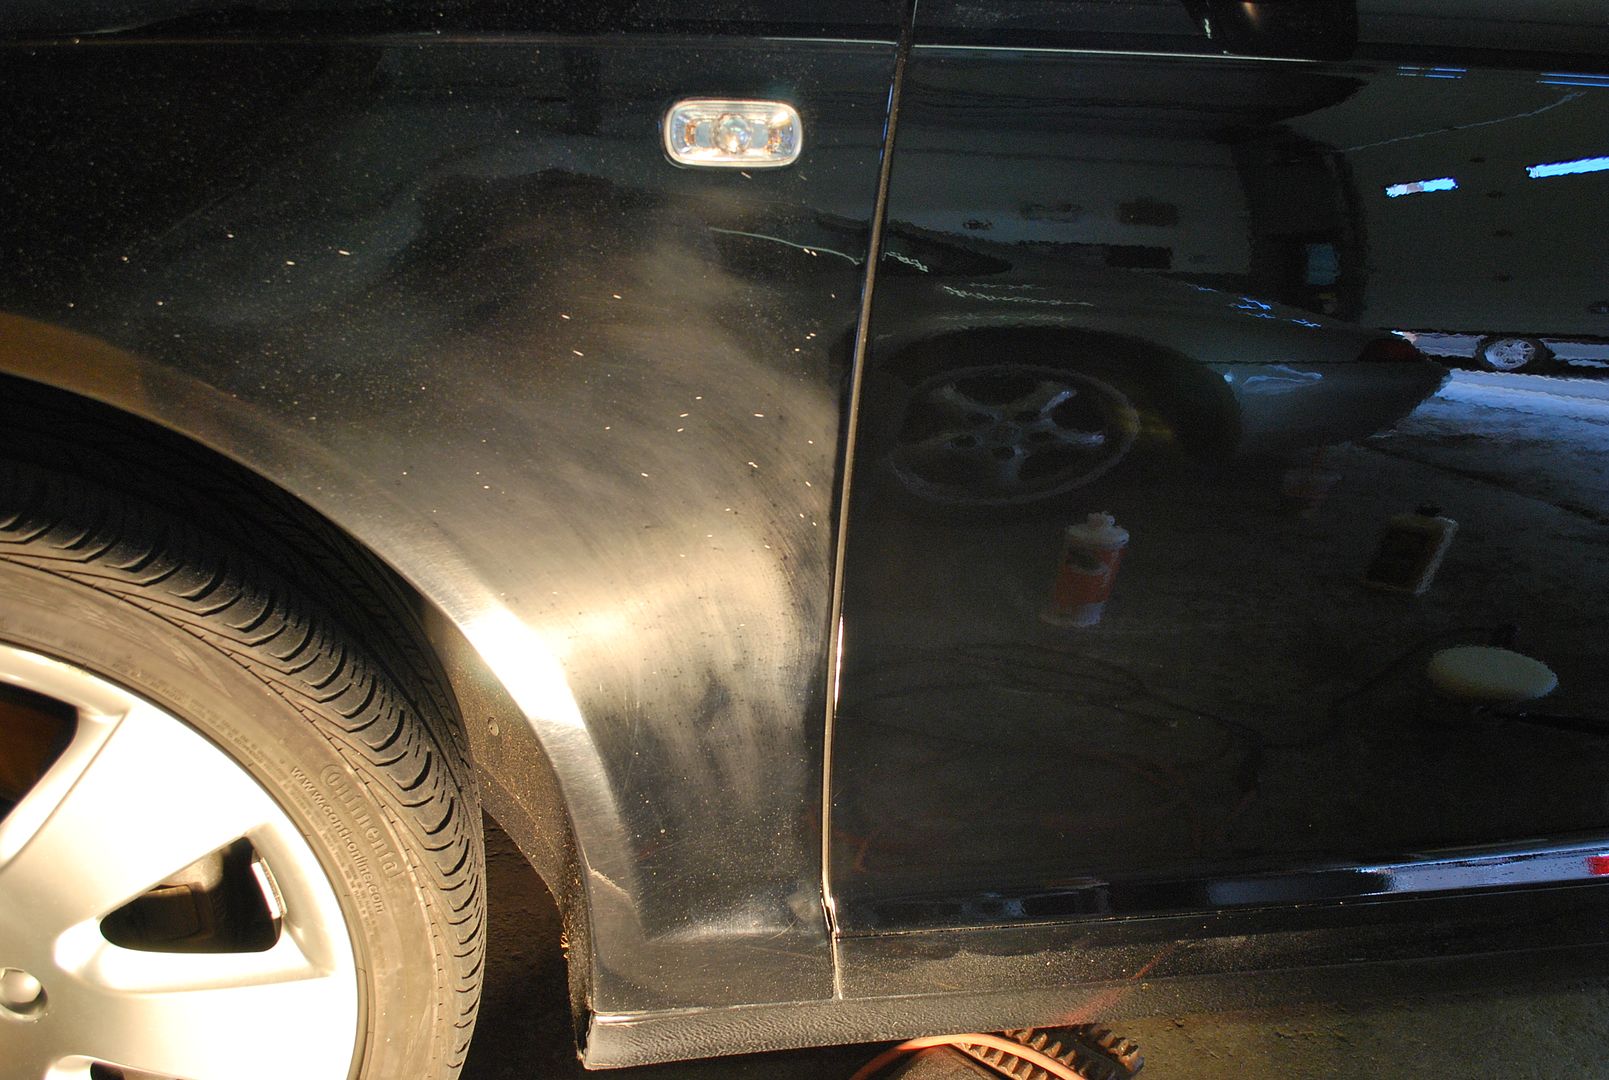
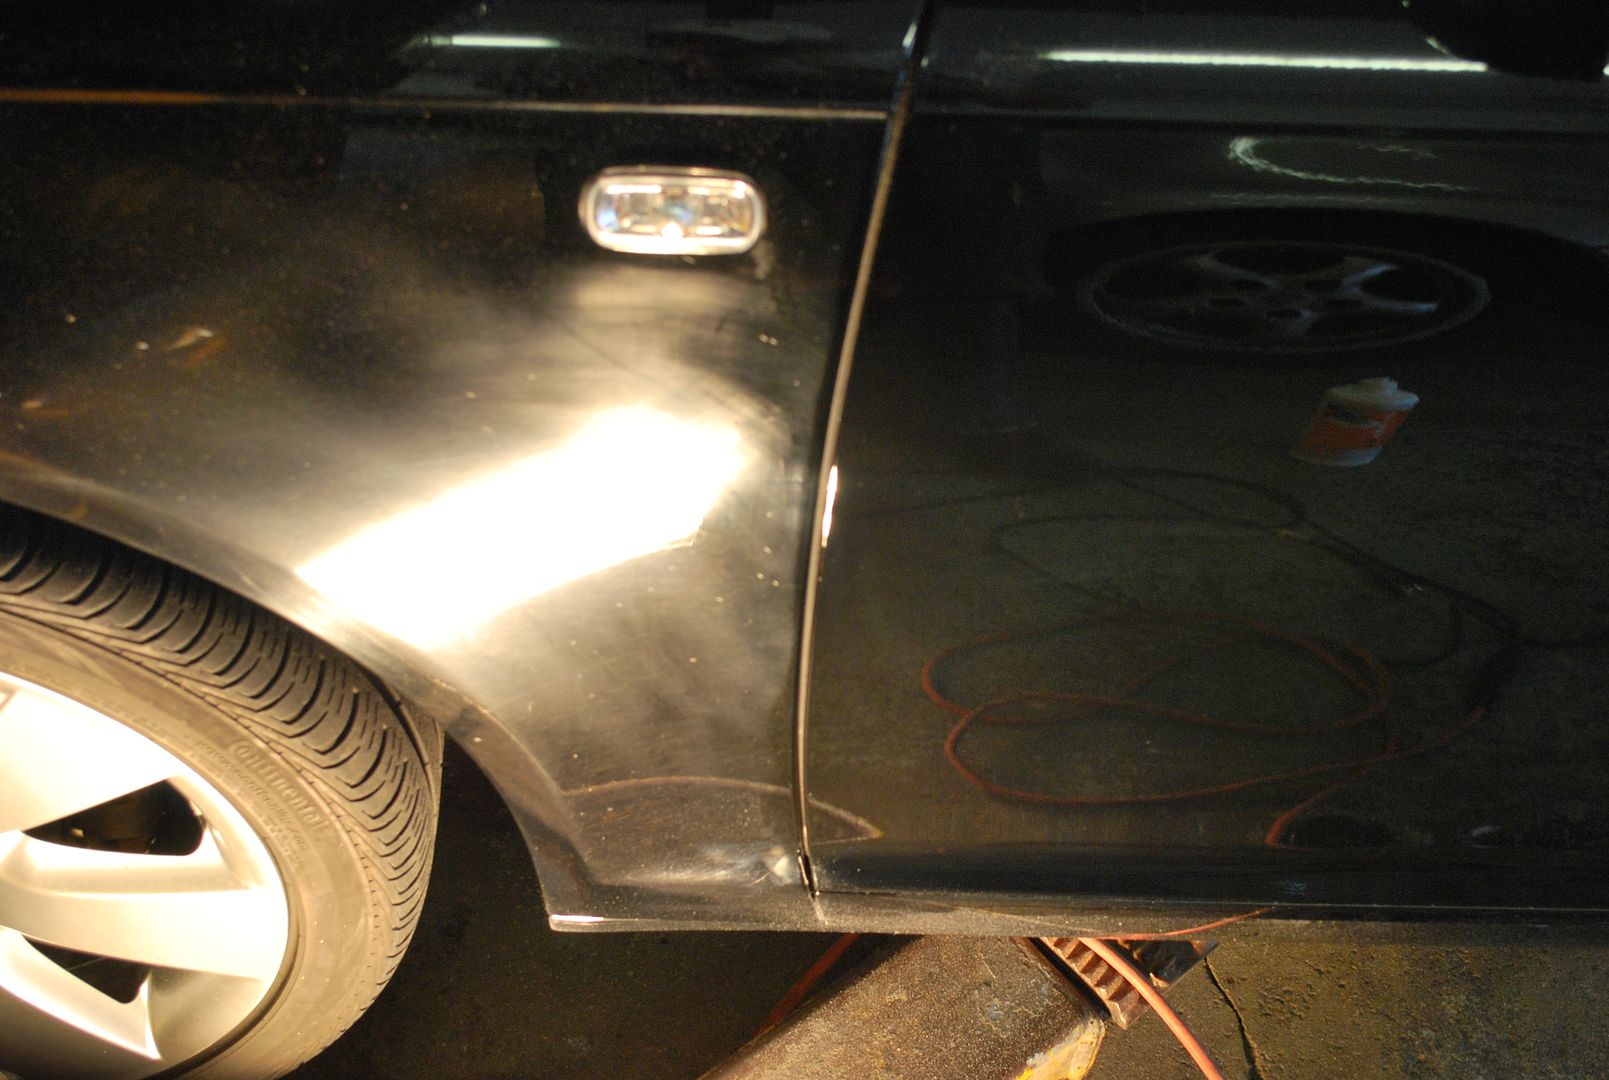
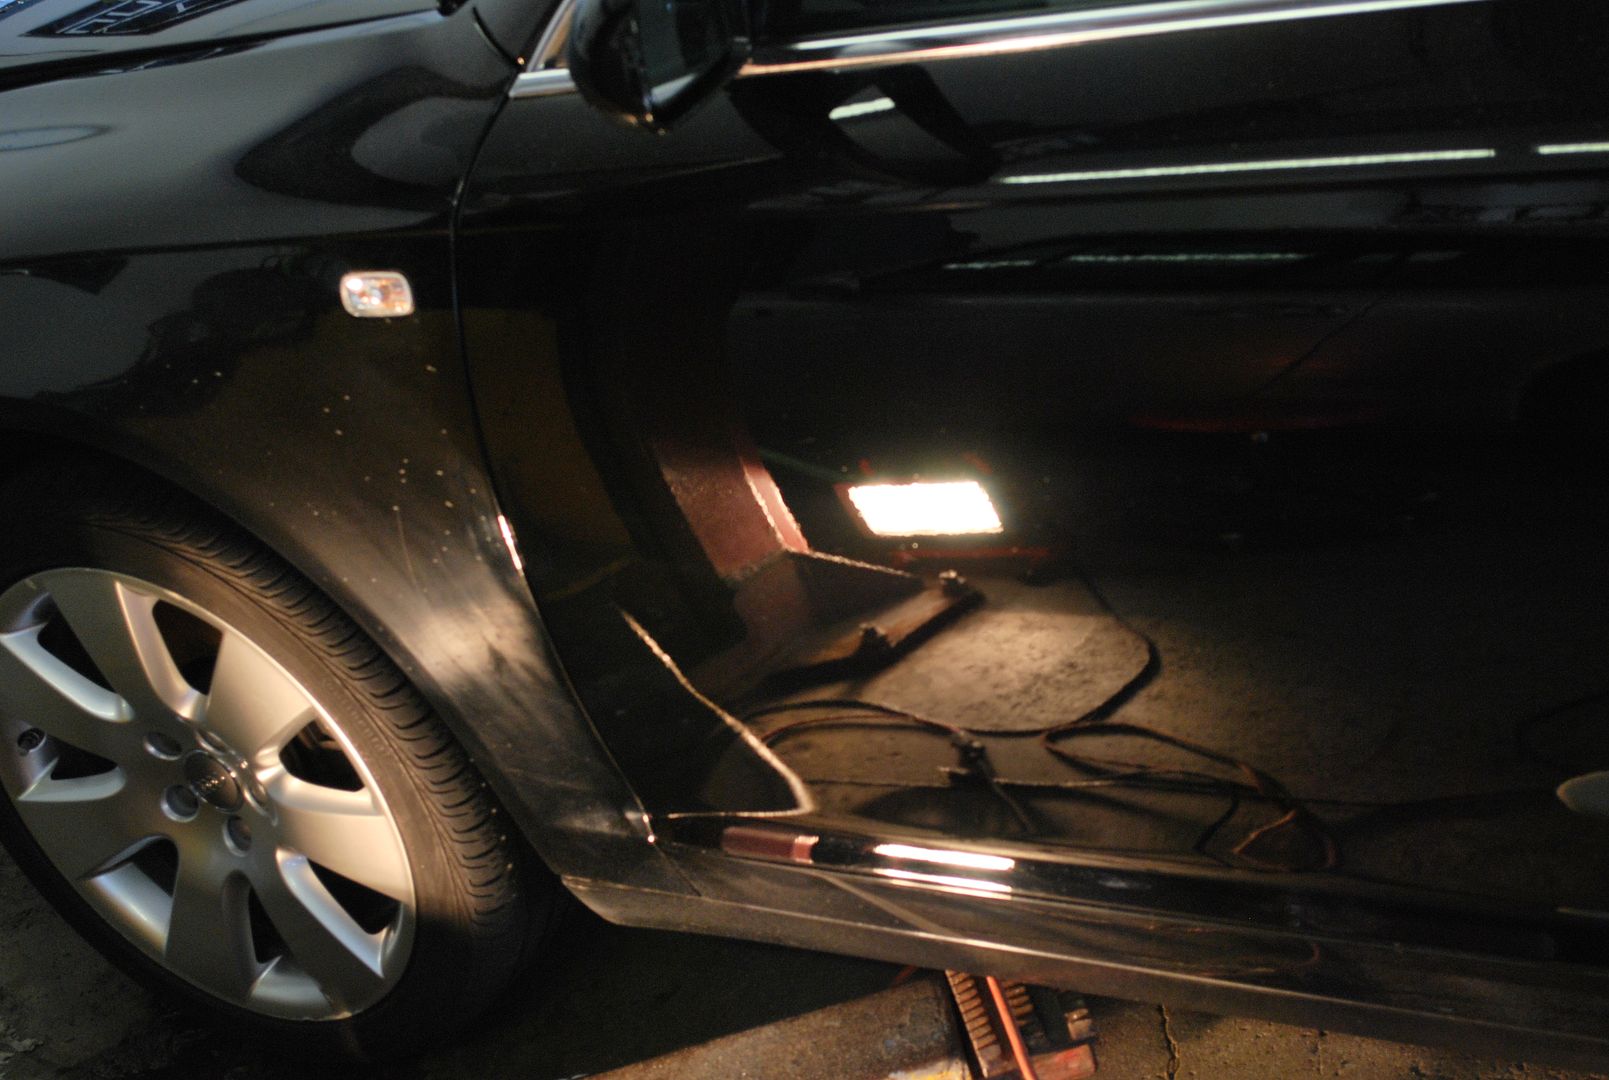
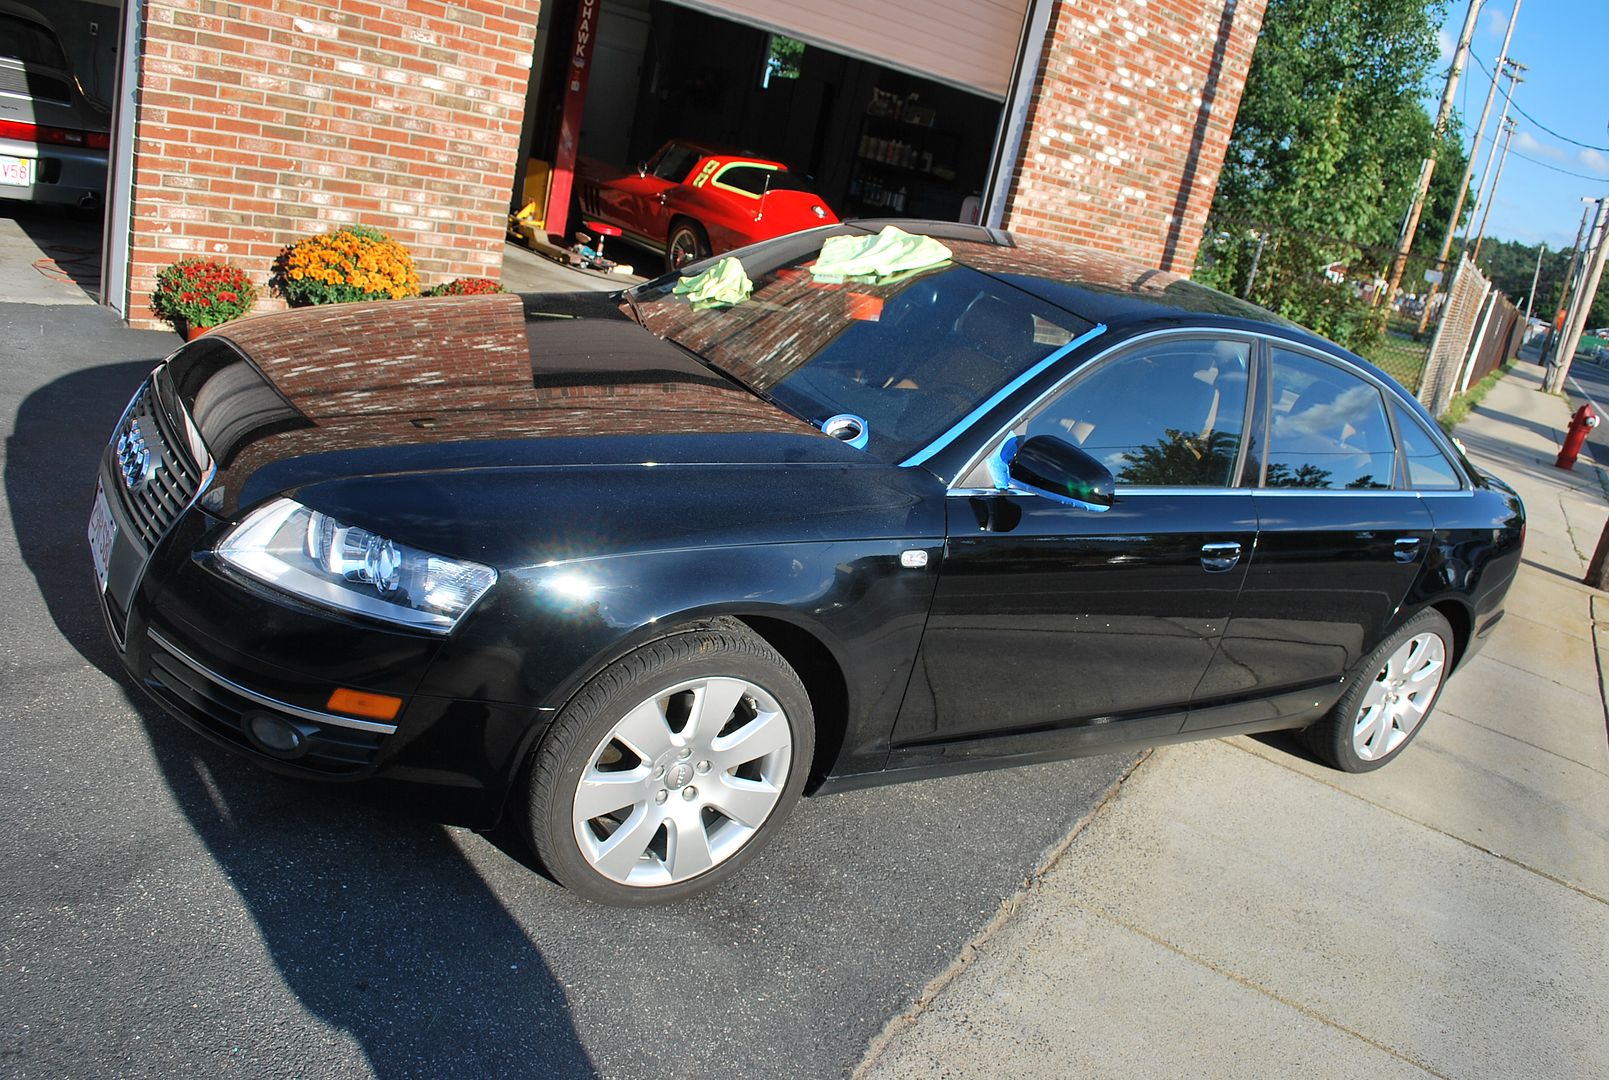
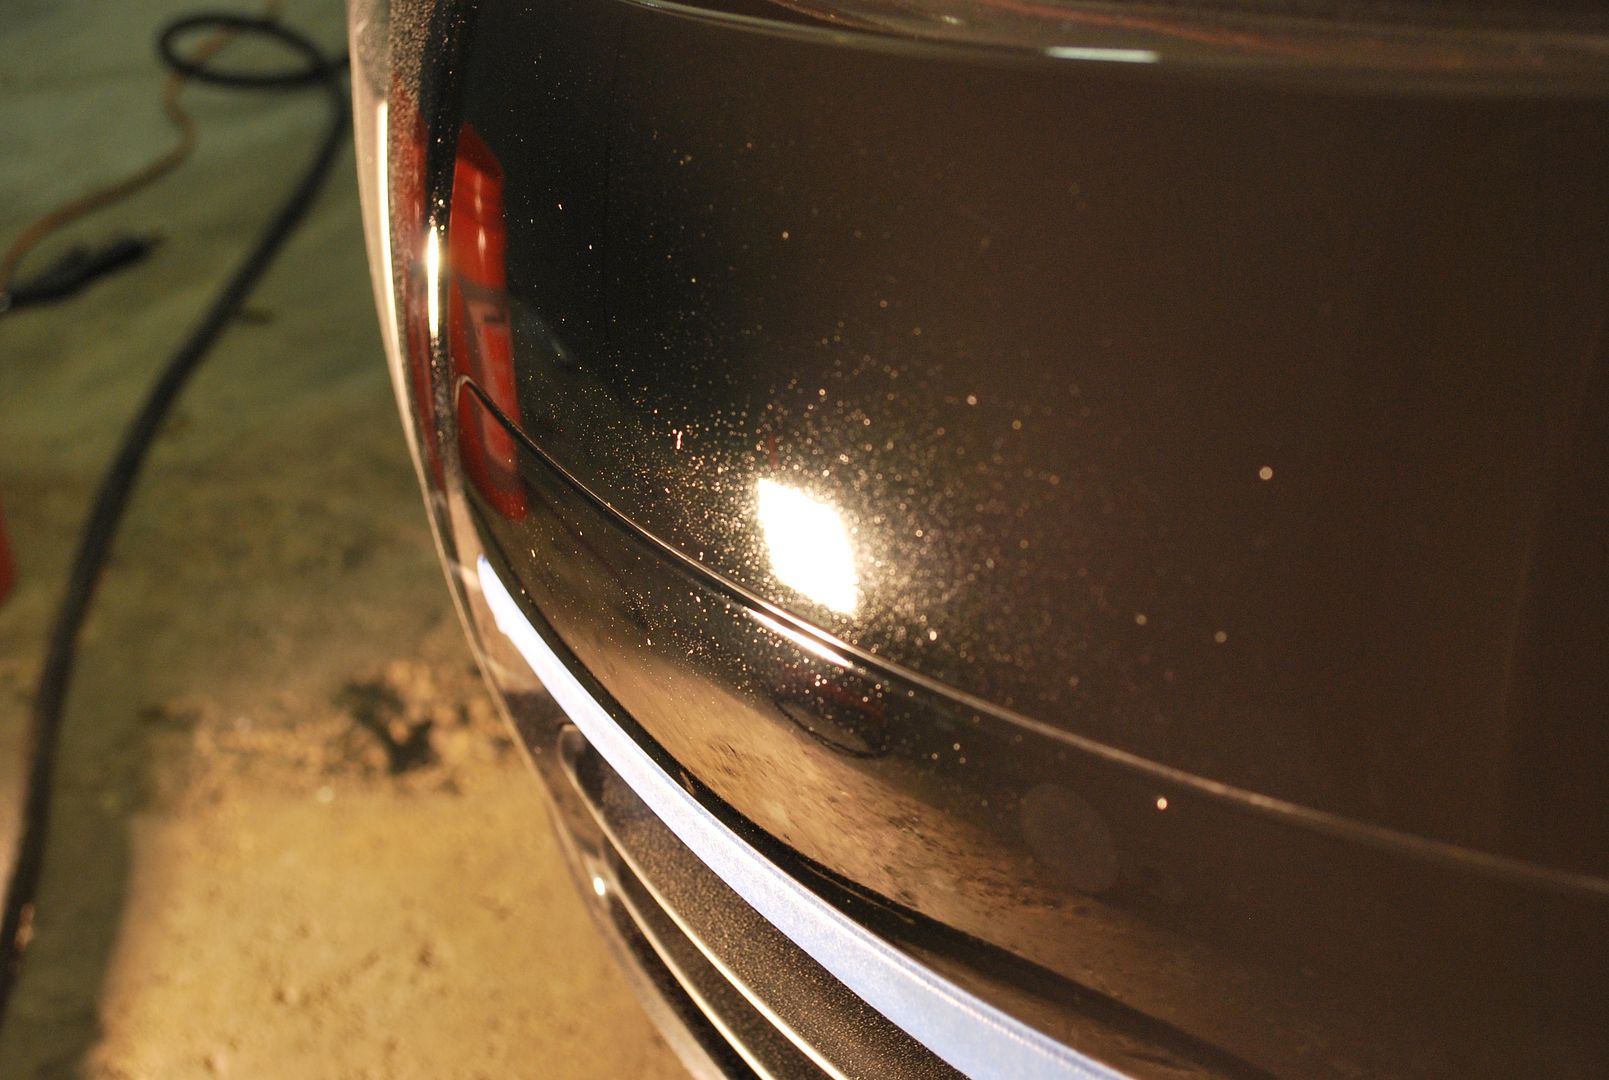
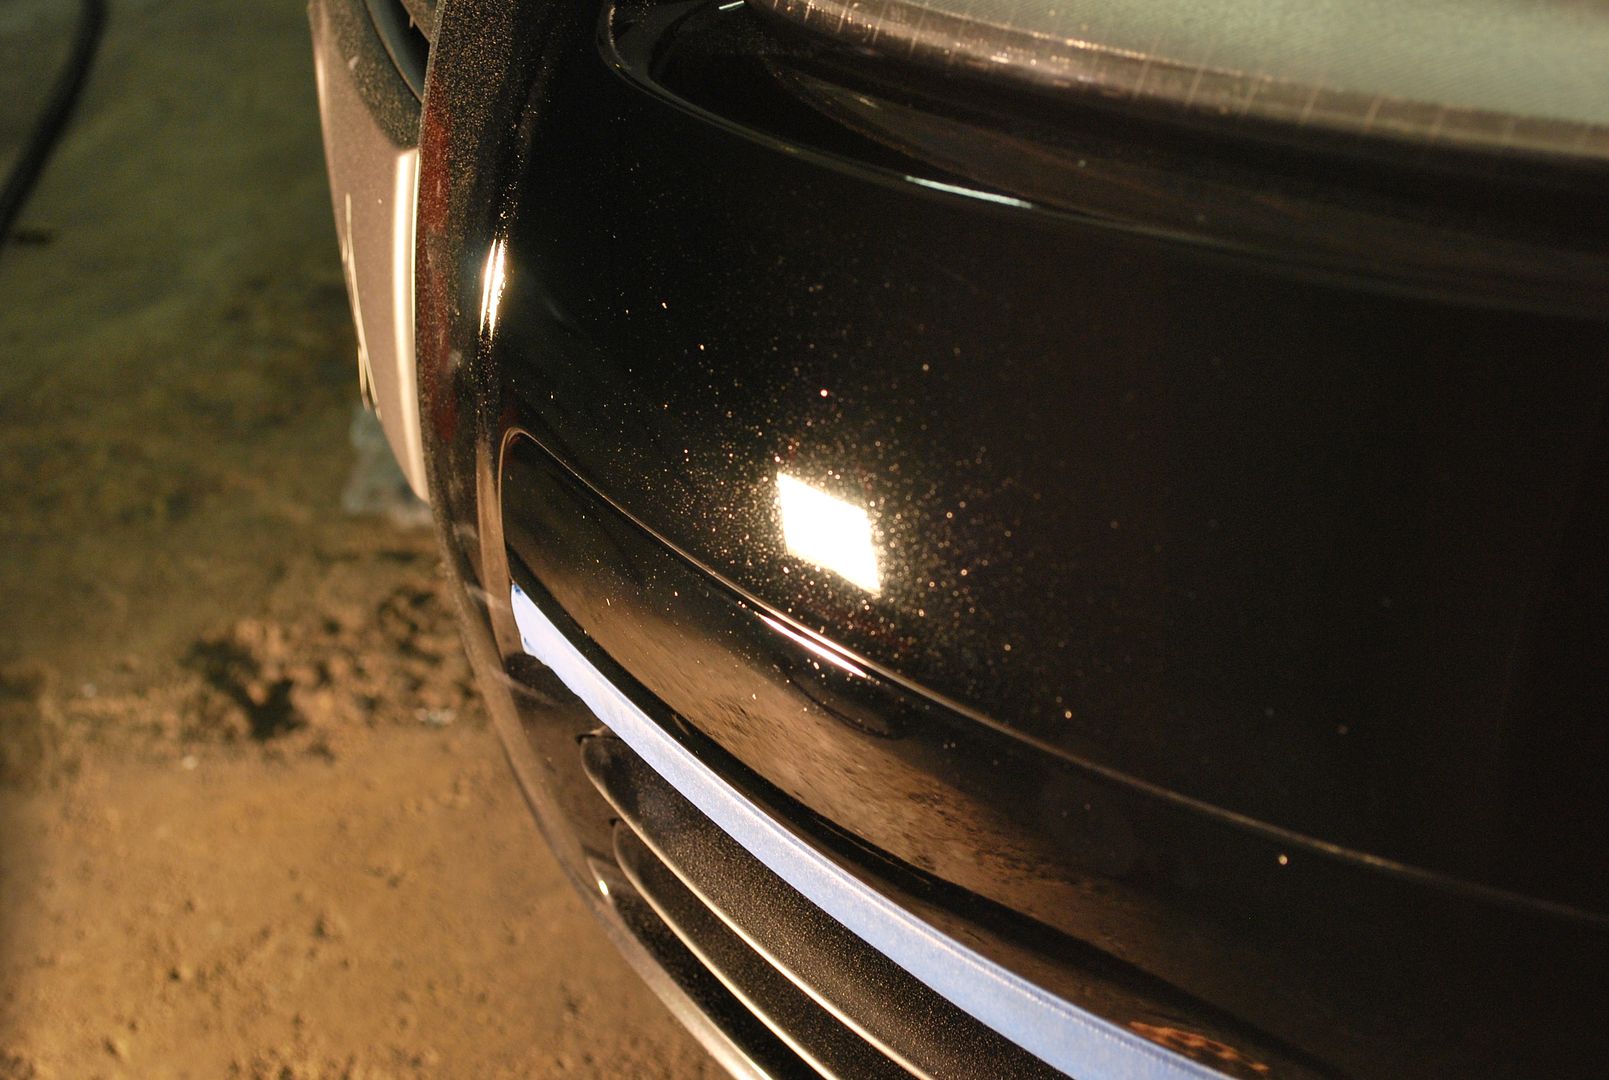
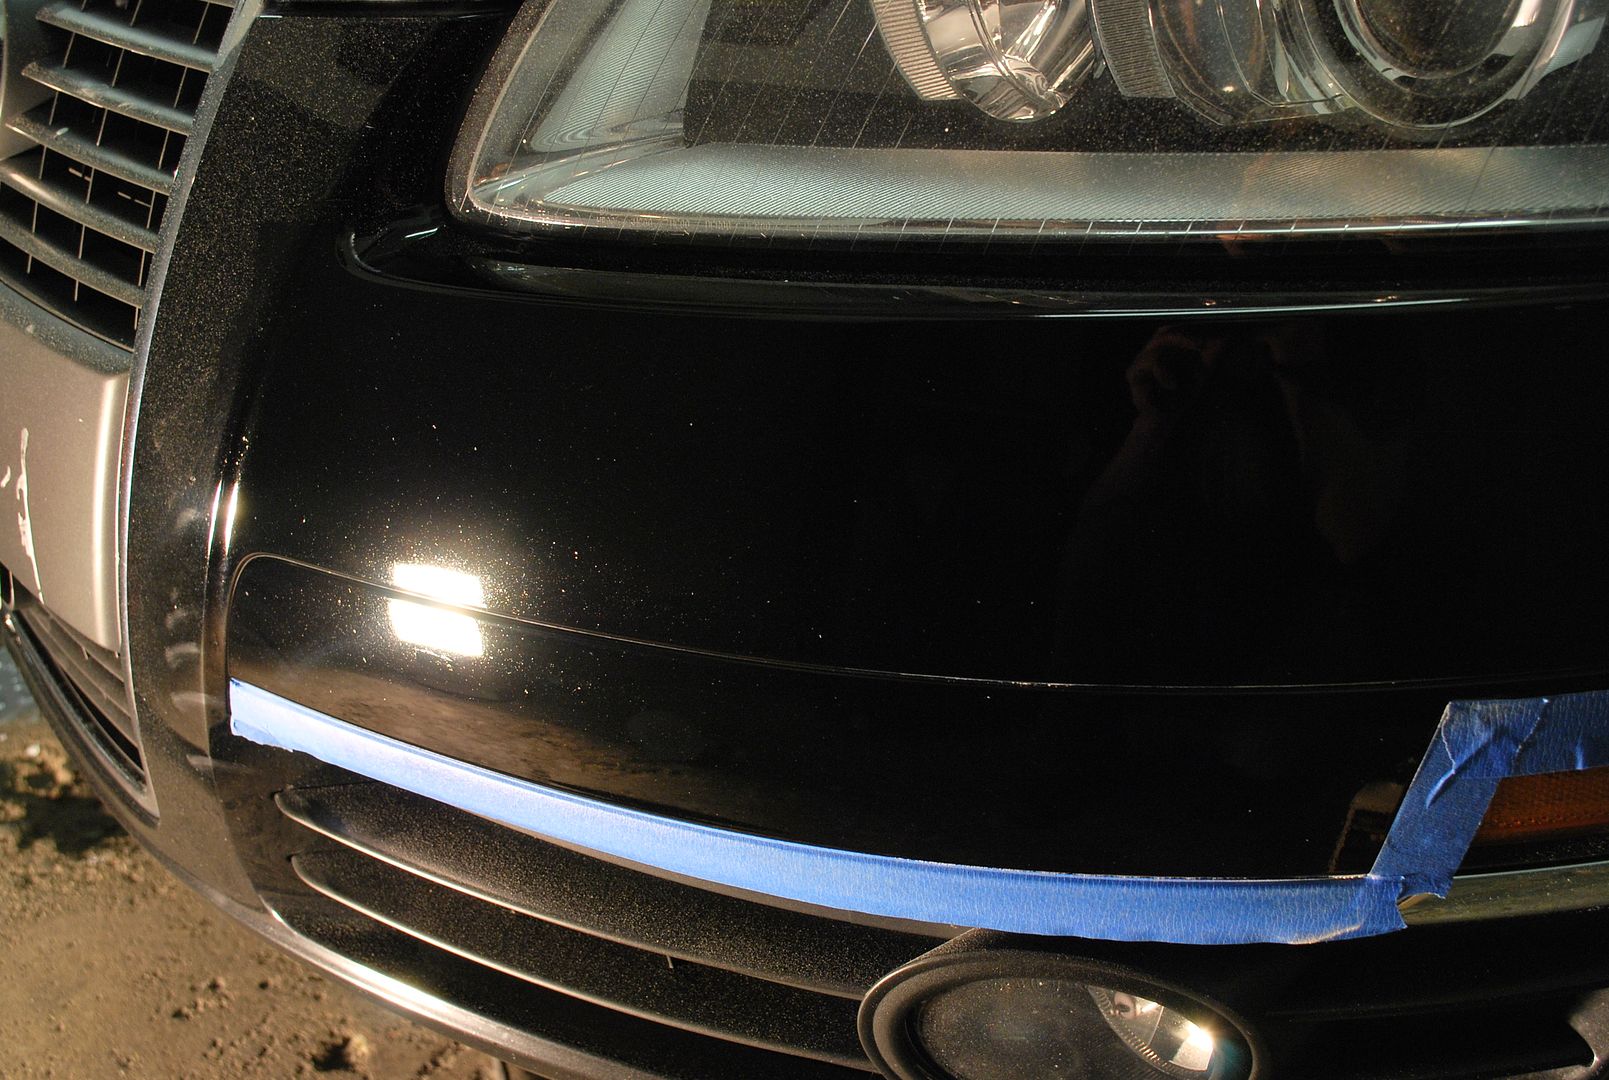
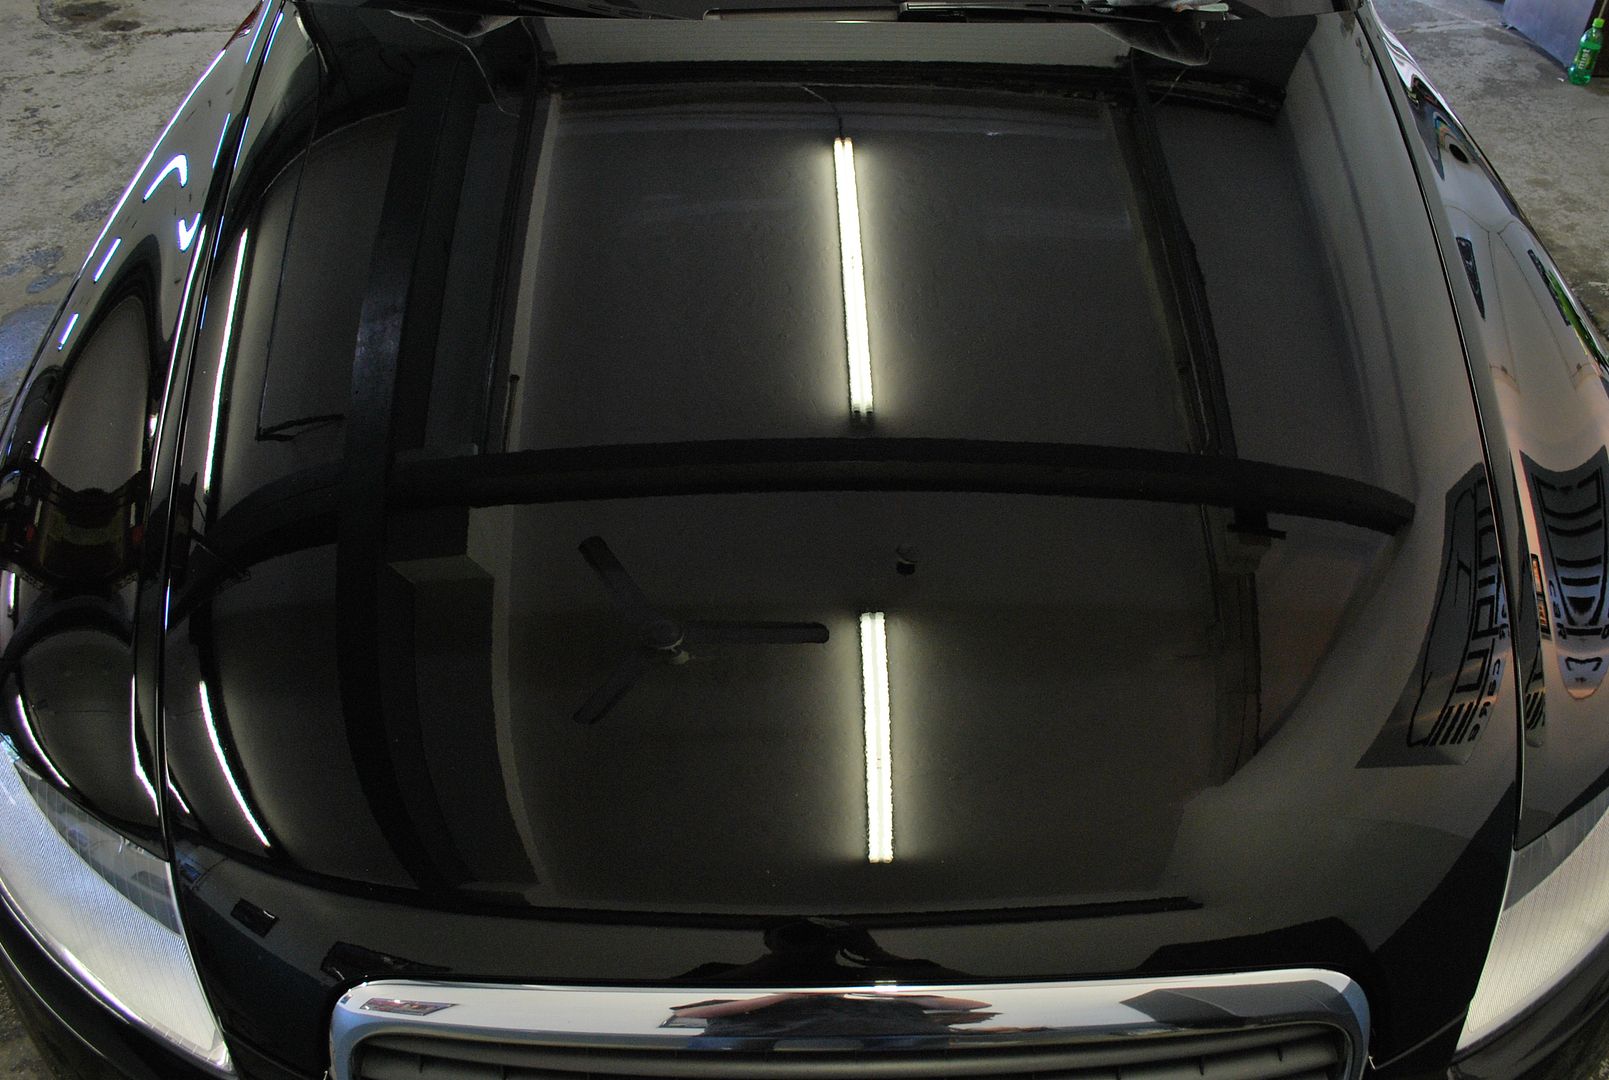
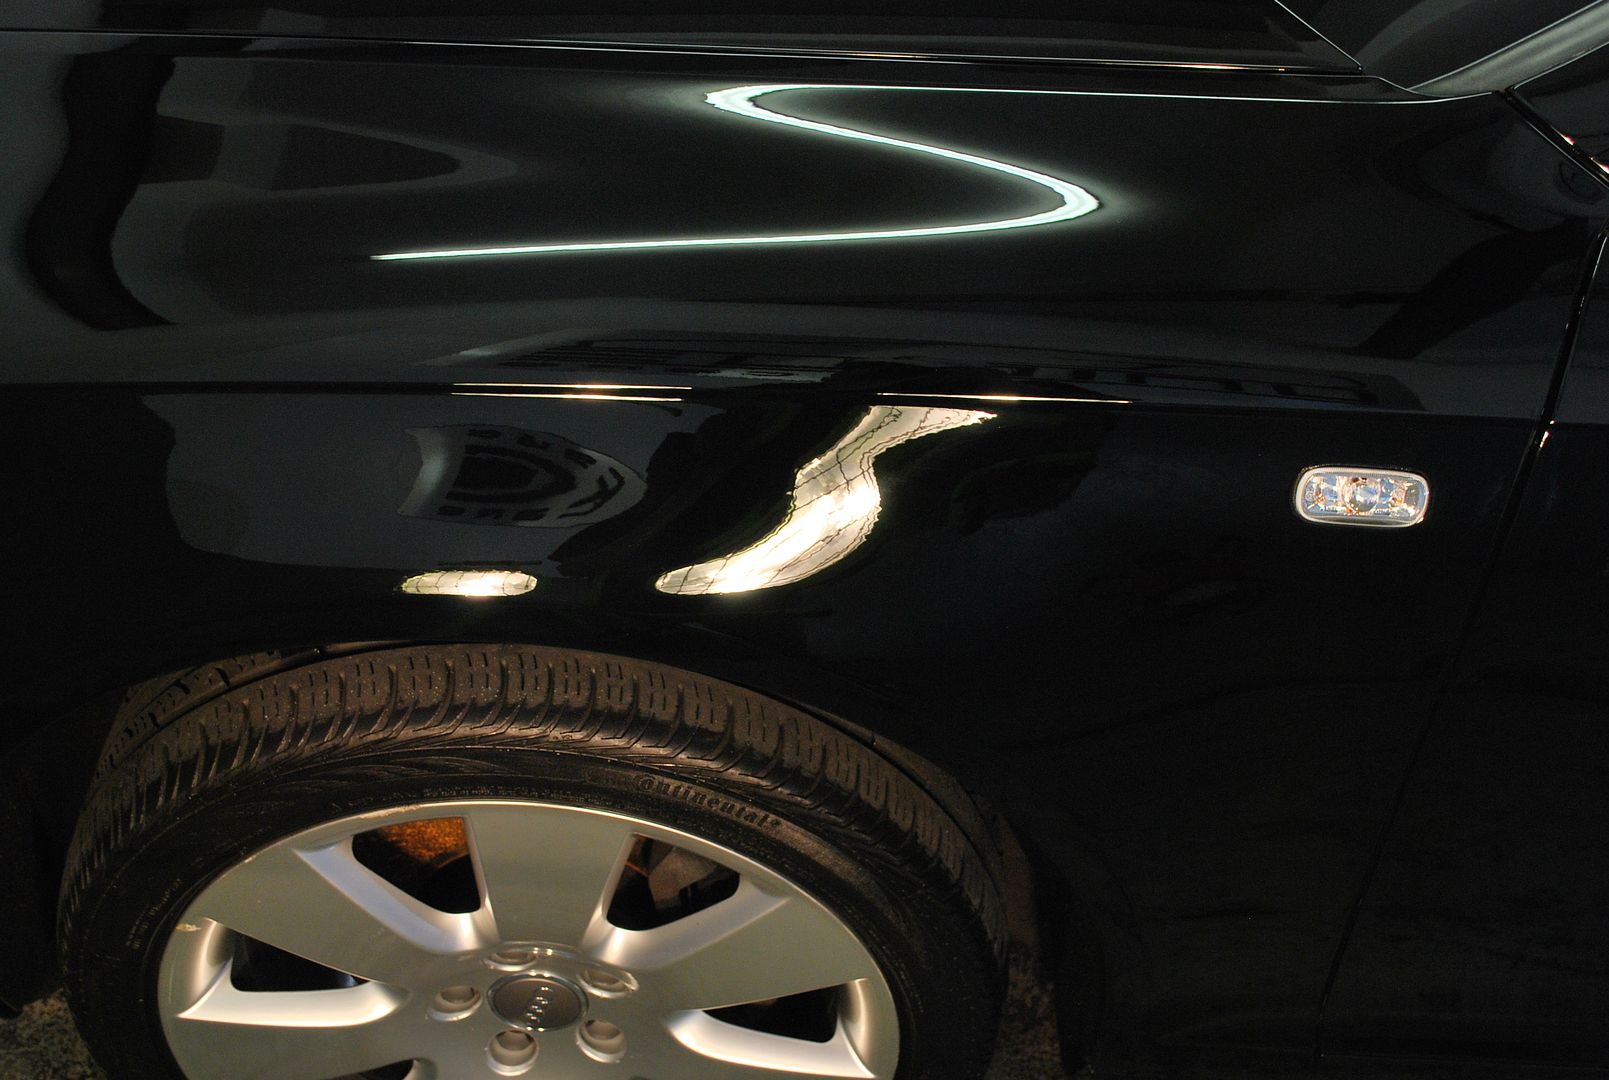
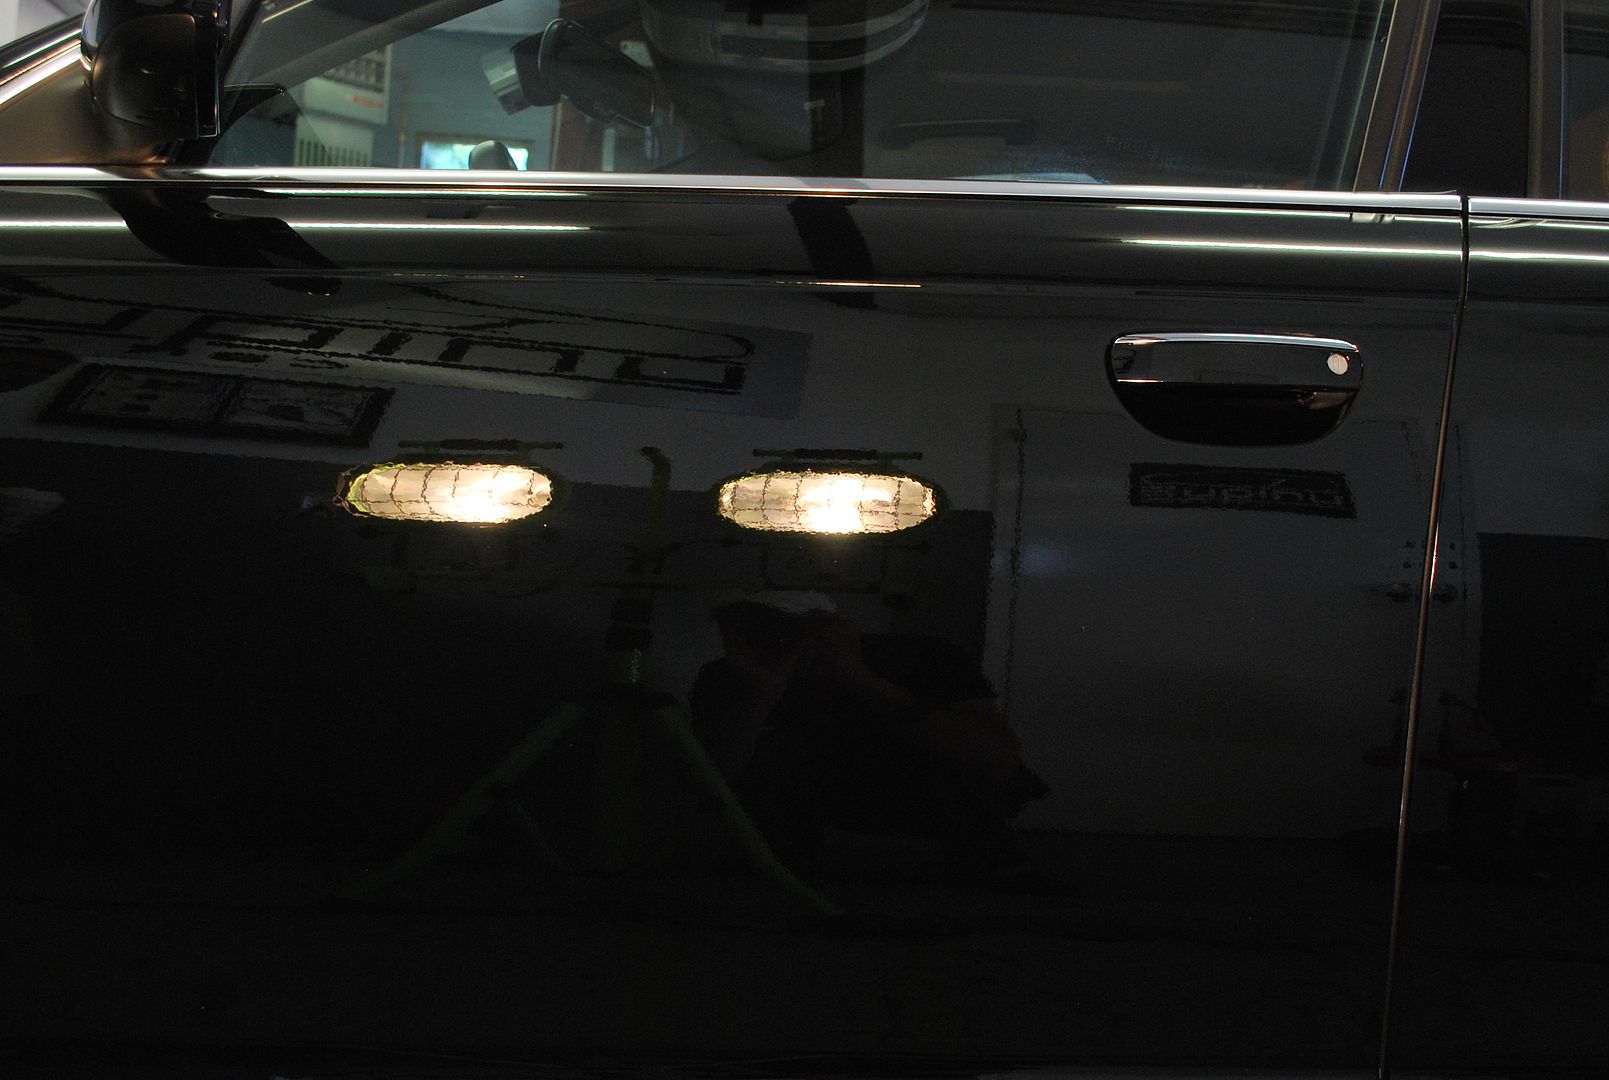
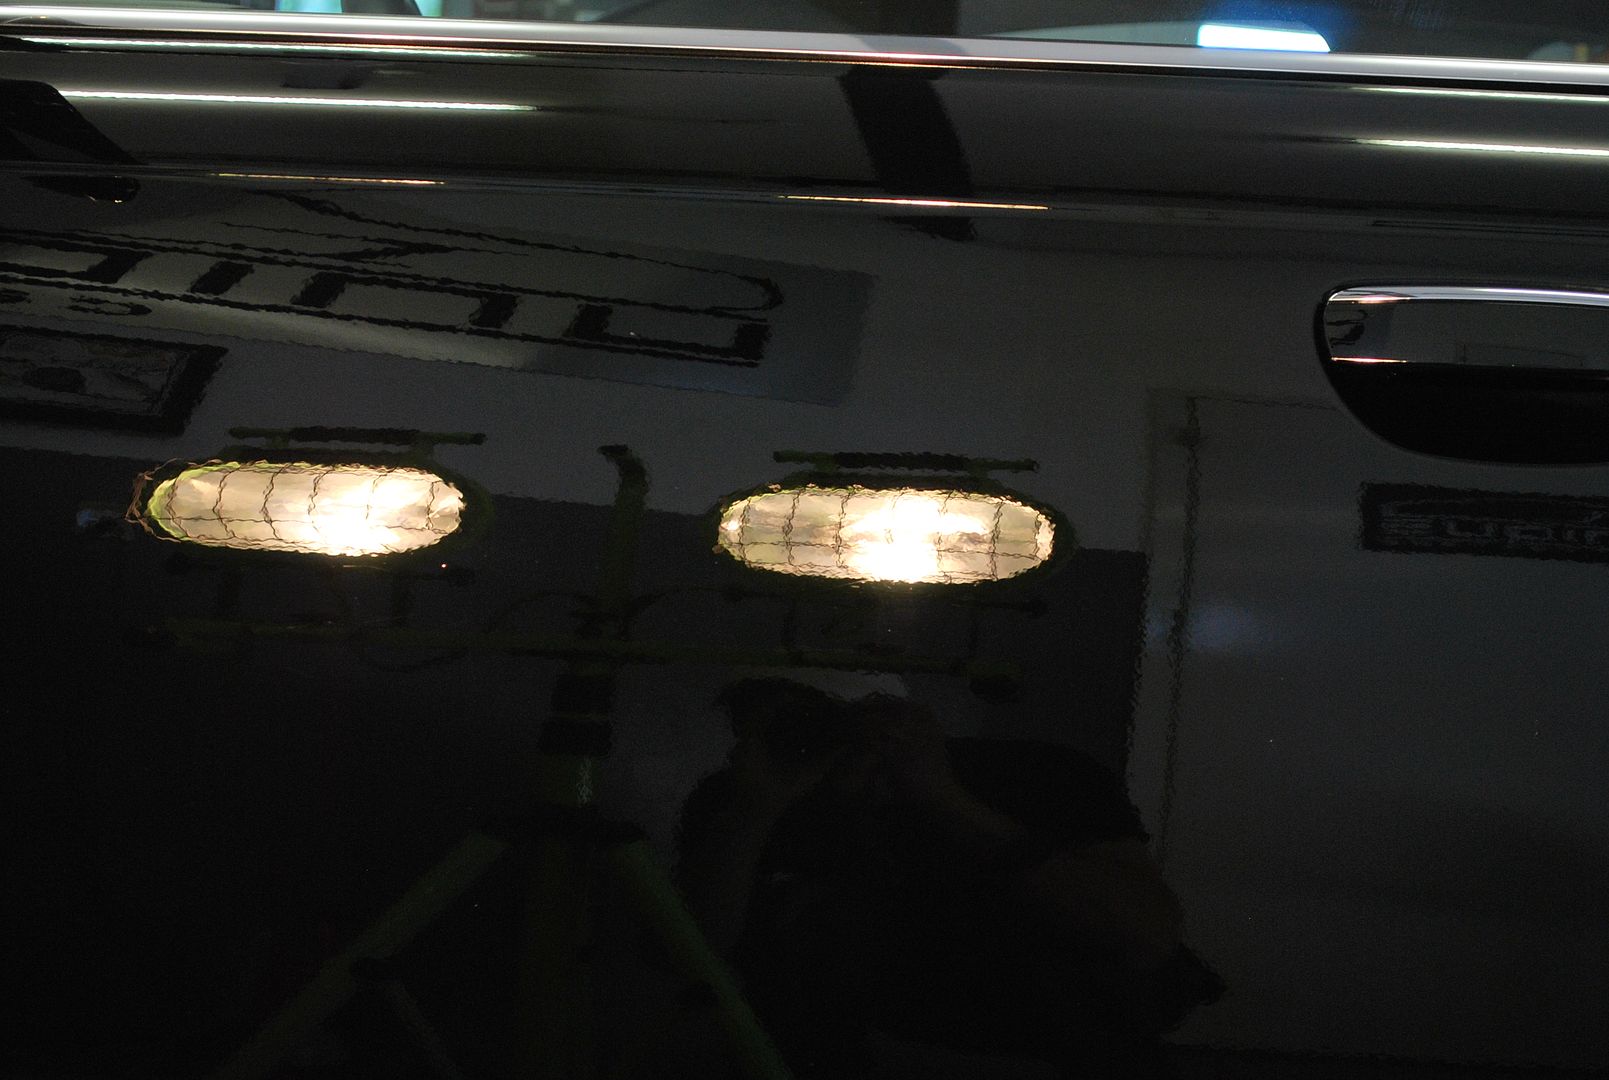
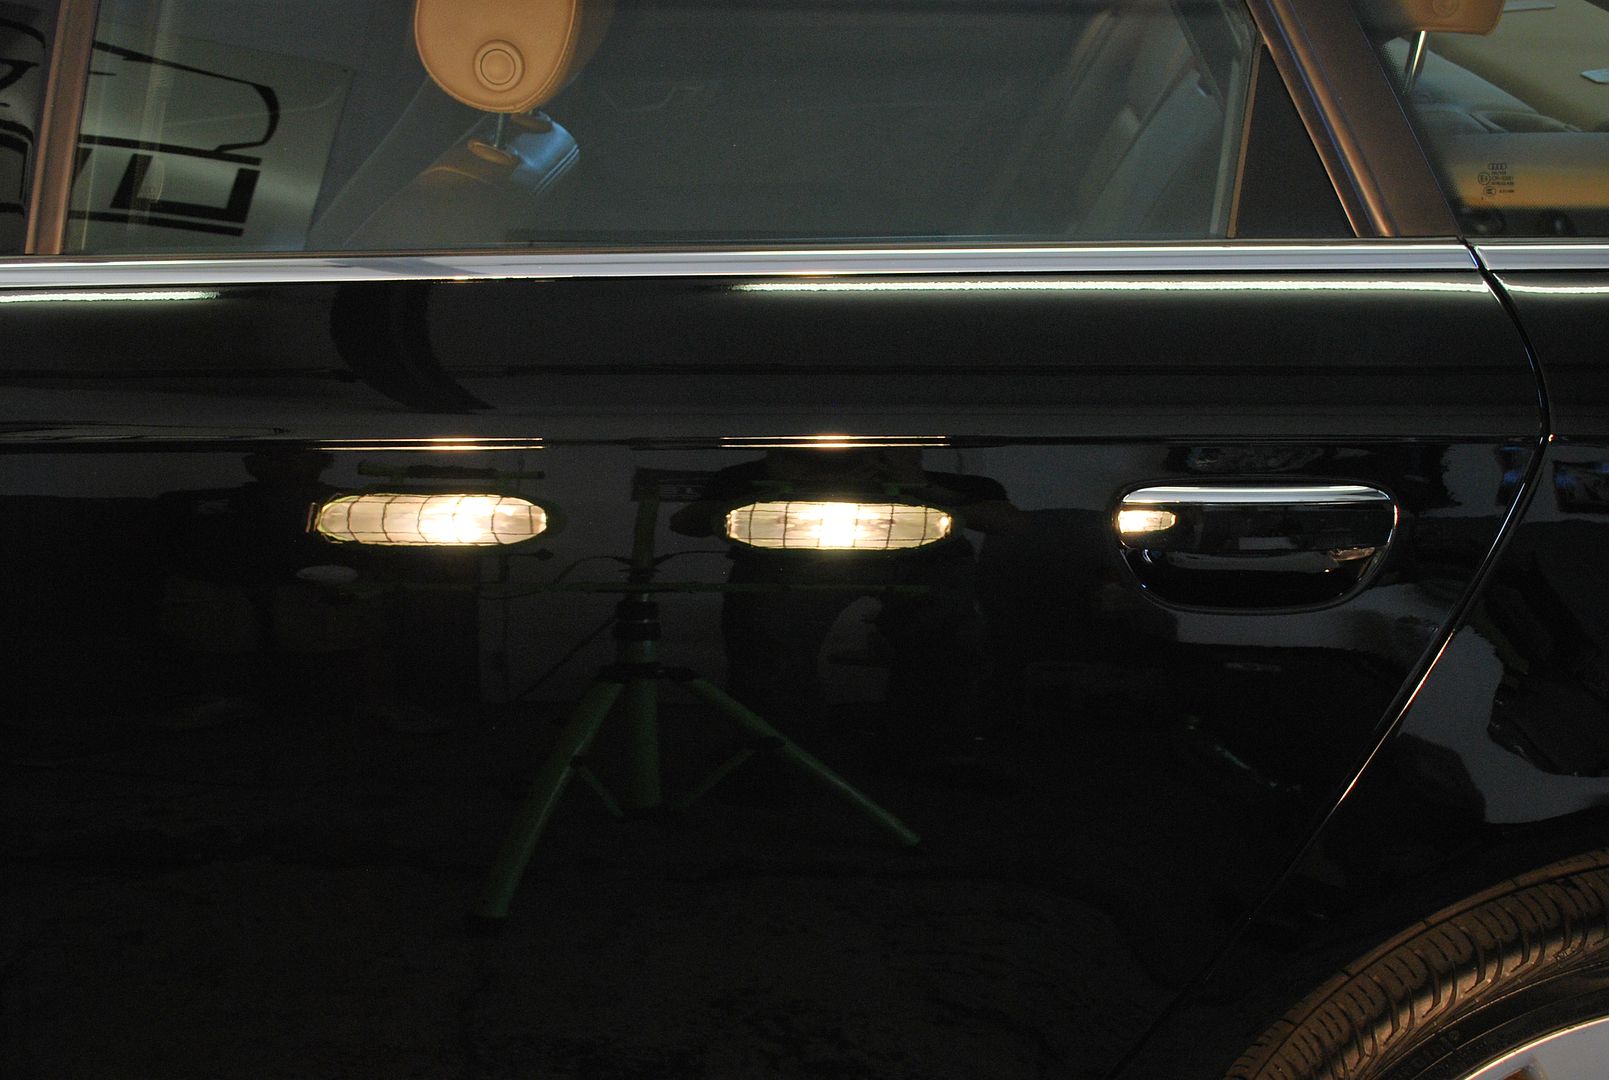
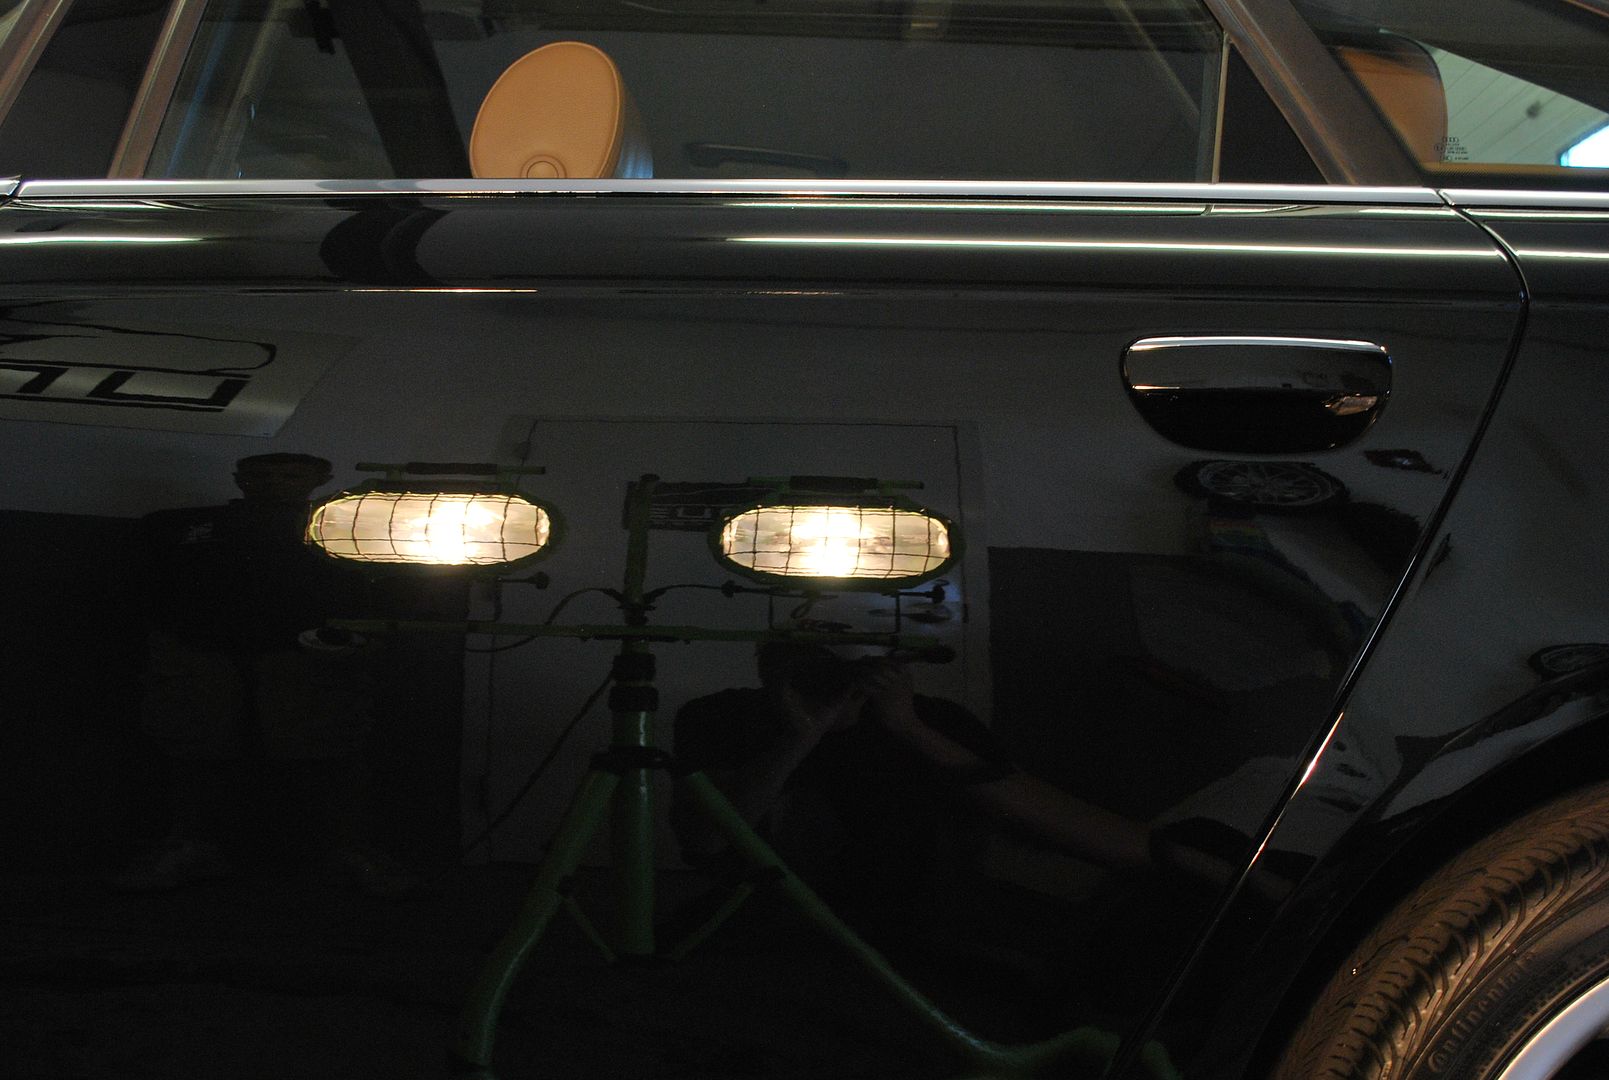
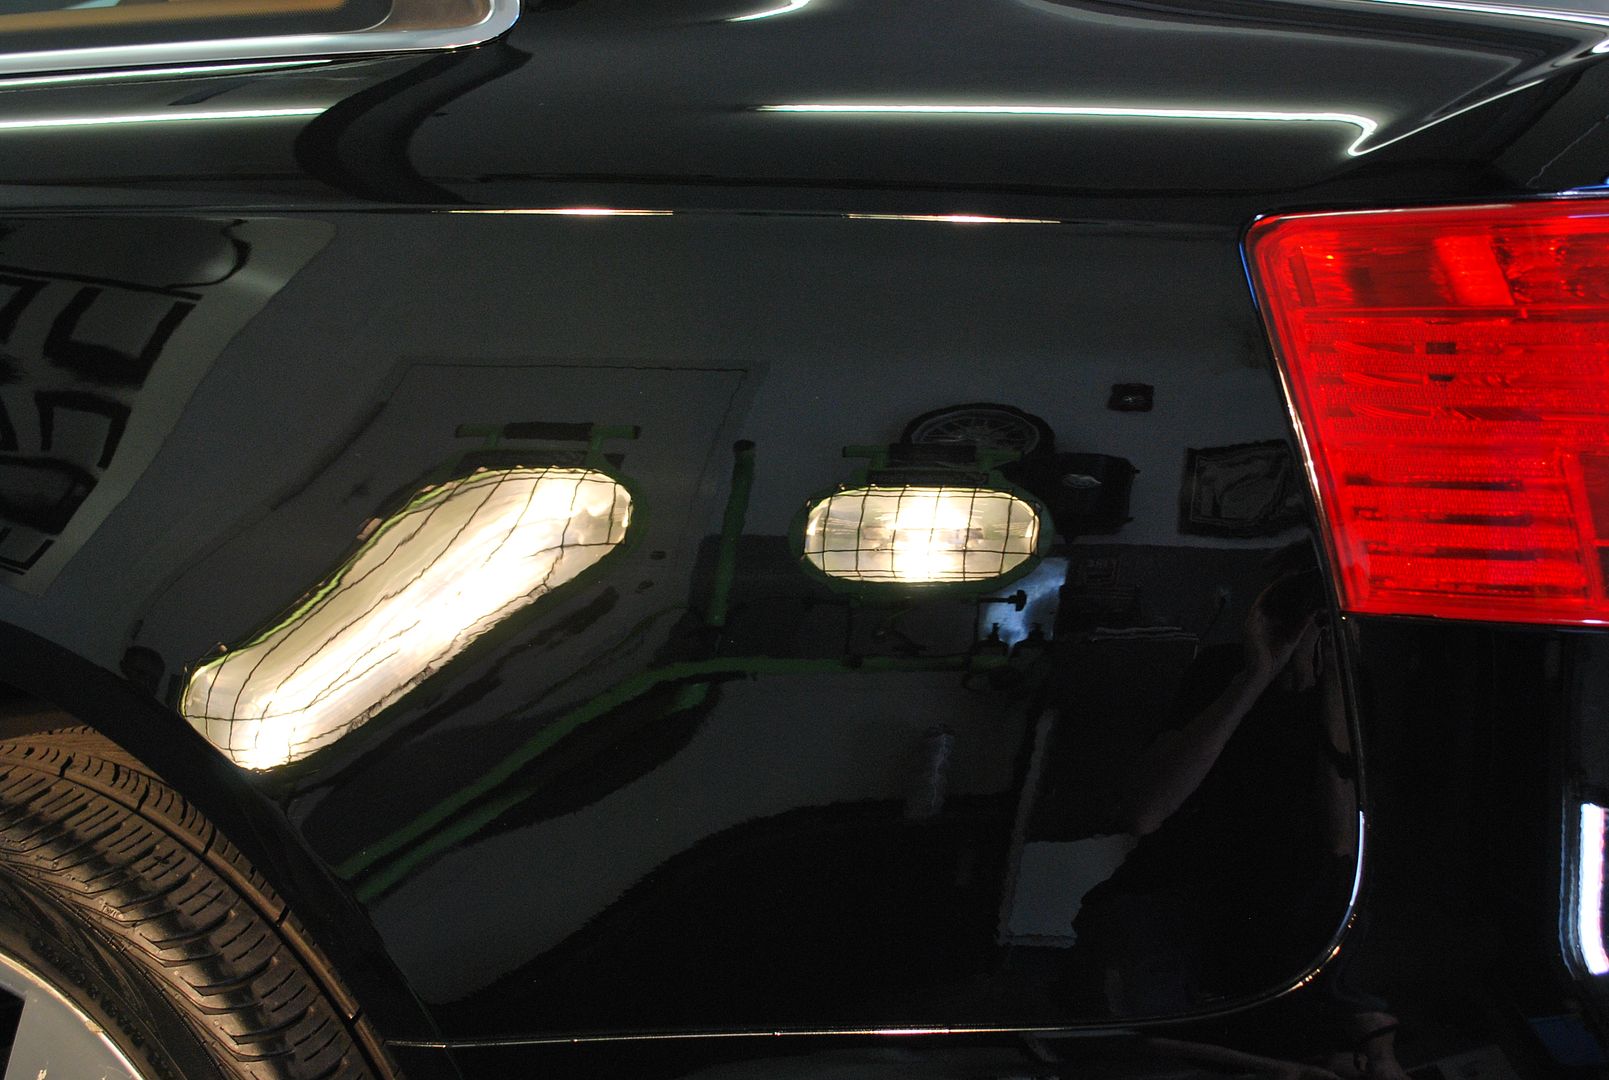
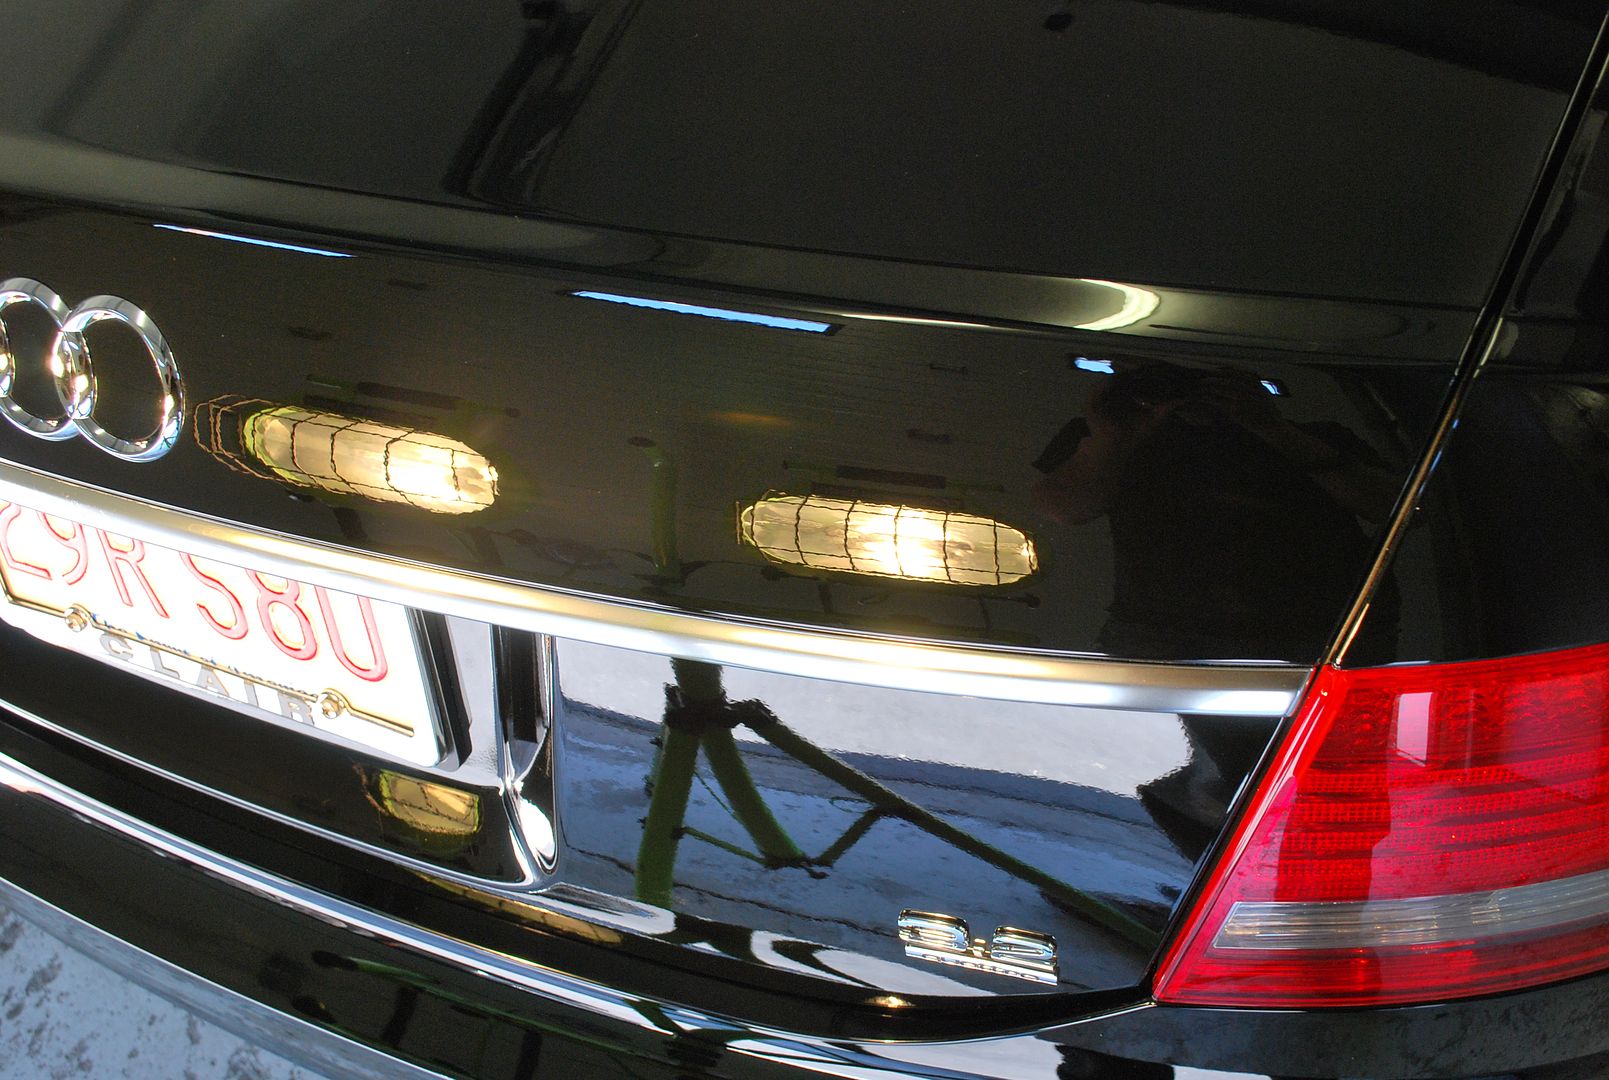
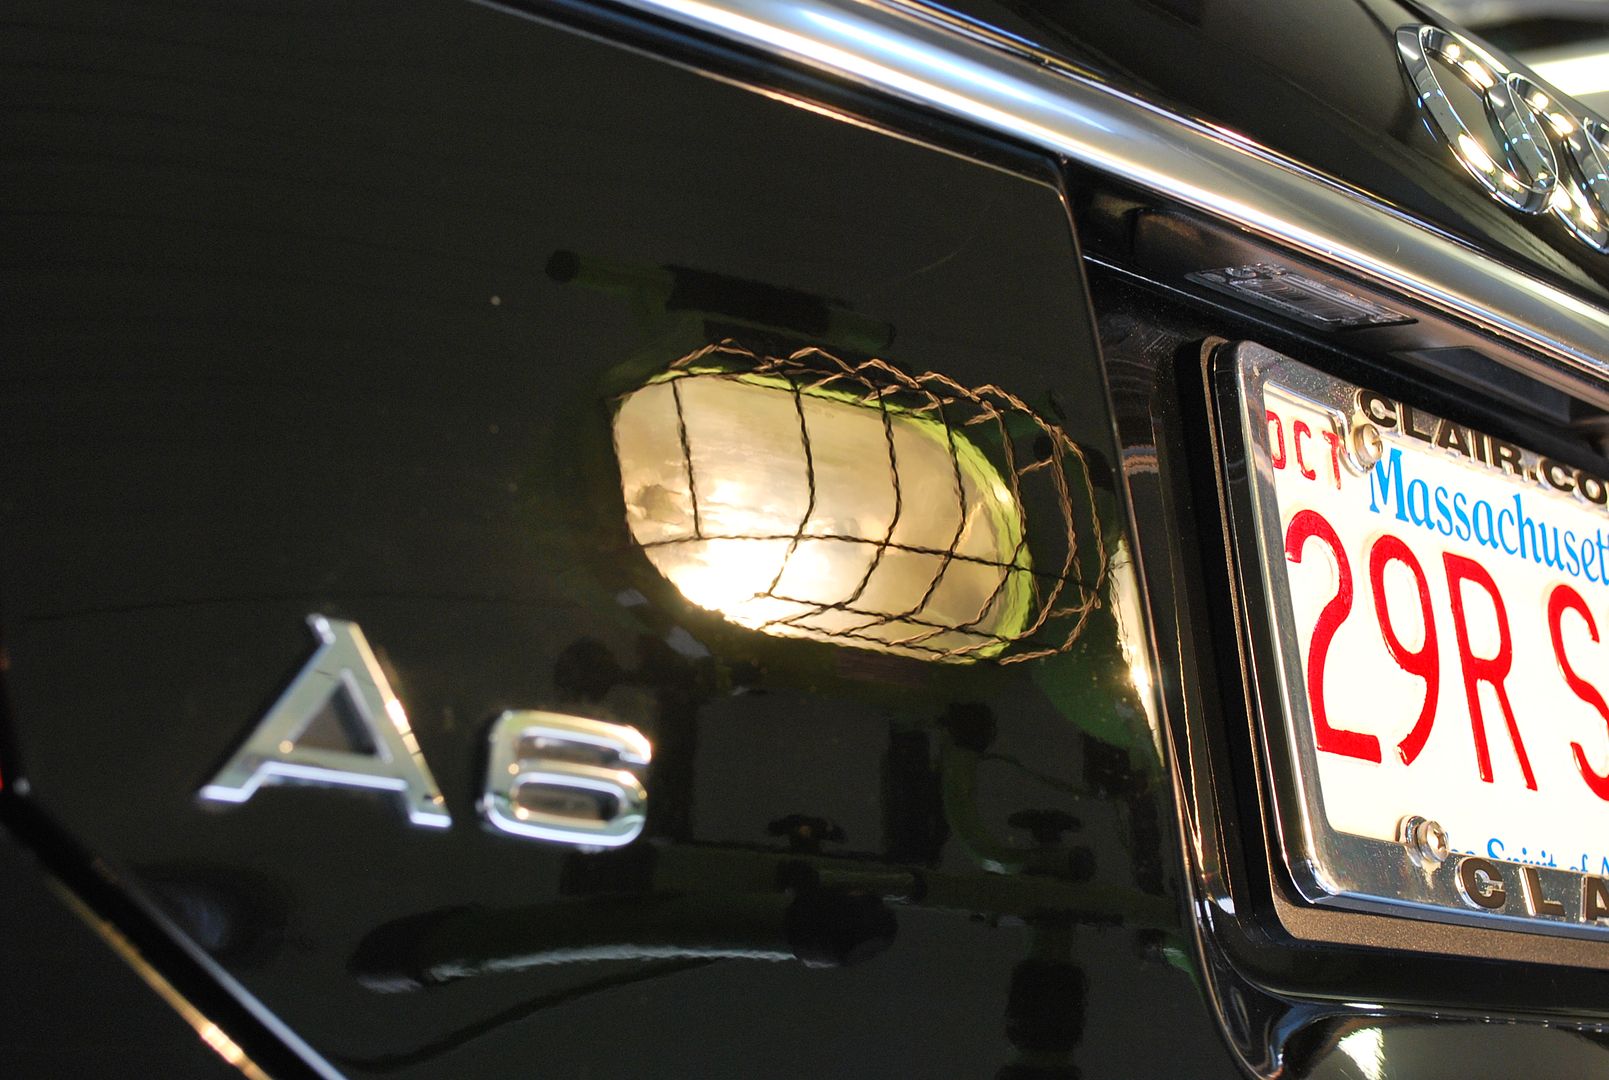
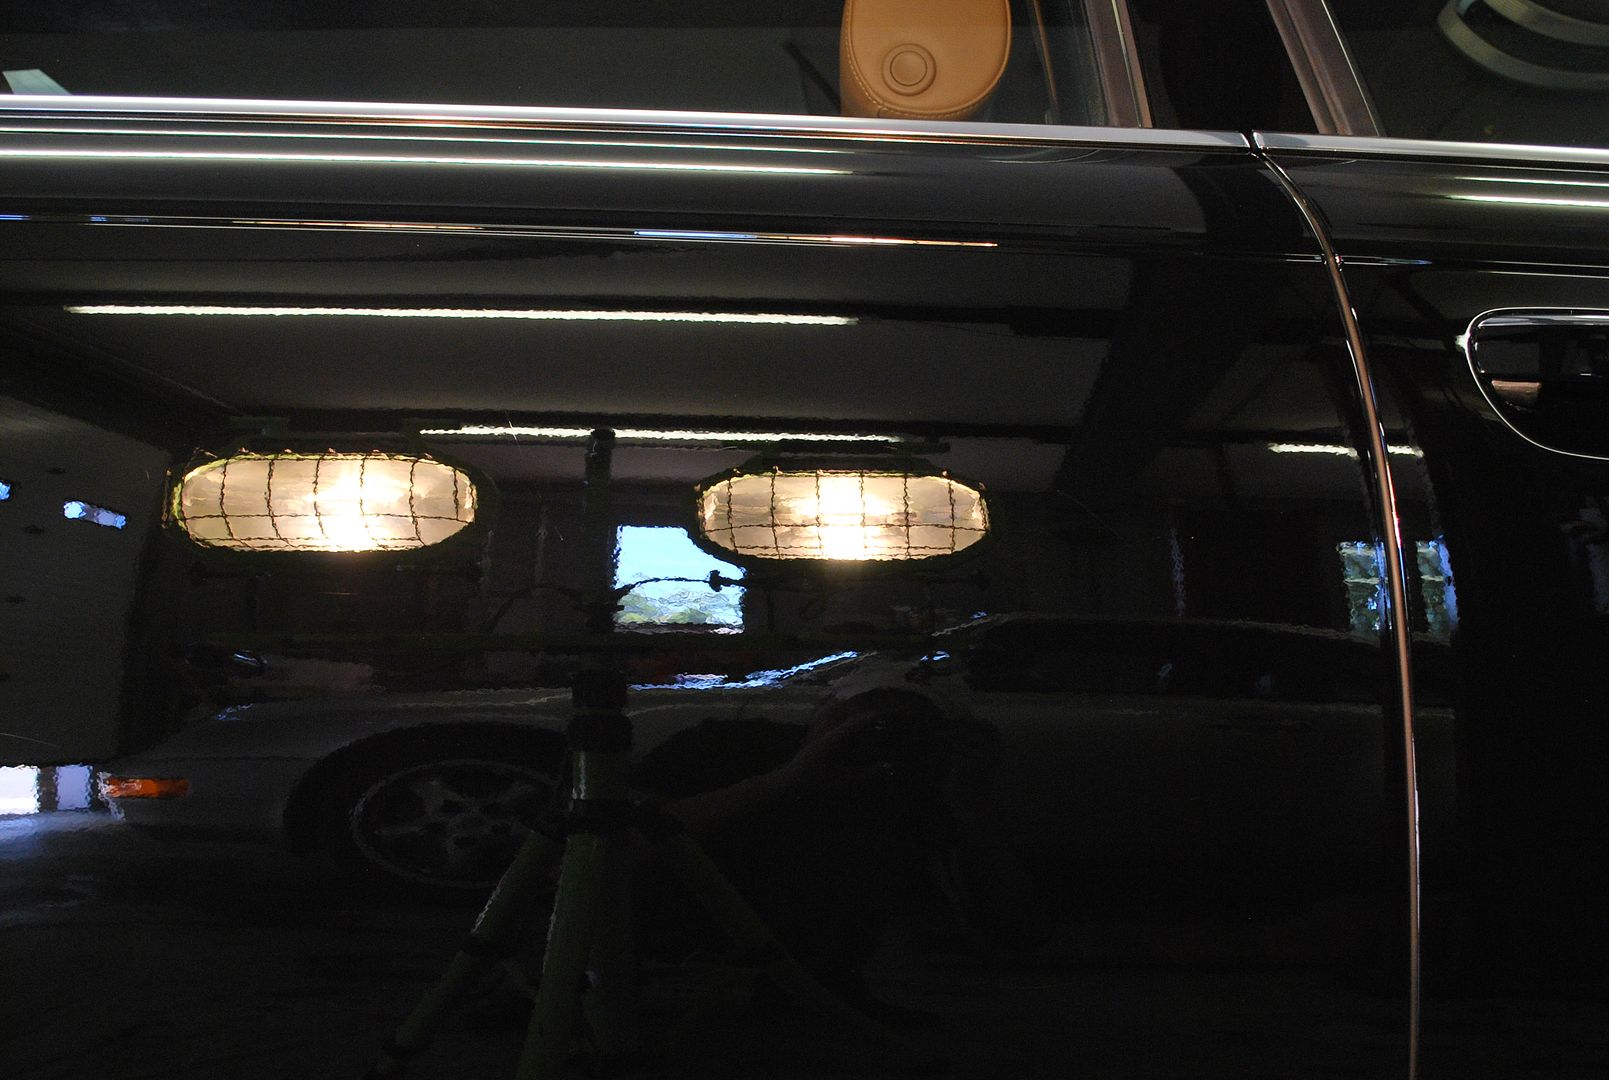
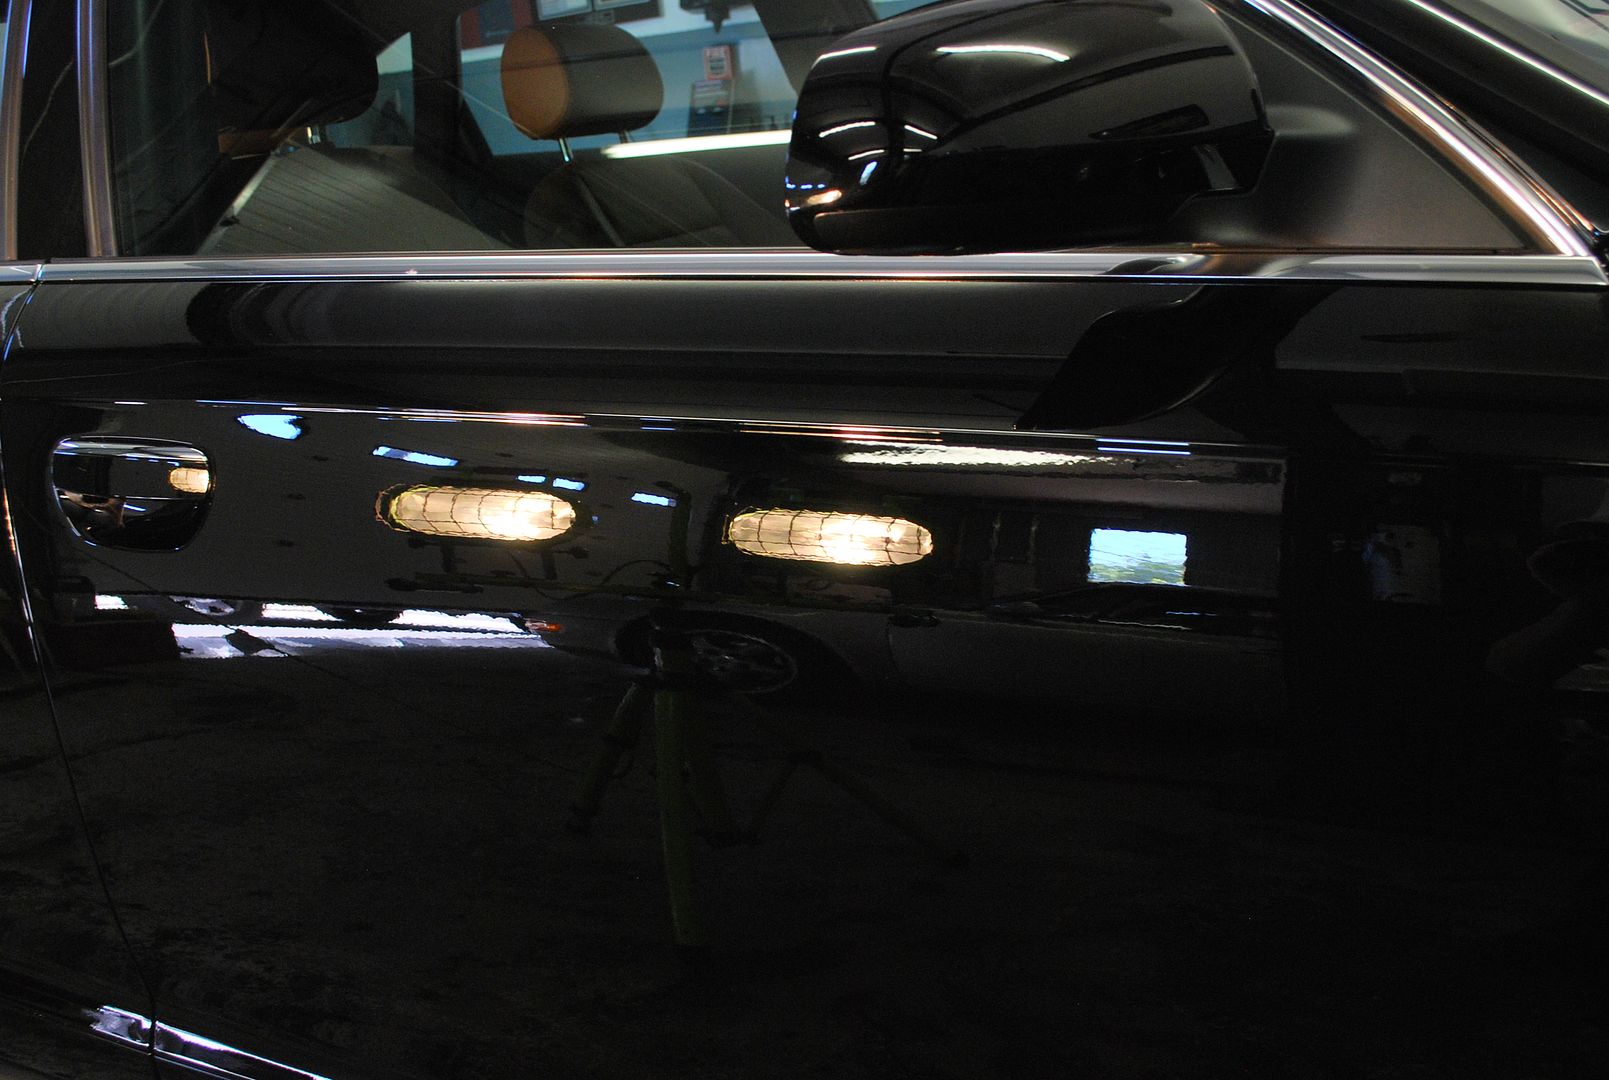
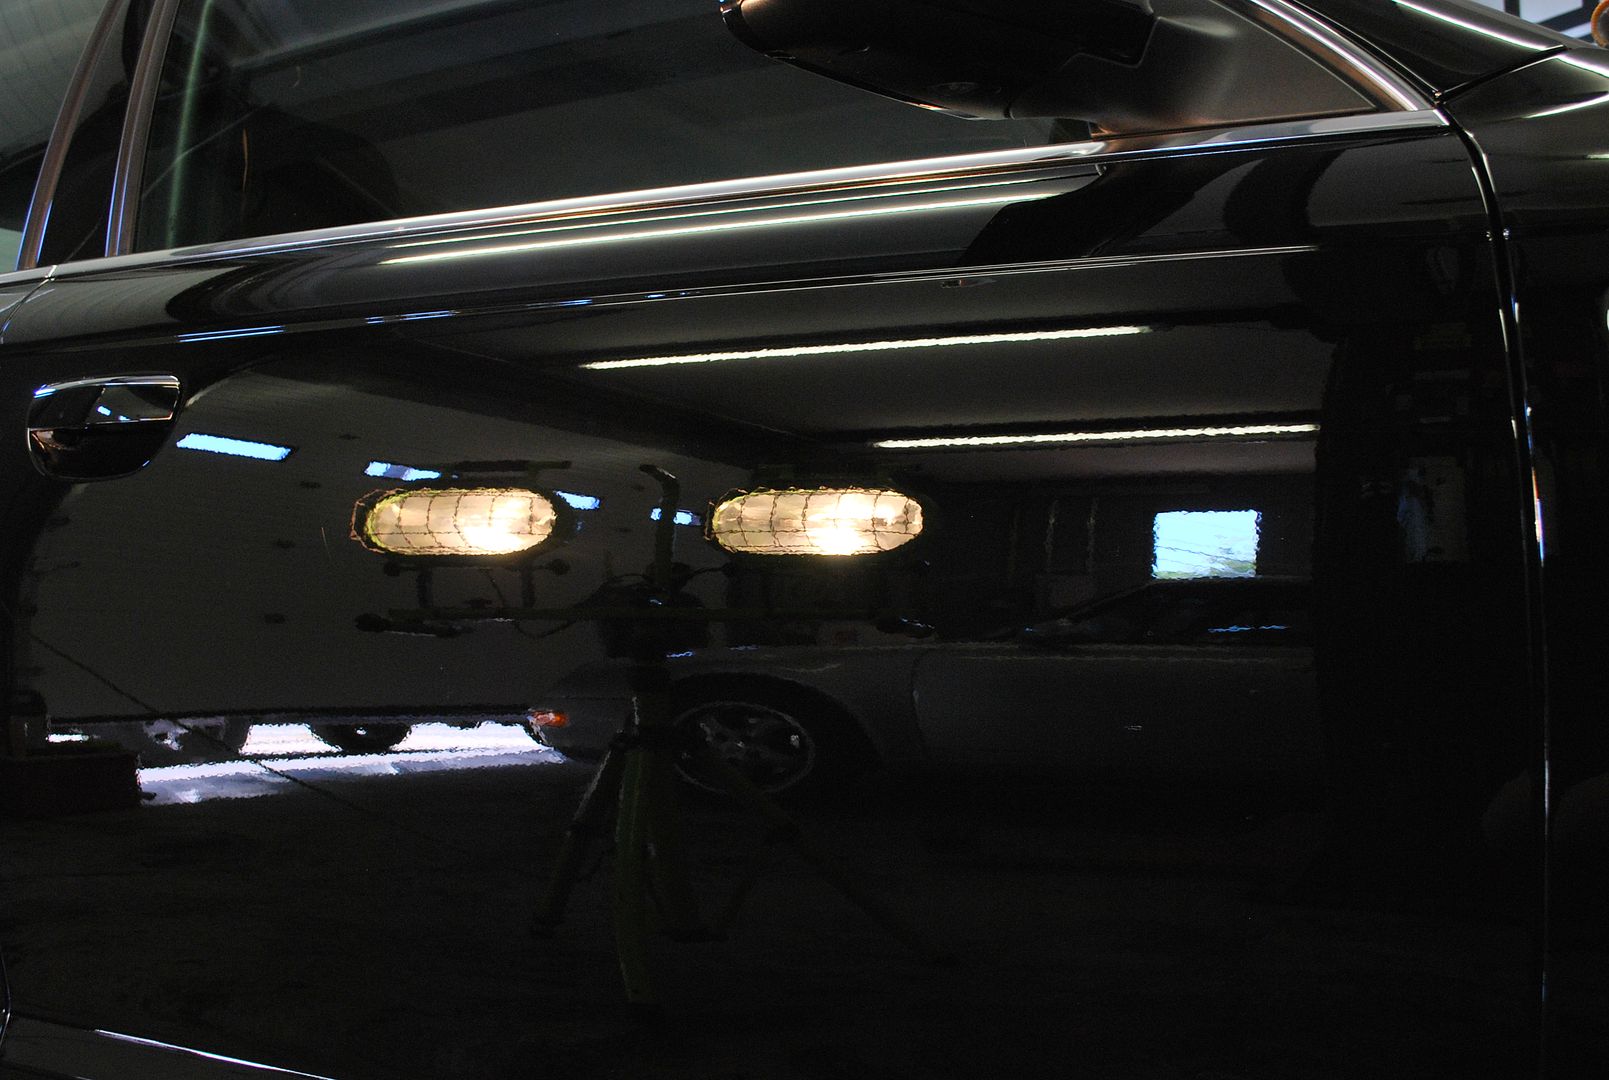
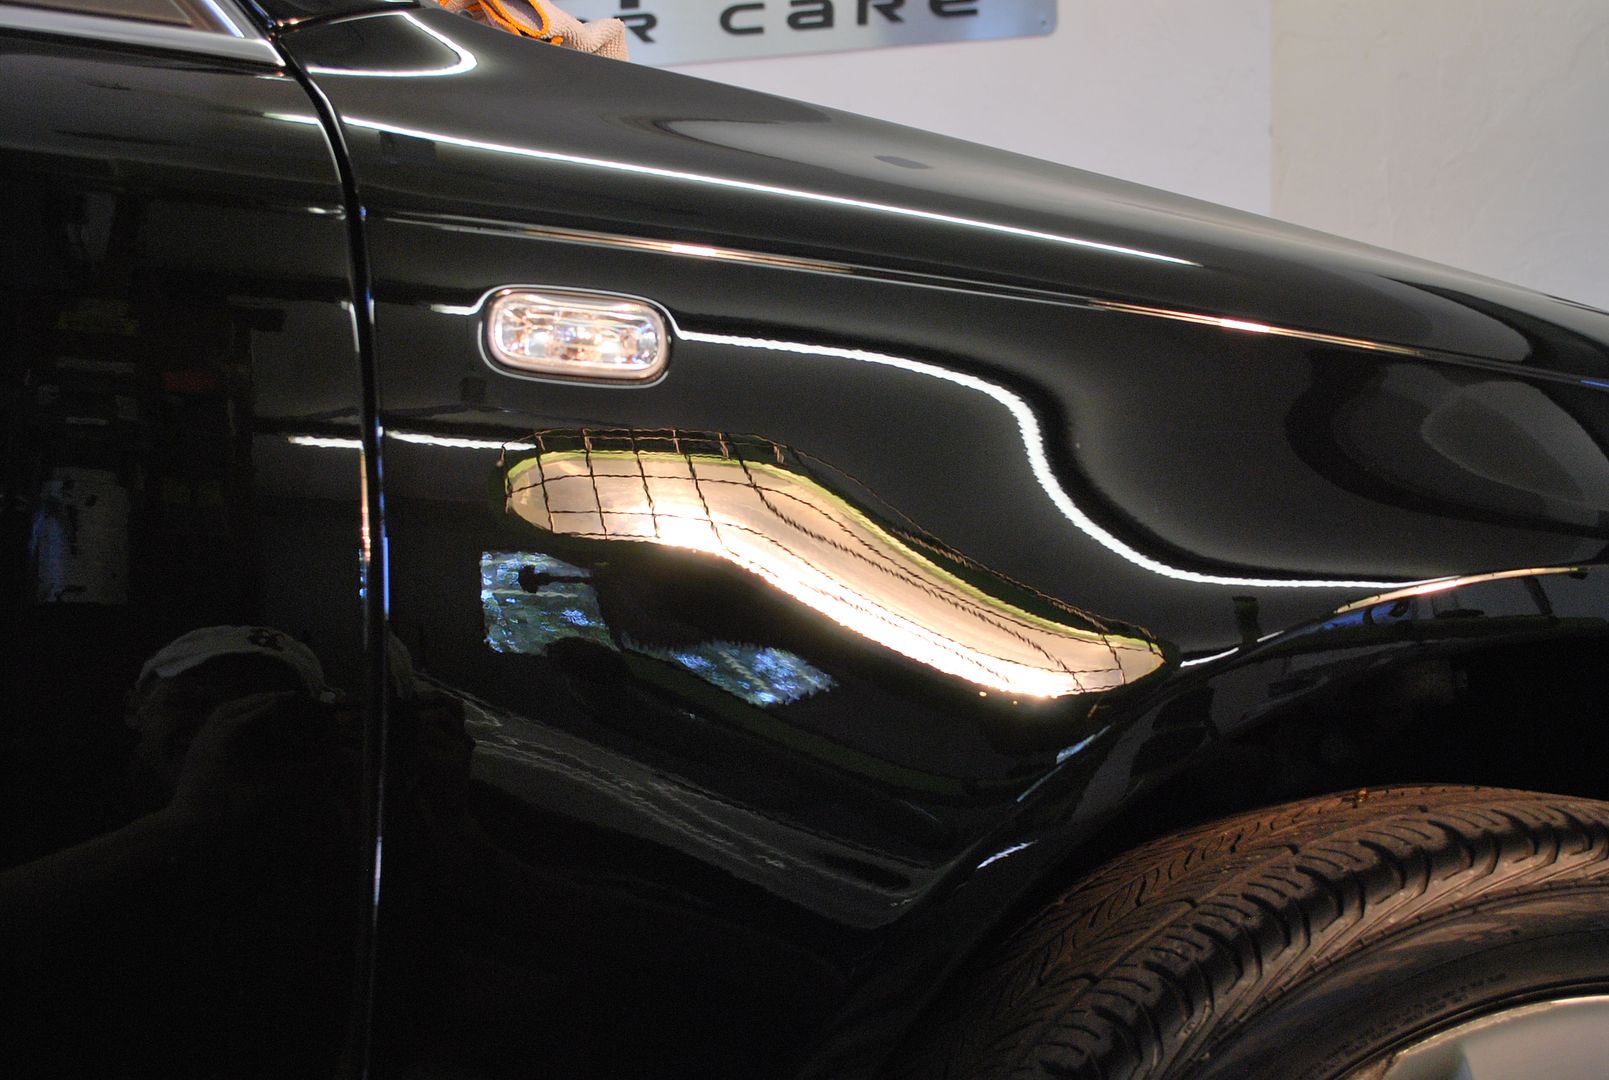
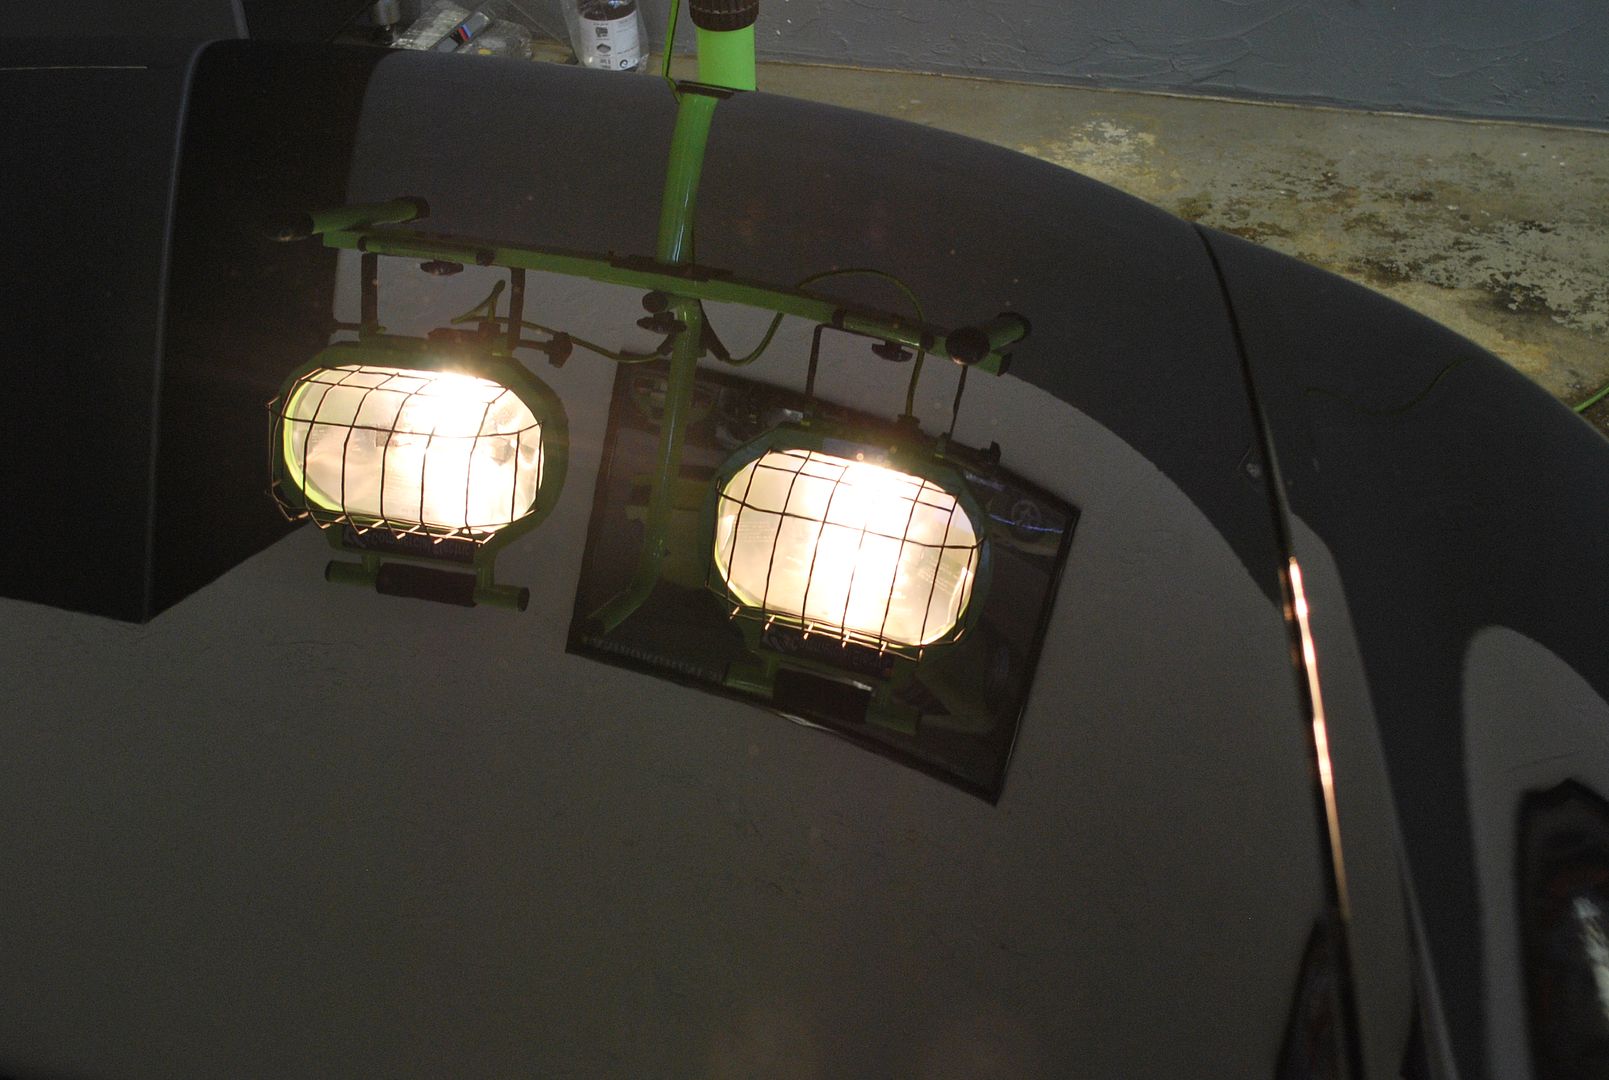
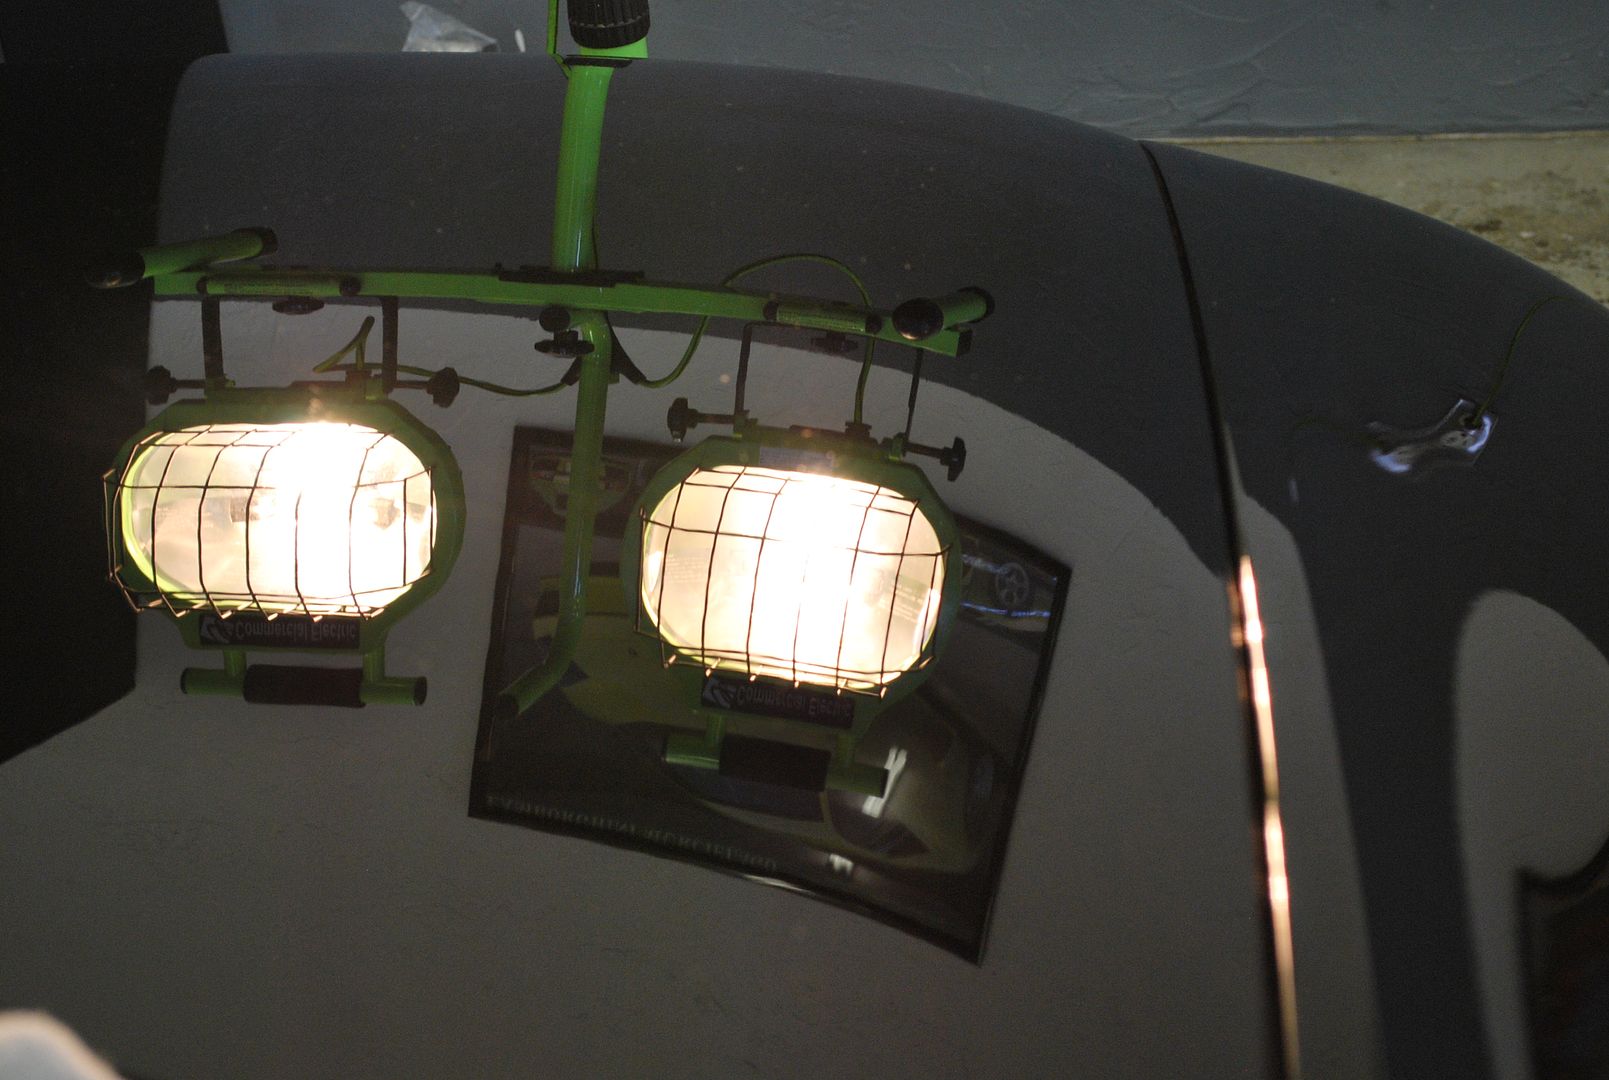
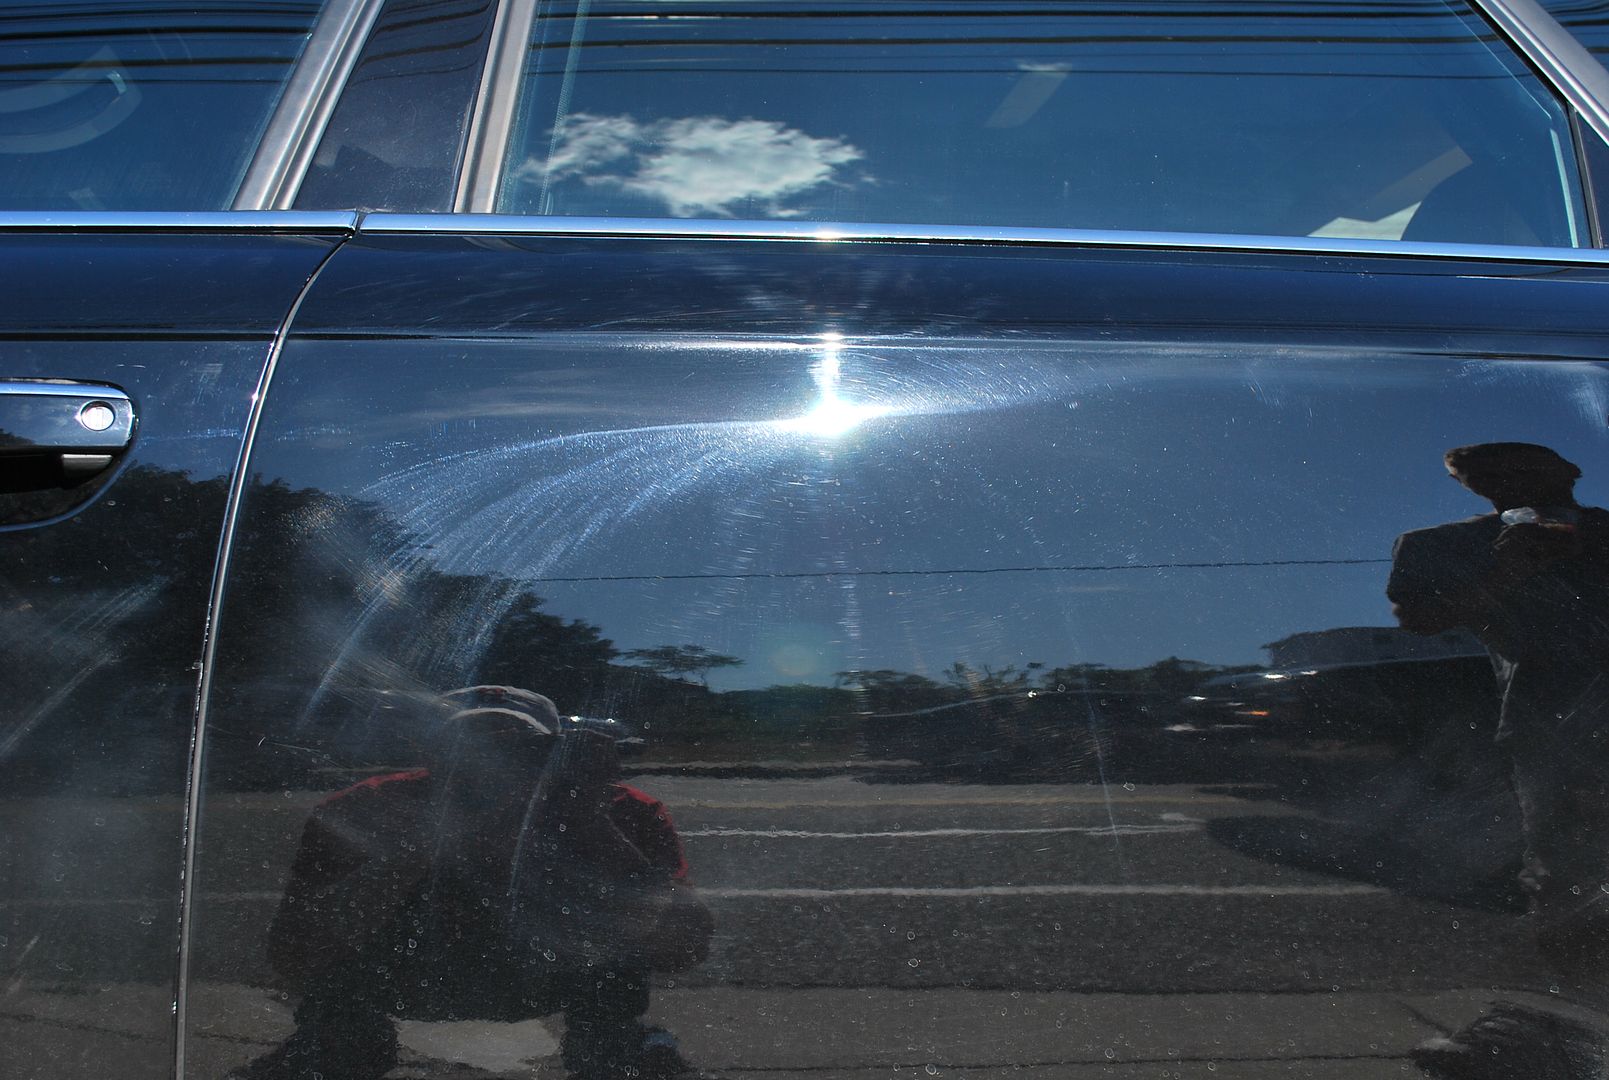
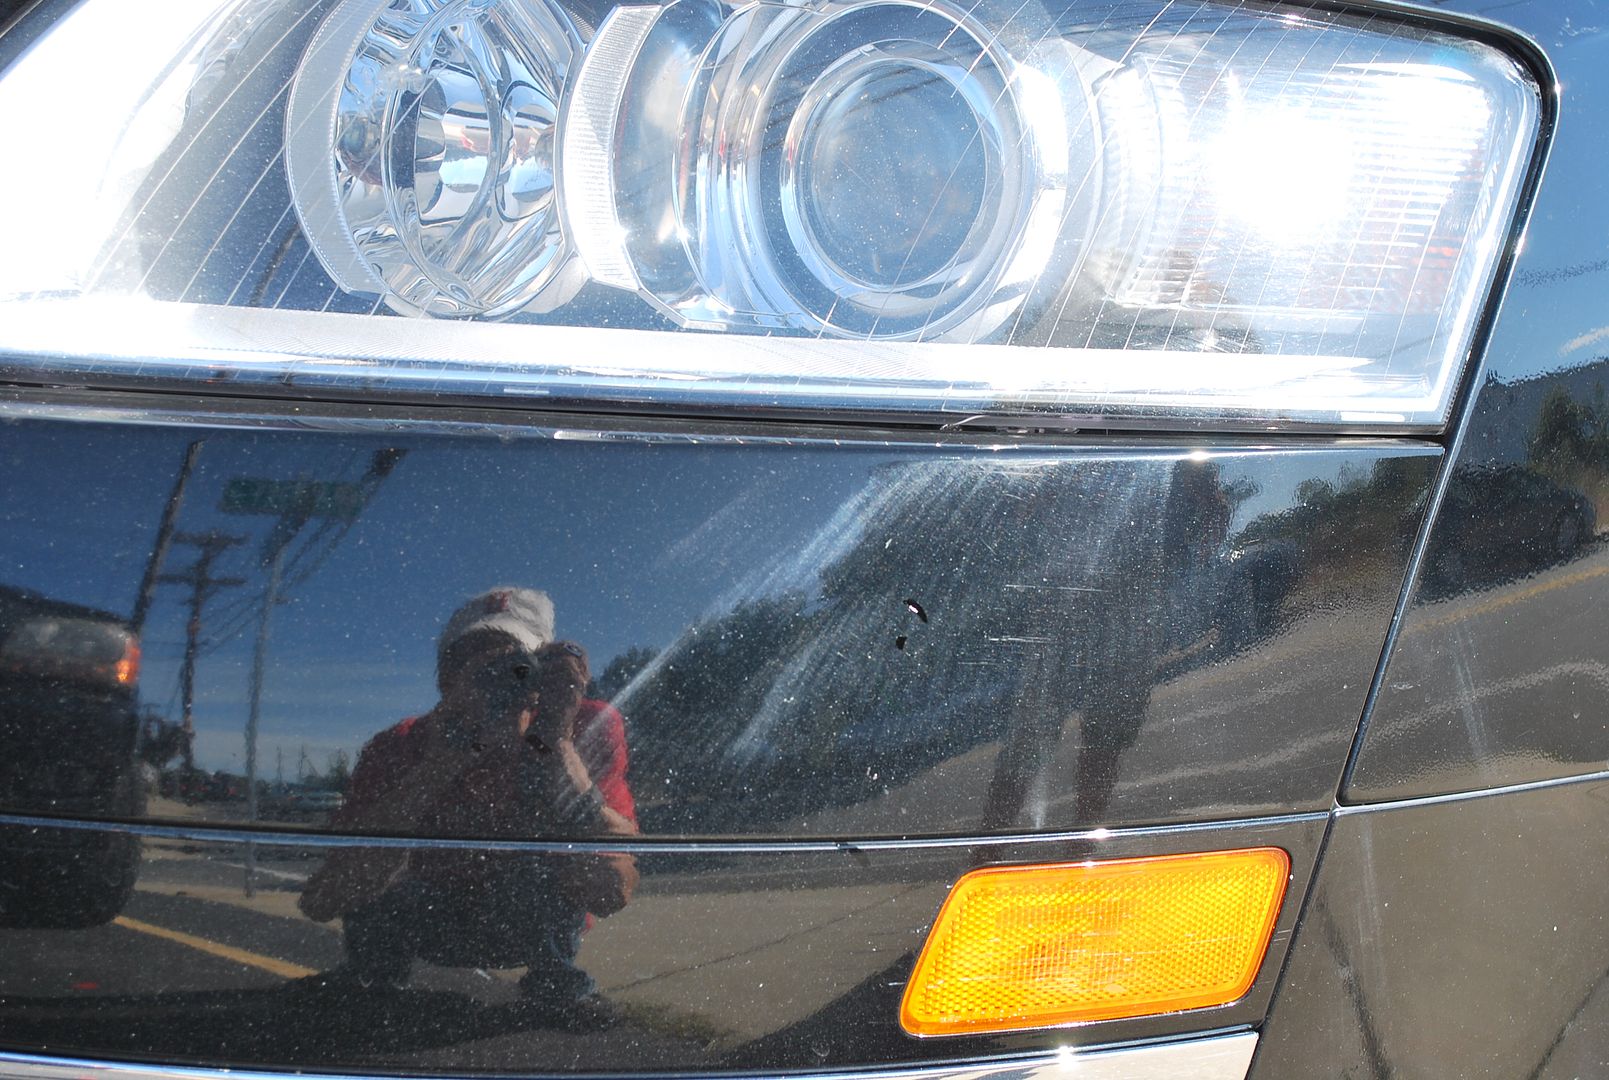
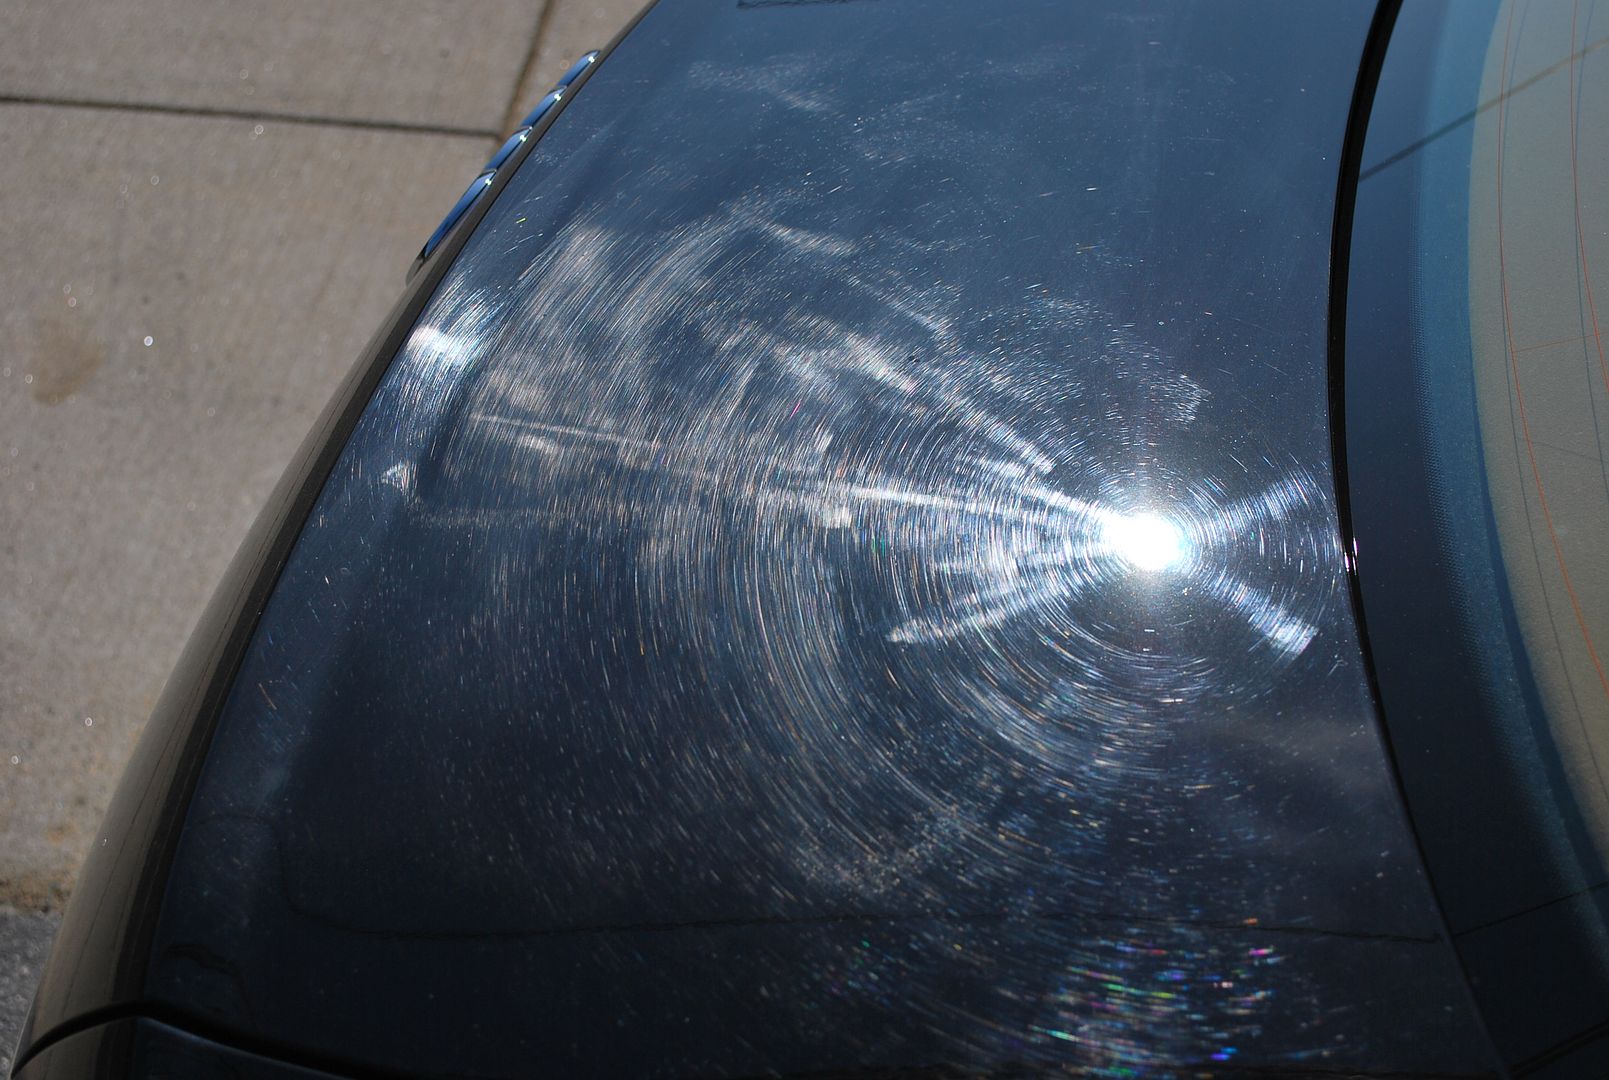
The pictures below show the condition of the exterior the day it was dropped off at the shop. Keep in mind that it had just left the body shop and was wearing a fresh coat of glaze which was hiding a good amount of the defects. I knew once it was properly prepped, it was only going to get worse.
Iâll just let the pictures do the talkingâ¦â¦
Results 1 to 15 of 66
-
12-18-2009, 06:59 AM #1


- Join Date
- May 2005
- Location
- Wakefield, MA
- Posts
- 2,400
- Post Thanks / Like

-
12-18-2009, 07:01 AM #2
- Join Date
- May 2005
- Location
- Wakefield, MA
- Posts
- 2,400
- Post Thanks / Like
The owner was planning on driving the car for another couple months and planned on putting the car up for sale. He wanted it as perfect as possible since it had fairly low miles and requested that we do our best to fix several stone chips that were improperly repaired on the nose that the body shop had done. I assured the customer that we would do the best we could and not to worry.
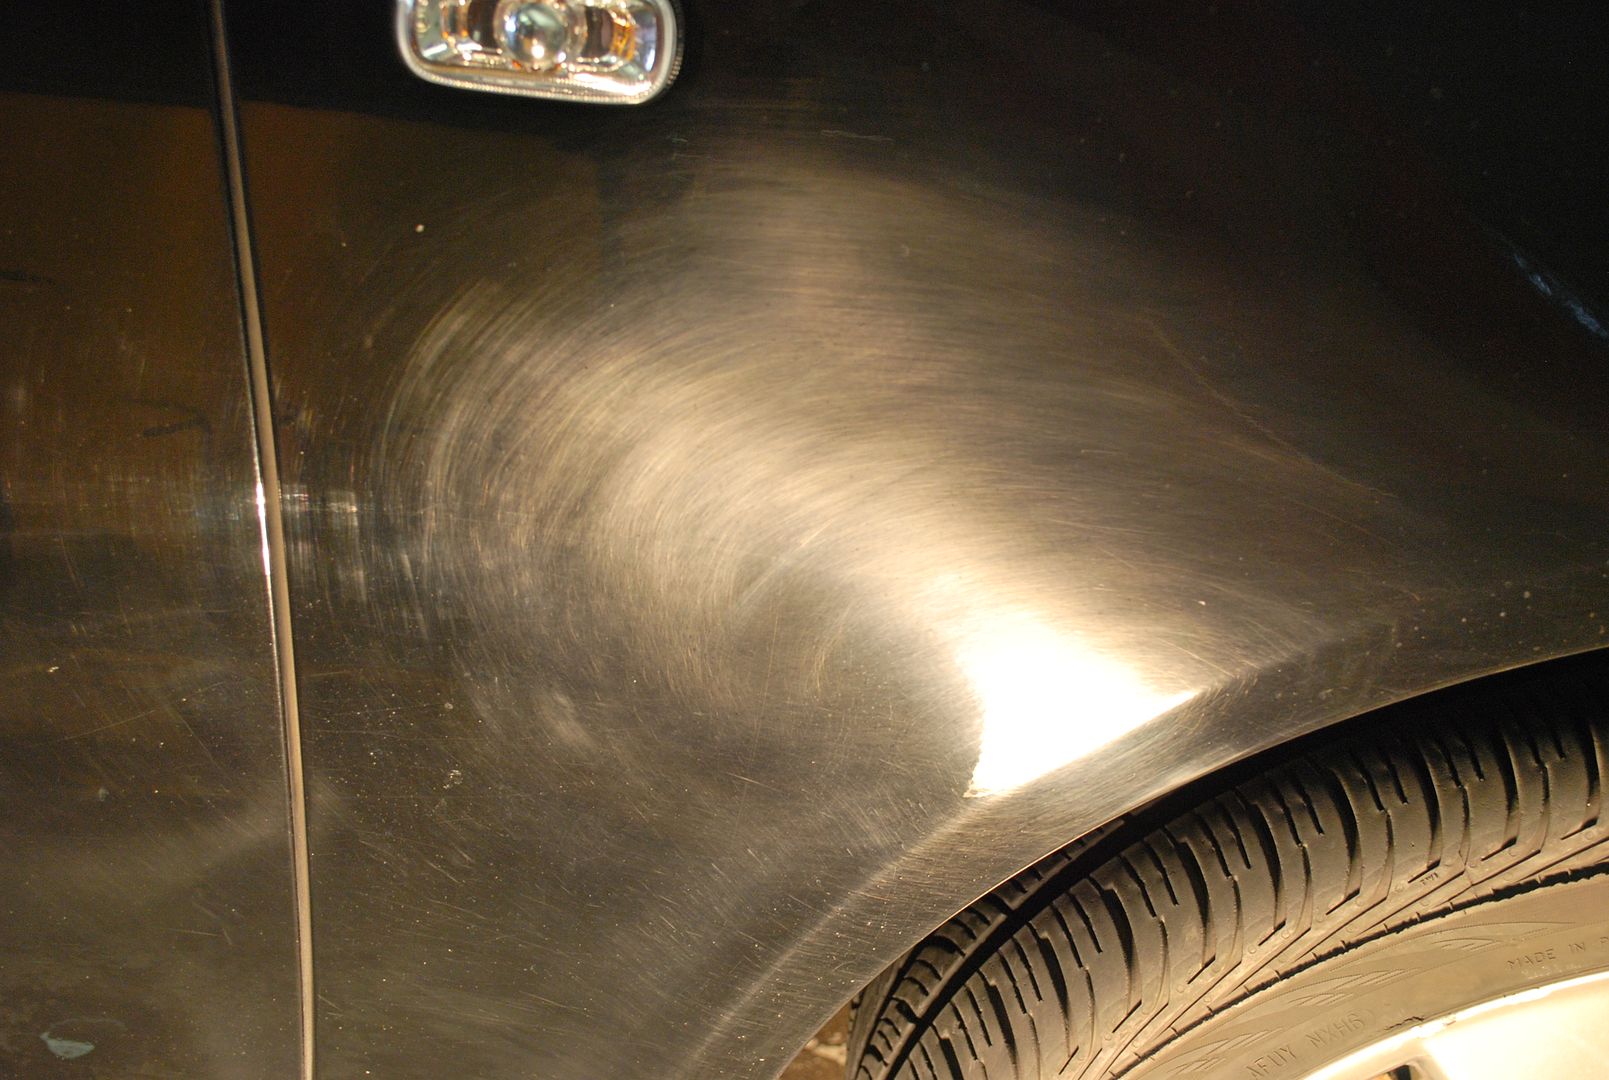
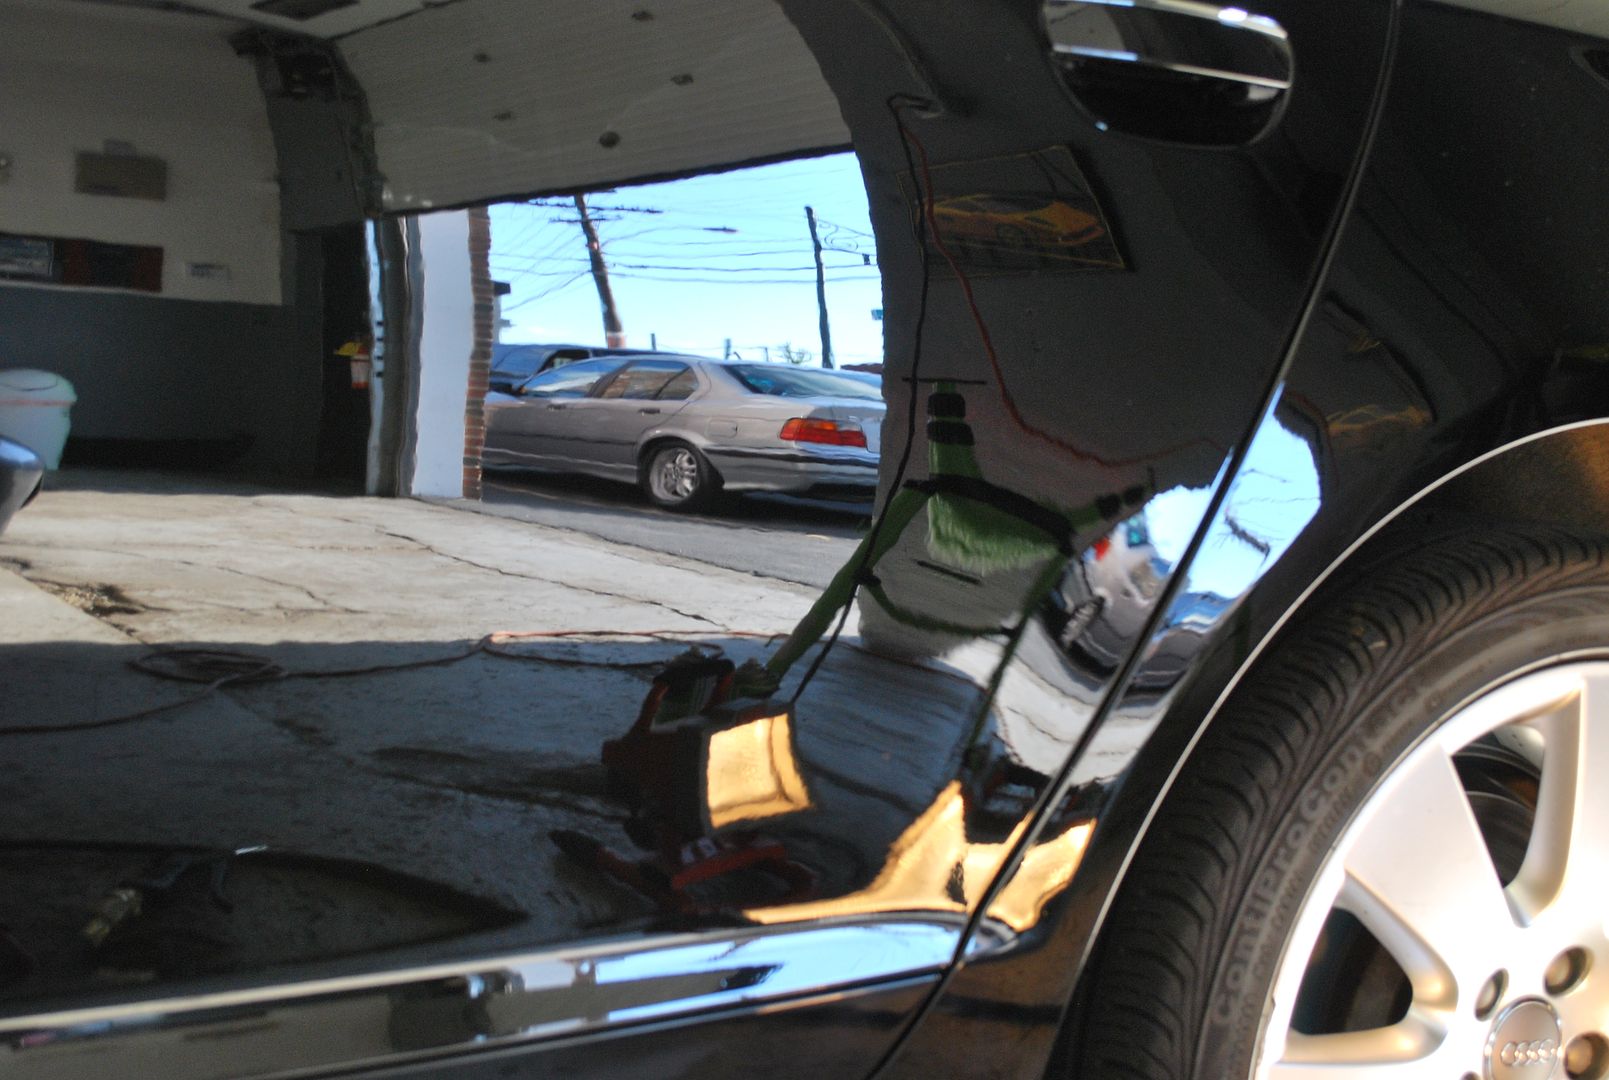
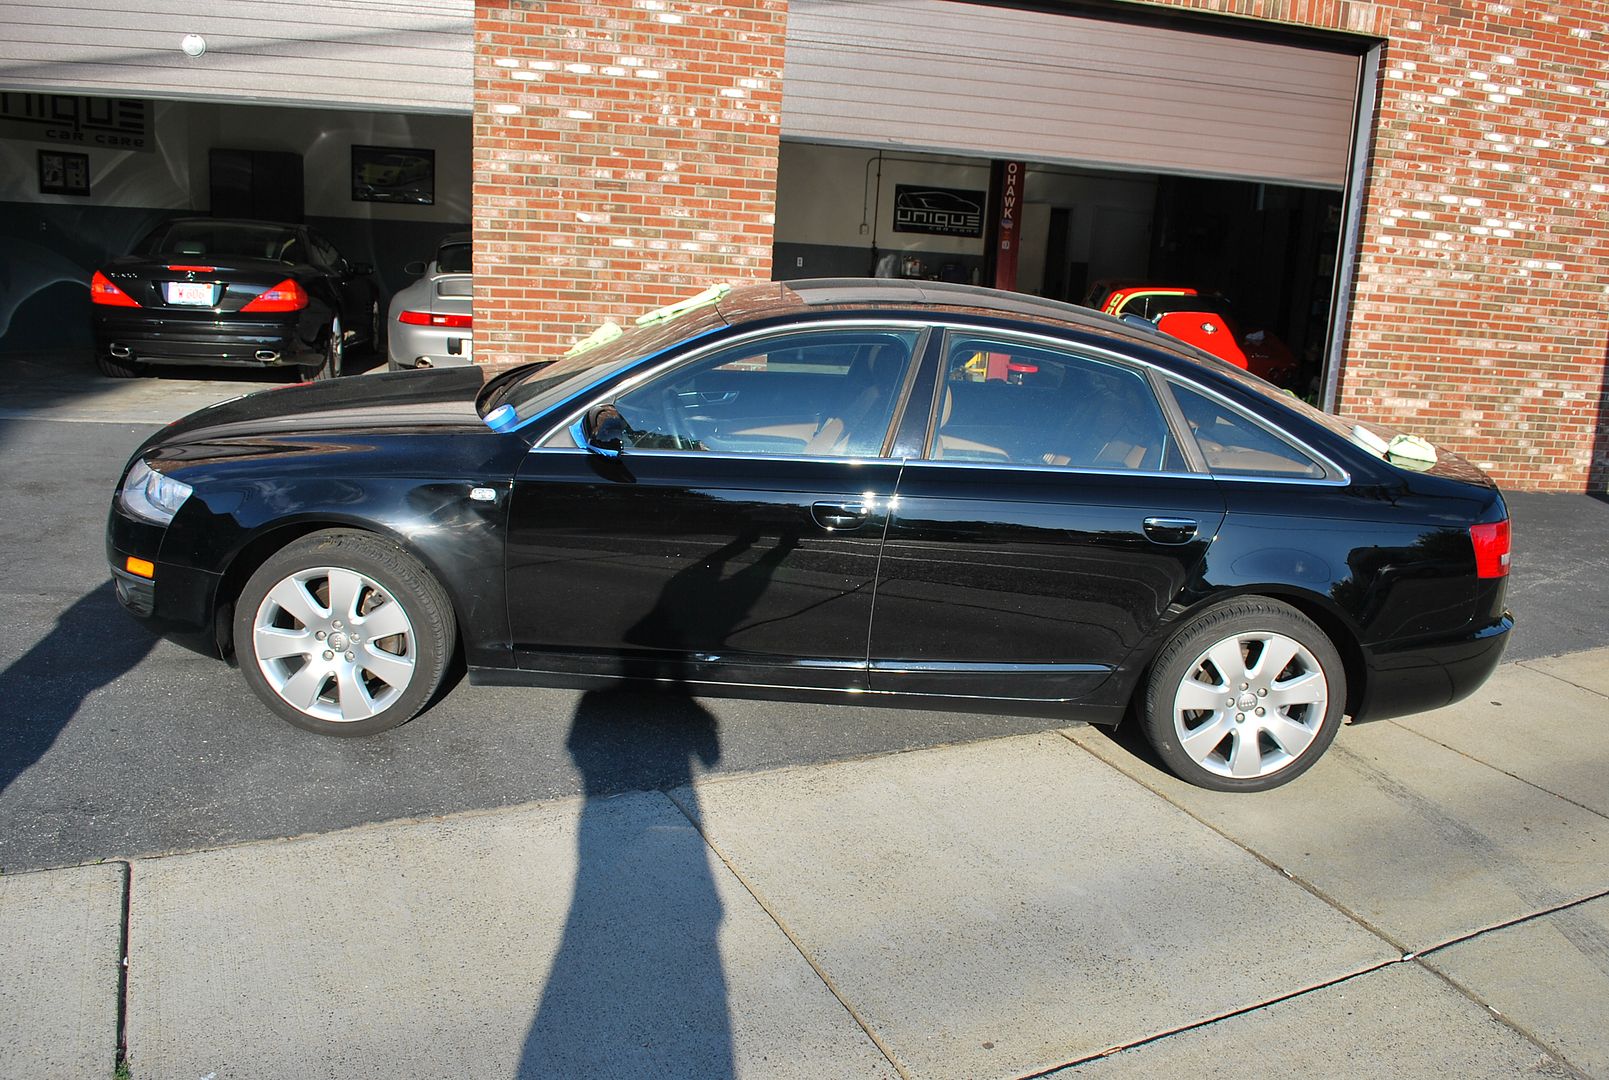
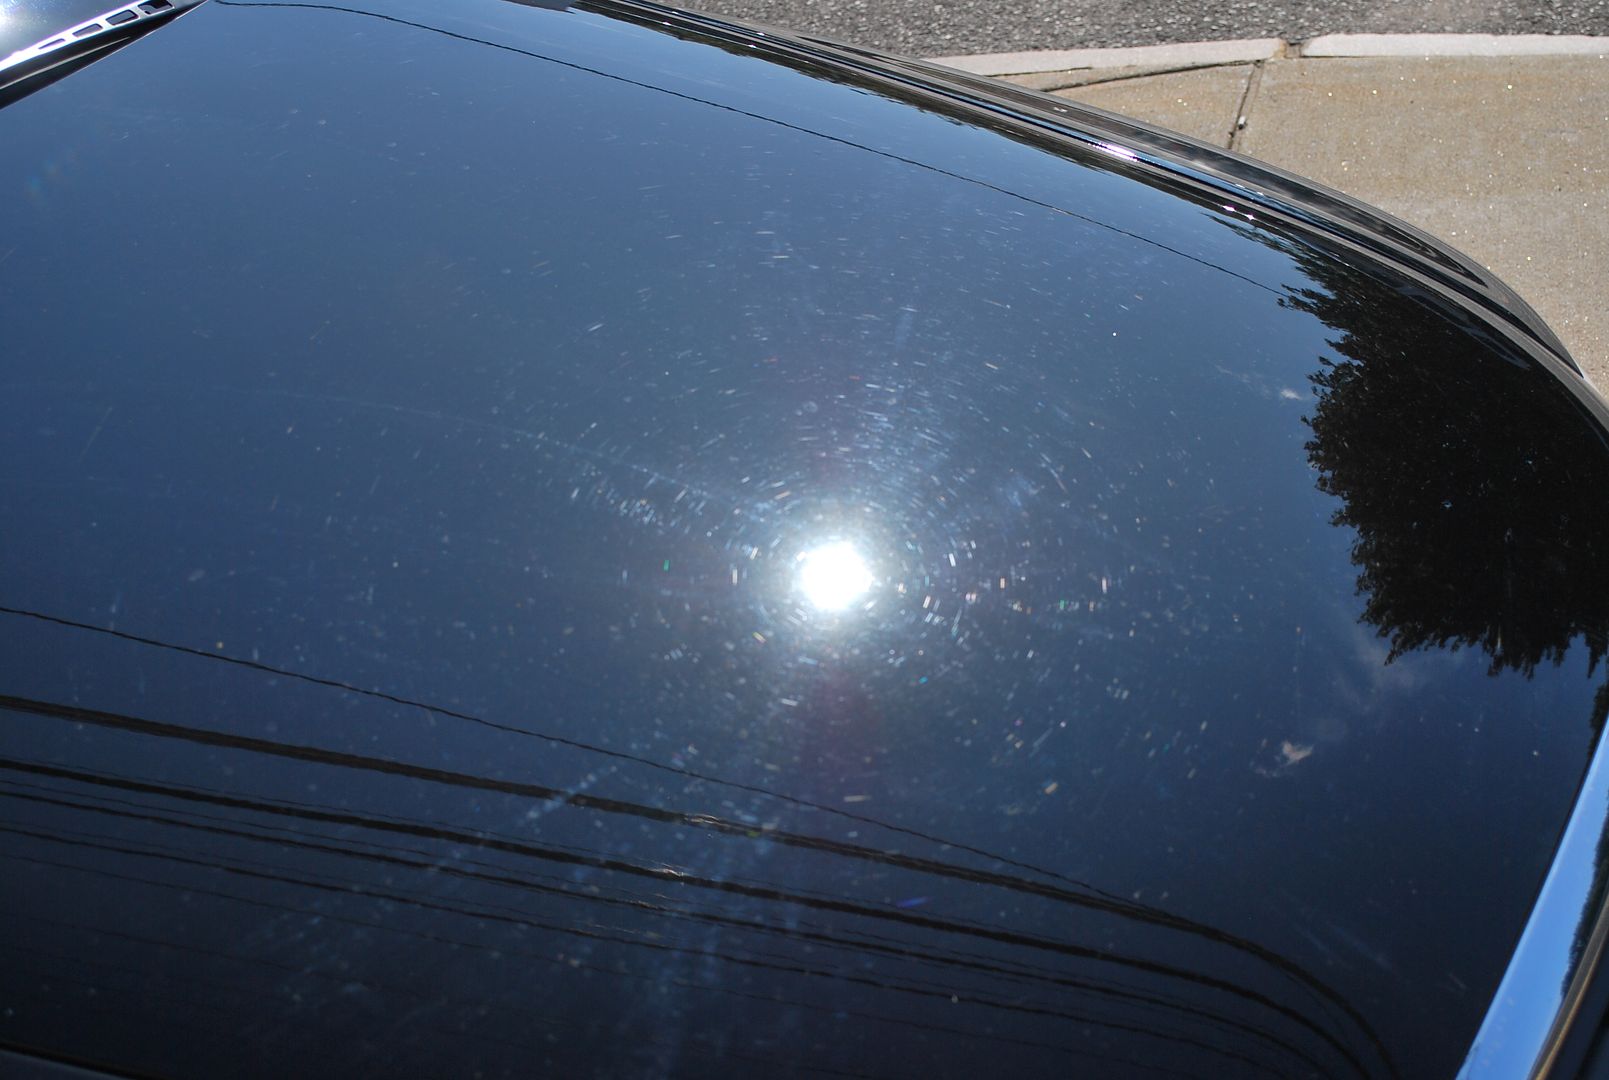
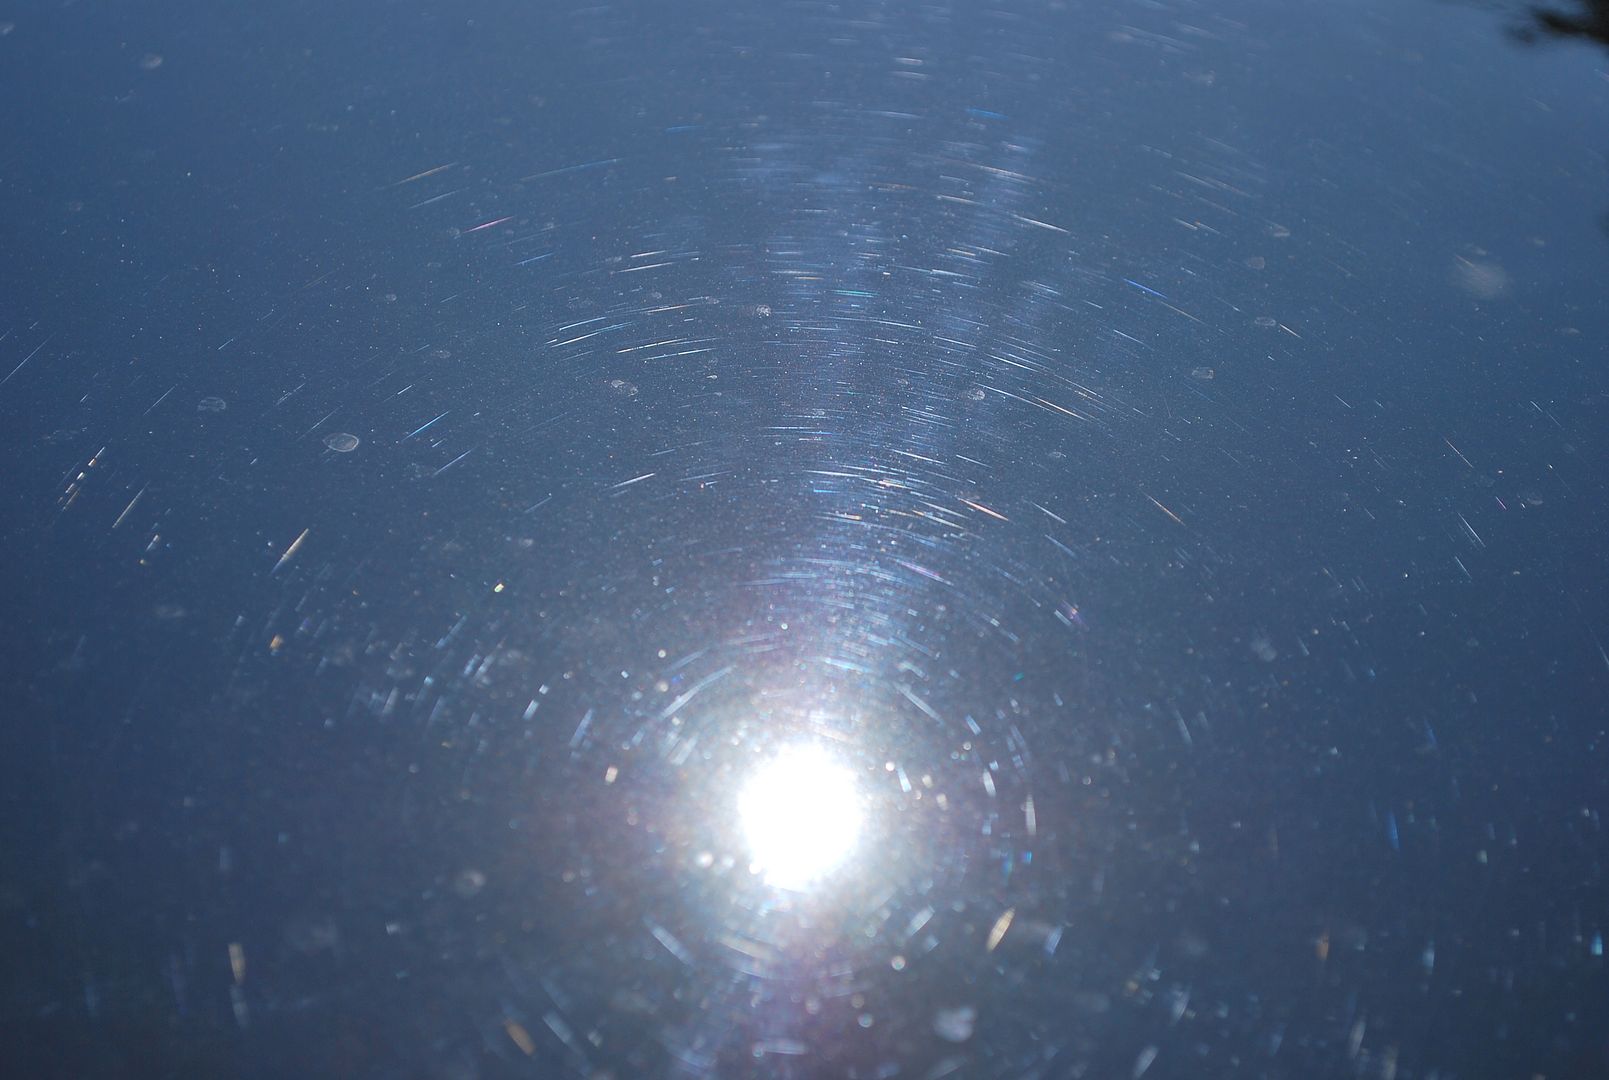
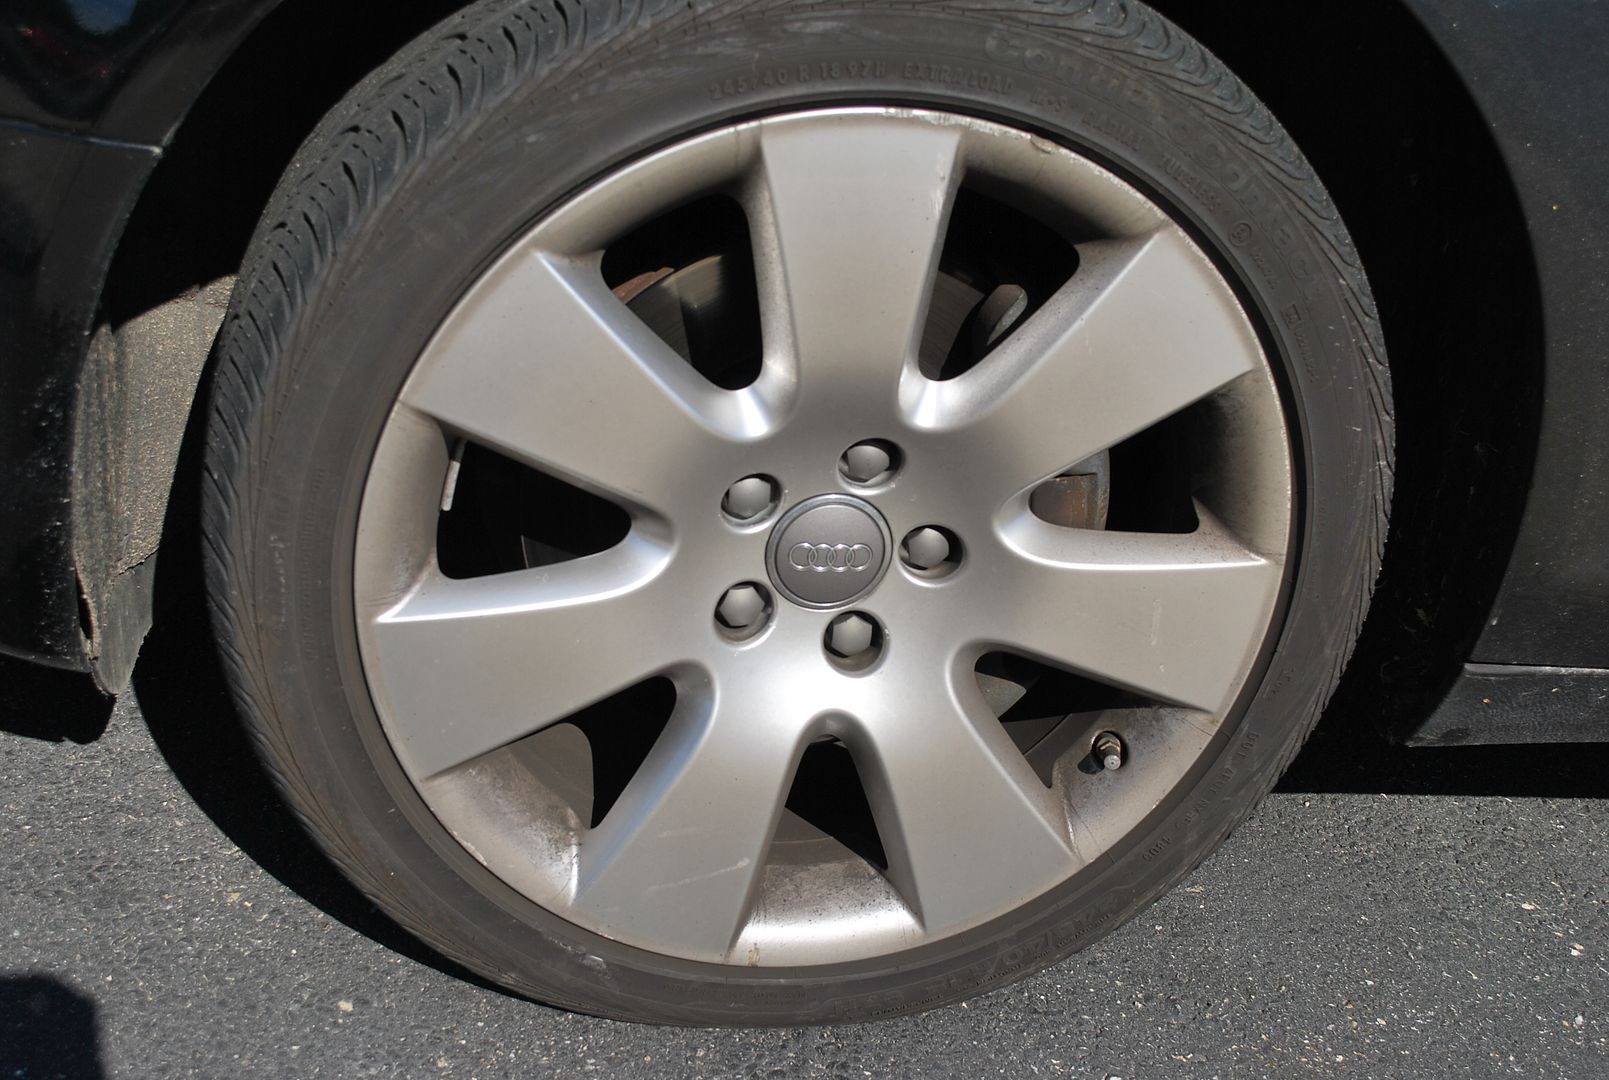
The first step was to give the exterior a thorough wash, clay, clean all wheels & tires, strip paint free of previous waxes/glazes and clean the engine compartment.
Here is what it looked like after it has been fully prepped for polishingâ¦â¦


-
12-18-2009, 07:02 AM #3
- Join Date
- May 2005
- Location
- Wakefield, MA
- Posts
- 2,400
- Post Thanks / Like

-
12-18-2009, 07:03 AM #4
- Join Date
- May 2005
- Location
- Wakefield, MA
- Posts
- 2,400
- Post Thanks / Like

After speaking with the owner over the phone, I found out that the 75% of the car had been repainted at different times, which meant that every panel would most likely react different to polishing.
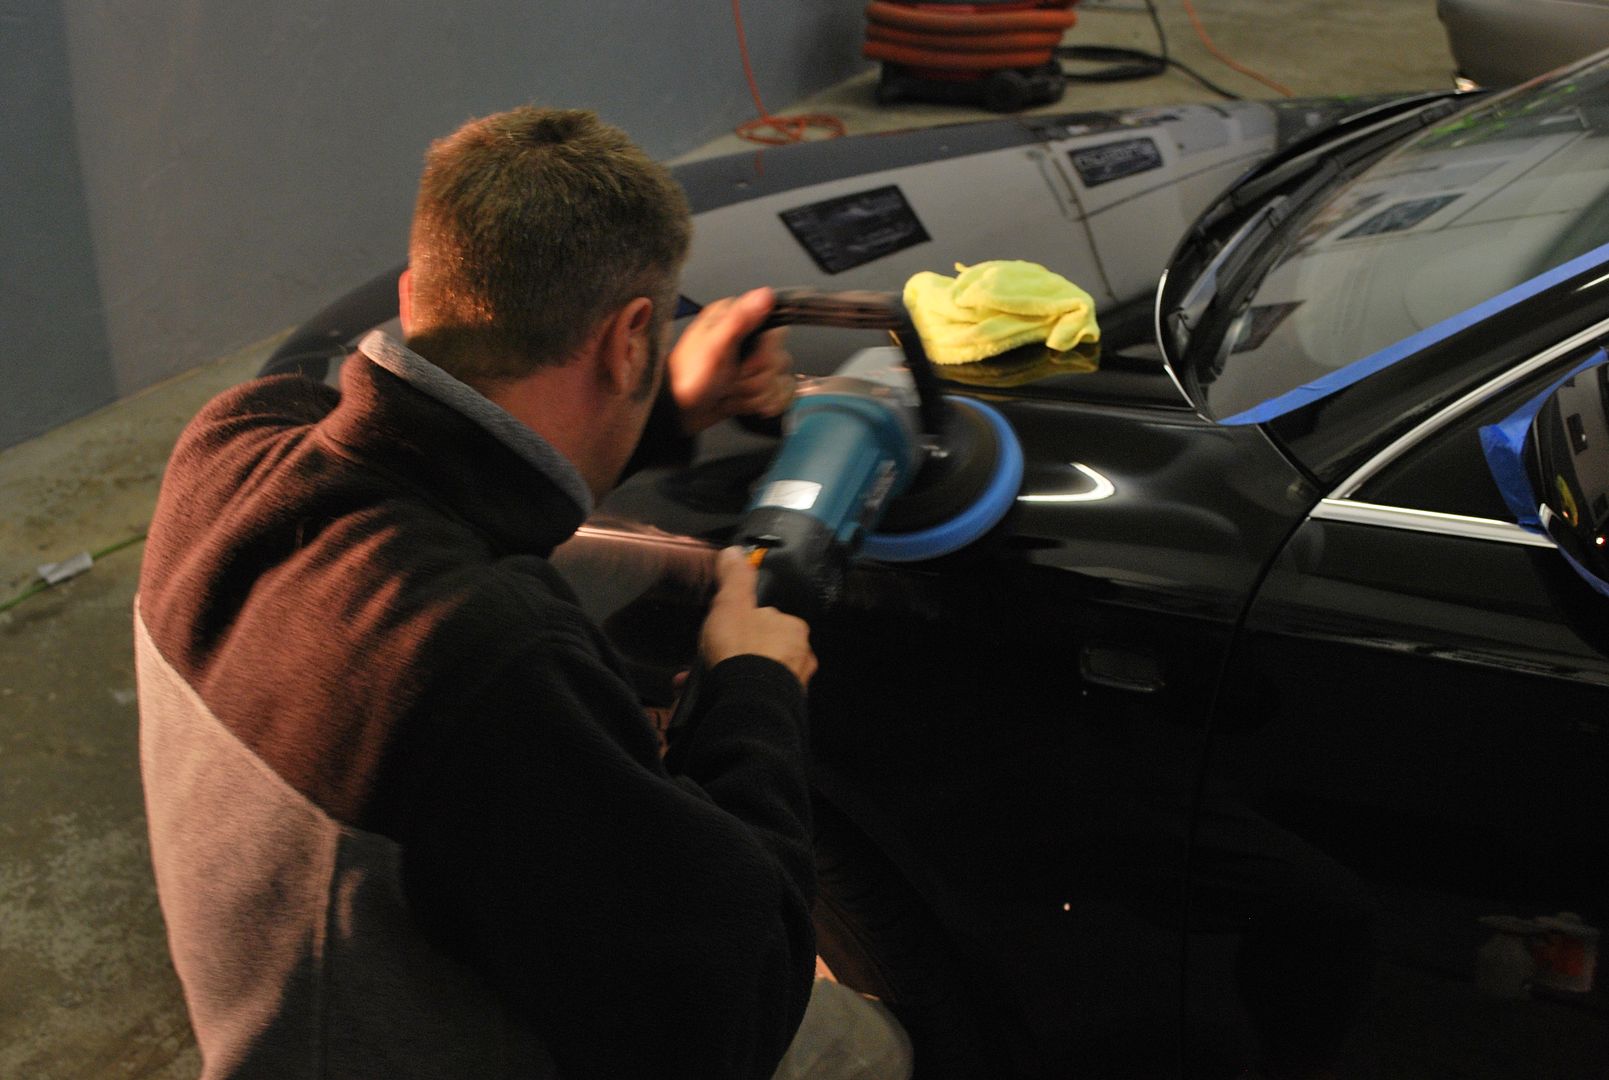
Before going to town on the exterior, I chose a test panel to see what products, pads & techniques would yield the best results. I knew that the process would change throughout the detail, so I decided to correct one panel at a time.
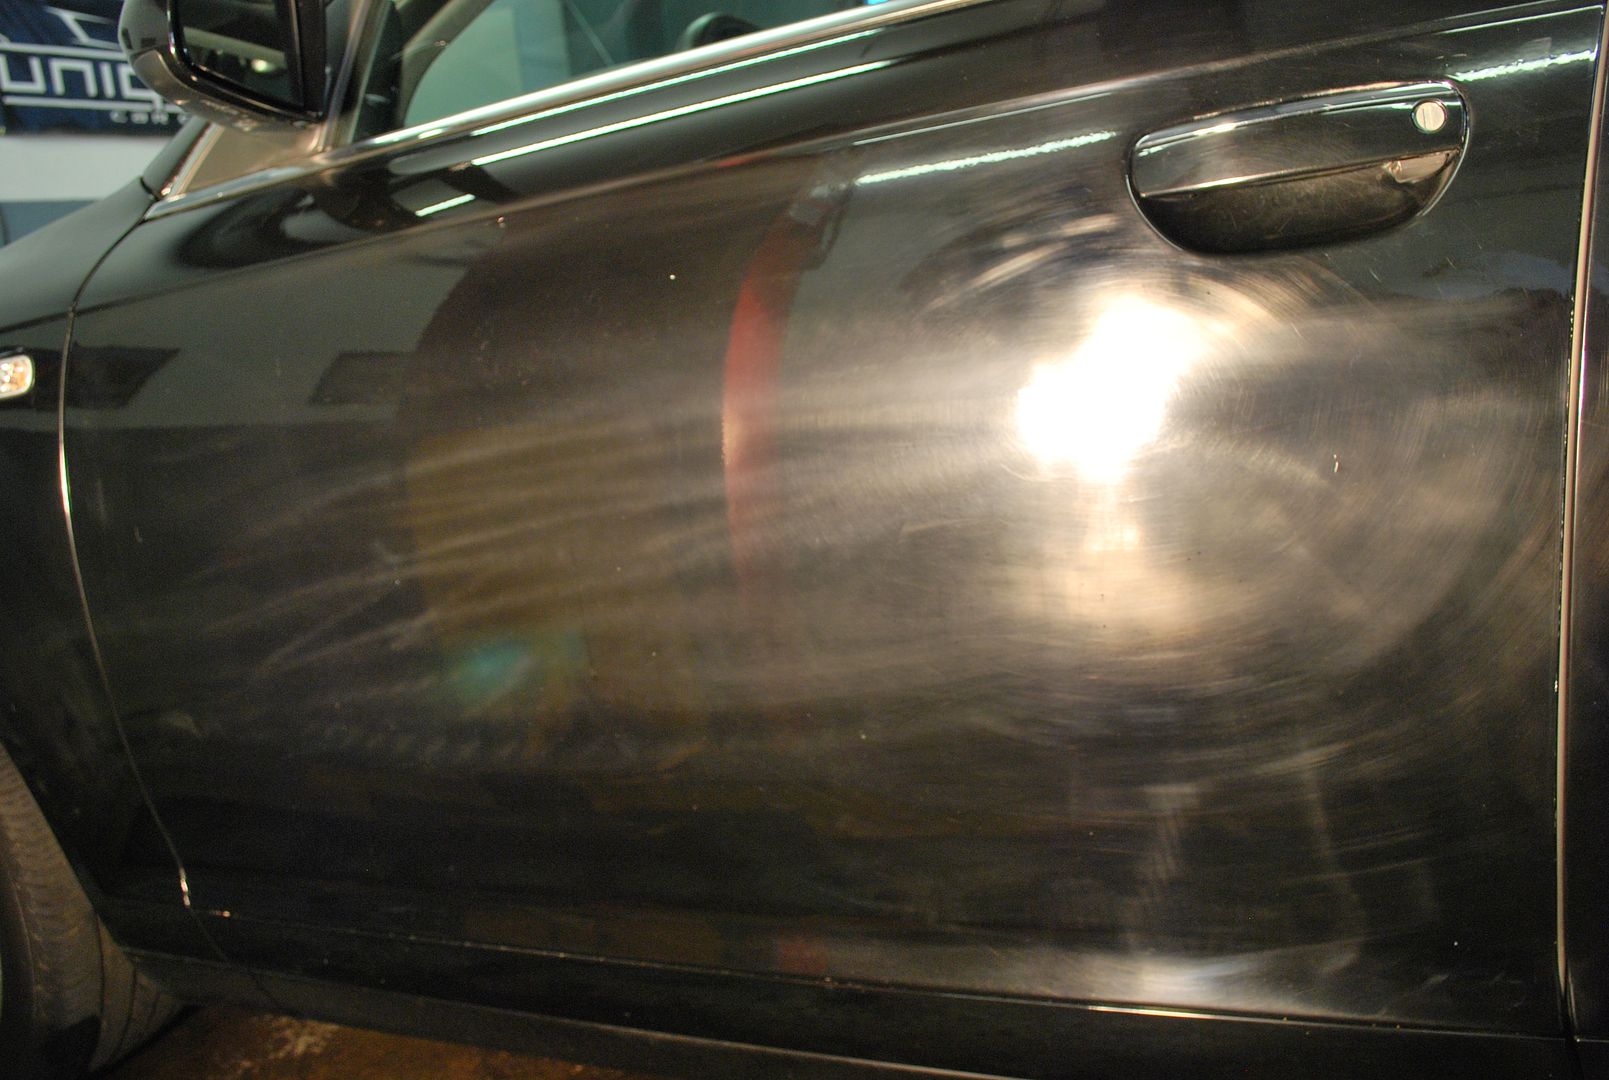
I started on the drivers side rear door to see what kind of correction could be achieved. I quickly found out how ridiculously hard the paint was and knew this car was going to be an absolute nightmare! I must have used a dozen different product/pad combinations before making a dent in it.
Below is the drivers side rear door after about 90 minutes of polishing. This is with no final polishing or wax! Definitely a huge difference compared to the front door!
Nice reflections!
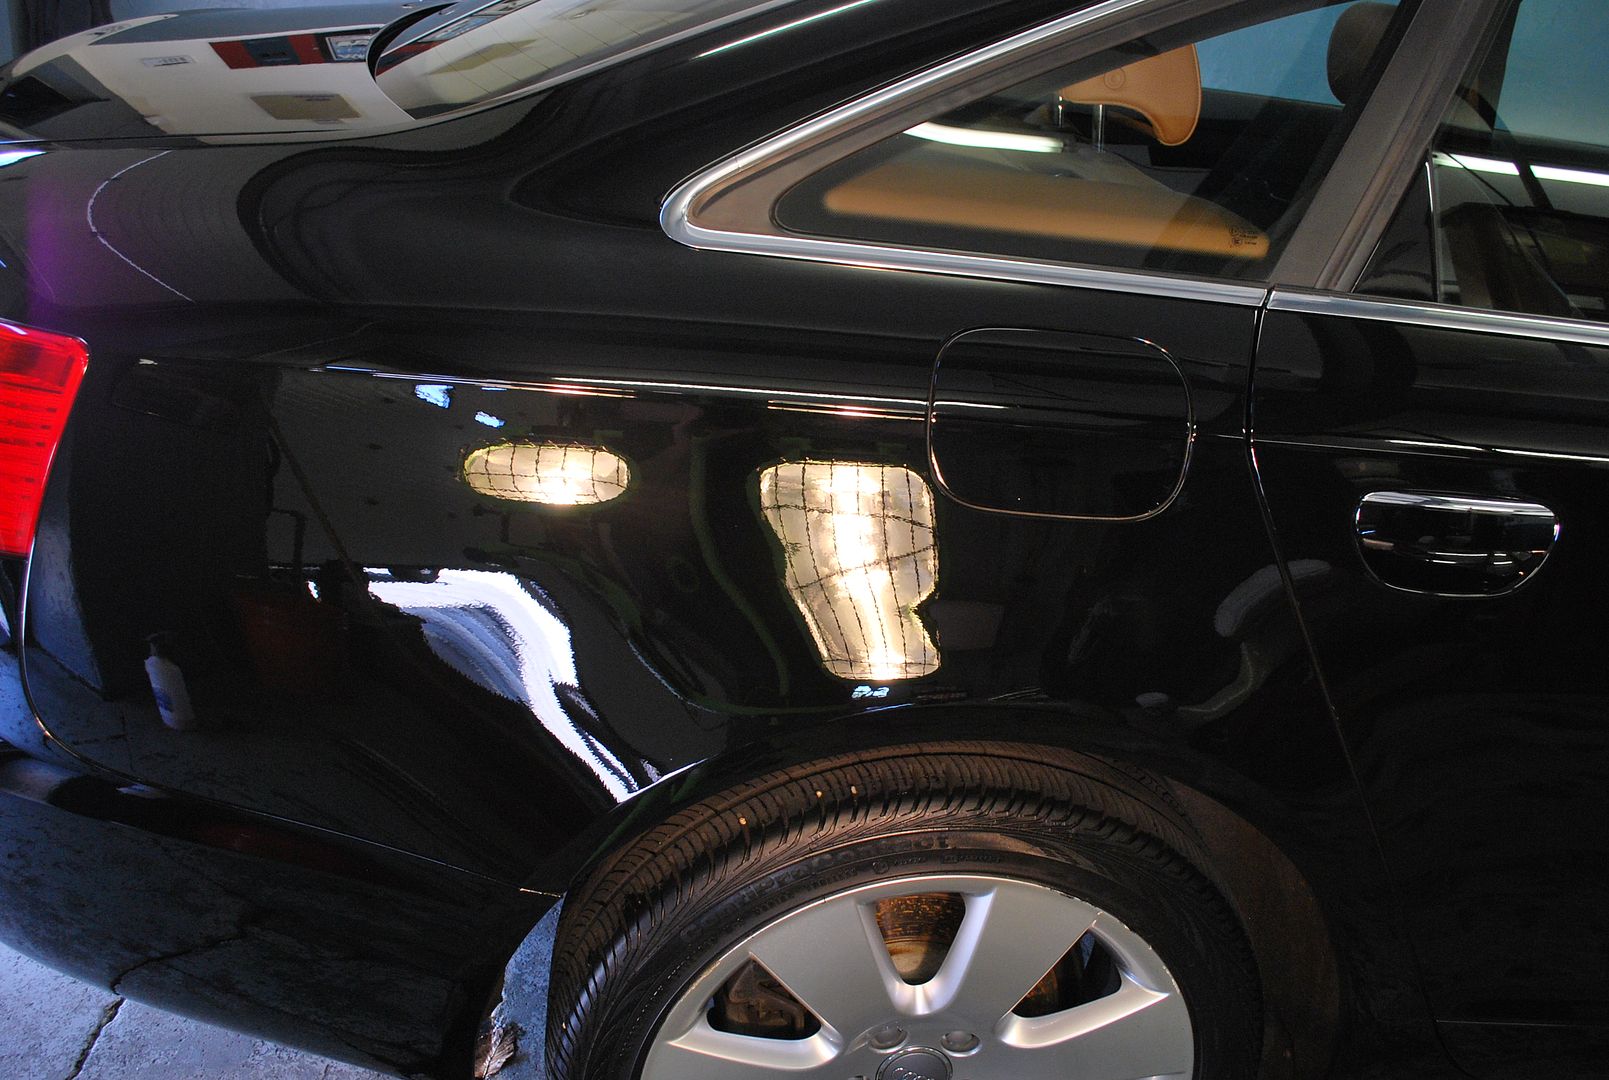
This picture shows the difference between the rear door and rear ¼ panel (no final polishing or wax)
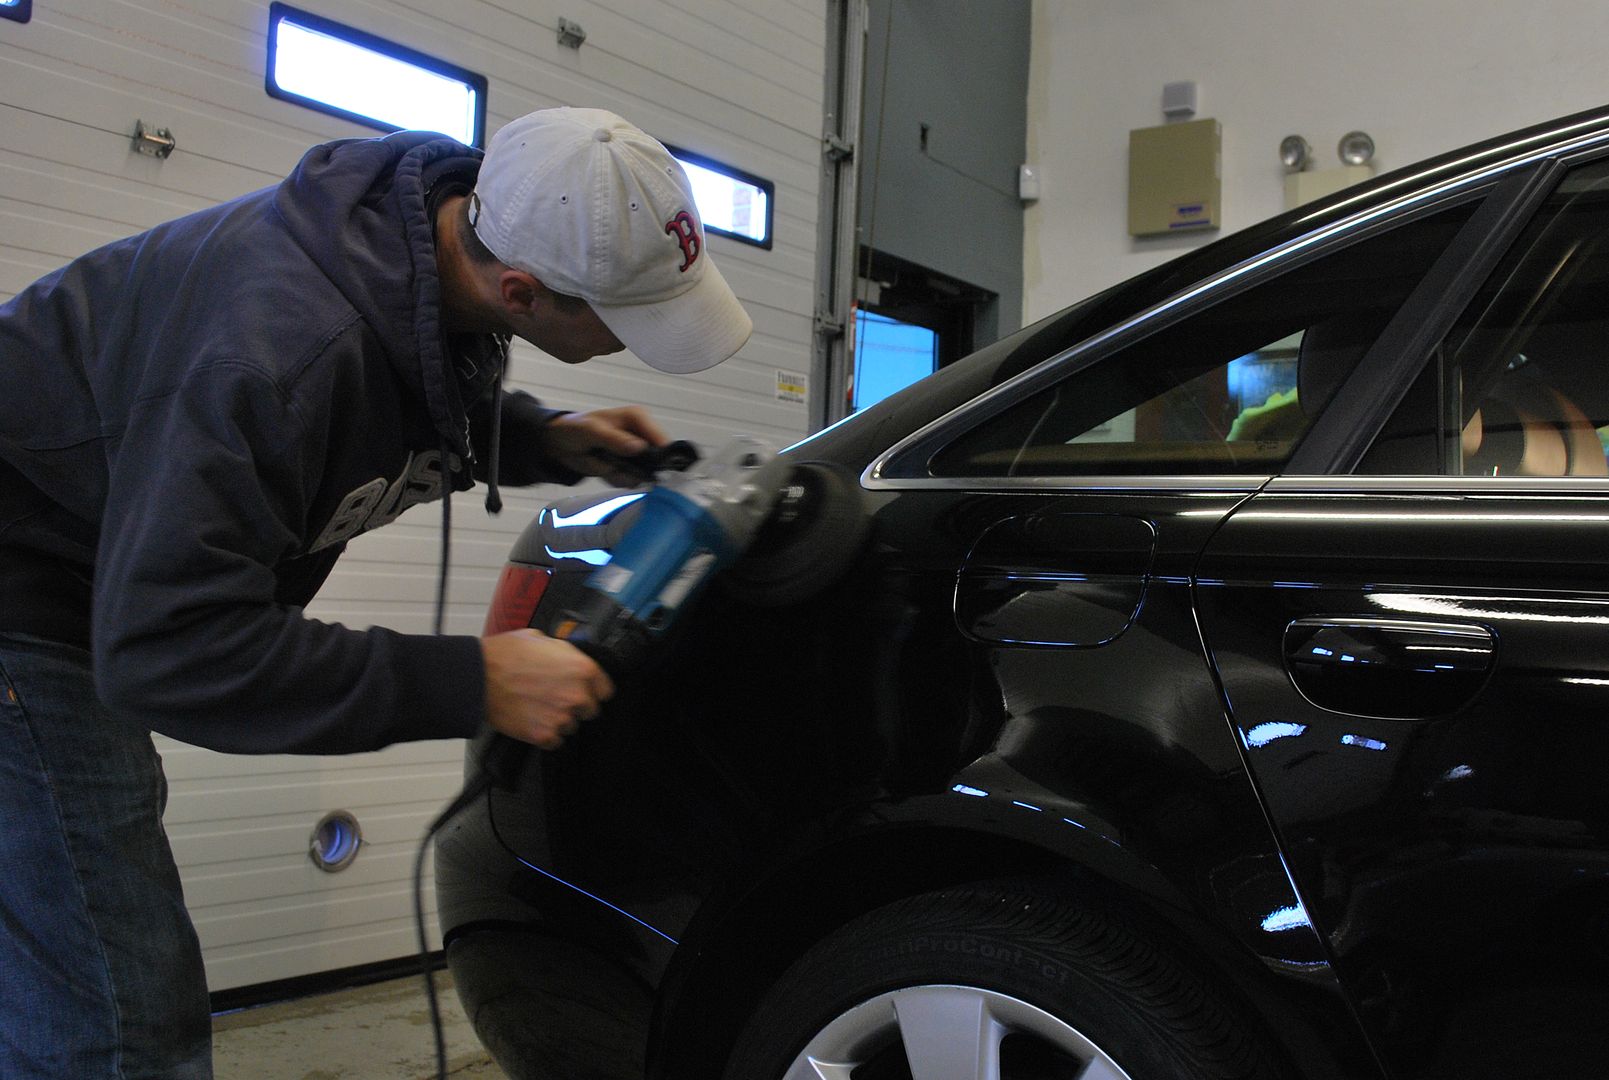
As you can see, it was coming along nicely, but wasnât going to be an enjoyable job. I moved onto the front door and used whatever products & pads necessary to achieve the results I was shooting for.
The picture below is the front door after more than an hour of polishing compared to the front fender (no final polishing or wax)â¦
Now that I had an idea how long this car was going to take, I asked Ryan to get off his butt and help me! He went to town on the passenger side, while I continued to work on the drivers side.
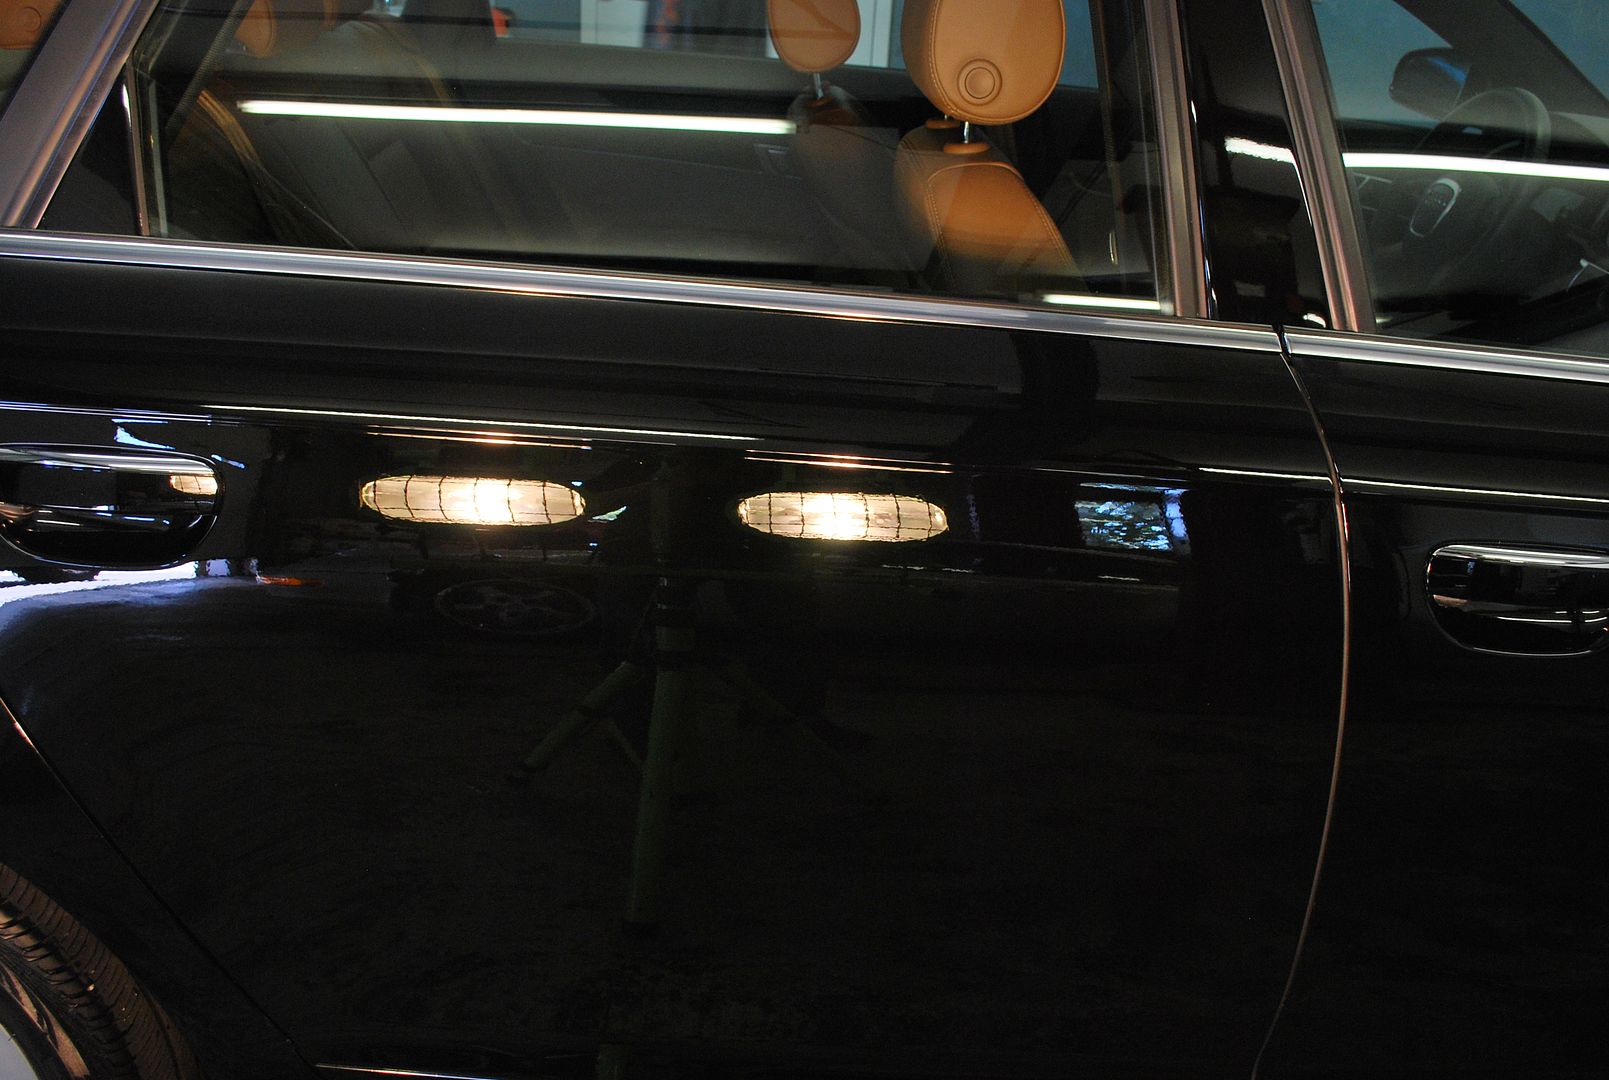
After polishing for several hours, I pulled the car outside to inspect it in the sun. Here is what the drivers side doors and rear ¼ panel looked like outside compared to the front fender, which was untouchedâ¦
-
12-18-2009, 07:04 AM #5
- Join Date
- May 2005
- Location
- Wakefield, MA
- Posts
- 2,400
- Post Thanks / Like
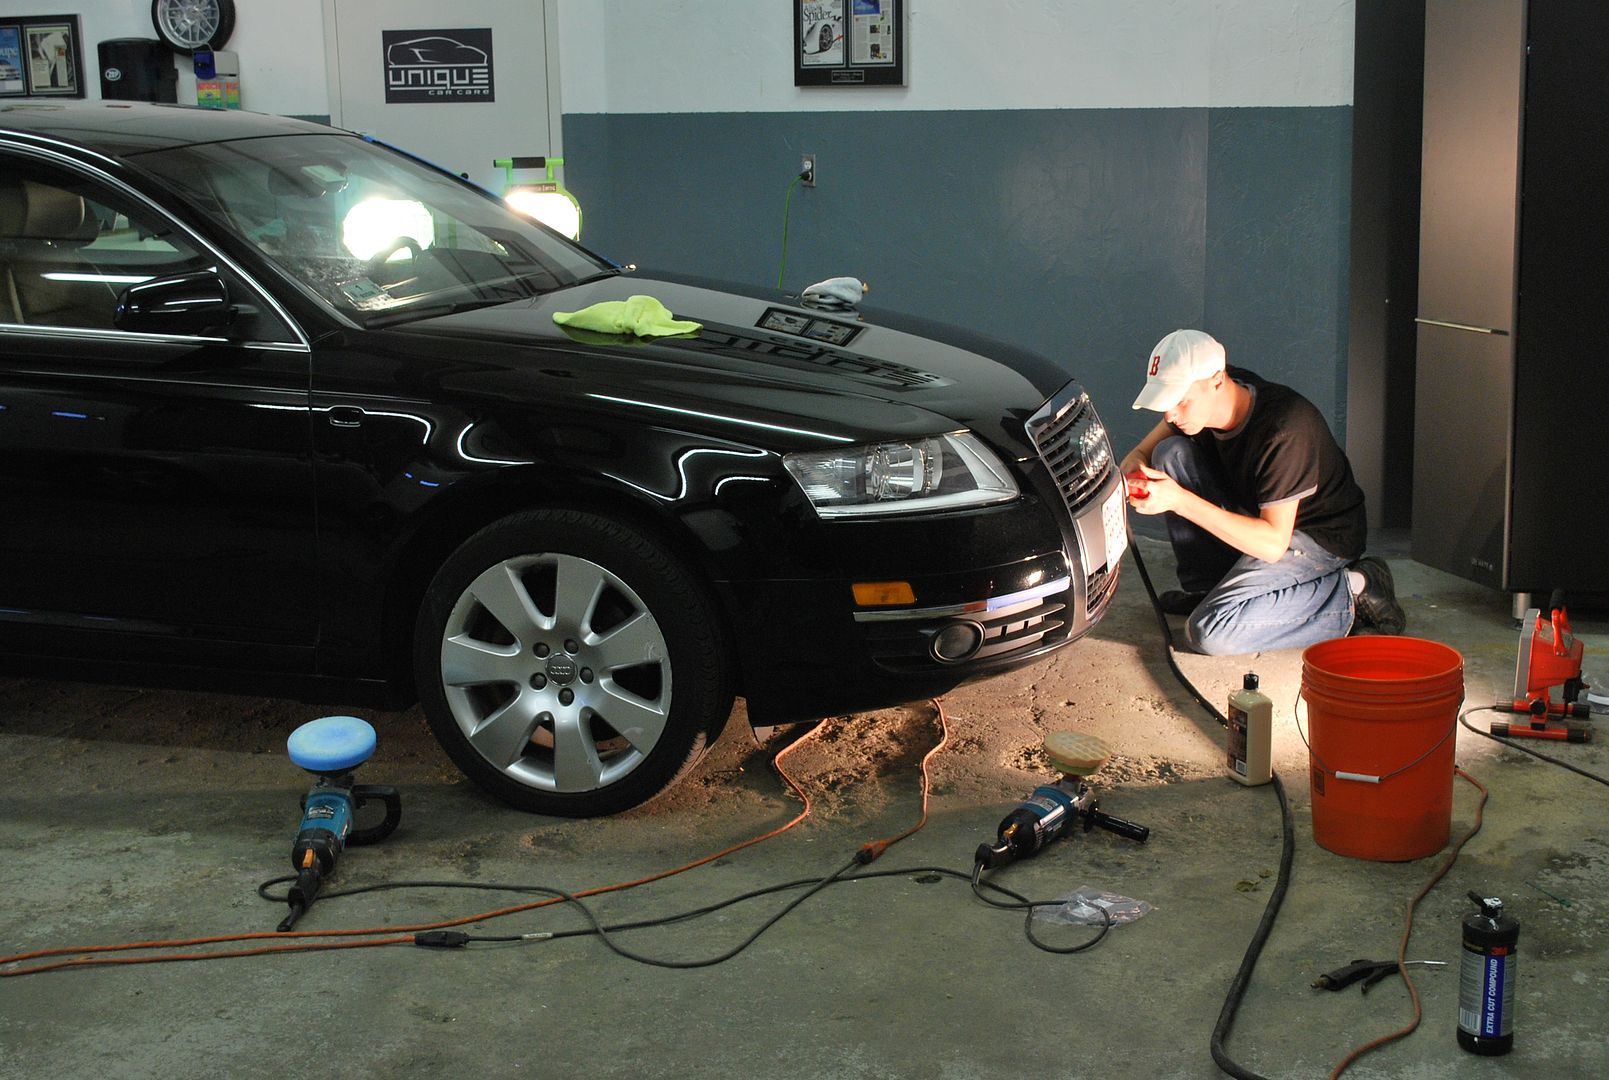
We pulled the car back in the shop and continued to work on it until later that night. We planned on working on the car for several days in order to get it looking as perfect as possible.
Below is me sanding down the front bumper in order to fix some deeper scratches and repair the poor touch-up job from the body shopâ¦
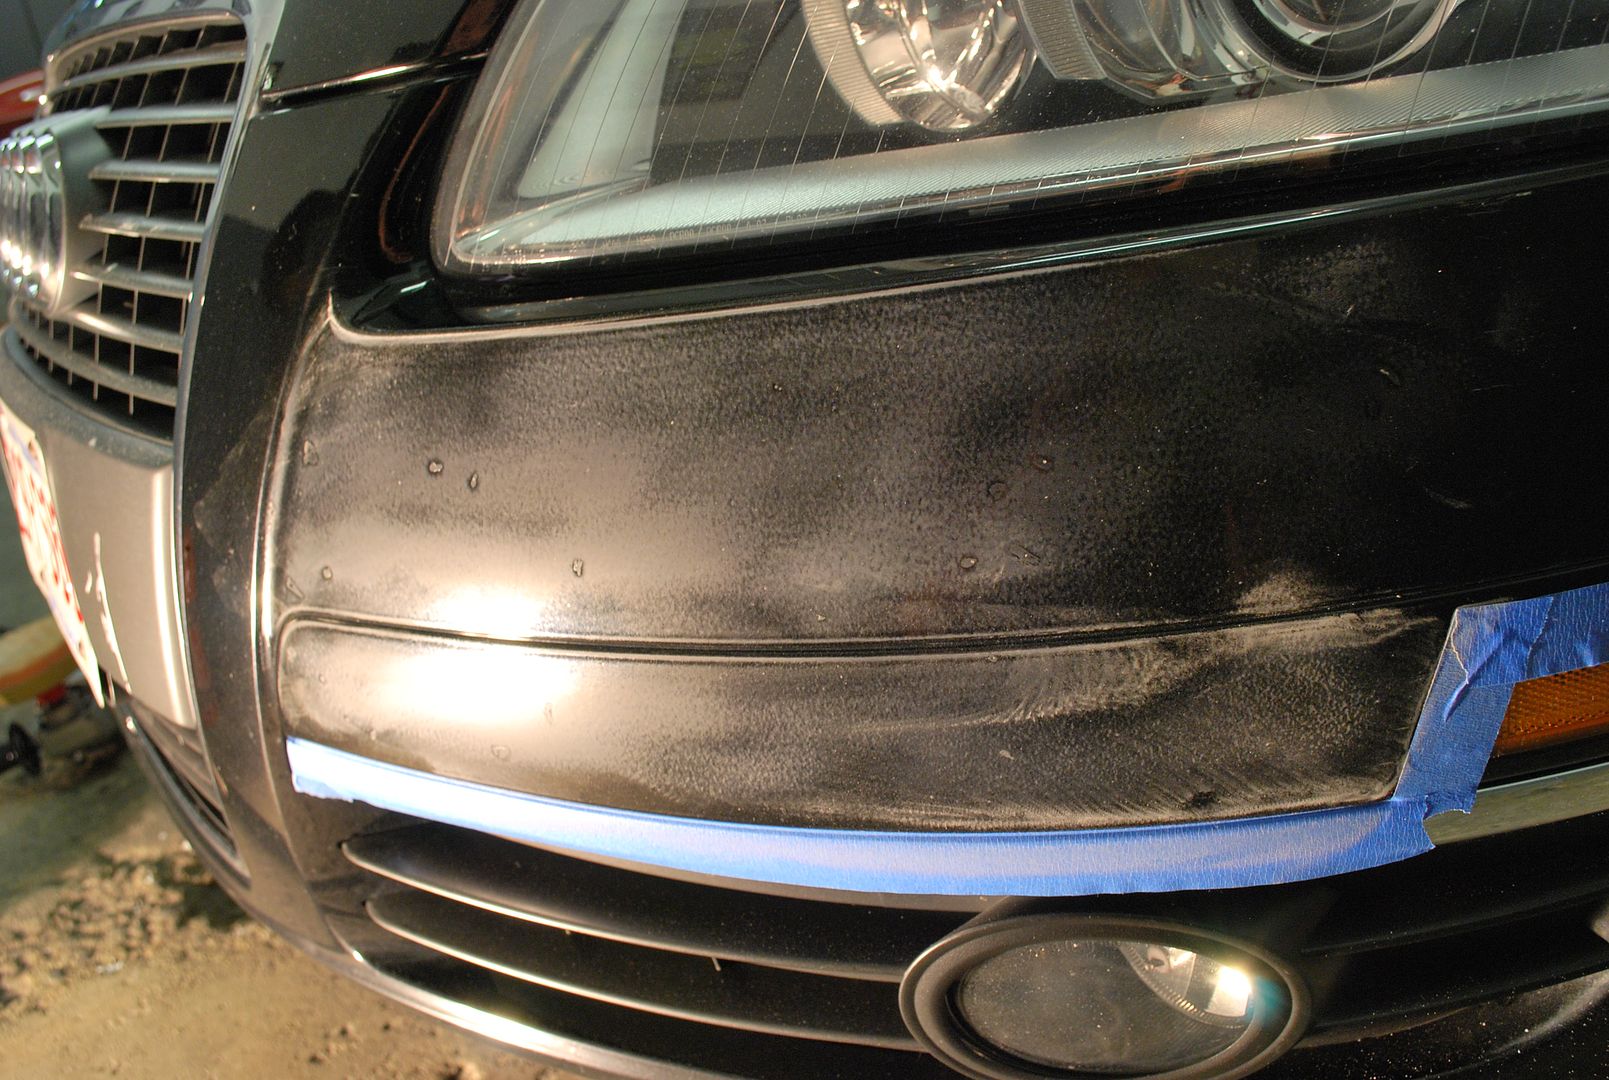
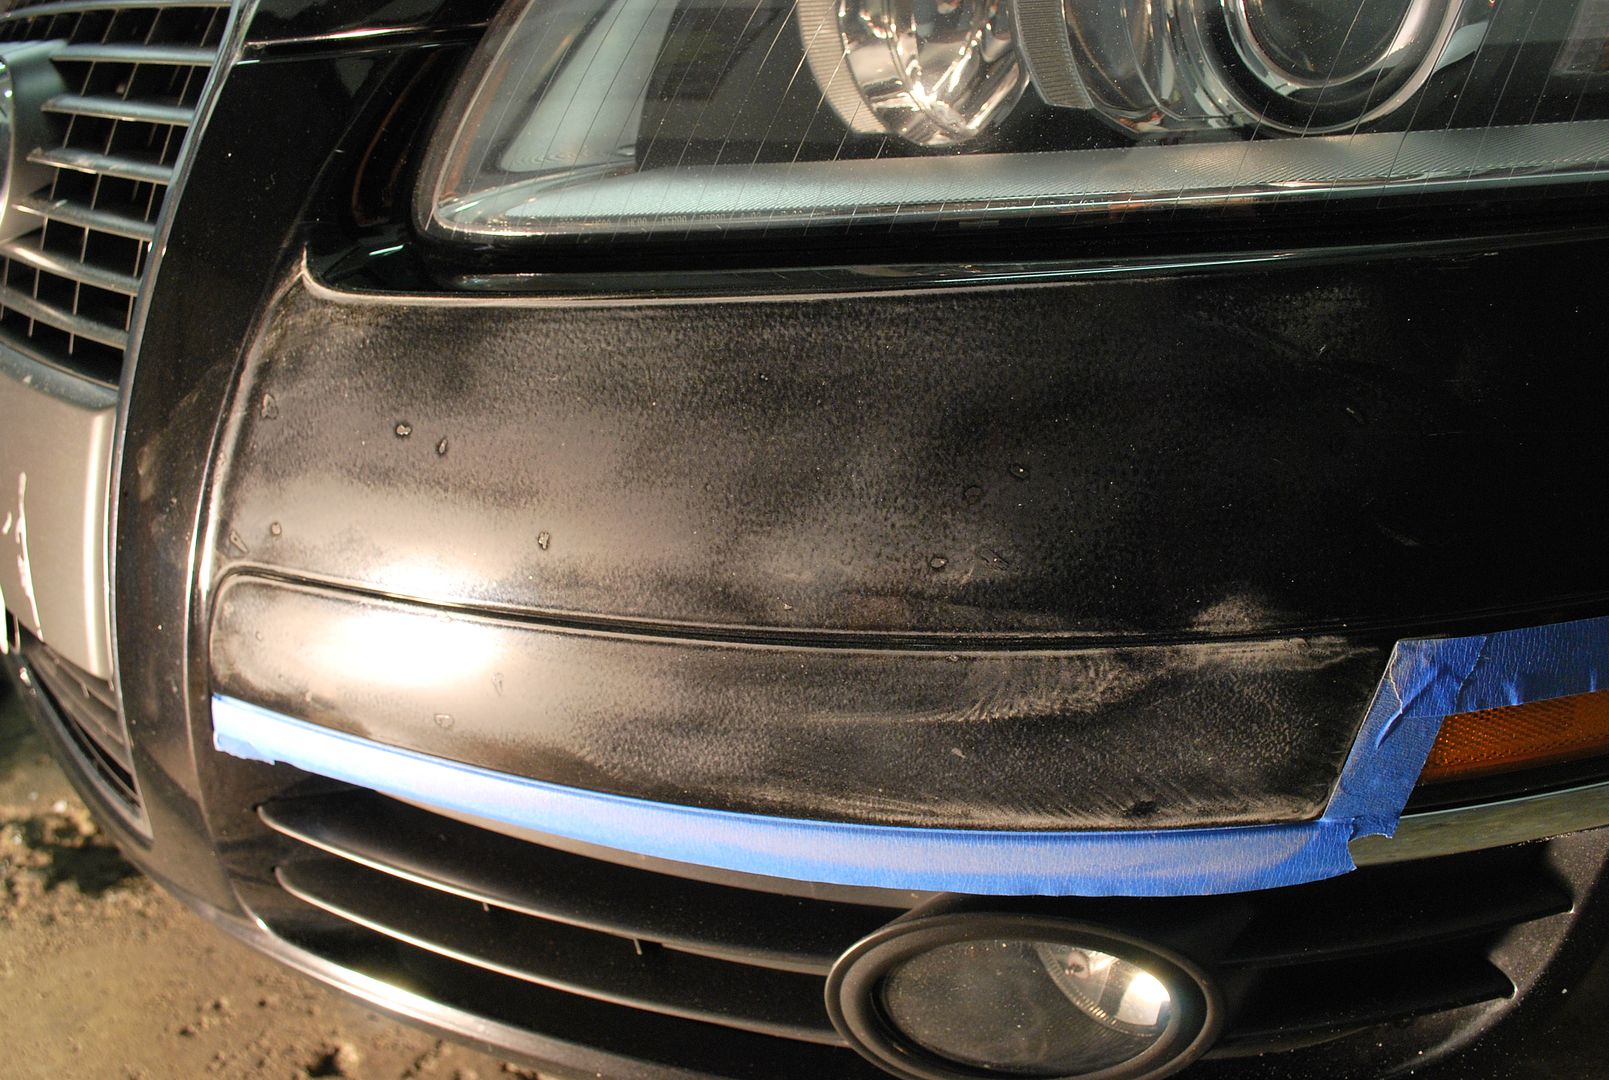
This is what the bumper looked like after sandingâ¦
This is what the bumper looked like after compounding (no final polishing or wax)â¦
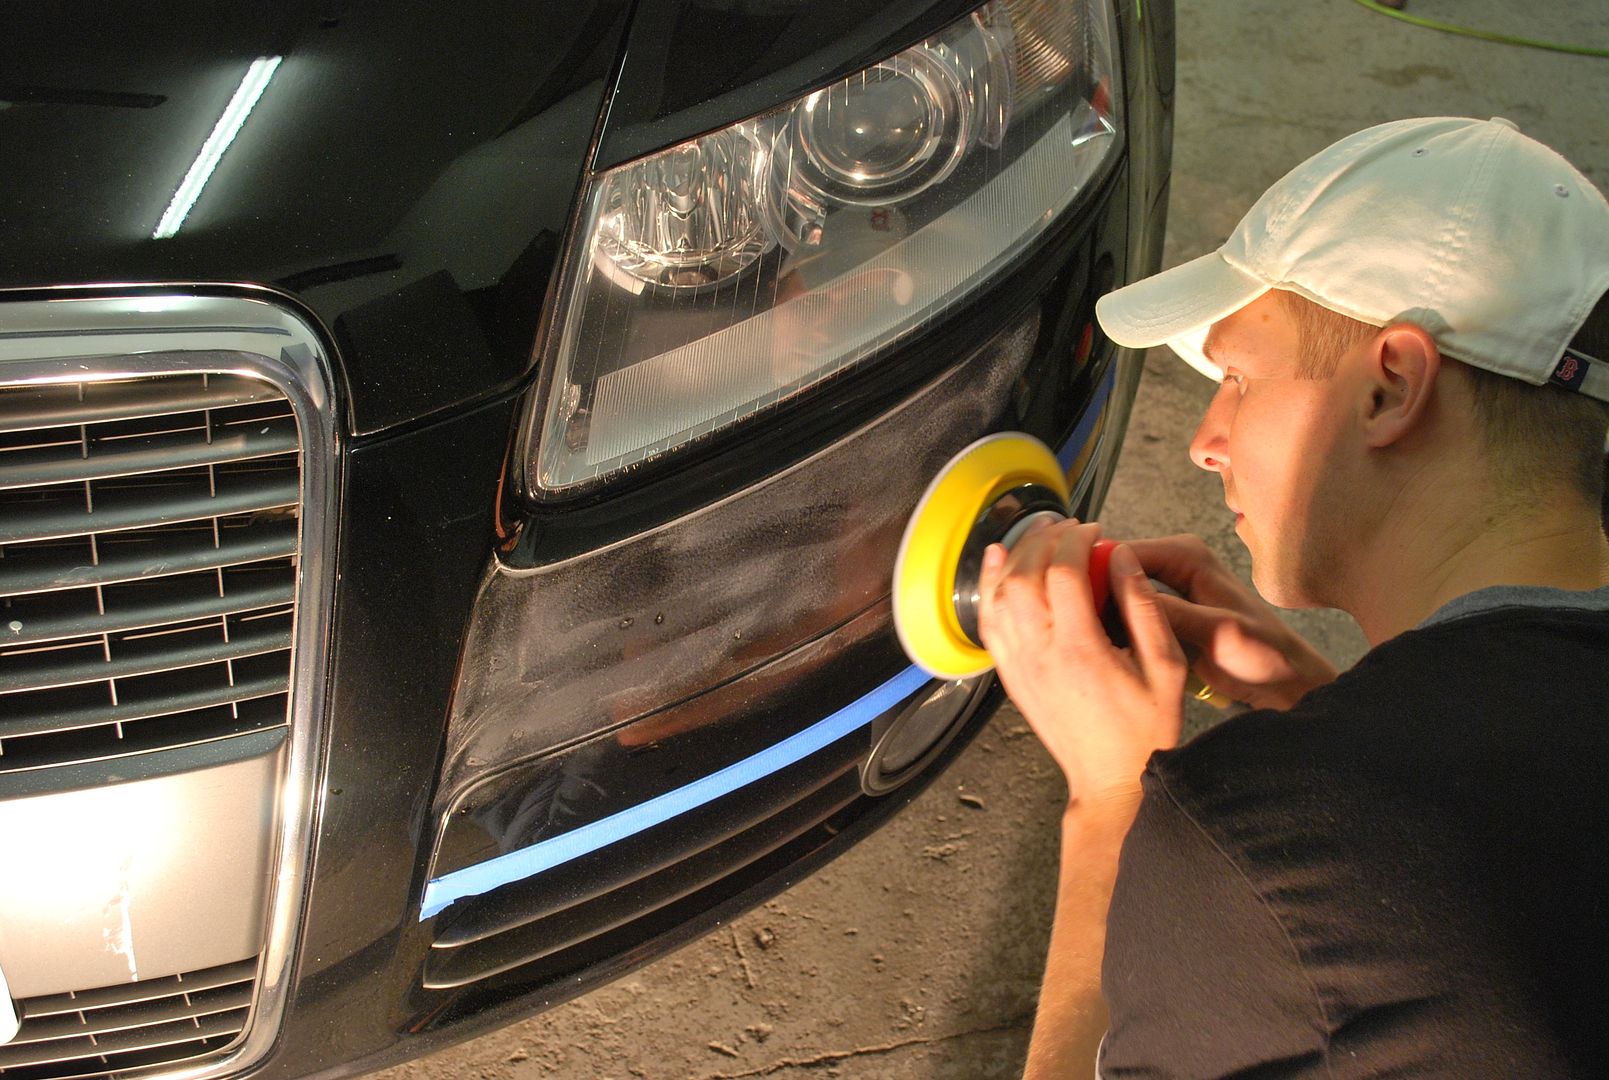
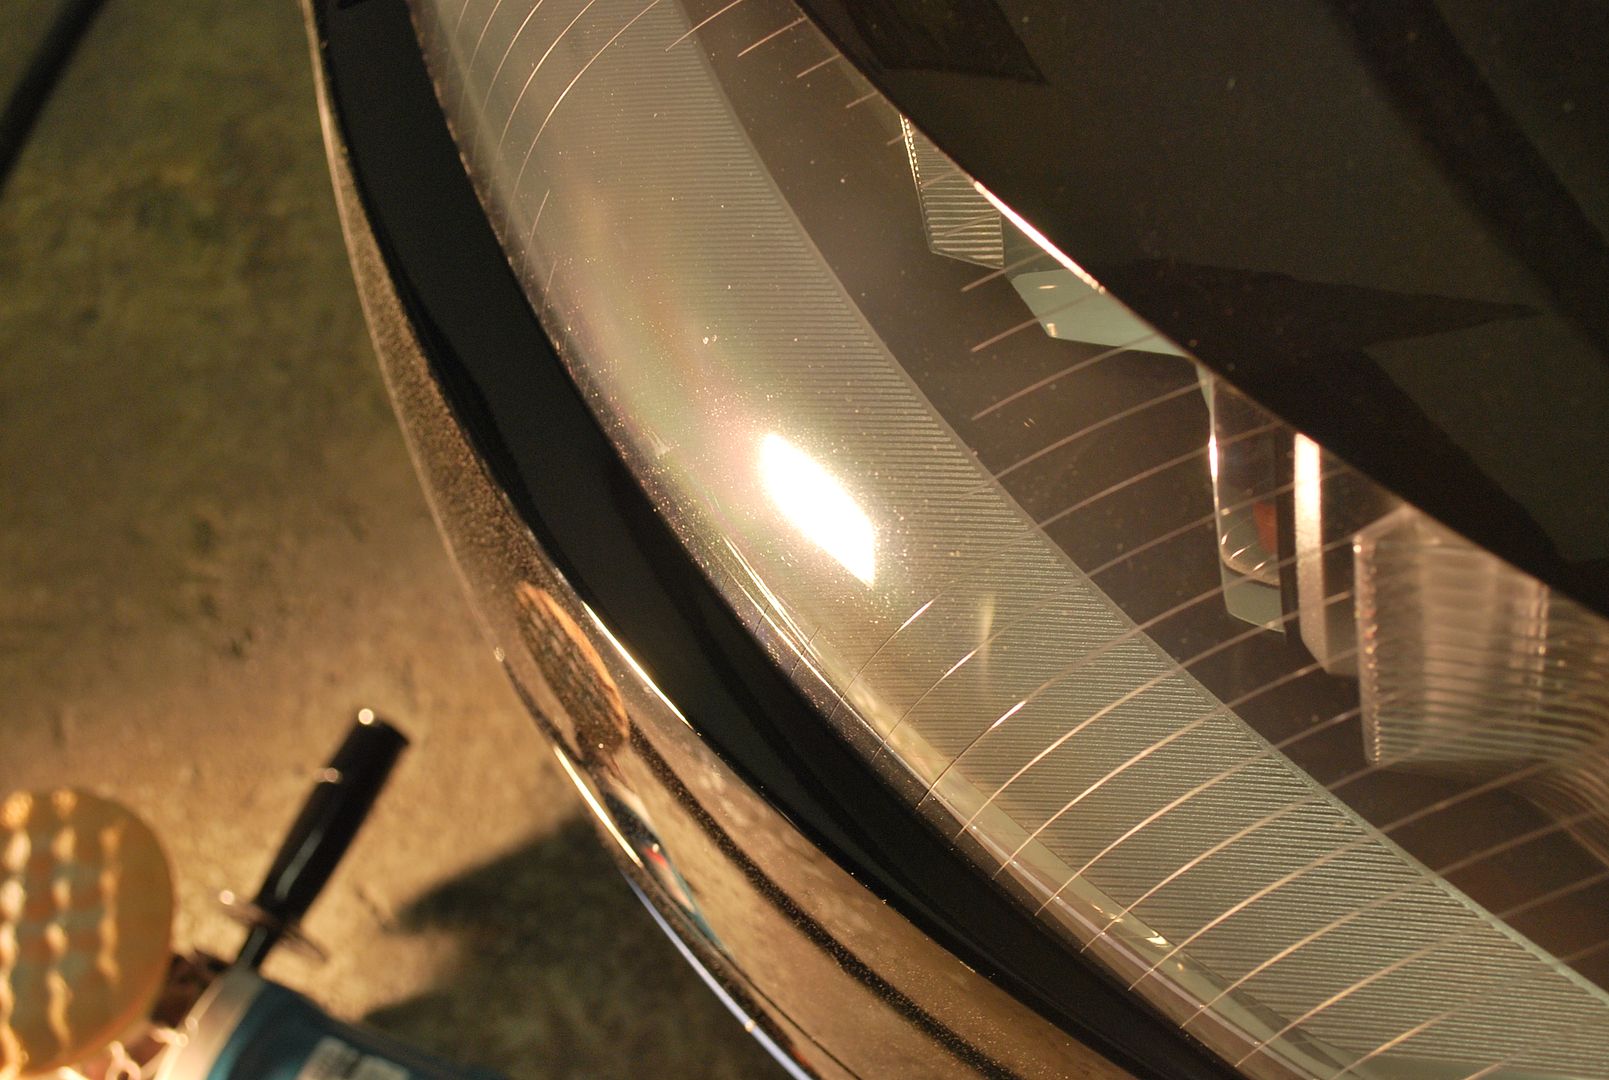
The front headlights were scratched as wellâ¦

Headlight after polishingâ¦
Here is Ryan compounding the front fenderâ¦
After 4 days of extreme polishing, we were finally getting somewhere! We decided to give the exterior a thorough wash to remove all of the compounding dust and spatter that was embedded in just about every crack & crevice before moving onto the final polishing.
Me final polishingâ¦.
Ryan cleaning the exhaust tipsâ¦
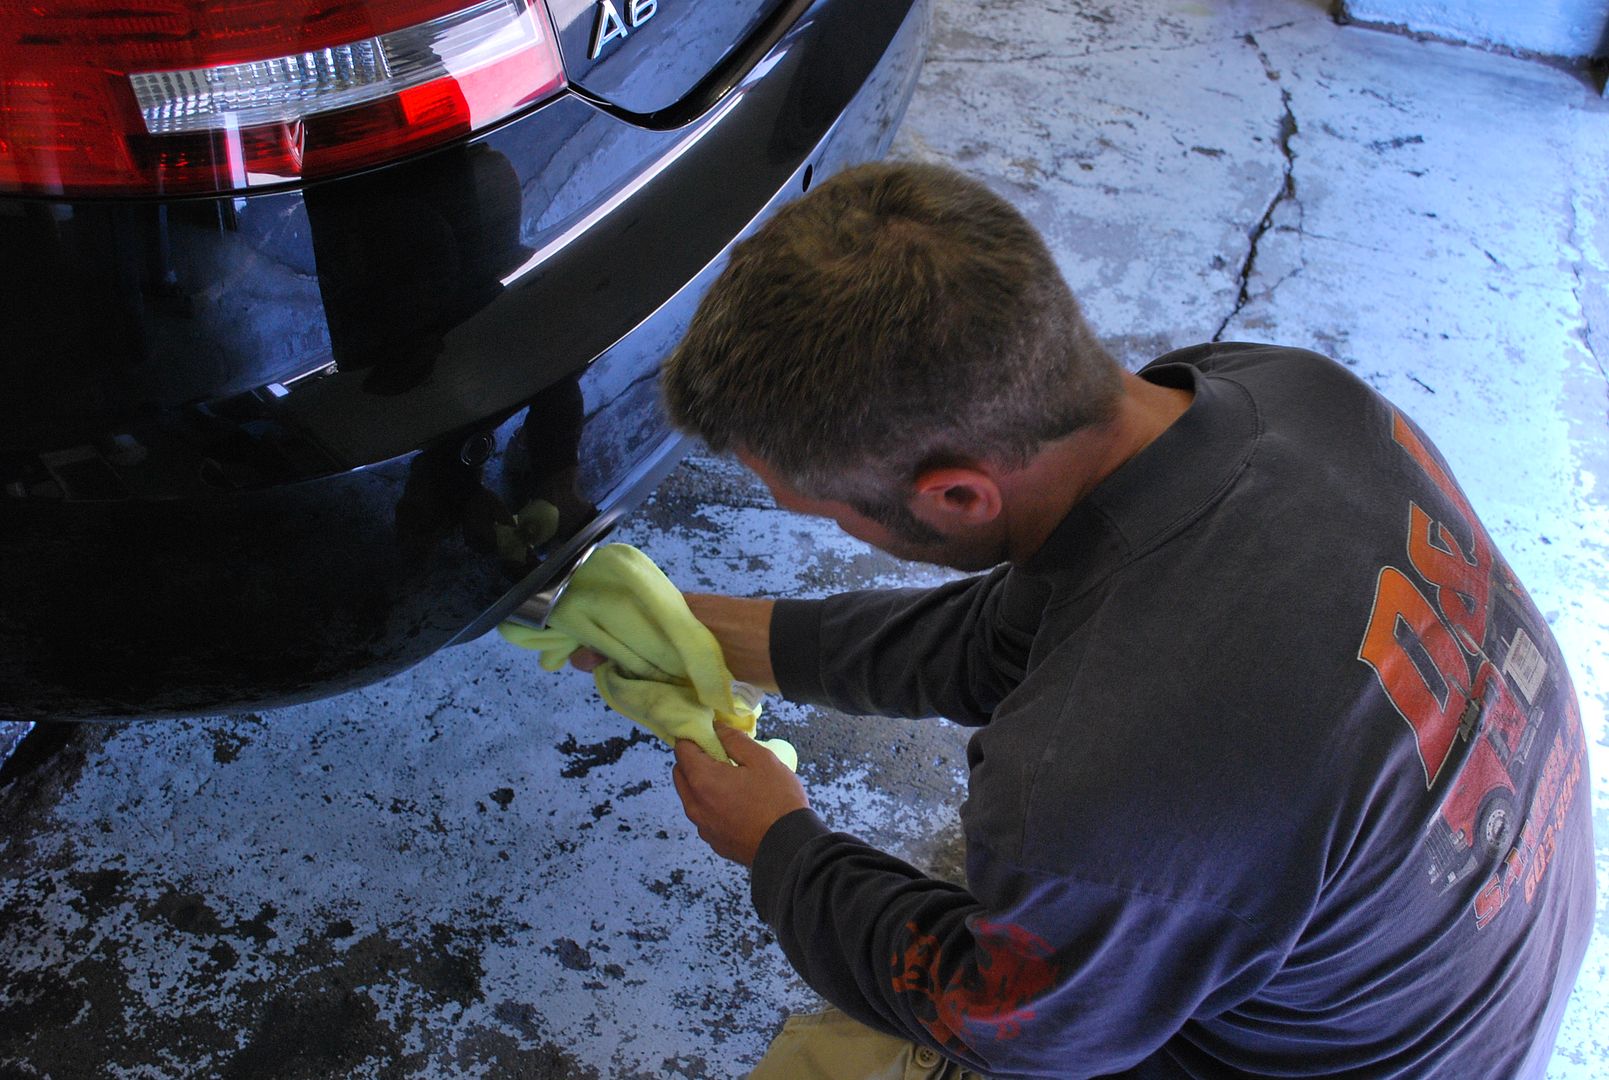
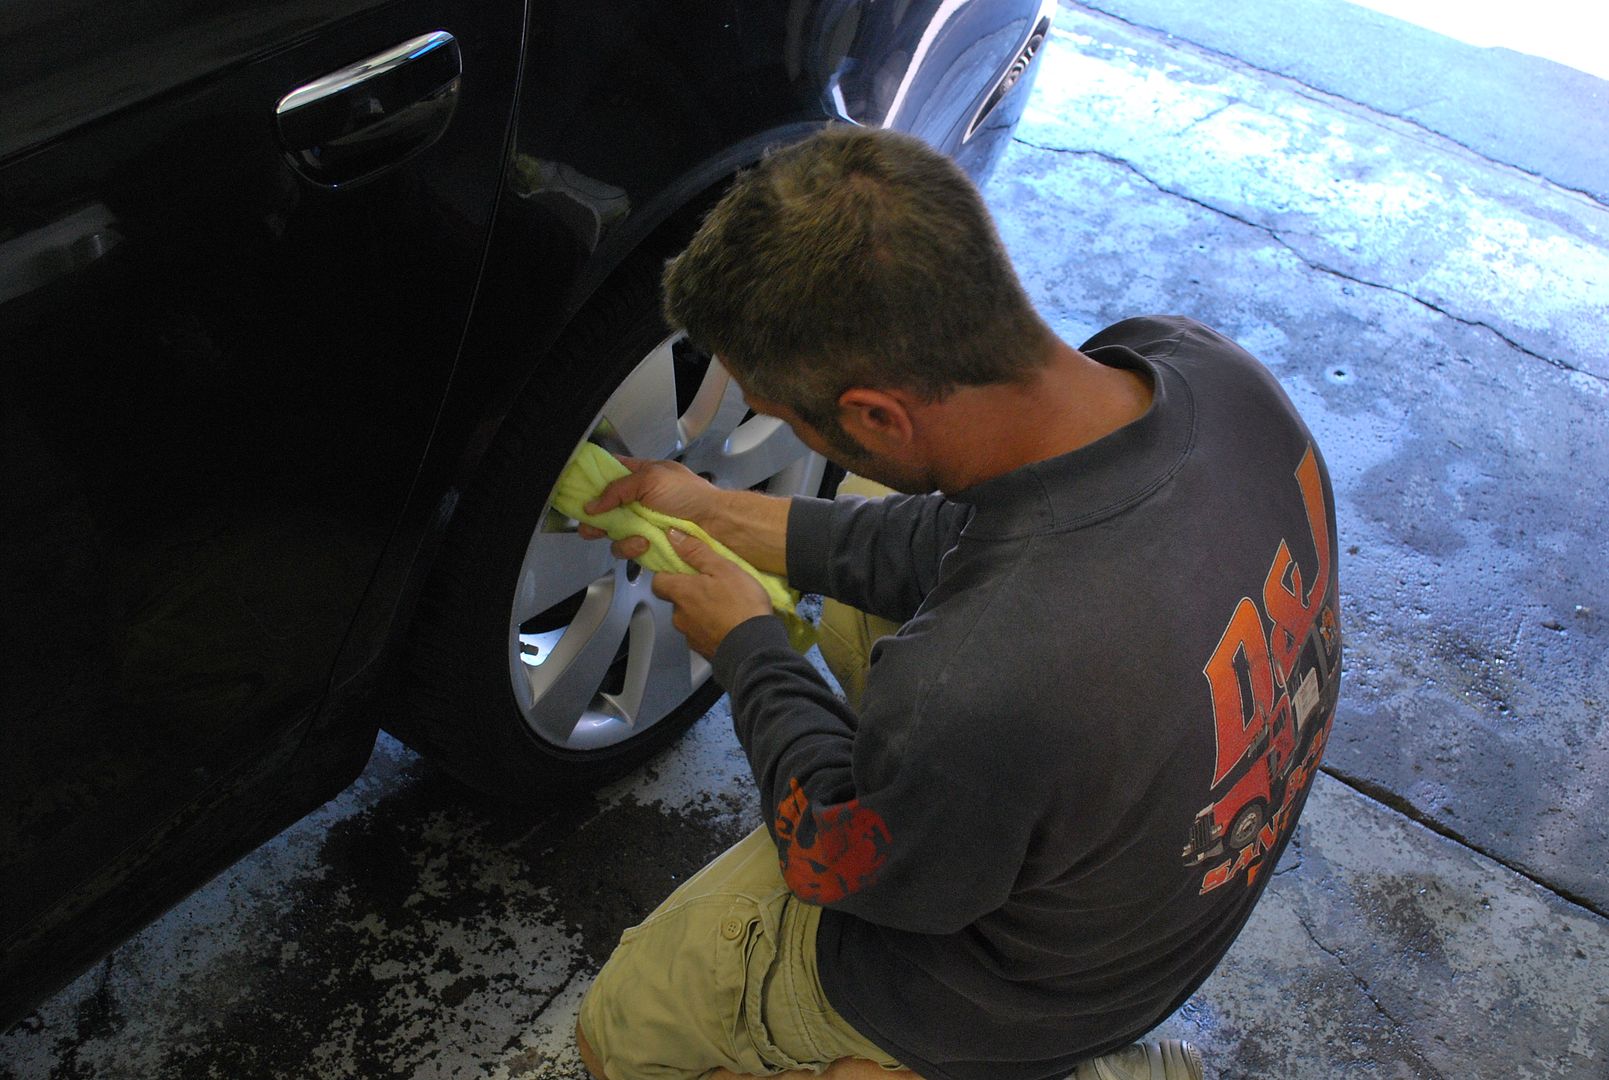
Me applying the paint sealantâ¦

Ryan sealing the wheelsâ¦
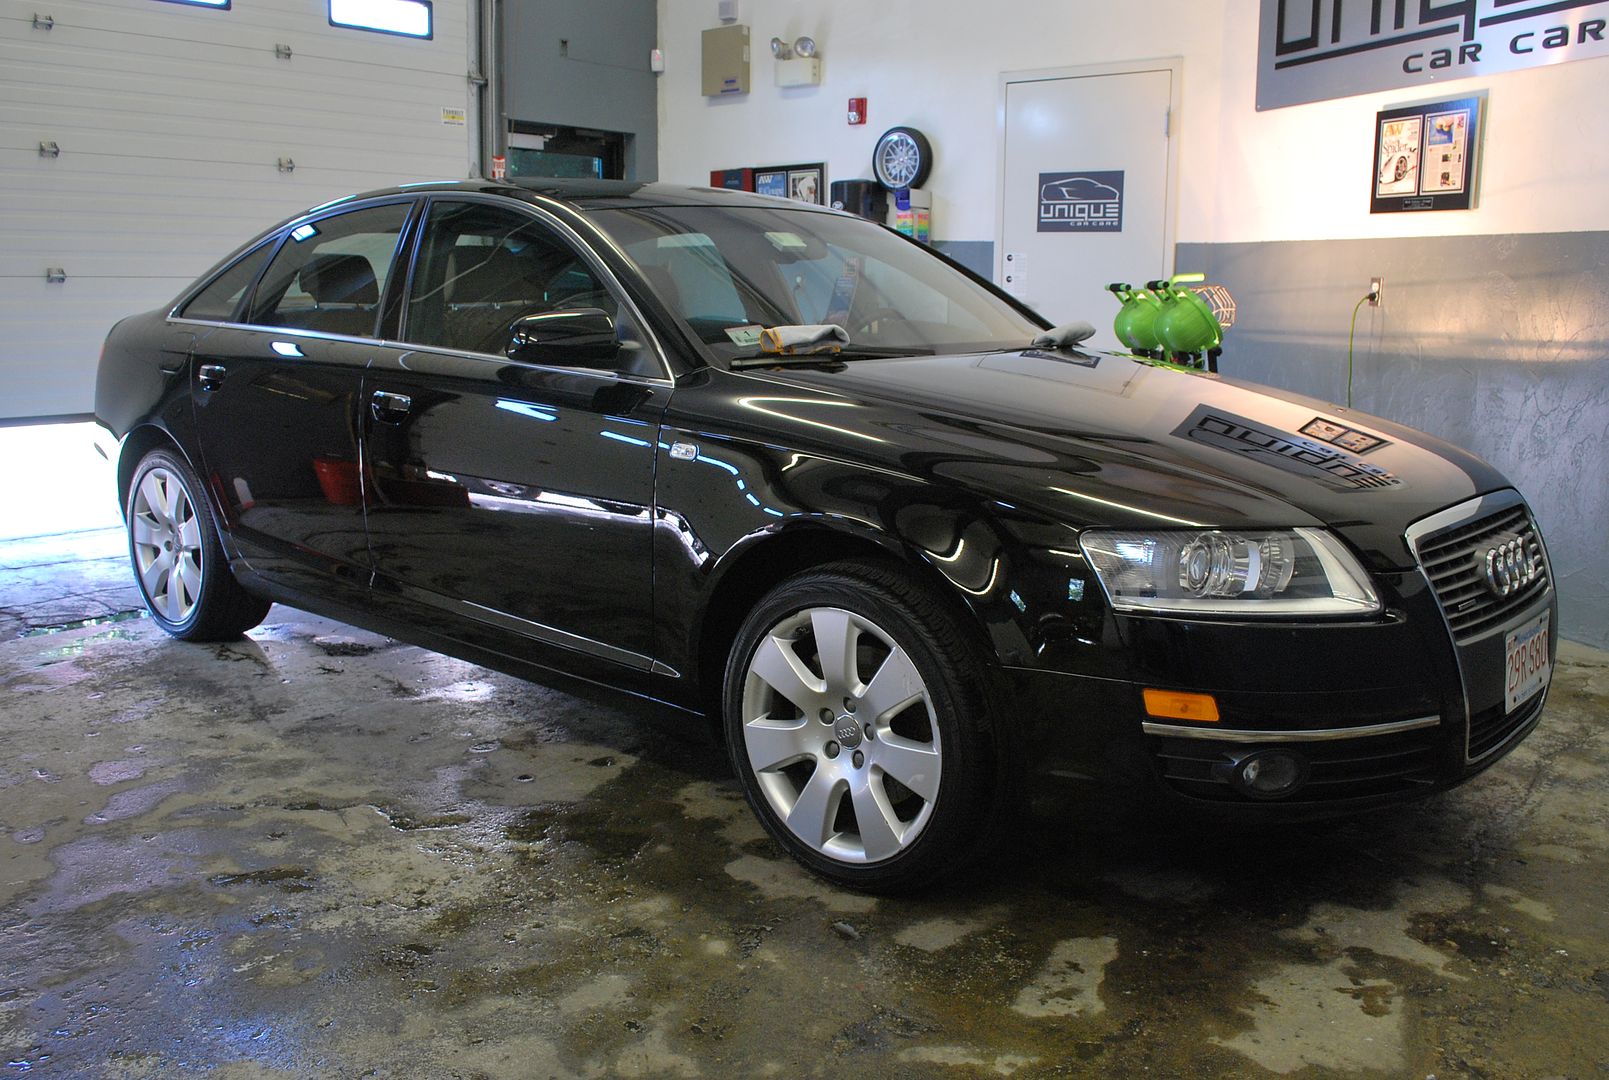
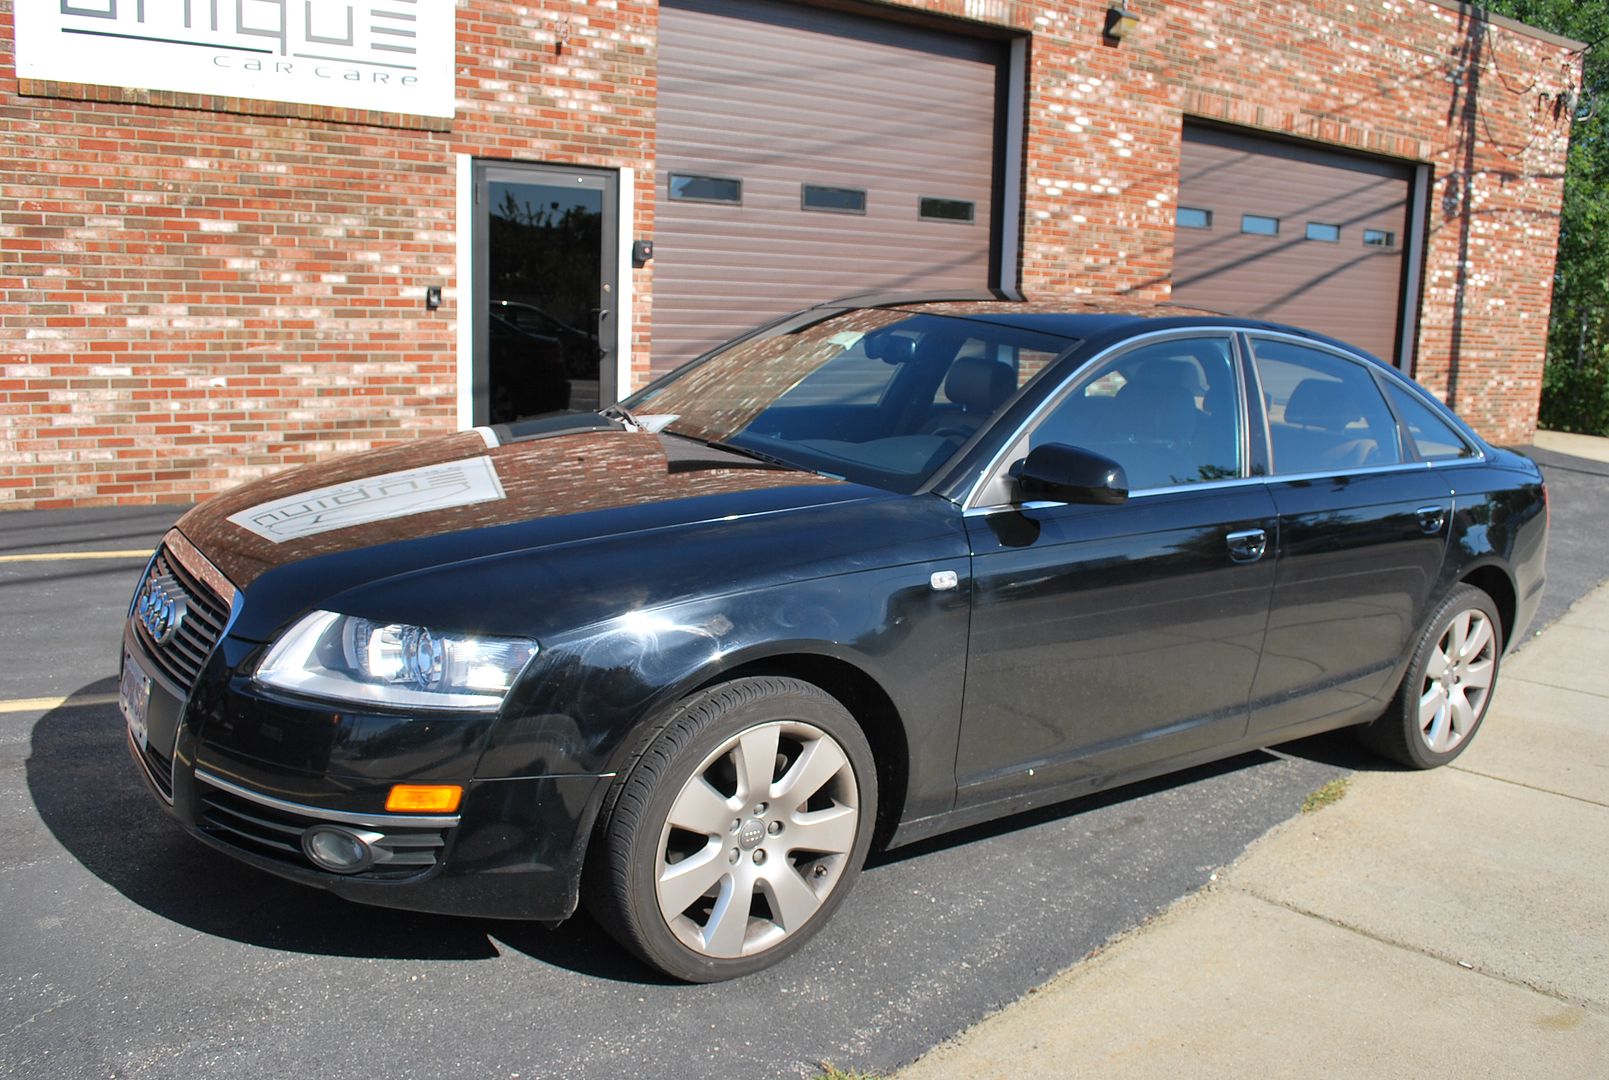
Now onto the after pictures! We were so beat upon completion that we didnât go crazy taking after pictures, but I think you get the idea how well it came out!
AFTER!!!!!!
-
12-18-2009, 07:05 AM #6
- Join Date
- May 2005
- Location
- Wakefield, MA
- Posts
- 2,400
- Post Thanks / Like


-
12-18-2009, 07:06 AM #7
- Join Date
- May 2005
- Location
- Wakefield, MA
- Posts
- 2,400
- Post Thanks / Like

Thanks for looking!
-
12-18-2009, 07:24 AM #8
- Join Date
- Sep 2005
- Location
- Lancaster, PA
- Posts
- 1,022
- Post Thanks / Like
Amazing, oil pool looking paint. Those before were giving me a migraine! Outstanding.
David Bibiloni
Tailored Automotive Detailing
Drive with Distinction
-
12-18-2009, 07:24 AM #9
- Join Date
- Dec 2009
- Posts
- 6,772
- Post Thanks / Like
Kudos guys!
Some extremely impressive work! Looking forward to visiting the shop, hopefully soon.
-
12-18-2009, 07:28 AM #10
- Join Date
- May 2005
- Location
- Wakefield, MA
- Posts
- 2,400
- Post Thanks / Like
D Tailor- Thanks David!
G35stilez- Thanks Sean! Whenever you want to stop by works for me. I`ll be at the shop for a little while this Saturday and will be there the entire week after Christmas. Let me know...
-
12-18-2009, 07:45 AM #11

- Join Date
- Jan 2010
- Location
- Babylon, NY
- Posts
- 173
- Post Thanks / Like
Awesome job bringing that paint back to life!
-
12-18-2009, 07:55 AM #12

- Join Date
- Apr 2011
- Location
- New Jersey
- Posts
- 13,240
- Post Thanks / Like
You know I was scrolling thru the pictures and thought "oh, he started wetsanding it" then scrolled a little more and it was still before pics...holy crap...parts of that car were so dull I thought you had been sanding them already! Great recovery!
-
12-18-2009, 08:04 AM #13
- Join Date
- Mar 2009
- Posts
- 1,624
- Post Thanks / Like
Nice work guys. Those are probably the worst "before" I have ever seen.
Amazing save.
-
12-18-2009, 08:20 AM #14
- Join Date
- Jul 2006
- Location
- San Jose / Berkeley, CA
- Posts
- 1,354
- Post Thanks / Like
you`re right. I was going to say the car didn`t look to bad in the beginning, nothing SIP can`t clean up. but boy was I wrong! Amazing... turnaround.
BTW, would you have achieved the same results with the sanding if you did it by hand? I get ask by couple of clients to sand down the front too and rock chips, but I never use the tri-zac disks.-Sam
Serving Northern California (East Bay) from
San Francisco, Berkeley, to San Jose.
-
12-18-2009, 08:24 AM #15
- Join Date
- Apr 2009
- Posts
- 1,072
- Post Thanks / Like
Unbelievable work Rick (and Ryan). I`ve had some tough black Audi`s myself in the past, but that one went way beyond. With stupid-hard paint, and several re-paints, I know that you guys were in for some serious work.
You know Rick...we`re buds and everything, but I`m convinced that you do in fact come from a different planet because your skills, knowledge, and level of paint correction are simply out of this world!


 Reply With Quote
Thread Information
Users Browsing this Thread
There are currently 1 users browsing this thread. (0 members and 1 guests)
Similar Threads
-
Peachstate Detail: 2009 Red Corvette Extreme Correction
By gmblack3 in forum Click & Brag -The Detailers ShowcaseReplies: 27Last Post: 09-28-2011, 04:46 PM -
** Blue BMW 135i Paint Correction by Unique Car Care **
By Rickrack in forum Click & Brag -The Detailers ShowcaseReplies: 43Last Post: 05-14-2009, 02:16 PM -
** Imola Red BMW M3 Paint Correction by Unique Car Care **
By Rickrack in forum Click & Brag -The Detailers ShowcaseReplies: 31Last Post: 05-14-2009, 01:48 PM -
** Imola Red BMW M3 Paint Correction by Unique Car Care **
By imported_RickRack in forum The Detailers ShowcaseReplies: 9Last Post: 04-08-2009, 07:35 PM -
** Blue BMW 135i Paint Correction by Unique Car Care **
By imported_RickRack in forum The Detailers ShowcaseReplies: 16Last Post: 04-08-2009, 08:17 AM
Bookmarks