

I received a call from the owner of this brand new BMW 128i about having the exterior detailed and discussed a good time to bring the car by so I could take a look at the condition of the paint. He was concerned about some hazing and holograms that were visible on the top surfaces and was afraid that it may have been from improper washing.
He stated that he had done lots of homework, researching what products to use and the correct way to wash and care for the car. He just couldnât understand why he was experiencing these problems, since there was only 250 miles on the car and he had only washed it twice. As soon as I looked at the paint, it was evident that the car had been improperly buffed, which left a considerable amount of holograms and buffer trails. He mentioned that when he took delivery of the car from the dealership, there was some water-spotting on the top surfaces, so he brought the car back in to have them fix the problem. Now it was starting to make sense that the dealership had caused what he was seeing and was not from improper washing.
It was evident that the dealership must have used an aggressive compound with a wool pad to remove the water spots and ended up buffing the entire exterior, leaving excessive micromarring, buffer trails, swirl marks, holograms, etc.. Instead of refining the finish further, they just applied a glaze to cover it up. Most glazes contain silicon oils, polymers, oils, etc. and will make the finish look perfect, when in reality it is not. Over a short period of time, the glaze begins to wash off and the true condition of the paint is revealed. I inspected the car carefully and gave the owner an estimate. We set up an appointment for the following week.
The car arrived in the same condition as the week before and I expected to have the car finished in a day or two. I was hoping to get away with doing nothing more than a 2-step polishing treatment to get the car back in âlike newâ condition. I have done lots of newer BMWâs and find them to have relatively hard paint, which I prefer, since softer paint can be finicky and difficult to correct at times.
Knowing that the dealer had applied some sort of glaze to the exterior, it was very important to strip all traces of it from the paint before any polishing took place. Most glazes contain silicon, which deeply embeds itself in the paint and can be very difficult to remove. I find it absolutely necessary to remove all traces of silicon from the paint in order to fully remove the defects. When there is silicon present on a paint finish, it acts as a lubricant and makes polishing near impossible. The silicon oils prevent the abrasives in the polish from cutting into the paint, which is necessary in order to correct the defects. As most of you know, a microscopic amount of clear coat is removed in order to level the paint when polishing. When there is silicon present on a finish that you are trying to correct, the buffing pad tends to âhydroplaneâ above the surface, not allowing the paint to be leveled.
I was expecting the car to look a little worse once I was done removing the glaze from the paint, but I had no idea what I was getting myself into!! I started by giving the exterior a normal wash, cleaned the wheels & tires and rinsed down the engine compartment. Next, I spent a good amount of time trying to strip the paint free of all silicon oils.
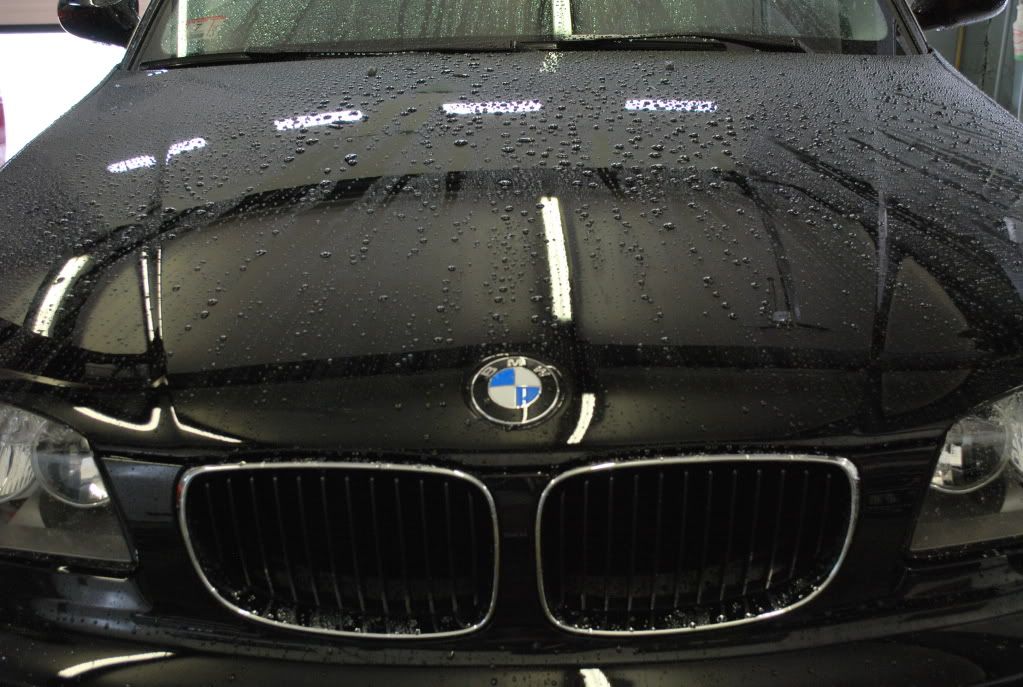
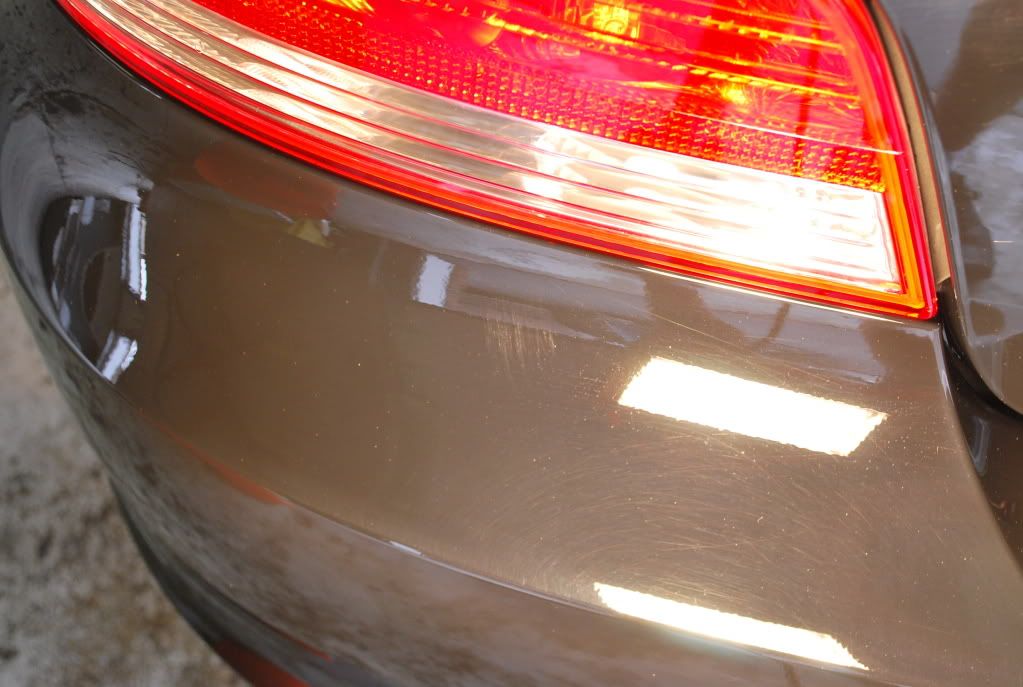
The picture below shows the paint beading the water heavily, meaning there is some sort of wax, sealant, glaze, quick detailer, etc. on the paint.
To strip the paint free of any previous products, I used some industrial strength degreaser at full strength by spraying it into a new microfiber towel and scrubbing each section for several minutes. Whatever product that was on the paint was very difficult to remove and took about 4 degreasing steps in order to remove it.
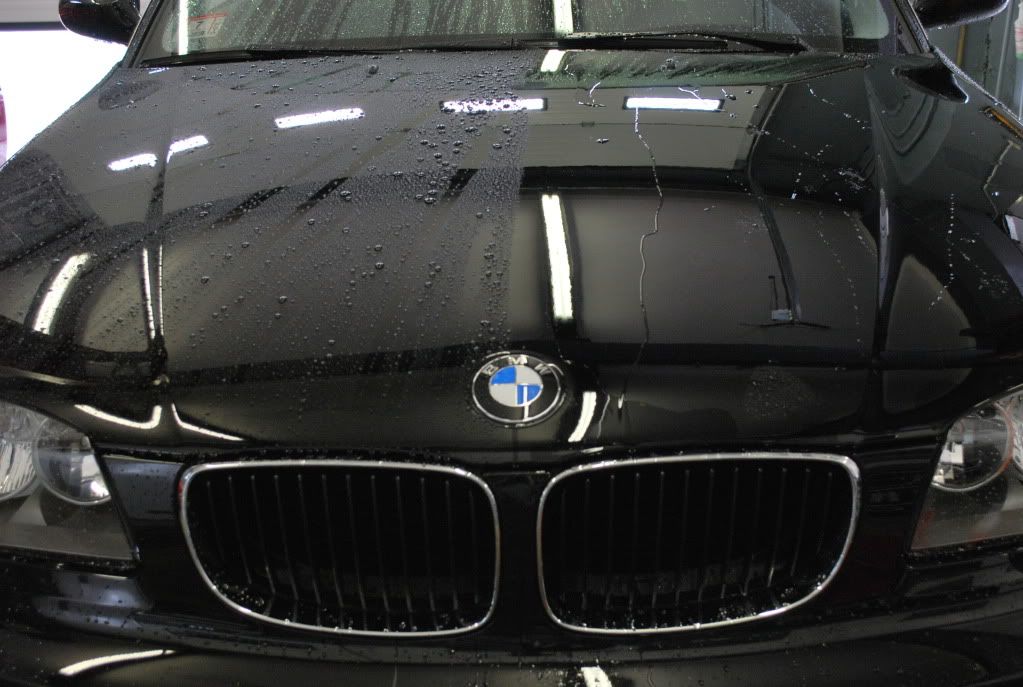
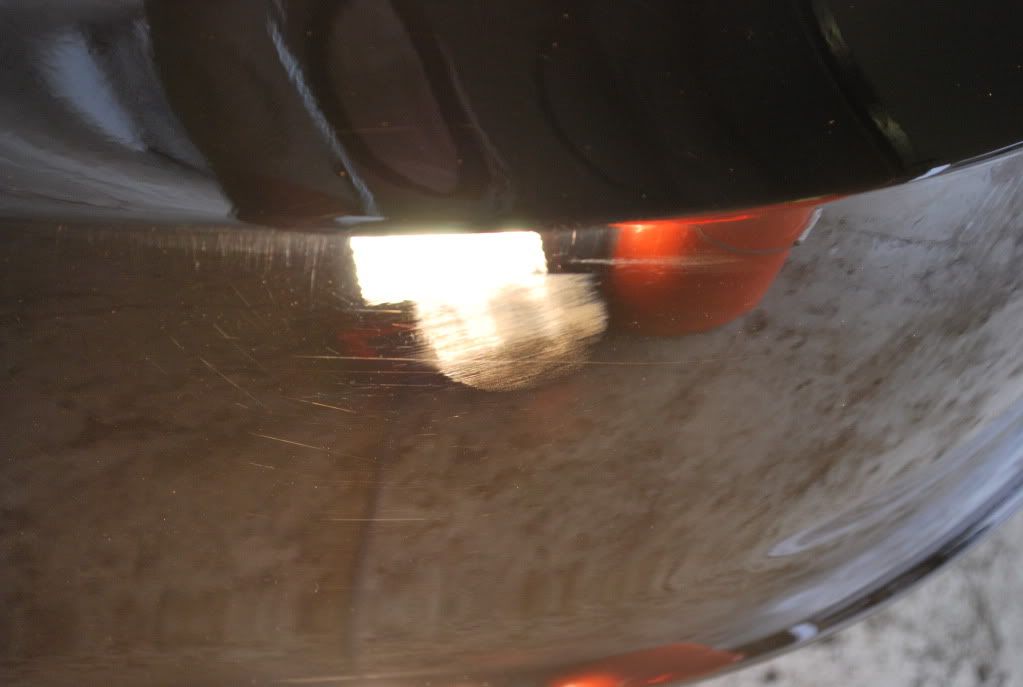
The picture below shows how the water is beading heavily on the side that was washed with regular cars soap (left) and how the water is sheeting off the side that has been degreased (right). The water sheeting is a pretty good indication that the paint is completely bare.
I continued to go around the car and degrease every panel until the entire car was no longer beading water. This step along took almost 4 hours, since the product did not come off easily. After completing the degreasing step, I gave the car another quick wash with regular car wash soap to remove any residue left behind from the degreaser. I dried the exterior using a microfiber drying towel, blew out all cracks & crevices with purged air and wiped all jambs clean with a fresh microfiber towel. Once dry, I masked off all areas that could be stained or damaged from the buffer and gave the exterior a quick alcohol wipedown to ensure a perfect surface for polishing.
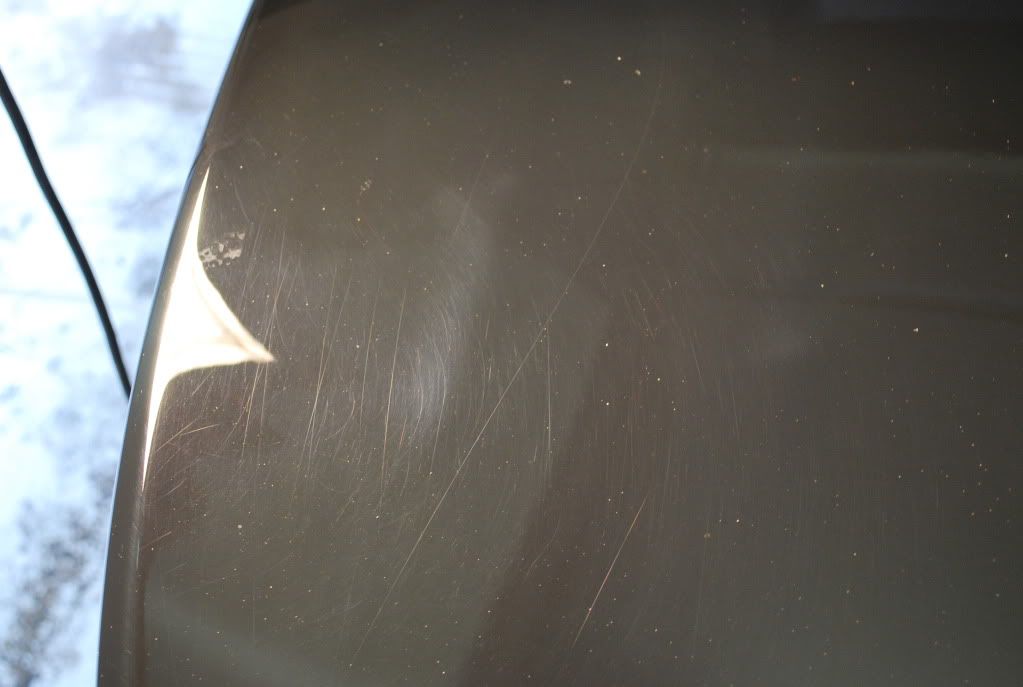
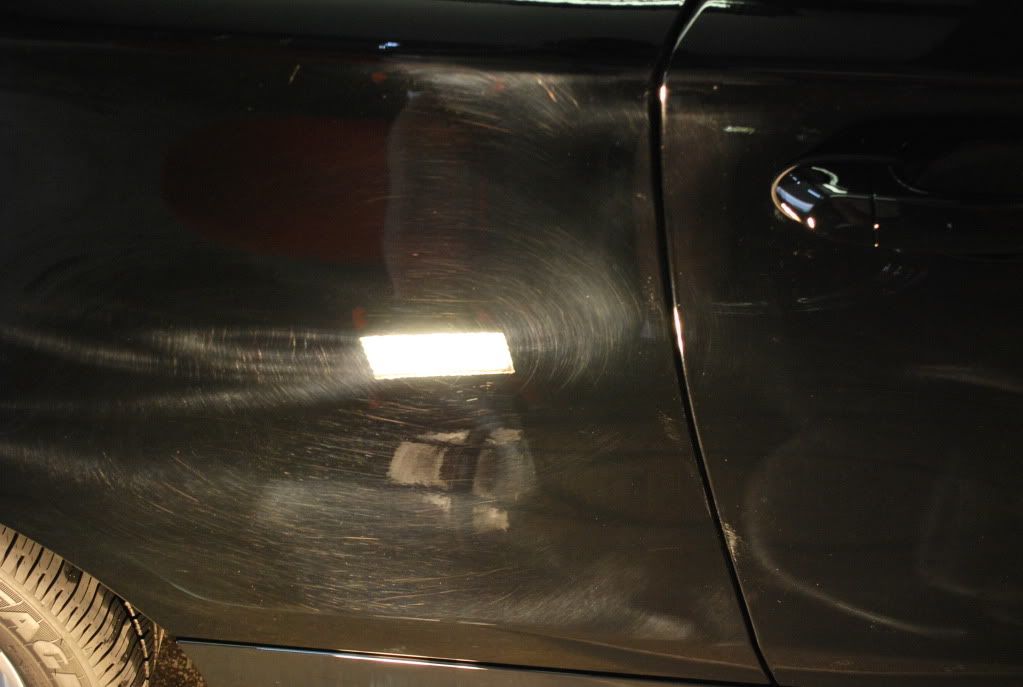
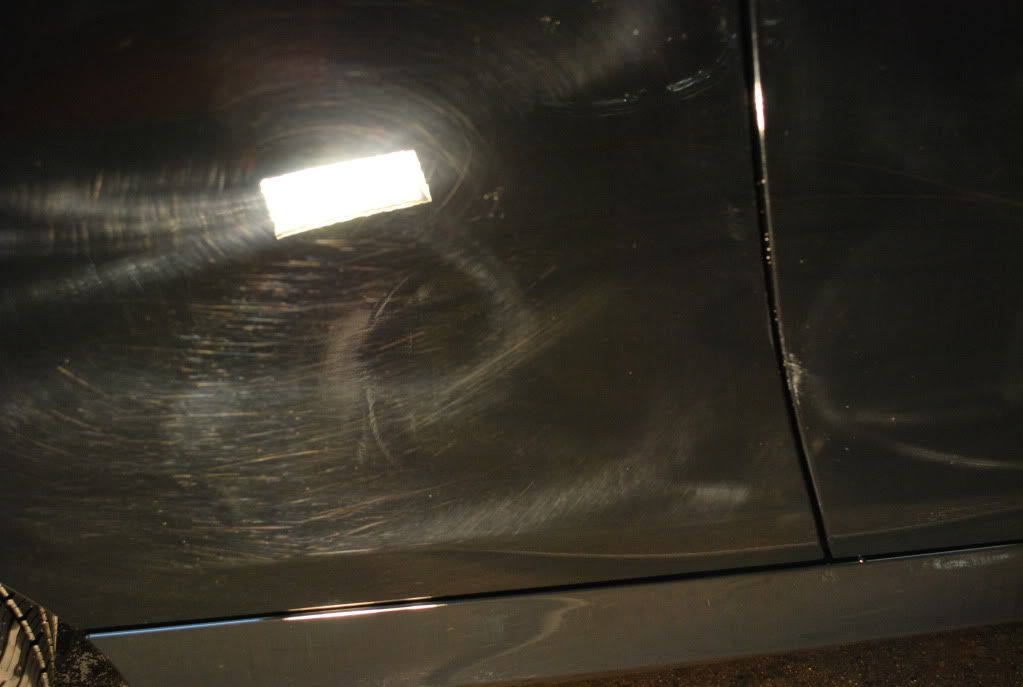
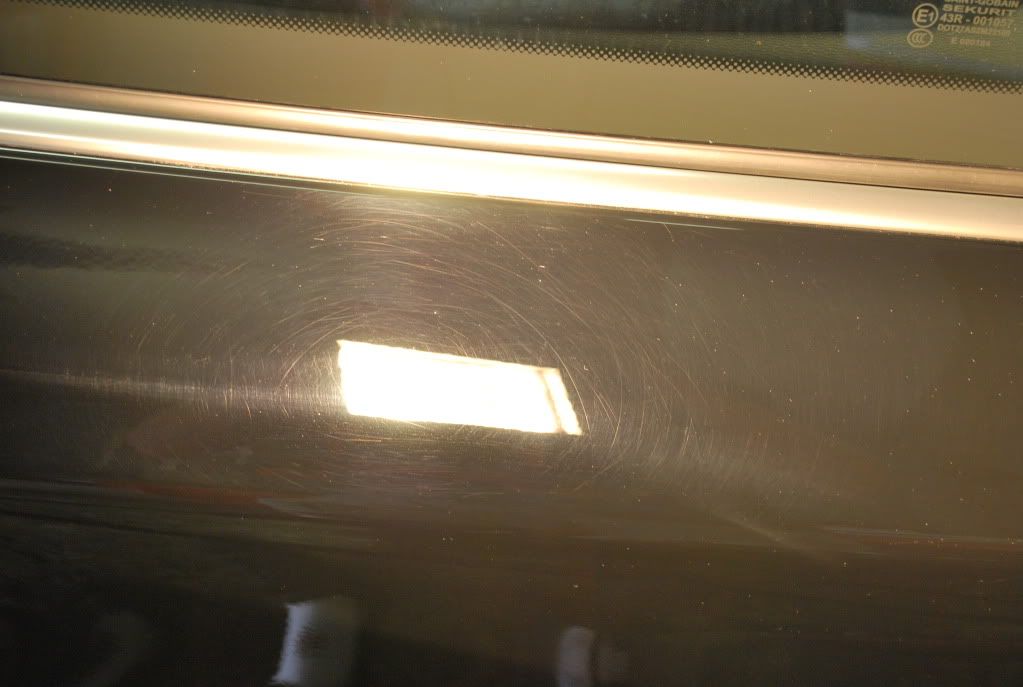
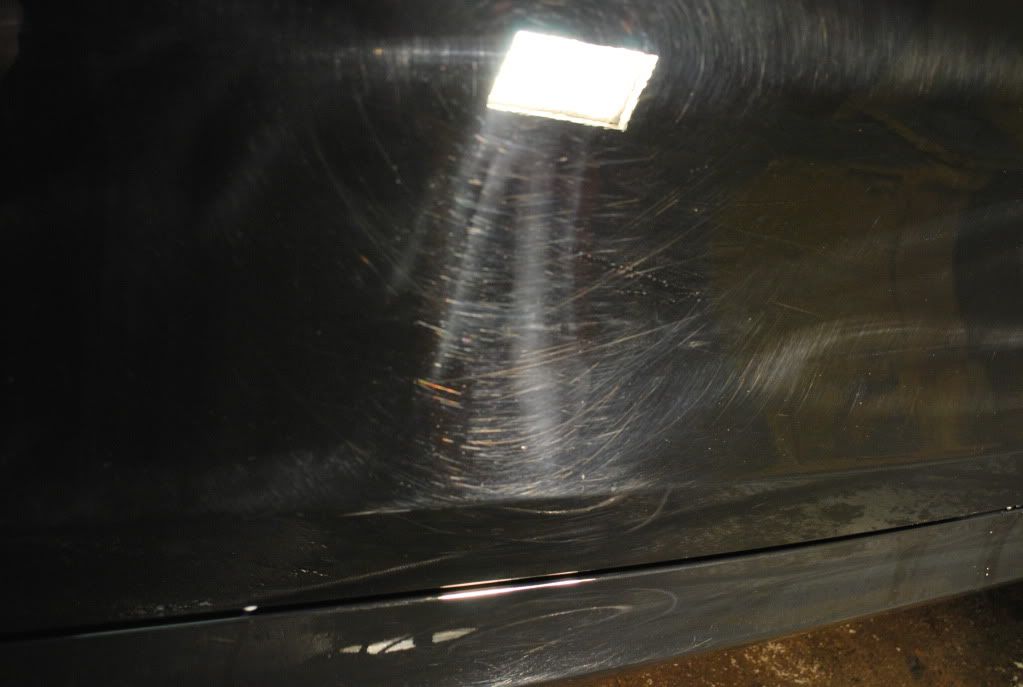
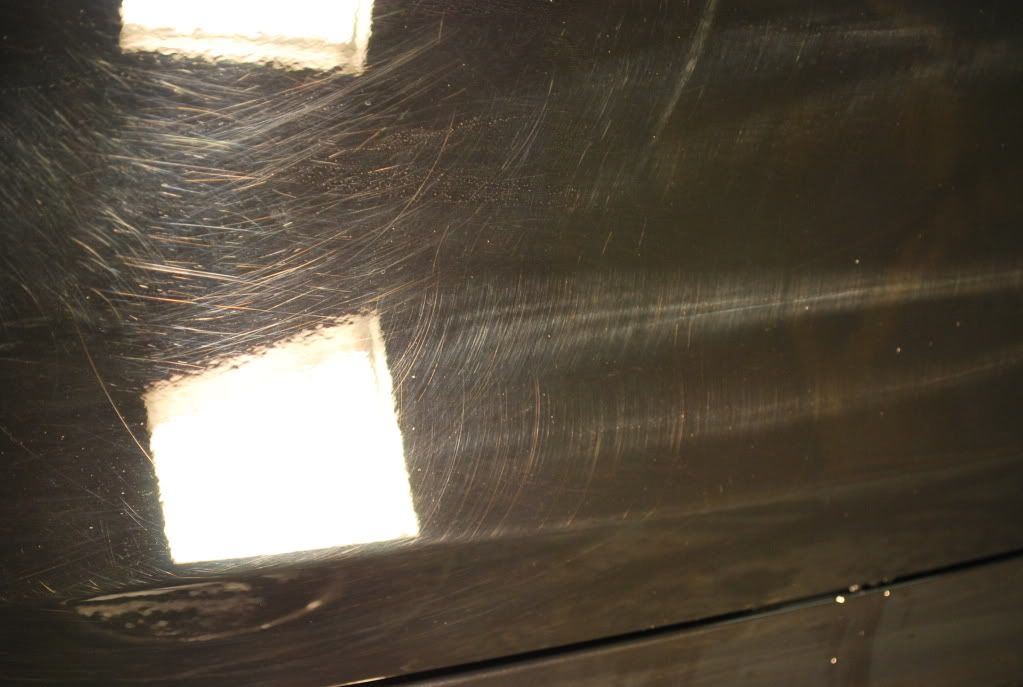
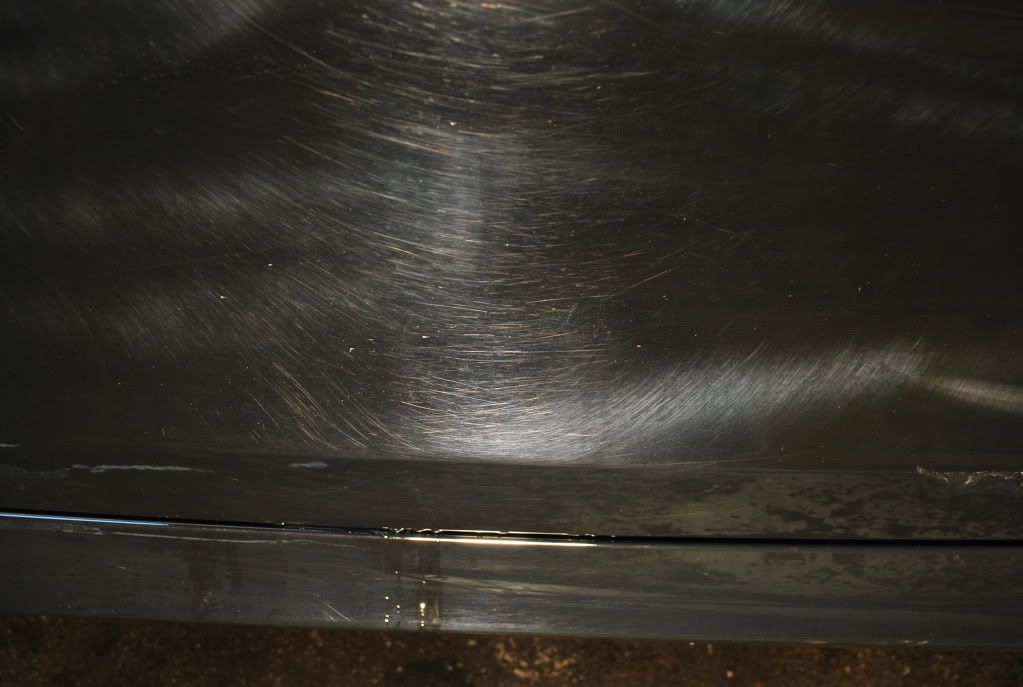
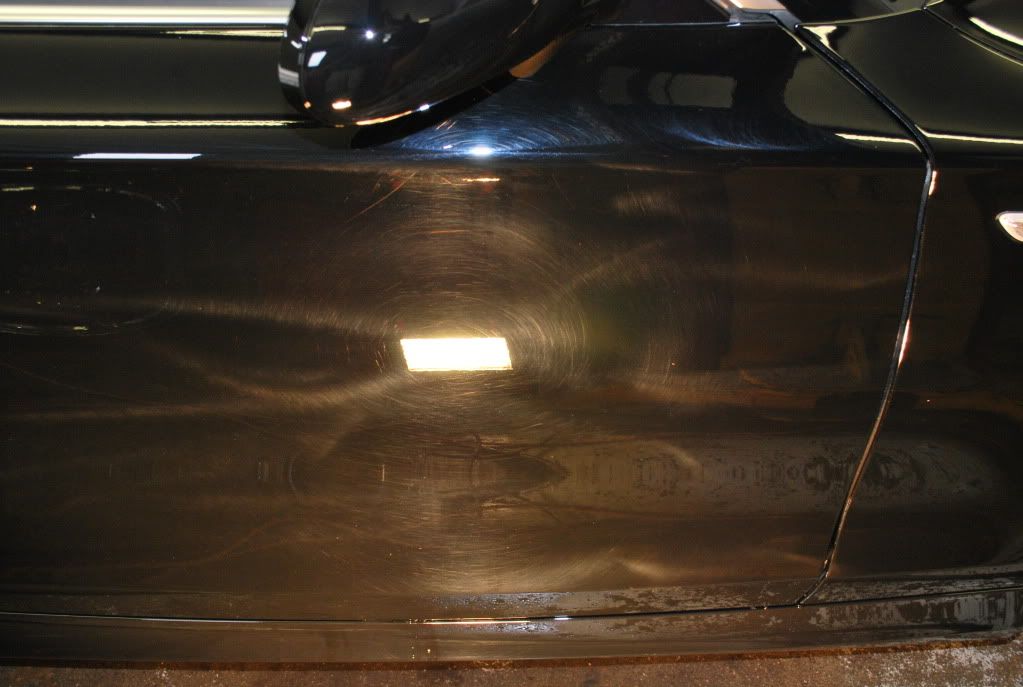
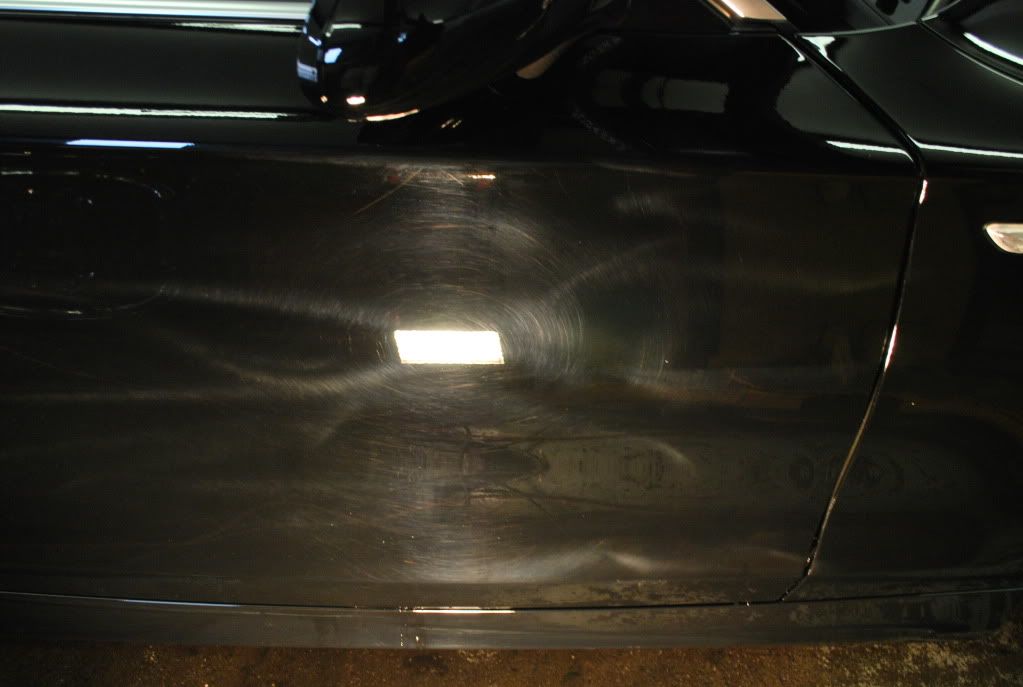
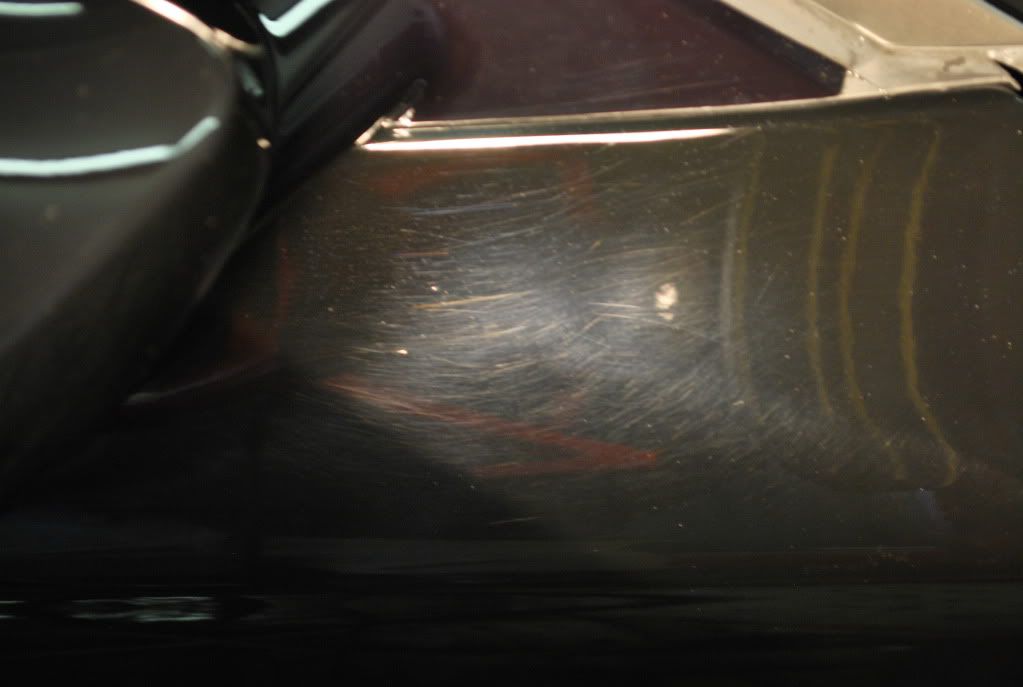
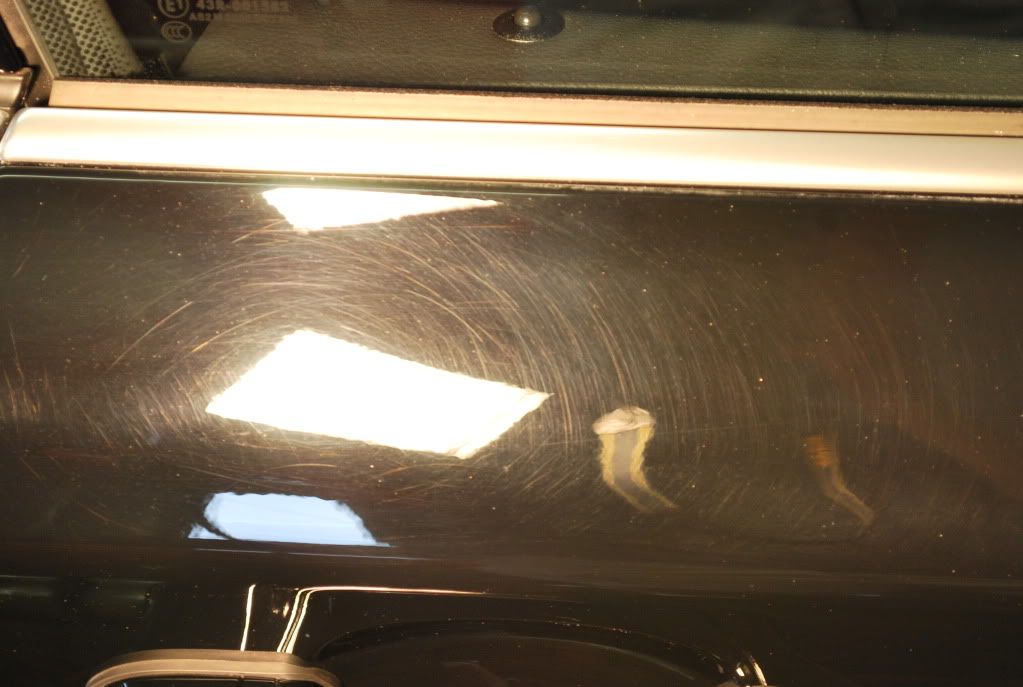
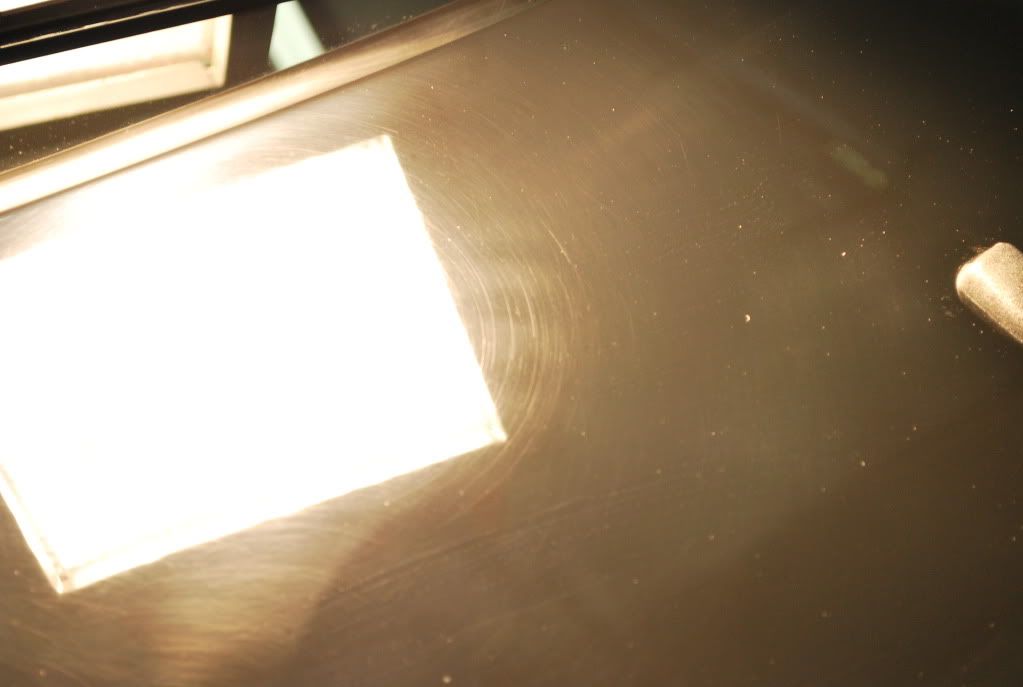
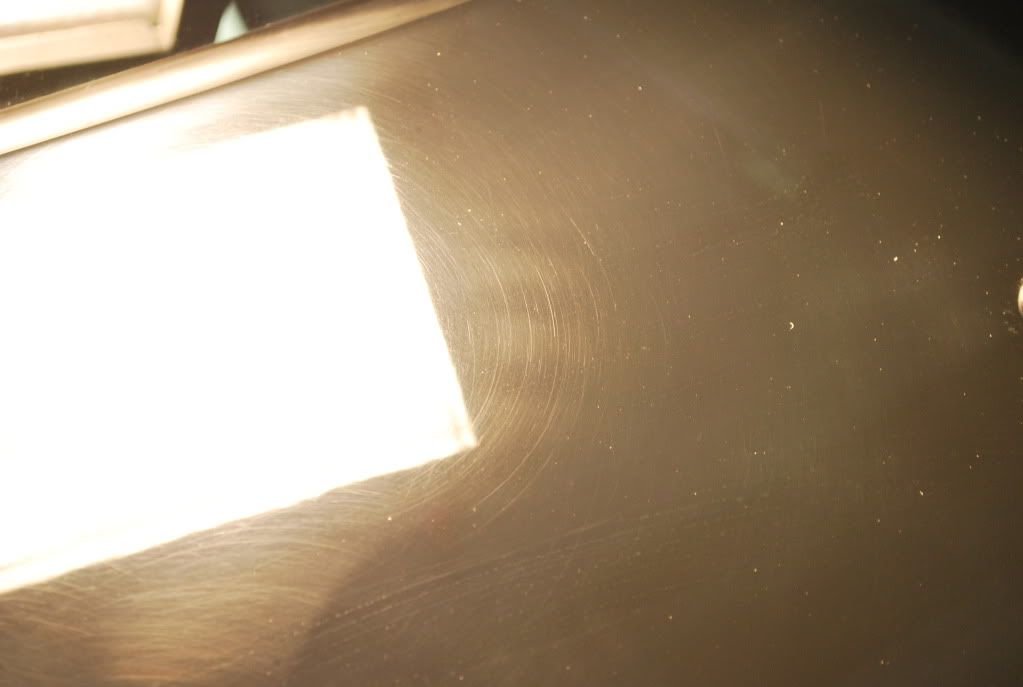
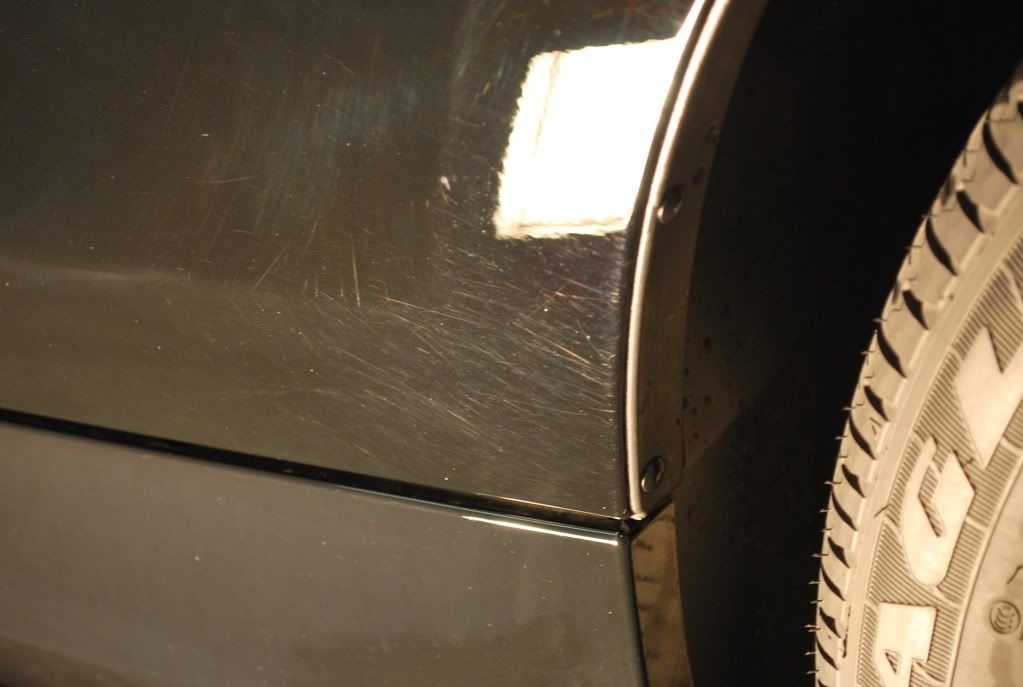
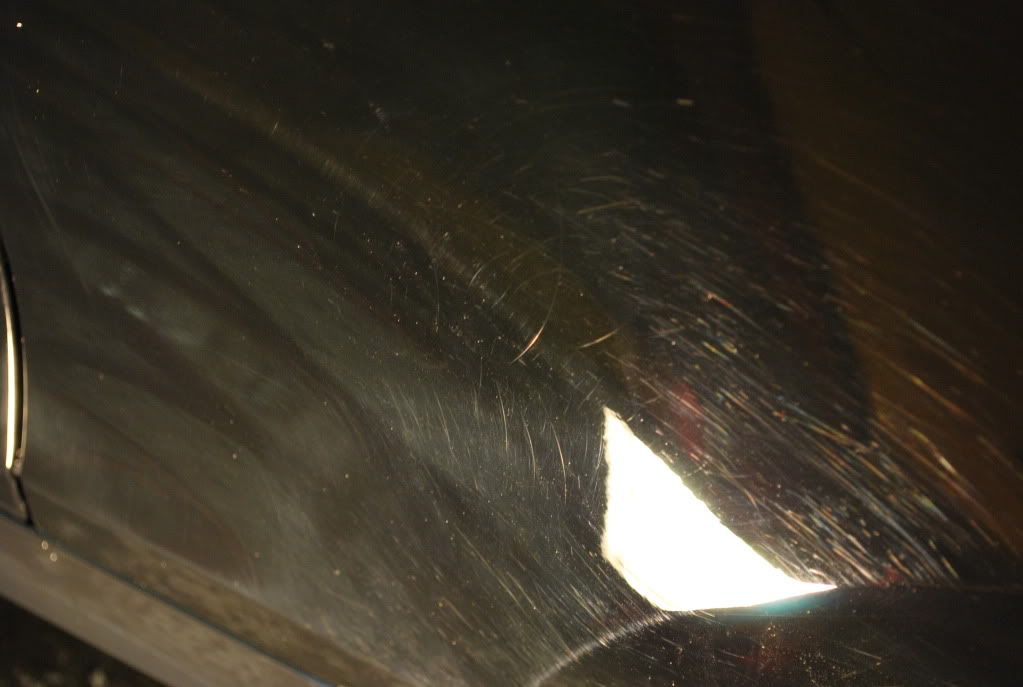
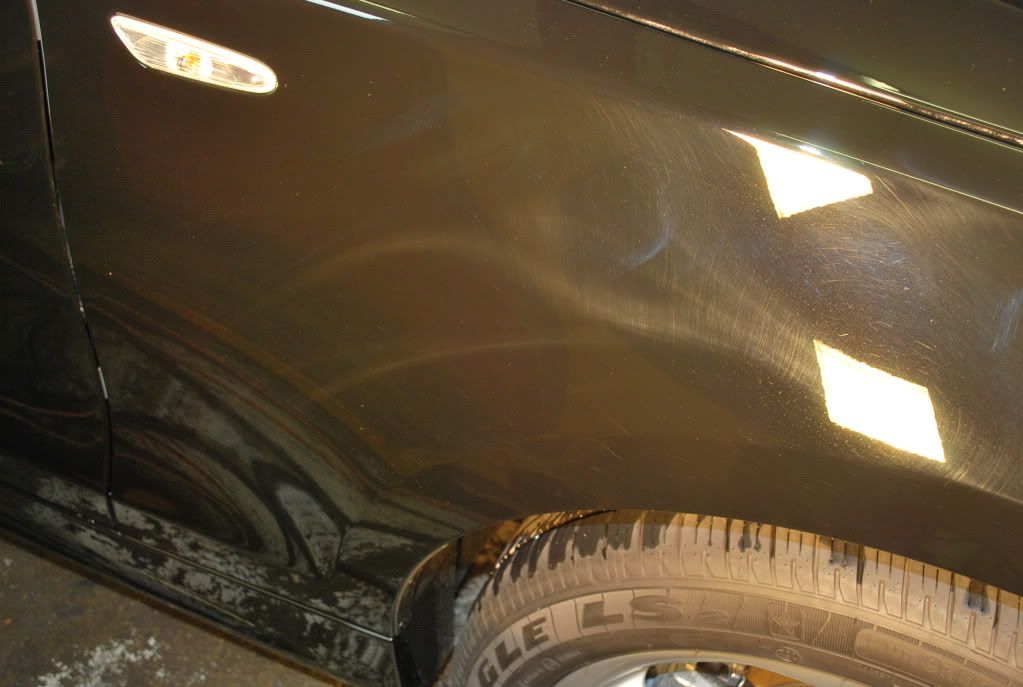
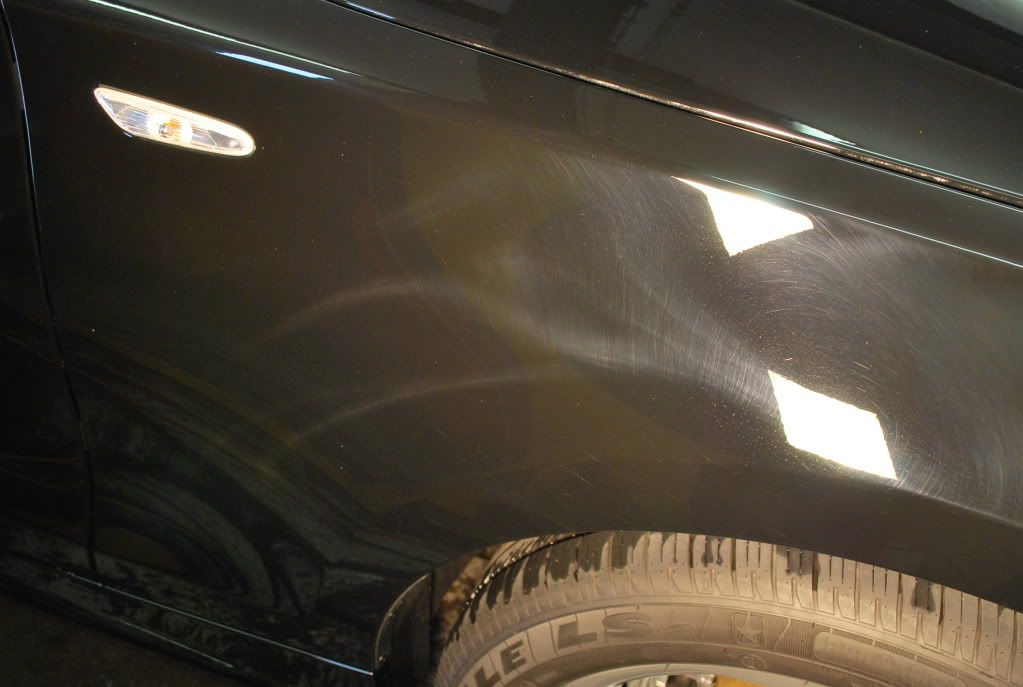
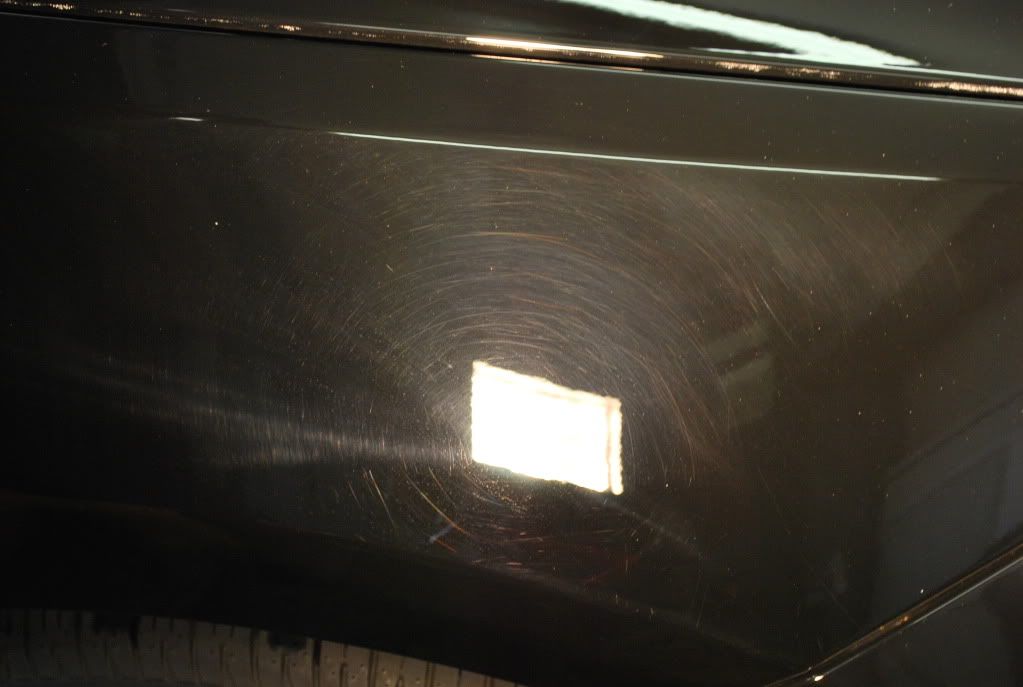
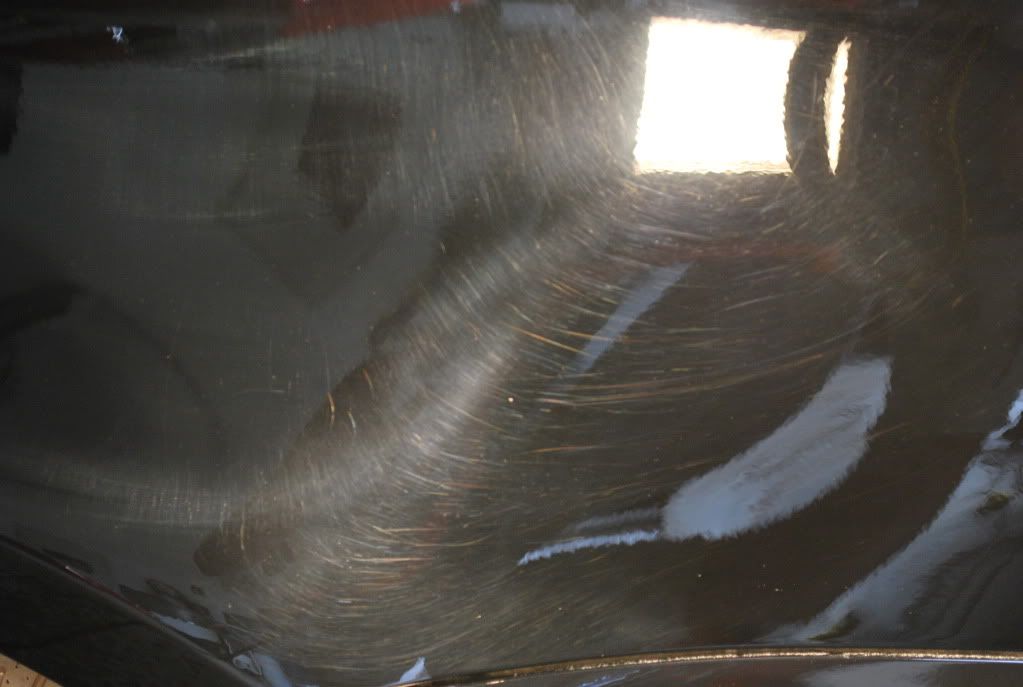
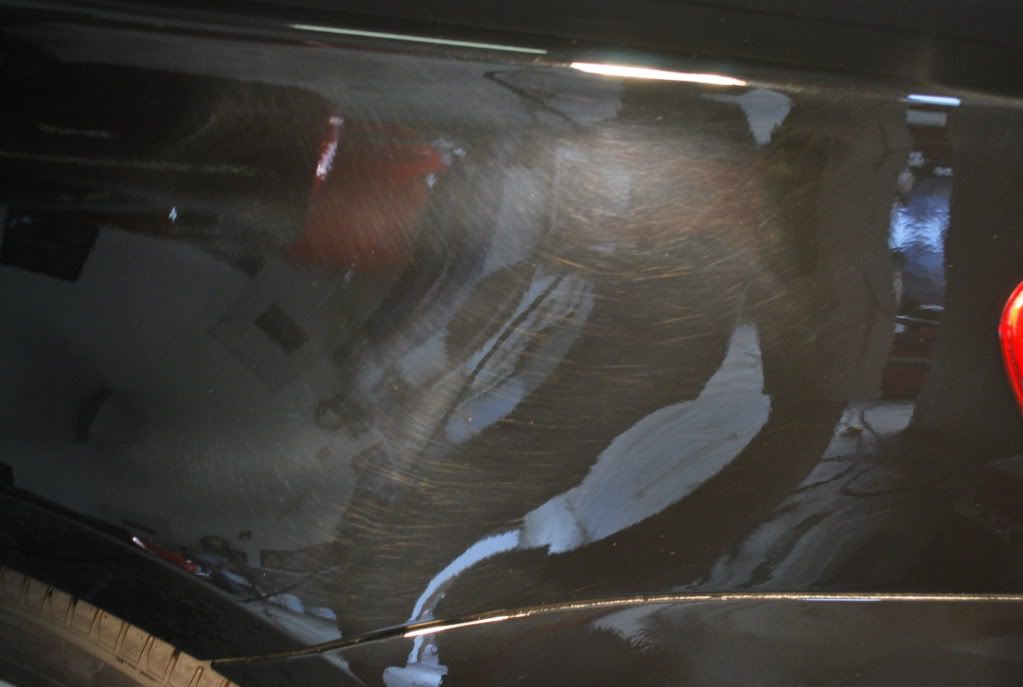
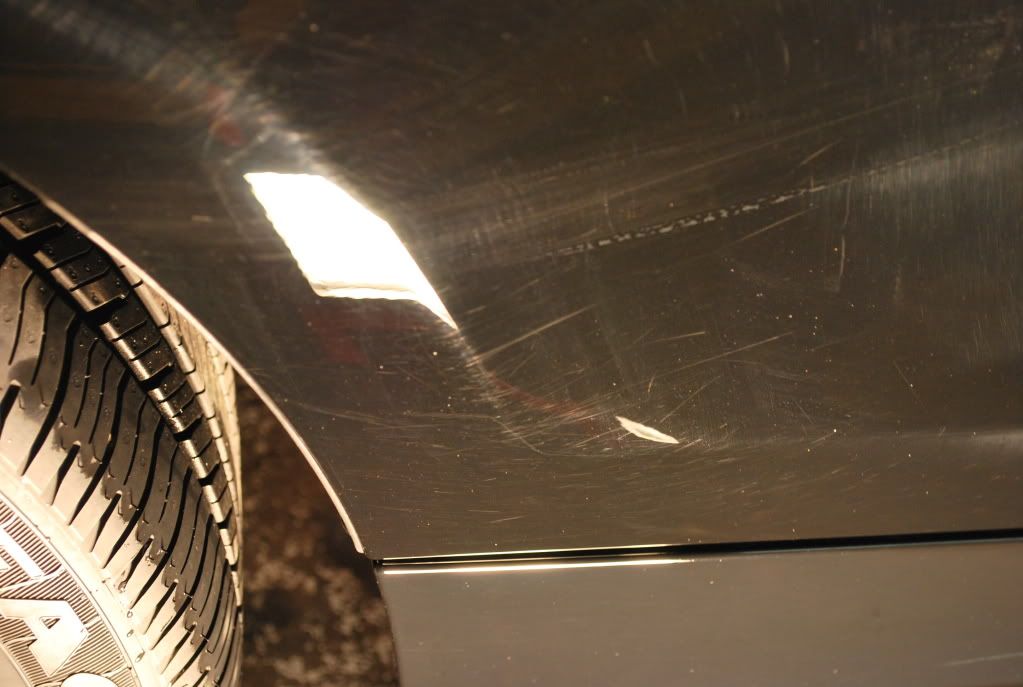
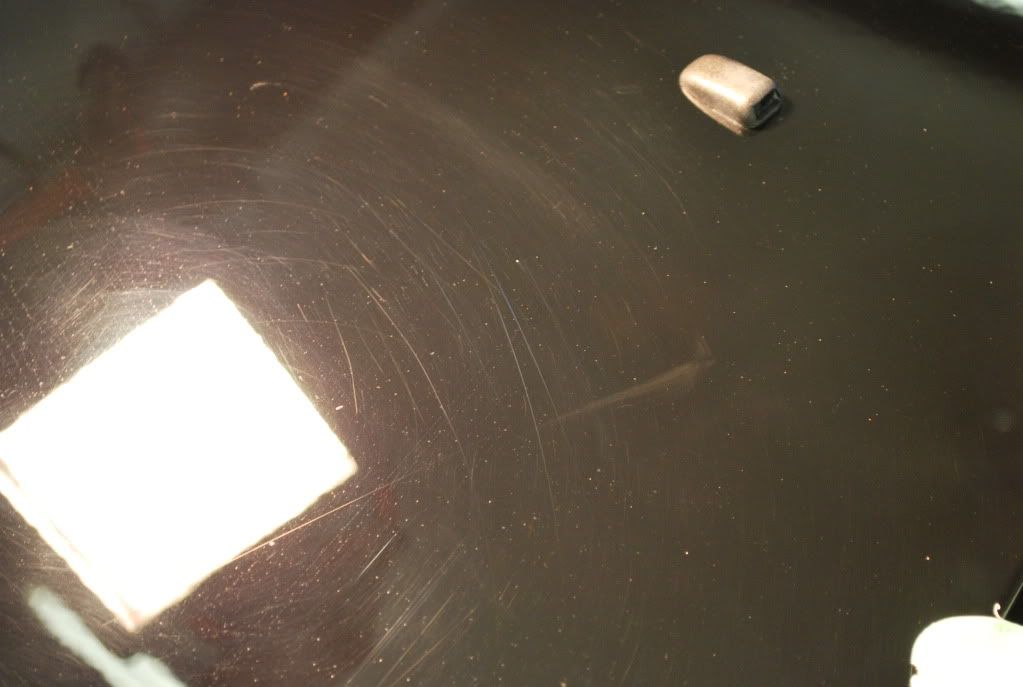
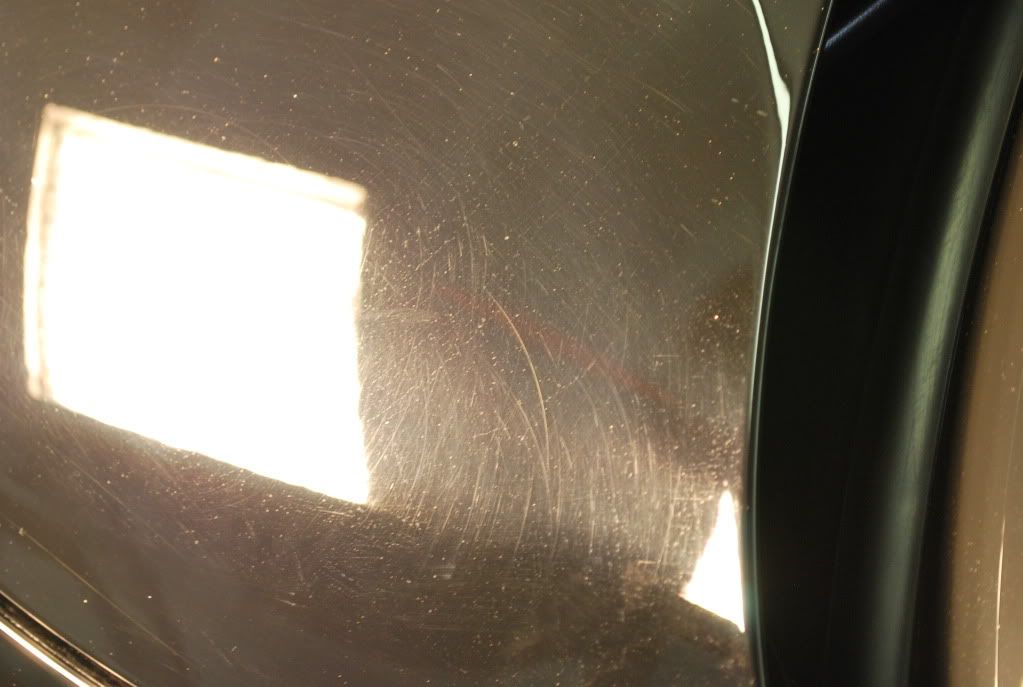
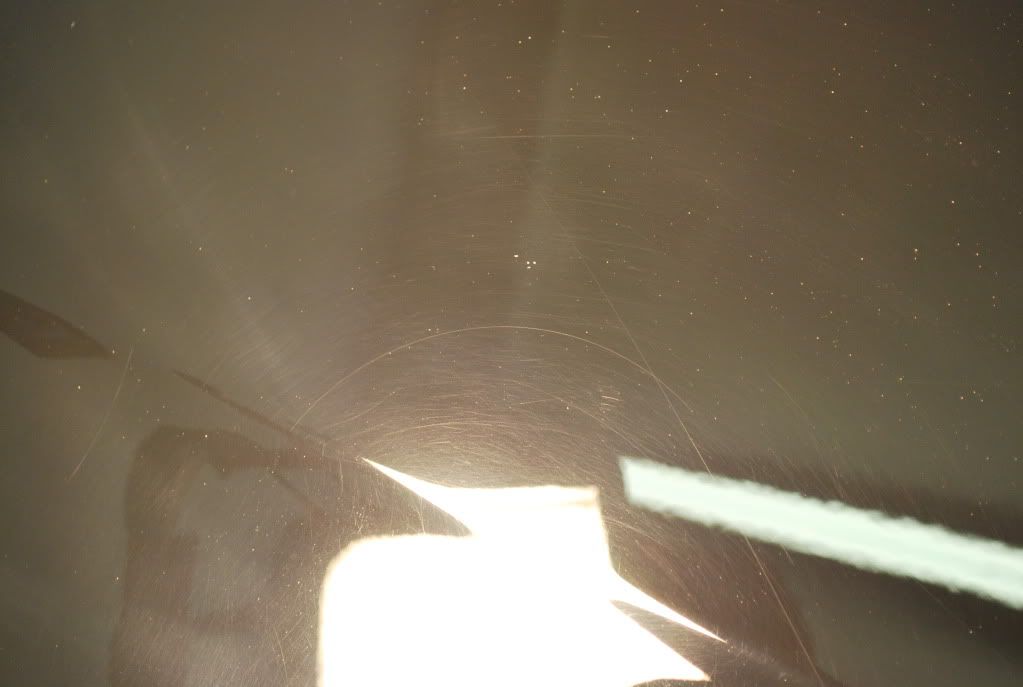
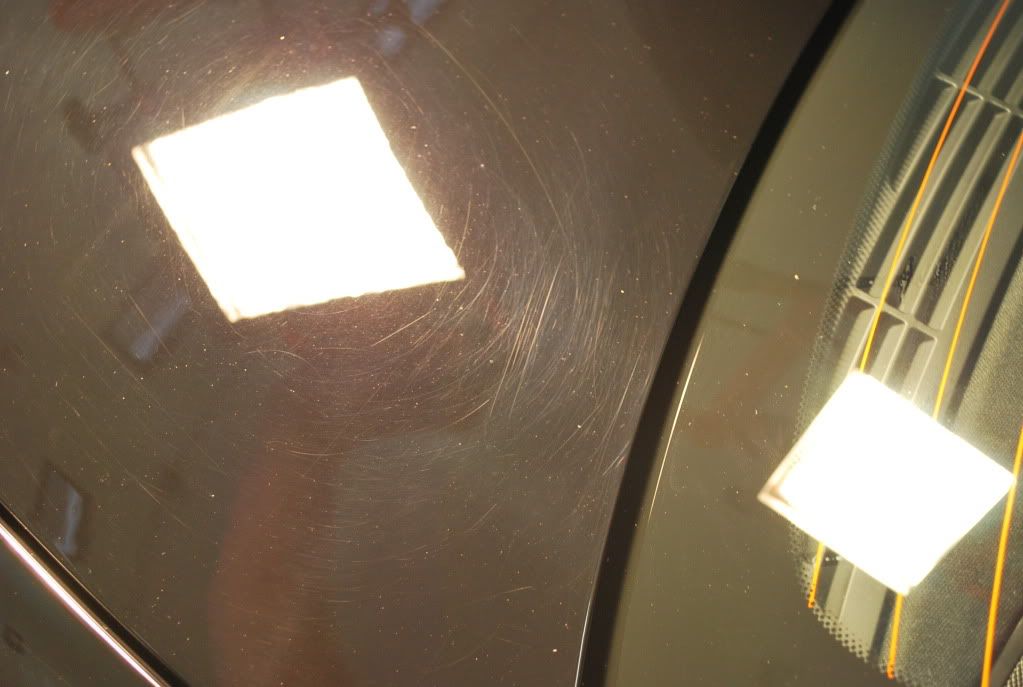
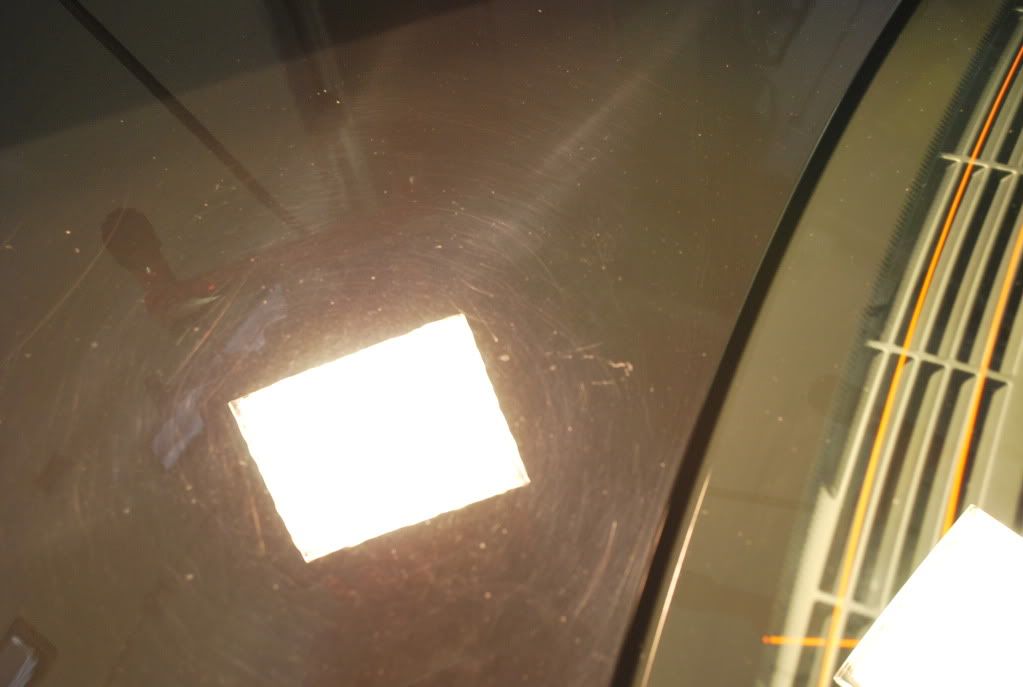
OK, this is where it gets ugly! While I was cleaning my buffing pads and getting my buffer ready, I decided to turn on the halogen lights to inspect the paint carefully before proceeding to any polishing. This allows me to see any and all paint defects that are not visible with the fluorescent lights. To my surprise, the paint was in much worse condition and was going to be way more work than I had originally expected.
These pictures below were taken after all of the prep was complete, before any polishing took place⦠Keep in mind, this car has less than 300 miles on it!
Results 76 to 90 of 106
Threaded View
-
08-19-2009, 05:31 AM #1


- Join Date
- May 2005
- Location
- Wakefield, MA
- Posts
- 2,400
- Post Thanks / Like


 Reply With Quote
Thread Information
Users Browsing this Thread
There are currently 1 users browsing this thread. (0 members and 1 guests)
Similar Threads
-
Metallic Black Mercedes CL500 Paint Correction by Unique Car Care!
By Rickrack in forum Click & Brag -The Detailers ShowcaseReplies: 33Last Post: 02-23-2011, 05:24 PM -
Black Porsche Paint Correction and Clear-bra Install by Unique Car Care
By Rickrack in forum Click & Brag -The Detailers ShowcaseReplies: 28Last Post: 11-17-2010, 10:07 PM -
Carbon Black BMW M3 - Extensive Paint Correction by Unique Car Care!!
By Rickrack in forum Click & Brag -The Detailers ShowcaseReplies: 26Last Post: 04-14-2010, 09:53 AM -
Trashed Sapphire Black BMW Paint Correction by Unique Car Care!
By Rickrack in forum Click & Brag -The Detailers ShowcaseReplies: 37Last Post: 02-16-2010, 10:56 AM -
** Imola Red BMW M3 Paint Correction by Unique Car Care **
By imported_RickRack in forum The Detailers ShowcaseReplies: 9Last Post: 04-08-2009, 07:35 PM
Bookmarks