

just a teaser for now, - 5 polishing steps & 4 LSP steps. sunny pictures and complete process tomorow, if anyone is interested.
enjoy:

Results 1 to 15 of 39
-
10-15-2006, 06:10 PM #1


- Join Date
- May 2004
- Location
- Portland OR
- Posts
- 12,745
- Post Thanks / Like

-
10-15-2006, 06:31 PM #2
- Join Date
- Aug 2004
- Location
- Hudson, WI
- Posts
- 2,003
- Post Thanks / Like
Thats Deep! Whats with the ghetto style front rim on the jetta?
Greg:usa
-
10-15-2006, 06:52 PM #3
- Join Date
- Jun 2004
- Location
- Ashburn, VA
- Posts
- 2,171
- Post Thanks / Like
That is the WETTEST looking Sienna I HAVE EVER SEEN IN MY LIFE!!!!!! Great work Thomas, how long did that take ya?!?
Refined Detailing
Chris - Sole Proprietor
-
10-15-2006, 08:52 PM #4
- Join Date
- Oct 2001
- Location
- Arlington, TX
- Posts
- 34,077
- Post Thanks / Like
 That has the be the best finish I have ever seen on a minivan!
-
10-15-2006, 09:08 PM #5
- Join Date
- Sep 2006
- Posts
- 1,093
- Post Thanks / Like
That looks great!
I`m looking forward to the results, as my dad has a `02 Sienna (in that gold color) that I`ve been planning to do for some while now, but am still trying to figure out the best approach.
I`m especially curious as to how you were able to polish in between the tracks on the roof rack!
-
10-15-2006, 09:08 PM #6
- Join Date
- Nov 2006
- Posts
- 148
- Post Thanks / Like
products/process please !!!
-
10-16-2006, 08:08 AM #7

- Join Date
- May 2005
- Location
- Binghamton, NY
- Posts
- 1,035
- Post Thanks / Like
 Originally Posted by GregCavi
That`s Thomas being original. :cooleek: Apparently its a NoVA thing. The Getta I did had the same deal, different front and rear wheels.
I`m interested in your after pics and process Thomas.John
JEMM Auto Detailing - Serving the Greater Binghamton, NY area
-
10-16-2006, 08:11 AM #8
- Join Date
- Feb 2005
- Posts
- 45
- Post Thanks / Like
Awesome!

-
10-16-2006, 08:22 AM #9
- Join Date
- Apr 2006
- Location
- Maine
- Posts
- 732
- Post Thanks / Like
Stop being a lazy poster and tell us!
Detail ME
05 Tacoma TRD sport
99 Audi A4
-
10-16-2006, 10:47 AM #10
- Join Date
- May 2004
- Location
- Portland OR
- Posts
- 12,745
- Post Thanks / Like
I started saturday evening around 6pm. Took a dinner break around 7pm or so and didn`t continue until 8pm.
ONR to clean the car because it wasn`t too bad.
Clayed with DP clay. I can`t remember the last time the van was polished. I think nearly 2 years ago or so and this was the amount of dirt on the van - I`d say due to waxing every time the van gets washed.
side one

side two

Since the paint on the toyota is very easily corrected, I wanted to make sure that I didn`t remove too much clear. So I used my new Bday gift

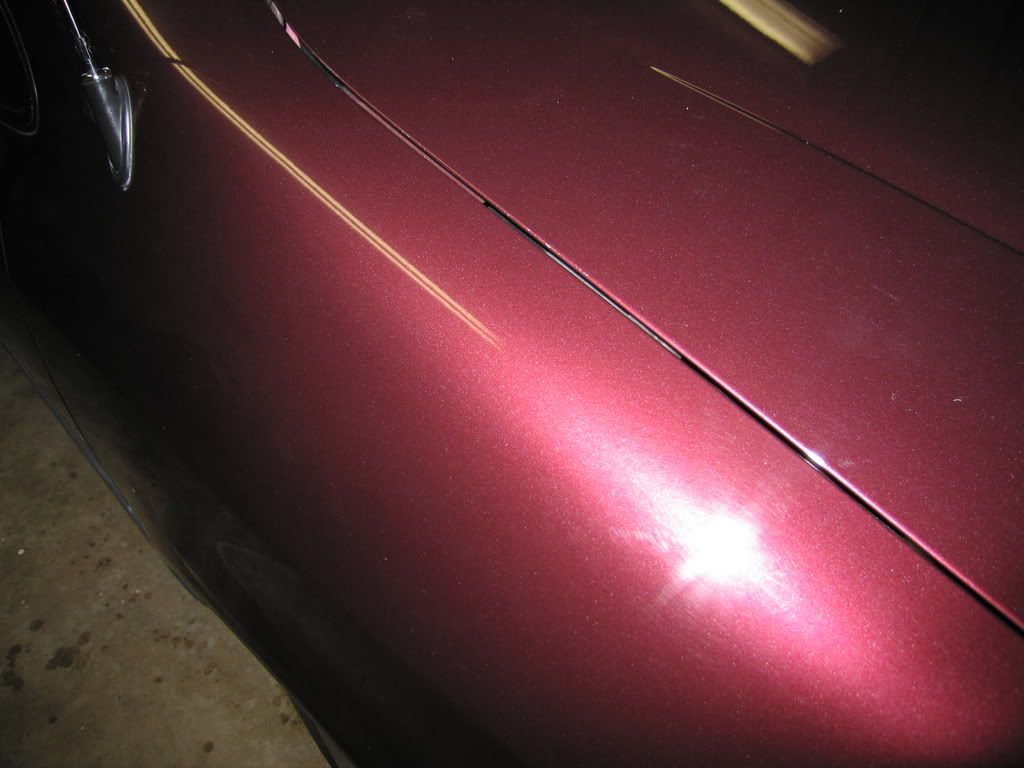
Once I clayed I took some before pictures to document my process. here is what the car looked like. (I will post pictures at the very end about the little accident the van was in a few weeks ago. Some of these swirls came from the bodyshop and some from my mechanic working on the car (90000 miles service. )
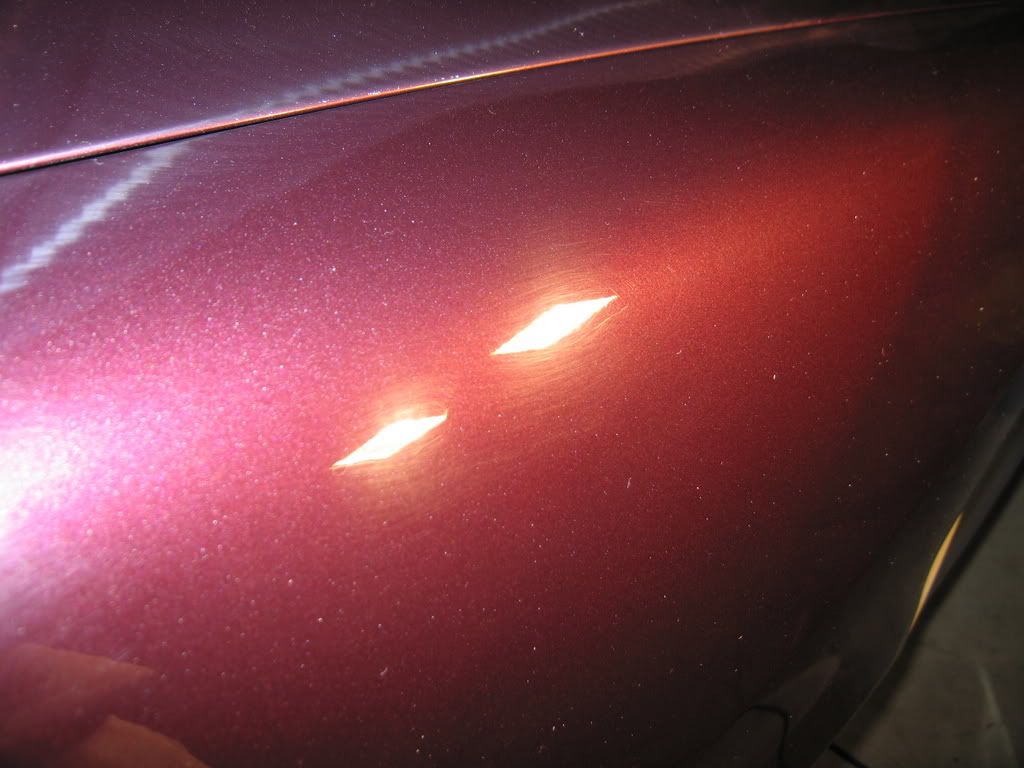
And a reading of it:

Here is the after with OP and a yellow FK1 cutting pad.

and the after reading

]
-
10-16-2006, 10:49 AM #11
- Join Date
- May 2004
- Location
- Portland OR
- Posts
- 12,745
- Post Thanks / Like
Some other random before pictures for you.


-
10-16-2006, 01:50 PM #12

- Join Date
- Sep 2002
- Location
- NE Ohio
- Posts
- 86,984
- Post Thanks / Like
Originally Posted by tdekany
Looks great! Nice to see a minivan getting a proper detail! Looking forward to more info and pics.
Good idea using the ETG, the paint on our MPV is very thin...makes me wonder if some manufacturers just cut corners like that with minivans in general.
-
10-16-2006, 03:11 PM #13
- Join Date
- May 2004
- Location
- Portland OR
- Posts
- 12,745
- Post Thanks / Like
I started in the back of the van on the tailgate. I tried using me 4" pads ont he pc, but twice the backing plate flew off!!! Didn`t do any damage to the paint. :spot
So I changed to the rotary & 4" pads. (no pix)
Throughout the whole detail, my TOL orange pads gummed up on me for some weird reason. Weather I used OHC or OP, the same results. I didn`t want to use any of my 7.5" LC pads that night. I was going through pads like crazy - the rotary would even hop on me which have not happened since I first practiced. :nixweiss :nixweiss
Than I remembered that I had some new FK1 Yellow pads and that solved the problem. Finally I can get moving! :getdown :waxing:
Due to hardly any usable light above the van, I just used the pc and the yellow pad and OP on the roof rack part. Sealed it with CG`s EXTREME TOP-COAT SEALANT+ 3X CARNAUBA
Next I moved to the sides and finished up the hood. I went upstairs around 1:30am
While detailing I listened to Janis Joplin, Pink floyd, and some brazilian copmilation, so I wasn`t in any hurry. Plus my wife would come see me in the garage very often which I loved.
So now the polishing process....
1 = ohc/op yellow cutting pad rotary 1500rpm (deeper imperfections = ohc)
2 = op pc yellow fk1 pad 6
3 = op pc white lc pad 6
4 = op pc blue lc pad 5
5 = CG`s EXTREME SHINE EZ~CREME GLAZE w/ACRYLIC SHINE II pc 6 propel blue pad
6 = OP pc 6 blue lc pad on the repaint
Finally the protection list
1 = CG`s EXTREME TOP-COAT PAINT SEALANT+ 3X CARNAUBA pc 1 black lc pad
2 = EXTREME DEPTH LIQUID CARNAUBA CREME WAX + X-Seal pc 1 black lc pad
3 = FK1 PINK WAX pc 2 blue propel pad
4 = DP`s MAX WAX pc 2 blue propel pad
5 = FK1 #2180 on the freshly painted areas on the right rear fender/dsliding door
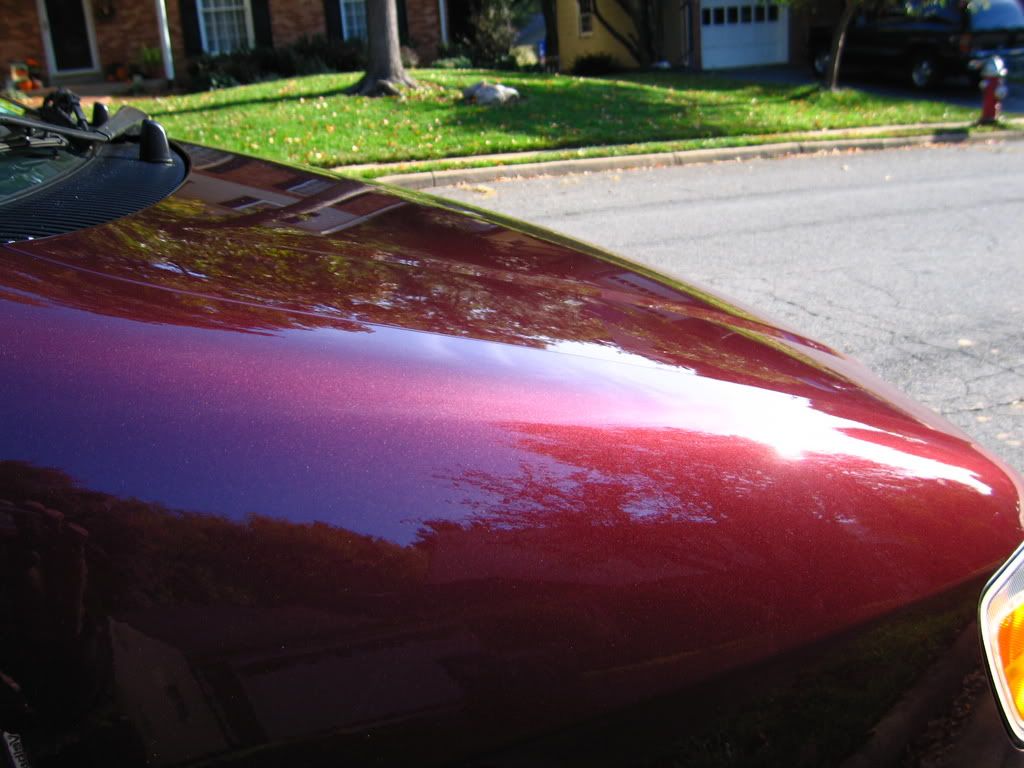
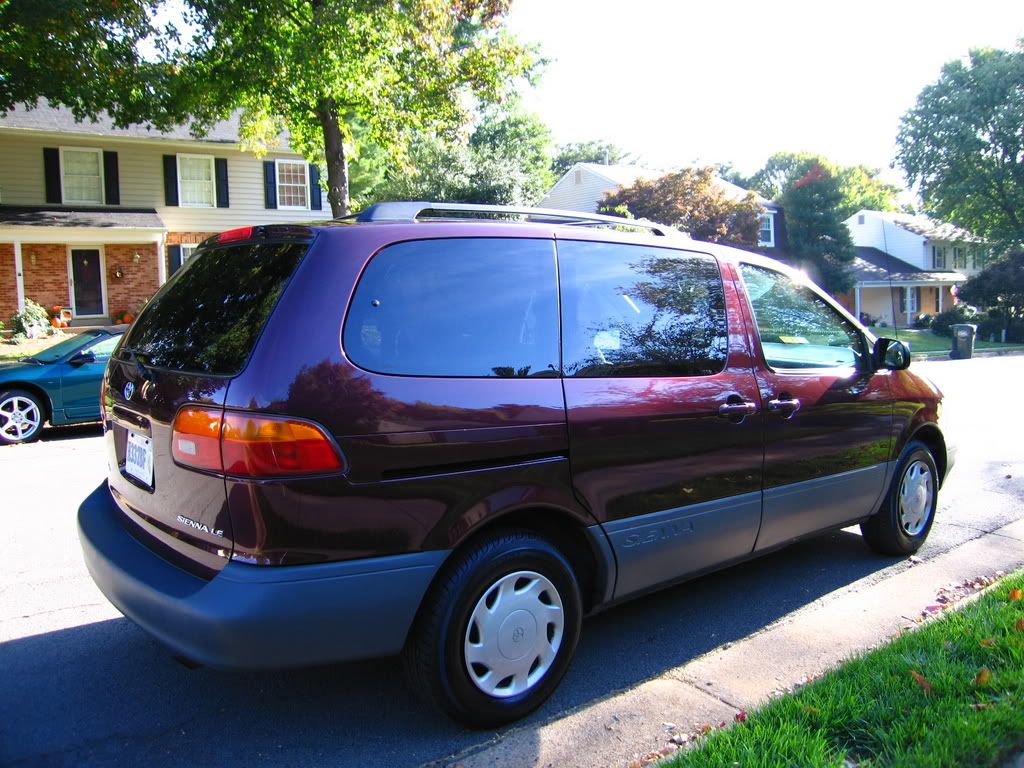
here some after pictures. I took them this morning around 9:30 so they are not the best, but after all it is a minivan so if I can`t deliver it`s exceptional finish thru the internet? I am sorry.It does look better than ever. Feel of the paint is best I have ever felt on any car. :chuckle:
PS: THERE ARE some random deeper scretches around the car, that will stay for ever. it is our car and don`t want to be sorry.
-
10-16-2006, 03:12 PM #14
- Join Date
- May 2004
- Location
- Portland OR
- Posts
- 12,745
- Post Thanks / Like


more to come
-
10-16-2006, 03:15 PM #15
- Join Date
- May 2004
- Location
- Portland OR
- Posts
- 12,745
- Post Thanks / Like
these are after polishing steps I believe ( I took too many pictures)


 Reply With Quote
Thread Information
Users Browsing this Thread
There are currently 1 users browsing this thread. (0 members and 1 guests)
Similar Threads
-
Turning a 12 Years old E39 to show room condition, step by step guide by KC
By bbquer in forum The Detailers ShowcaseReplies: 7Last Post: 07-21-2010, 04:36 AM -
Can someone explain to me step by step the process of properly preparing a finish (claying)?
By danondorf in forum Detailing Product ReviewsReplies: 21Last Post: 09-18-2008, 11:23 AM -
Step-by-step paint defect repair with photos?
By golfdude in forum Car DetailingReplies: 6Last Post: 03-11-2005, 10:38 AM -
Topper, or 2 step that gives 3+ months of protection?
By LightngSVT in forum Professional Detailer General DiscussionReplies: 8Last Post: 05-01-2004, 10:35 PM -
Best One-Step Protection
By carcover in forum Car DetailingReplies: 5Last Post: 01-01-1970, 12:00 AM
Bookmarks